Losing data from a GPT (or GUID Partition Table) can be stressful, especially when you have a significant amount of valuable information stored on it. Thankfully, there are ways to recover data from a GPT partition on Windows, and it’s a lot easier than you think.
Not only will we walk you through the process of recovering your data, but we’ll provide some insights on GPT data recovery as well. These tips will help prevent you from losing your GPT partition data in the future.
Table of Contents
Most Common Causes of GPT Partition Problems
The following is a list of the most common causes for GPT partition problems. Some of them can be prevented with precautionary measures while others are the result of unfortunate circumstances which couldn’t be avoided.
| Cause | Description |
| 🔌 Unexpected/Forced Shutdown | If either you force your computer to shut down or you experience an unexpected power outage, your GPT partition table may be damaged while it is trying to save data to your drive. |
| 🤷♂️ Human Error | Accidents happen all the time, and sometimes, files can be deleted as a result. While not always the sole cause of GPT partition deletion, human error is often partially responsible for deleted partitions. |
| 💻 Damaged Hardware | If for whatever reason your hard drive suffers physical damage, you may have trouble finding some of your GPT partitions afterwards. If you’re lucky enough, the damage will be minimal and you’ll still be able to recover your files. |
| 🔨 Corrupted Drives | Drives can be corrupted due to viruses, unexpected computer shutdowns, and various other reasons. In this case, your data most likely isn’t deleted, but it will be impossible to access. |
| 📦 GPT Partition Formatting | Formatting your storage devices before use is generally a good idea, but not when there’s still data on it! While formatting a partition won’t delete the files permanently, you’ll need a data recovery tool such as Disk Drill to access and recover your GPT partition table. |
| 🪲 Malware | Ideally, your computer will be equipped with anti-malware so as to keep it protected from malicious viruses you may encounter on the internet. These viruses can cause all sorts of harm to your device, including damaging your GPT partition table. |
How to Recover Data from a GPT Partition
First, let’s dive into what you came here for: recovering your lost data. We’ll use Disk Drill for Windows because it’s an intuitive, easy-to-use data recovery software that will allow you to recover your GPT partitions. It works with virtually any type of data storing hardware out there, so it’s bound to come in handy more than once.
We’ve taken screenshots of the steps so it’ll be easy to follow.
- If you haven’t already, make sure you download and install Disk Drill, run the application.
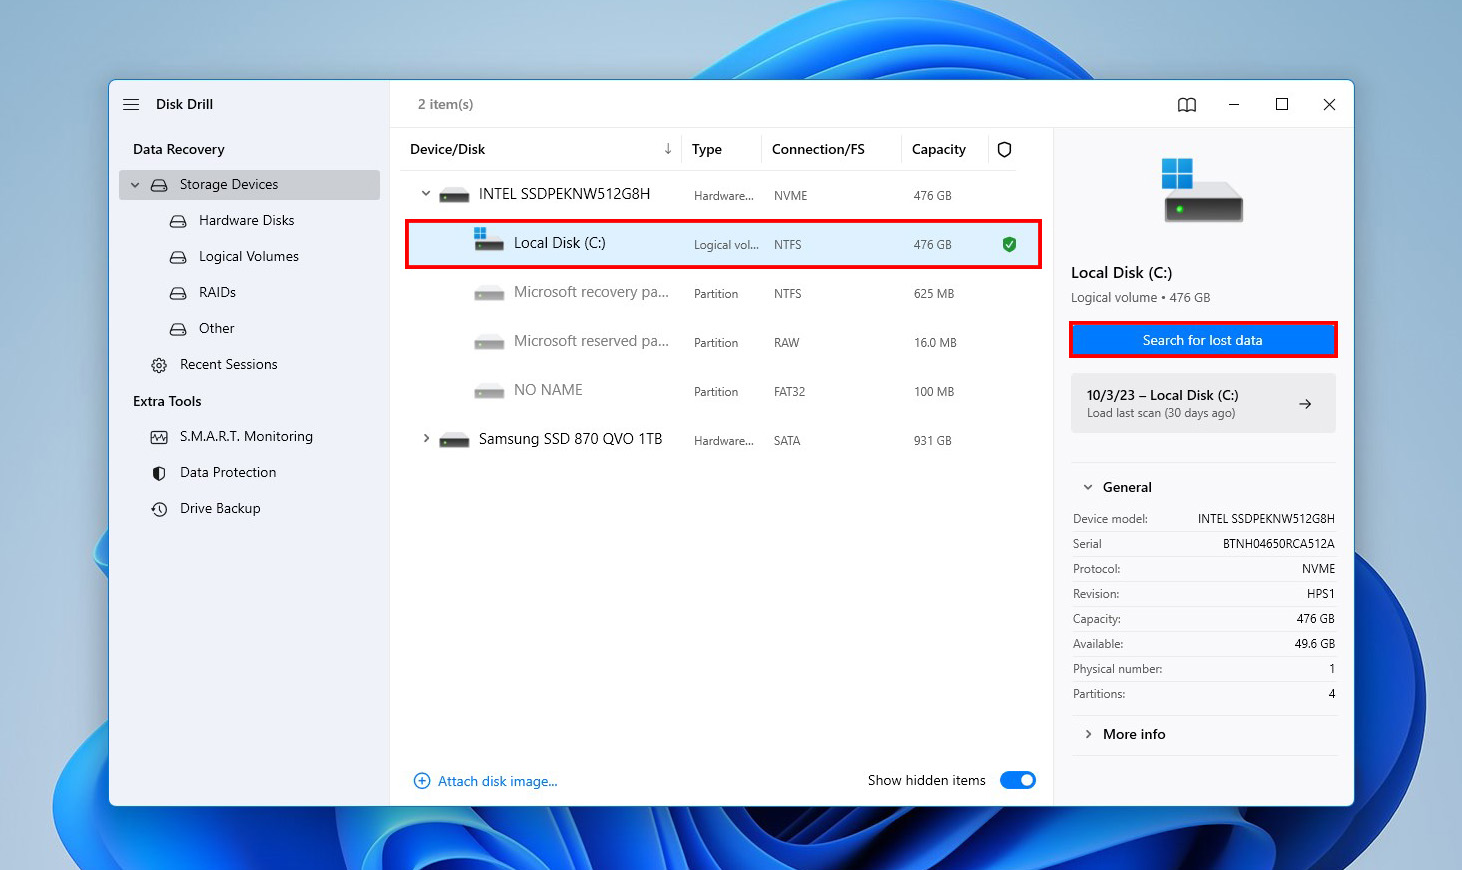
- You should now see a list of storage devices and partitions like in the screenshot below. Select the partition where your files used to be. Click on the Search for lost data button. Disk Drill will then start scanning your partition for any files it may have contained.
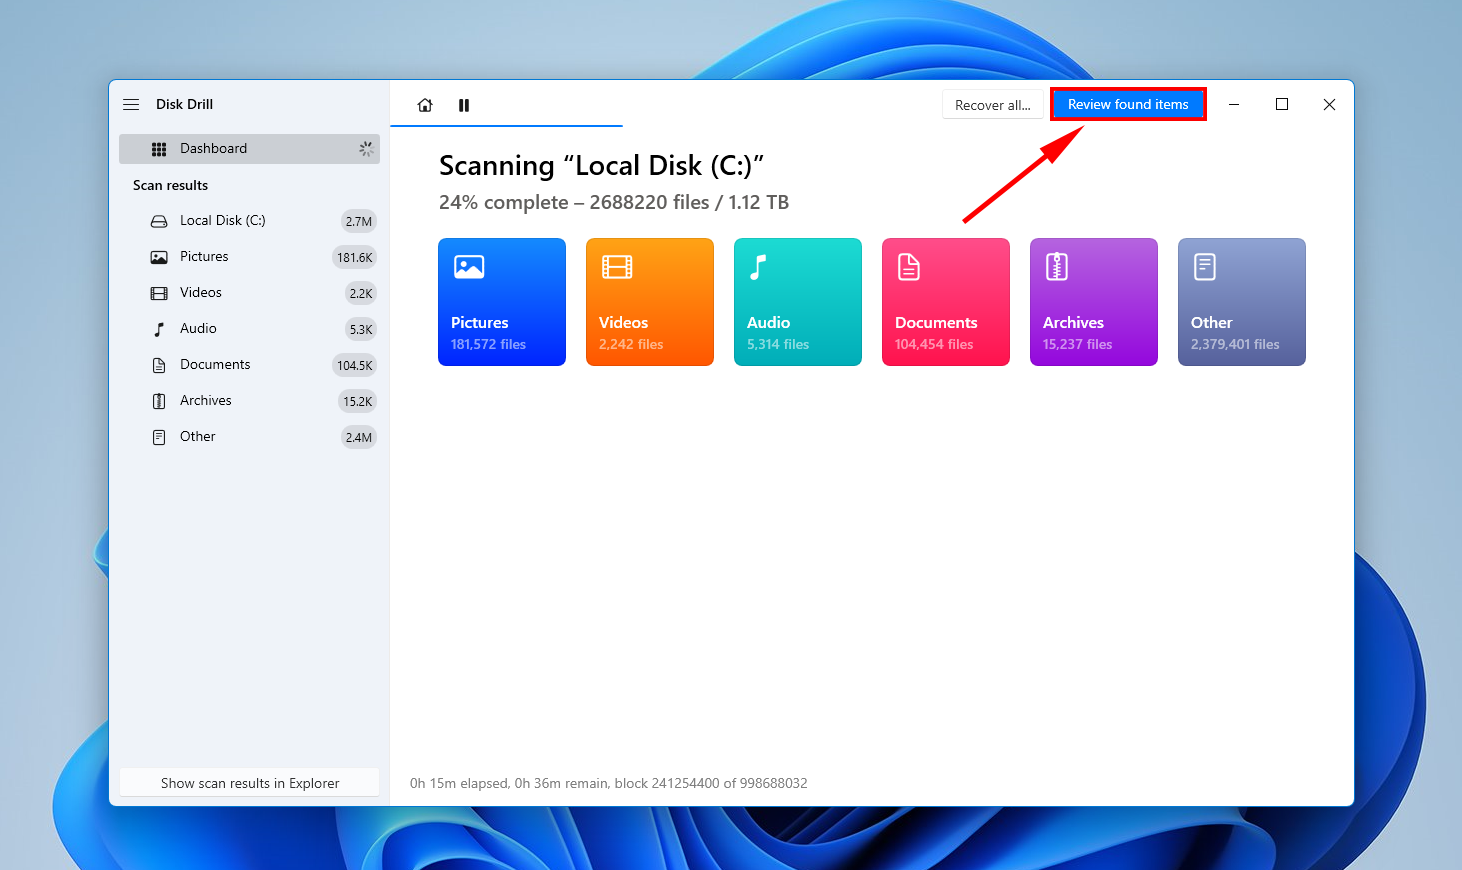
- The scan may take a few minutes to complete. Once it’s done, Disk Drill will show you all the files it managed to find. Click on Review found items.
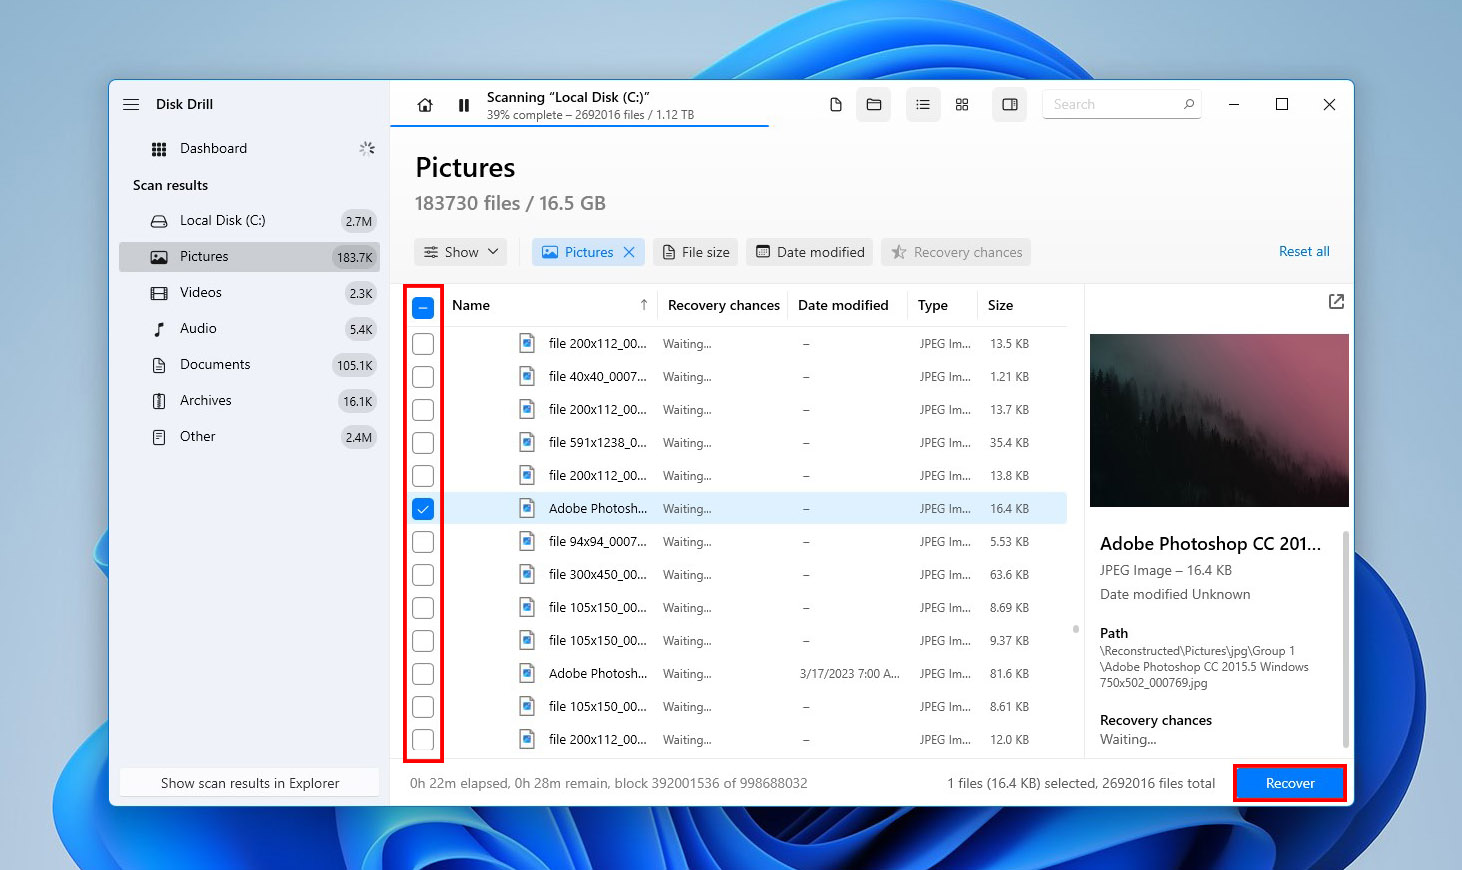
- If you’d like to recover everything that Disk Drill found on your lost GPT partition, click on Recover. If you’d only like to recover a few files, you can select those files manually and then click Recover.
- Disk Drill will now ask you to select a location to send your recovered files. Select the folder and then click Next.

That’s it! Your files will now be recovered and ready to use.
How to Fix a GPT Partition
Fixing a GPT partition is more complex than simply recovering data from it. However, here too, you’ll need to use a third-party tool. For our tutorial, we picked TestDisk. While the program doesn’t have a GUI, it more than makes up for it with its advanced functionality and partition repair capabilities.
Here’s how to repair a GPT partition using TestDisk:
- Download TestDisk and extract its contents.
- Run testdisk_win.exe. To navigate around TestDisk, use the arrow keys. Press Enter to confirm any selection.
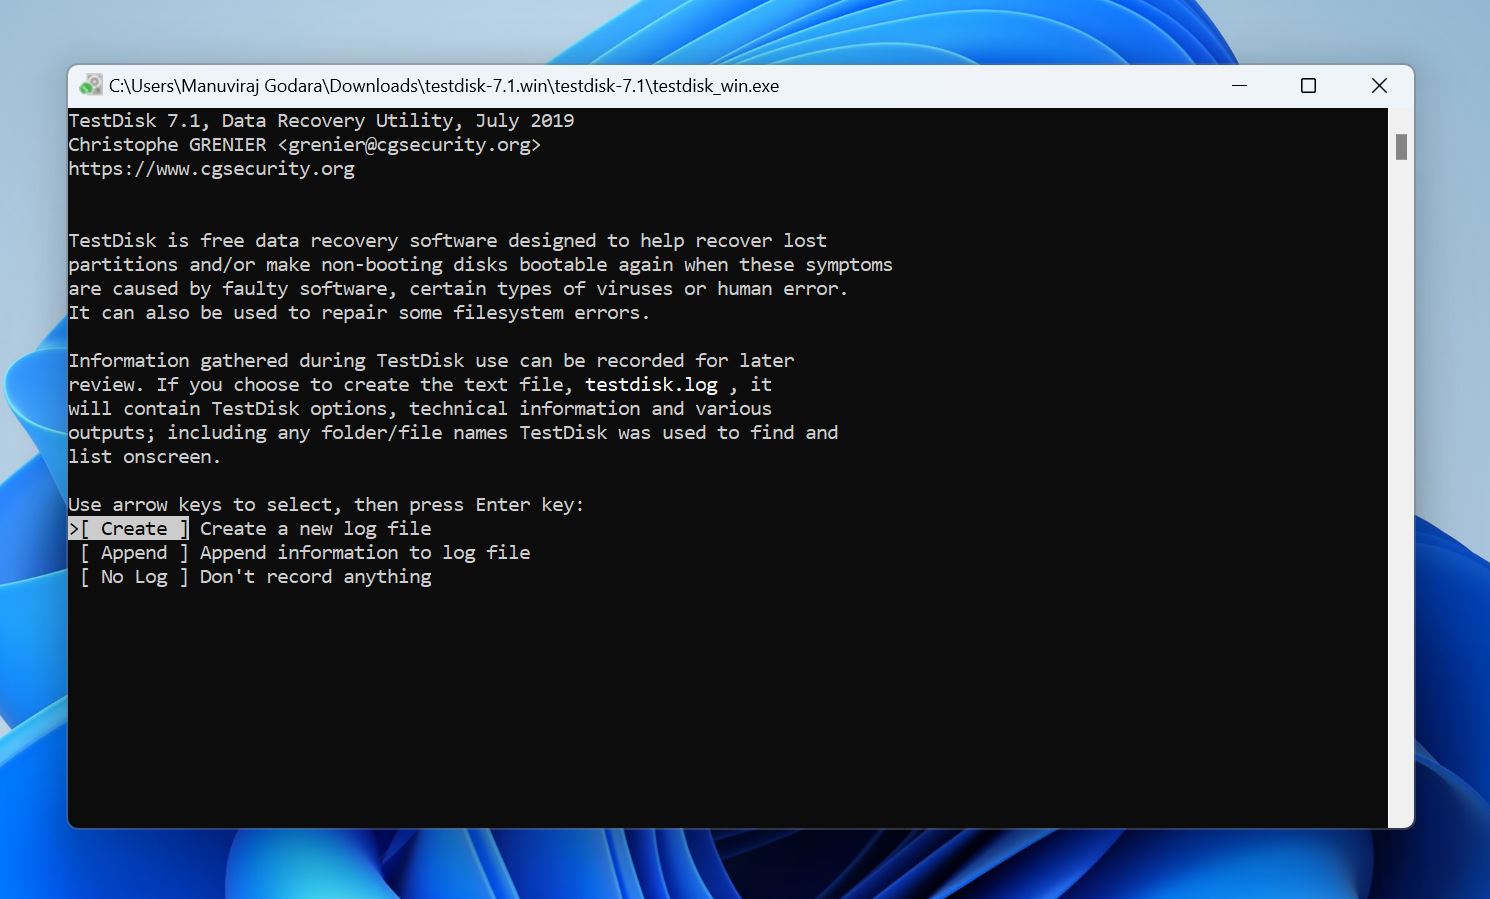
- Choose whether you wish to create a log file or not, and press Enter.
- Select the drive with the GPT partition and press Enter.

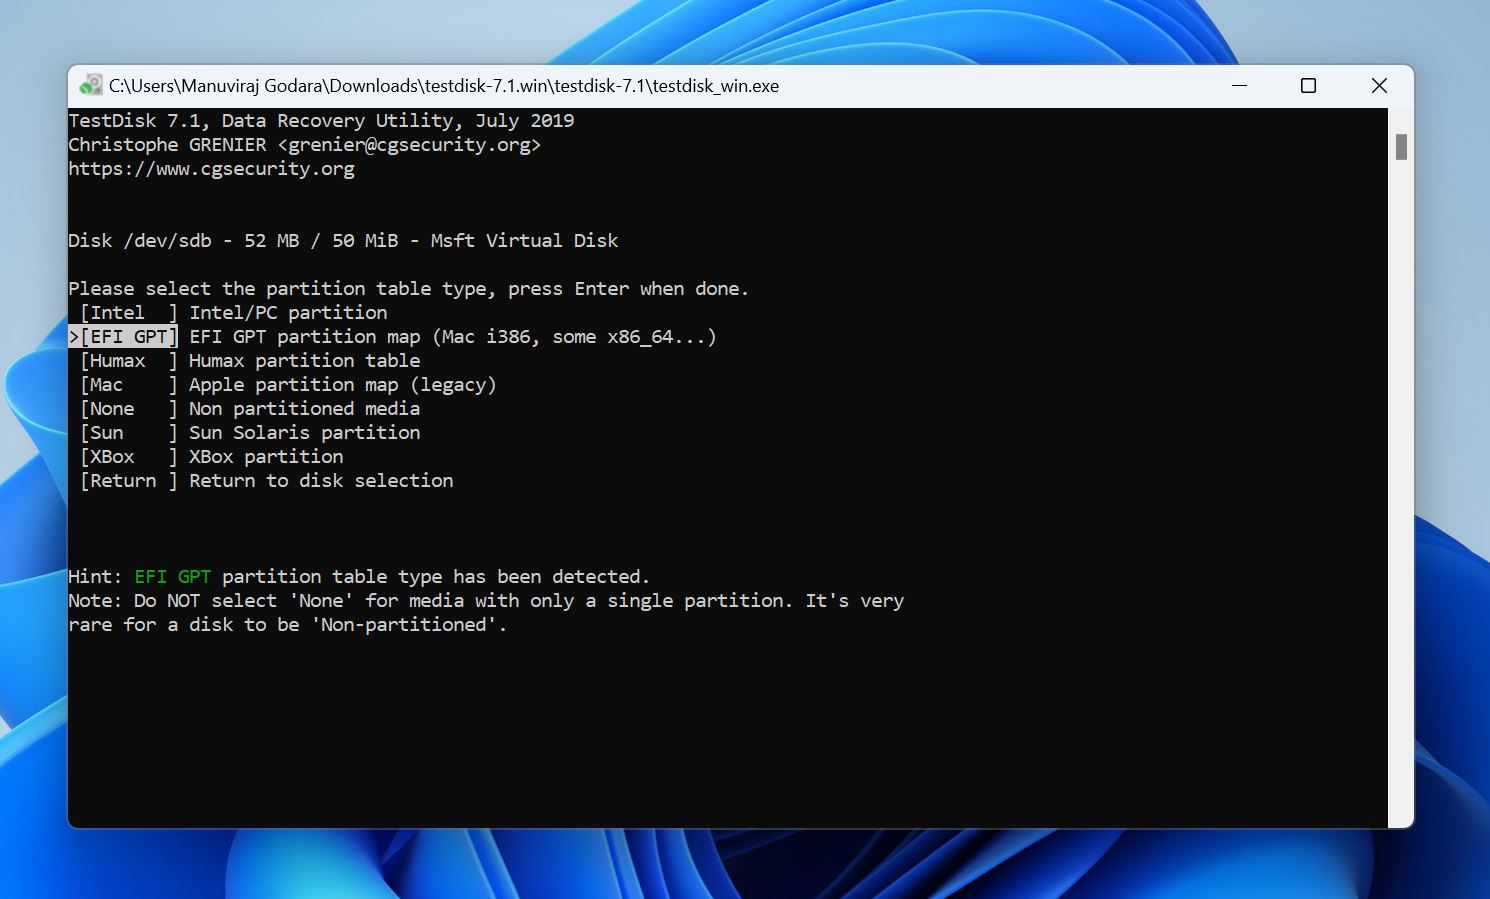
- Now, choose the partition table type. In this case, it’s GPT. TestDisk usually auto-selects the correct partition table.
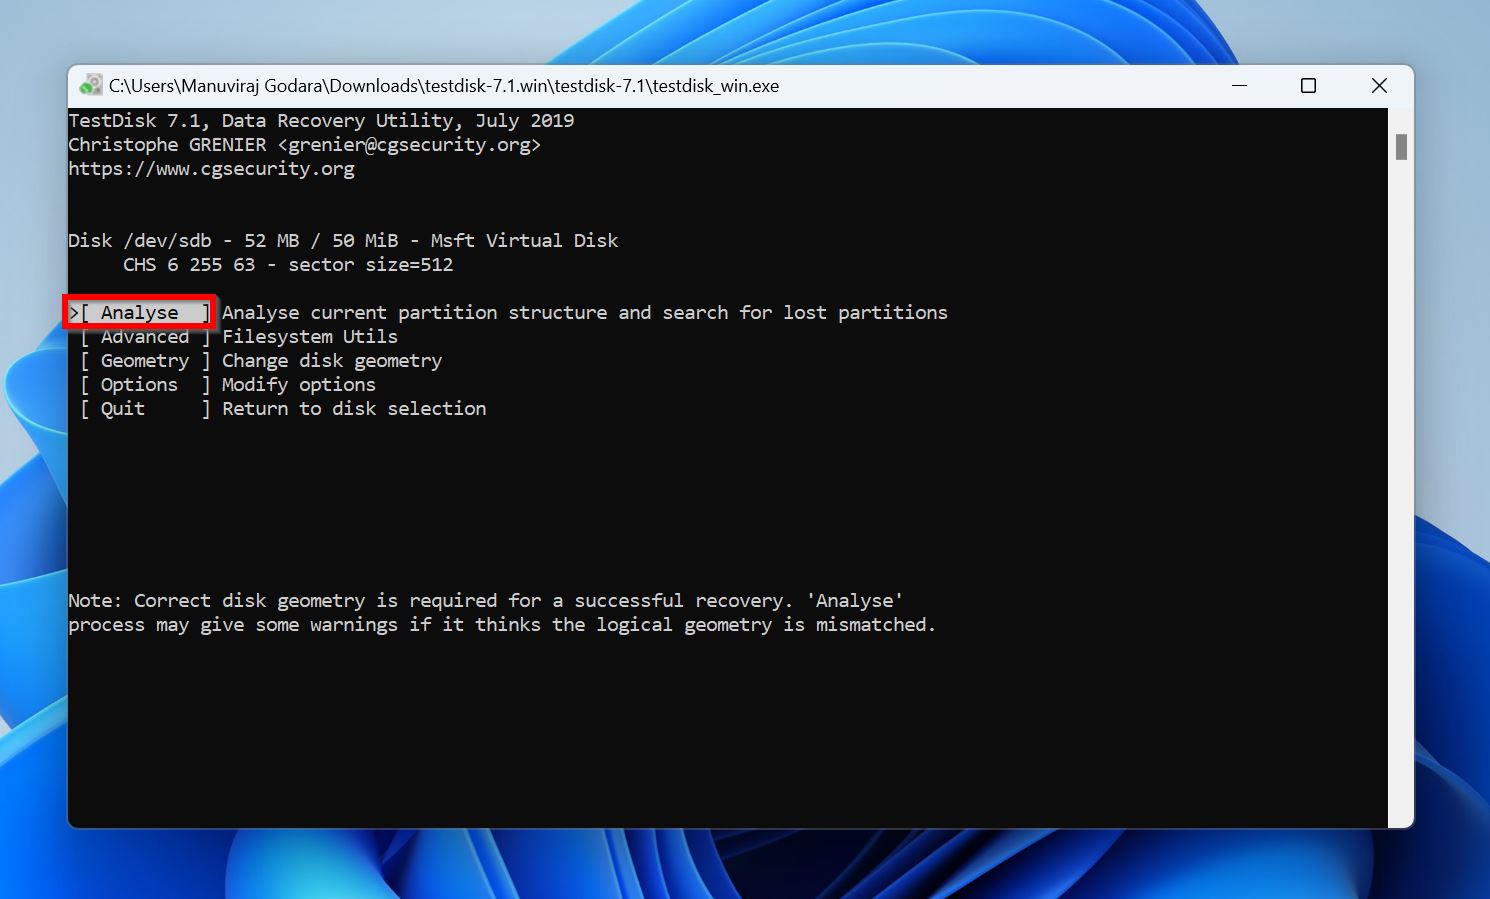
- Select Analyze and press Enter.
- Select Quick Search and press Enter.

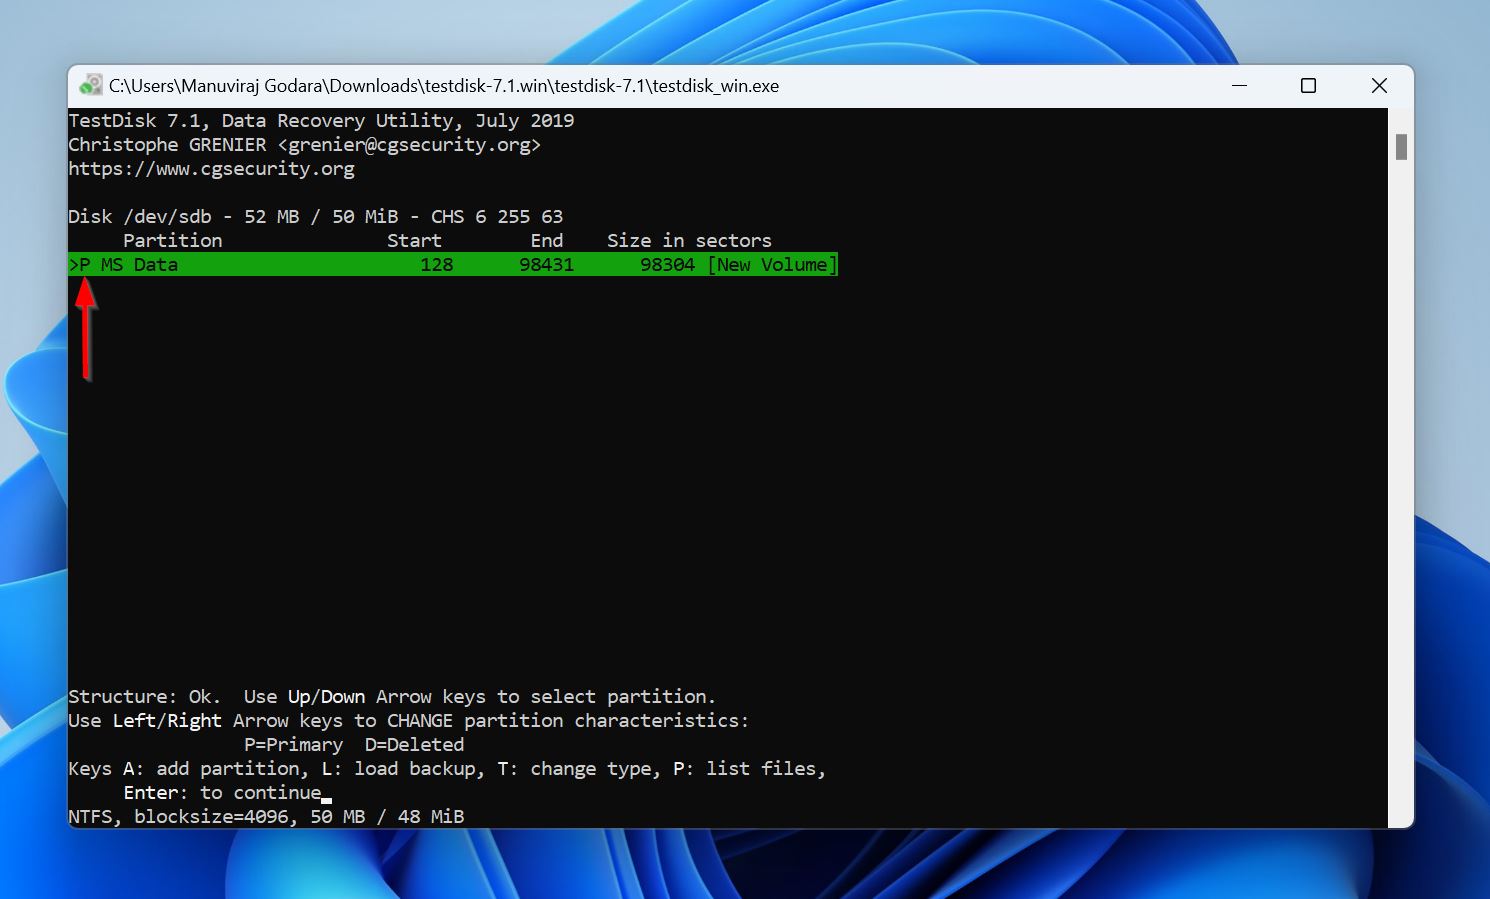
- TestDisk will list the recoverable partitions. There will typically be a D (Deleted) prefix before each partition. You need to change this prefix to P (Primary). To do so, ensure the partition is highlighted and then cycle through the prefixes using the left or right arrow keys until you see a P. Once you’ve done that, press Enter.
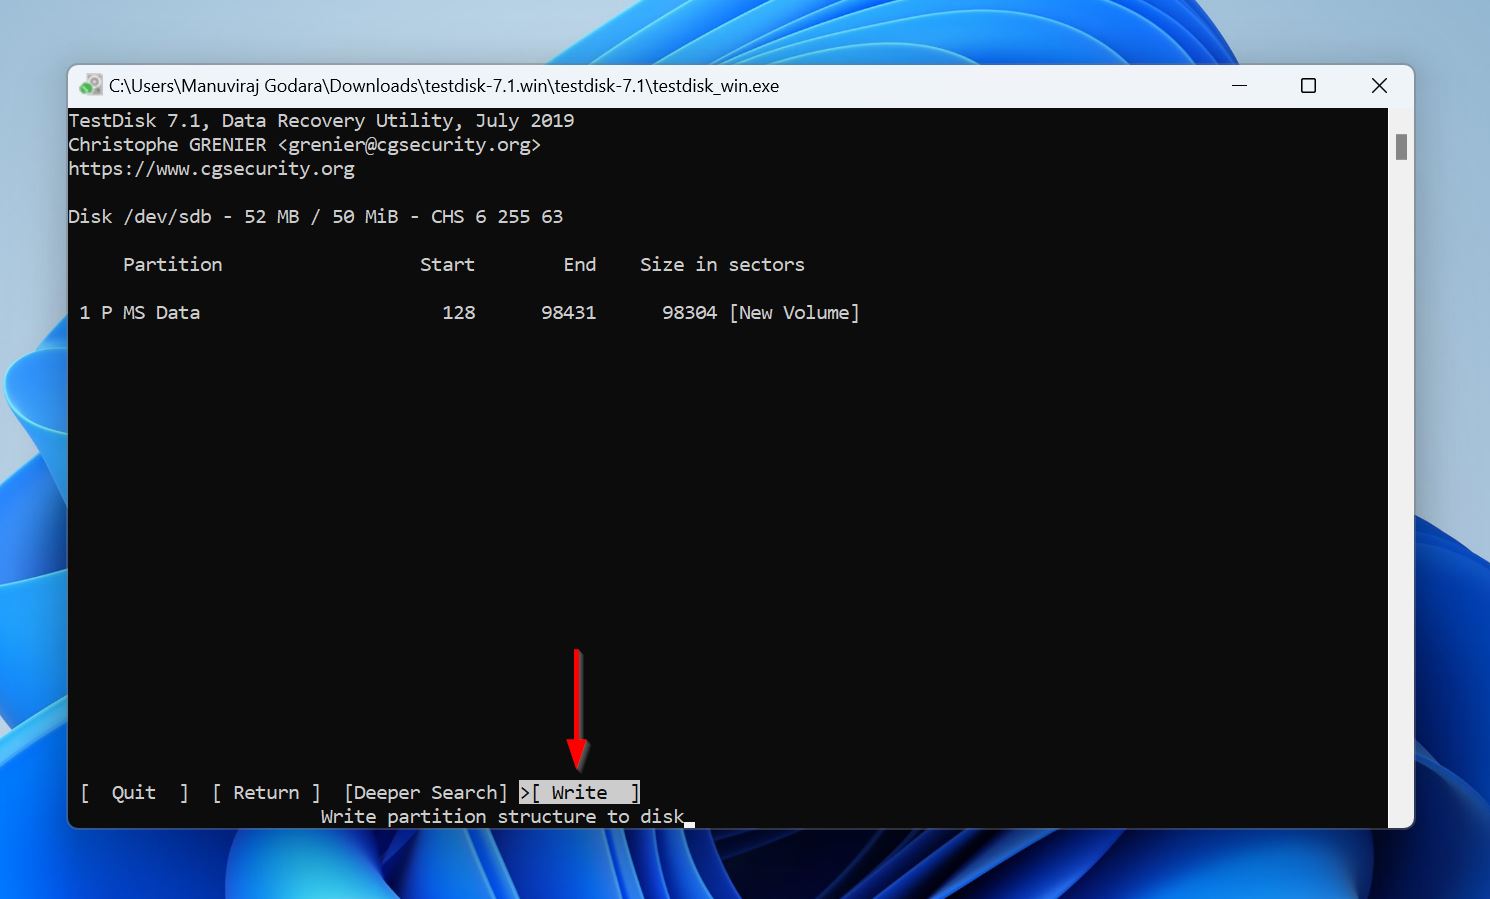
- You can now opt for a Deeper Search or simply select Write and press Enter to repair the GPT partition.
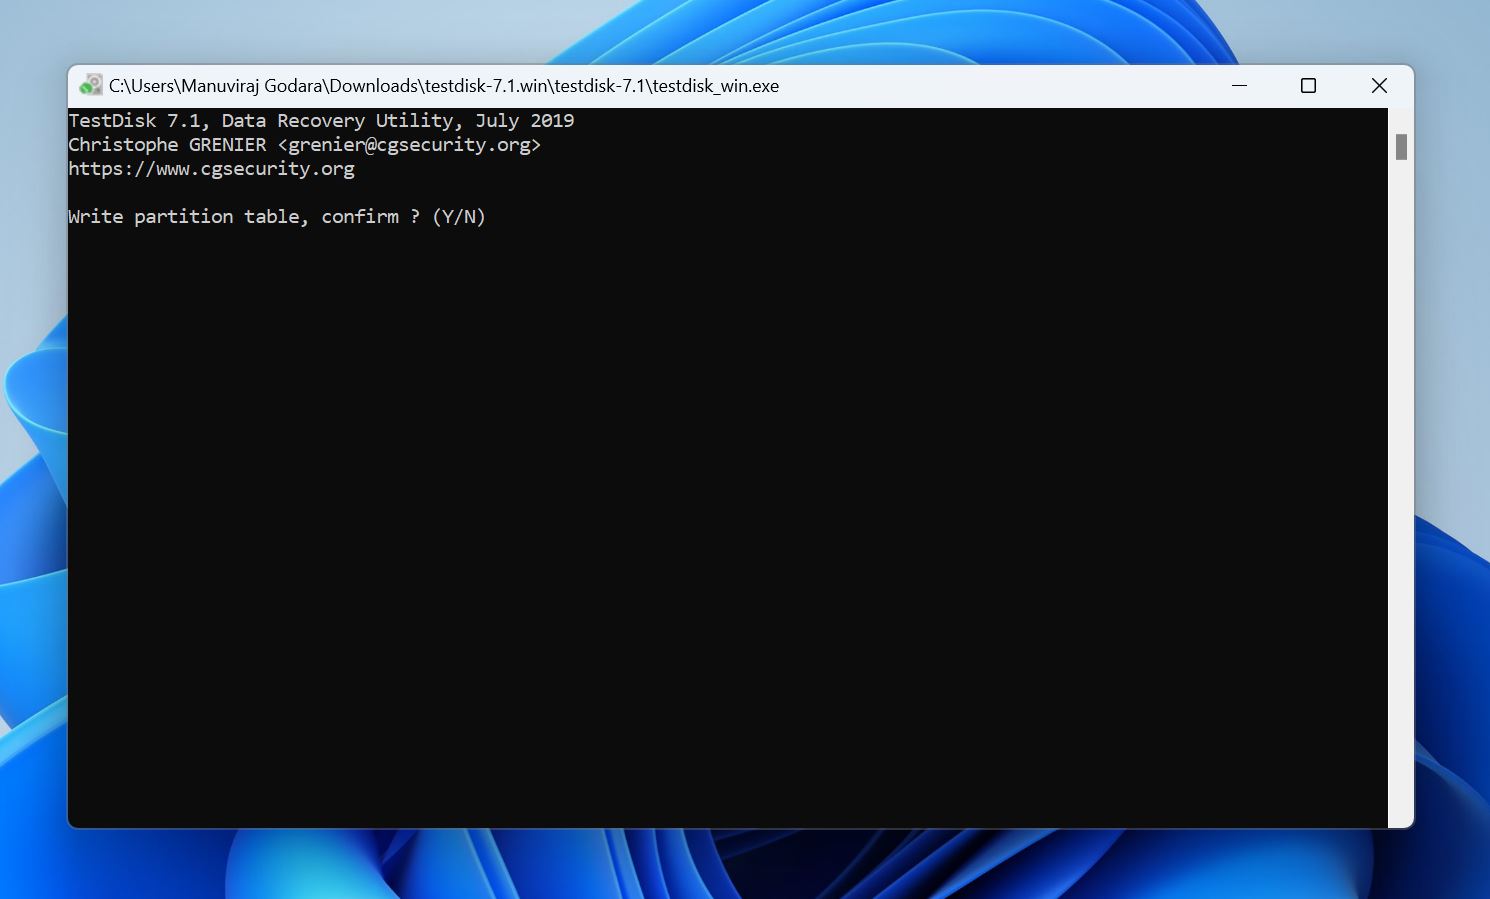
- You’ll see a confirmation screen. Press Y to proceed.
- Reboot your PC.
Can You Recover Data from a GPT Protective Partition?
You can neither access, nor modify a GPT protective partition using traditional methods like Windows Explorer. However, using specialized data recovery and partition repair tools, you can get back your data, and potentially fix the storage drive in question.
Bonus: Master Boot Record (MBR) and GUID Partition Table (GPT) are both partition schemes with their own advantages and disadvantages. GPT is the newer partition scheme and hence offers more features and support for larger partitions.
To prevent older programs and operating systems from incorrectly detecting the GPT drive as uninitialized and empty, GPT drives have a protective MBR header. This MBR header displays the drive as a GPT Protective Partition that’s inaccessible, so that legacy operating systems and programs don’t accidentally modify the drive.
So, if the drive is showing up as a GPT Protective Partition on older operating systems that only support MBR, it’s nothing to worry about. However, if the same is happening on systems that recognize and work with GPT, it’s usually a cause for concern as it could signal corruption and damage to the partition table. This logical corruption can be attributed to factors like viruses, improper usage, an accumulation of bad sectors, and more.
Conclusion
With computers now being an essential part of our lives, understanding how to recover lost files is more important than ever. Disk Drill’s data recovery tool makes this an easy process that you can do yourself.
FAQs:
- Download and install Disk Drill.
- Open Disk Drill, then select your GPT protective partition from the home screen.
- Click Search for lost data to begin a data scan.
- Select the data you wish to recover, then click Recover.
- Choose a different disk where you wish to transfer your files. You will now be able to open your files that were previously inaccessible.
- Click the Windows key and type "diskpart" into the search bar and press Enter.
- Type in "list disk" and press Enter. Diskpart.exe will show you which disks are available.
- Select the disk with your GPT protective partition by typing in "select disk x", with x being the desired disk number.
- Now that the appropriate disk is selected, type and enter "clean". The selected disk will now be completely wiped.
- Afterwards, it’s a simple matter of converting the disk to the format of your choice. Type and enter "convert gpt" if you wish to format your disk as a GPT partition.


