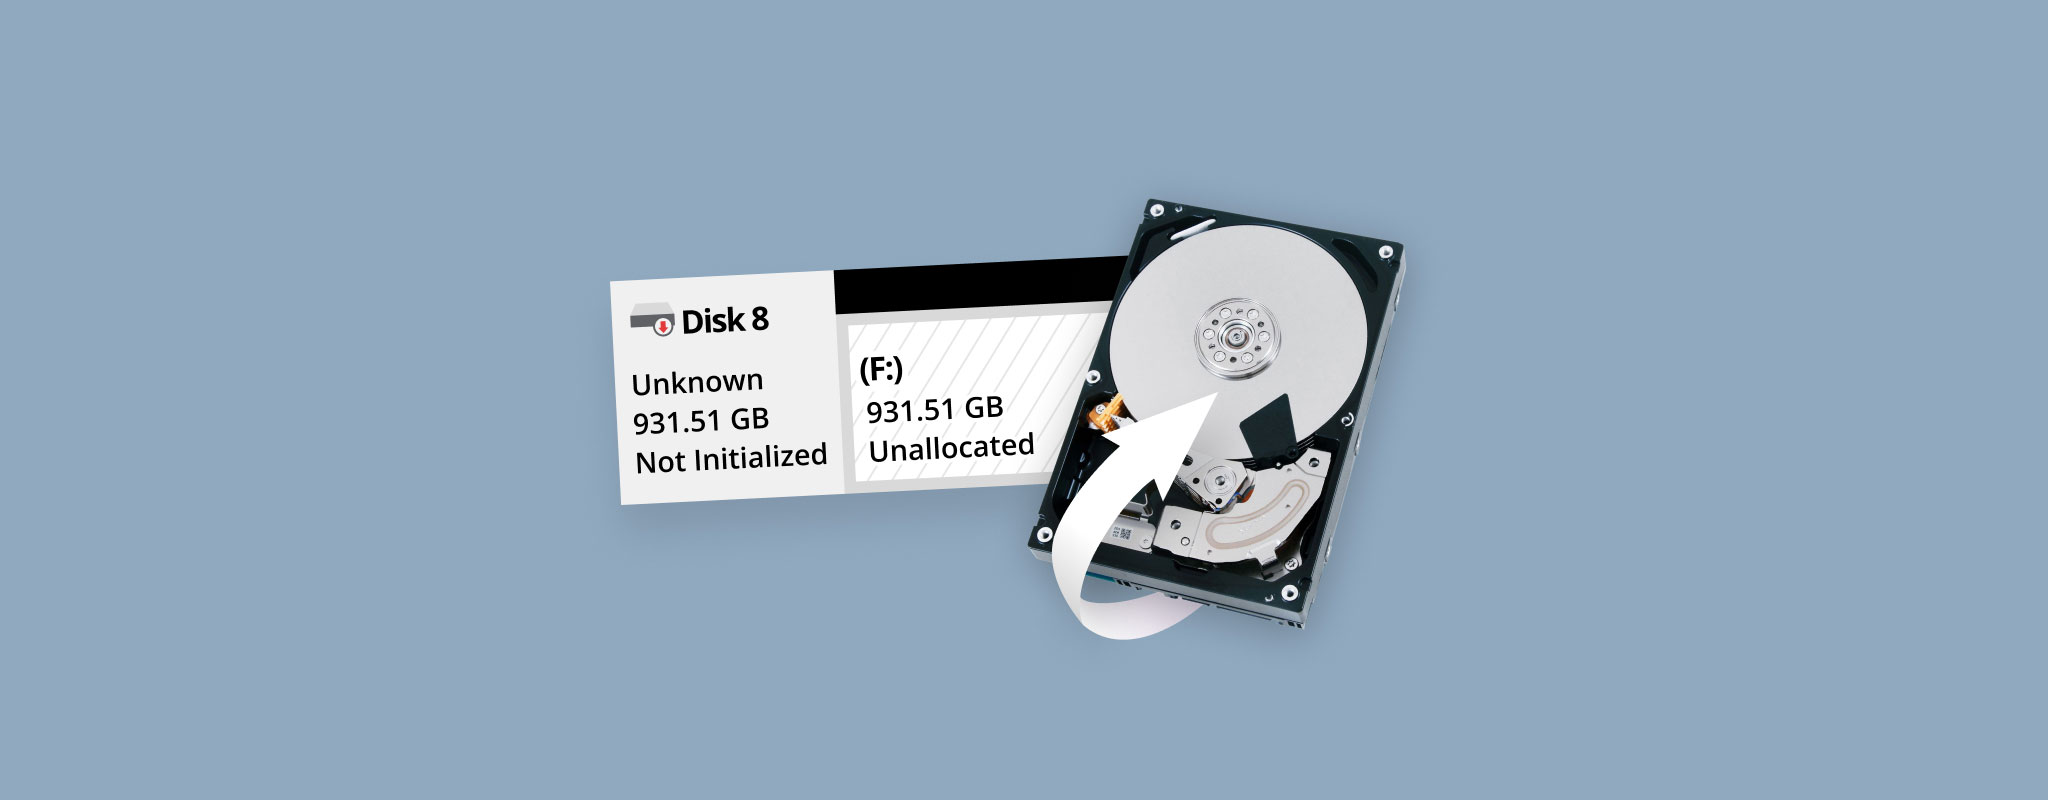
 Booting up your computer to find an unallocated hard drive is an immediate cause for concern. If you check Disk Management, you’ll notice either a chunk or all of your hard drive has turned into unallocated space.
Before you take any action to fix the situation, you need to recover your data. Otherwise, it might become lost for good. Read on to find out how to fix an unallocated hard drive and recover data from it.
Table of Contents
What Is an Unallocated Hard Drive
When you write a file to your hard drive, a file system is used to keep track of where that file physically resides on the disk. Each partition requires a file system in order to function. On Windows, the standard go-to is typically NTFS. Without a file system, the operating system won’t know where to locate the file in order to open it.
Unallocated space on a storage device refers to physical space that doesn’t contain a working file system. For example, if you buy a USB drive that’s unallocated, it’s usually because it hasn’t been formatted yet. However, if unallocated space suddenly appears on a hard drive you’ve been using for a long time, it’s an indication that something has damaged your file system.
In most instances, a damaged file system doesn’t mean your data is gone. Instead, it means that your data is inaccessible. If your hard drive is unallocated, the data can still be recovered using specialized data recovery software.
How to Recover Data From an Unallocated Space
Any attempts to repair the unallocated space may inadvertently result in some or all of your data becoming unrecoverable. Therefore, you should start with data recovery first. To achieve this, we’ll be using Disk Drill.
We recommend Disk Drill as it excels in recovering data in most data loss of situations. Seeing as it has support for FAT16/32/exFAT, NTFS, HFS, HFS+, APFS, and EXT2/3/4 file systems, it gives you the opportunity to recover data from unallocated space that appears on a multitude of devices. If it can’t use the underlying file system, it also supports data recovery by file signature.
The sudden loss of a partition may point toward a failing drive. Therefore, we recommend you create a byte-to-byte backup where possible before you begin recovery.
The below instructions demonstrate how to recover data from unallocated space on an external hard drive using Disk Drill:
- Download and install Disk Drill.
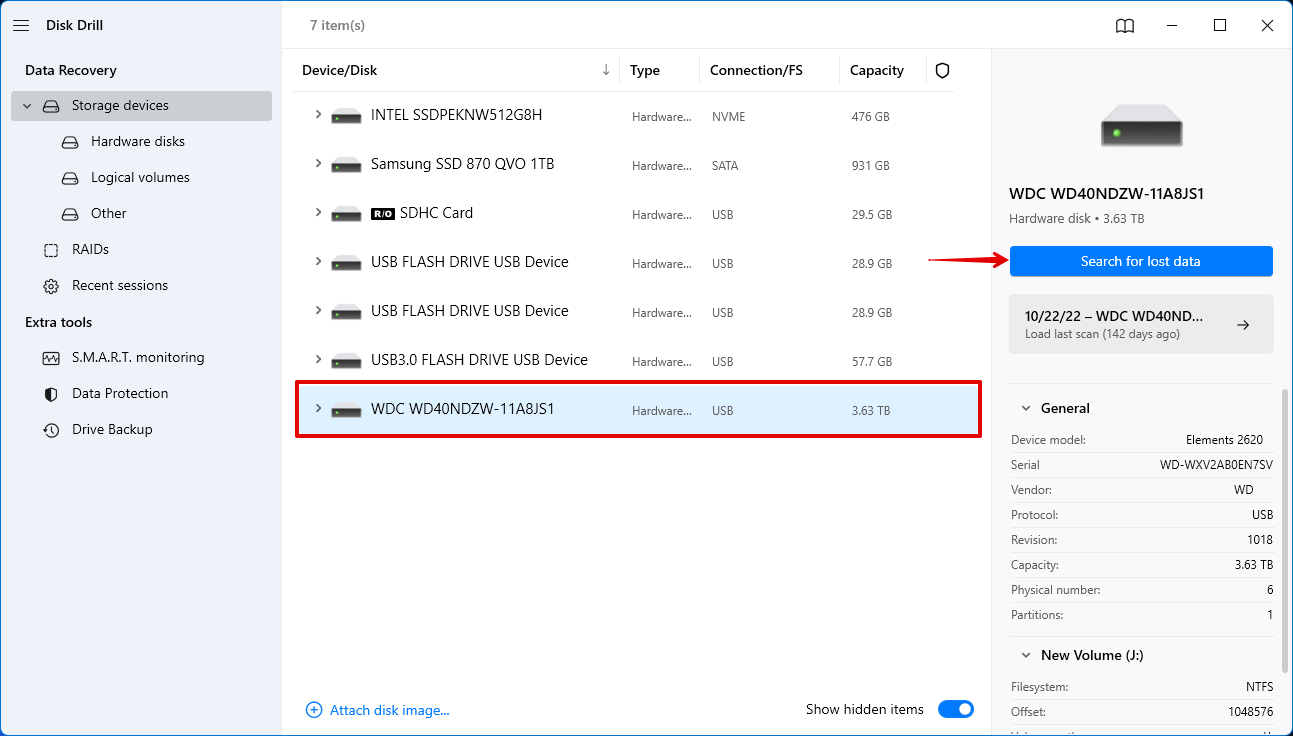
- Connect your unallocated hard drive and select it from the list. Click Search for lost data.
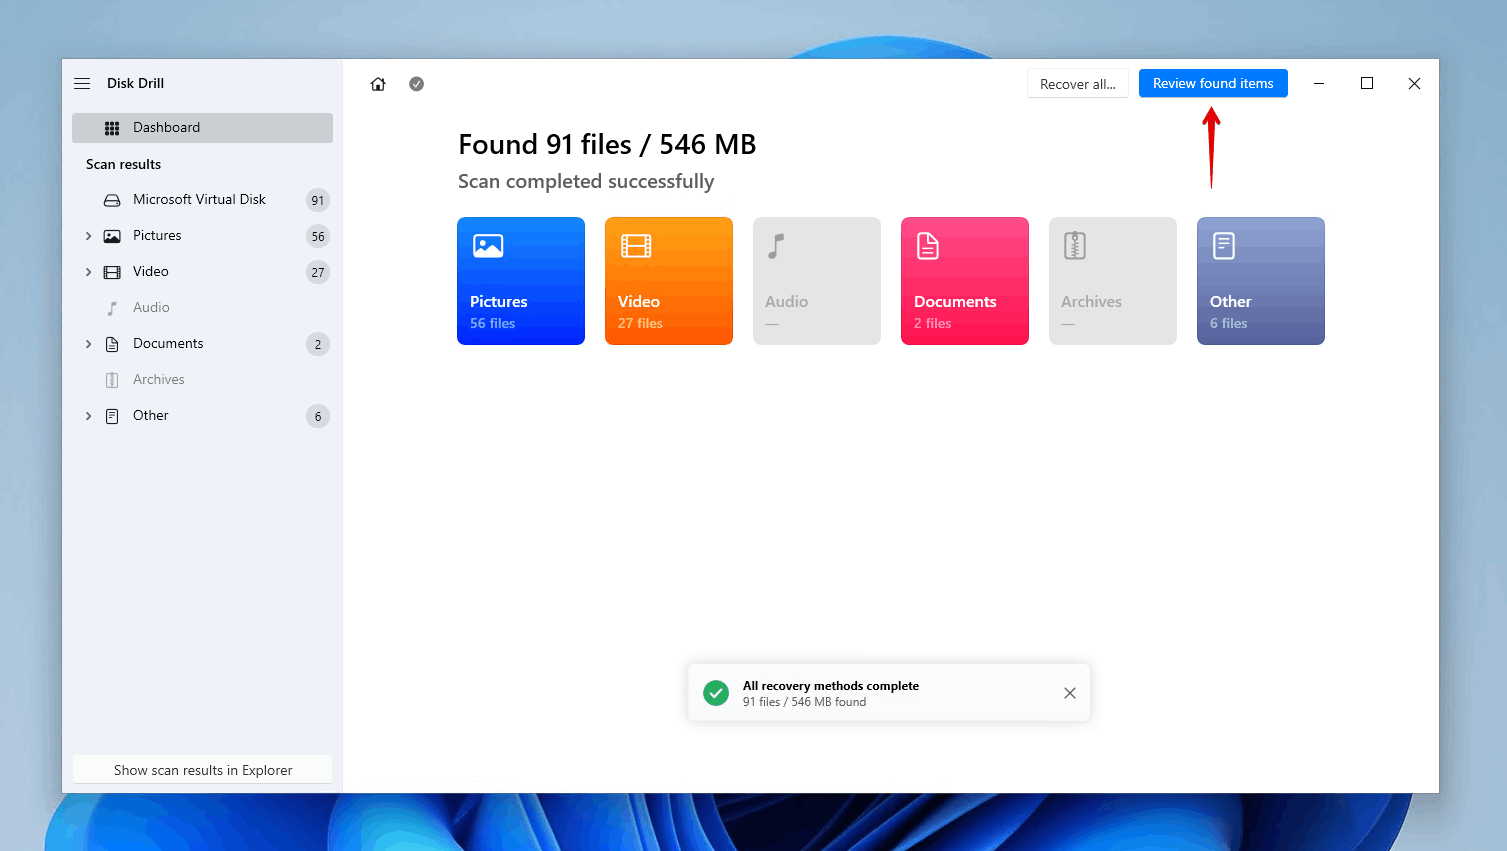
- Click Review found items once Disk Drill’s scan has finished. If you’re only searching for specific file types, click one of the colored file type icons instead. Or, recover everything by clicking Recover all.
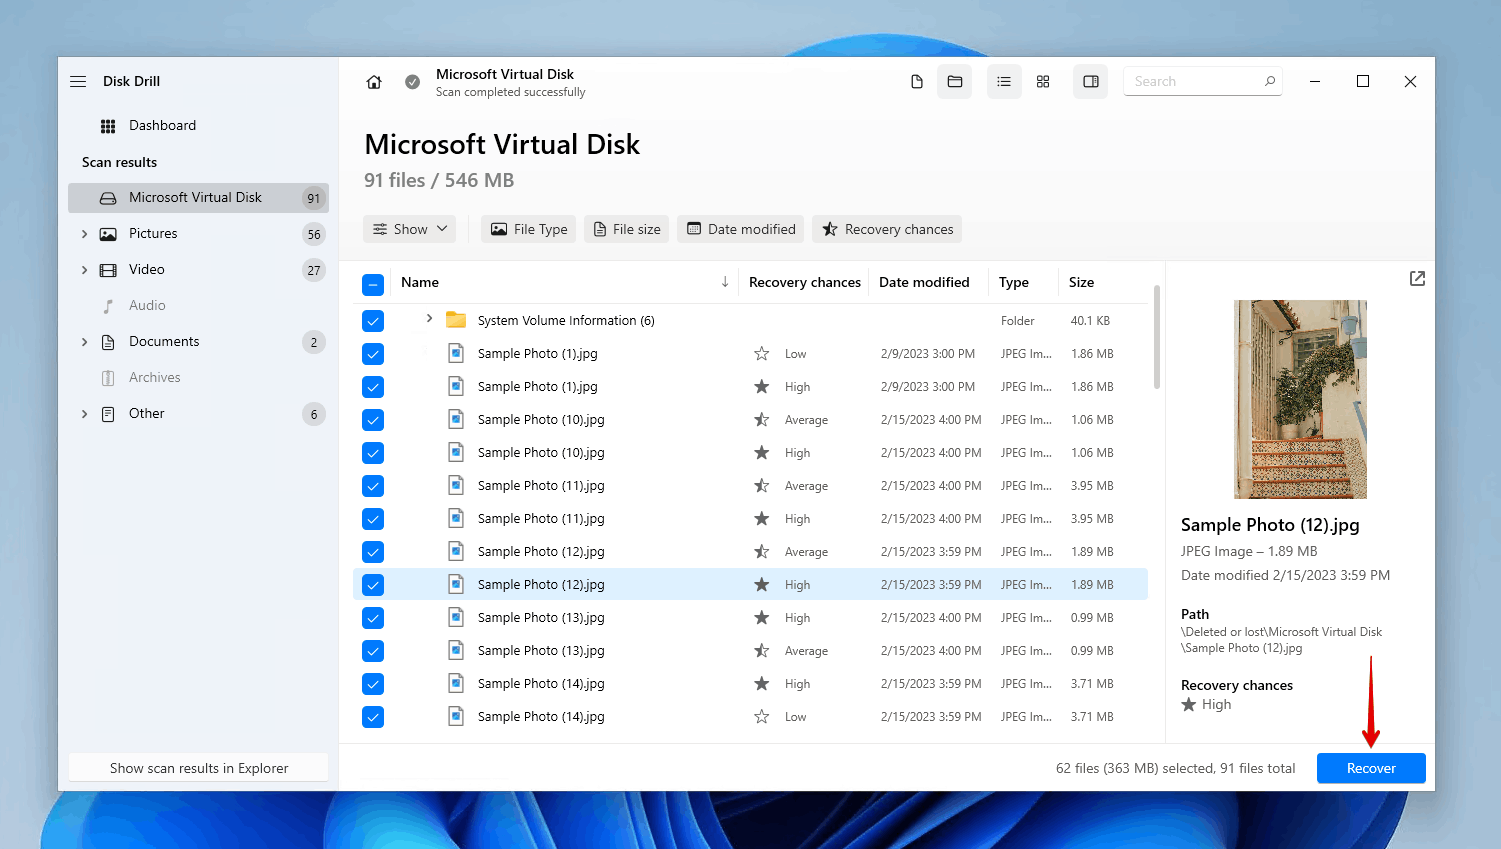
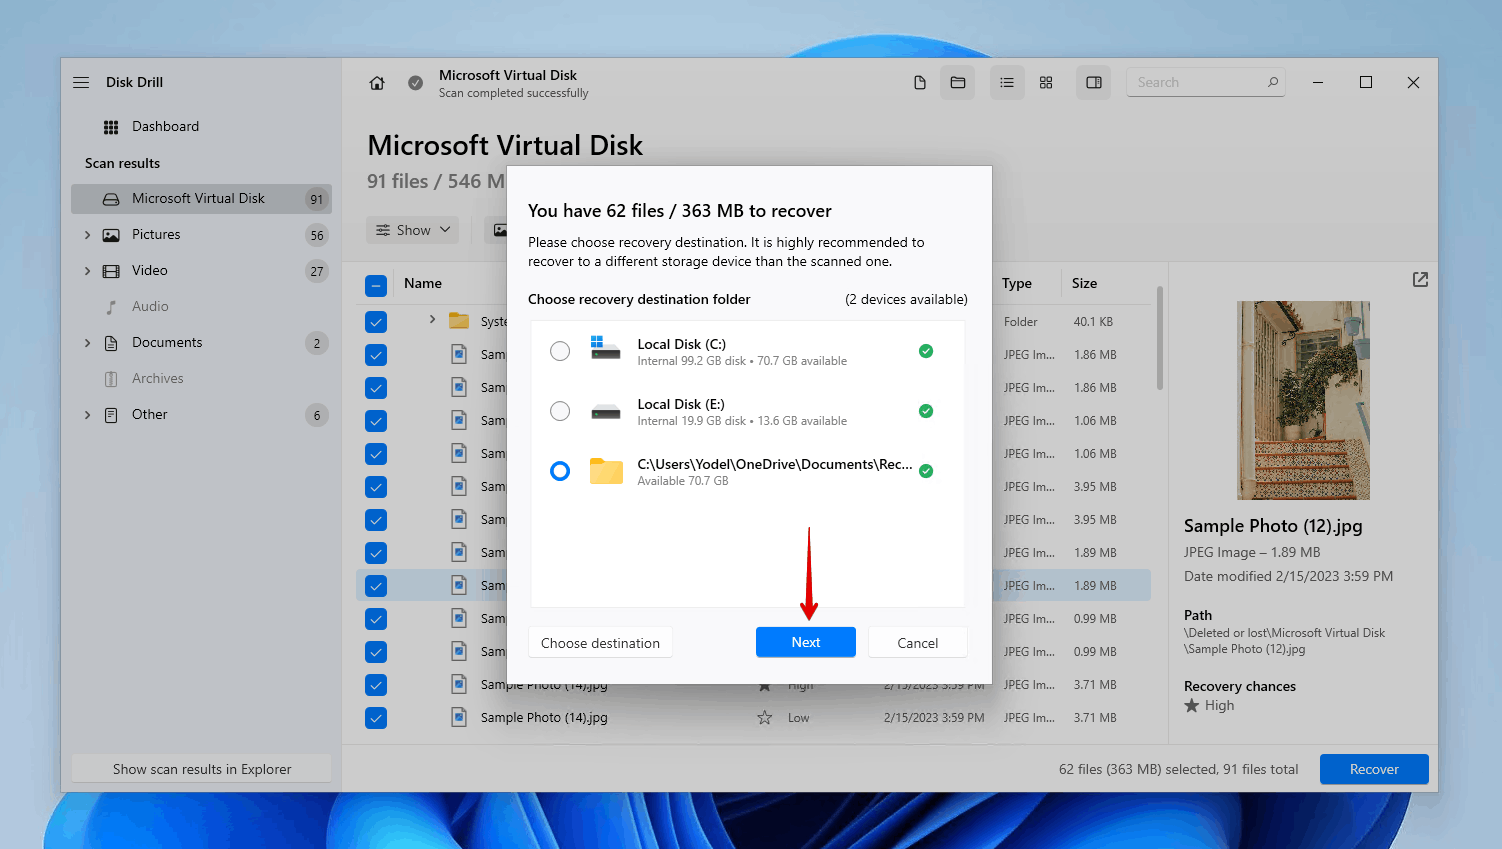
- Select the files you want to recover from the unallocated hard drive. The recovery chances column and preview panel give you a good indication of what data can and cannot be recovered. If a lot of data was found, make use of the filter buttons to narrow the search results. When you’re ready, click Recover.
- Select a recovery location. Make sure you’re not restoring the data to the same drive you’re recovering it from to avoid data corruption. Click Next to complete recovery.
How to Fix an Unallocated Hard Drive
Following the recovery of your data, you’re free to begin troubleshooting the problem that caused your hard drive to become unallocated. Check out the solutions below.
Method 1:Update Drivers
When a disk is unallocated, it can often be the result of outdated or corrupted drivers. Drivers are a key component in the communication between your storage device and the rest of your hardware. Without functioning drivers, problems arise.
These steps will guide you through updating your drivers, as well as reinstalling them if they’re corrupted:
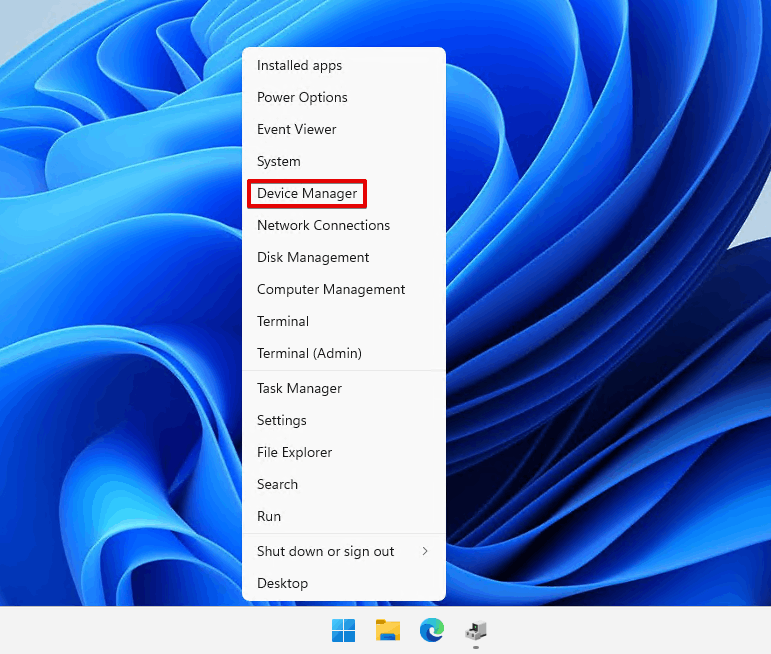
- Right-click Start and click Device Manager.
- Expand Disk drives. Right-click your disk drive and click Properties.
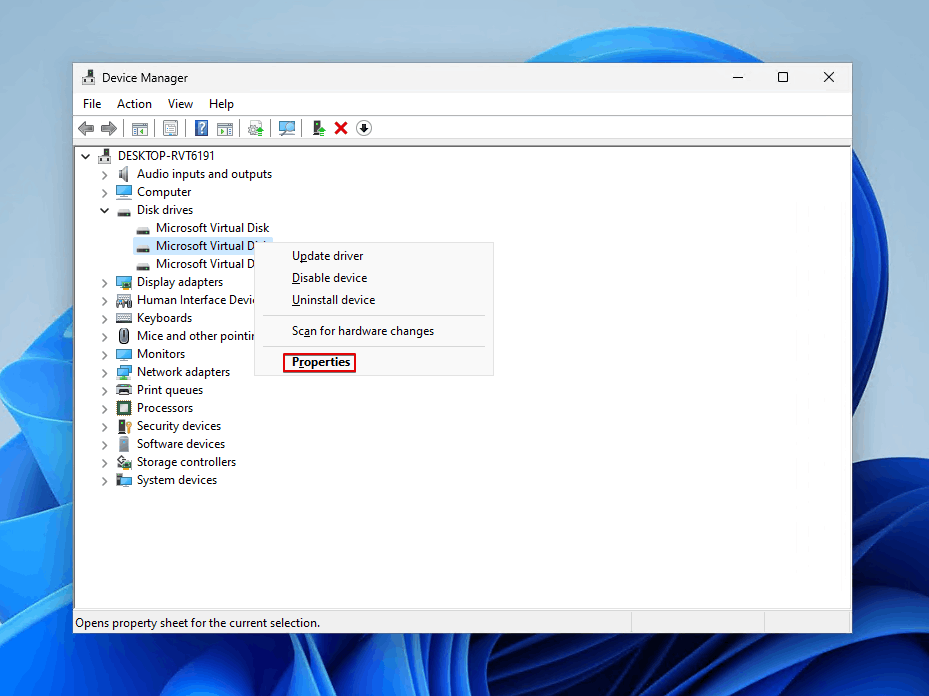
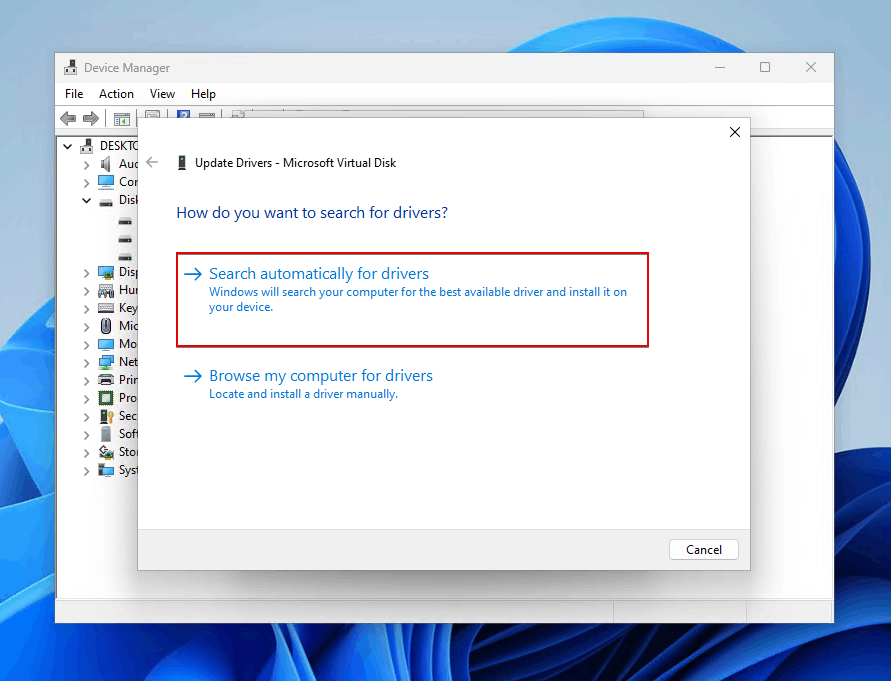
- Click the Driver tab, then click Update Driver.
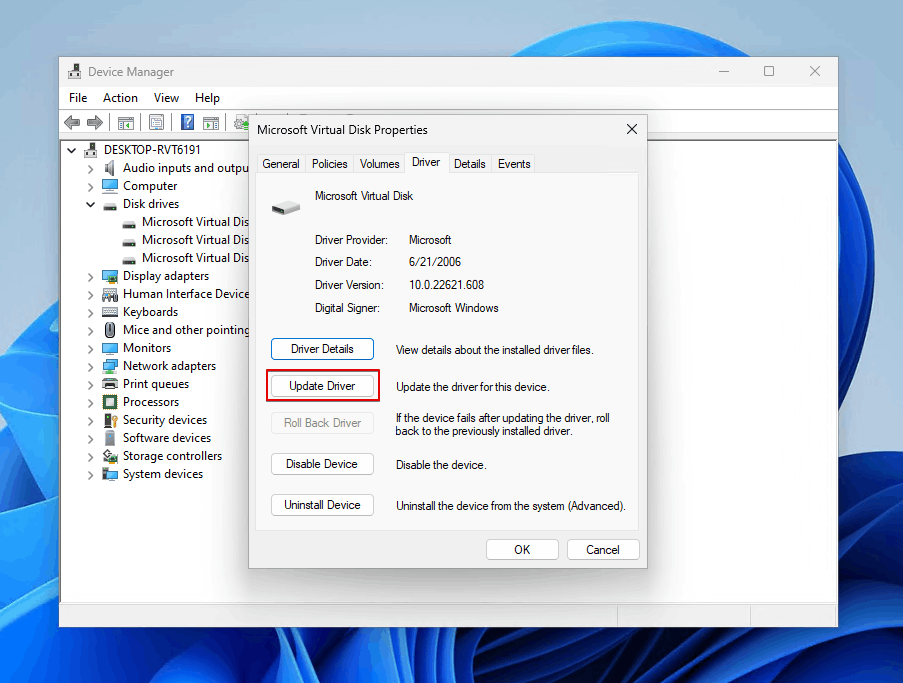
- Click Search automatically for drivers. If no updated drivers were found, proceed to the next step.
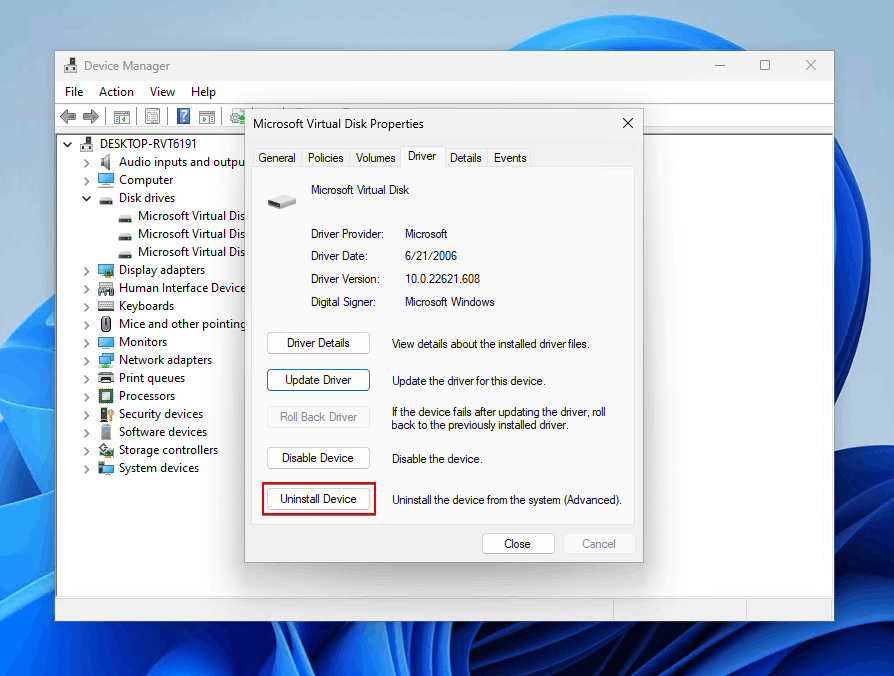
- Click Close.

- Click Uninstall Device.
- Click Uninstall.
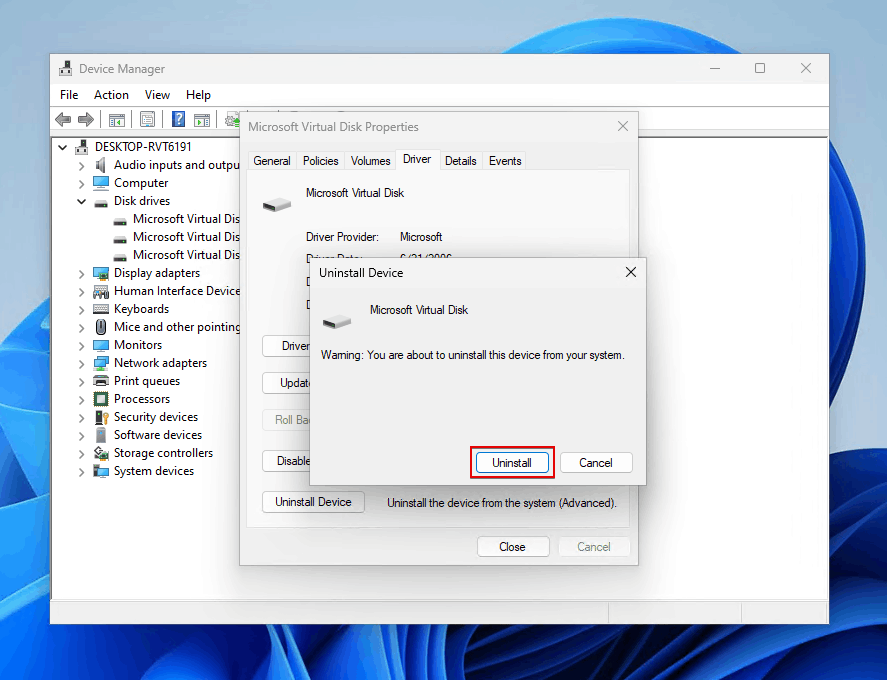
After uninstalling the drivers, restart your computer to force the drivers to reinstall. If this occurred on a removable device, you can simply remove the storage device and reconnect it.
Method 2:Run the DiskPart Command
DiskPart is a command-line tool that gives you control over the drives in your computer. It shares some of the same functionality you’d find in Disk Management, but with more flexibility. Using DiskPart, you can create a new partition to fill the void of the unallocated space.
Follow these instructions to create a partition and format it with a file system using DiskPart:
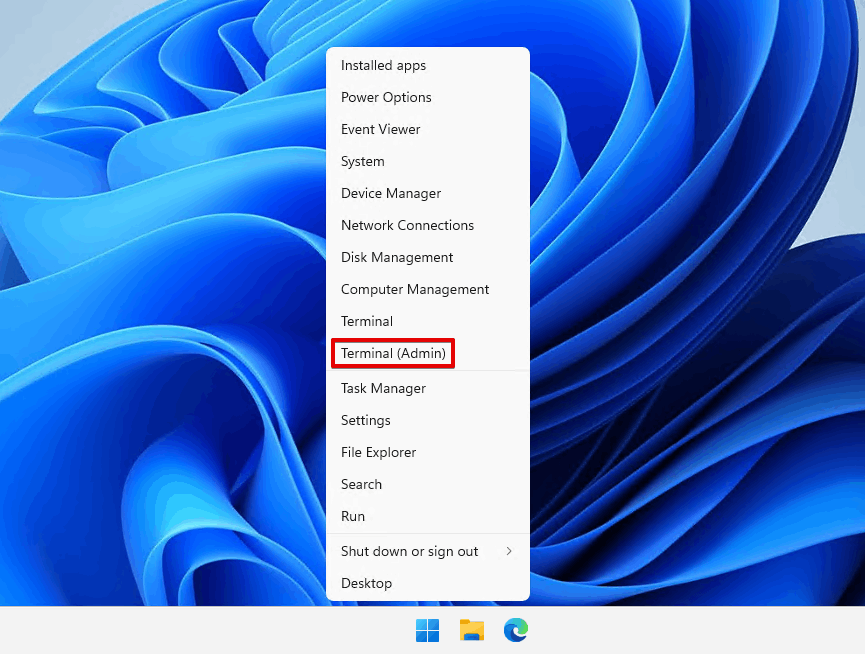
- Right-click Start and click Terminal (Admin). If you’re on Windows 10, click Windows PowerShell (Admin) instead.
- Type
diskpartand press Enter.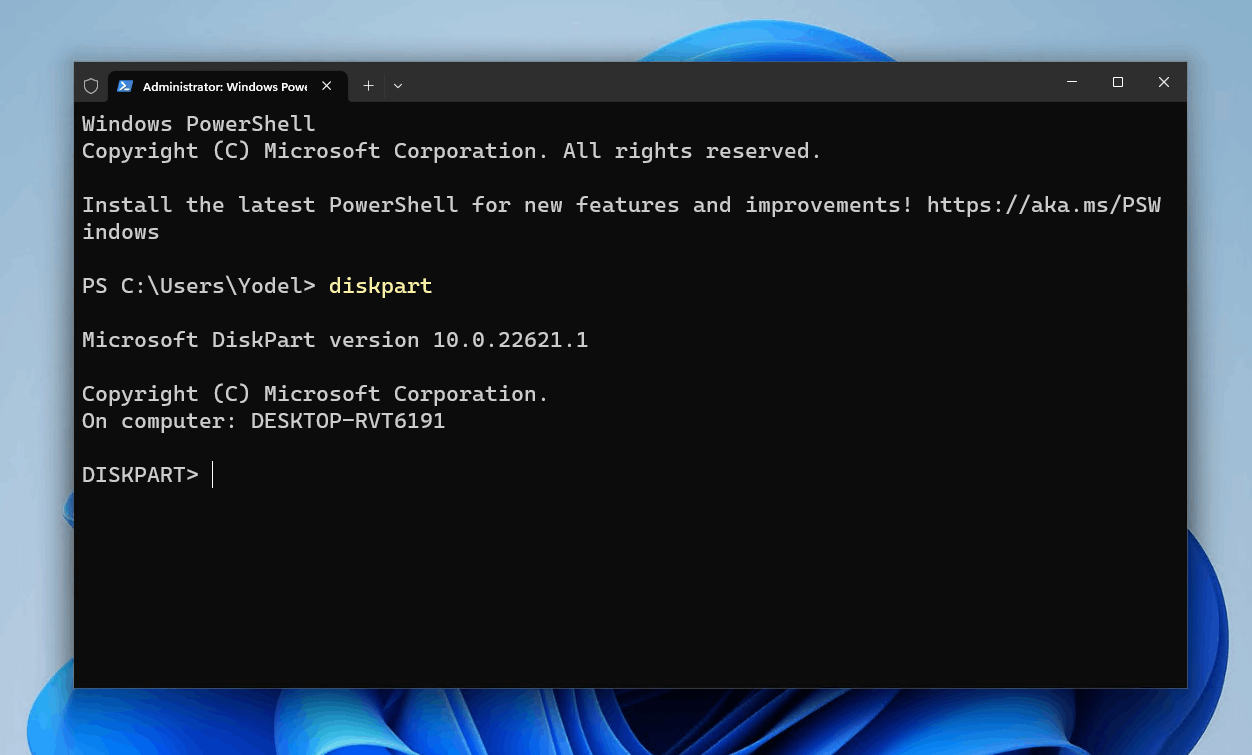
- Type
list diskand press Enter. Make note of the number associated with your unallocated hard drive.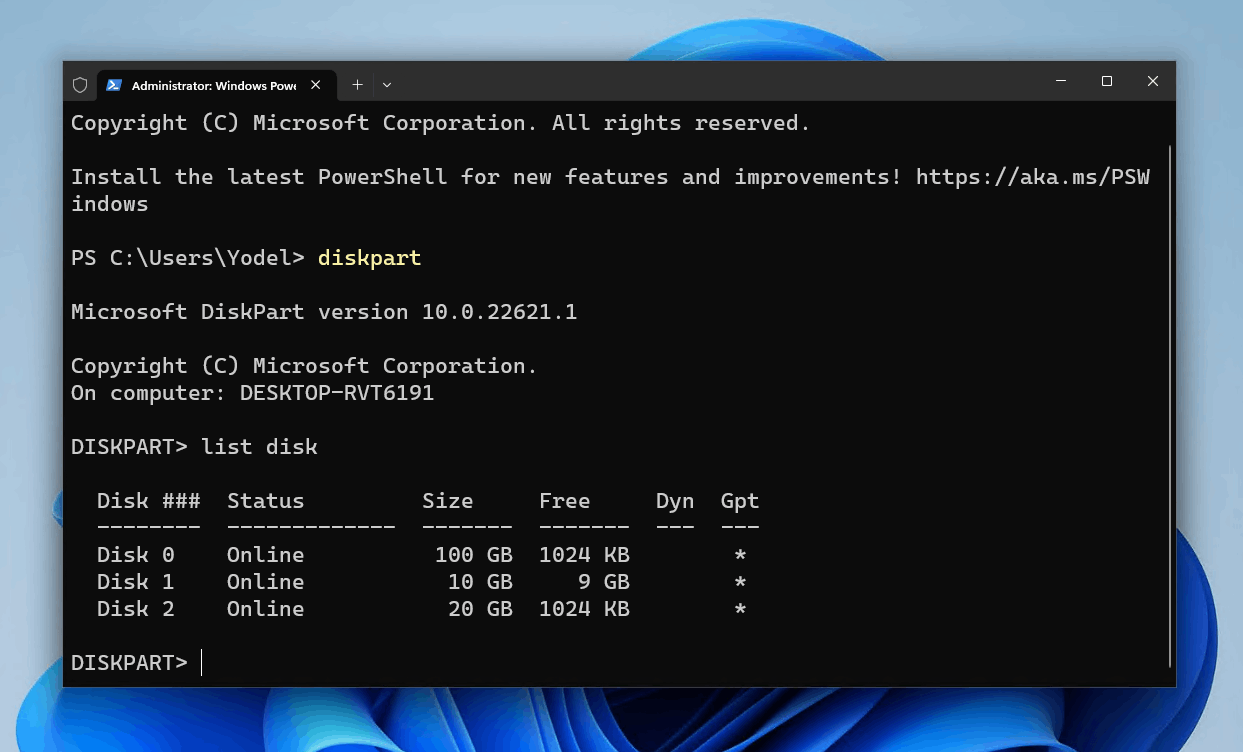
- Type
select disk *. Replace * with the number of your unallocated hard drive. If you’re only targeting a portion of the disk, you’ll need to run the commandslist volumeandselect volume *instead.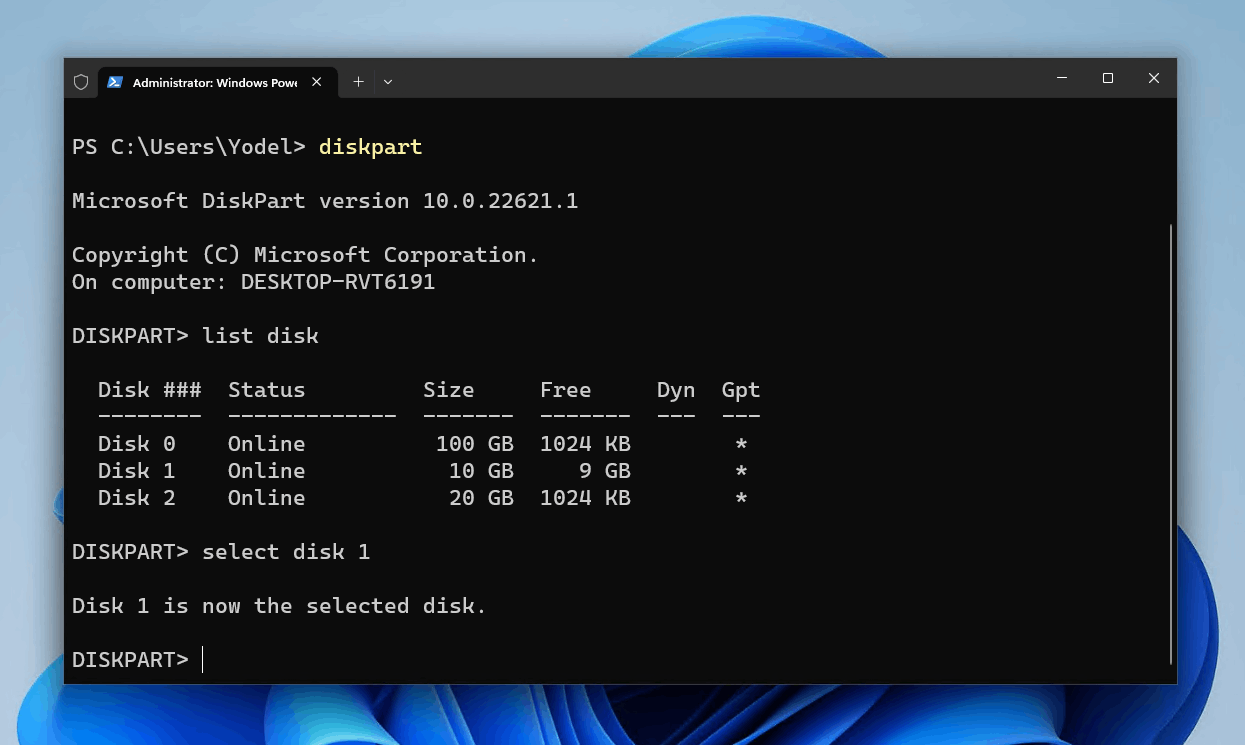
- Type
cleanand press Enter.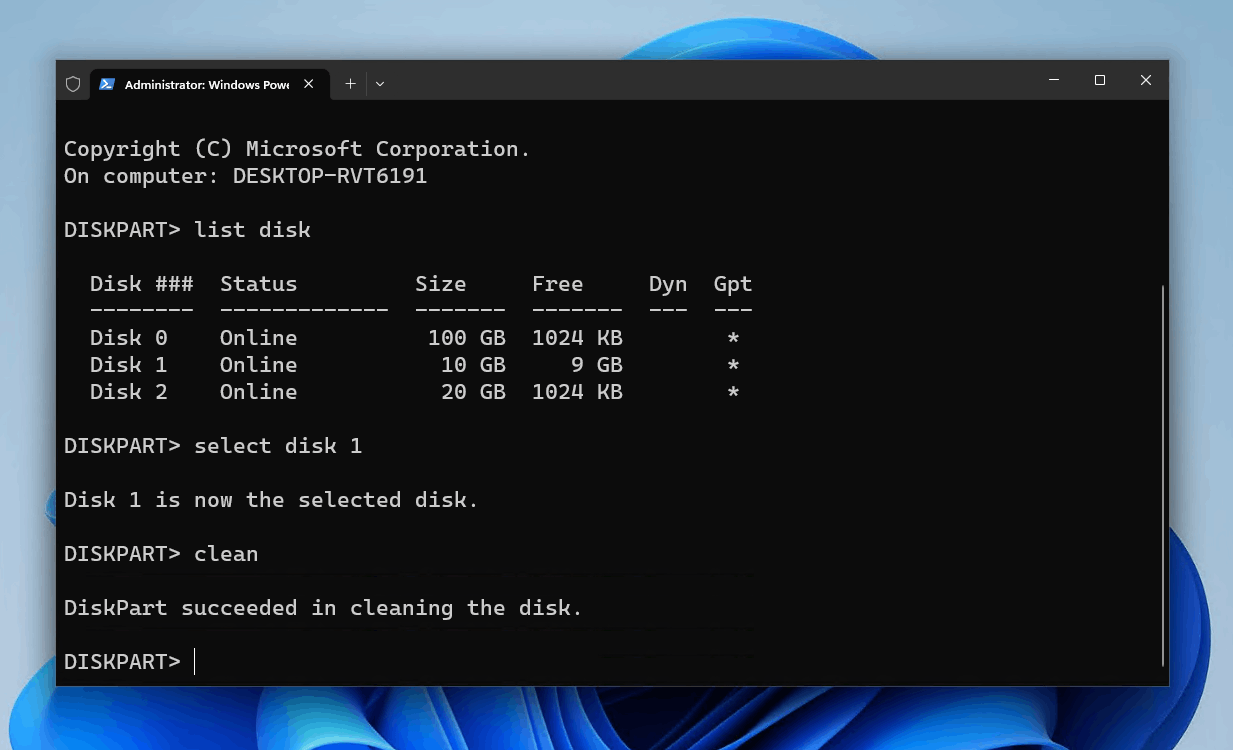
- Type
create partition primaryand press Enter.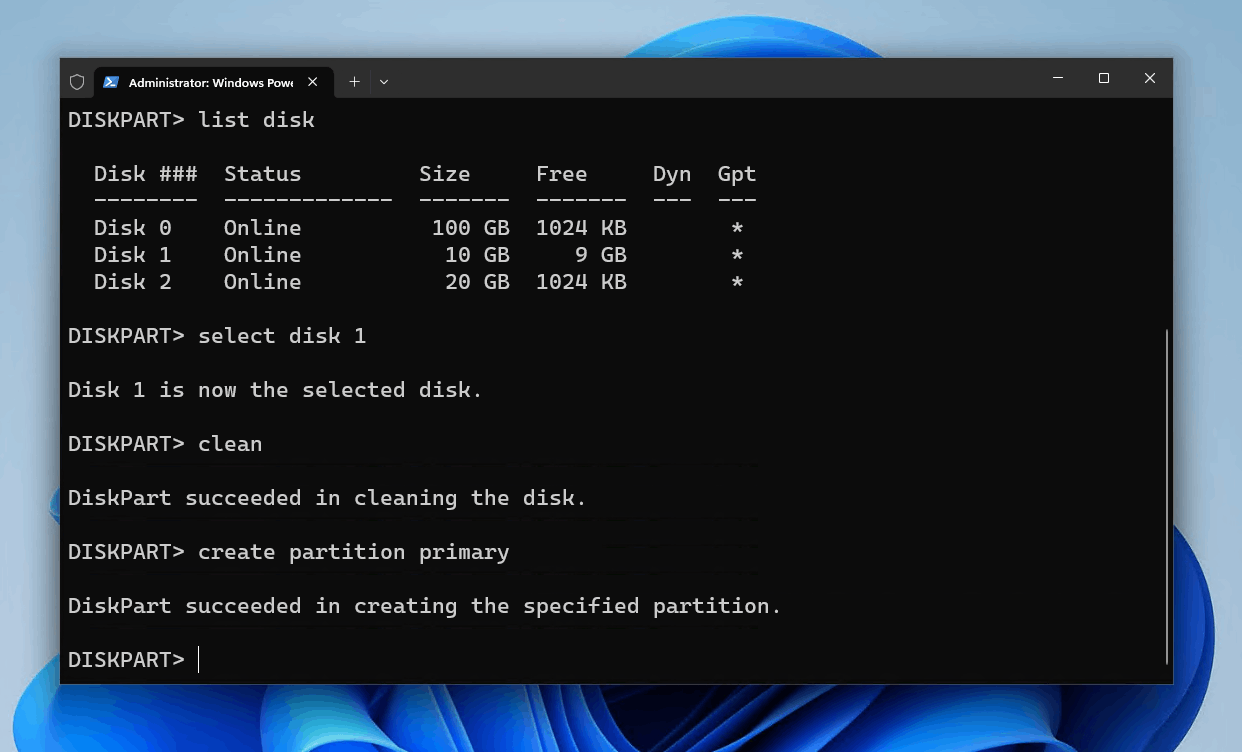
- Type
format fs=ntfsquick and press Enter.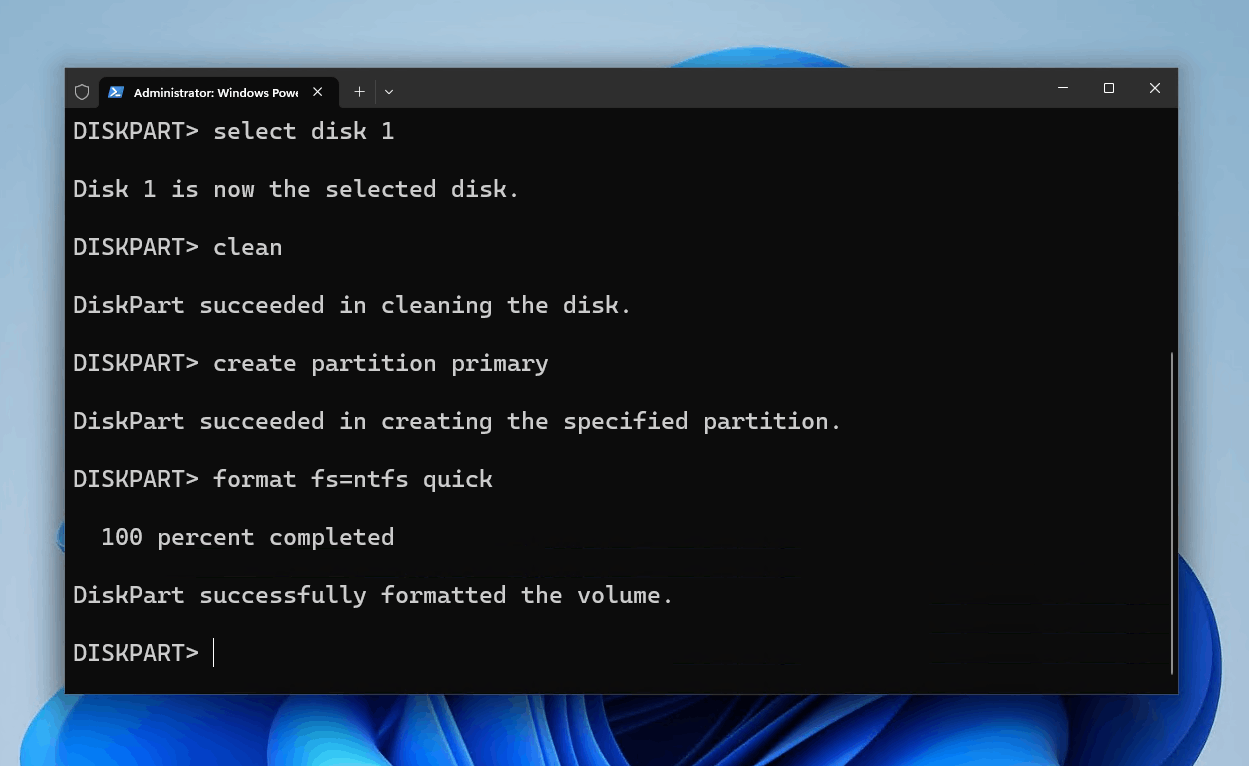
- Type
assignand press Enter.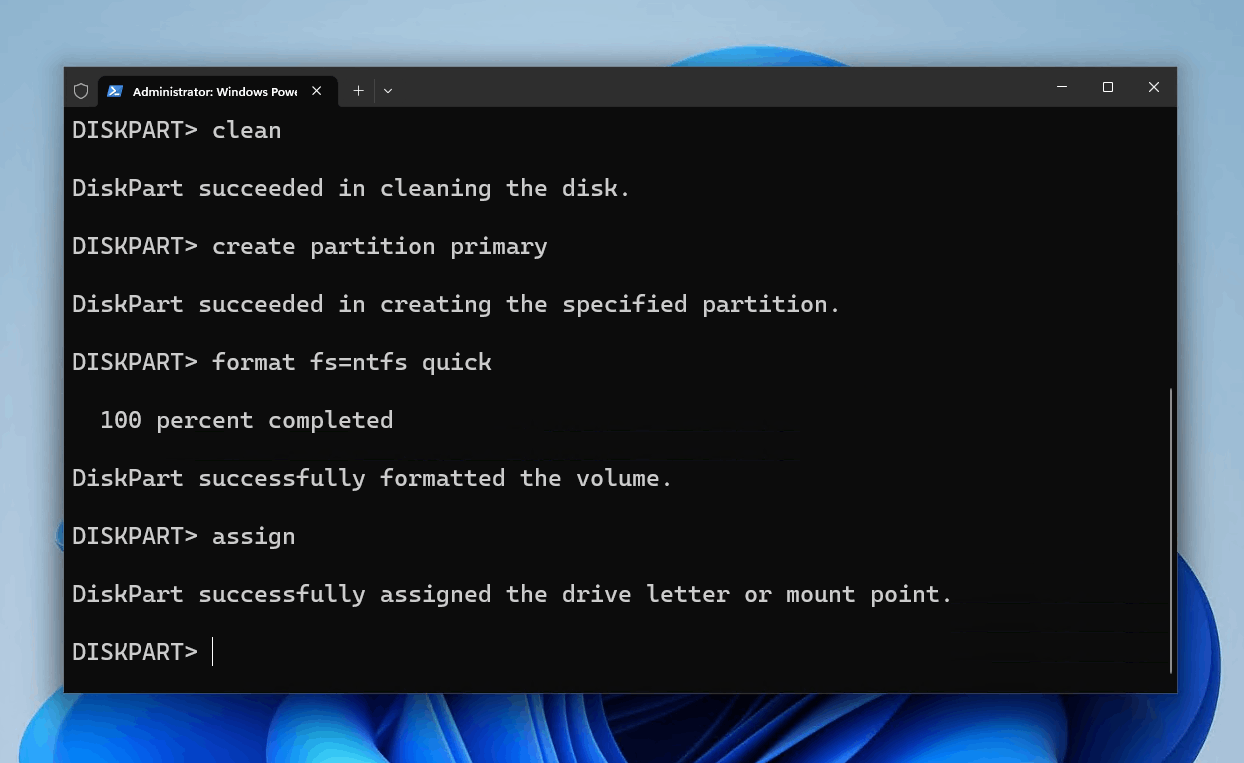
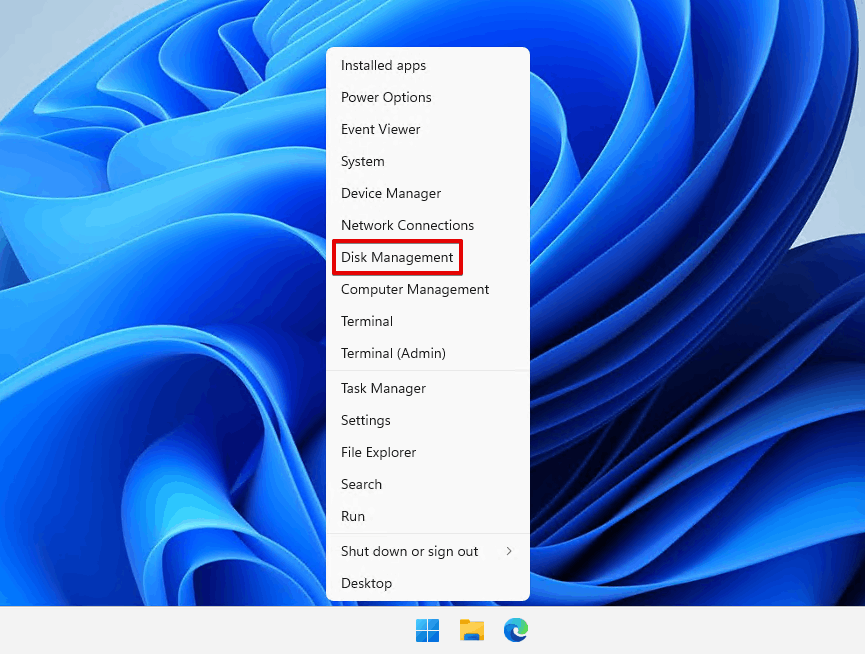
Method 3:Add Space to an Existing Partition
If only part of your hard drive was converted to unallocated space, why not allocate that hard drive space to an existing partition? Extending an existing partition will give it more storage space and simplify things if you don’t want to create a whole new partition.
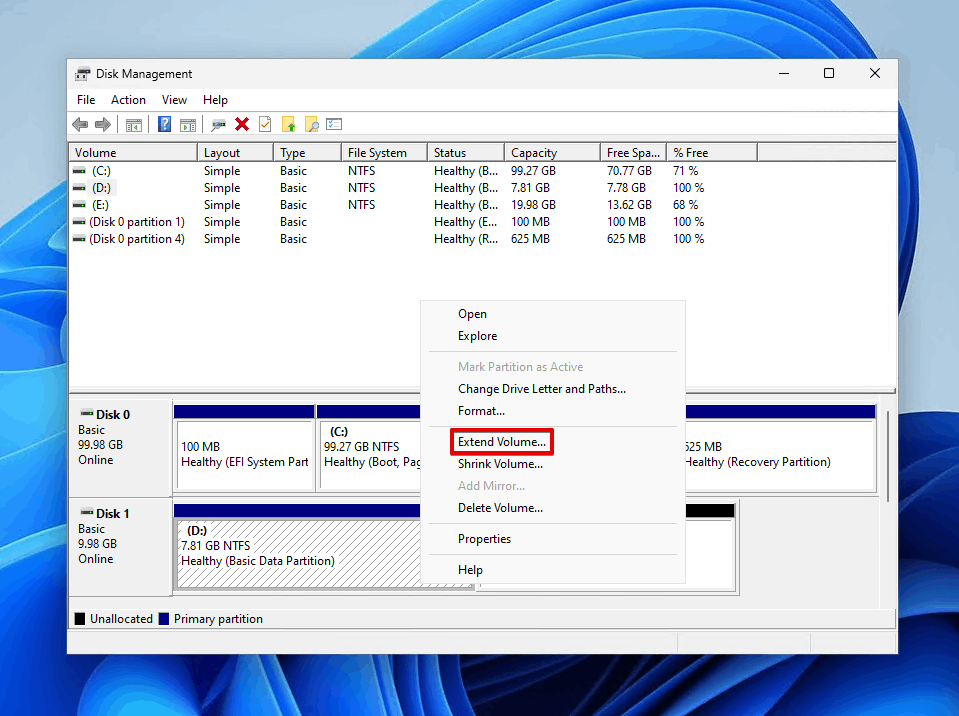
Here’s how you can extend a partition in Disk Management:
- Right-click Start and click Disk Management.
- Right-click the existing partition and click Extend Volume.
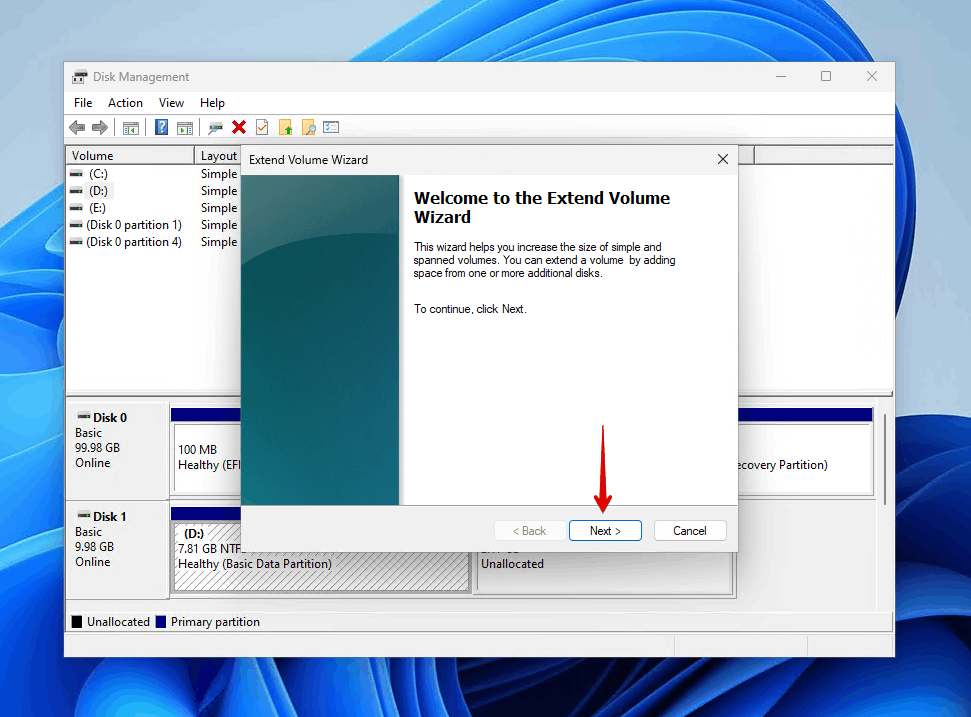
- Click Next.
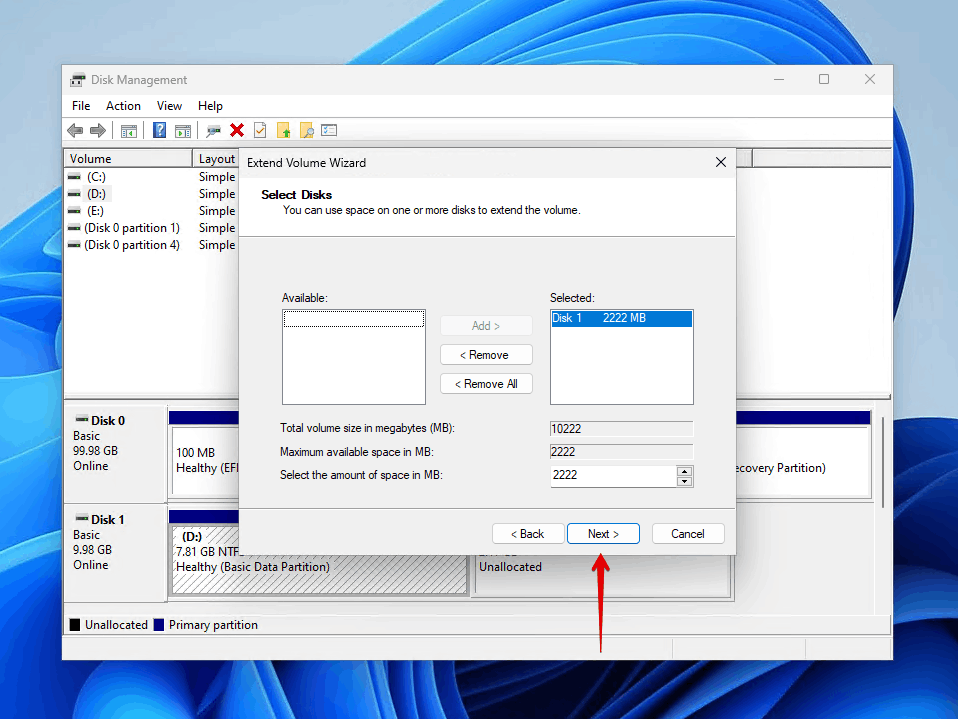
- Click Next.
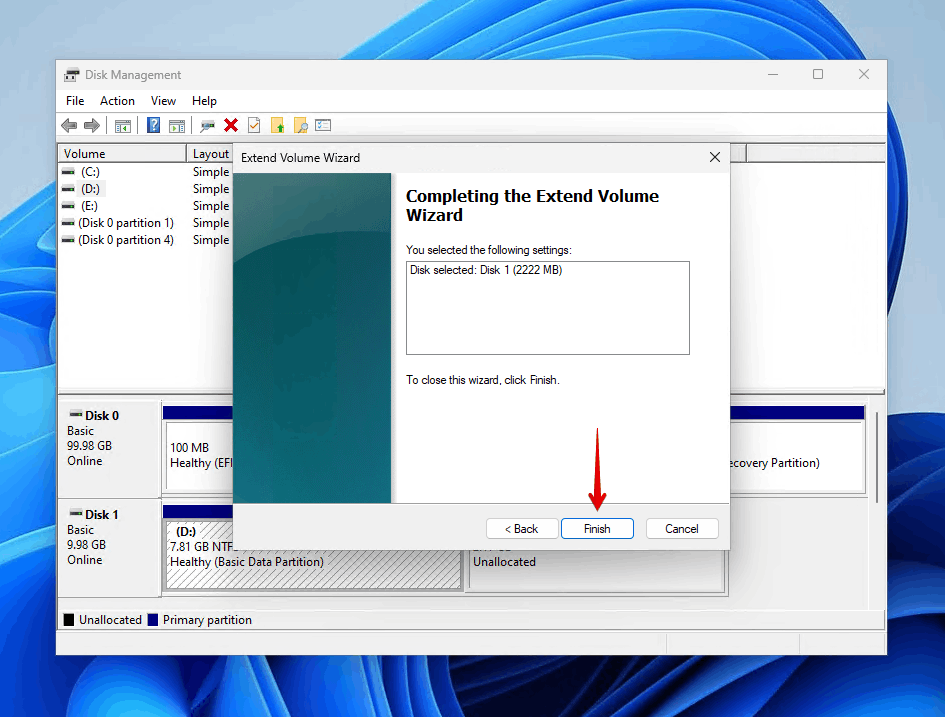
- Click Finish.
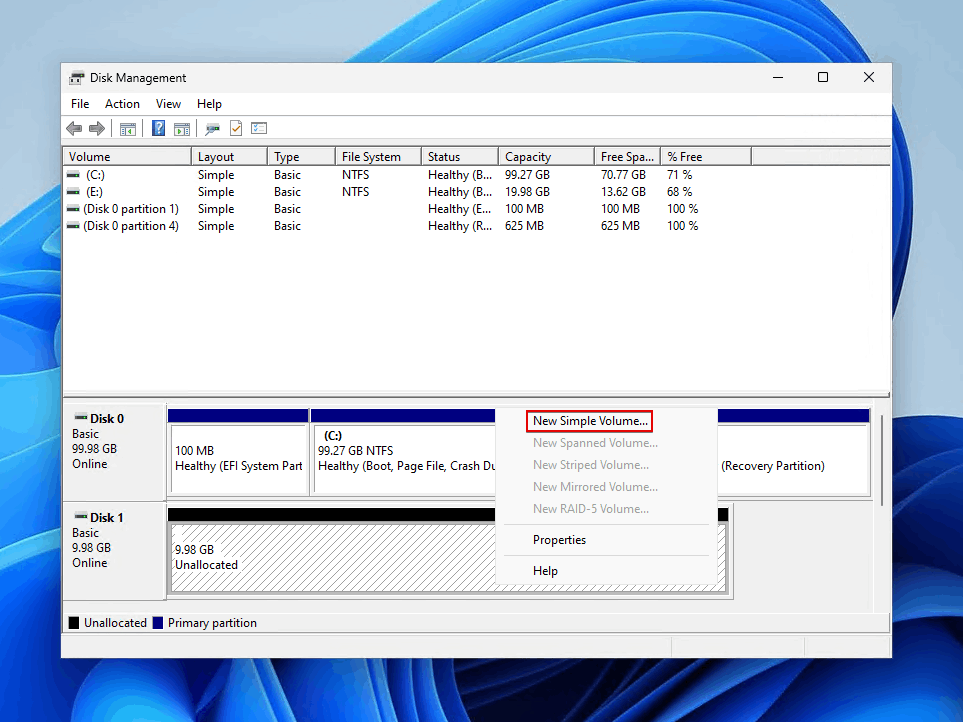
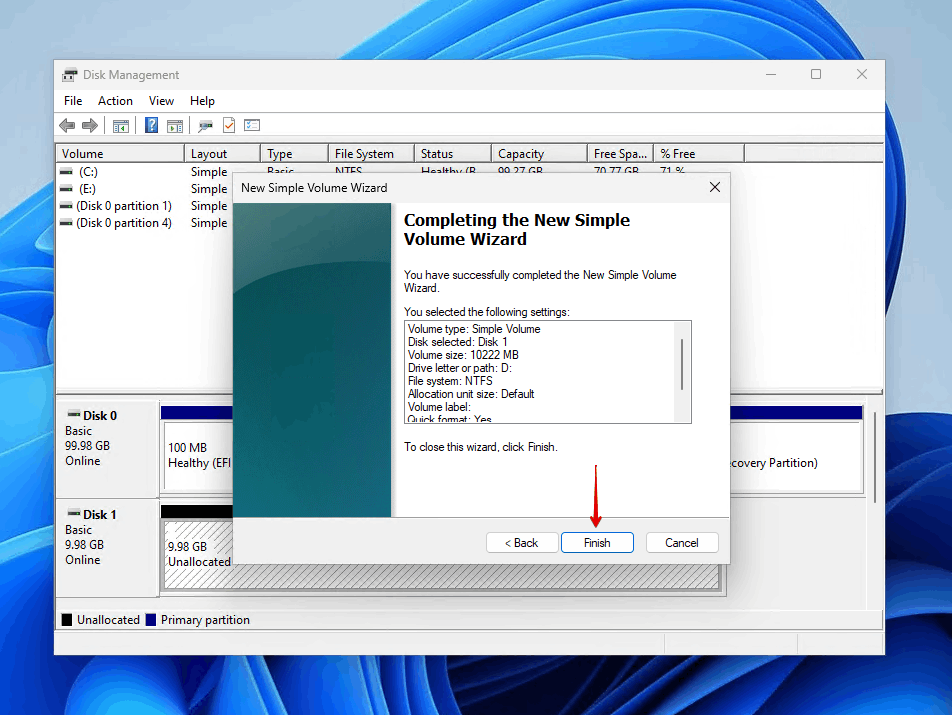
Method 4:Create a New Partition Using the Unallocated Space
When a considerable portion of your hard drive becomes unallocated, you can turn that unallocated disk space into a new partition. Converting it into a partition will then allow you to format the unallocated disk space with a file system, which then allows you to begin storing data on it.
Follow these steps to create a new partition from unallocated space:
- Right-click Start and click Disk Management.
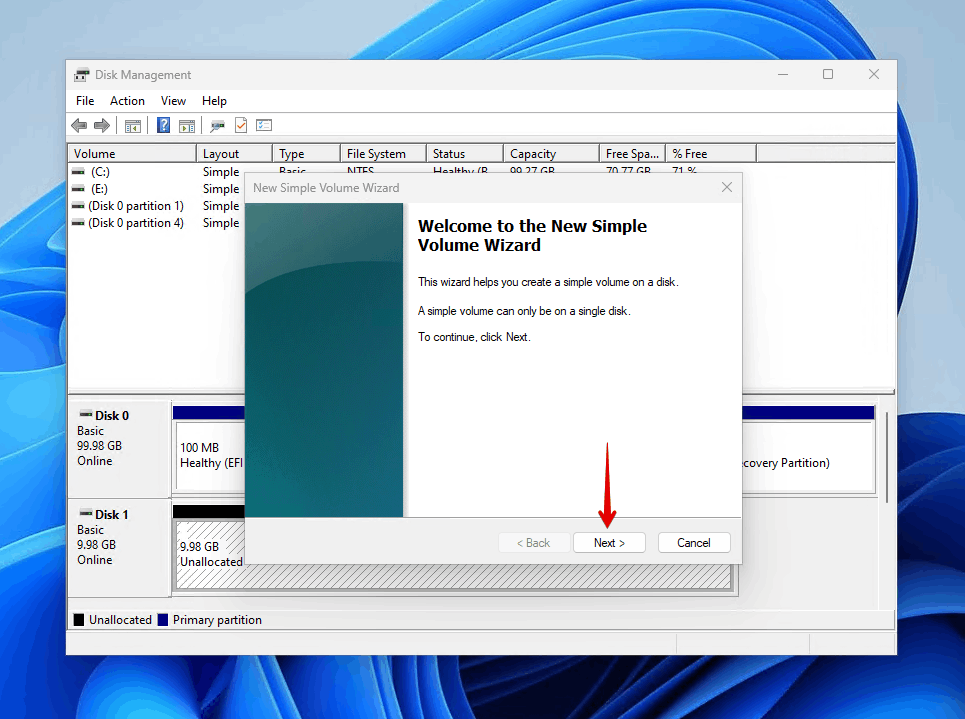
- Right-click the unallocated space and click New Simple Volume.
- Click Next.
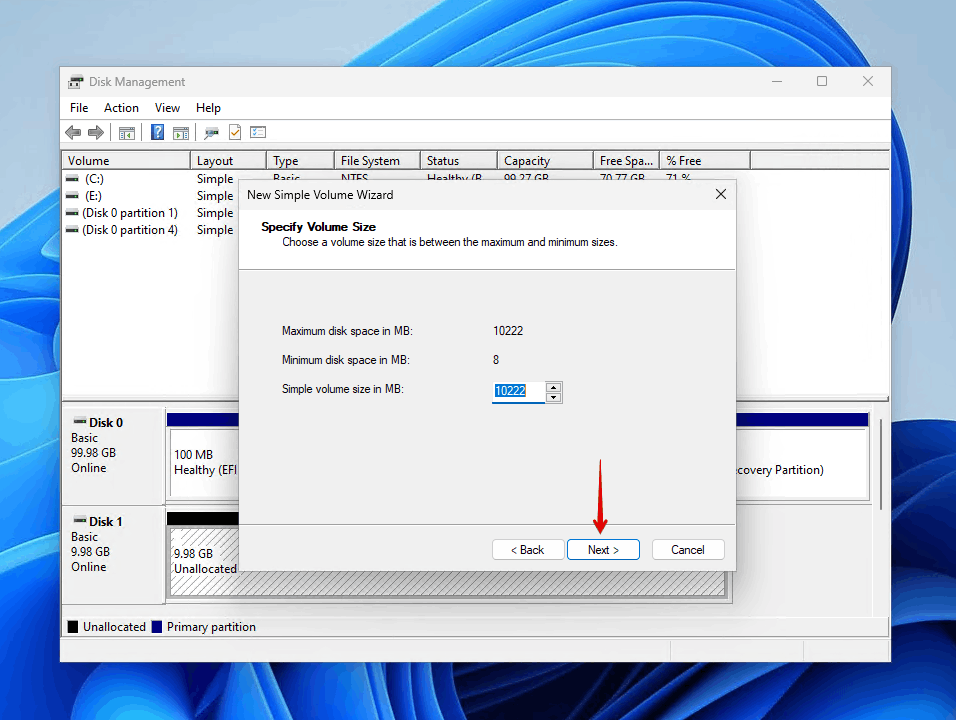
- Click Next.
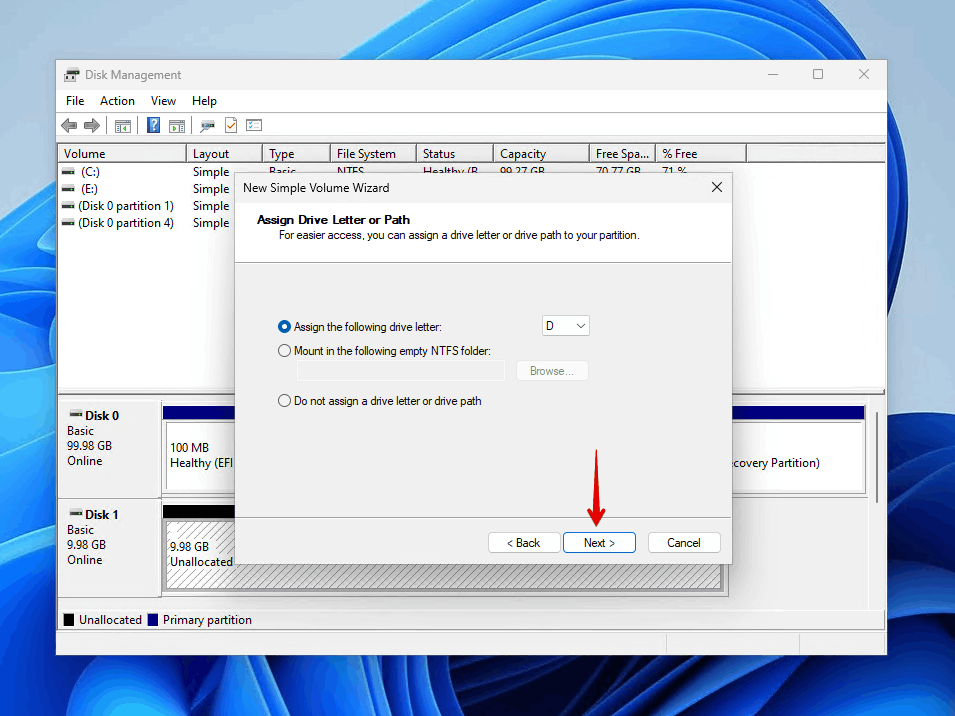
- Select a drive letter and click Next.
- Make sure Perform a quick format is selected and click Next.
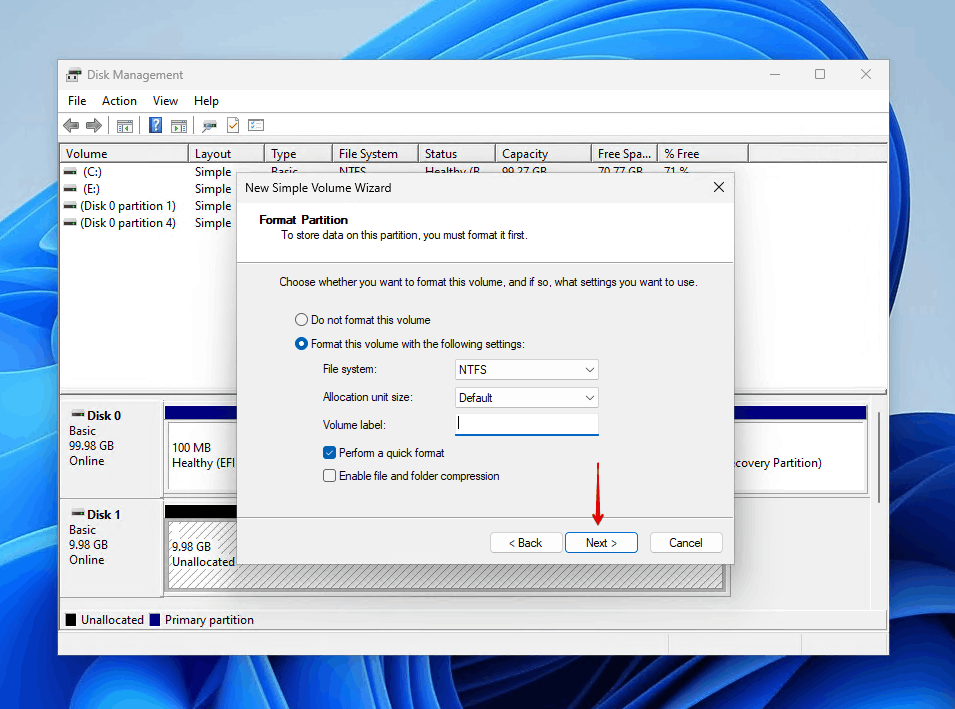
- Click Finish.
Why a Hard Drive May Become Unallocated
There’s no single reason why unallocated space on a hard drive suddenly appears. Here are various reasons why a hard drive may become unallocated:
| Reason | Description |
| 🗃️ File system corruption | When a file system of a partition becomes corrupted, it can often turn into unallocated space even though data still resides on it. |
| 🔧 Hardware failure | Hard drives do not last forever. If a physical component of your hard drive stops functioning unexpectedly, it could lead to a partition turning into unallocated space. |
| ⚡ Power loss | Loss of power during critical actions being performed on your hard drive can cause your once functional partition to become lost, resulting in unallocated space. |
| 🙅♂️ Human error | Even the most competent computer users make mistakes sometimes. If you happen to accidentally delete a partition, the space that was allocated to that partition will become unallocated. |
Typically when a hard drive becomes unallocated, it’s localized to that drive. So, if only your second hard drive is unallocated, you can usually rest easy knowing that your primary drive is safe. But, to save yourself from the hardships and uncertainties of recovering your data after the fact, do yourself a favor now and back up your data so you can easily restore a working copy when needed.
Conclusion
Unallocated space appears on existing hard drives and other storage devices when something damages the partition or file system. Thankfully (in most cases), the data on your drive will still be in a recoverable state until it’s overwritten. Use this opportunity to recover the data using a data recovery tool like Disk Drill.
Once the data is recovered, try updating your drivers to repair the drive. If that doesn’t work, simply extend an existing partition to make use of the unallocated space, or create an entirely new partition and format it to begin storing files there once more.
FAQ
- Right-click Start and click Terminal (Admin). If you’re on Windows 10, click Windows PowerShell (Admin).
- Type diskpart. Press Enter.
- Type list disk. Press Enter. Remember the number of your unallocated hard drive.
- Type select disk *. Replace * with the number of your unallocated hard drive. If you’re only targeting a portion of the disk, run the commands list volume and select volume * instead.
- Type clean. Press Enter.
- Type create partition primary. Press Enter.
- Type format fs=ntfs quick. Press Enter.
- Type assign. Press Enter.


