 For one reason or another, you need to switch your partitioning scheme from Master Boot Record (MBR) to GUID Partition Table (GPT). The key problem you’ll face is the fact that you need to reformat the disk, which will delete all of your data.
But, did you know that you can make the conversion without losing all of your precious data? And it’s not as difficult as you’d think. Read on to learn how you can convert MBR to GPT without data loss.
Table of Contents
Why Would You Switch From MBR to GPT
Most of the time, we don’t switch from MBR to GPT unless it’s absolutely necessary. But, as hard drive technology progresses, GPT is becoming a much more appealing option. In some cases, it’s actually required. For instance, in order to use Windows 11, the operating system must be installed on a system using the GPT partitioning scheme and a UEFI-compatible motherboard.
| Parameter | MBR | GPT |
| Partition capacity | Only supports partitions up to 2 TB. | Supports partitions over 2 TB. Theoretically, the maximum partition size is 9.4 zettabytes (ZB), equal to 9.4 trillion GB. |
| Partition amount | You can have a max of 4 partitions. | GPT supports much more and is only limited by the OS. On Windows, the max is 128. |
| Supported drive size | While it can read drives above 2 TB, anything over 2 TB will be unusable. | GPT supports all sizes of drives. |
| Compatibility | Best used for older systems. | Best for modern systems using a UEFI-compatible motherboard. |
In addition to the above differences, GPT offers more in the way of features, such as improved security (like Secure Boot), and partition table redundancy, as it stores a copy of at the end of the disk.
Make a Backup to Preserve Your Data in the Process
The key to converting from MBR to GPT without erasing data is backing it up. Without a backup, the format will delete anything and everything on your drive.
There are a multitude of backup solutions to choose from on the web, but our tried and true solution is Disk Drill. Primarily a data recovery tool, it also includes a free byte-to-byte drive backup feature you can use to make a full copy of your drive, then recover the data from it once the process is done. A byte-to-byte copy of your drive differs from a normal backup in the sense that it makes a copy of every individual byte on your disk, acting as a snapshot in time you can restore data from if something goes wrong with the MBR to GPT conversion process.
Here’s how you can make a byte-to-byte backup on Windows 10 and 11 using Disk Drill:
- Download and install Disk Drill.
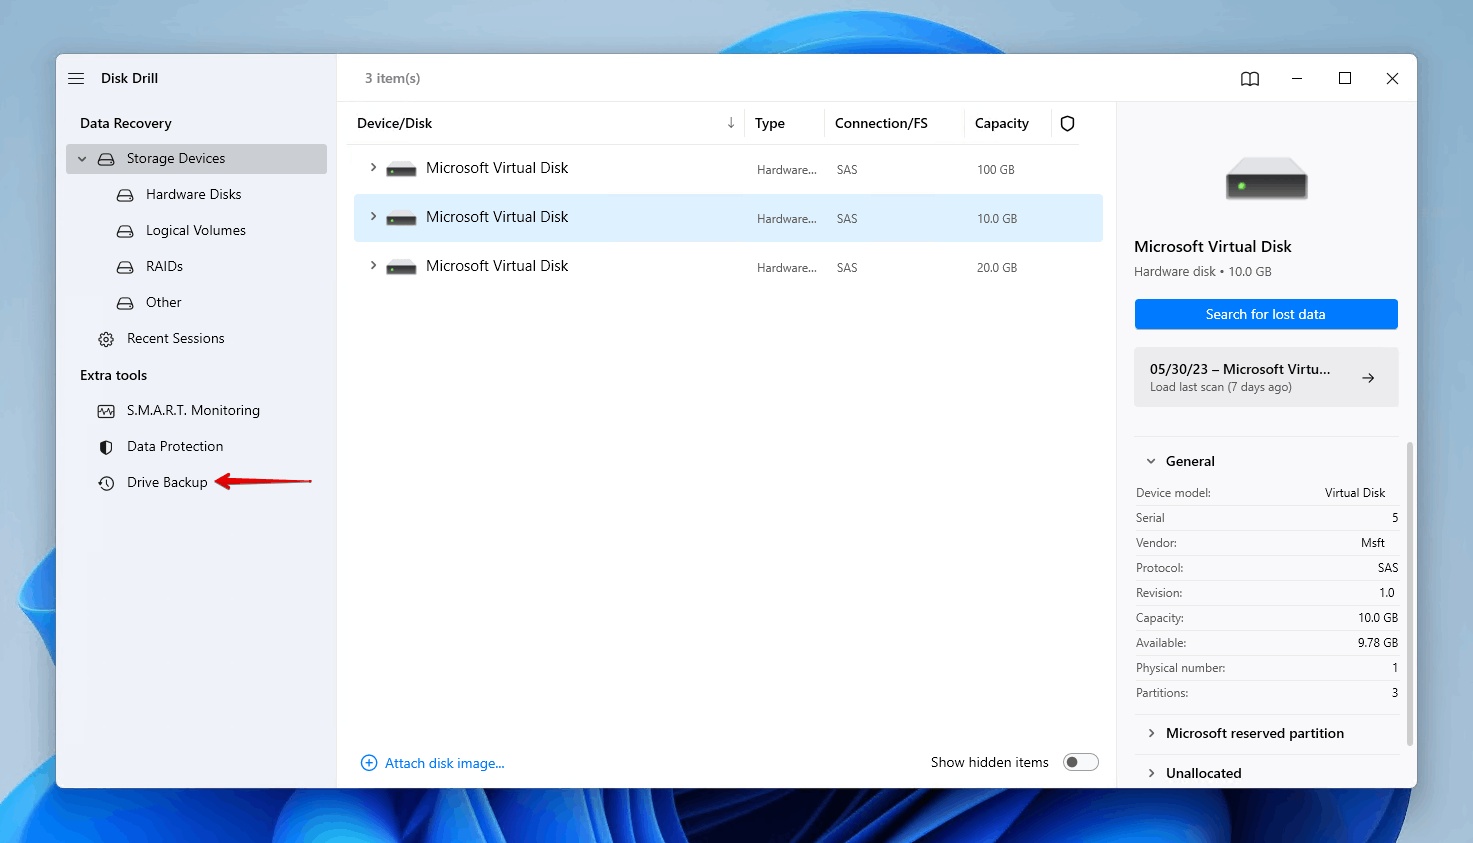
- Click Drive Backup.
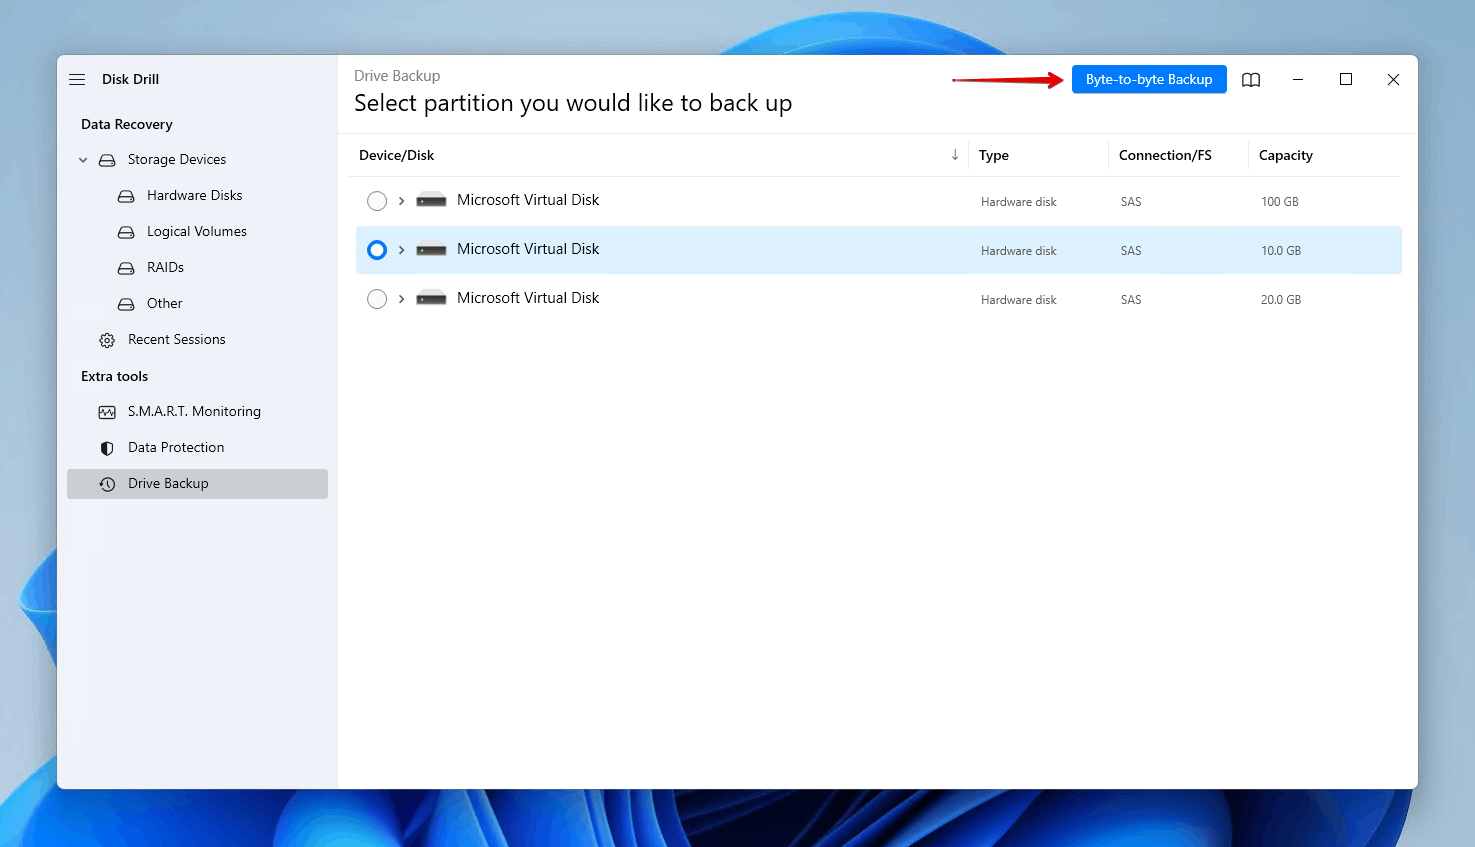
- Select the MBR drive and click Byte-to-byte Backup.
- Name your backup and choose where you want it to be stored. Click OK. Once the byte-to-byte copy is created, it is ready to use for the data recovery process we discuss later in the article.

How to Convert MBR Disk to GPT
Once your data is safe and sound in the backup we just finished making, use one of these methods which demonstrates how to convert MBR to GPT without losing data.
After your disk is converted from MBR to GPT, it may no longer boot. If this happens, it’s because you will need to switch your BIOS mode from Legacy to UEFI. Refer to the documentation of your motherboard or BIOS version for specific instructions.
Using DiskPart
DiskPart is a hard drive and partition management utility included with Windows. It’s similar to Disk Management, but it’s run at the command level instead.
When converting a system disk, you’ll need to run CMD either from Windows installation media or WinRE.
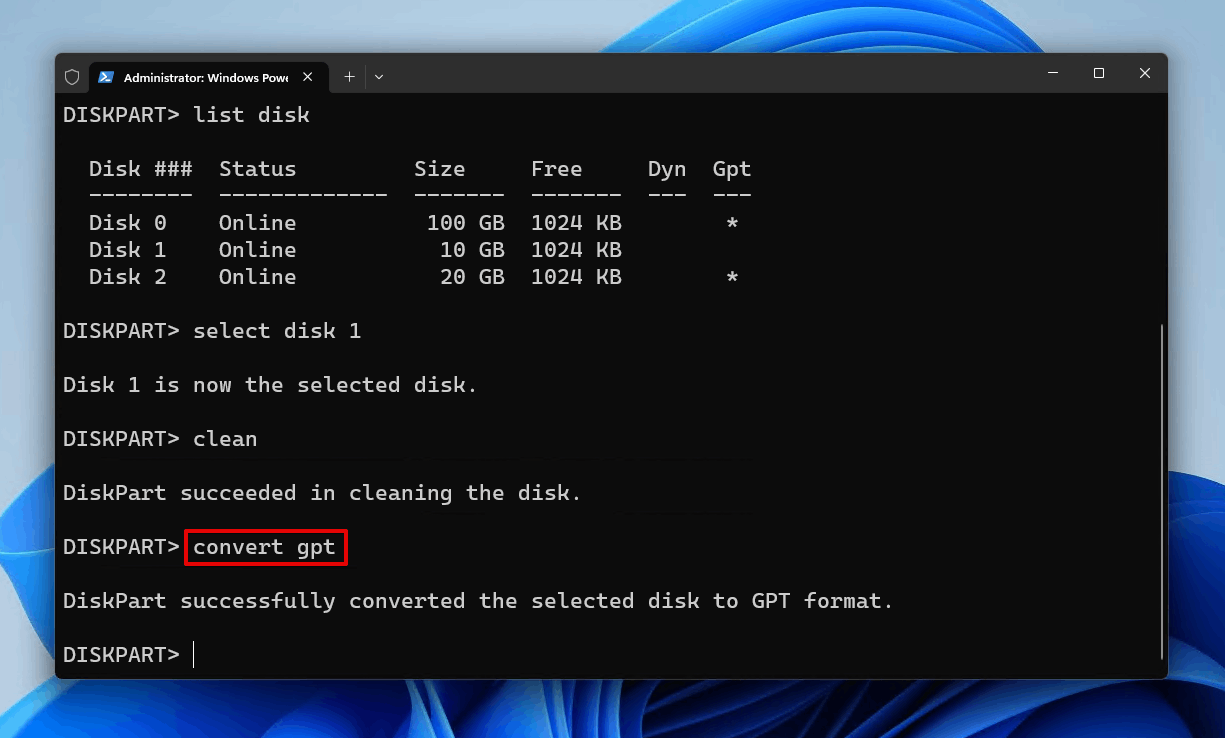
This is how you can use DiskPart to convert MBR to GPT with Command Prompt:
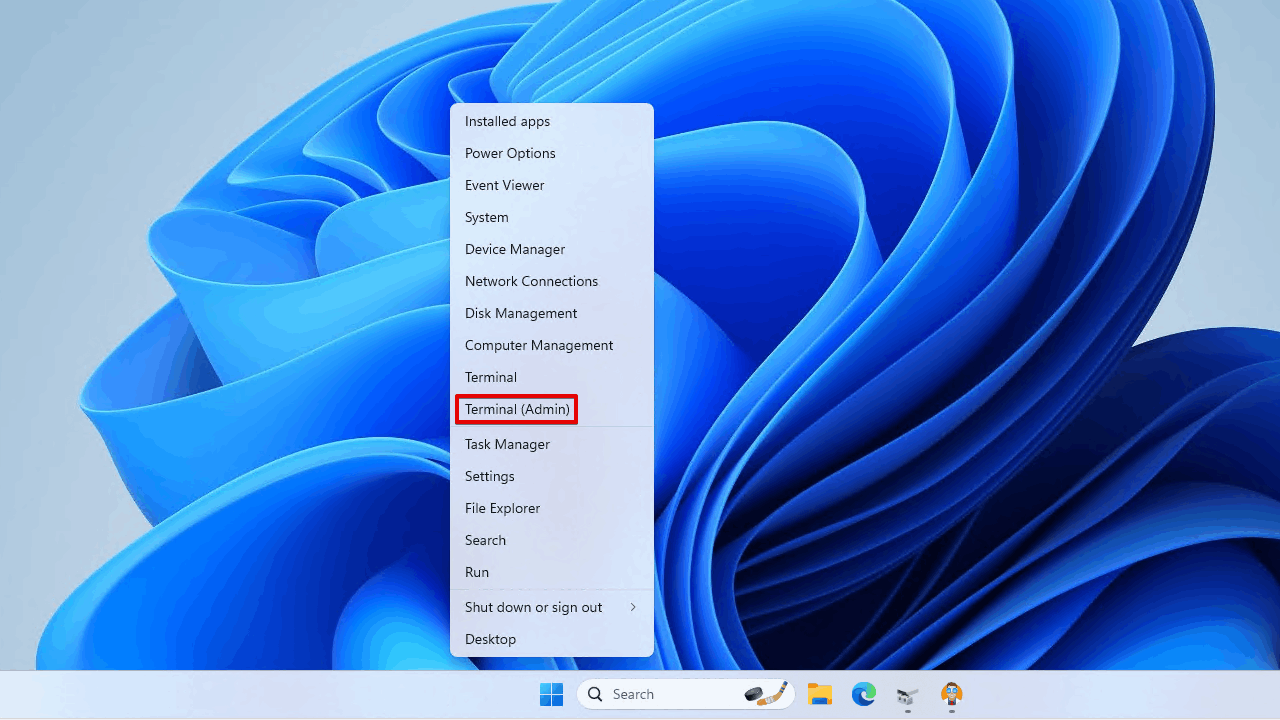
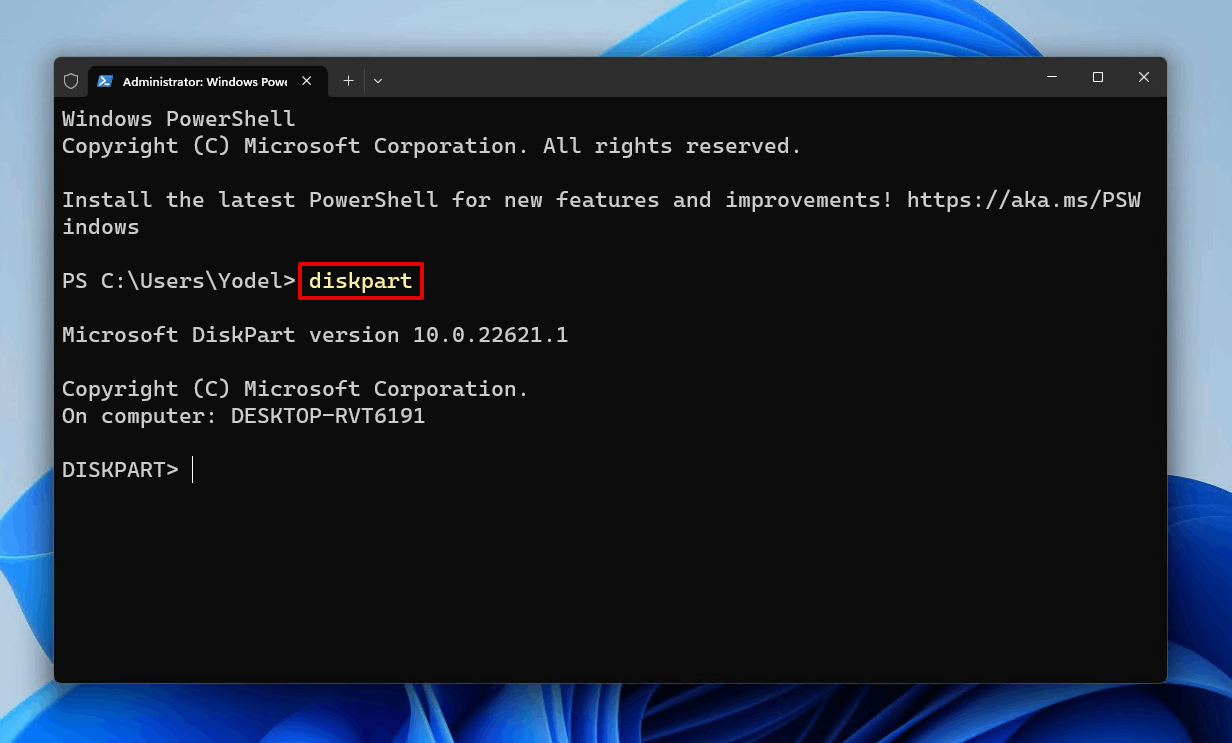
- Right-click Start and click Terminal (Admin). Windows 10 users will need to click Windows PowerShell (Admin) instead.
- Type diskpart and press Enter.
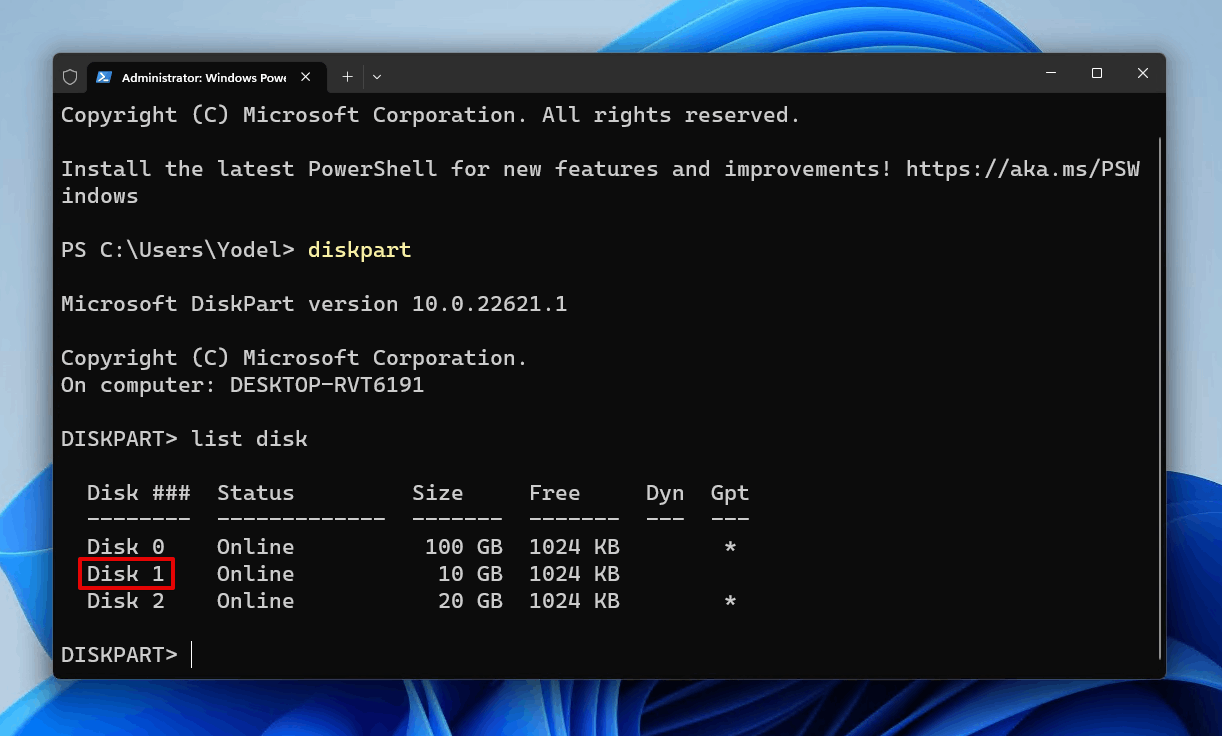
- Type list disk and press Enter. Make note of your MBR disk number.
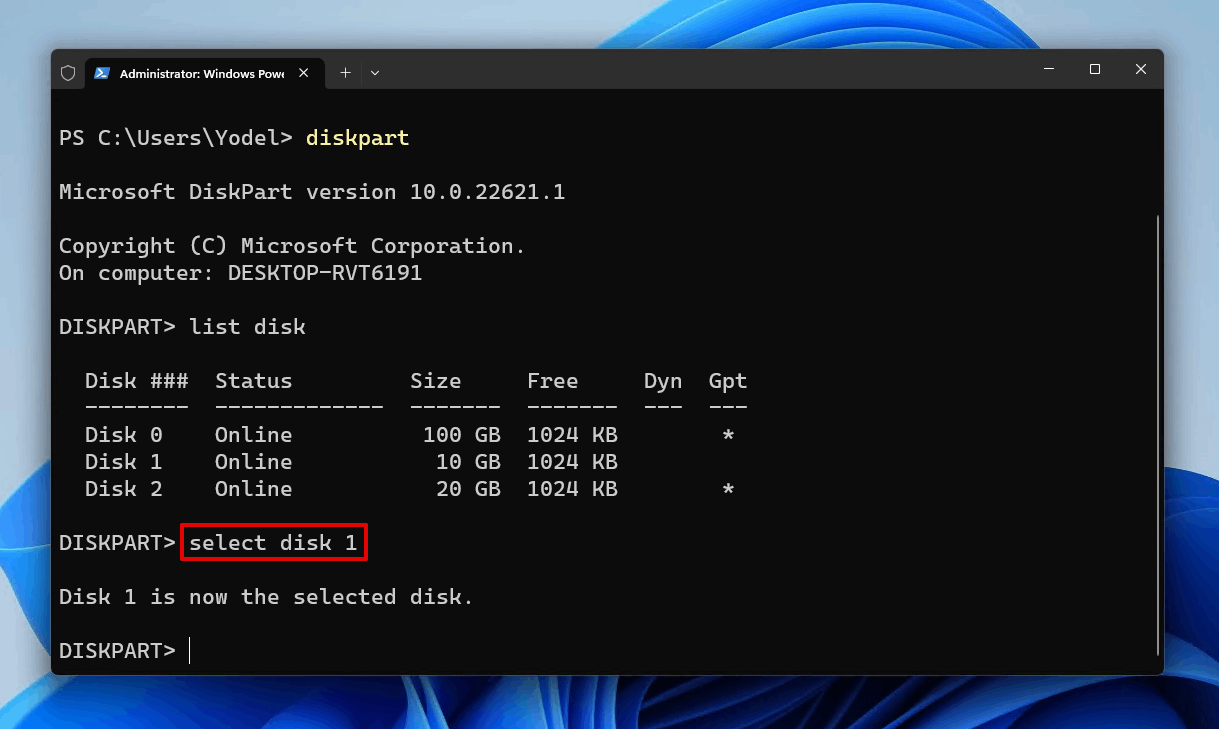
- Type select disk *. Replace * with your MBR disk number. Press Enter.
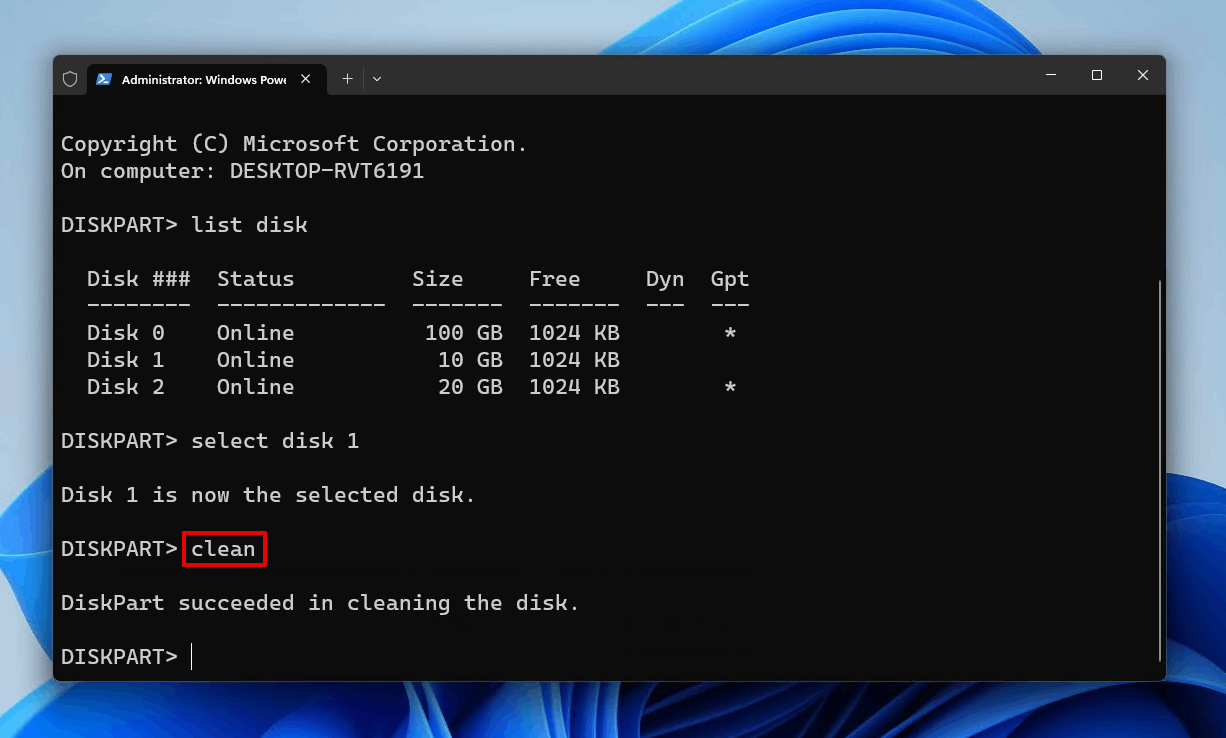
- Type clean and press Enter. This will delete all information from the disk, including the partition table.
- Type convert GPT and press Enter.
Using Disk Management
If you’re converting a non-system drive from MBR to GPT, it’s a little bit easier. The one downside to Disk Management is that you won’t be able to do this on a system drive, as it requires the intact system partition to remain functional.
Follow these steps to change MBR to GPT through Disk Management:
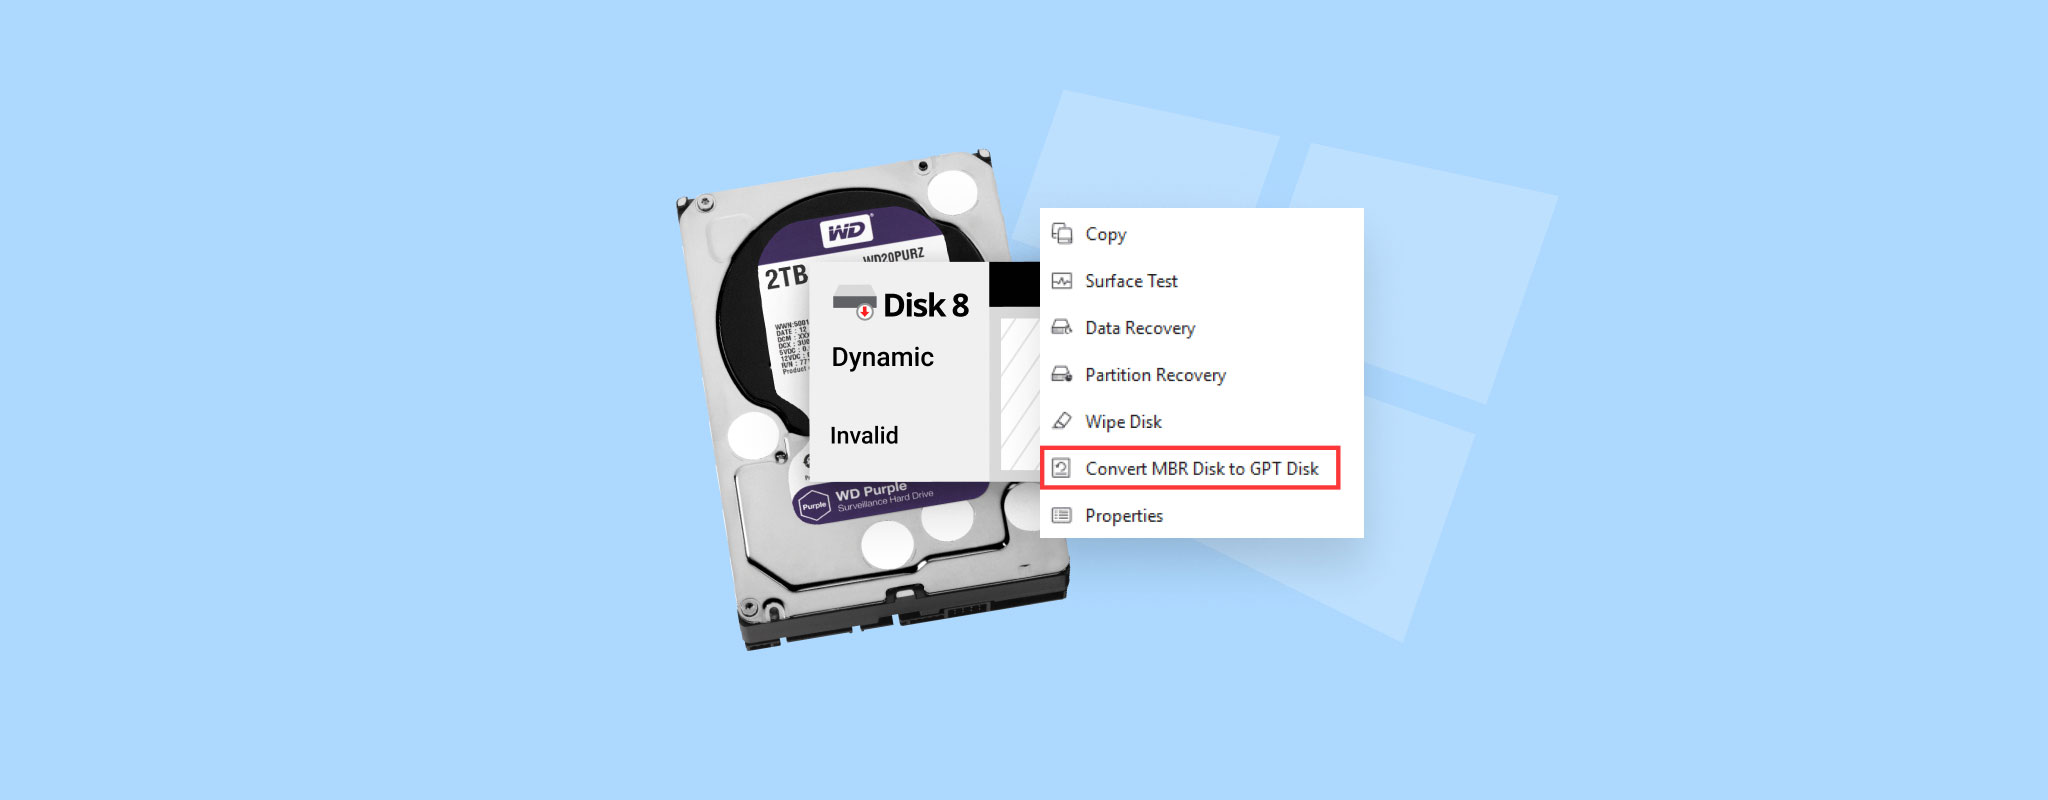
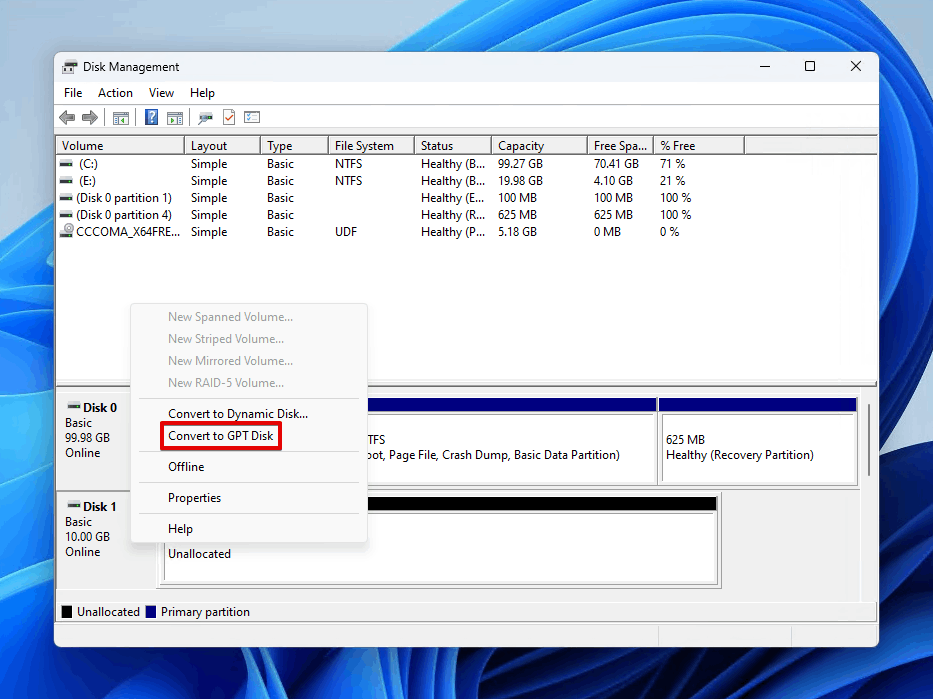
- Right-click Start and click Disk Management.
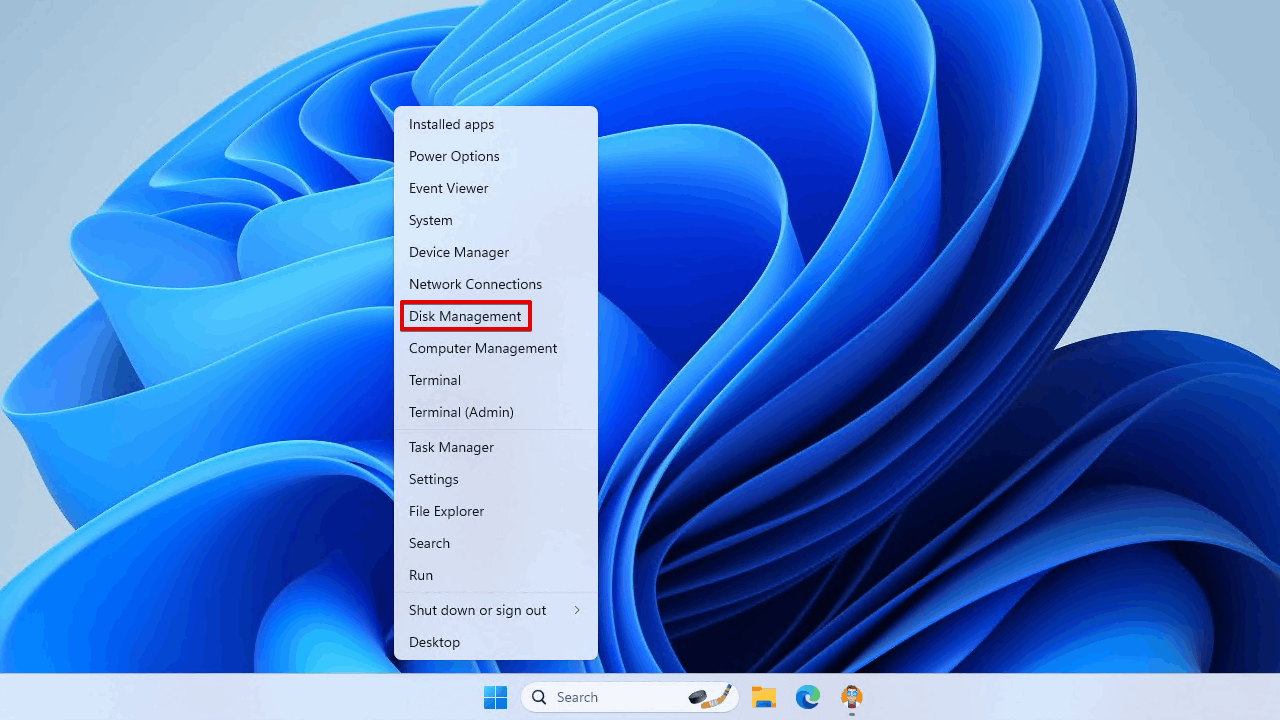
- Right-click the MBR disk and click Convert to GPT Disk.
Using MBR2GPT
MBR2GPT is a built-in Windows utility that’s designed to convert your disk from MBR to GPT without modifying or deleting the data on it. Converting MBR to GPT with MBR2GPT can be done in Windows Recovery Environment (WinRE), allowing you to convert the disk before installing Windows 11 if needed.
Even though MBR2GPT is designed to convert MBR system disk into GPT without deleting your data, we still highly recommend making a backup because anything can go wrong.
Here’s how to convert MBR to GPT during Windows installation without data loss:
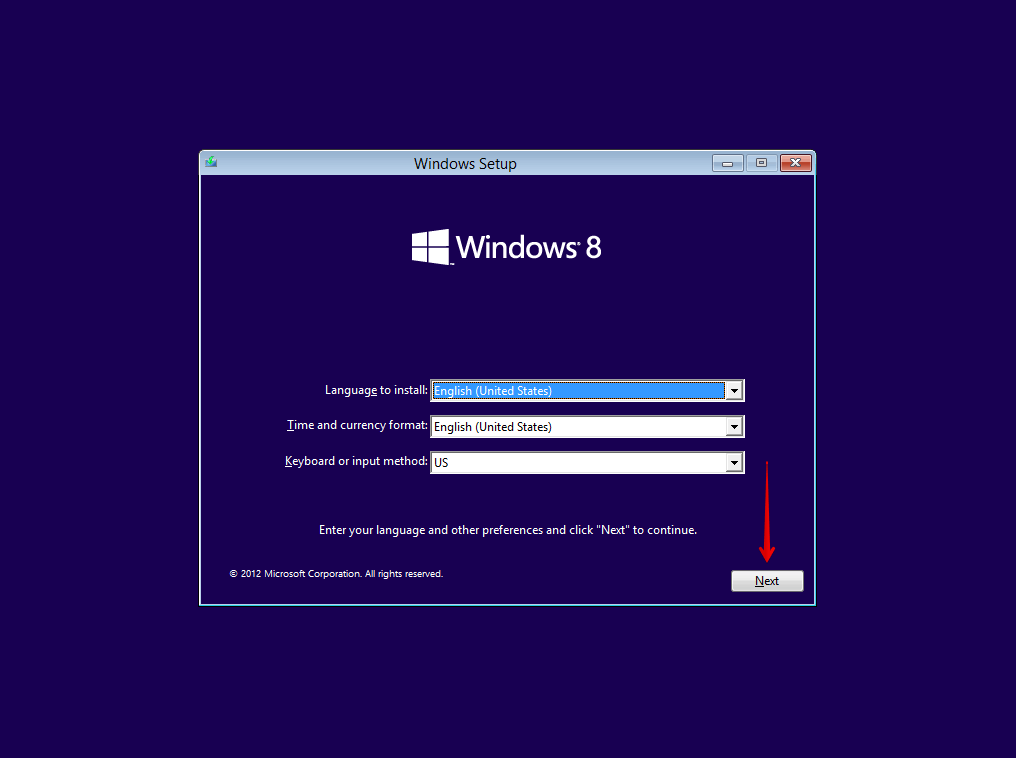
- Boot to WinRE.
- Select your language preferences, then click Next.
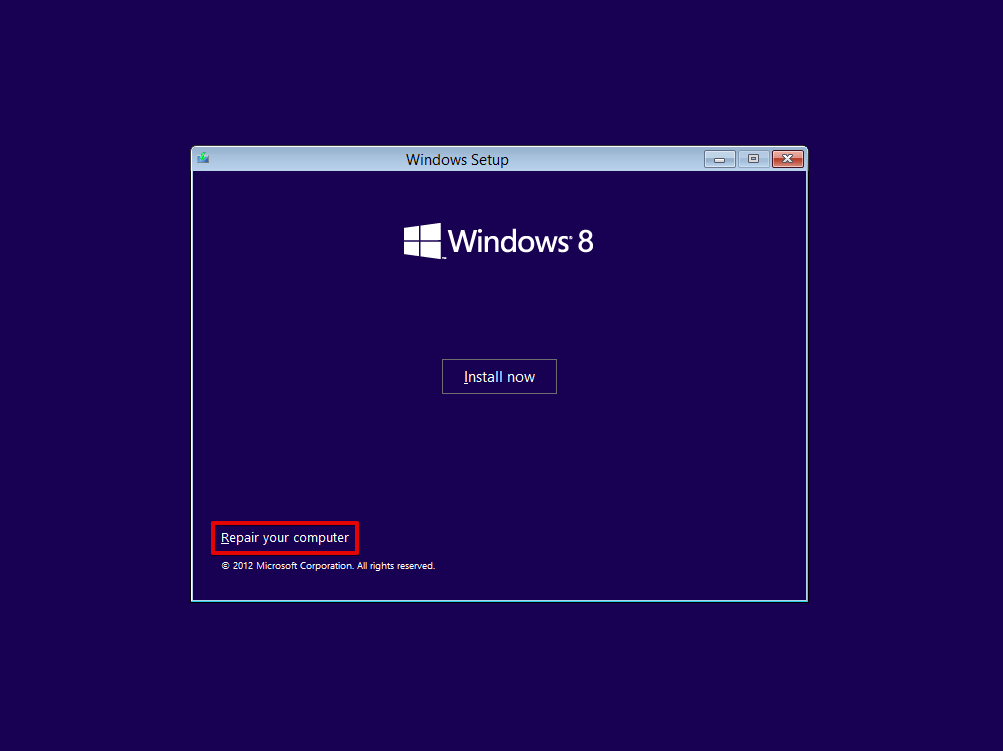
- Click Repair your computer.
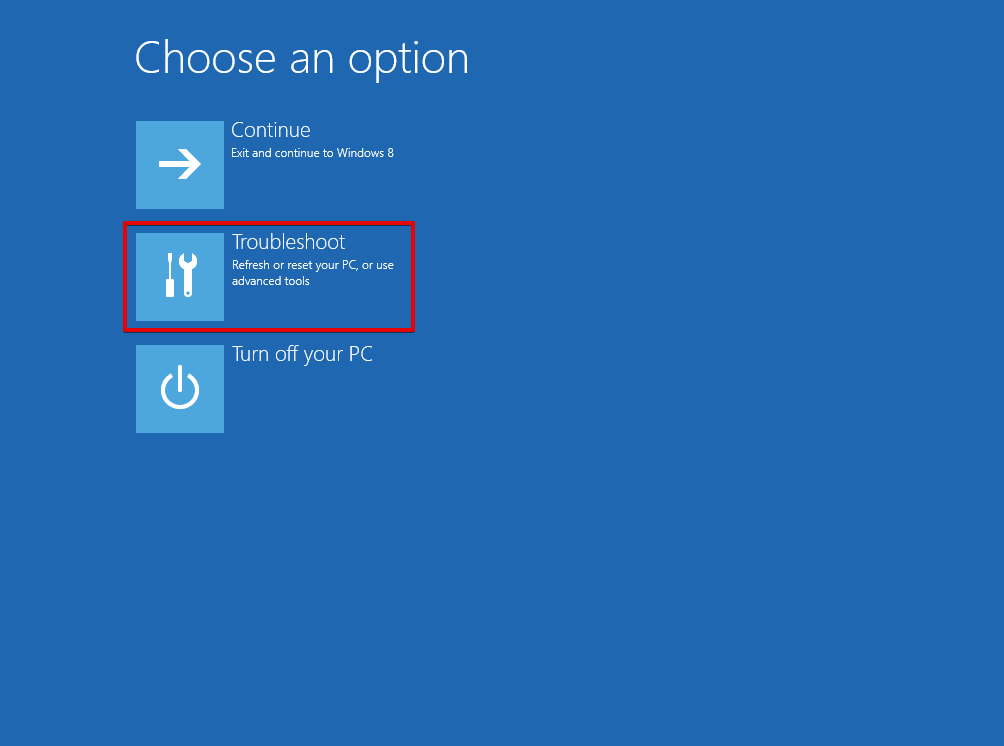
- Click Troubleshoot.
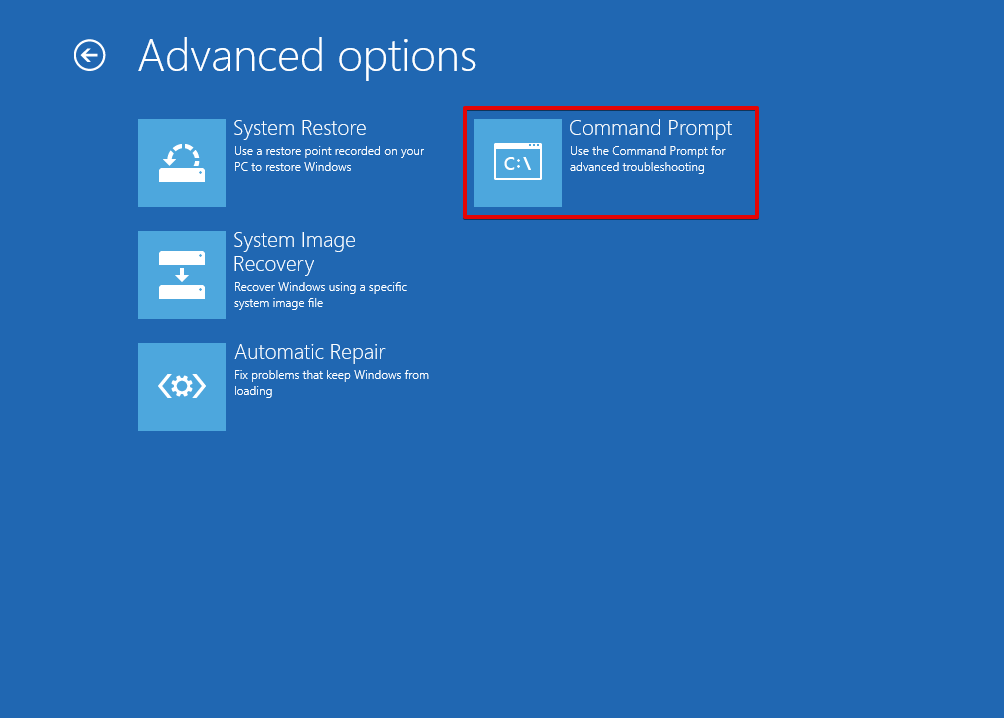
- Click Advanced options.

- Click Command Prompt.
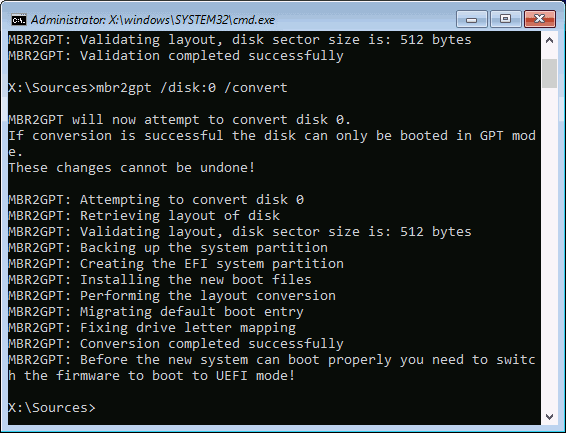
- Type mbr2gpt /disk:0 /validate and press Enter. This will check whether the disk is eligible to be converted from MBR to GPT.
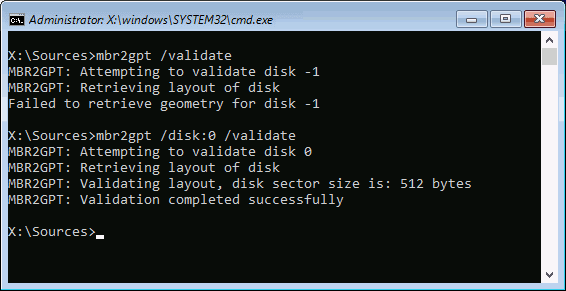
- Type mbr2gpt /disk:0 /convert and press Enter.
How to Recover Your Data After Conversion
Once you’ve converted your disk from MBR to GPT, it’s time to restore all of the data you backed up. For this, we’ll be using Disk Drill, the same application we used to make a byte-to-byte backup of the disk. Disk Drill is our preferred option, as it’s primarily a data recovery tool. This allows you to recover data from the GPT partition afterward if you didn’t make a backup and some of your files were lost in the conversion process.
Follow these steps to recover any lost data after the MBR to GPT conversion:
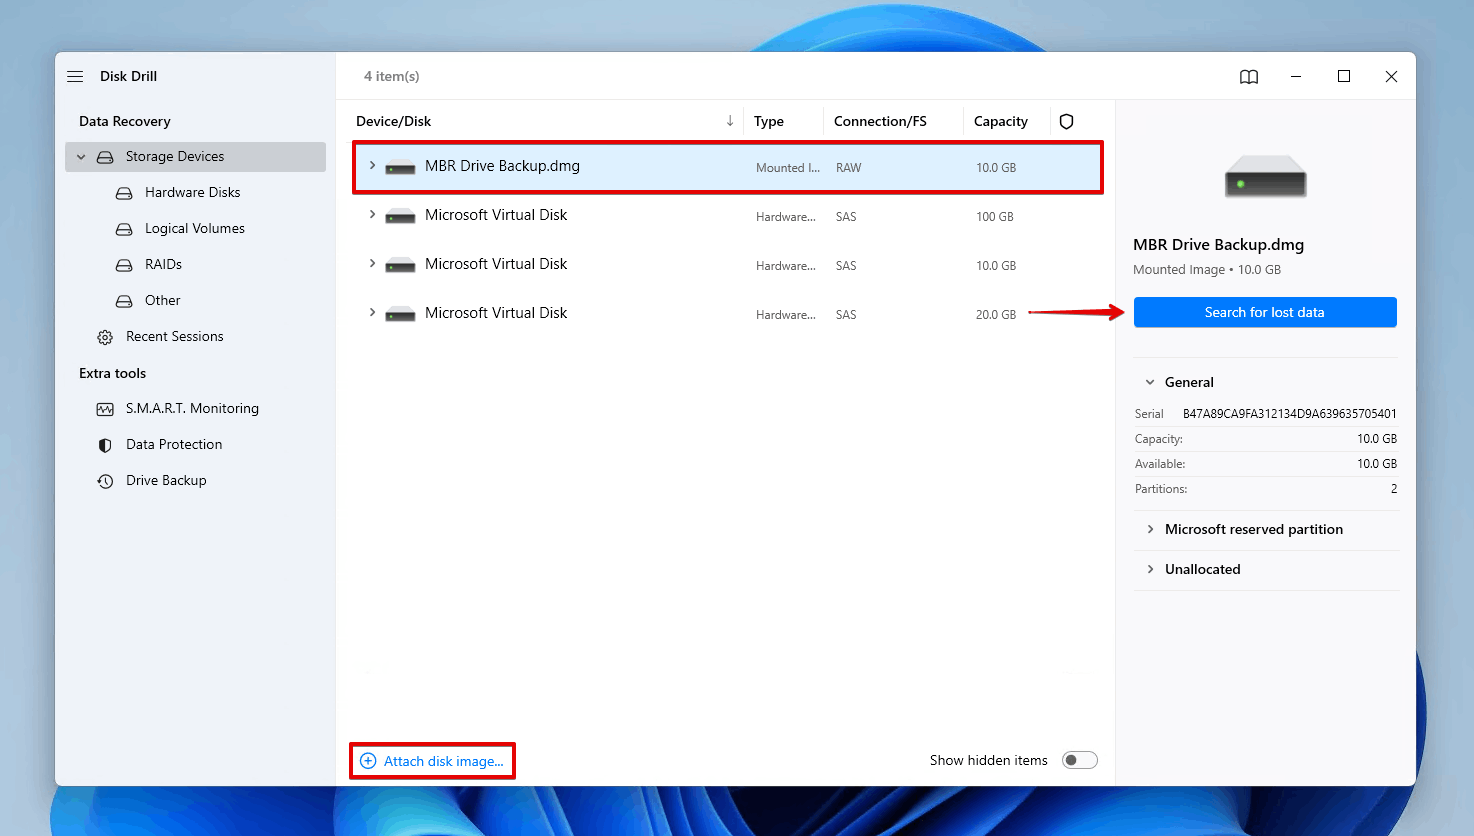
- Open Disk Drill.
- Assign the byte-to-byte backup that we made earlier and select it. If you didn’t make a backup, select the GPT disk from the list of devices instead. Click Search for lost data.
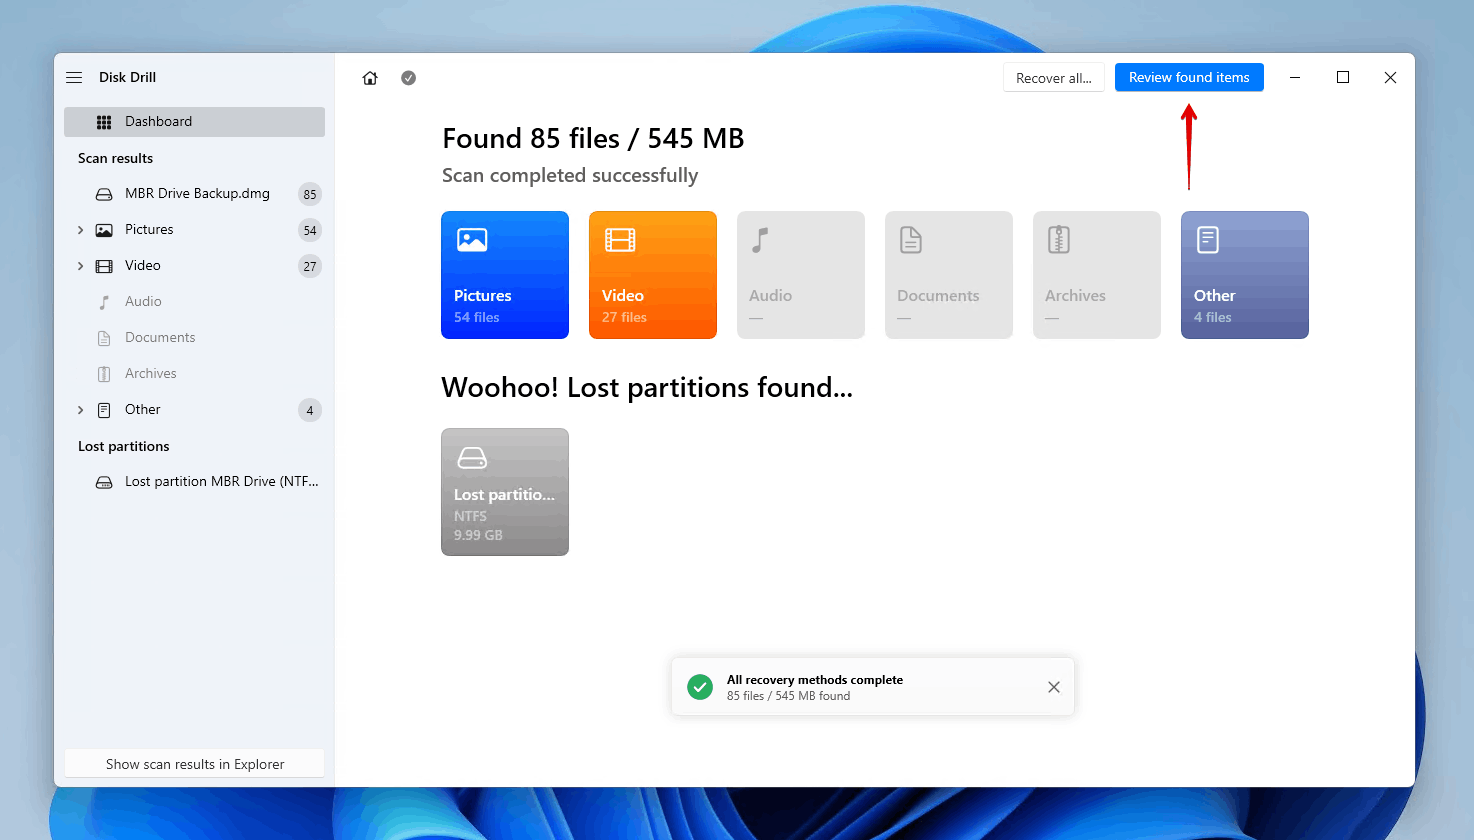
- Click Review found items to check all the recoverable files.
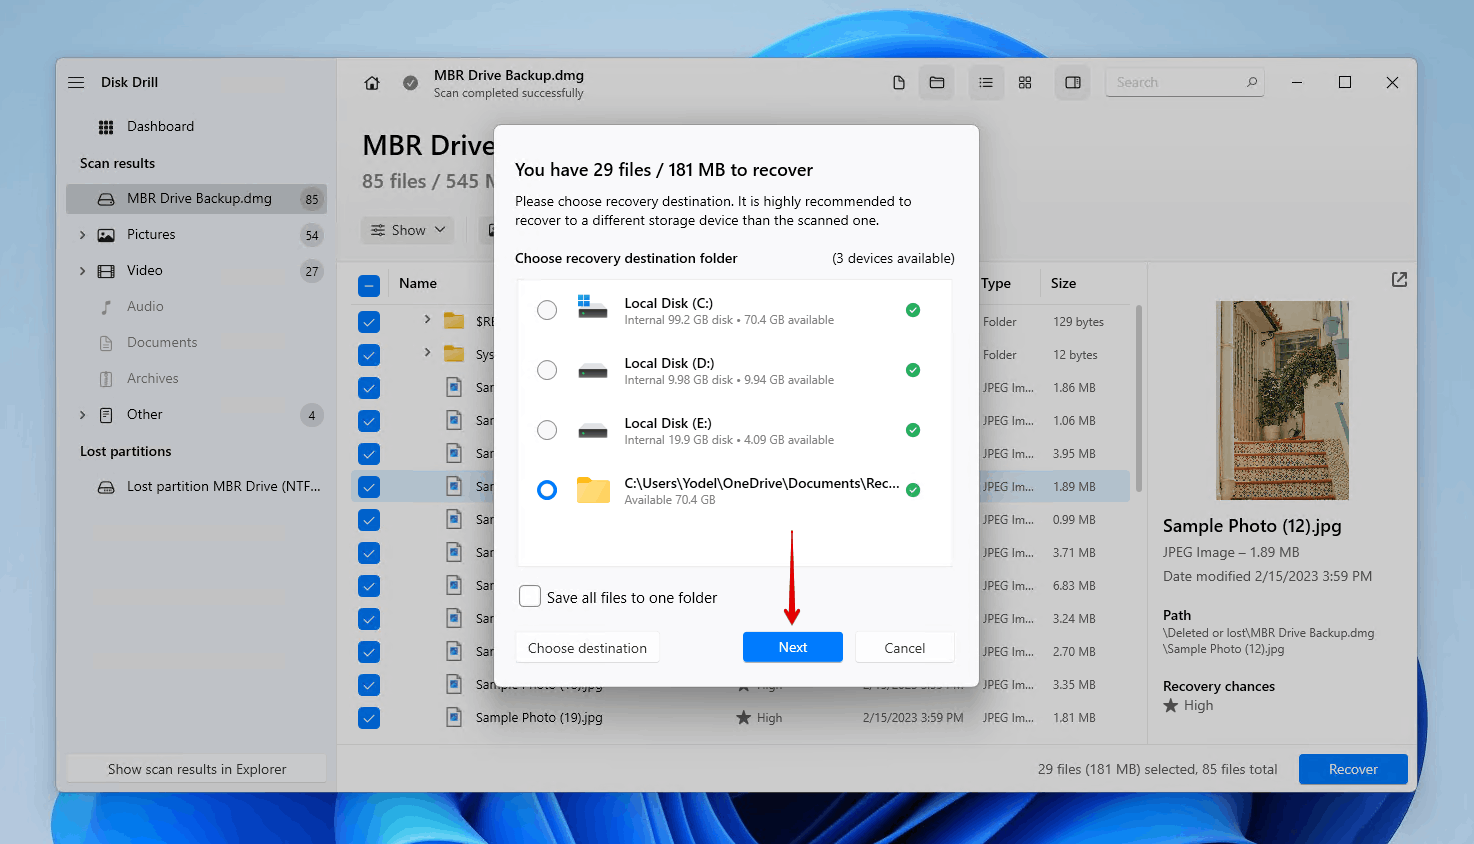
- Select the files that you lost during the MBR to GPT conversion. Use the recovery chances column and preview panel to determine what files have the best chance of recovery. When you’re ready, click Recover.

- Choose a safe location for recovery. Make sure you choose a recovery location on a separate storage device. To complete recovery, click Next.
Conclusion
The process you need to go through to change a disk from MBR to GPT can be difficult if you don’t know what to do. Before doing anything, make a byte-to-byte backup of your drive to preserve your data. Then, you can convert the MBR disk to GPT either by using DiskPart, Disk Management, or MBR2GPT. Once converted, restore all of your backed up data.
FAQ
- Start the device in BIOS mode and upgrade to Windows 10.
- Boot into WinRE.
- Specify your currency and language preferences, then click Next.
- Click Repair your computer.
- Click Troubleshoot.
- Click Command Prompt.
- Type mbr2gpt /validate and press Enter.
- Type mbr2gpt /convert and press Enter.
- Change the firmware from BIOS to UEFI mode, then boot into Windows.
- Boot to WinRE.
- Select your language preferences, then click Next.
- Click Repair your computer.
- Click Troubleshoot.
- Click Advanced options.
- Click Command Prompt.
- Type mbr2gpt /validate and press Enter.
- Type mbr2gpt /convert and press Enter.


