 Are you having issues connecting your Toshiba external hard drive to your MacBook? Whether it’s because of file system compatibility or corruption, your best solution to make the drive usable again is to format it.
In this article, you’ll find step-by-step instructions on how to format Toshiba external hard drive for Mac, as well as learn how to recover files from the drive in case they were erased during the formatting process.
Table of Contents
What Are the Best Formats for Hard Drives on Mac
The file system format of your external hard drive is responsible for organizing and indexing the data on it. There are a few Mac-compatible formats to choose from. When deciding on a format for an external hard drive which you’re planning on using with a MacBook, it’s essential to choose the one that’s compatible with macOS and one that best suits your needs.
Check out the table below to see which formats you can use for your Toshiba external hard drive.
| Format | Description |
| APFS | Used by macOS 10.13 or later |
| HFS/HFS+ | Used by macOS 10.12 or earlier |
| FAT | Used for Windows drives that are 32GB or less (compatible with both Windows-based computers and Macs) |
| ExFAT | Used for Windows drives that are 32GB or more (compatible with both Windows-based computers and Macs) |
So if you want to use your Toshiba external HDD only with a Mac, your best option is to format it as an APFS drive since this file system format is best suitable for external hard drives and is much faster and more reliable compared to HFS/HFS+.
However, if you want your Toshiba external hard drive to be compatible with both Macs and Windows-based computers, you should choose exFAT.
How to Format Toshiba Hard Drive on Mac
Reformatting Toshiba external hard drive is a simple and quick process. All you need for it is your MacBook, the drive, a cable to connect it to the computer, and a suitable application.
Note: It’s important to highlight that if your Toshiba hard drive contains any valuable data, you need to back it up before starting the formatting process. After you format the drive on your Mac, the files that were located there will be permanently erased.
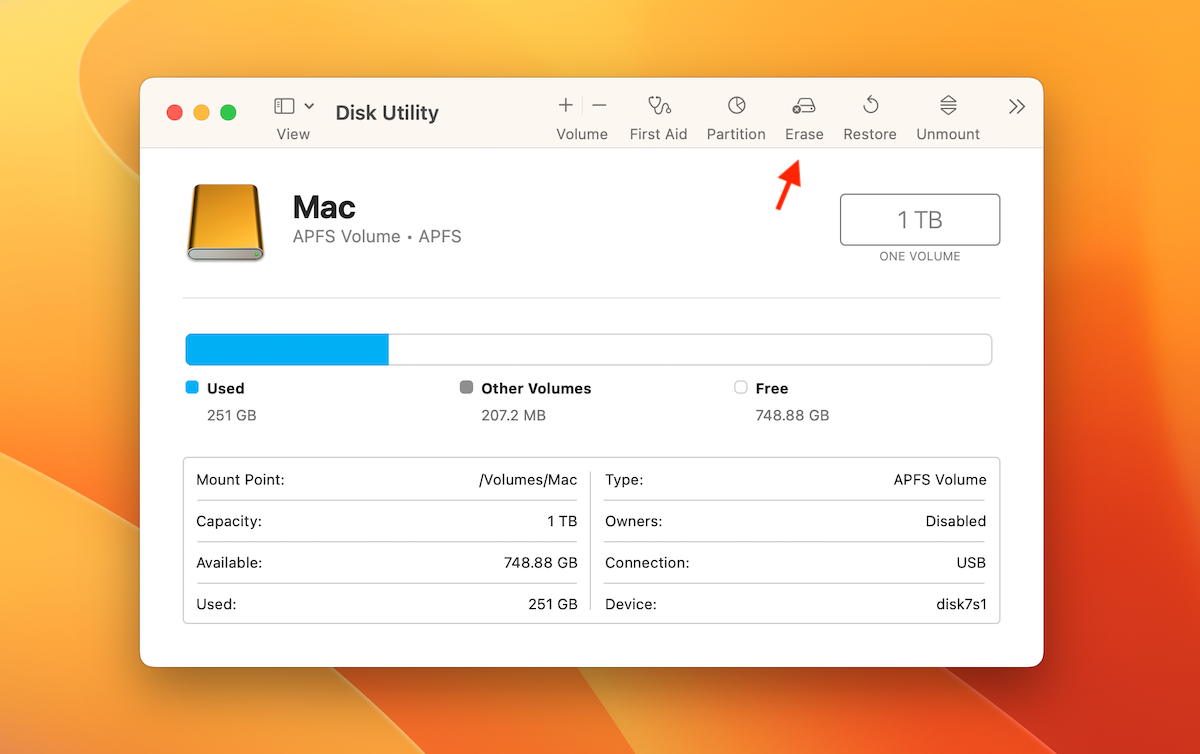
To reformat an external hard drive on your Mac, you’ll be using a macOS native tool called Disk Utility. All Macs come preinstalled with this app, so all you have to do to start the formatting process is to locate and launch Disk Utility. To do that, open Finder and go to Applications > Utilities > Disk Utility.
Once you’ve opened the Disk Utility application, follow these steps to format the Toshiba external hard drive for your Mac:
- Connect the Toshiba external HDD to your Mac.
- Use the sidebar on the left to view all of the connected devices.
- Click your Toshiba external hard drive to select it.
- Click the Erase button at the top.
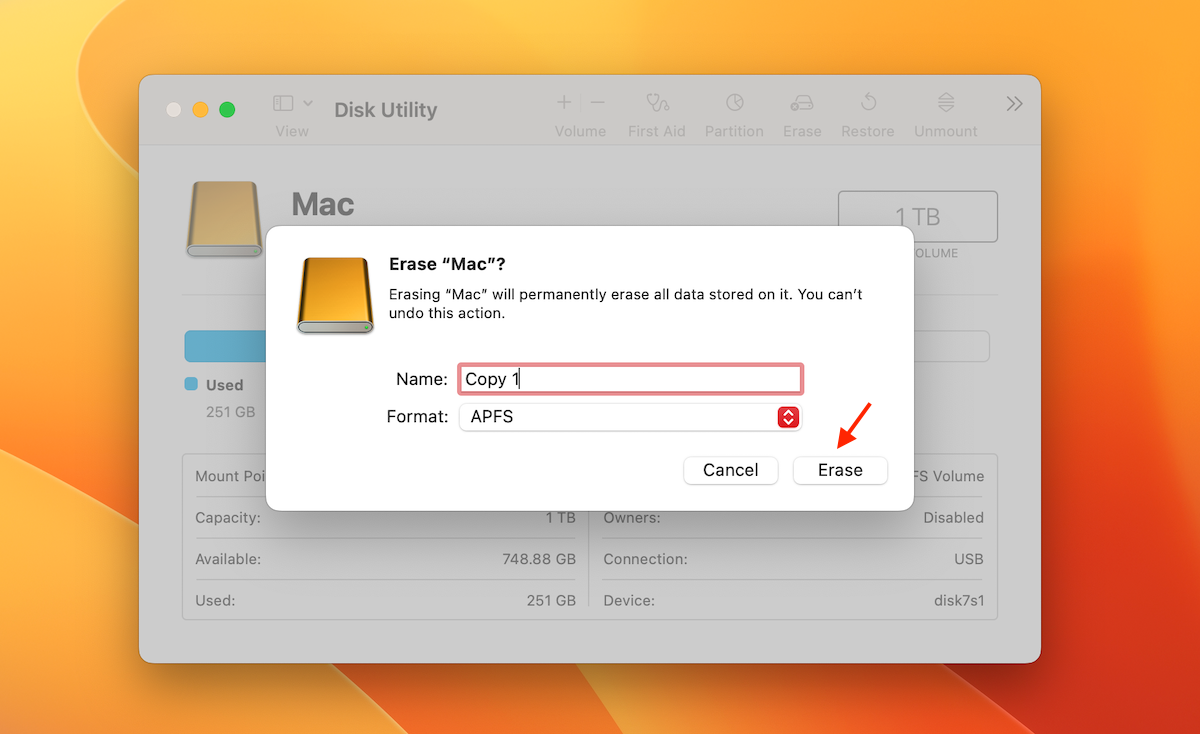
- Type in a preferred name for your drive, choose the file system format (for example, ExFAT), and select the GUID Partition Map as the scheme. Click Erase to confirm.
Once the formatting process is finished, you can use your Toshiba external hard drive as you wish.
How to Recover Data from a Formatted Toshiba Hard Drive
If, after formatting your Toshiba external hard drive, you’ve realized that there used to be some important files on it and you wish to bring them back, your best option is to use a specialized data recovery tool. Luckily, your chances of successfully recovering that data can be pretty high as long as you stop using your drive as soon as you’ve noticed that the files are missing.
When it comes to the selection of the data recovery application for the Toshiba hard drive recovery, we recommend trying out Disk Drill for Mac since it supports all major file system formats that can be used on that drive (such as APFS, HFS/HFS+, exFAT, and others). Moreover, you can use the free Disk Drill version to see whether the data can actually be recoverable from your Toshiba drive without having to pay even a cent for that.
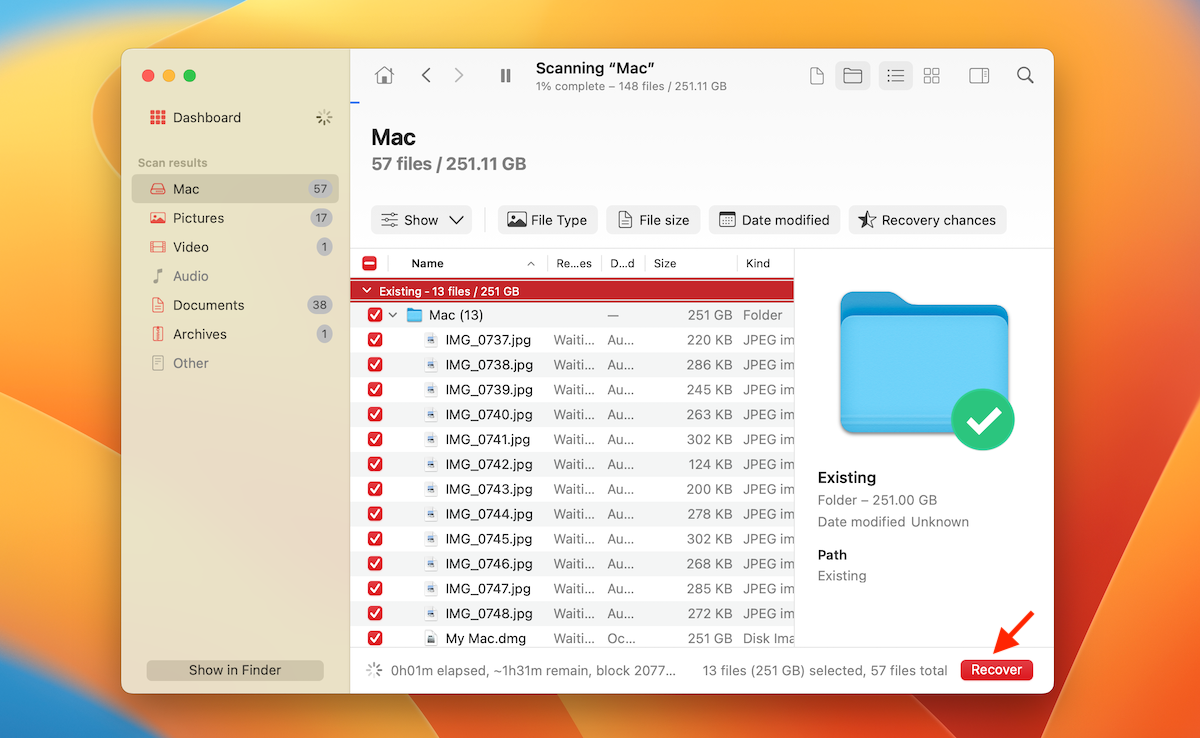
Follow these steps to recover deleted data from a formatted Toshiba hard drive on a Mac using Disk Drill:
- Download and install Disk Drill on your Mac.
- Using a cable, connect the Toshiba external hard drive to the computer.
- Launch Disk Drill and select Storage Devices from the sidebar on the left.
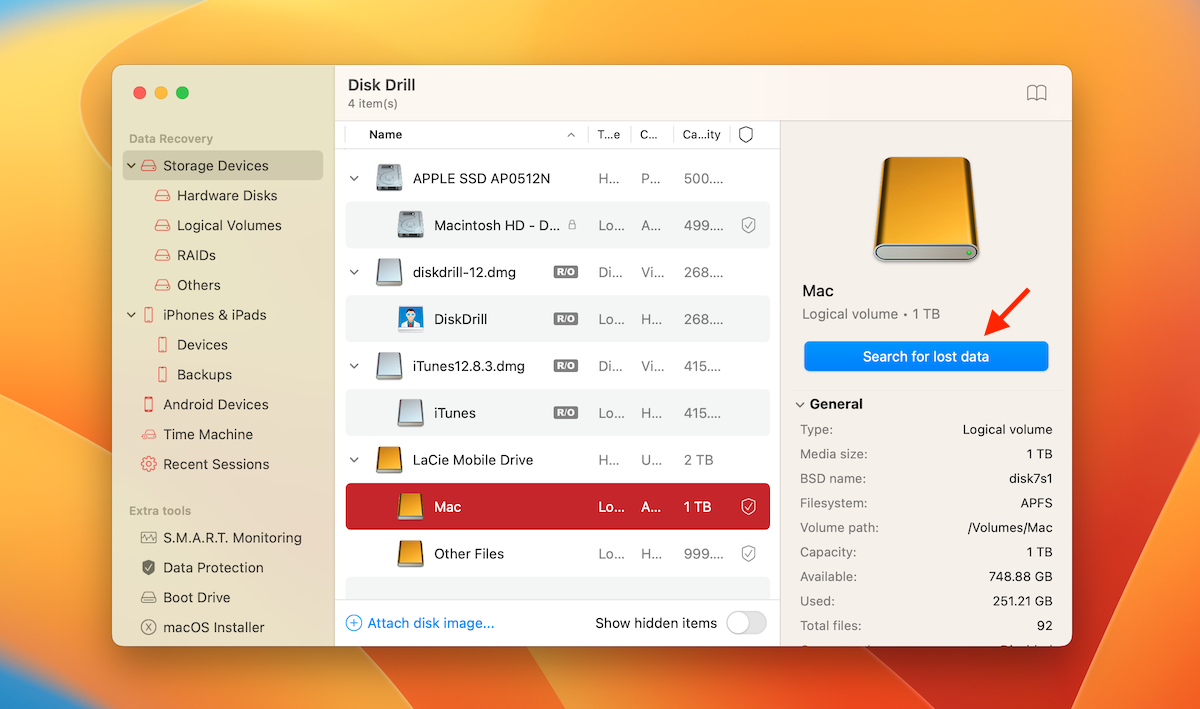
- Click your Toshiba external HDD to select it on the list of available devices.
- Click the Search for lost data button.
- Wait for the scan to finish and click Review found items.
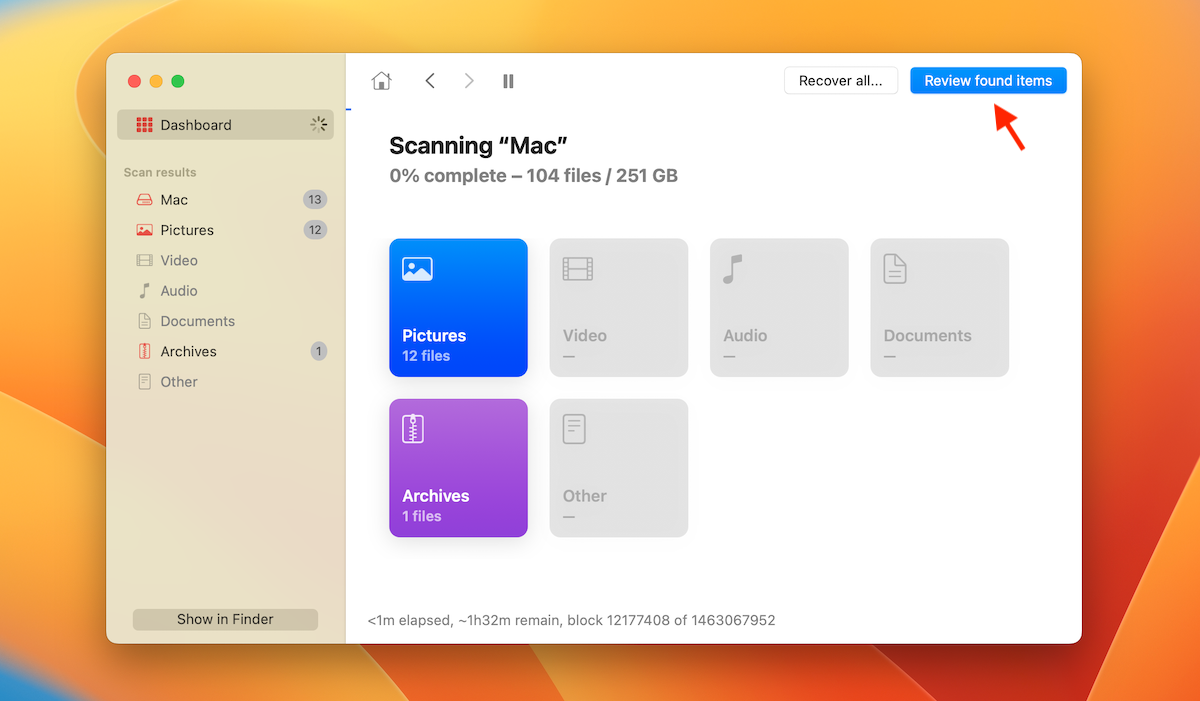
- Use the sidebar on the left to view your discovered files according to their types or use the search field on the top-right to find a specific folder or file. If you want to recover the whole drive, put a checkmark in the box at the top to choose all of the discovered data.
- Click the Recover button and choose the preferred location for the recovered file (not on the Toshiba hard drive we’re recovering from).
Conclusion
No matter why you want to format a Toshiba external hard drive on your Mac, you can do it hassle-free and in minutes with the help of Disk Utility. But keep in mind, once you format the drive, all of the data stored there will get wiped off. So to keep that from happening, make sure you backup your drive before formatting it.
FAQ:
- Connect the Toshiba drive to your Mac.
- Open Disk Utility and choose the drive on the list of available devices.
- Click the Erase button.
- Type in a preferred name for the drive, choose the needed file system format, and use
- GUID Partition Mac as the scheme.
- Click Erase to confirm and wait for the process to finish.
- Locate your external HDD icon on the desktop and right-click it.
- Choose Get Info from the drop-down menu.
- If prompted, enter your Mac’s administrator password to open the permission settings.
- Click Sharing & Permissions to see all of your options.
- Choose the suitable setting (Read & Write, Read Only, Write Only, or No Access).


")