 Accidental data loss has become increasingly common among Windows users as more people rely on Windows devices for their daily work, studies, and leisure activities. Still, it hasn’t changed how frustrating accidental deletion can be.
Depending on the cause of data loss, it is possible to recover permanently deleted files without software using simple methods available on Windows.
Windows offers several built-in features that can assist in data recovery. This article will explore these methods, providing you with effective ways to retrieve your files without the need to download extra software.
Table of Contents
Make Sure that Files are Actually Deleted
Before attempting to recover your files, make sure that they have actually already been deleted. Check for your files in the Recycle Bin to see if your files are present. You can use the search feature in File Explorer or simply type the filename in the Start Menu to locate them.
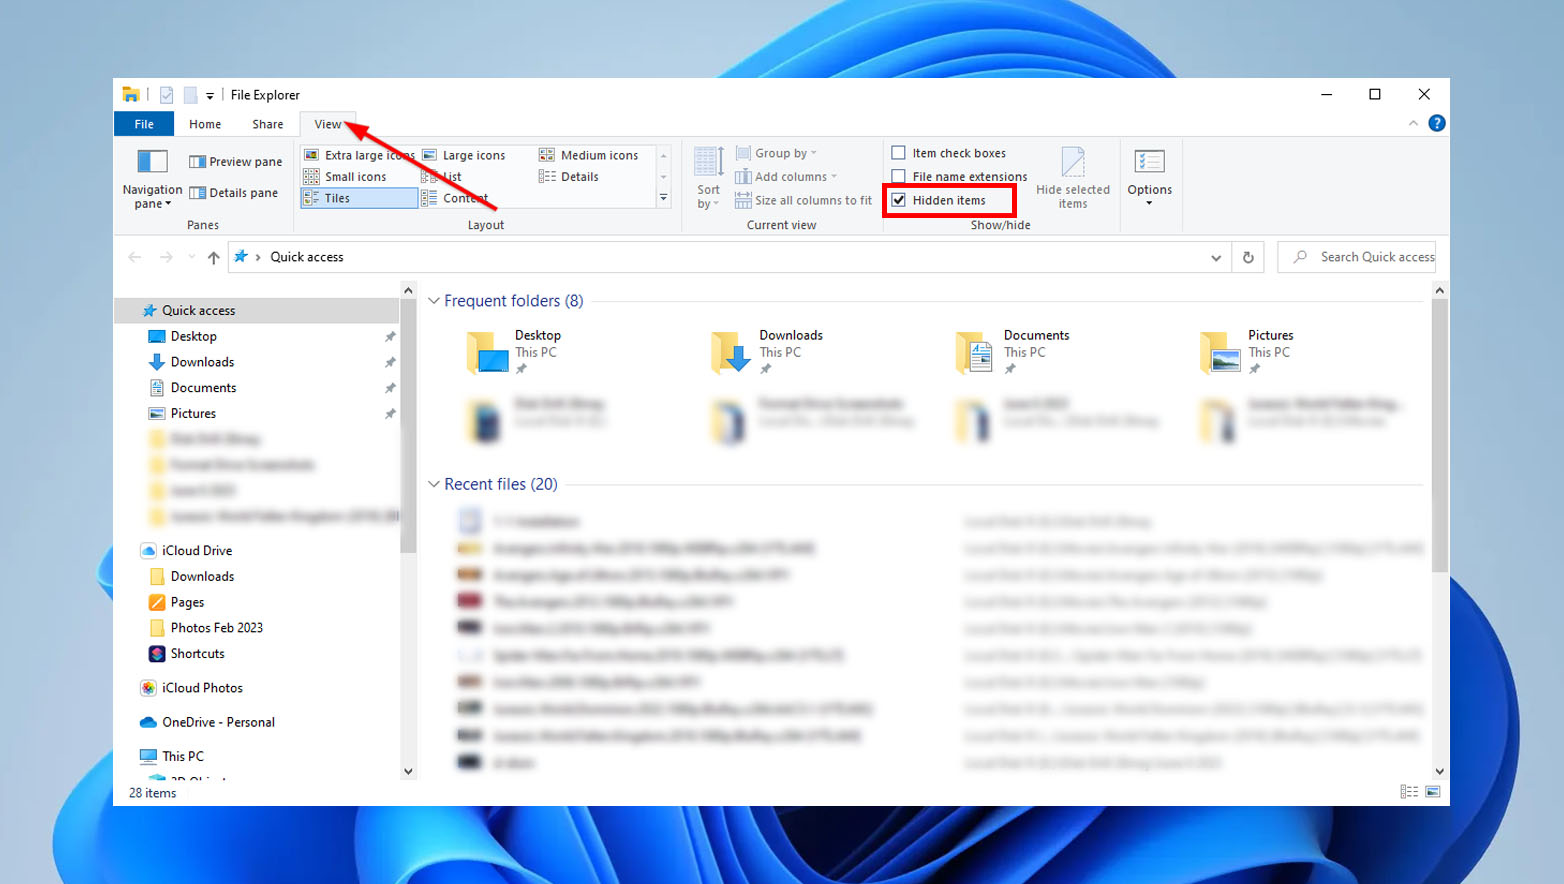
In addition, you can try looking for hidden files by navigating to File Explorer, selecting the View tab, and enabling the “Show Hidden Items” option (the steps may vary depending on your operating system version).
However, if the file deletion is a result of a malware infection, it is unlikely that you will be able to locate the files using these methods.
How to Recover Deleted Data Without Software
When dealing with data loss due to permanent deletions, data recovery methods often involve downloading third-party data recovery software. However, you can also recover deleted data using built-in Windows tools.
Here are some effective data retrieval methods without software:
Method 1: Use Command Prompt
The Command Prompt utility has different tools for file system error repairs as well as file recovery. CHKDSK, for example, is a command that can scan a disk on your computer for errors and attempt data recovery.
Here’s a quick and easy guide on how to recover your files using CMD:
- To get started, open Command Prompt as Administrator.

- Next, type “chkdsk X: /f,” where “X” represents the letter of the drive from which you are trying to recover files. This command scans the hard drive for bugs and attempts to repair them.

- Then, type “ATTRIB -H -R -S /S /D X:.,” where “X” is the same drive you entered in the previous step.
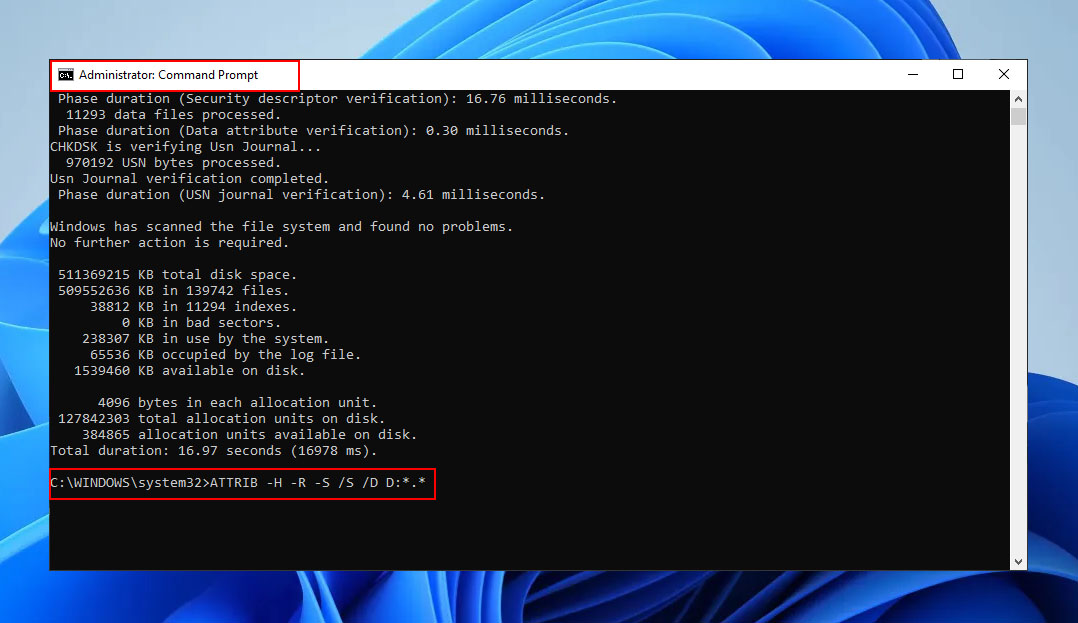
The ATTRIB command above recovers hidden files that may have become inaccessible due to virus attacks or other reasons.
By following these steps, you can utilize the power of the Command Prompt to attempt file recovery and recover hidden files that may have been lost or inaccessible.
Method 2: Use File History
File History is another valuable built-in tool on Windows that backs up your files and allows you to restore previous versions of them. This tool was introduced in Windows 8 and is also one of the most common ways to recover permanently deleted files on Windows 10.
It is important to note that File History only backs up and keeps track of file versions after you turn on the feature. Additionally, it only covers files in the Desktop, Documents, Music, Pictures, and Videos folders on your PC. If you were not able to turn on File History prior data loss, skip to the next method.
There are some variations in using File History depending on whether you are using Windows 7 or higher versions:
on Windows 8 and newer
Here’s how to restore permanently deleted files on Windows 8 and newer using File History:
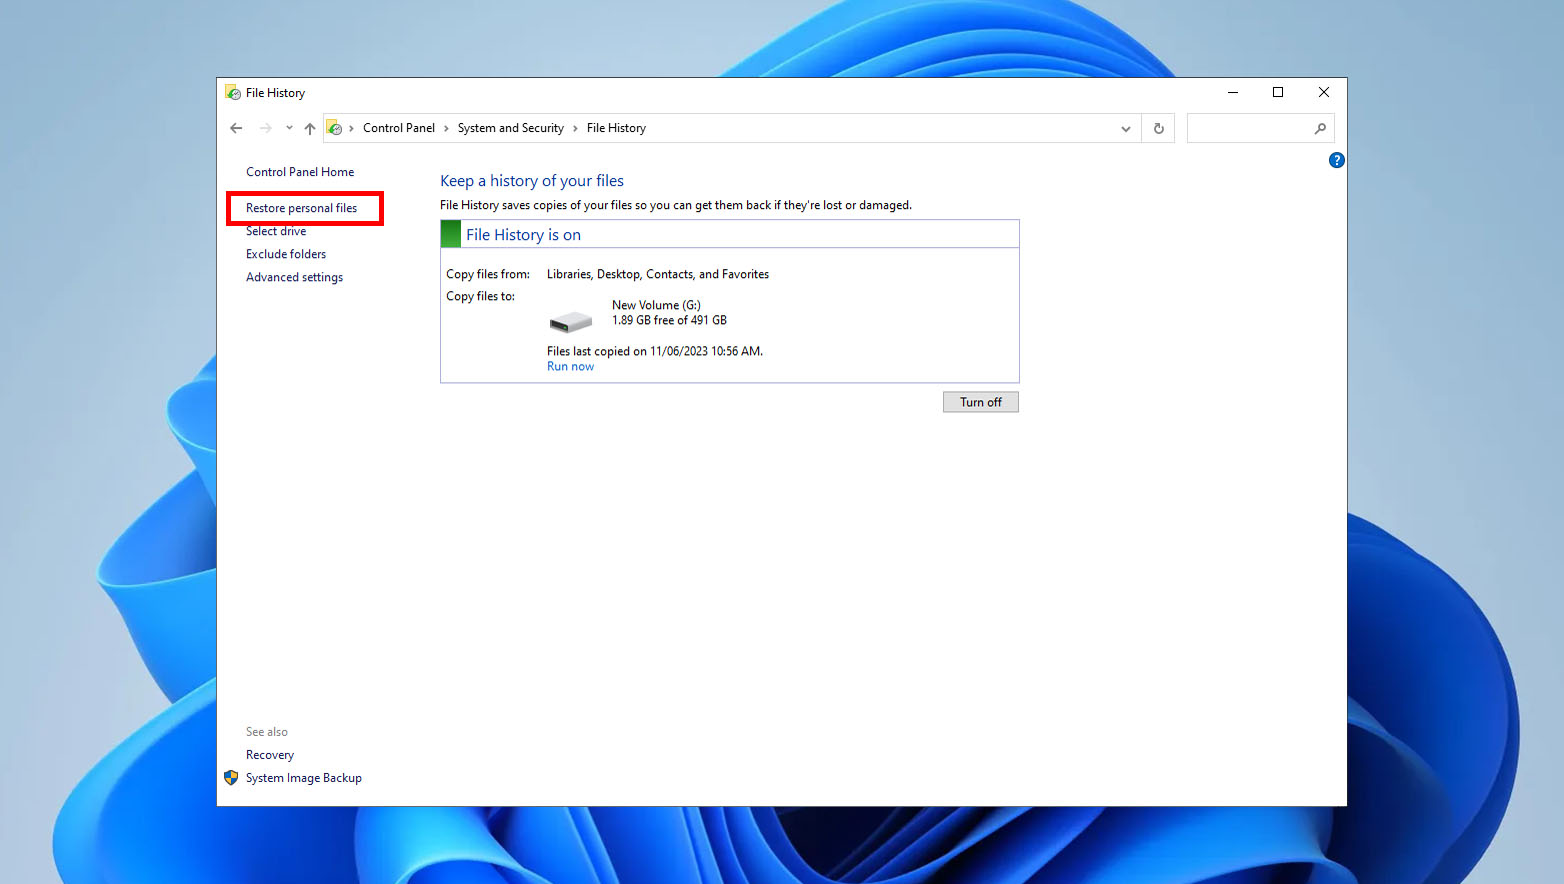
- First, type “File History” in the Start Menu and select “Restore your files with File History.” Alternatively, from the File History window, go to “Restore personal files” in the menu on the left side of the window.
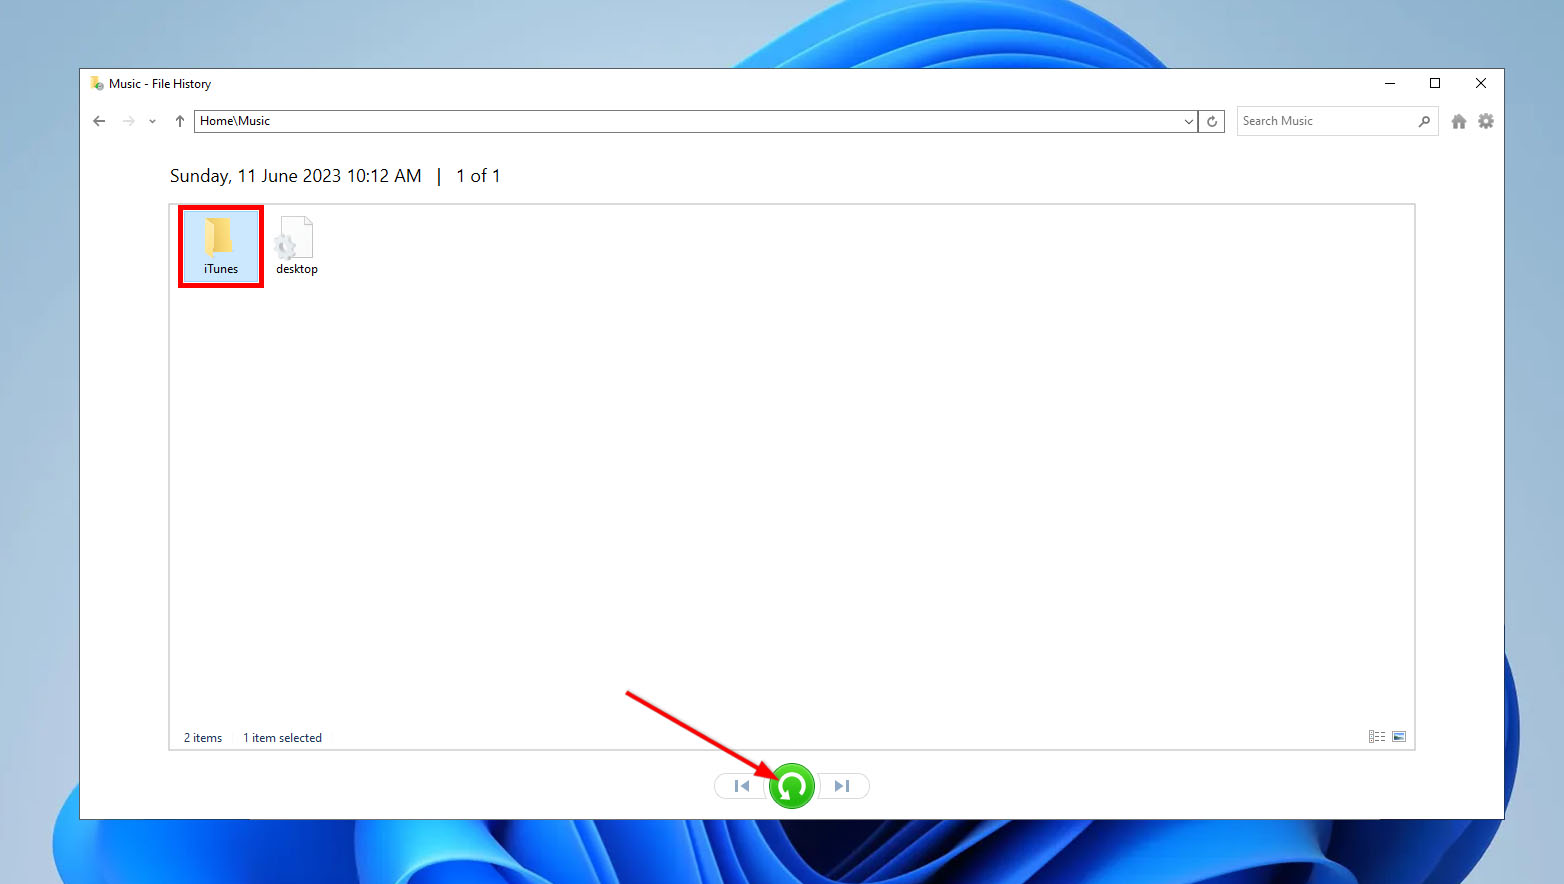
- Next, choose the files you wish to restore and click the “Restore” button (usually a green button) located at the bottom center of the window.
For Windows 7, follow these steps instead:
Enable File History by opening My Computer > Properties > System Protection > Under the System Protection tab, select your drive and click Configure.
File History will create “save points” when a new application or driver is installed, when there is a Windows update installed, or when no restoration point has been created in the last 7 days.
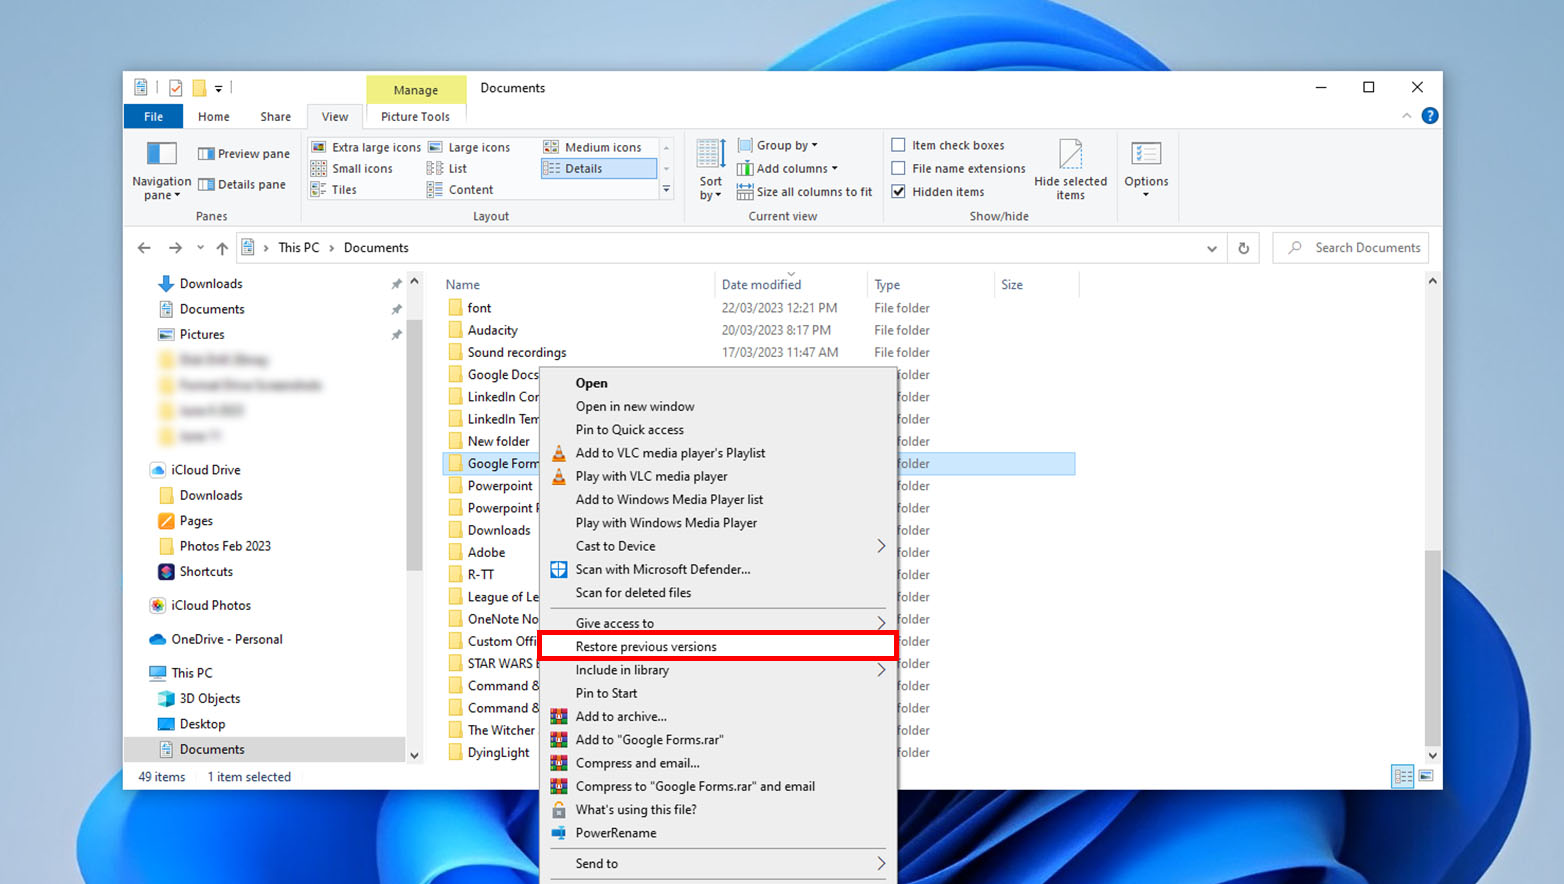
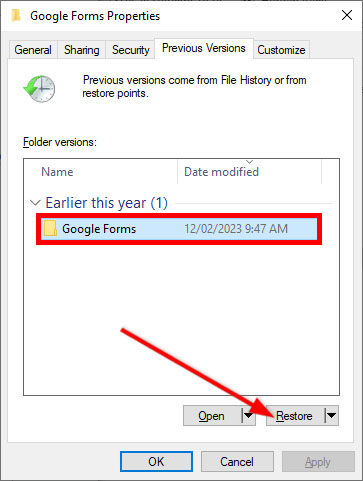
If File History is already enabled on your device, you can restore a previous version of a file by locating the file, right-clicking on it, selecting “Restore previous versions,” choosing the desired version, and clicking “Restore.”
Method 3: Use Backup and Restore
If you have set up Backup and Restore on Windows, you can use this method to recover permanently deleted files free from any additional software. If you did not set up Backup and Restore prior data loss, skip to the next method.
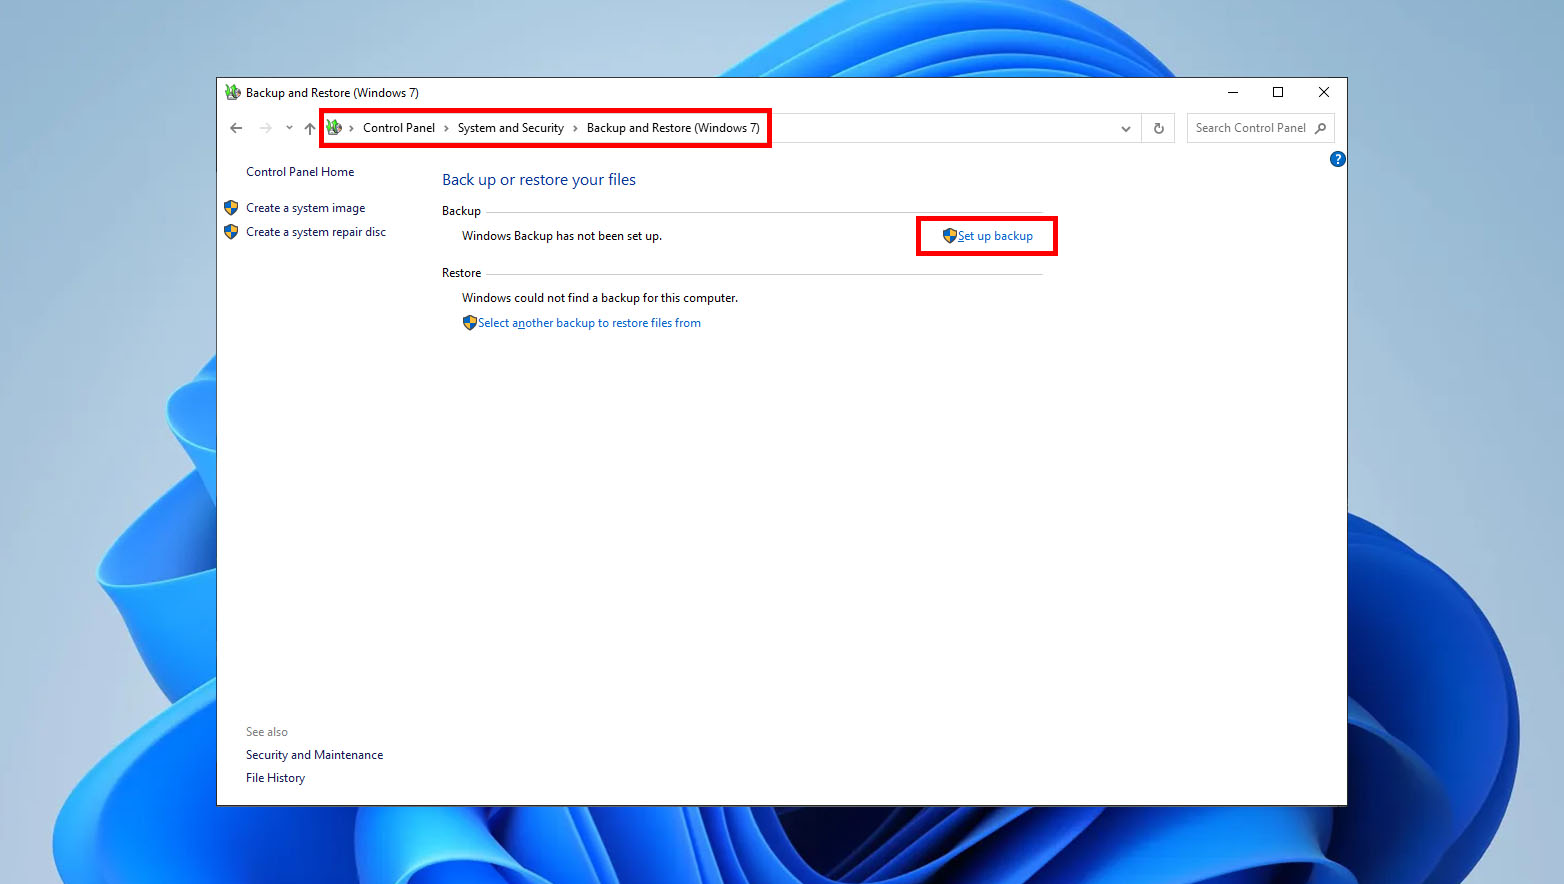
To restore available backups, on the Backup and Restore window, click Restore my files and follow the instructions provided to complete the file restoration process.
However, it’s important to note that if the same files already exist in your current version, Windows may overwrite them. Therefore, it is recommended to back up your existing files before proceeding with the restoration process to avoid potential data loss or file overwriting.
Method 4: Recover Files from Cloud Storage
Cloud Storage backups can be convenient data recovery since you can easily access your files even using other devices as long as you have an internet connection.
This method describes recovering files from OneDrive’s cloud storage. OneDrive offers seamless integration with Windows for backing up and restoring your files. But if you were not able to turn on OneDrive backup prior data loss, skip this method.
To recover files from your OneDrive backup, you can access your OneDrive folders either online or using File Explorer. Then, search for the specific files you want to recover and download them.
If the previously explained methods fail to recover your files or if you don’t have any backups available, you will need to resort to using data recovery software to recover your files.
It’s important to note that relying on data recovery software should be the last resort, as it may not guarantee complete file recovery or may require additional technical expertise. Therefore, it’s always recommended to have regular backups in place to avoid data loss situations.
Recovering Data with Professional Data Recovery Software
Disk Drill is a reliable software that can safely scan and recover deleted files on Windows. It supports a wide range of commonly used file types (audio, documents, photos, videos, etc.) and file systems, and can even recover files while retaining their original names. The free version of Disk Drill allows for the recovery of up to 500 MB of data on Windows.
To recover your files using Disk Drill, simply follow the steps outlined below:
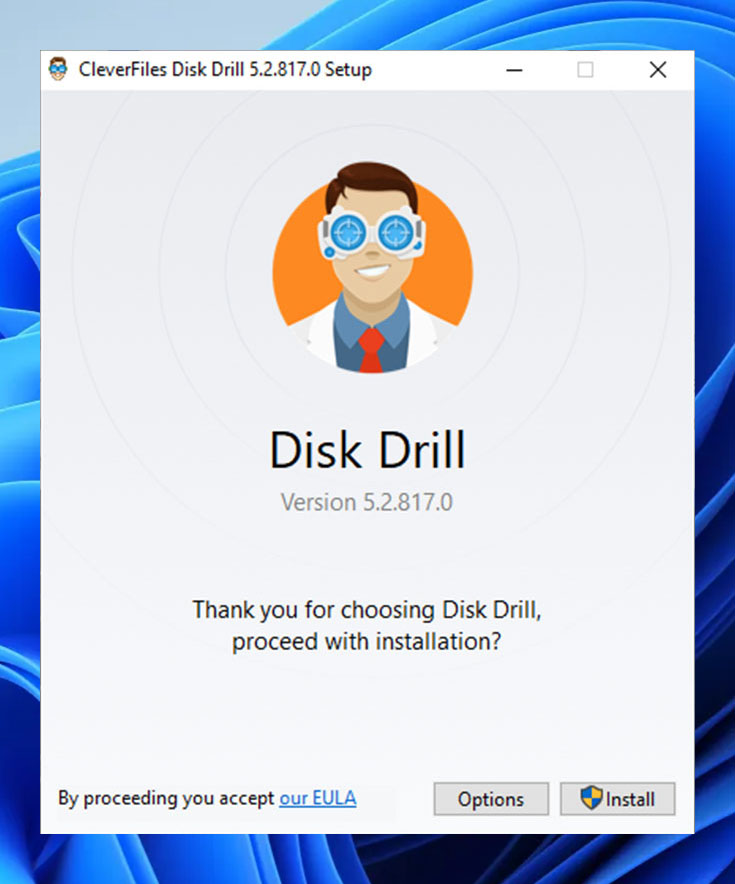
- First, download Disk Drill from its official website and install the application on your computer.
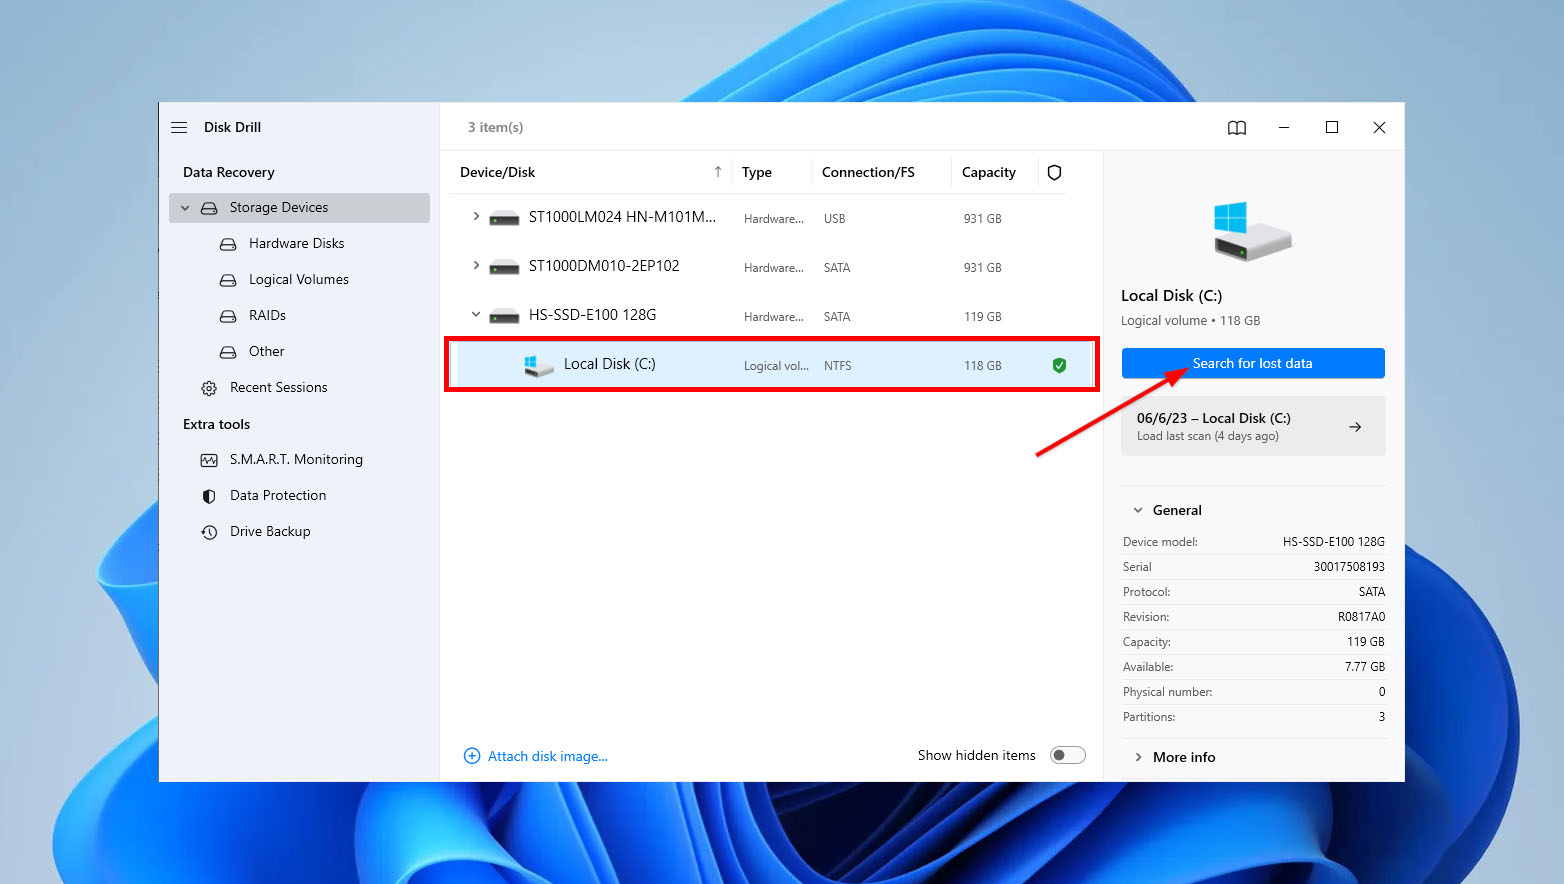
- Once installed, launch Disk Drill. On the main screen, select the drive where your deleted files were located and click “Search for lost data” to initiate the scanning process.
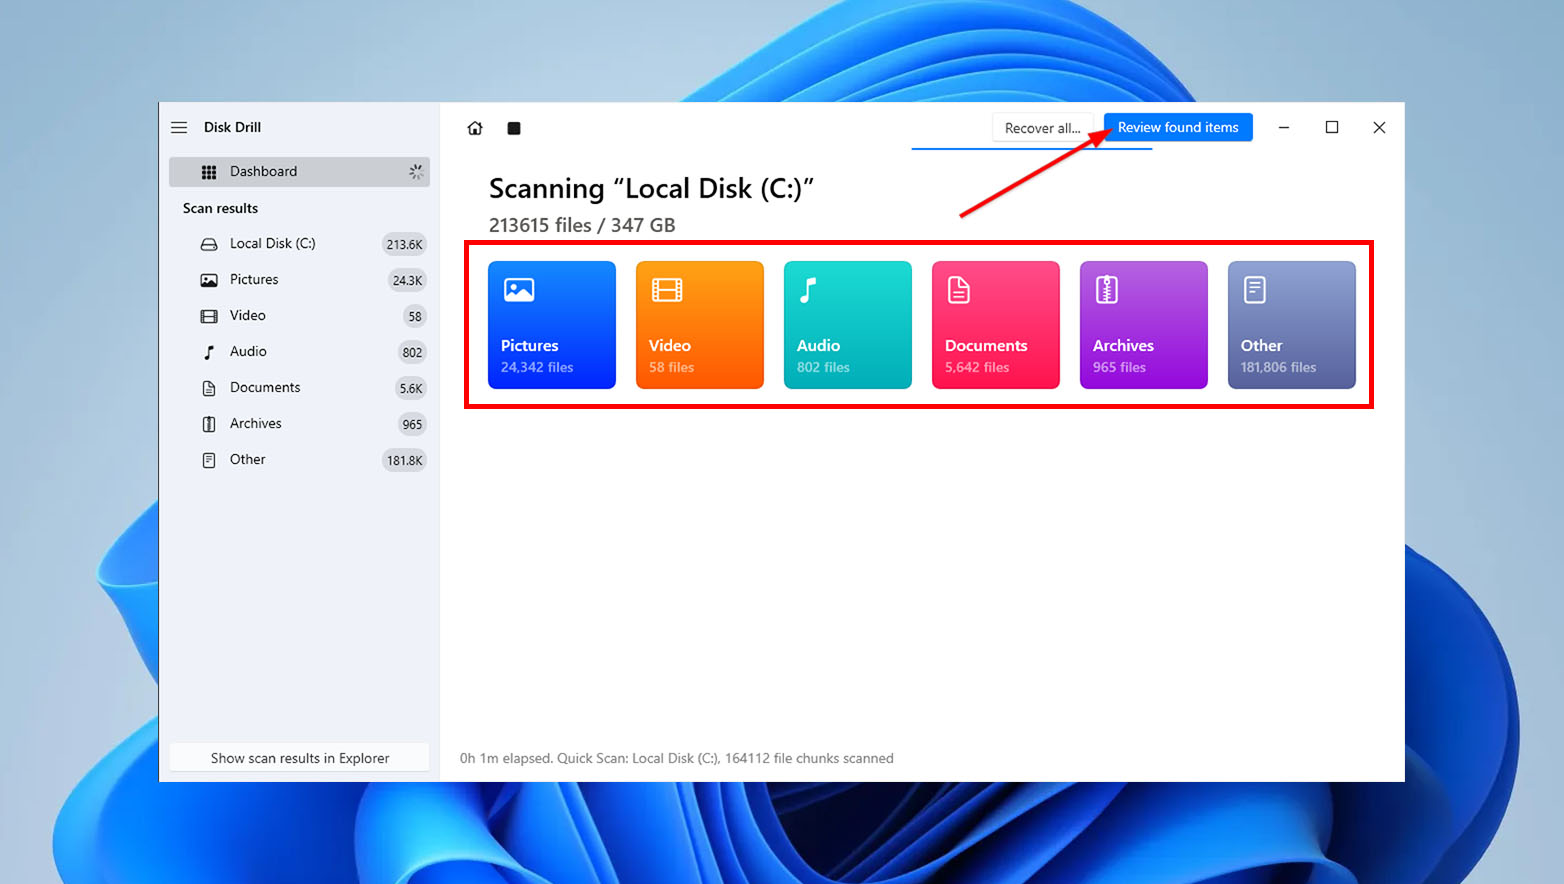
- You can preview the files that Disk Drill has scanned by clicking on the desired category or using the “Review found items” button located in the top-right corner of the window. If you prefer to let the scan finish before reviewing the files, proceed to the next step.
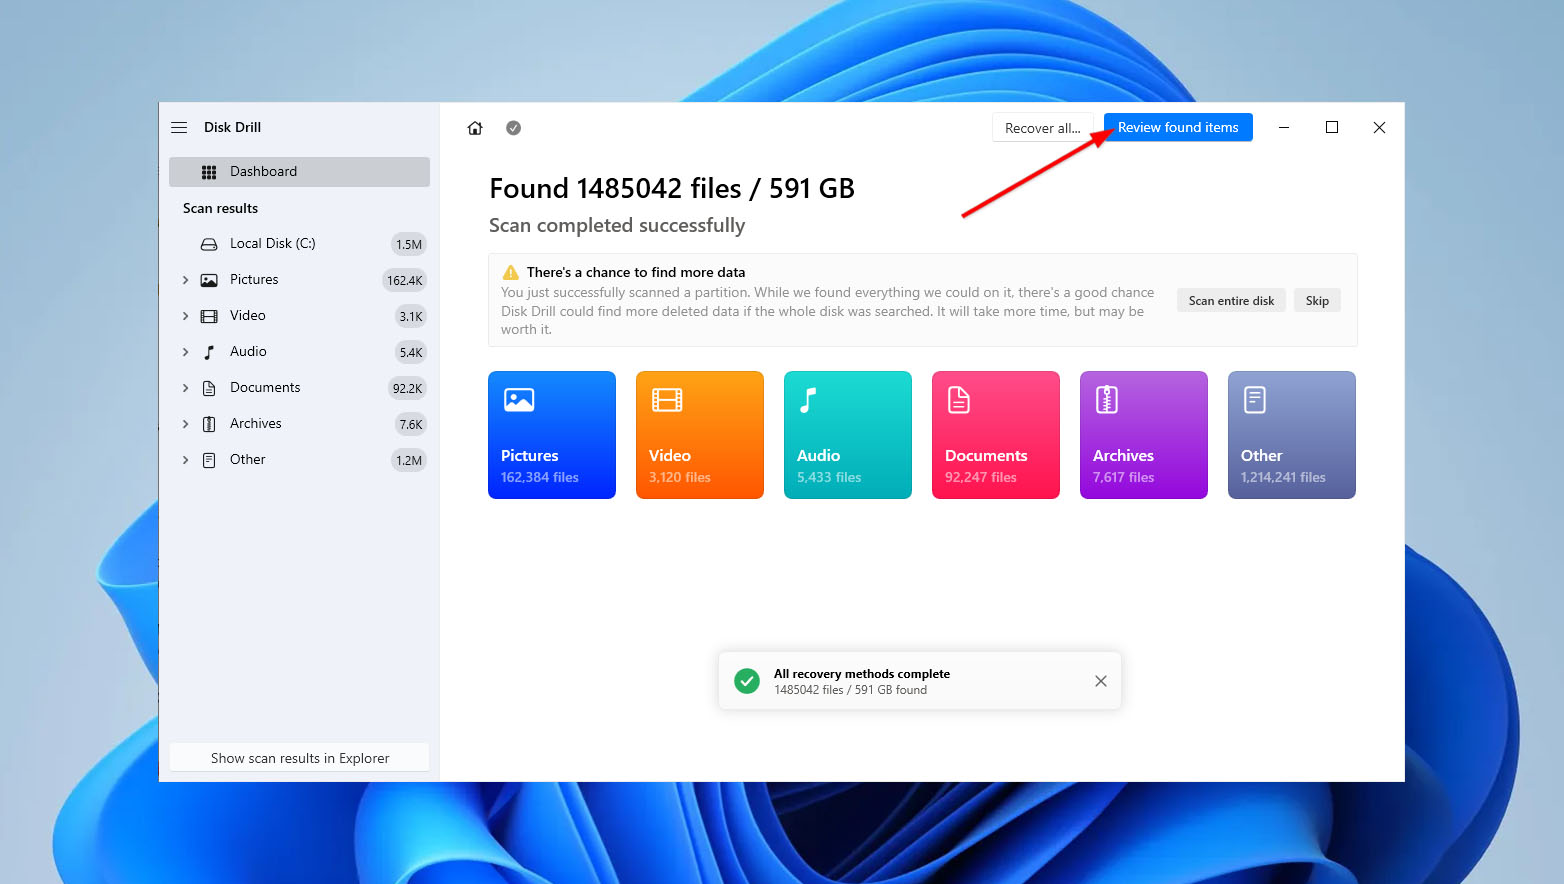
- After that, click “Review found items” once the scan is complete to view the files that Disk Drill has identified for recovery.
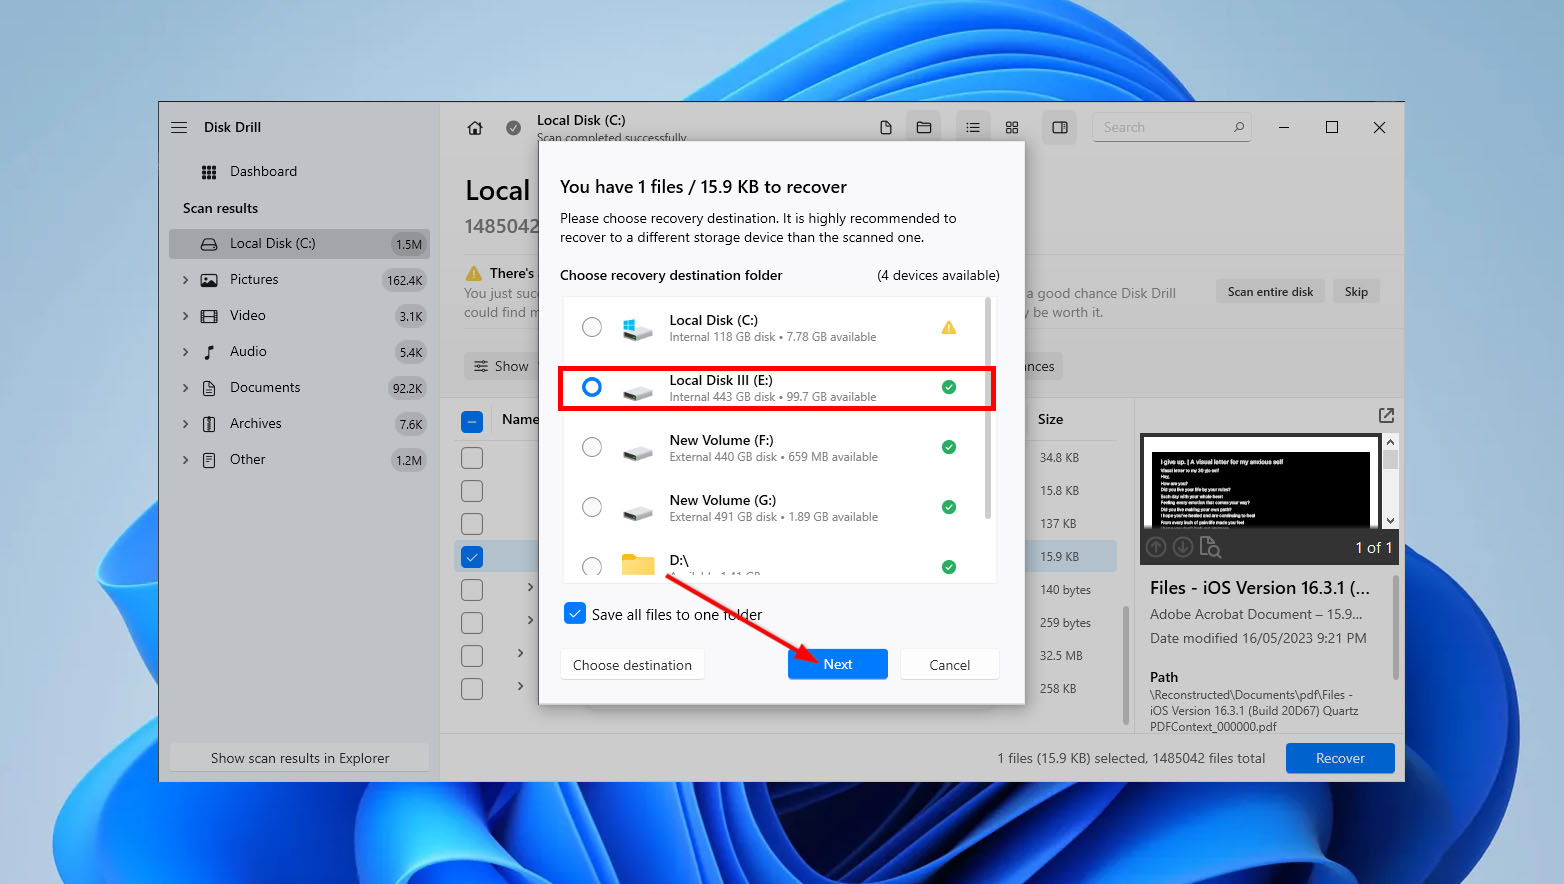
- Select all the files that you want to recover and click Recover.

- Next, choose a destination for your recovered files, ensuring that you select a different drive than the one being scanned. After specifying the location, click “Next.” Disk Drill will then attempt to recover your files and save them to the specified destination.
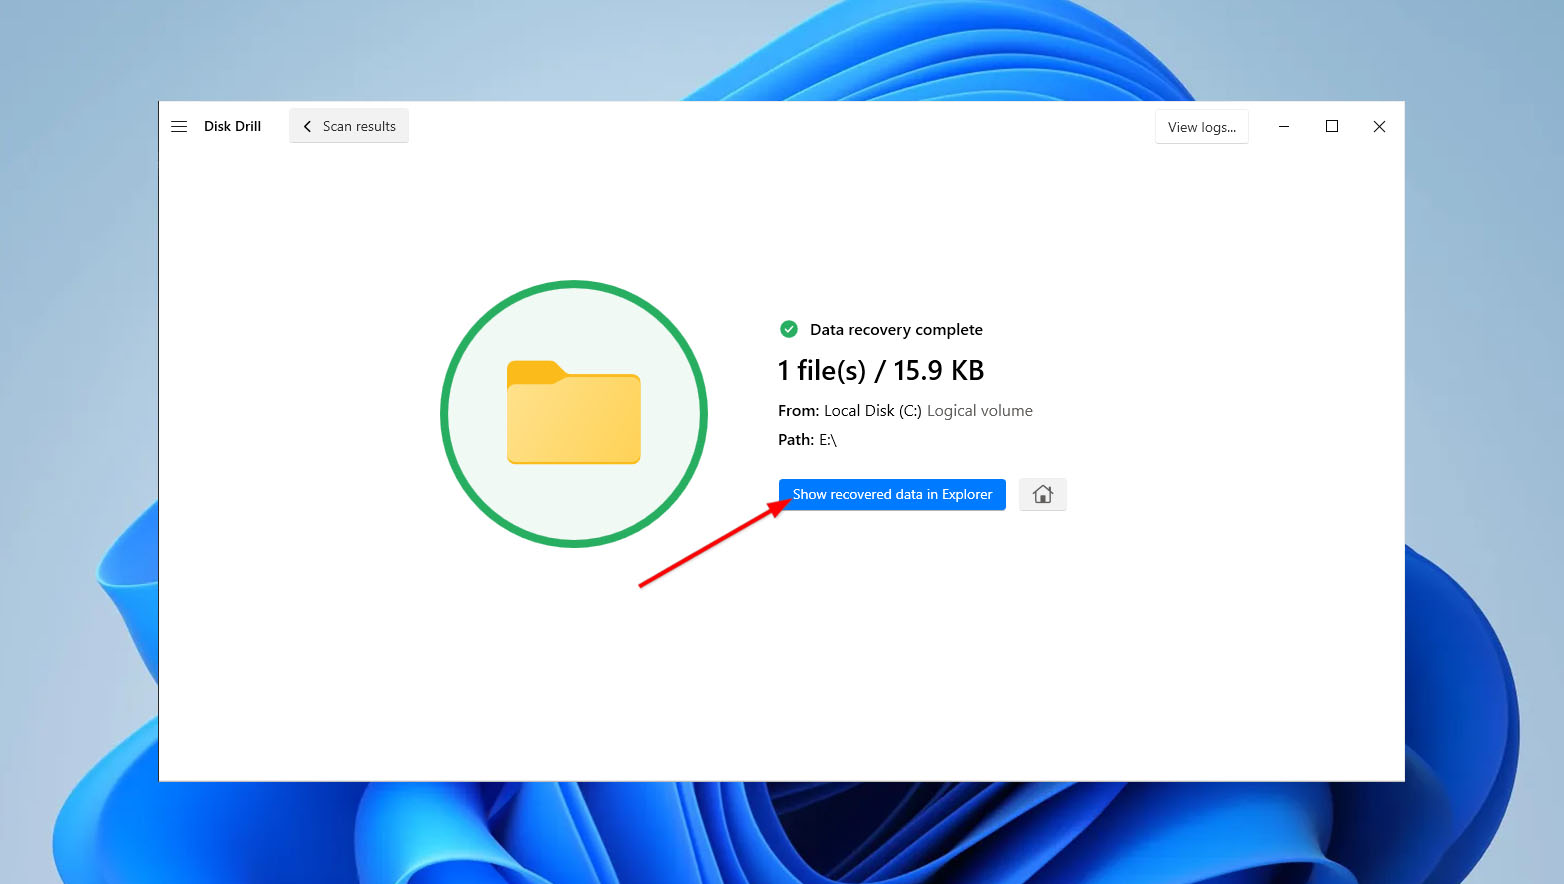
- Once Disk Drill completes the file recovery process, it will display the number of files restored. Click “Show recovered data in Explorer” to verify and access your recovered files.
Conclusion
Accidental file deletion can be a frustrating experience, but there are methods on how to recover permanently deleted files without software on Windows.
Using commands such as CHKDSK and ATTRIB in the Command Prompt can help uncover hidden files and potentially recover them. Additionally, built-in Windows features like File History, Backup and Restore, and cloud storage options such as OneDrive can assist in restoring files and folders if you have set them up prior to data loss.
When all else fails, and you can’t recover permanently deleted files without software, you may need to resort to third-party data recovery tools like Disk Drill. It’s important to note that when using data recovery software, it is advisable to avoid using the affected drive to prevent overwriting the deleted files, which can reduce the chances of successful recovery.
To prevent future data loss, it is always recommended to regularly back up your files. This ensures that you have a copy of your important data stored in a separate location, reducing the impact of accidental deletions or other data loss events.
FAQs:
- Check the Recycle Bin on Windows to see if the file is still there. If it is, you can easily restore it to its original location.
- Use File History to restore previous versions of files from backups. This feature keeps track of changes to your files and allows you to revert to earlier versions.
- Recover hidden files using Command Prompt commands like CHKDSK and ATTRIB to help recover hidden files that may be inaccessible due to various reasons.
- Utilize Data Recovery software to scan your storage device and attempt to recover deleted files. It's important to note that using data recovery software increases the chances of successful recovery, but it is not guaranteed.


