 Now known as SanDisk Professional, G-Technology is a line of pro-grade, high-performance storage devices under the Western Digital brand. G-Technology external drives often feature sturdy enclosures, robust connectivity options, and native Mac support. One of their more popular offerings is the G-Drive – a lineup of external hard drives and SSDs generally marketed toward photography and videography enthusiasts or professionals.
While these devices are built with security in mind, they’re still vulnerable to losing data in various ways. In this guide, we’ll go through the best methods to recover G-Drive files that were accidentally deleted, and we’ll also discuss the most common causes of data loss in these kinds of drives.
Table of Contents
What Are the Causes of Data Loss on a G-DRIVE
No matter how secure a storage device claims to be, data loss will always be an unfortunate scenario that’s looming around the corner. Below are some of the usual reasons G-Drive owners experience loss of data, as well as the best course of action to take when encountered.
| Reason | Description |
| 💥 Accidental deletion | This is likely the most common cause of data loss for owners of G-Drives or pretty much any other storage device, for that matter. If your G-Drive was connected to your computer at the time of deletion, then you should first check your Recycle Bin or Trash tool to see if you can restore the files from there. Otherwise, you can recover G-Tech files using a trusted data recovery program, provided the files have yet to be overwritten. |
| 💻 System corrupted | Corruption is another leading reason for data loss in G-Drive devices. This may be caused by abrupt disconnections or interruptions while the device is reading or writing. It could lead to unreadable files or the entire device becoming inaccessible. There are some data recovery programs that can detect inaccessible storage devices, but if the files are corrupted, they will remain that way when retrieved. |
| 🦠 Virus infection | Viruses can cause a wide range of issues to your G-Drive device, including hiding, corrupting, or deleting your files. So step one would be to install a competent antivirus program to oust the intruder. From there, you can use a good data recovery app to retrieve lost files from your G-Tech external hard drive, depending on what the virus did to them. |
| 🔨 Physical damage | It’s not uncommon for your G-Technology hard drive or SSD to lose data or become inaccessible when it sustains significant physical damage. These types of cases should be left to the professionals, meaning you should contact a top-notch data recovery service to see if they can help. |
How to Recover Data from G-Technology External Hard Drive
The first rule when experiencing data loss is to immediately stop using the device. This minimizes the chances of the data being affected any further. From there, connect your G-Technology hard drive to a computer and make sure that it’s recognized by system. Once that’s been confirmed, proceed to the data recovery methods below right away.
Method 1: Retrieve Data with Data Recovery Software
The most flexible way to retrieve lost files from G-Technology hard drives for Mac and Windows is by using a capable data recovery program. Disk Drill comes highly recommended on account of its exceptional recovery potential, quick scans, and polished user interface. It also includes a range of nifty features, such as:
- Support for just about any file format available, including RAW media files and other proprietary file types.
- Compatibility with the vast majority of storage devices and file systems, allowing to perform Western Digital and SanDisk data recovery from any of the brand’s models.
- Capable of external hard drive recovery on Mac and Windows computers.
If you’re not completely sold on the program just yet, you can test out its trial version that lets you recover up to 500 MB and comes with all the bells and whistles of the paid variant. Here are the steps on how you can use Disk Drill to perform data recovery on external hard drives from G-Technology:
- To get started, download the Disk Drill installation file from the Cleverfiles website and install it on your computer.
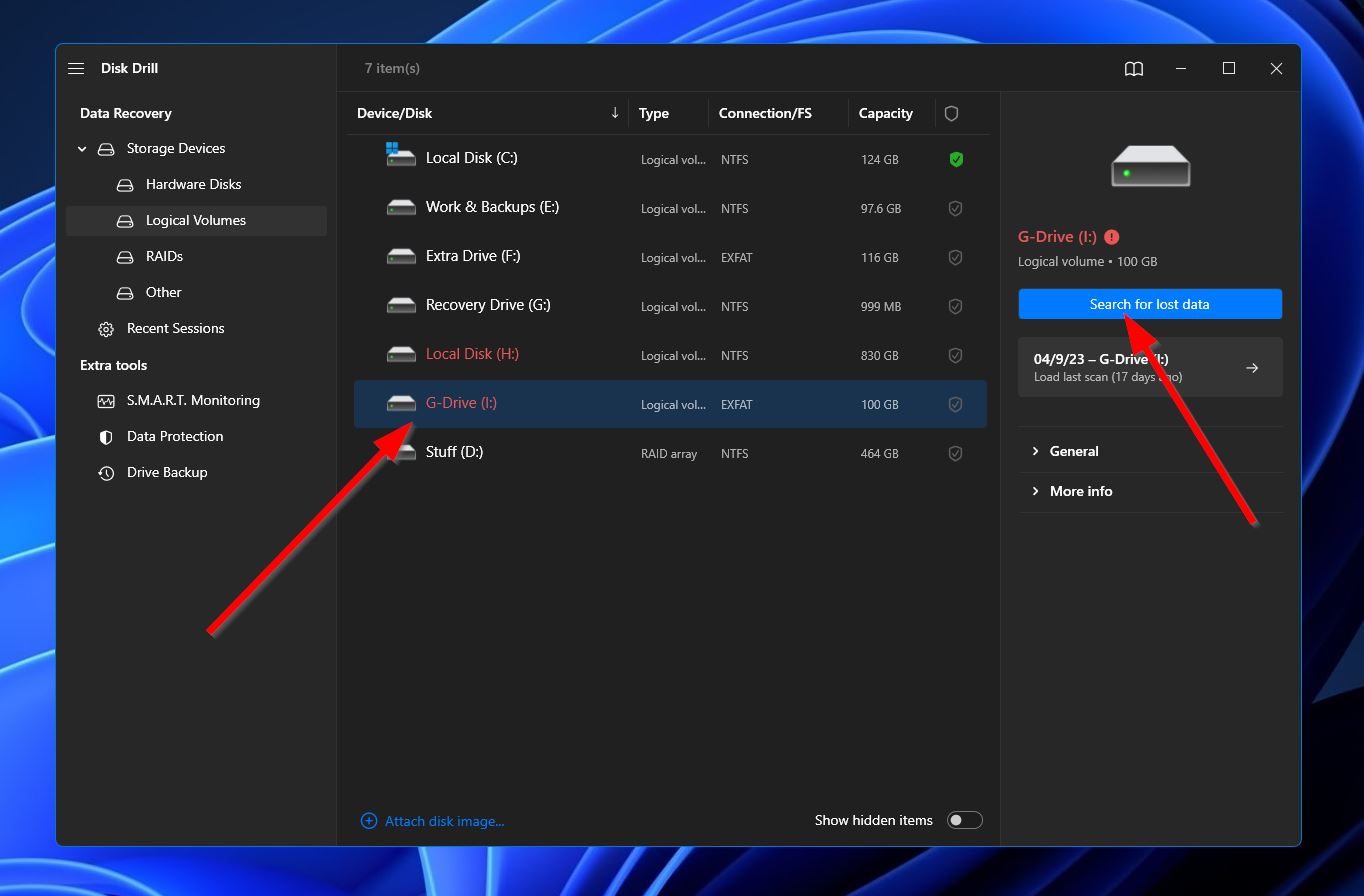
- Make sure your G-Drive is connected to your machine, then launch Disk Drill. From there, select the G-Drive from the list of available storage devices and click “Search for lost data.”
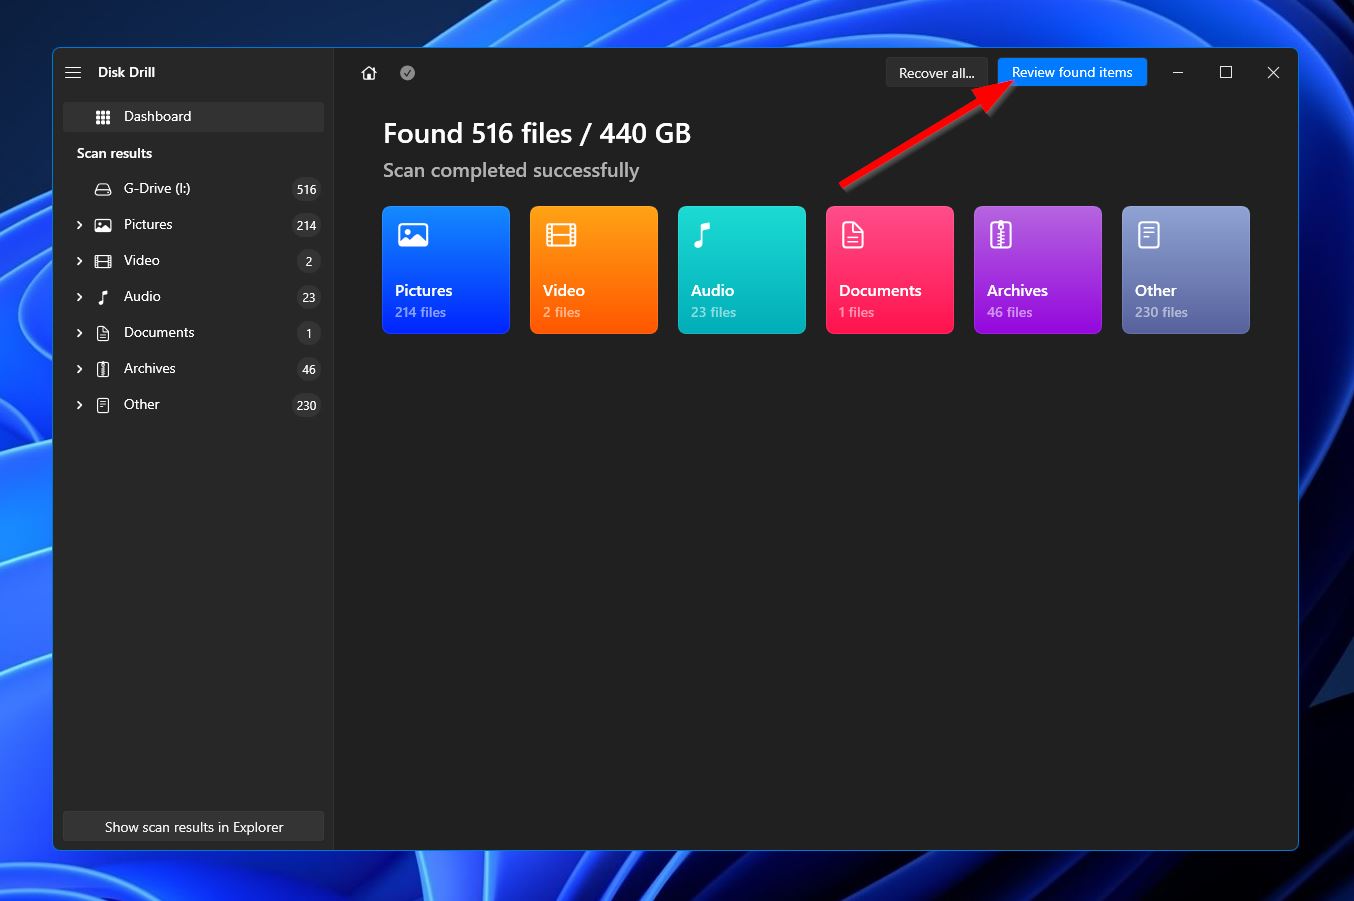
- Next, the program will begin scanning the G-Drive from any files that can potentially be recovered. This process can take quite a bit of time, depending on the overall capacity of your storage device. While waiting, you can click the “Review found files” button located at the top-right corner to check what files Disk Drill has found so far. You can also just wait for the process to complete first before clicking the same button to proceed.
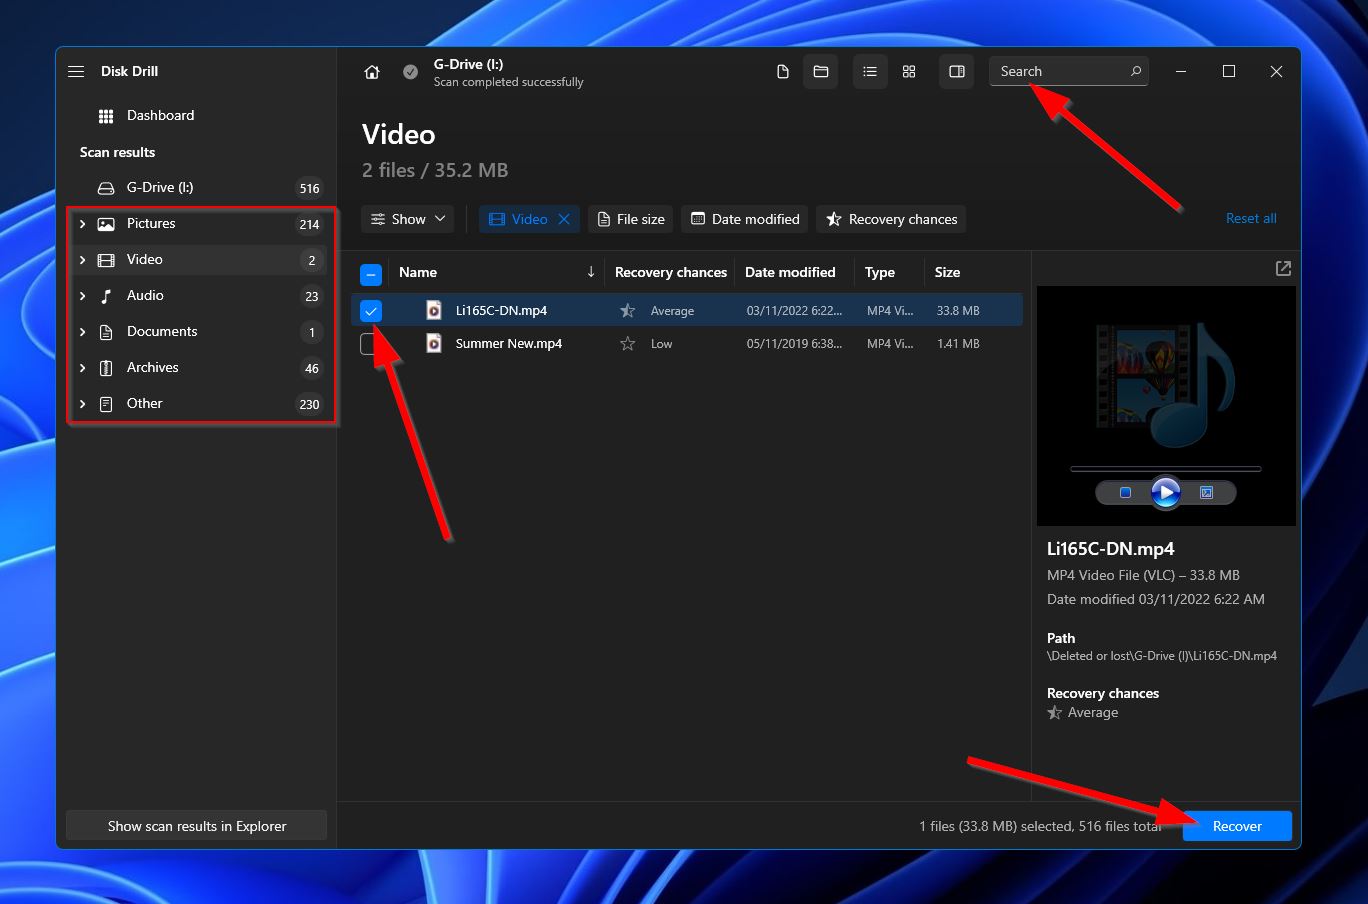
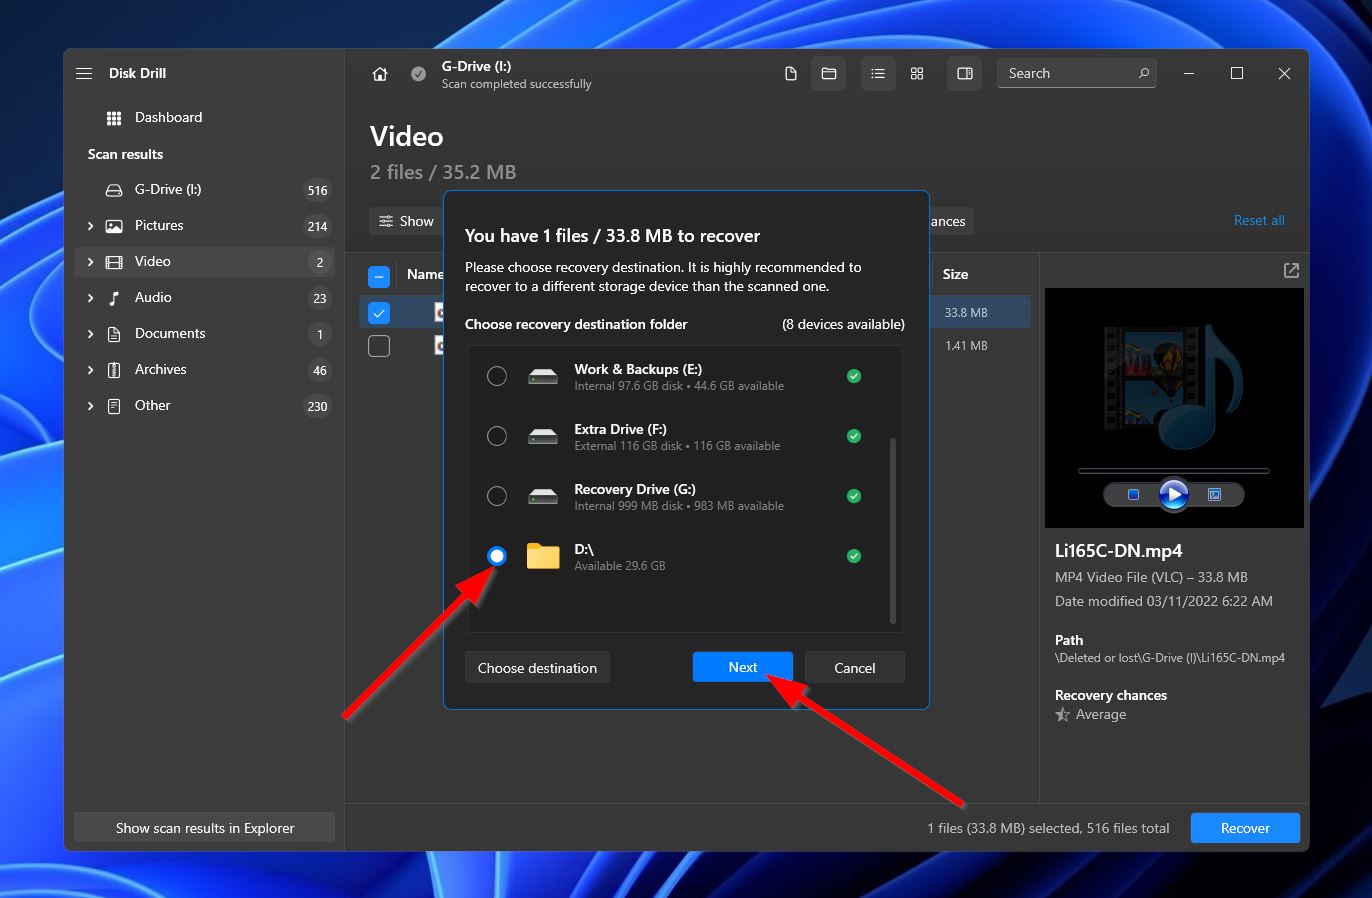
- In the results section, you can use the filtering options on the left or the search bar in the top-right corner to quickly track down the files you want to restore. Keep in mind that the search bar can look for both file names and file extensions. Once you’ve found what you’re looking for, select the files by ticking the checkbox next to the file names, then click the “Recover” button to continue to the next step.
- After that, a small window will appear where you’ll have to choose a location for your recovered files. Of course, this has to be on a different storage device than the one you’re retrieving files from. Click “OK” when you’re ready.
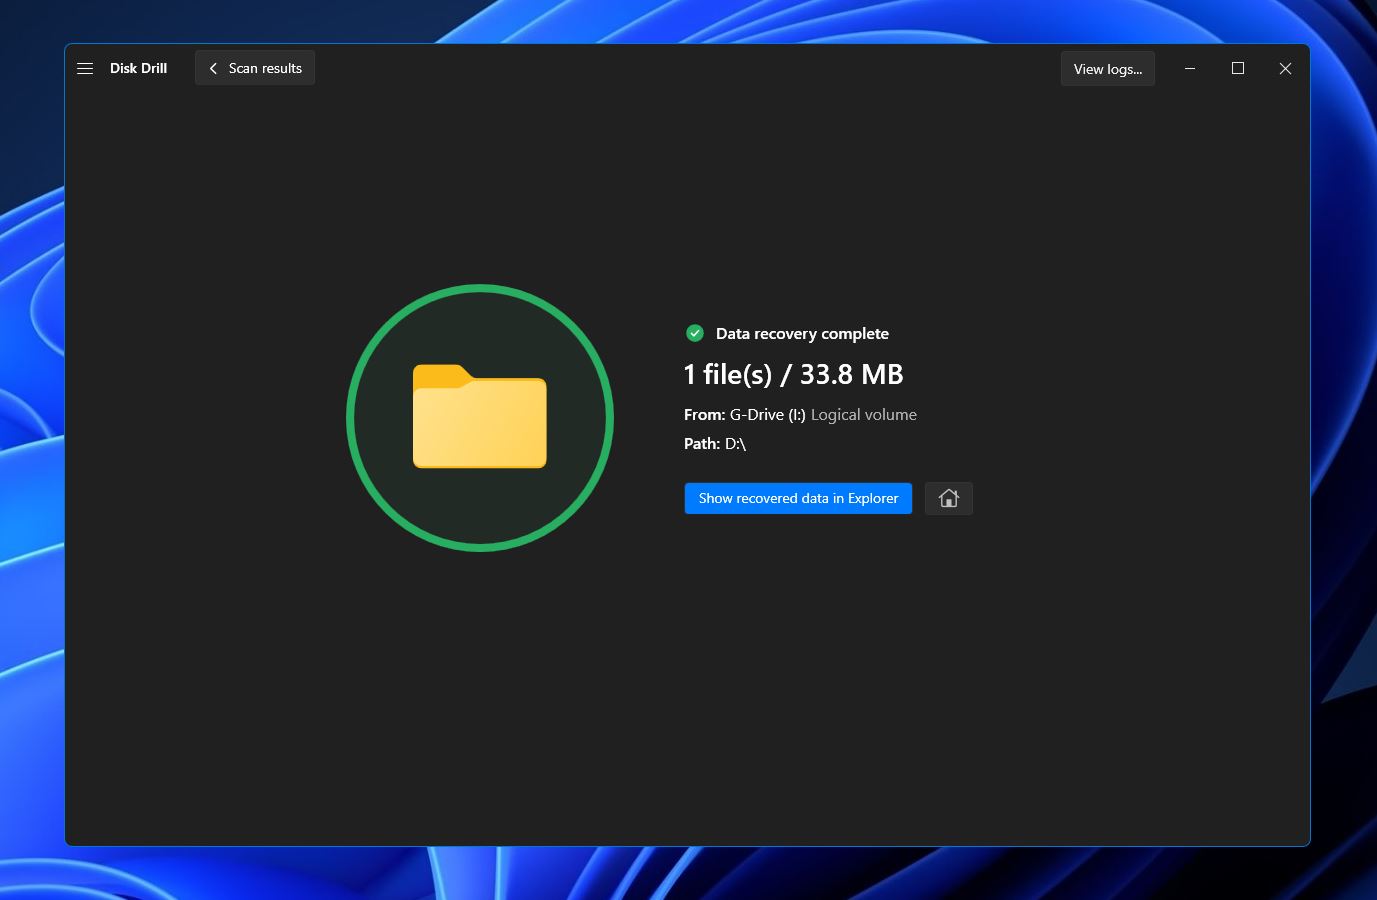
- Disk Drill will now attempt to restore the lost files. Once it’s finished, you’ll see a completion message and a “Show recovered data in Explorer” button that you can use to open the folder where your rescued files are located.
Method 2: Recover Files from a Recycle Bin/Trash
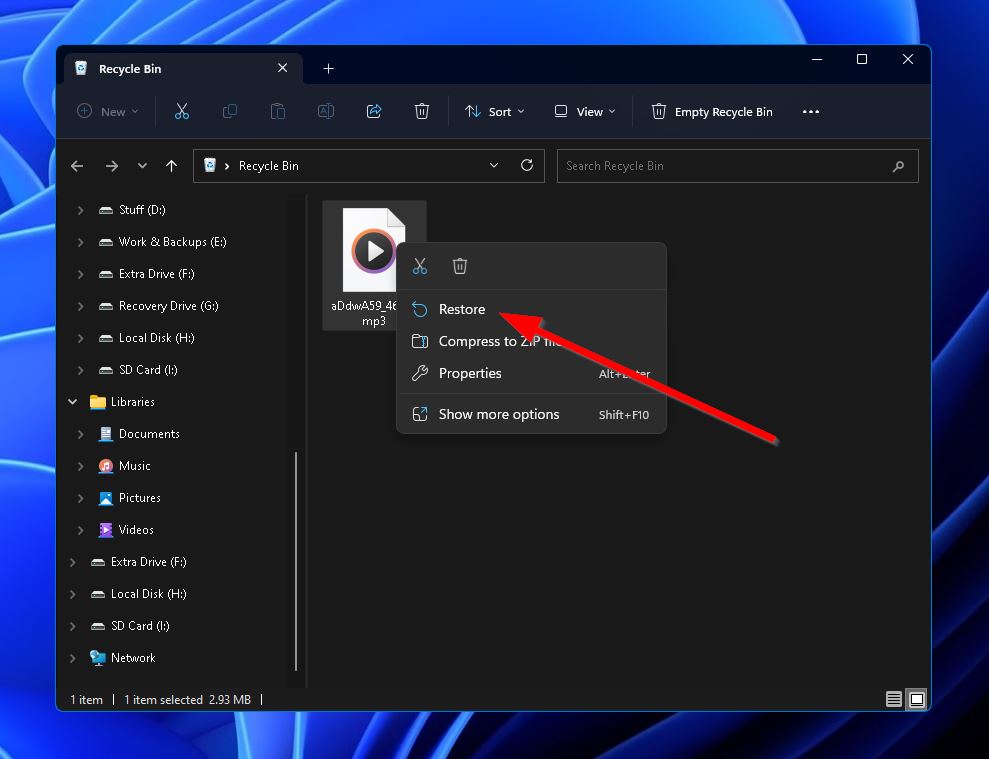
If your G-Tech external hard drive was connected to your computer at the time the files were deleted, there’s a chance those files were sent to your Windows Recycle Bin or Mac Trash tool. In these cases, retrieving the files is as easy as heading the Recycle Bin/Trash, highlighting the files in question, then right-clicking your mouse and selecting “Restore” or “Put Back.”
Method 3: Contact a Professional Data Recovery Center
If your files weren’t in the Recycle Bin/Trash tool and the data loss scenario affecting your G-Tech external hard drive is beyond the capabilities of a data recovery program, the best thing you can do is look up a data recovery service that caters to your area. These types of businesses specialize in retrieving files from more difficult data loss cases, like if the device was damaged.
FAQ:
- Corrupted file system
- Unsupported file system
- Faulty USB port or cable
- Device damage
- Lack of power


")