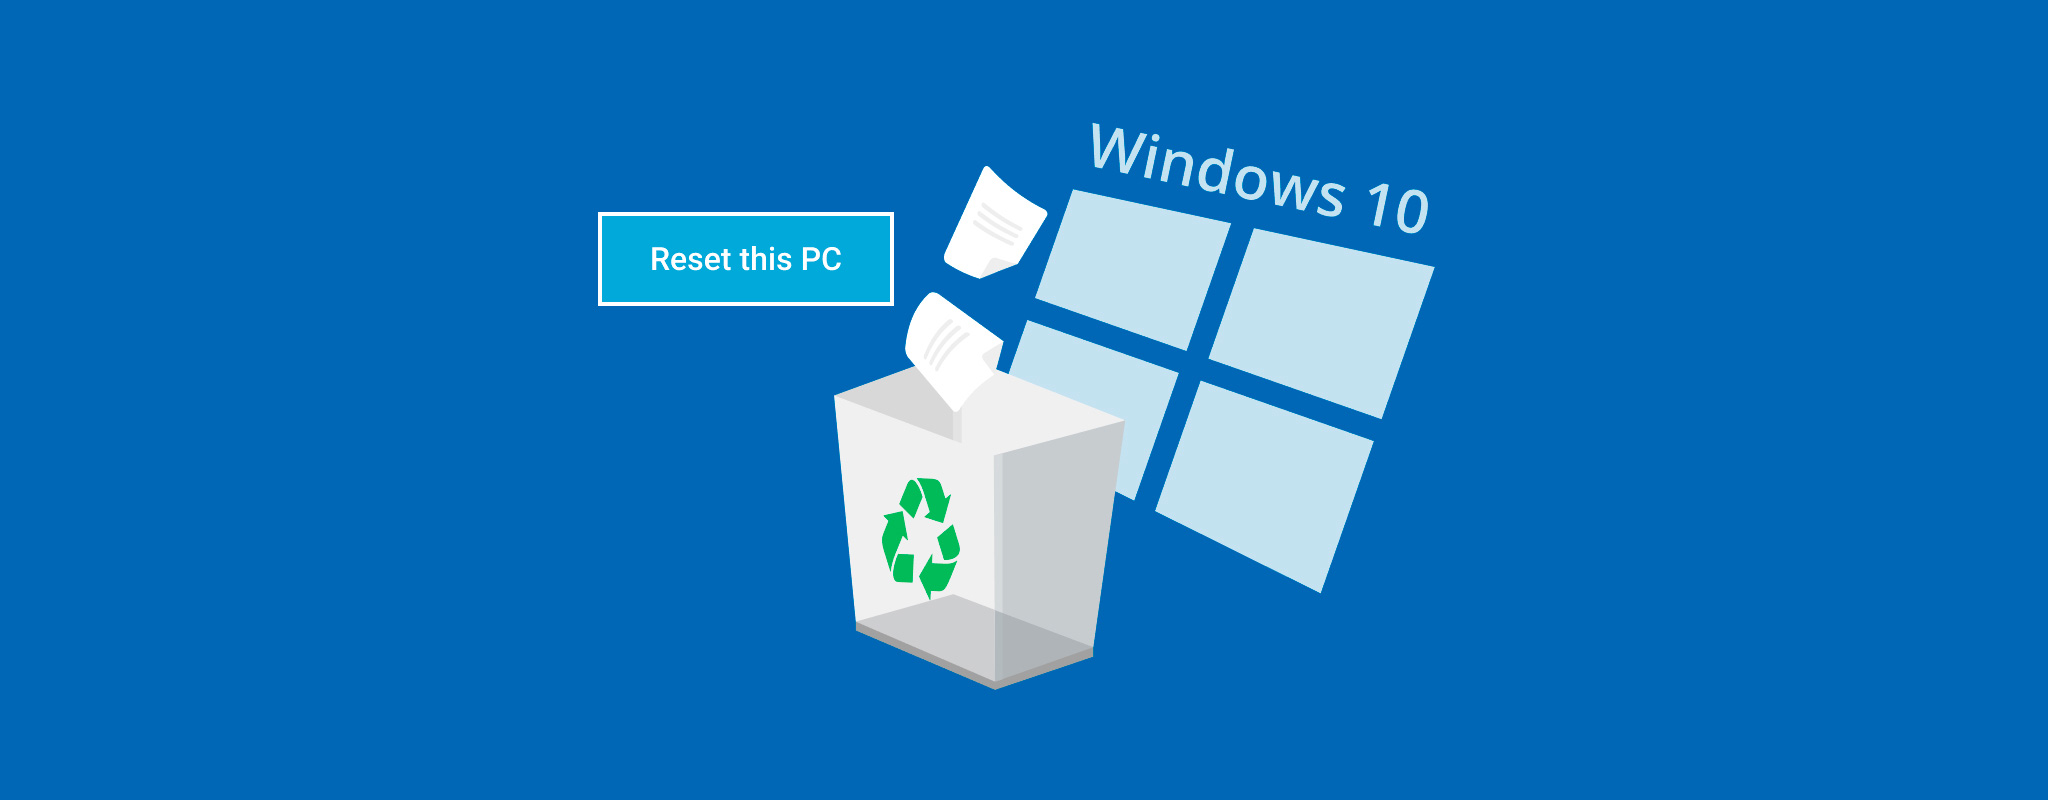
You may want to perform a factory reset on your Windows computer for several reasons. You could be encountering major operating system issues that you just can’t seem to fix, or perhaps your PC is underperforming all of a sudden.
While a factory reset is a great way to breathe new life into your machine, doing so potentially comes at the cost of losing all the data on your hard drive. Fortunately, those files aren’t exactly gone for good and can still be recovered using the right methods.
Table of Contents
Things to Know about Resetting Your PC
Windows offers multiple options when it comes to resetting your PC, but each method varies from the other in certain ways. Figuring out which kind of reset you’re looking for can be confusing, so here are the main differences between each of the approaches:
| Method | Description |
| 🏭 Factory Reset | Factory Reset returns your version of Windows back to its original state when installed. Essentially, its aim is to revert your machine back to how it was when the operating system was first introduced to it. You have two options to choose from when using this method: you can either keep your personal files or remove everything. The latter leads to a simple format of your hard drive. |
| 🔄 Windows Fresh Start | Windows Fresh Start is a feature that allowed users to install a clean copy of Windows on their machine along with the latest updates. It should leave your personal files largely intact, though you would lose all installed apps, including the pre-installed ones that came with your original copy of Windows. |
| ⏳ System Restore | System Restore is a Windows tool that rolls your OS settings back to a pre-defined point. While it shouldn’t affect any of your personal data, any programs or drivers that were installed after the restore point was created will be uninstalled. |
Depending on which option you select, resetting your Windows PC could lead to the loss of some or all of your files. The good news is that this is the result of a simple format, meaning that the data loss isn’t necessarily permanent. The files should still exist on the hard drive, it’s just that their addresses were removed, so Windows is no longer able to locate them.
That being said, recovering the files depends on a certain degree of luck. After all, there’s a good chance the Windows reinstallation during the factory reset process ended up overwriting some of them. This could lead to corrupted files here and there, but most of your data should be available for recovery.
How to Recover Files After a Factory Reset
There are multiple ways of recovering lost files on Windows. You can use data recovery software or make use of a professional data recovery service. Here is a breakdown of how each of these methods works.
Method 1: Restore From Backup
A great way to recover files that were lost in a factory reset is to restore them from a backup storage device or a cloud service like OneDrive or Google Drive. This, of course, means that you need to have backed up your files prior to the reset.
OneDrive makes this easy by allowing you to create quick backups of your personal files through Settings > Backup, Manage Backup > Start Backup. If you were fortunate enough to do so, you simply need to navigate to the backup drive or cloud service and copy your missing files over to your freshly reset PC.
Method 2: Use Professional Data Recovery Software
Professional data recovery programs are designed to rescue files from a variety of data loss scenarios, such as accidental deletion, formatting, and even factory resets. Disk Drill is a particularly competent entry in this niche that boasts exceptional recovery rates, speedy scans, and a newbie-friendly user interface
It’s also compatible with all file systems that can be read by Windows, and it’s capable of retrieving pretty much any kind of file format. It even comes with a trial version that lets you test out all of the program’s features and recover up to 500MB of data for free.
- Head to the official website and click on the Download button.
- Run the setup to install Disk Drill on your computer.
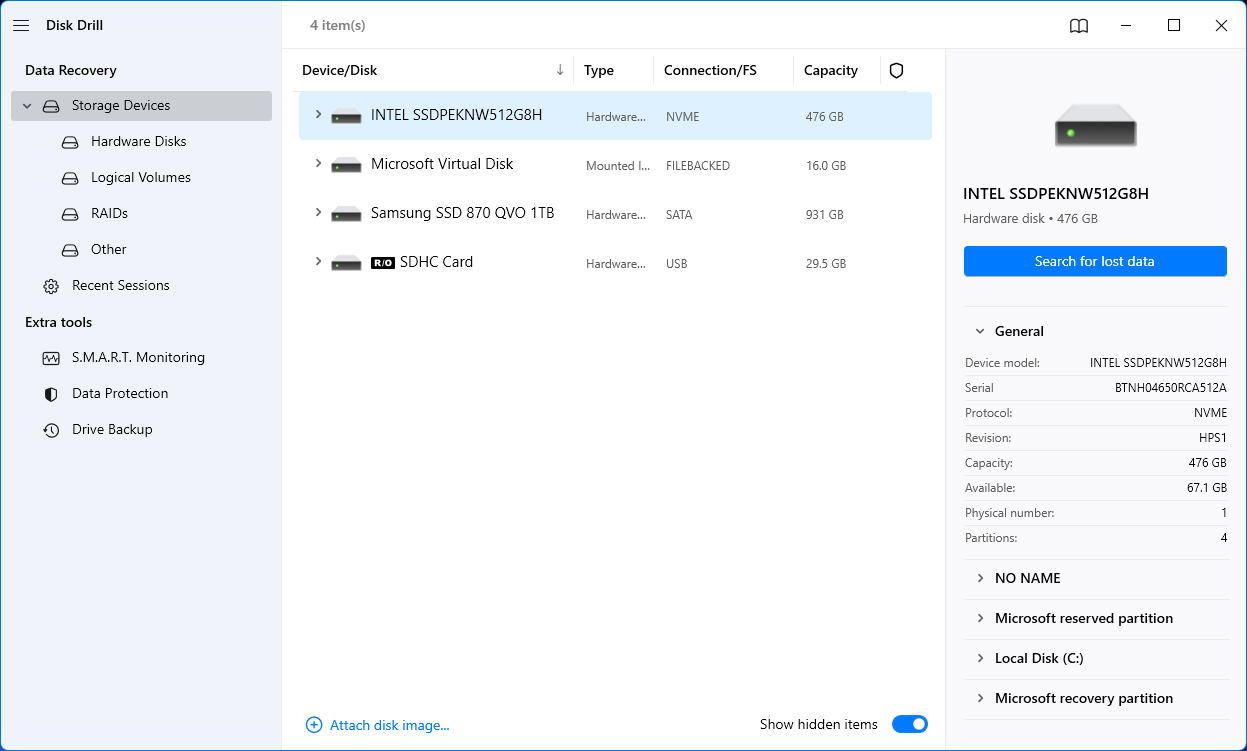
- Open Disk Drill and navigate through the initial setup screens. You will come to the main window displaying all the drives connected to your computer. Select the disk you want to scan and click on Search for lost data.
- While Disk Drill is scanning, it will keep sorting any files that are discovered by their file types. You can pause the scan and check out these files by clicking on Review found items.
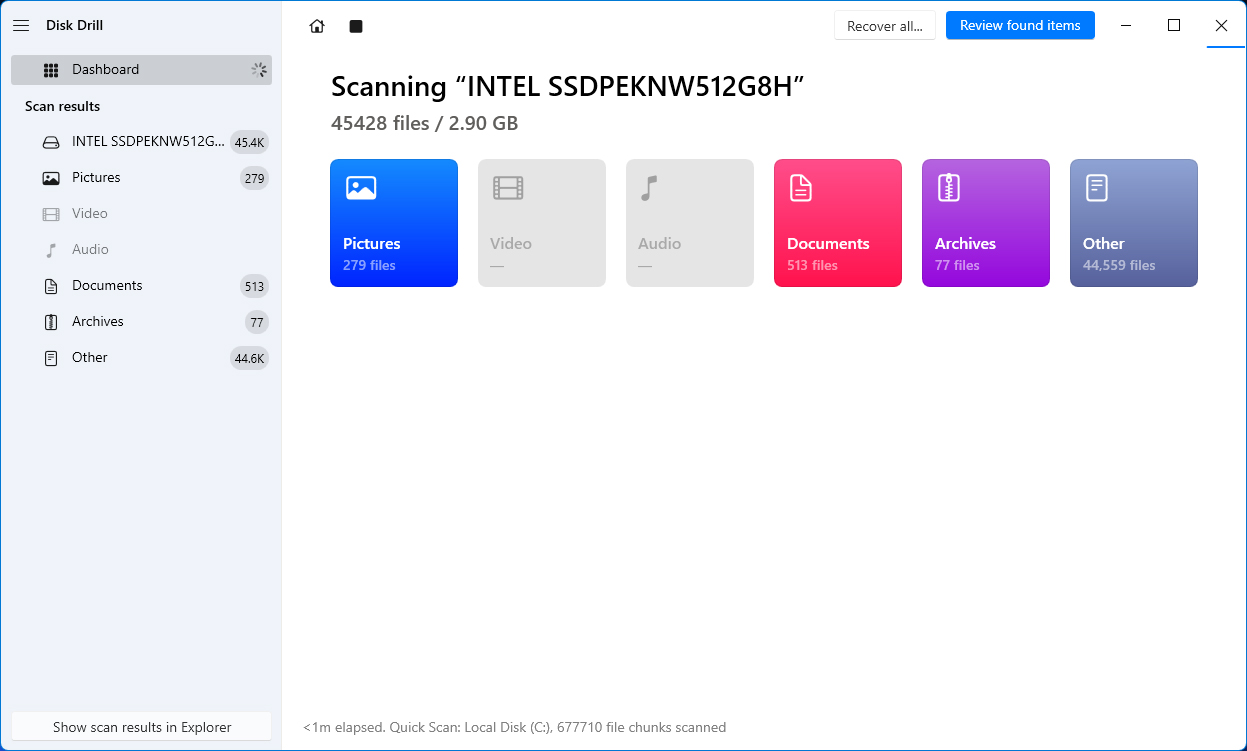
- The files will show up in a File Explorer-like view, where you can expand folders to view their contents. You can also select which type of files you want to see from the categories on the left.

- You can use Recover all button to recover all found files and folders, or you can manually check only the files you wish to recover.

- You will be prompted to choose a drive to save the recovered files to. You can also manually select exact folder, just make sure that the folder is not in the same drive you are recovering from, and you are good.

- And that’s it. Your selected files will be recovered to the location you specified. If you are using a free version of Disk Drill, choose carefully, as these files cannot be of more than 500 MB collectively. On the paid version, you are free to recover as much as you like.
Method 3: Use Free Data Recovery Software
If you have more than 500 MB of data to recover and you don’t want to pay for it, Recuva might be a good option. Unlike other data recovery tools, Recuva does not limit the amount of data you can restore in its free version. You can save as many files as you want, free of charge.
The caveat? It is not that effective. The free version of Recuva can only recover the least ‘problematic’ files, performing only a basic recovery. To restore files that are more tricky to recover, or were overwritten, you need different tools.
Still, it is a great option to recover an unlimited number of files without paying a dime.
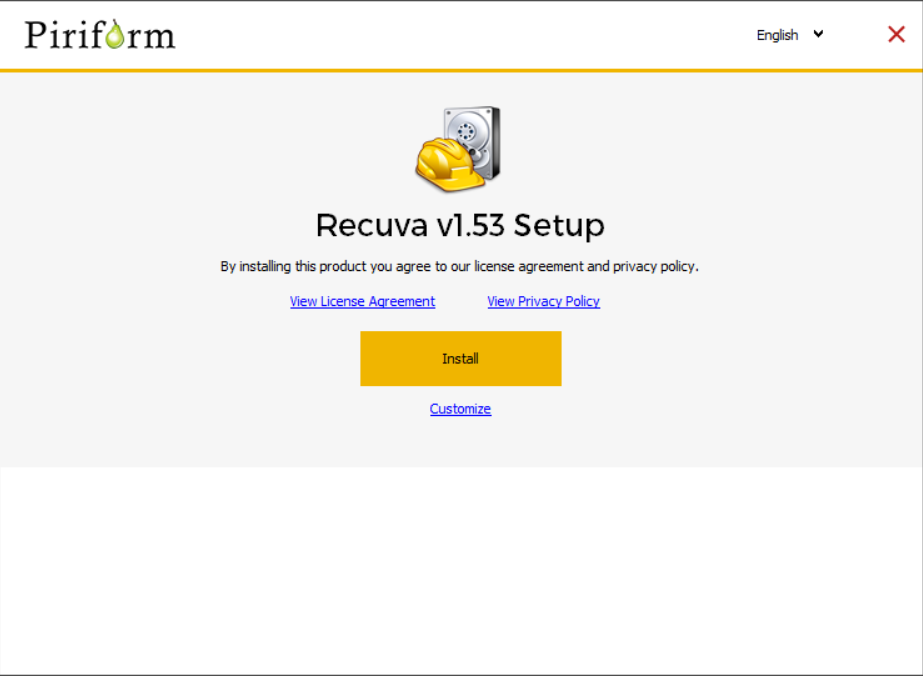
- Begin by downloading the free version of Recuva from the CCleaner website and installing it.
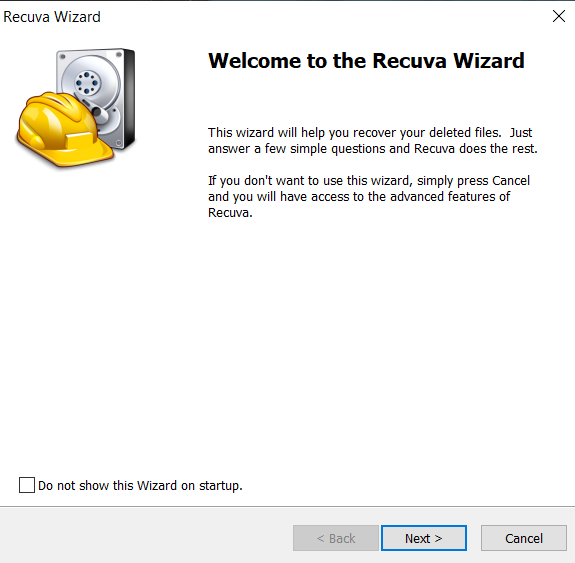
- Running the application starts the Recuva Wizard. Click Next to continue.
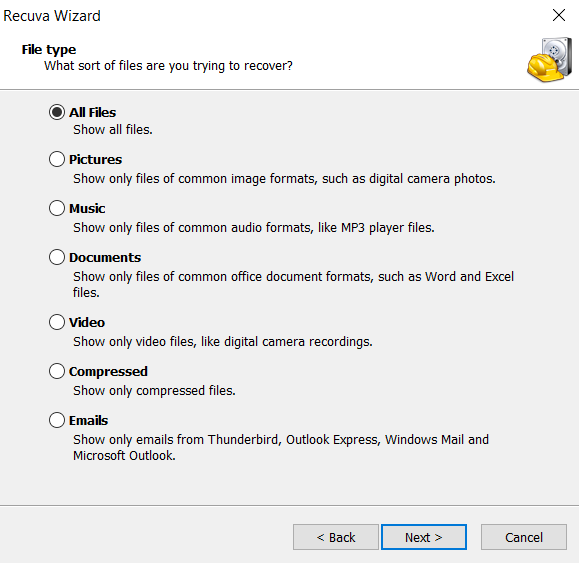
- The first thing to select is the file type. You can choose to scan for just pictures, music, documents, etc, or go with All Files to find everything.
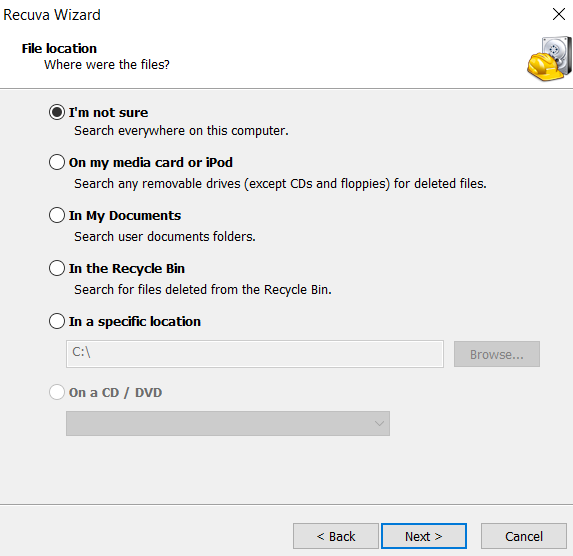
- The next screen lets you specify where you want Recuva to scan. You can choose between common file locations like My Documents or even browse to a particular folder. Using the first option scans everywhere on your computer.
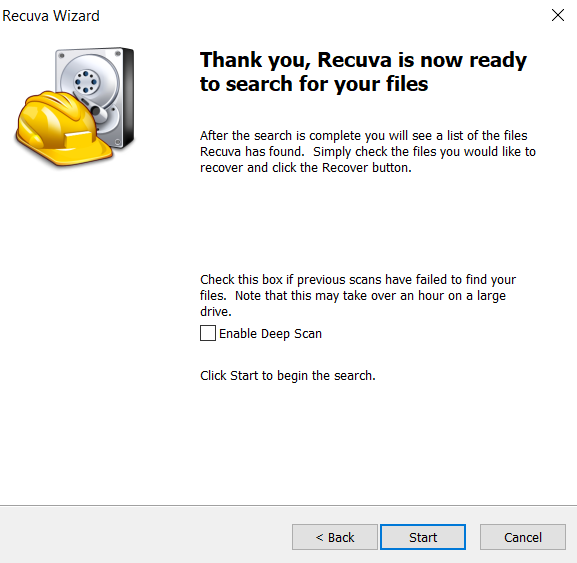
- With this, you are ready to start scanning. There is an additional Deep Scan option that you should use when the normal scan fails to turn up with your files, as it takes much longer to get results.
- The normal scan returns a list of results in a matter of minutes. All files are listed alongside their locations and chances of recovery, giving you a better look into what files you should save.
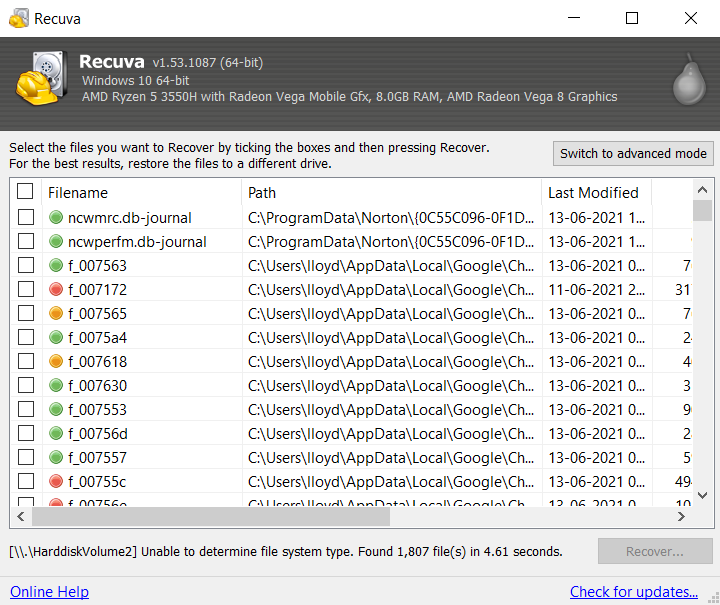
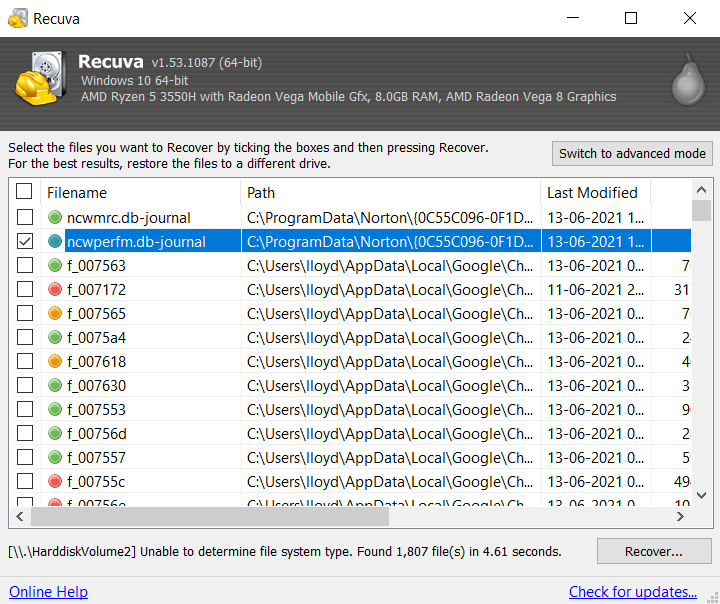
- To actually recover any of the discovered files, check the boxes and hit the Recover button.
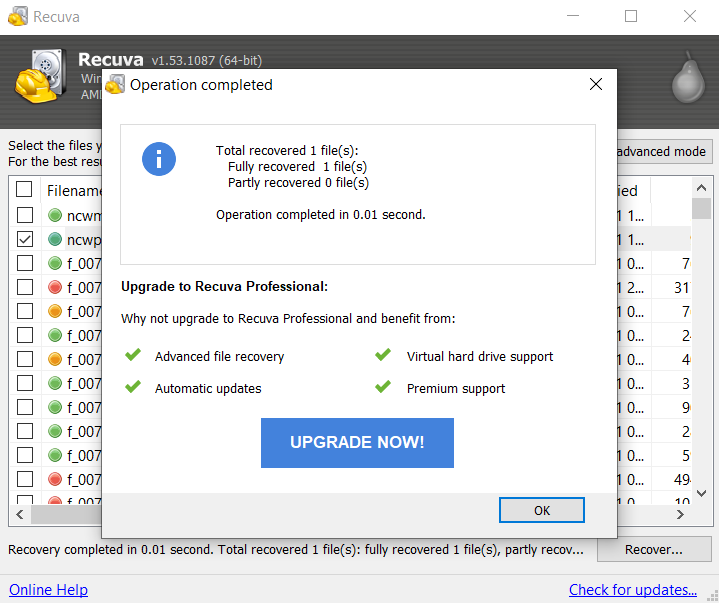
- You will be prompted to specify a location to save the recovered files to. Make sure you do not use the same drive you were scanning as that can overwrite other files.

- And that’s it. Your files will be recovered and saved to the target location.
Method 4: Apply Data Recovery Service
When all else fails, it is time to call in the experts. Many firms offer professional data recovery services to help regain lost data from any situation, even an unresponsive hard drive. If you cannot recover your files using any of the methods we mentioned, it might be worth trying this approach.
The recovery service offered by Cleverfiles is a good option, thanks to their ‘No Data – No Charge’ policy. Basically, if they fail to retrieve any useful data from your drive, you don’t have to pay a dime. They do not charge you for simply attempting a recovery.
Method 5: Restore From a System Image
Windows has a Backup and Restore feature that you can use to create a system image on a storage device, which you can later use to retrieve the entire contents of your system drive. Here’s how to restore files from a previously created system image:
- Make sure the storage device that contains your system image is properly connected to your PC. This is usually a USB flash drive or external hard drive. From there, head to Settings > System > Recovery and click the “Restart now” button next to “Advanced startup.”
- Windows will now boot your computer into its Recovery Environment. There, you’ll need to head to the “Advanced options” section and click on “System Image Recovery”.
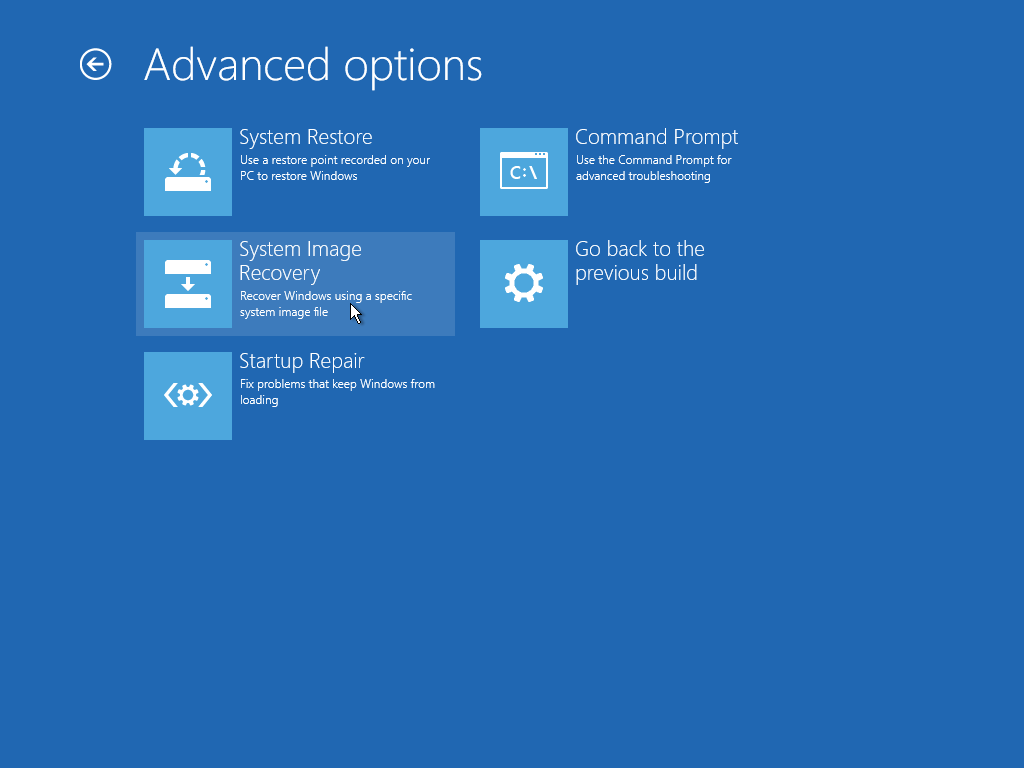
- A pop-up window will appear in which you’ll need to select a system image. Windows usually locates the appropriate system image automatically. However, you have the option to choose one manually in case Windows doesn’t find it or you want to use a different image. Then, just follow the instructions provided, and your system drive will eventually be restored.
How to Save Data When Restoring PC
While they do need to be created on a regular basis, backups are a surefire way of safeguarding your data from data loss, no matter the scenario. There are many different ways you can go about creating backups, ranging from OS-related tools to third-party apps.
Windows, for example, has built-in features like File History and System Image that can establish backups for different situations. You can also opt to simply make copies of your important files on a separate storage device or cloud storage service. That way, you can always copy them over in case essential files go missing. With that in mind, we’ve listed some effective ways to save data when restoring your PC.
Method 1: Create a System Image
Before you factory reset your computer, you should take a few moments to create an external backup using a system image.
- The System Image will backup the entire contents of your drive, so you need an external hard drive with at least as much capacity as your current disk. Plug the external HDD into your computer.
- Now navigate to Settings > Update and Security > Backup.
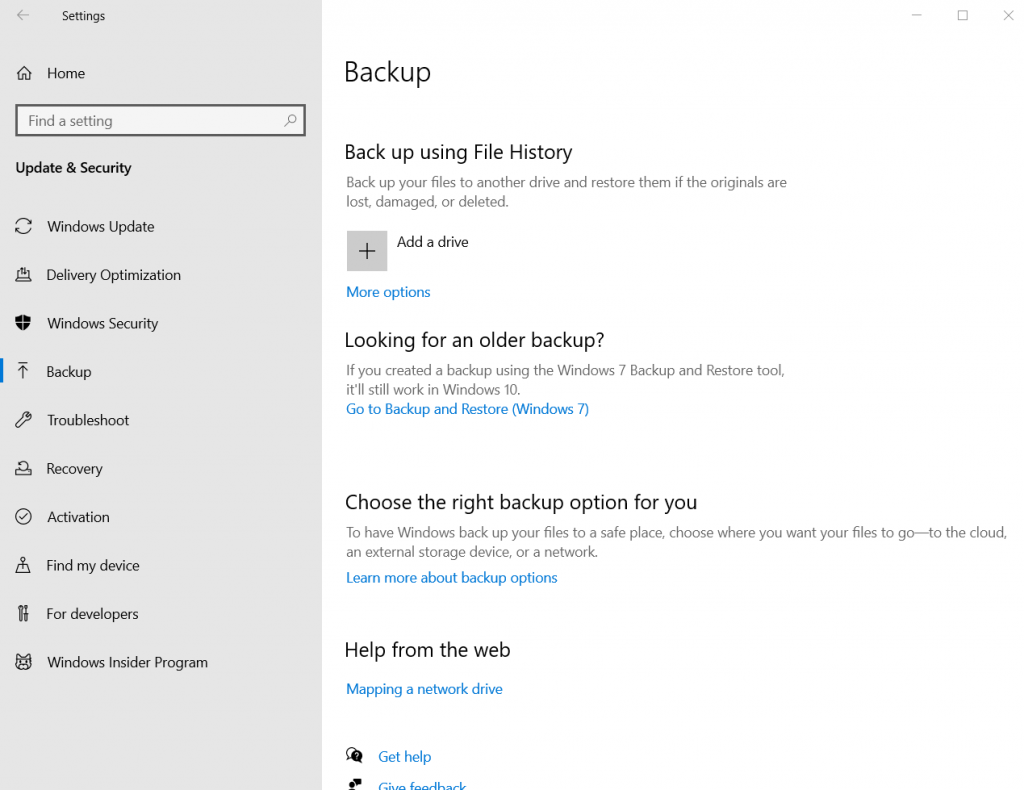
- The default backup option is by using File History. We don’t want that, so click on the Go to Backup and Restore (Windows 7) instead.

- In the window that appears, there is an option to Create a system image on the left. Click on it.
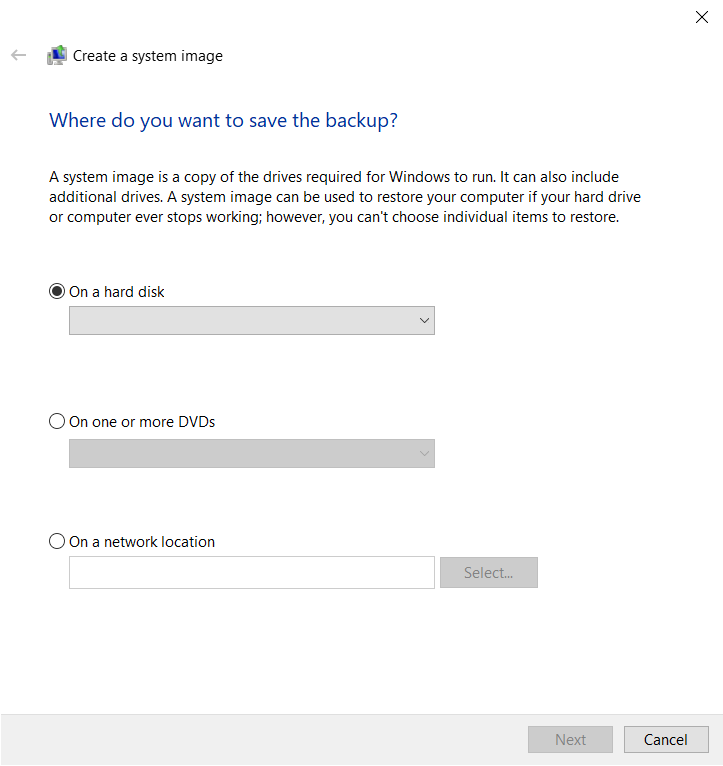
- All you now need is to choose the external drive you connected from the drop-down menu and click on Next. The entire contents of your Windows installation will be backed up to that drive.
Method 2: Copy Important Data to External Drive or Cloud Storage
Perhaps the simplest and most common way of creating a backup of important files is to just copy them to an external hard drive using Windows File Explorer or upload them to your preferred cloud storage service.
Copying Important Files To External Drive Using File Explorer:
- Navigate to the files you want to back up, then highlight them, right-click one of the files, and select the “Copy” option.
- Press the Windows + E keys simultaneously to bring up an instance of File Explorer and head to the external drive where you want to store the backup of your files.
- From there, right-click an empty space and select “Paste.” The files you copied previously will now appear on your external drive. You can also choose to paste the files into a folder of your choosing to keep things more organized.
Uploading Important Files to a Cloud Storage Service:
- Head to the OneDrive homepage and log in using your user credentials.
- Make sure “My files” is highlighted on the left-side panel, then click the “Upload” button near the top of the page and select either “Files” or “Folders”, depending on what you want to upload.
- A pop-up will appear where you’ll need to browse your computer for the files you want to upload. Once you locate the files, highlight them and click the “Open” button.
- The files will now be uploaded to cloud storage for safekeeping.
Method 3: Use Specialized Software to Create Backup
There are a lot of apps out there specifically developed for creating backups of your files. A good example of this is Perfect Backup. Here’s how to use it to create regular backups of your important files:
- Navigate to the Perfect Backup website, then download the app setup file and install it on your computer.
- Launch Perfect Backup and click “New Job” in the top-left corner of the window. A pop-up will appear, asking you to label the job. Type in an appropriate name and click “OK.”

- Head to the files or folders you want to back up and select them by ticking the checkbox next to their names. Once you’ve selected all the files, click “Next”.

- Choose the storage device where you’d like to create the backup by selecting it from the “Disk” dropdown. You can also designate the subfolder they’ll be saved in by clicking the “Choose” button next to the Subfolder header. Then, when you’re ready, click the “Next” button.

- Choose the backup type you’d like to perform. In our case, we selected “Full” and set the number of full copies to “1”. Click “Next” to proceed.

- Tick “Enable ZIP compression” if you’d like your backups compressed to save space. Then, click “Next” once more to continue.

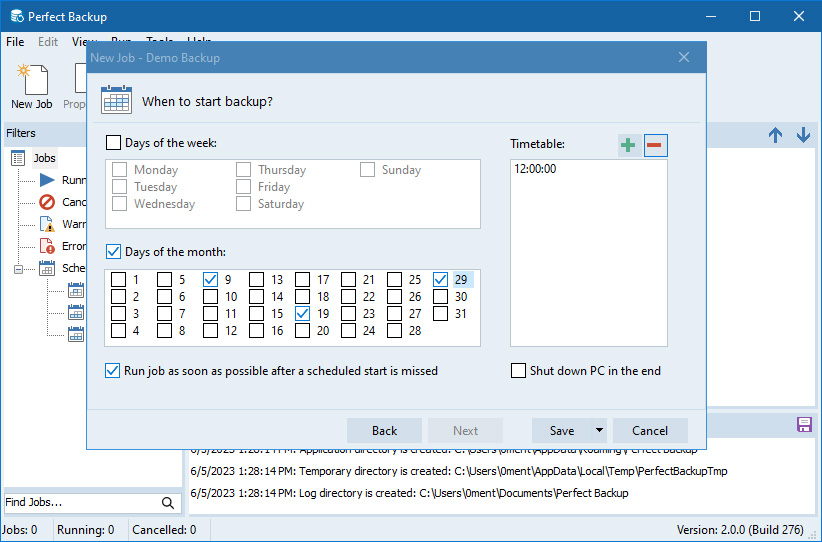
- Here you can decide whether the backup process runs on specific days of the week or certain days of the month. Whichever you choose, you’ll need to click the “+” button at the top-right corner and add a particular time for the backup process to run. There are also options you can toggle for running the process in case a scheduled day is missed and for shutting down your computer after the job is done. Finally, click the “Save” button to finalize the process. Backups will now be established regularly according to the options you selected.
Conclusion
Performing a factory reset on your PC is a terrific way to get it back in working order or get rid of all the accumulated clutter over the years. However, the biggest downside to doing this is the likelihood that you’ll lose some important files in the process.
Hopefully, following the instructions described in this guide can help you retrieve any files that were lost during the reset as well as assist you in creating backups to avoid data loss moving forward.
FAQ
- Download and install Disk Drill.
- Launch the program and scan your system drive.
- Choose the files you want to retrieve.
- Select a drive to store your recovered files and finalize the recovery process.


