 Is your CF card missing precious photos, videos, and other files? Depending on what caused the data loss, you might have a good chance of getting those files back – however, you have a limited window of time to restore them before they are lost forever.
But since CF cards are commonly used in professional photography and cinematography, you need methods that are proven and reliable.
So we wrote this short but in-depth guide on CF card recovery on a Mac. We cover why it happens and demonstrate the exact steps to get them back. Read on!
Table of Contents
Reasons Why You Lose Data on CF Cards and Their Recoverability
Data loss can occur on CF cards for a number of different reasons. We’ll briefly summarise them in this section, as well as provide the challenges and conditions for recovering data for each of these reasons.
- Accidental deletion or formatting – Accidental deletion or formatting is common with CF cards due to their frequency and intensity of usage in professional settings. If it only happened recently, data recovery has a high possibility of success – even if you emptied your Trash folder.
- Memory card corruption – CF cards are also very prone to corruption simply because of how frequently gigabytes of data get written to and read from them (which increases the likelihood of those processes getting interrupted). Malware infection is also a strong possibility whenever you transfer your data to and from computers you’re not familiar with. However, recovering data from corrupted SD cards
- Mechanical issues – Mechanical issues are malfunctions that prevent your operating system from even detecting the CF card, such as worn down ports on your Mac, bent or broken contact points on the CF card, or a problem with the USB card reader itself. Unless you’re restoring a (cloud) backup, your CF card needs to be detectable for other solutions to work. See this section for more details.
- Physical damage – Storage devices that are physically damaged won’t operate as intended. Further attempting to restore data from a physically damaged CF card will most likely cause permanent data loss. We strongly recommend that you send your memory card to a professional data recovery service. We wrote about them briefly in Method 4.
4 Ways to Restore Lost and Deleted Files from a CF Card
In this section, we cover 4 ways to restore missing files from a CF card. We start with the easiest and unintrusive methods – so you can start with Method 1 and work your way up.
Method 1: Restore CF Card Files From Trash or .Trashes
In most cases, deleting files from your CF card while using your Mac sends those files to the local Trash folder (on the rightmost side of your dock). In other cases, a hidden .Trashes folder is created on the CF card itself.
This serves as an alternative temporary storage for the files deleted from your memory card (if you don’t have free storage space after deleting files, this is why).
We’ll show you how to use both folders to recover your CF card data.
Restore files from local Mac Trash folder:
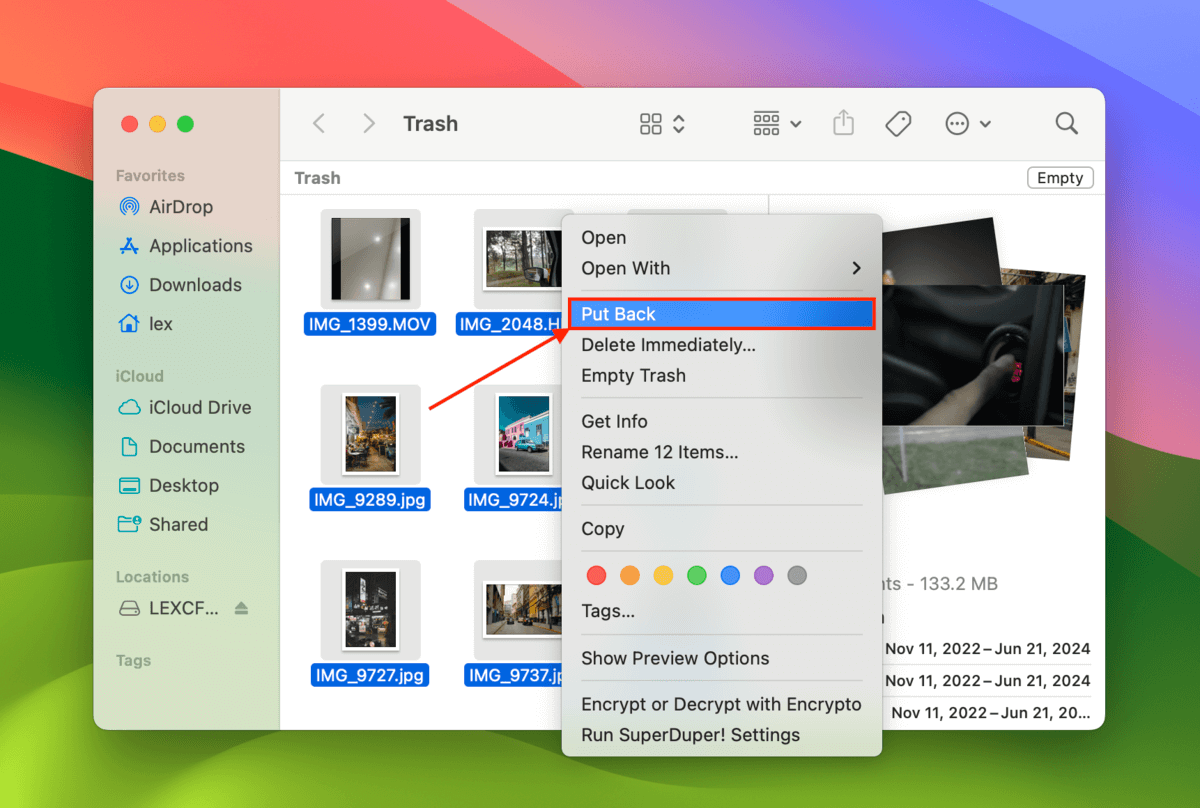
- Connect your CF card to your Mac and open the Trash folder on your dock.
- Click on the file or folders you want to restore or drag a box around multiple items to select them all at once. Then, hit right-click > Restore.
Restore files from .Trashes folder on CF card
- Connect your CF card to your Mac. Then, open its root folder in Finder.
- Hit the Command + Shift + > keys at the same time to show all your memory card’s hidden contents.
- If the .Trashes folder appears, you can copy its contents to a safe location as normal.
Method 2: Download Your Files From a Cloud Backup
Do you have any cloud backup tools installed and enabled on your Mac, like iCloud, Google Drive, or Dropbox? If so, it may be worth checking its cloud server to see if your files were automatically backed up.
Some – if not all – cloud backup services have some variation of an automatic backup feature. For example, Dropbox can be set up to automatically upload any photos and videos it finds from an external storage device to a folder called Camera Uploads in the server.
Files that have been uploaded to a major cloud service can be downloaded online using any browser. We’ll show you how it works.
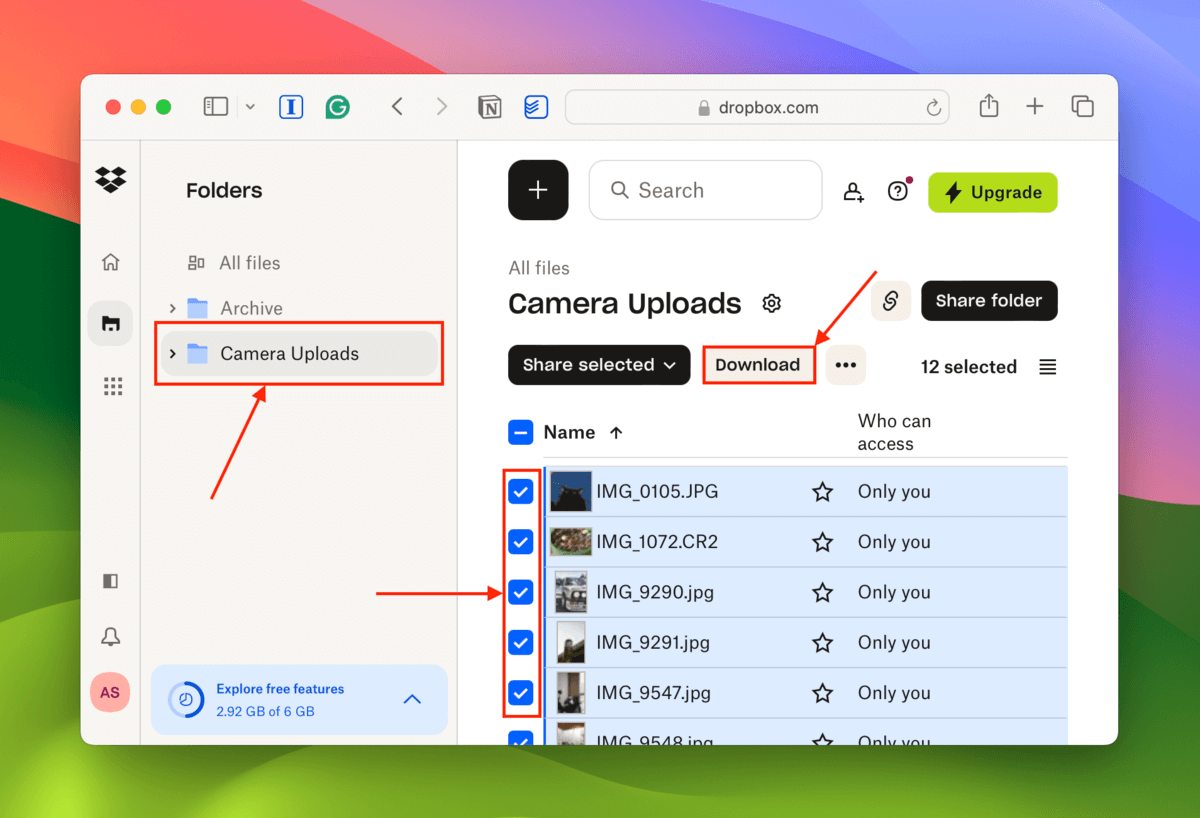
- Open a browser and login to Dropbox.com with your credentials. Then, locate and open a folder called Camera Uploads.
- Mark the boxes beside the photos and videos you want to download. Then, click the Download button.
Method 3: Use CF Card Recovery Software
CF card recovery software is a tool you can install on your Mac that is capable of restoring lost, deleted, and corrupted files from CF cards using the files’ actual binary data (as well as metadata like file name, creation date, etc.).
We’ll demonstrate the recovery process using Disk Drill, one of the best data recovery tools for RAW photos and videos. It supports pretty much all standard photo and video file extensions like JPG, PNG, BMP, and GIF. It also supports almost all mainstream proprietary extensions, including CR2/CR3/CRW (Canon), GPR (GoPro), NEF/NRW (Nikon), SRF/SRW (Sony), and much, much more.
Disk Drill also has one of the best preview features on the market – almost every single file type we threw at it was previewed successfully, even videos! This can really help determine whether your files will work after recovery. We’ll show you how to use CF card recovery on a Mac.
While Disk Drill and other top data recovery tools have often succeeded in recovering gigabytes – and even terabytes – of lost files, professional data recovery services can offer a higher success rate than DIY solutions… but expect to spend more. See the next section for more details.
- Download Disk Drill and install it on your Mac (your CF card should not be connected at this time).
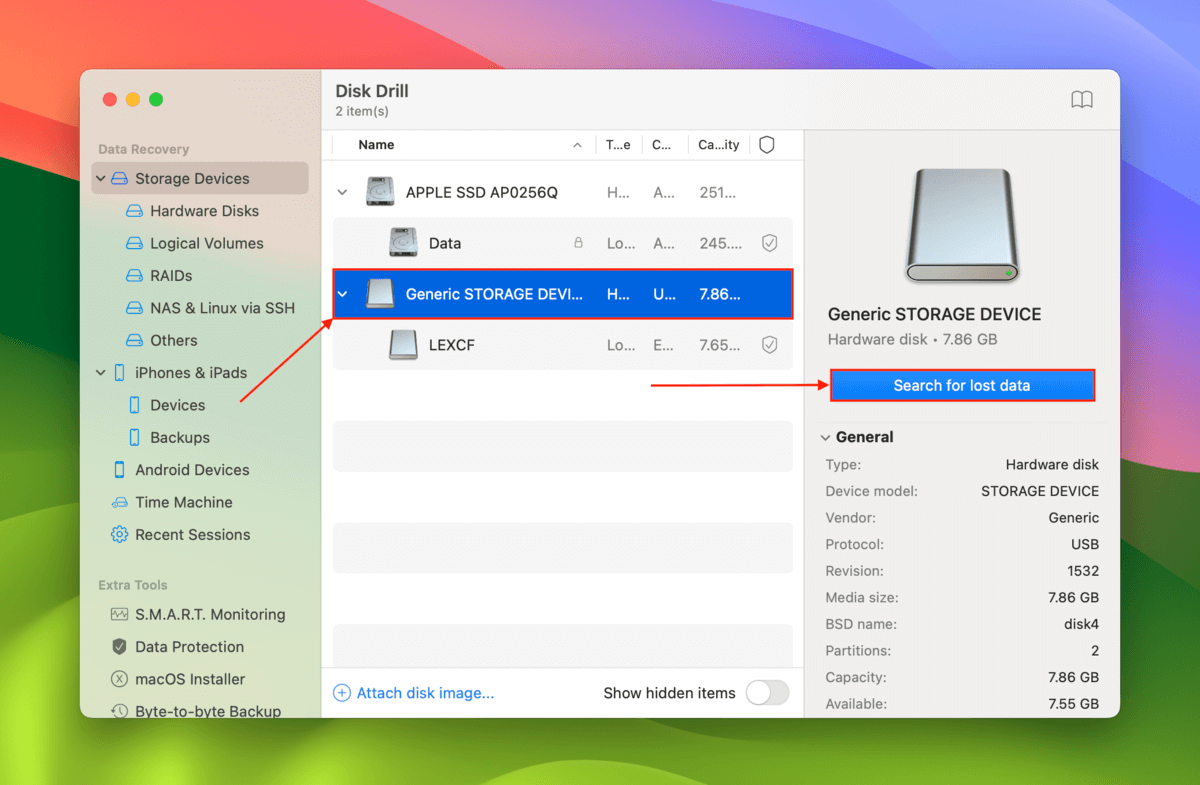
- Connect your CF card to your Mac using a USB card reader. Then, open Disk Drill.
- Select your CF card from the list of disks (we recommend scanning the entire disk, not just the partition) and click Search for lost data.
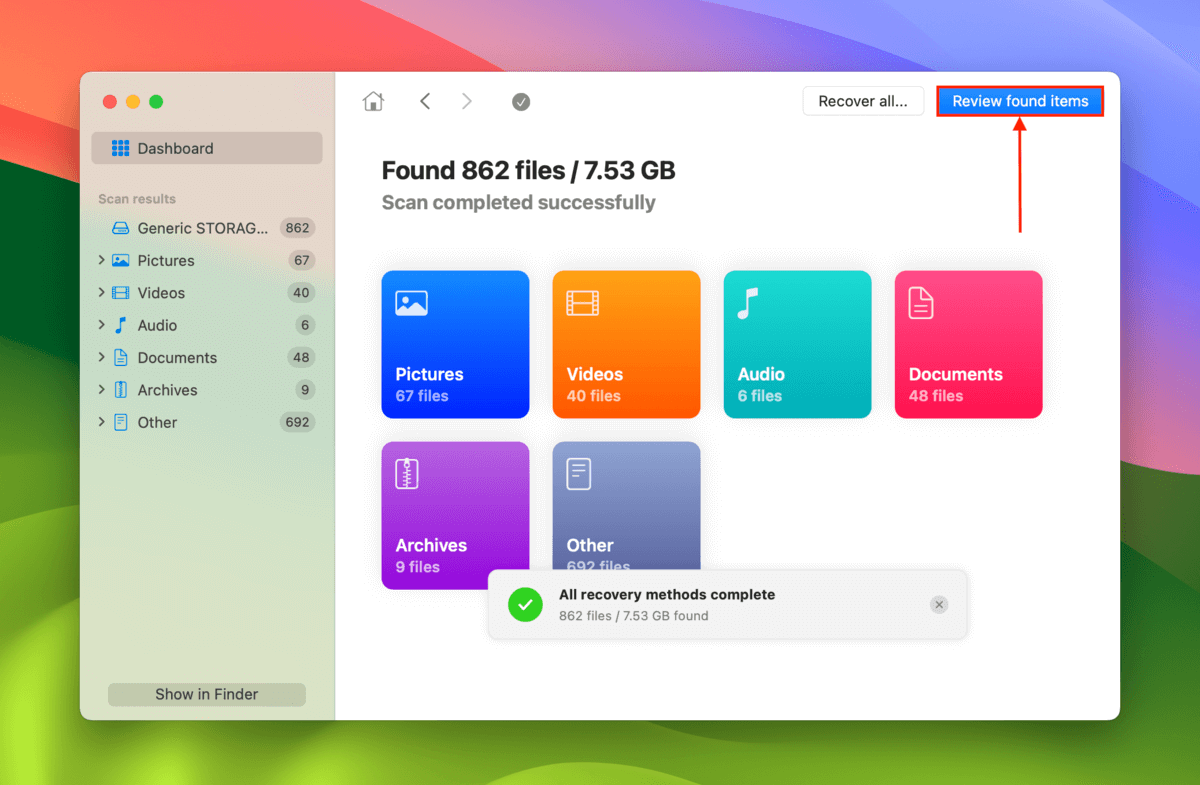
- Once Disk Drill is done scanning your CF card, click Review found items.
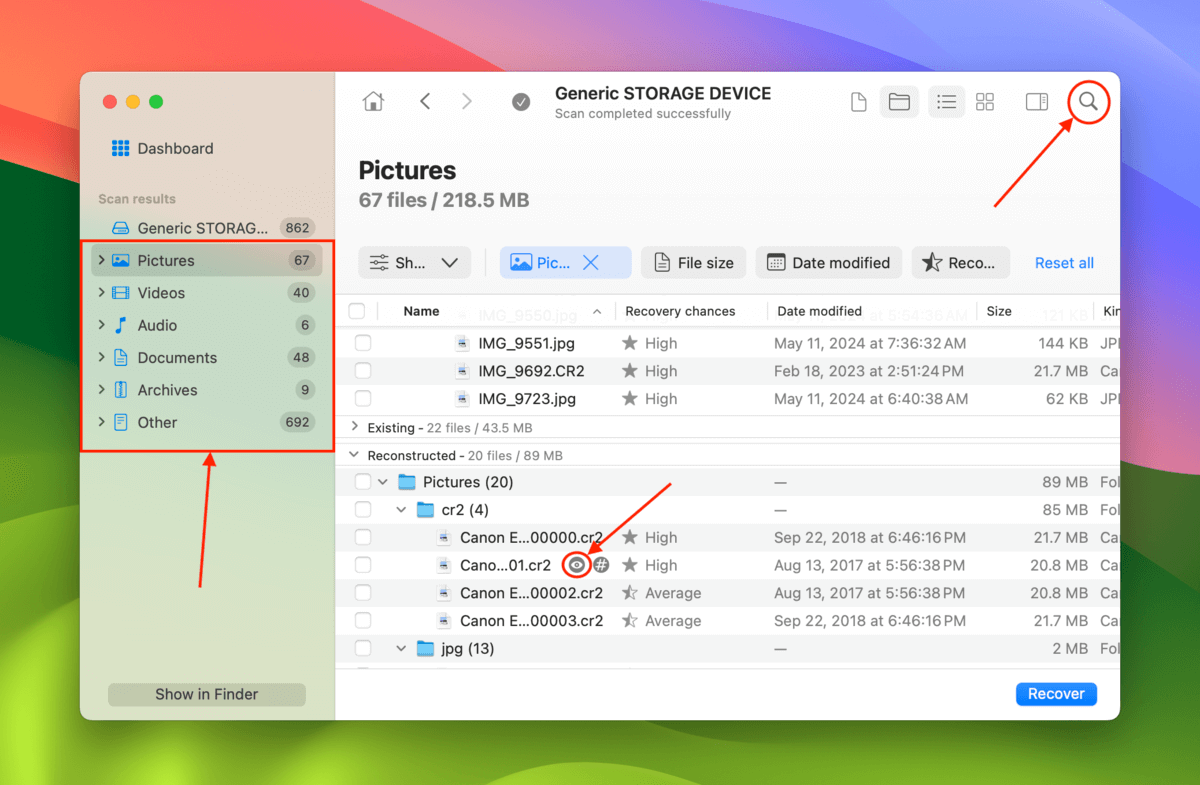
- You can select the photo or video options in the left sidebar. The search is especially useful for narrowing the scan results by file name or even file extension. Make sure to click the eye button to preview your files (the eye appears beside a when you hover your mouse next to it).
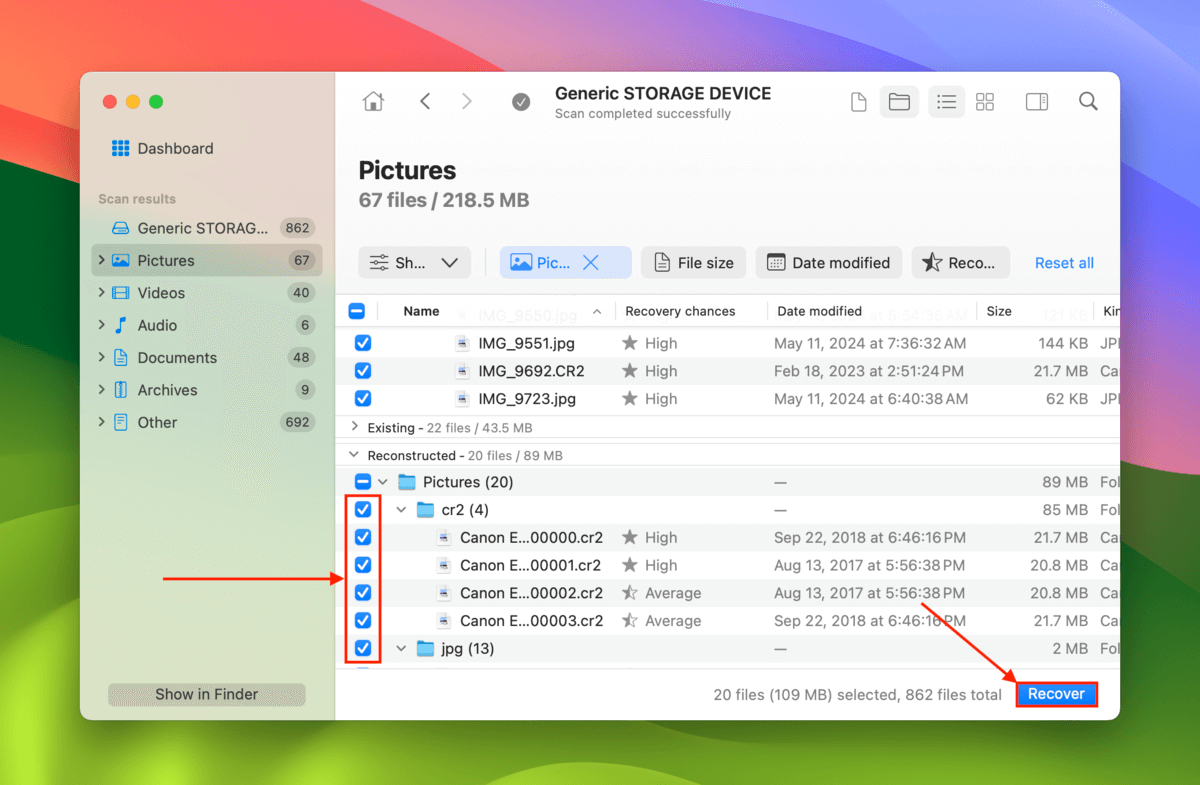
- Select the files you want to restore by marking the boxes beside them. Then, click Recover.
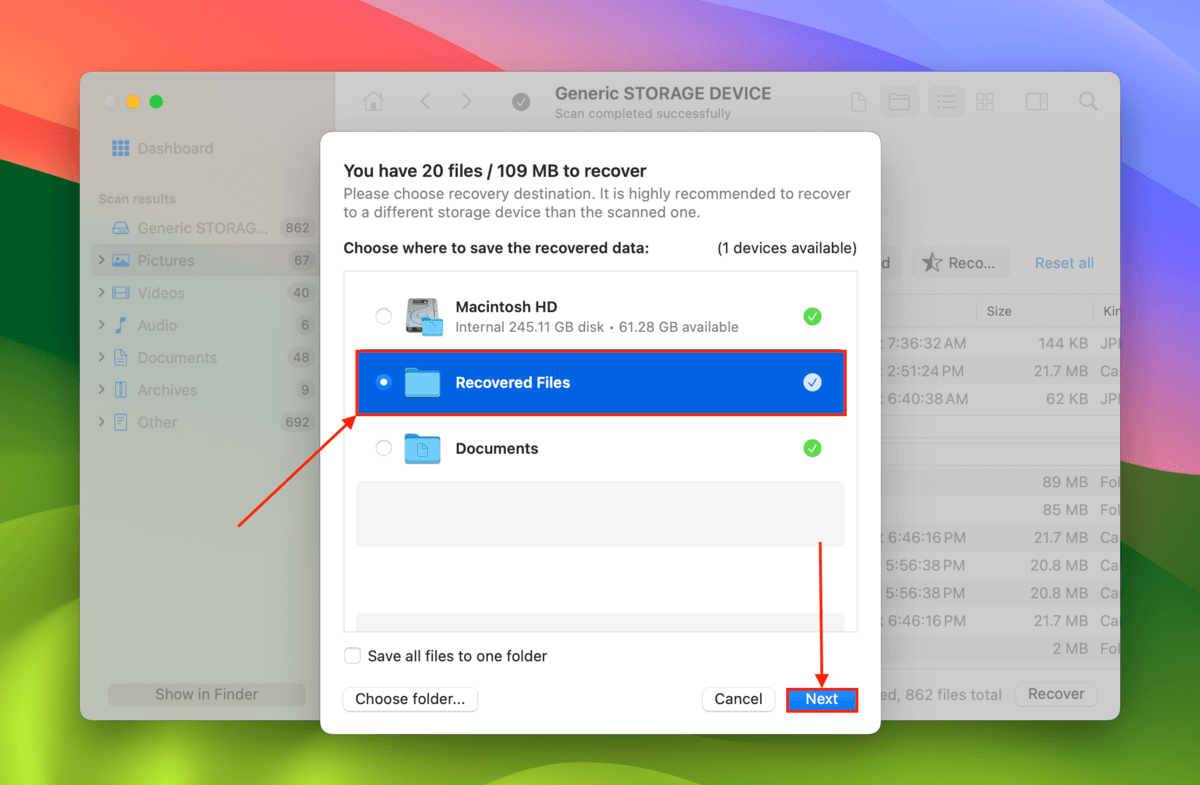
- Choose a folder on your Mac (NOT on your CF card) where you want Disk Drill to restore the found files. Finally, click Next.
You’ll need to purchase a license to actually recover your files, but you can scan and preview your data as much as you want. If you want to try a free app, we recommend PhotoRec, which is also excellent at restoring lots of different file extensions. However, its signature database isn’t as big as Disk Drill’s and it lacks a modern interface, a preview feature, and more advanced scanning tools.
Method 4: Professional Data Recovery Service
A professional data recovery service is a business that can restore data from CF cards (and other storage devices) for a fee. They invest in advanced software, hardware, and expert talent so they can restore files that consumer software and regular computer shops can’t.
Data recovery shops can also offer a much higher success rate for easier recovery operations compared to other solutions, so consider using one if you need the absolute maximum success rate for your CF card (e.g. restoring professional client photos).
There are a lot of data recovery services around the world, which makes it impossible to recommend one shop that works for all readers. Instead, here are practical tips that can help you look for a good one:
- Look for a No Data – No Charge guarantee. No Data – No Charge means that you only get charged the recovery fee if the shop successfully restored the specific data you wanted. This info can usually be found on the shop’s website or you can ask customer service.
- Check if they offer free diagnosis. Most shops can give you a rough quote over the phone but others will even evaluate your drive in their lab for free. Just make sure to ask how large the possible gap is between the initial estimate and the final quote.
- Read LOCAL reviews. Some data recovery centers have dozens of branches all over the globe. Often, some branches perform much better than others, so make sure to check the branch you intend to send your drive to. Also, make sure to check recent reviews with different star ratings.
- Consider shipping costs. Free inbound shipping is a common offer from well-known shops. However, return shipping usually isn’t free, so factor that into your budget.
- Ask if they have a cleanroom. A cleanroon isn’t necessary for simple data loss cases, such as recent accidental deletion or formatting. For more complex cases that require disassembly, a cleanroom is necessary to protect the drives’ internal components from damage.
- Consider emergency services. Need to submit the missing photos and videos to a client or your team ASAP? Many data recovery shops offer 24/7 emergency services. In other words, they will prioritize your device and assign specialists to work on it non-stop. However, note that emergency services typically cost more than standard recovery jobs.
Can’t attempt recovery because your CF card’s not working?
As we mentioned at the very beginning of this article, your Mac needs to detect and recognize your CF card before most data recovery solutions will work.
We can help you with that too – read our guide on how to fix a CF card that isn’t recognized using a Windows or Mac computer.


")