 Apple’s various MacOS were generally designed with simplicity in mind, catering to both newbies and tech-savvy users alike. Nonetheless, it’s not uncommon for some people to have difficulty locating a certain file or folder. This is especially true for users who aren’t very familiar with computers or people who are used to different operating systems like Windows or Linux.
In this guide, we’ll teach you how to see all files on Mac hard drives using various methods. We’ll also go through what to do if you just can’t seem to find the files you’re looking for.
Table of Contents
3 Ways to See All Files on Mac Hard Drive
The macOS is pretty accessible by nature, allowing you to reach different aspects of your computer with minimal effort. However, there are times when you’ll want a good view of your files or folders to manage hard drive space or troubleshoot a faulty app. Of course, you could also just be trying to track down a file that’s gone missing. Whatever the reason, here’s how to see all files on Macs in different ways.
Method 1: Use Finder to Navigate Around Your Drive
Finder is a macOS tool similar to Windows Explorer. It’s the default file manager and UI on Mac computers that allow you to maneuver all the different files and features. Here’s a quick and easy step-by-step guide on how to view all files on Mac using Finder:
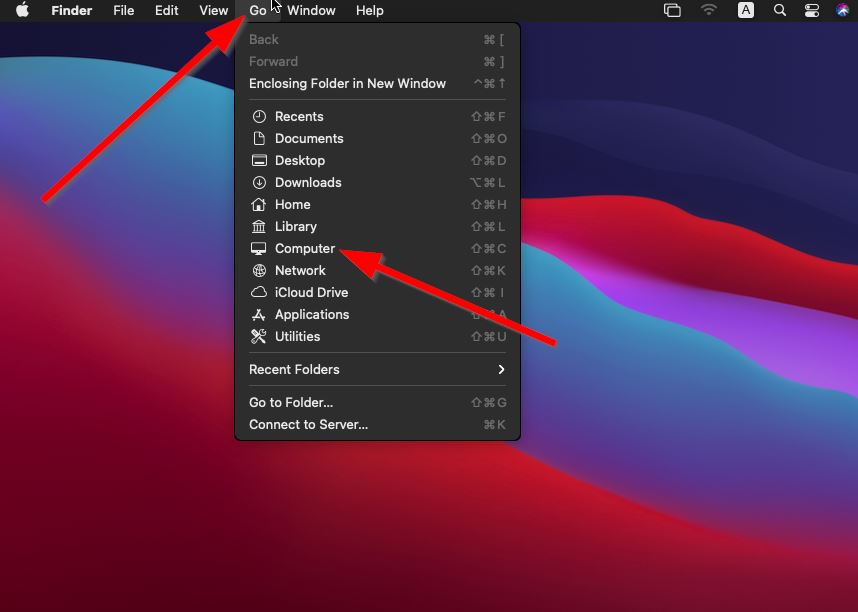
- To get started, turn your attention to the Finder menu bar at the top portion of your desktop and navigate to Go > Computer.
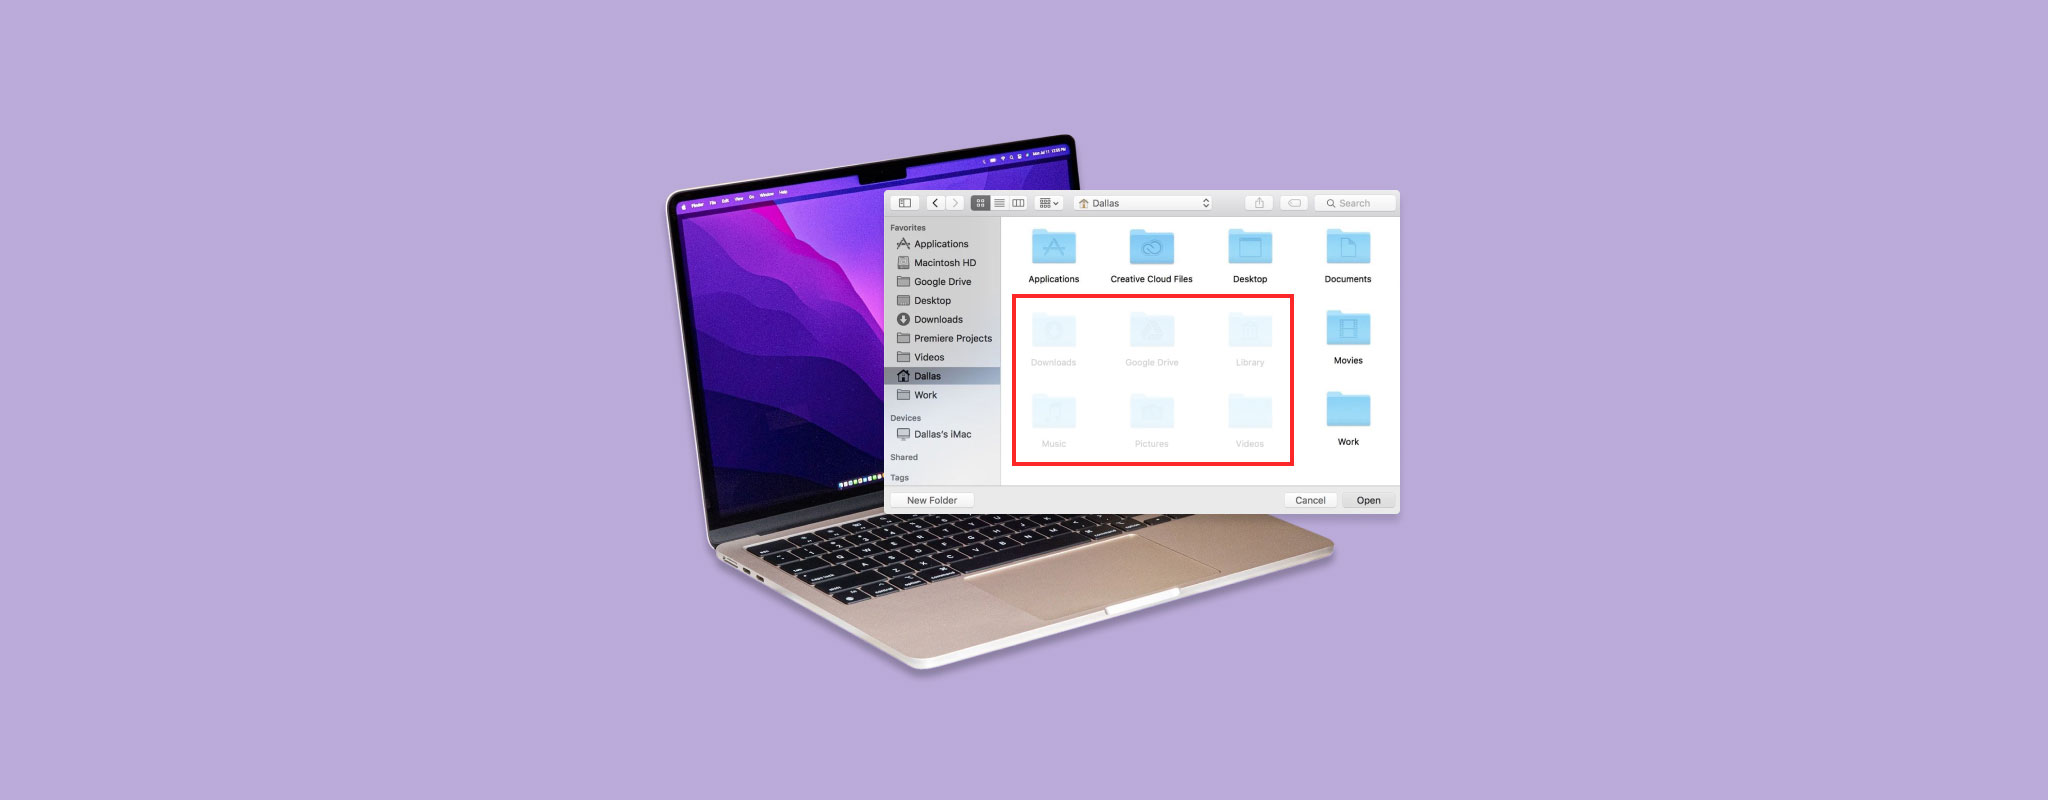
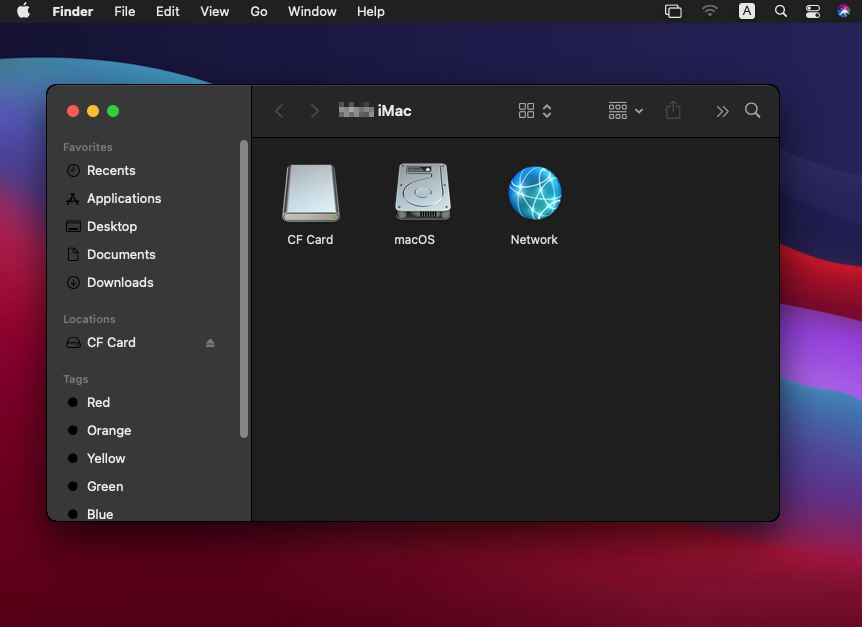
- Here you should be able to access any storage device connected to your computer, along with all the files and folders housed within them. However, this doesn’t include the “Library” folder under “Home.”
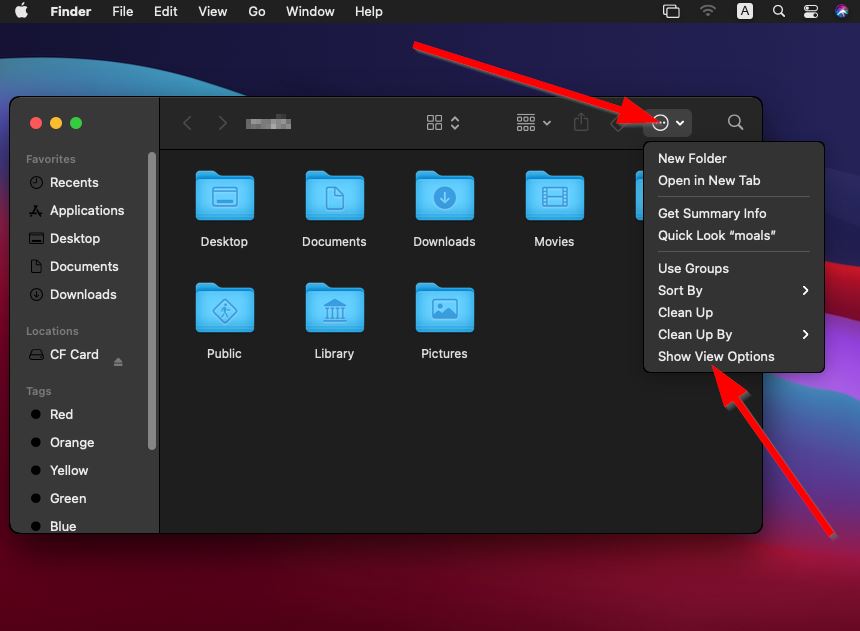
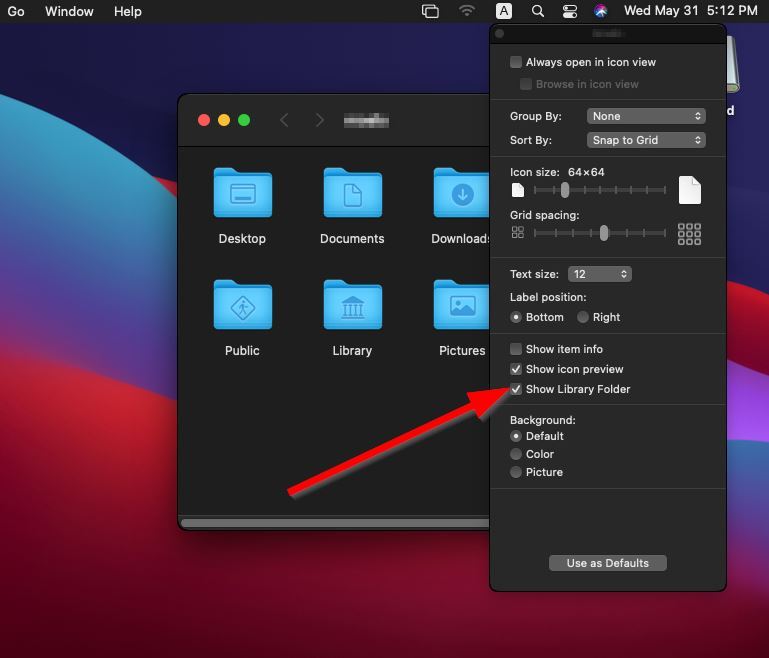
- To access the “Library” folder, head to Go > Home in your Finder bar. Then, click the three dots icon along the top edge of the window and select “Show View Options.”
- Next, in the pop-up that appears, tick the “Show Library Folder” checkbox. “Library” will now appear as an option in Finder > Go.
Method 2: View Hidden Files
If you’ve browsed through all your files and still can’t seem to find the one you’re looking for, it could just be hidden. The first way to show hidden files on Mac is to press the Command + Shift keys simultaneously. The drawback to this method is that you’ll have to repeat it each time you open the Finder and want to look through hidden files.
If you want a more permanent solution, you’ll need to enter a few commands in the Terminal. Here’s how to show all files on a Mac Terminal:
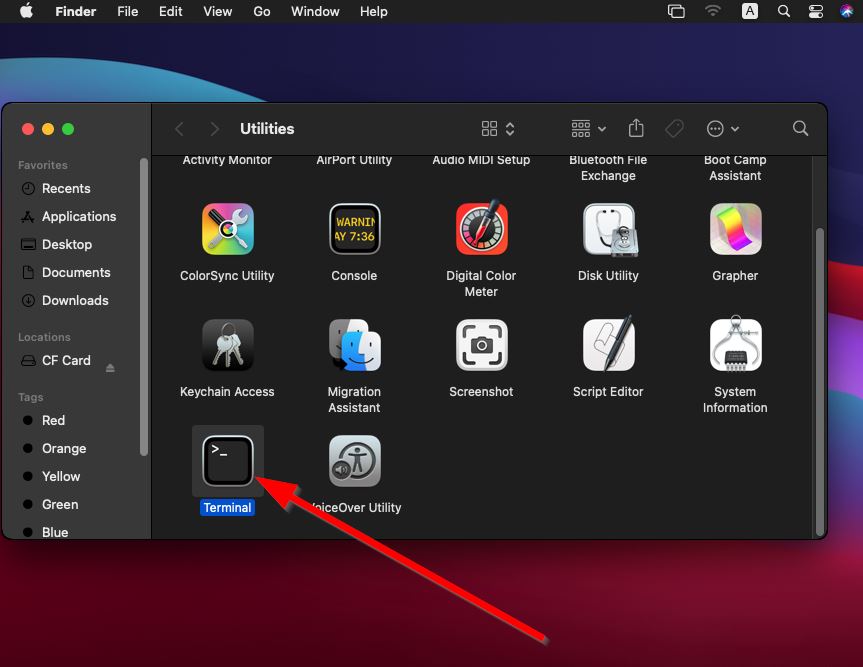
- First, navigate to Go > Utilities.

- Double-click Terminal.
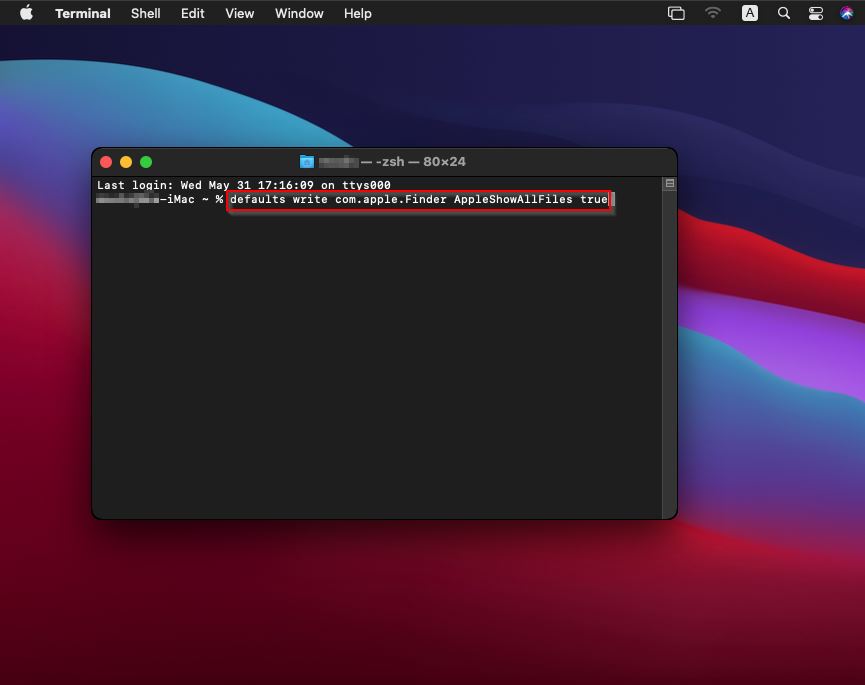
- Next, input “defaults write com.apple.Finder AppleShowAllFiles true” without the quotation marks and hit Enter. This command will always show hidden files on Mac moving forward.
- From there, type in “killall Finder” without the quotations and press Enter once more to restart the Finder app.
Note: If you want to undo this action and hide your files once more, simply type “defaults write com.apple.Finder AppleShowAllFiles false” into the terminal and hit Enter.
Method 3: Show Hard Drive Icon on Desktop from Finder Preferences
Tired of having to use the Finder menu bar every time you access your storage devices? You can make your computer even more accessible by showing hard drive icons on your desktop. This makes viewing your files and folders all that much easier.
To show hard drive icon on your desktop from finder preferences, simply follow the steps outlined below:
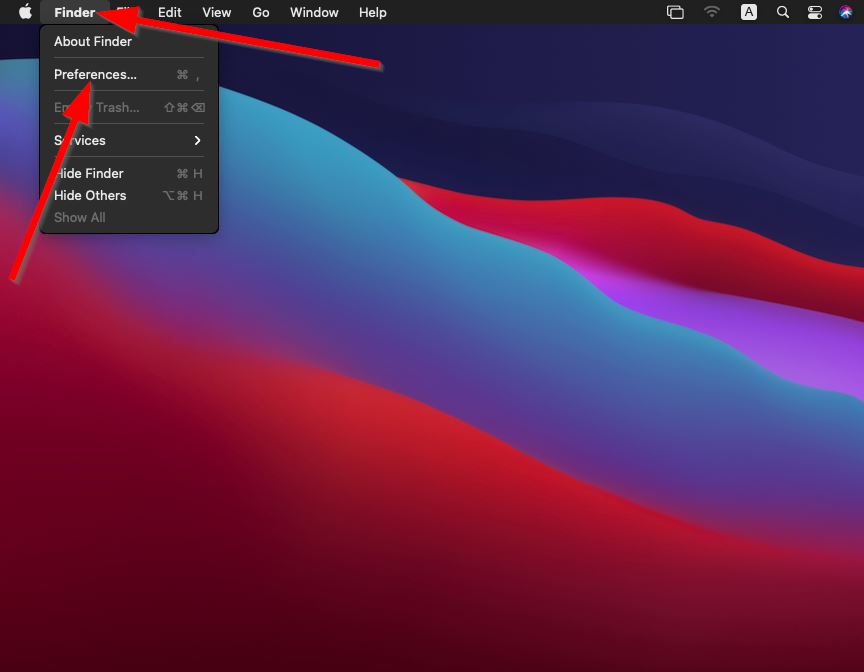
- First, head to Finder > Preferences in your Finder menu bar.
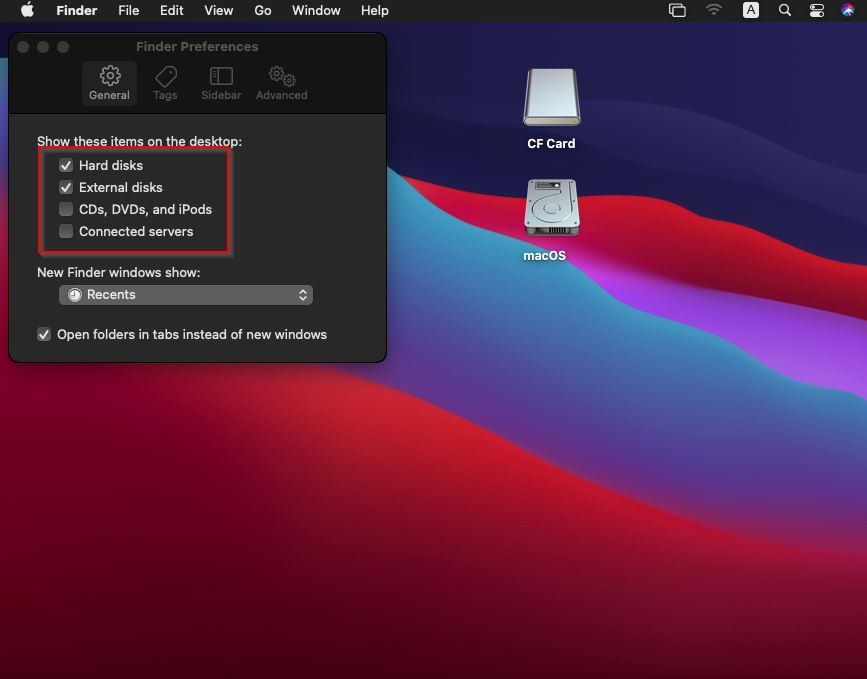
- Make sure you’re in the “General” tab, then tick the storage devices that you’d like to appear on your desktop. The choices include hard disks, external disks, CDs, DVDs, iPods, and connected servers. Once done, an icon for that particular storage device will show up on your desktop.
What to Do if You Can’t Find Files You Need
If you still can’t find your files after combing through your hard drive and external storage devices, there are a few other things you can try.
Method 1: Use Search in Your Finder
Finder includes a built-in search function that you can utilize to locate files using specific criteria. Simply follow these steps below:
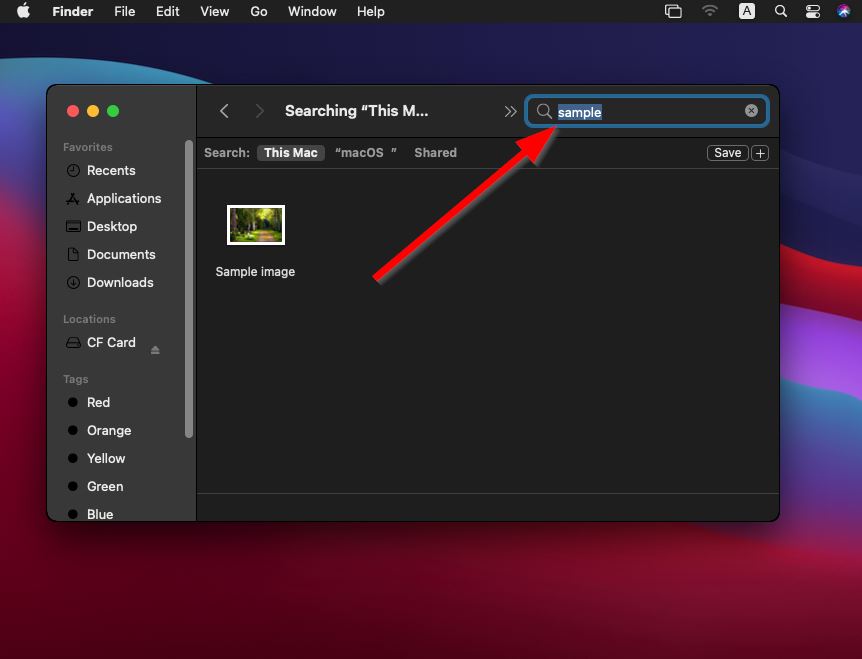
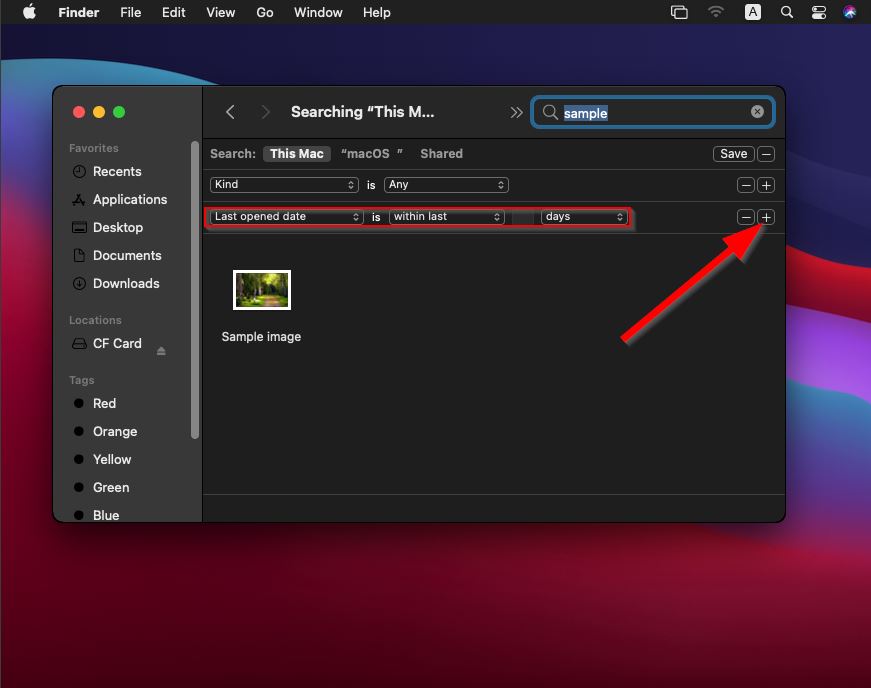
- To get started, open a Finder instance and click the magnifying glass icon in the top-right corner of the window, which will then turn into a search bar. Now type in a file name or file format and hit Enter. This will begin a basic search.
- From there, you can click the “+” button under the search bar to add a set of criteria, allowing you to choose between file type, name, date, etc.
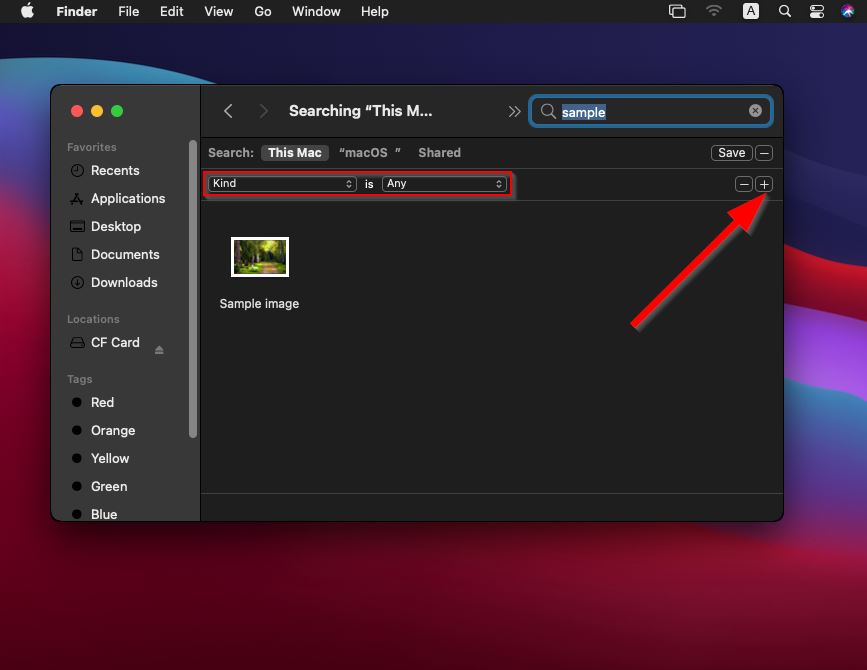
- After that, you can click the “+” button more times to add even more criteria.
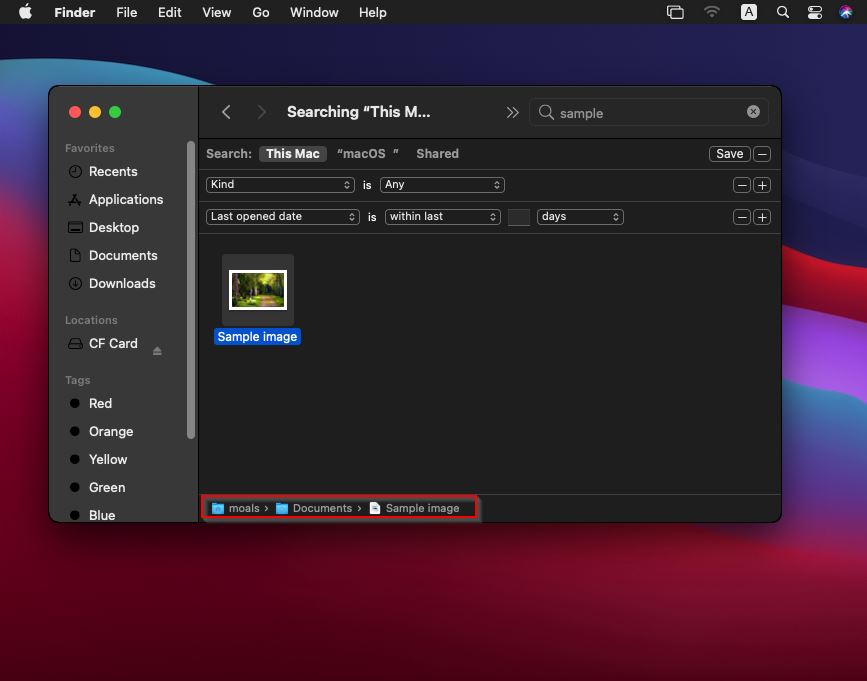
- If you’re wondering how to find the path of a file on Mac, you just highlight the file you located using Finder’s search feature, and you’ll see the path near the bottom of the window.
Method 2: Check Trash
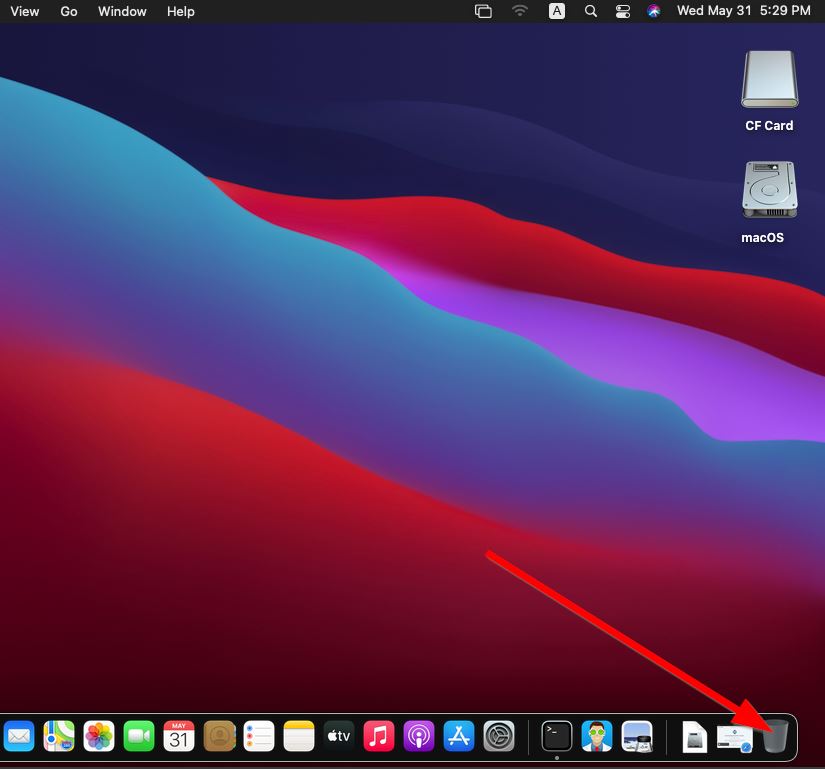
If a file isn’t showing up in your searches, you may have deleted it accidentally. And deleted files on Mac remain in the Trash tool until it’s emptied out, so it’s certainly worth giving it a look. To open the Trash tool, all you have to do is click the bin icon on the far right side of your dock. Then, if you find your files there, you can return them to their original location by right-clicking and selecting “Put Back.”
Method 3: Use a Professional Data Recovery Tool
If your files aren’t turning up through a search or in the Trash tool, they’re likely no longer on your hard drive. In that case, you can use a top-notch data recovery program to retrieve them. Disk Drill is one of the best options to recover permanently deleted files on a Mac, featuring some of the quickest scans, highest recovery rates, and most accessible user interfaces around.
It’s also highly compatible with almost all storage devices, file systems, and file formats. To recover files using Disk Drill, follow the steps below:
- To get started, head to the Cleverfiles website, then download the latest version of Disk Drill and make sure it’s properly installed on your computer.
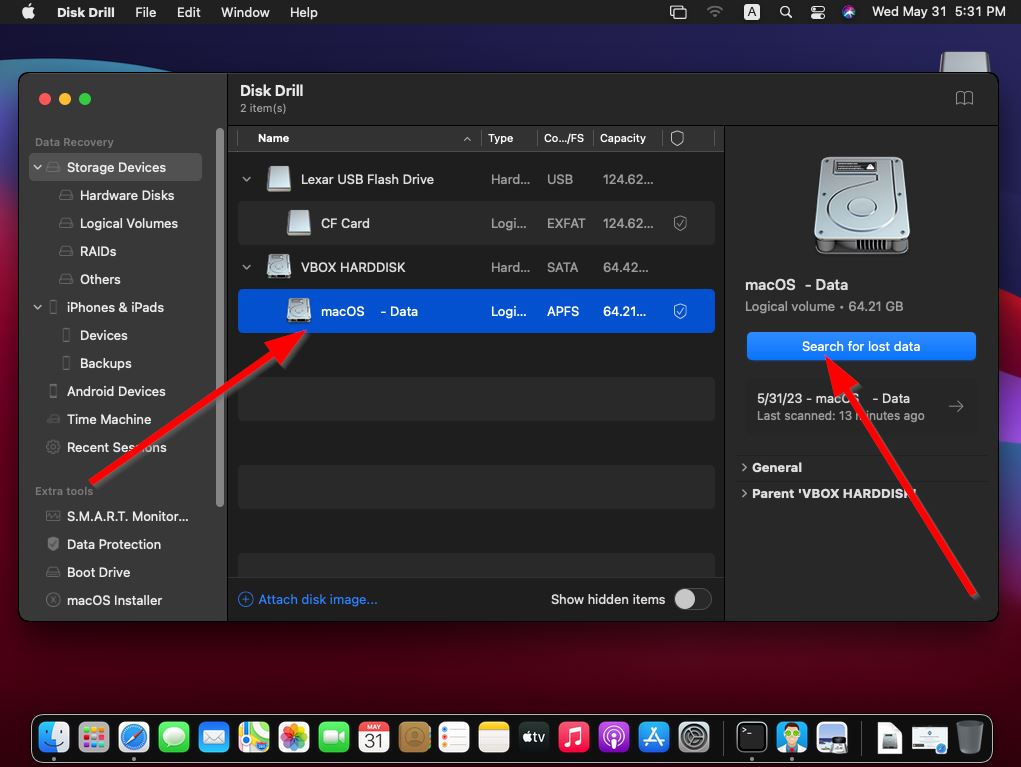
- Launch Disk Drill, pick the hard drive you want to recover from, and click “Search for lost data.”
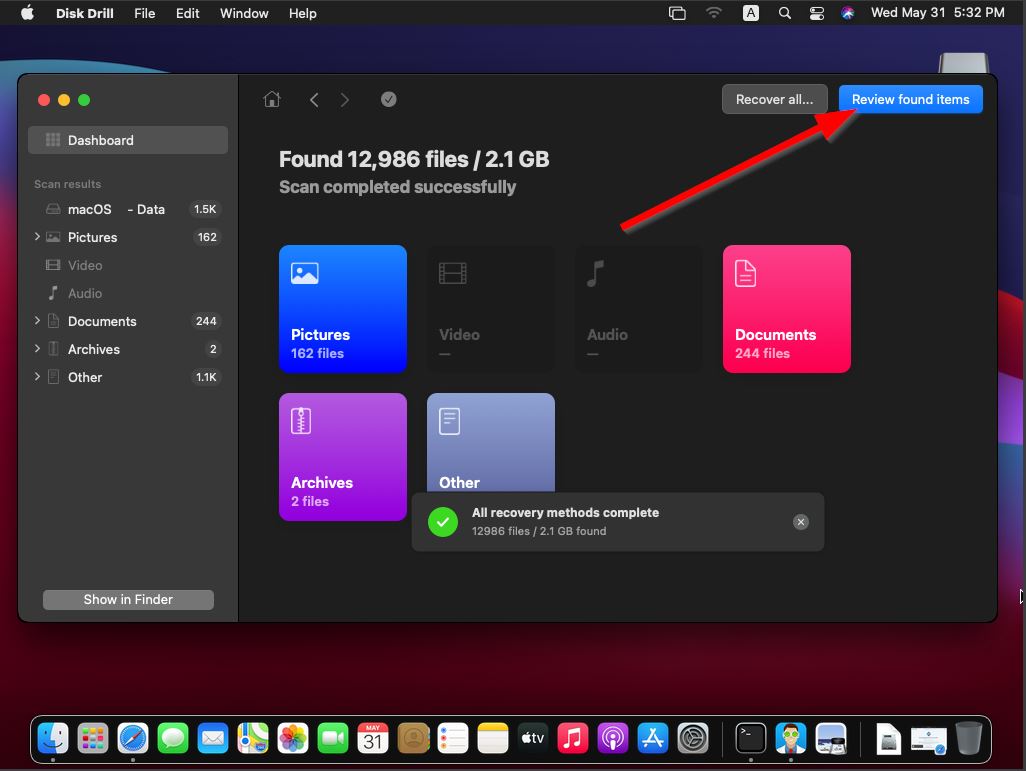
- After that, the scanning process will now begin. Once it’s complete, click the “Review found items” button in the top-right corner to proceed.
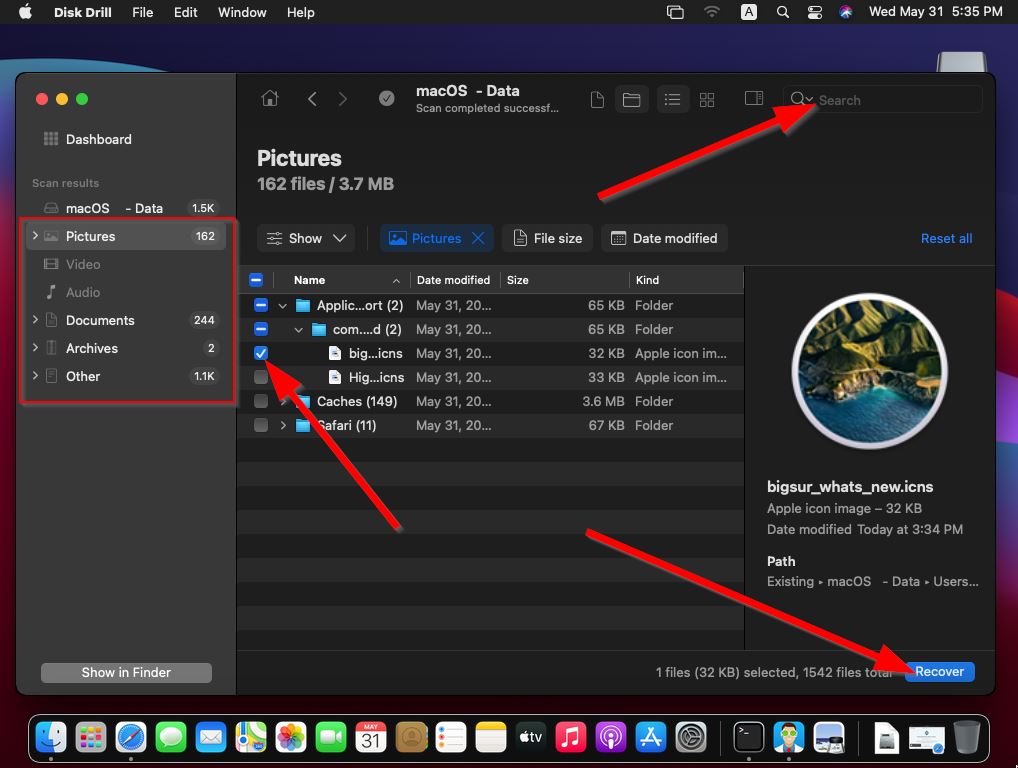
- In the results section, you can browse through all the found files Disk Drill has unearthed. To narrow down the results, you can use the filter categories on the left or the search bar at the top right. Keep in mind that the search bar works for both file names and types. When you find the files you’re looking for, tick the checkmark next to their names to highlight them, then click the “Recover” button in the bottom right to continue.
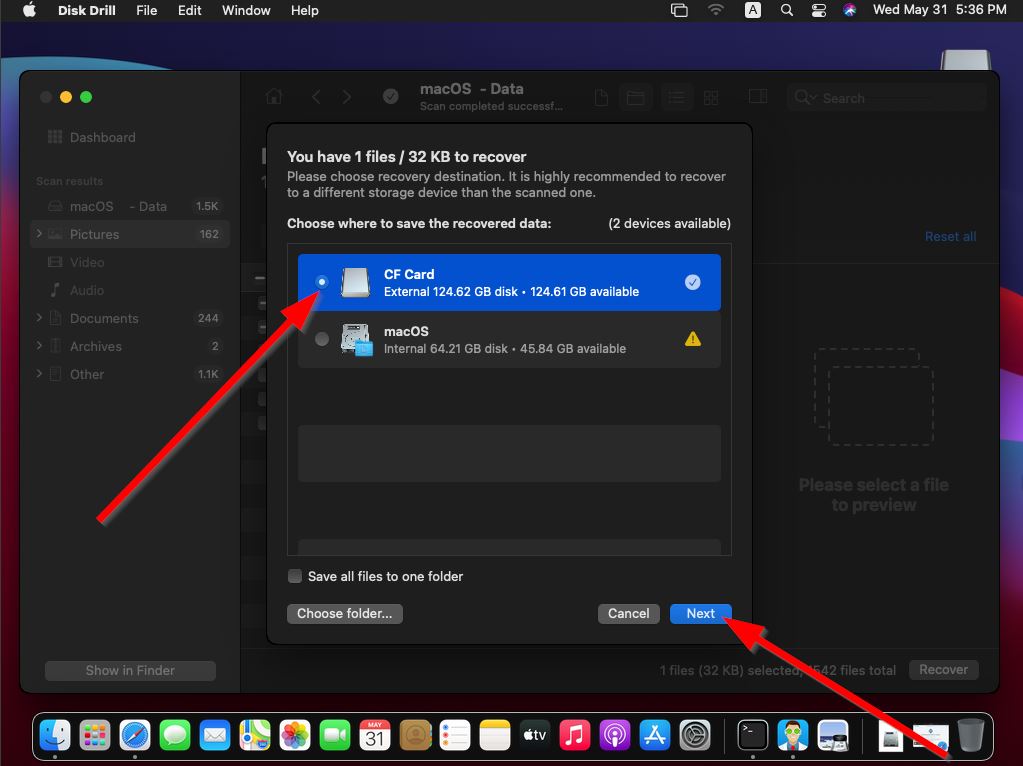
- Upon clicking, a small window will appear where you’ll need to choose a location for the recovered files. The location you select should be on a different storage device than the one you’re recovering from. Click “Next” when you’re ready.
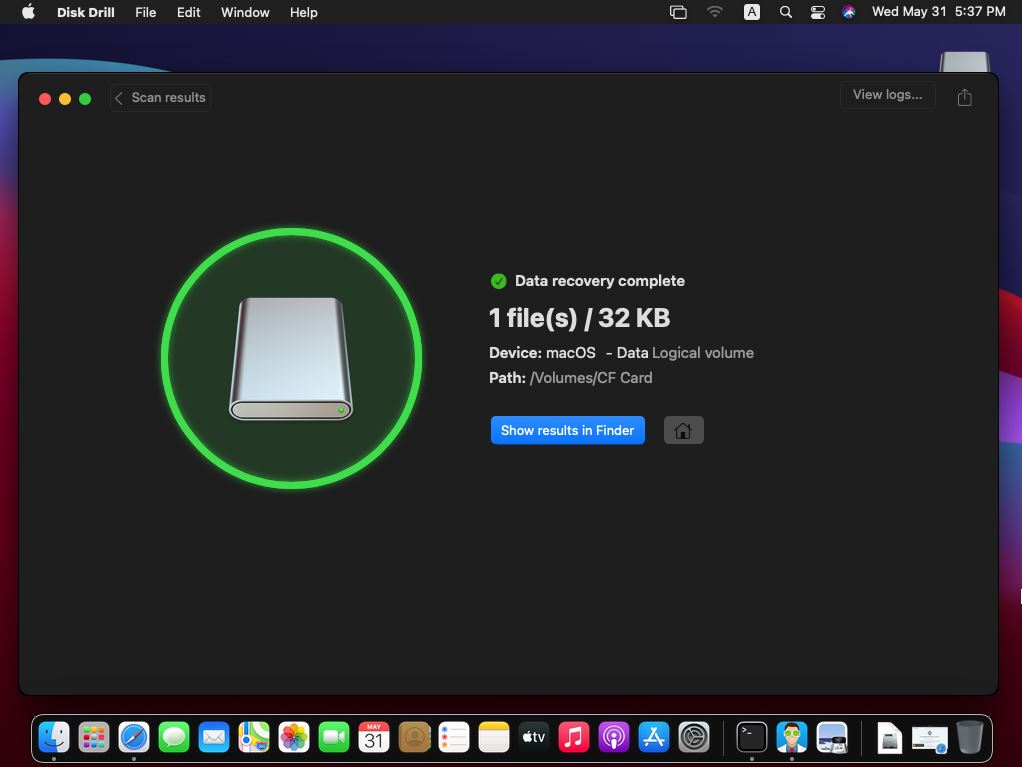
- Disk Drill will now try to get your files back for you. Once done, you’ll get a completion message and a button labeled “Show results in Finder” that you can click to go directly to your recovered files.
Note that the Mac version of Disk Drill only allows you to preview the files. In order to recover the data, you need to upgrade to the Pro version.
Conclusion
Mac operating systems may be simple enough to navigate, but many factors could make it hard to locate a specific file or folder. There are also varying reasons for wanting a complete view of the data on your hard drive. Either way, there are multiple avenues when it comes to how to view all files on Mac. Hopefully, the methods outlined in this guide helped you browse your files more thoroughly, as well as retrieve the ones no longer on your hard drive.
FAQ:
- Navigate to Go > Home in your Finder menu bar.
- In the window that appears, click the three dots icon near the top and choose “Show View Options.”
- A small pop-up will appear.
- Tick the checkbox labeled “Show Library Folder,” and it will now show up as an option in Finder > Go.
- Go > Utilities > Terminal
- Enter the “defaults write com.apple.Finder AppleShowAllFiles true” command.
- Type “killall Finder” and hit Enter to refresh Finder.


