
Losing a PowerPoint presentation can undo hours of hard work, and could impact you professionally too. Whether you deleted the presentation accidentally or it went missing due to other reasons—it’s often possible to recover it. But, how? Well, that’s where this guide comes in. The following sections contain all you need to know about recovering a deleted PowerPoint presentation using easy-to-follow methods.
Table of Contents
What Caused the PowerPoint Presentation to be Deleted
There could be several reasons behind a deleted PowerPoint presentation. It’s recommended you diagnose what caused the deletion, so you can choose the appropriate recovery method.
Here are some possible reasons why your PowerPoint presentation was unexpectedly deleted:
| Reason | Description |
| 🚨 Accidental deletion | It’s possible you deleted the PowerPoint presentation accidentally. Maybe it was located in a folder that had other files you actually wanted to delete. |
| ⚠️ PowerPoint crashed | PowerPoint can sometimes freeze up and crash. In this case, it may not save the PPT file, especially if you force close it using the Task Manager. |
| 💾 Closing PowerPoint without saving | Some versions of PowerPoint don’t have the autosave feature, and it’s possible you close the app without saving your progress first. |
| 💻 Windows malfunction | Abrupt shutdowns and crashes because of a Windows malfunction can cause you to lose your PPT presentation, as PowerPoint may not be able to save your progress in such cases. |
| 💿 Hard drive issue | If you notice randomly disappearing files, sluggish performance, and random freezes, there might be a logical issue with your hard drive. If these symptoms are accompanied by clicking, beeping, and whirring sounds, the hard drive is physically damaged, |
How to Recover a Deleted PowerPoint Presentation
There are multiple ways to recover a deleted PowerPoint presentation. We’ll take a look at all of these methods below. Keep in mind, these methods are only applicable to drives that are physically working. If you notice signs of physical damage on your drive, it’s best to contact a professional data recovery service.
Option 1: Check the Recycle Bin for the PowerPoint Presentation
Do you suspect that you may have accidentally deleted the PowerPoint presentation? If so, the first place you should look in, is the Windows Recycle Bin, which stores deleted files until you empty it. Keep in mind, files deleted using the Shift + Delete shortcut do not go to the Recycle Bin.
Here’s how to restore your deleted PowerPoint presentation from the Recycle Bin:
- Double-click on the Recycle Bin icon on the desktop, or search for the Recycle Bin in Windows Search (Windows Key + S).
- Look for the PowerPoint presentation and right-click on it.
- Choose Restore.
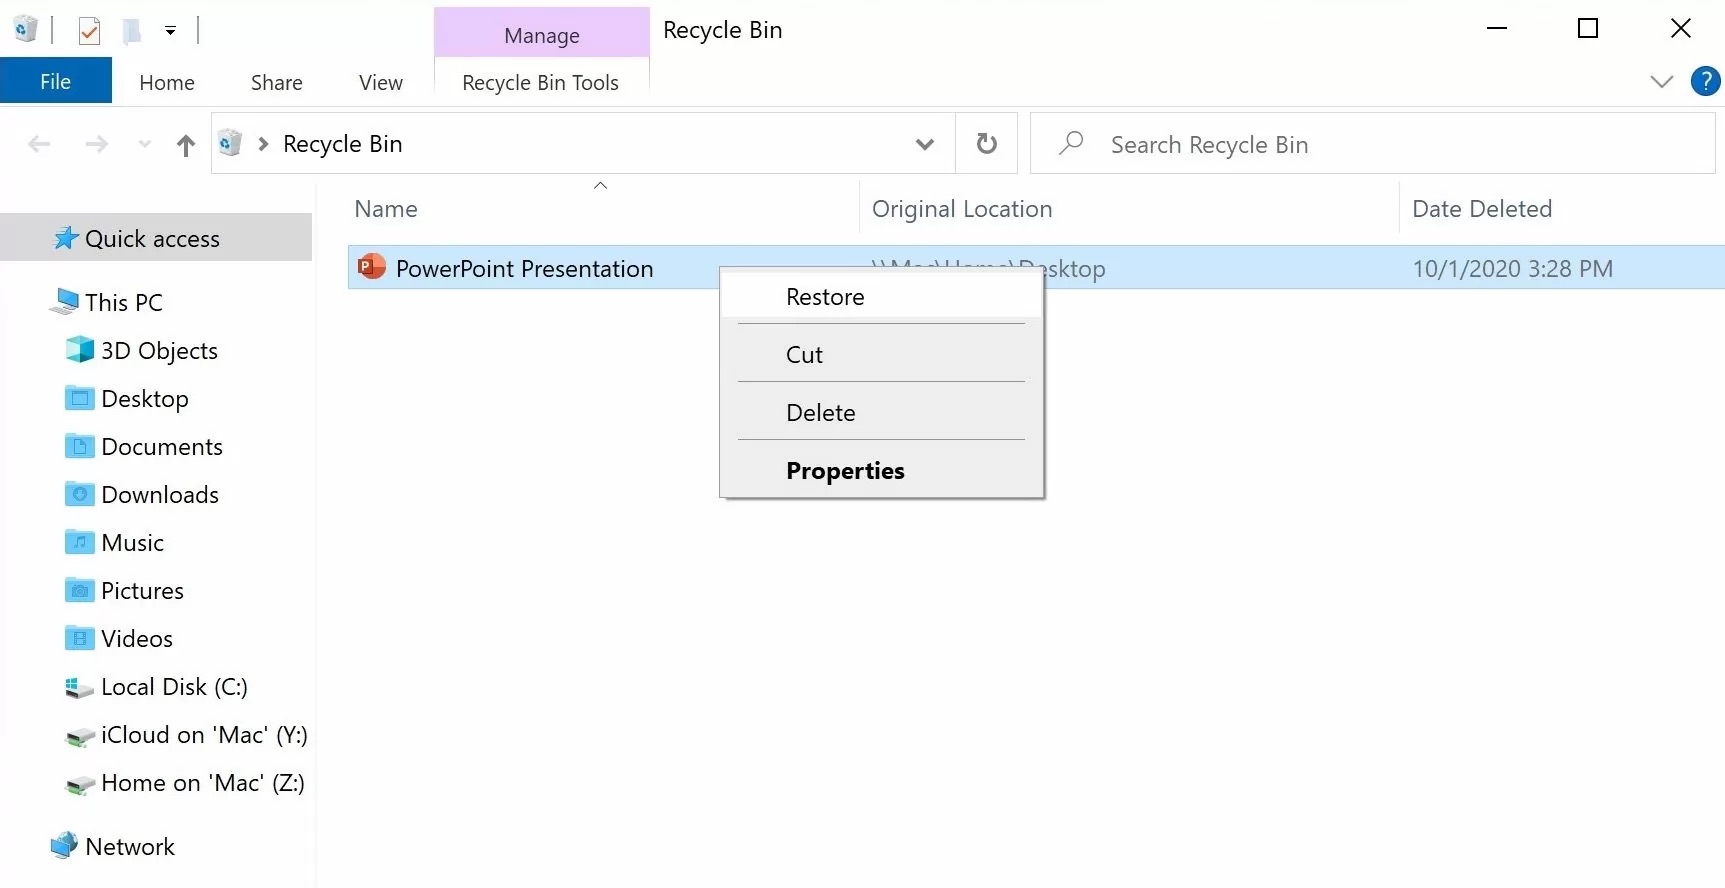
- The PowerPoint presentation will be restored to its original location.
Option 2: Recover your PowerPoint from a Windows Backup
Windows has two major backup features—Windows File History, and Backup & Restore (Windows 7). If you had set up any of the features beforehand, you can use the backup to restore your PowerPoint Presentation.
Here’s what the restore process looks like in Windows File History:
- Ensure the drive used to set up File History is connected to your PC.
- Search for “file history” in Windows Search (Windows Key + S). Click on Restore your files with File History from the search results.
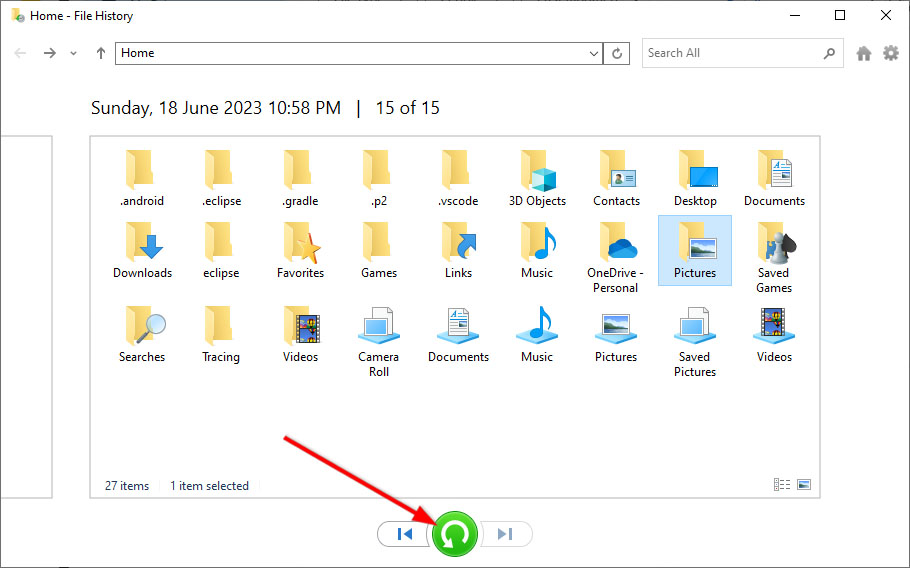
- Locate and open the folder where the PPT was saved (usually the Documents folder). Use the navigation buttons at the bottom to browse through the backups and find one that contains the PPT.
- Select the folder or the PowerPoint presentation and click on the green restore button at the bottom of the File History window.
Option 3: Look Through the Temporary Files Folder
Windows has a dedicated temporary files folder, usually located at C:\Users\<username>\AppData\Local\Temp which may contain a cached version of the PowerPoint presentation. The folder might contain an older version of the PPT, but it’s still better than nothing.
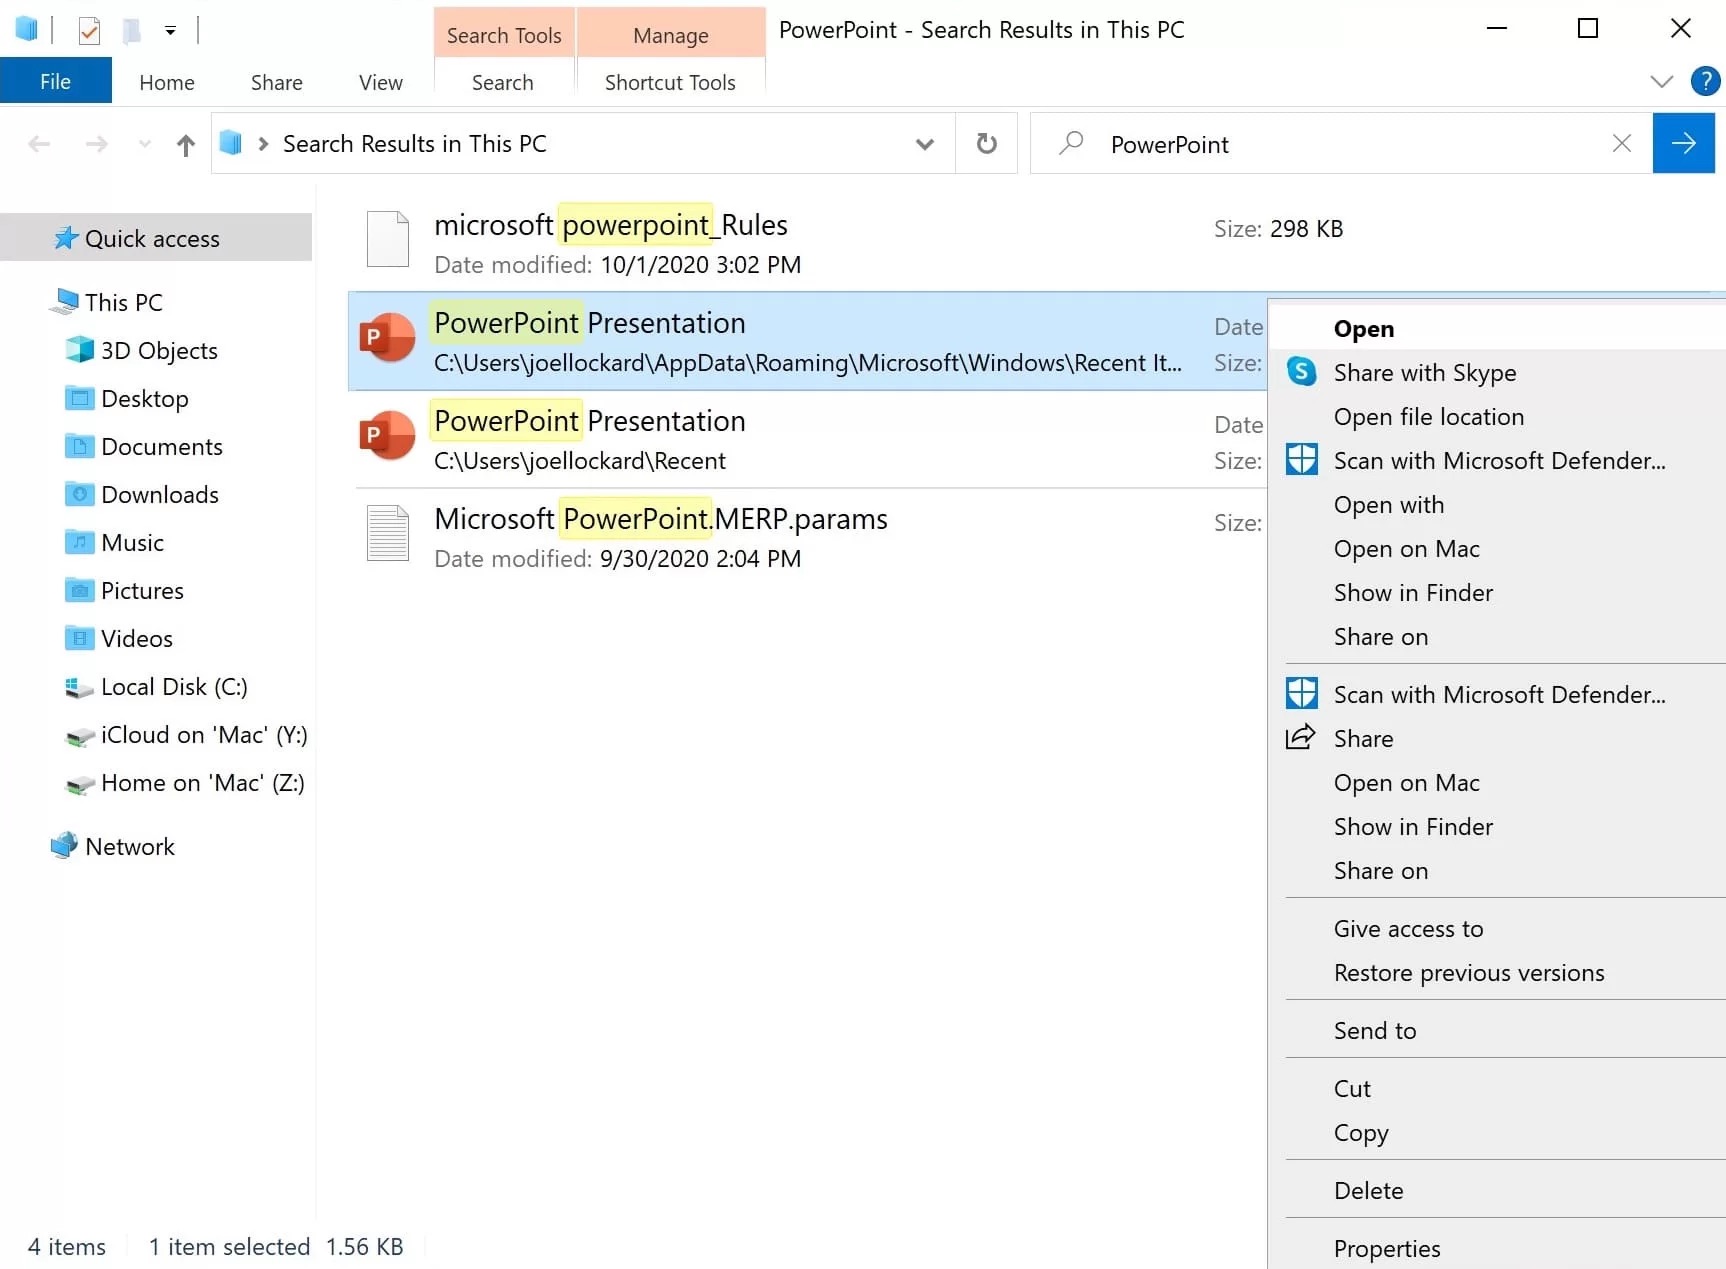
- Click Start and select Search from within the Windows Start-Up Menu.
- Type in the name of the file that you’re wanting to look for and then hit enter to search your Windows computer for the deleted file.
- If the presentation is located within the temporary files folder, it should show up in the results and it can then be recovered.
Option 4: Use the Built-in Unsaved Presentation Feature
Built right into PowerPoint is a recover feature that allows you to restore a presentation should something happen to it. This is perfect if you made changes to your work and then forgot to save it before something happened to it.
Steps to restore unsaved presentations:
- Launch PowerPoint on your Windows Machine.
- Click “File” in the upper left-hand corner of the screen and then you will see a “Recent” option located under “Open”.
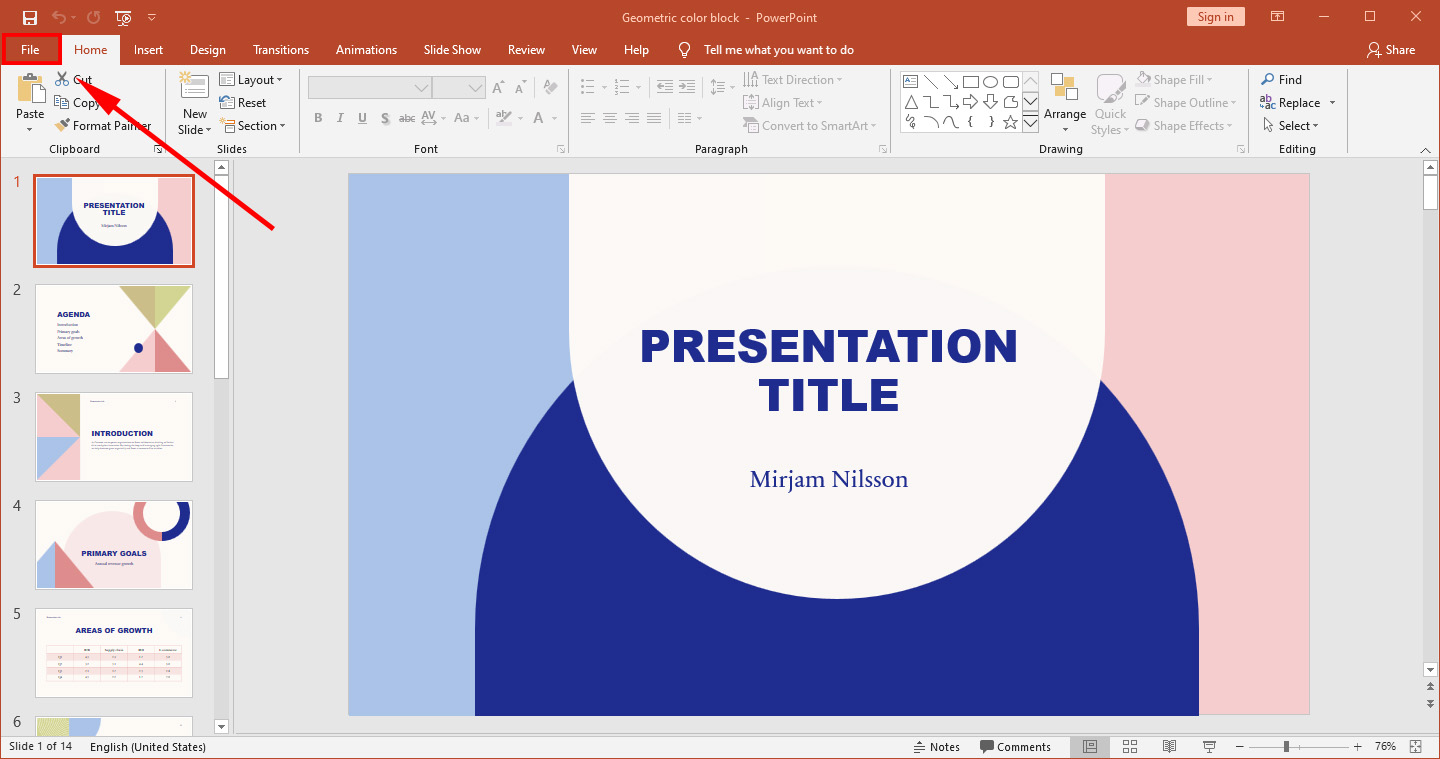
- Scroll down to the bottom and select “Recover Unsaved Presentations”.
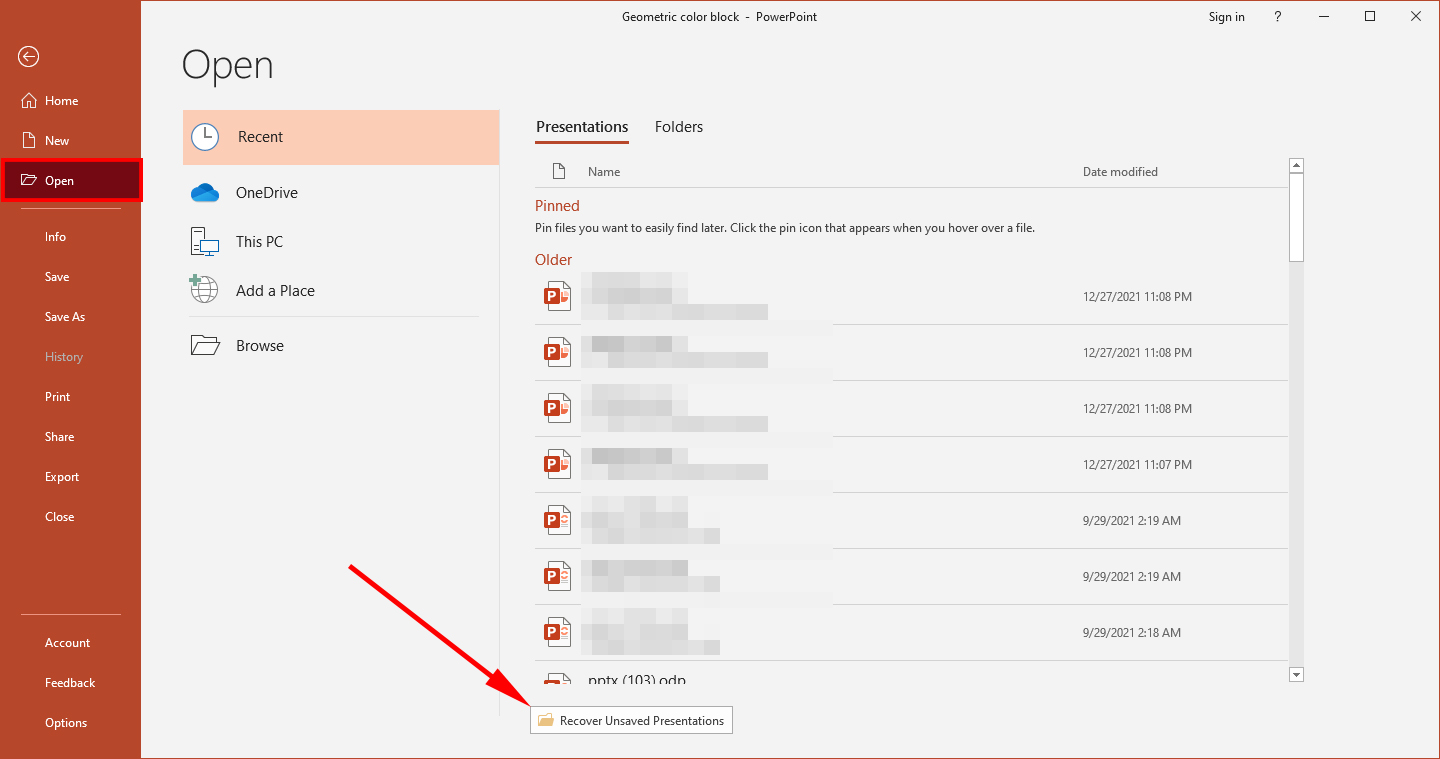
The “Recover Unsaved Presentations” folder only saves these PowerPoints for a short period of time. If you need to recover a lost PowerPoint Presentation, act fast!
Option 5: Use the Built-in AutoRecover Feature
Built into PowerPoint and turned on by default is a feature that will create AutoRecover information that will save your presentation at different time intervals. This is a handy feature to use if you’re forgetful when it comes to clicking on the “Save” option from within PowerPoint which can happen if you’re in deep thought about your work.
It will allow you to recover your PowerPoint and load it back into the state that it was at when it was last saved. As mentioned this feature is on by default, but in the steps below we will look at how to access it, use it, and change your time interval settings.
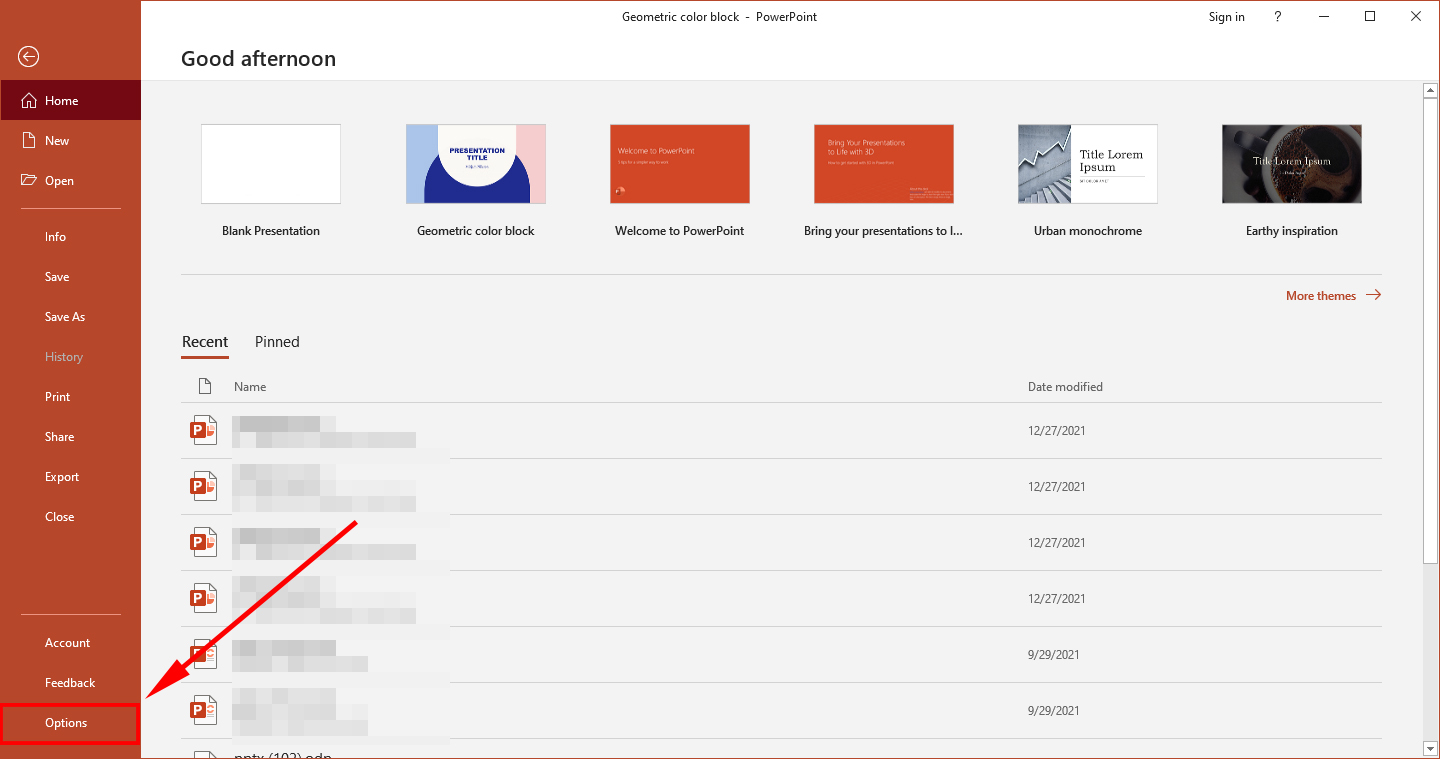
- Launch PowerPoint.
- With your current presentation open, choose File > Options > Save.
- From within Save, you can select a time interval for how often the AutoRecover feature will save your presentation should something happen to it. You can also turn on another option that will save your presentation if you close it and forget to save it before doing so. You can specify where the AutoRecover location will be on your Windows machine so that if you do need to find it, you will know the path to exactly right where it is.
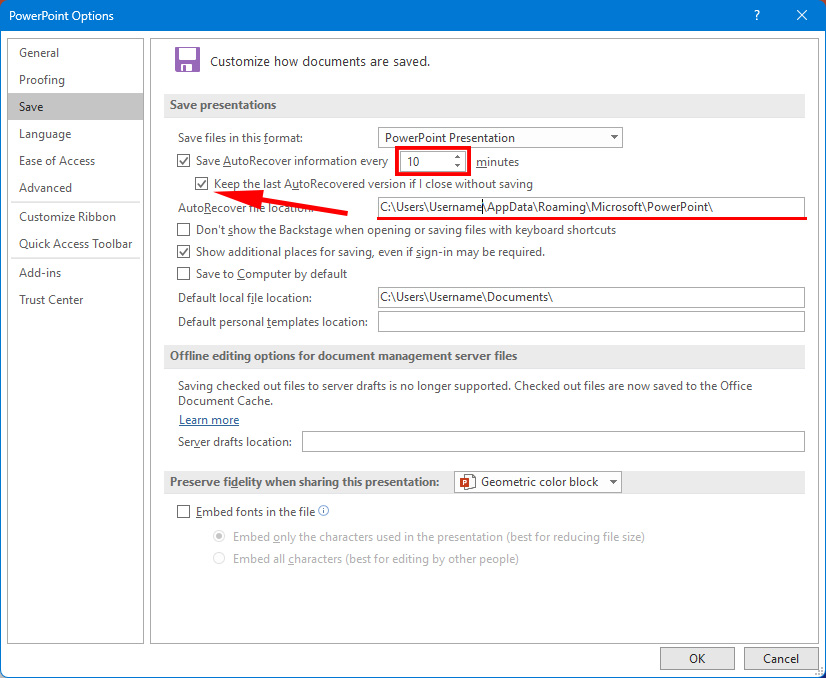
- If this feature was already on, then you can go to the AutoRecover file location and open the recovered PowerPoint from there.
Option 6: Use Third Party Software to Recover Your Presentation
If none of the above steps worked in recovering your presentation, then it’s time to move onto data recovery which can retrieve a file even if you have removed it from your computer.
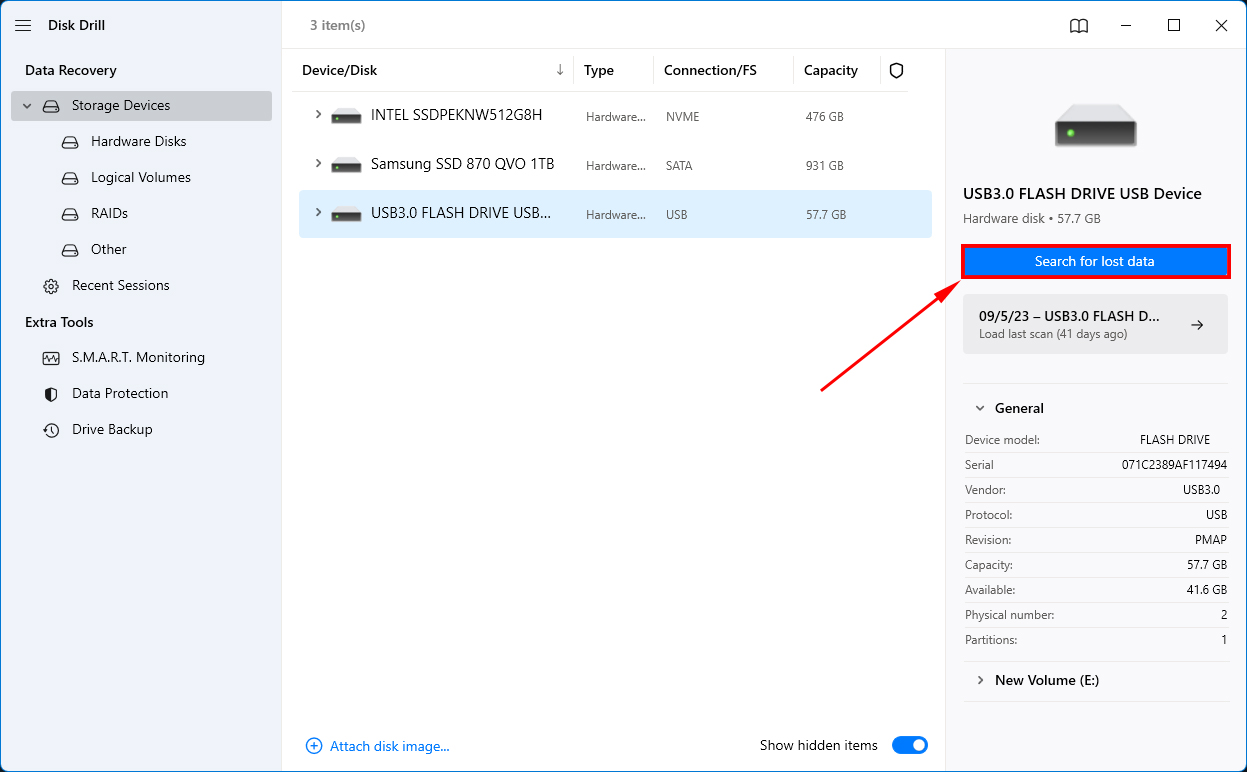
- Download and install Disk Drill for Windows. When using Disk Drill, it is best to install it onto an external hard drive or thumb drive as putting it on your Windows machine could overwrite the PowerPoint Presentation that we’re trying to recover. Also, try to limit installing other software or downloading other files as that can lower the chances of a successful recovery.
- Scan your Windows machine for the deleted PowerPoint Presentation. To start a scan, click on the “Search for lost data” option in the lower right-hand corner of the screen. The scan will start but it will take a few moments to complete based on the amount of data that you have on your Windows machine.
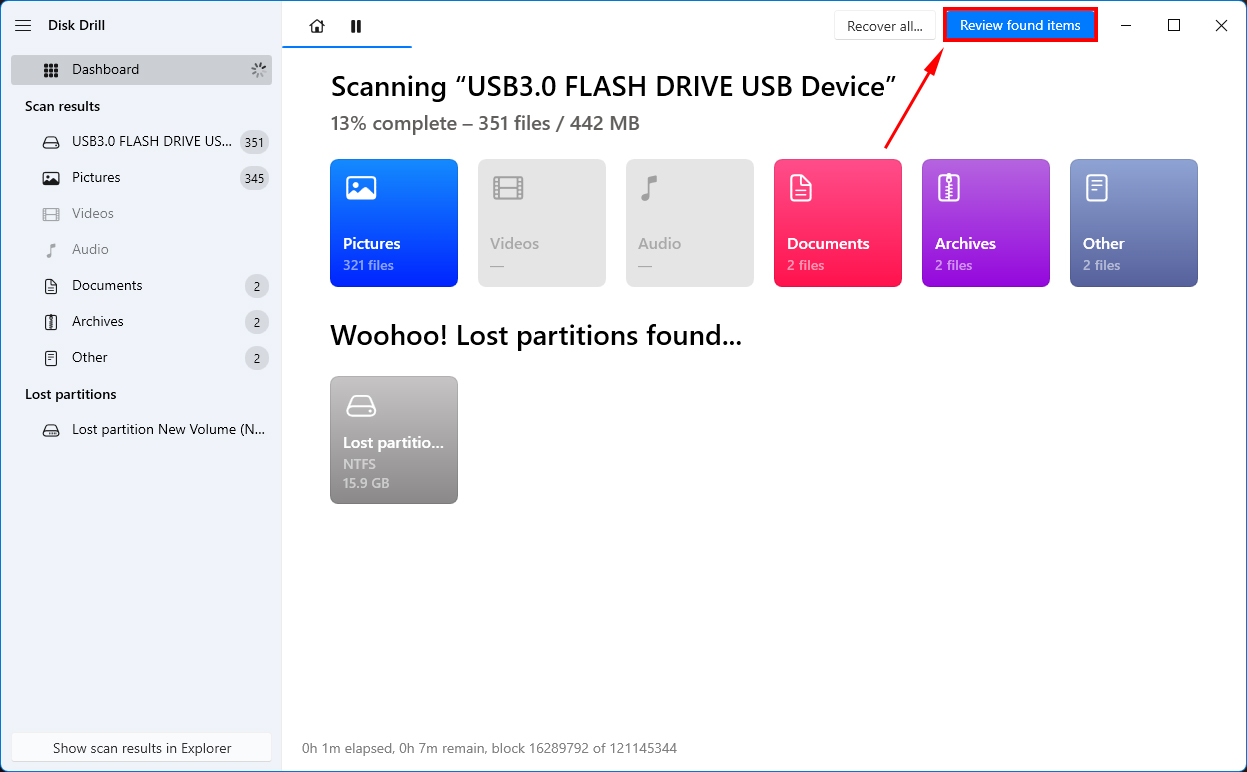
- Wait for the scan process to complete and choose to review found items.
- Search by the name of the PowerPoint Presentation that you want to recover.
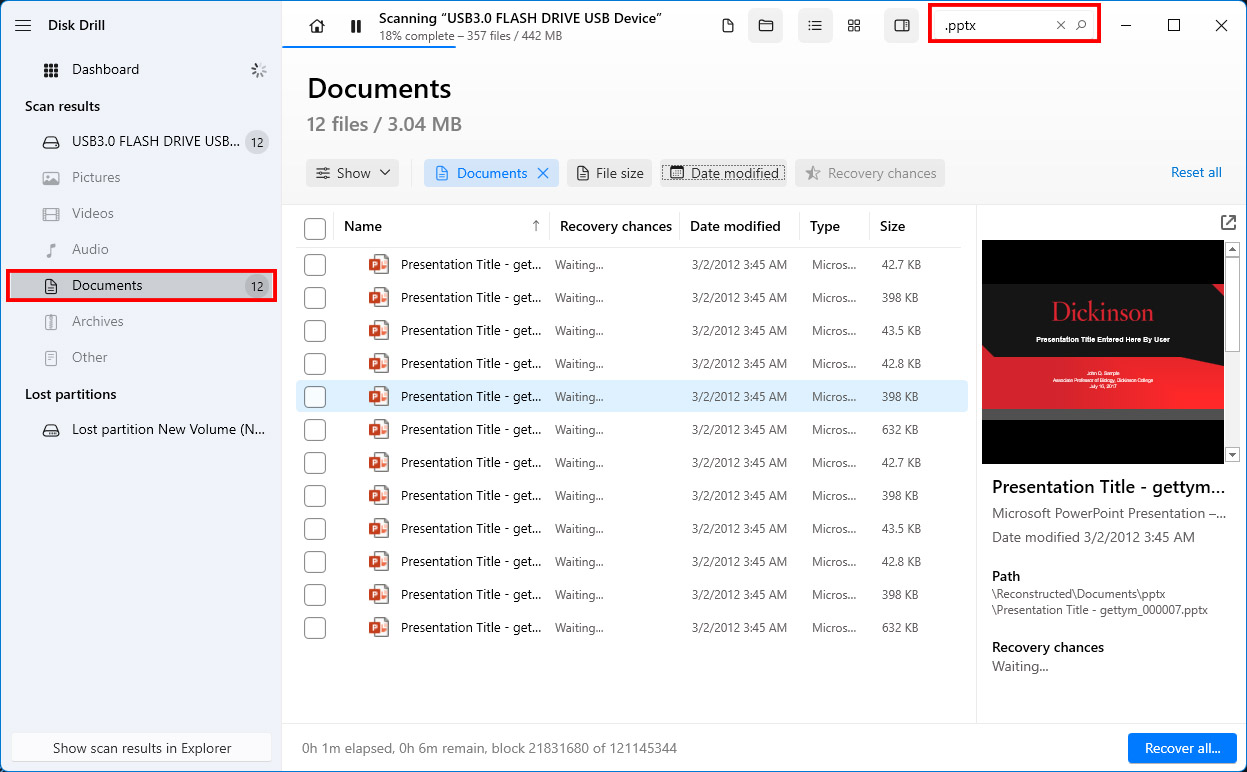
- Select the PPT files that you would like to recover.

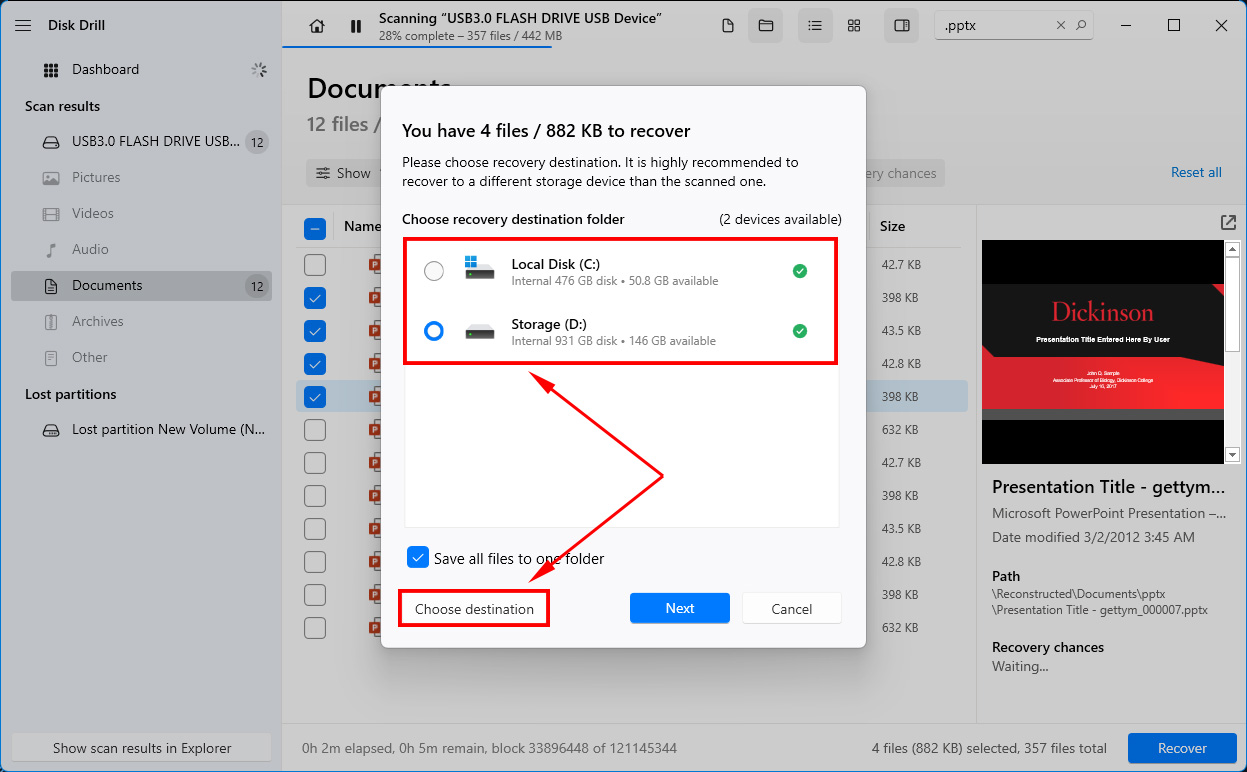
- Select a path for which the presentation will go after it has been recovered from Disk Drill.
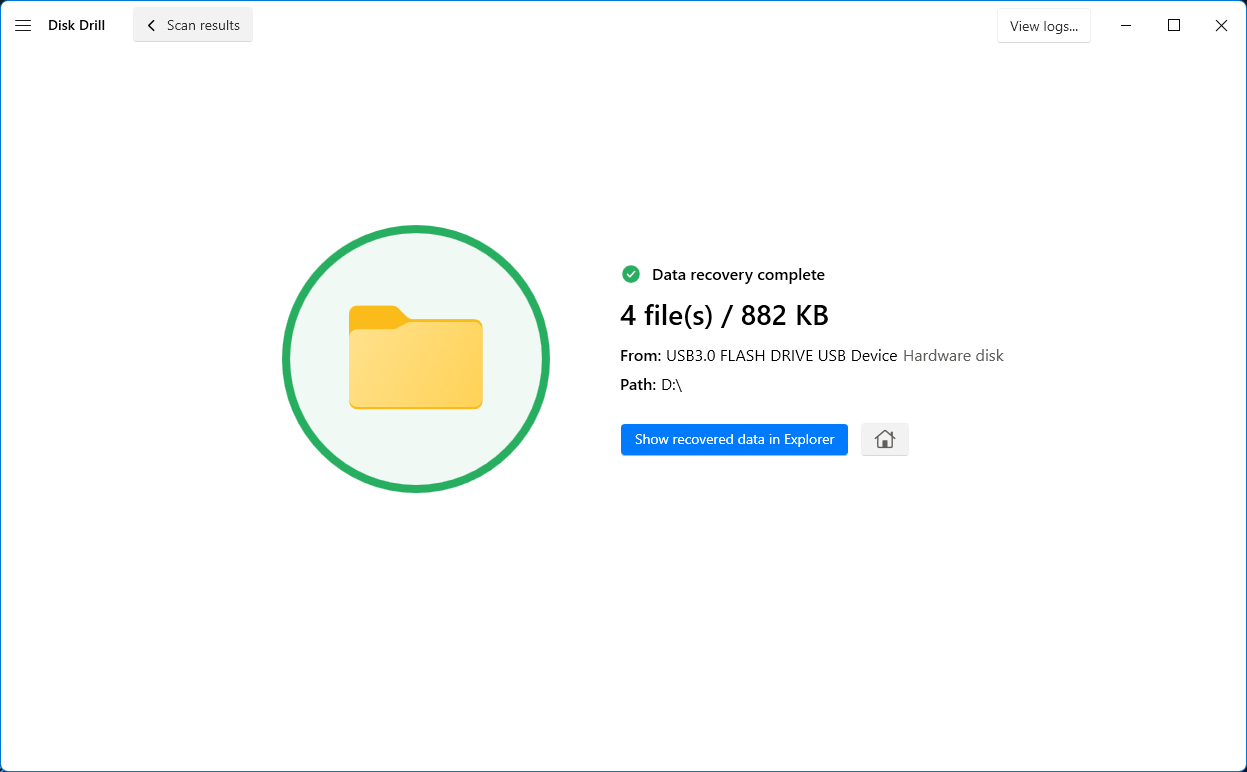
- Recovery has been completed and the path for where the files have been recovered to, is now shown.
With how busy our schedules are today, being able to recover a lost PowerPoint stops interruptions to your workflow. It will allow you to make sure that things are being completed on time and that computer mishaps won’t be able to get in the way of that. Nothing is worse than losing your data when you thought it was saved and now, that is no longer something to worry about.
Conclusion
Recovering a PowerPoint presentation is usually a simple affair and you don’t need to resort to third-party tools. You can restore the file from the Recycle Bin, Windows Backup, and the temporary folder. The PowerPoint app itself has features like the Autorecover feature that lets you restore a PowerPoint presentation. If all else fails, then data recovery tools like Disk Drill are almost guaranteed to help you recover a deleted PowerPoint presentation. But do remember, that you need to act quickly to maximize your chances of data recovery.
FAQ
- Download Disk Drill and install it.
- Open Disk Drill, select your drive and click Search for lost data.
- Click on Review found items.
- Select your PPT file and click Recover.
- Choose a recovery destination and click Next.
- Go to the OneDrive website and log in using your Microsoft Account.
- Right-click on the PowerPoint file and choose Version History.
- Click on the ellipses next to the version you wish to restore and click Restore.
- Search for “file history” in Windows Search (Windows Key + S). Click on Restore your files with File History in the search results.
- Browse through the backups until you find one that contains the required version of your PowerPoint file.
- Select the PPT and click on the green restore button.


