 Need to restore deleted files from an HFS or HFS+ partition on a Mac? Or maybe you’ve lost the whole partition and want to recover it? Regardless of whether you’ve deleted the data from the partition yourself or the data loss occurred because of a virus, there are a couple of methods that you can try to restore your files.
In this article, we’ll cover the most effective data recovery solutions that can help you with HFS recovery.
Table of Contents
All You Need to Know About HFS Recovery
A file system determines how your files are named, stored, and accessed. HFS/HFS+ (Hierarchical File System, also known as Mac OS Extended) are file systems, developed by Apple, and largely used in older Macintosh hard drives. Out of the two, HFS is practically obsolete. HFS+ too, has largely been replaced by APFS (Apple File System) – which is better suited for SSDs.
However, HFS+ compatibility with older Macs (macOS 10.12 and earlier) and better suitability for mechanical HDDs is why it still remains popular. Features like journaling, and the ability to configure case-sensitivity also add to its longevity.
When talking about data recovery from an HFS/HFS+ partition–as long as you have the right tool and follow proper data recovery etiquette, you can recover your deleted files. But, what is proper data recovery etiquette? Essentially, you need to keep the following pointers in mind:
| Tip | Description |
| 🚫 Avoid writing new files to the drive | Your deleted files are recoverable, as long as new data doesn’t come in and overwrite them. So, avoid using your drive until you need to perform data recovery (automatically created system files can reduce data recovery chances too). |
| ❓ Determine what caused the data loss | While data loss due to logical damage like corruption, malware attacks, and accidental deletion can be reversed using DIY methods; physically damaged drives should be looked at by an expert. Clicking, grinding, and beeping noises are the most common indicators of a physically damaged hard drive. |
| 🔍 Use a trustworthy data recovery program | Make sure to choose a data recovery program that supports HFS/HFS+ partitions, and has a good track record. The first data recovery scan is typically the most successful. |
Since HFS/HFS+ can be configured to be case-sensitive, it’s important to choose a data recovery program that recognizes it. A case-insensitive data recovery program may not be able to recognize and recover files that are named the same but differ only in case.
It’s also best to create a disk image of the drive you wish to recover data from. You can scan this disk image of the drive, instead of directly scanning the drive. This prevents additional stress on a drive that could already be logically corrupted and on the verge of failure.
How to Recover Data from an HFS Partition on a Mac
There are two primary DIY methods for data recovery from an HFS partition on a Mac. The method you choose will depend on your data loss scenario–whether you wish to recover specific deleted files, or you wish to recover the entire partition (in case the partition was deleted/corrupted). Regardless, you will need to download third-party programs.
Case 1: Recover Specific Files From the HFS Partition
The most convenient way to recover specific files from an HFS partition, is to use a data recovery program. But, it’s important to do your due diligence before selecting a program. Choose one that supports HFS partitions and has a proven track record.
Our software recommendation is Disk Drill since it supports all major file systems and can be used to restore data from APFS , HFS, HFS+, NTFS/NTFS5, FAT/FAT32/exFAT, and EXT3/EXT4 drives or partitions.
Important: Once you notice that files are missing from your HFS/HFS+ partition, you should stop using it immediately. To successfully conduct an HFS data recovery, it’s also essential to start the process as soon as possible. This should help to avoid the data getting overwritten with other files.
Follow these steps to recover files from an HFS/HFS+ partition on a Mac with Disk Drill:
- Connect the HFS/HFS+ drive to your Mac (if you want to recover data from a partition on your Mac’s main drive, skip this step).
- Download Disk Drill and follow the onscreen instructions to install it.
- Launch the app and choose the Storage devices tab from the sidebar on the left.
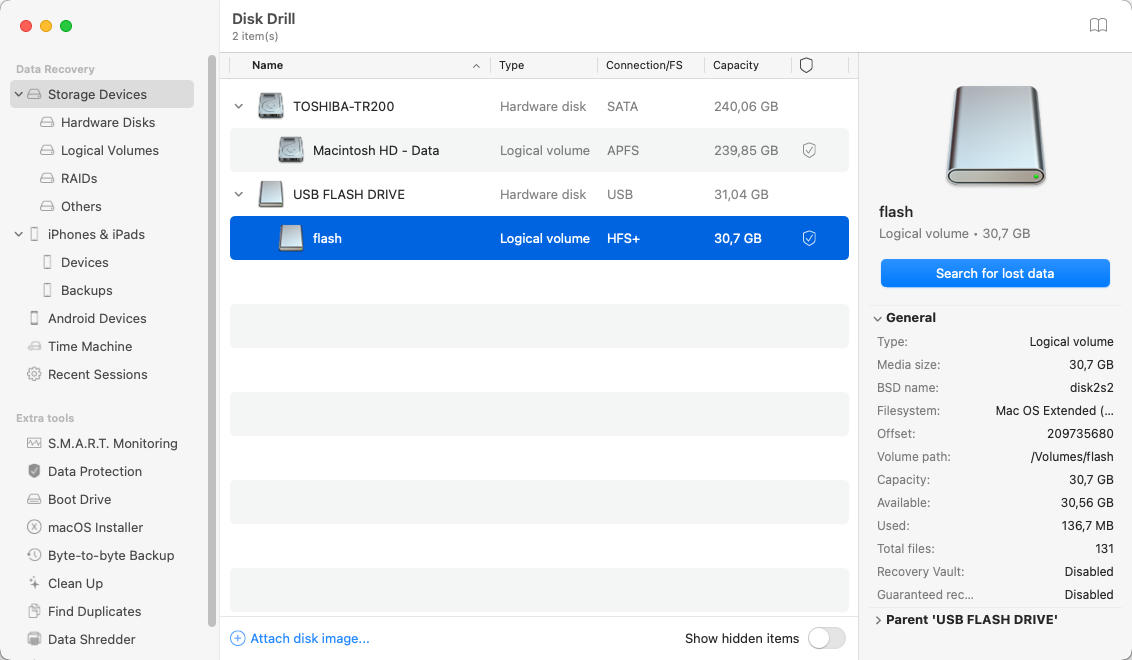
- Choose the drive which you need to recover files from and click the Search for lost data button.
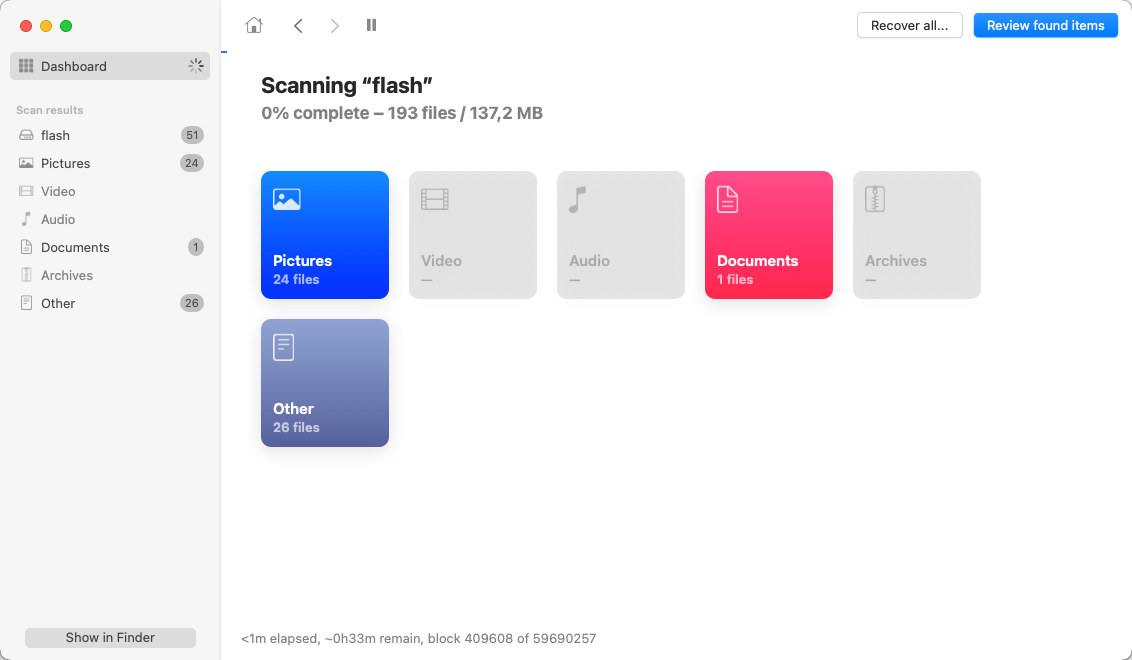
- Wait for the scan to finish and click Review found items.
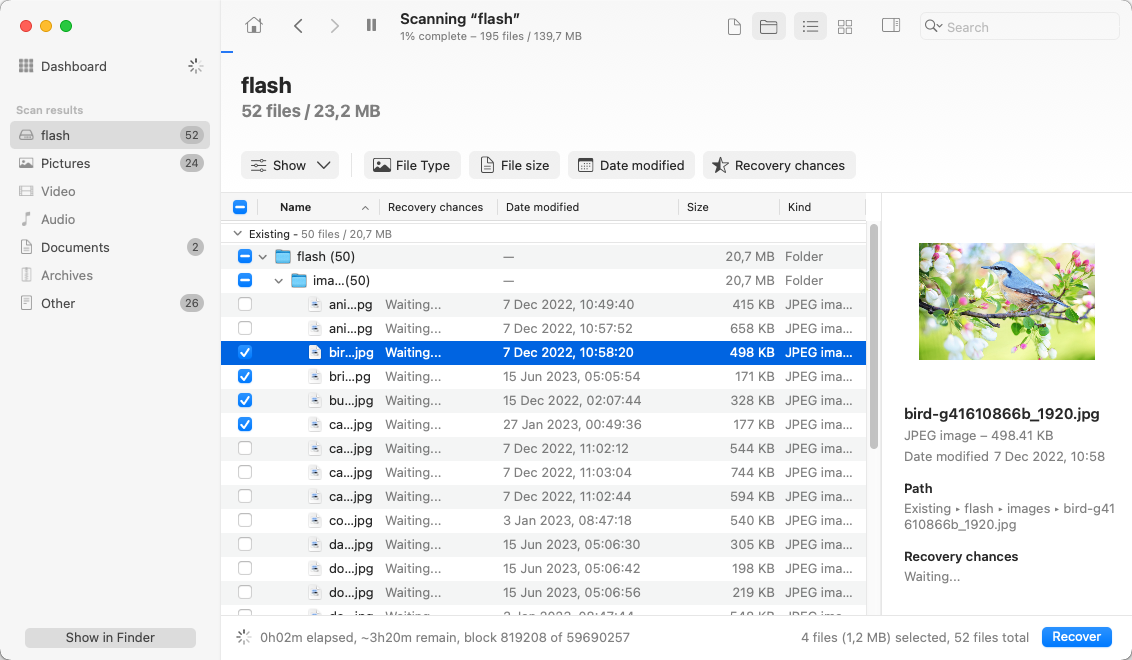
- Look through the files and choose the ones you want to recover (use the search field on the top-right or the tabs on the sidebar on the left to simplify the search). Click the eye icon near a certain file to preview it.
- Click Recover.
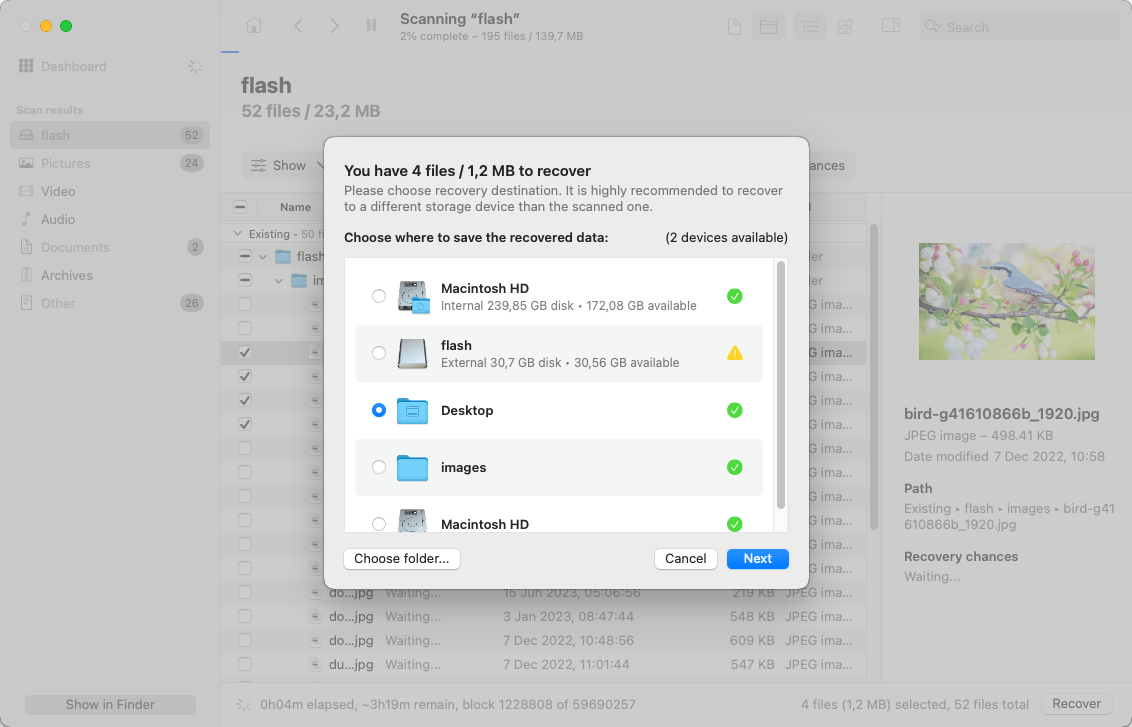
- Choose a location for the recovered files (it should be a folder on a drive different from the one that was used for recovery) and click Next.
Disk Drill has a free trial which allows you to scan the partition and preview the found files. So if you want to actually complete the HFS/HFS+ partition recovery, you’ll need to purchase the pro version.
Case 2: Recover the Whole HFS Partition
If you need to recover the whole HFS or HFS+ partition on a Mac, you should try doing it with TestDisk. It is a free open source data recovery application that has the capabilities to restore deleted, lost, or damaged partitions.
Note: This HFS recovery software should be able to restore a deleted partition only if the data loss was caused by a human error or malware. If the drive containing the partition has physical damage, you might need to get help from a professional data recovery center.
However, TestDisk has a text-based user interface. So it might be a bit complicated to navigate this application and recover a lost HFS+ partition for users that don’t have much experience with using such applications.
Before you move forward with the partition recovery process, you need to install TestDisk. The easiest way to do it is with the help of Homebrew via Terminal. Here’s how to install TestDisk on your Mac:
- Launch Terminal (go to Launchpad and type Terminal in the search field).
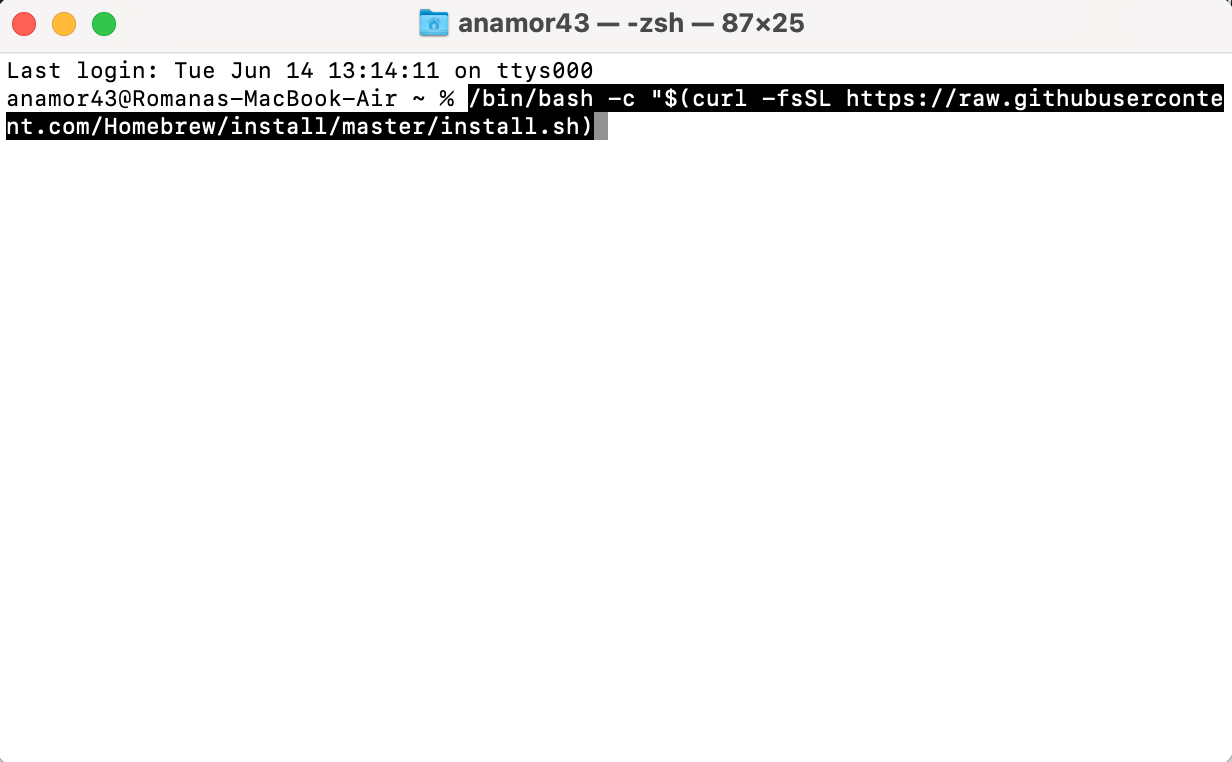
- Copy and paste the following command in the Terminal window and hit Return:
/bin/bash -c "$(curl -fsSL https://raw.githubusercontent.com/Homebrew/install/master/install.sh)"
- Open Terminal and type in
brew install testdisk, and hit the Return key.
Follow these steps to complete an HFS disk recovery with TestDisk on a Mac:
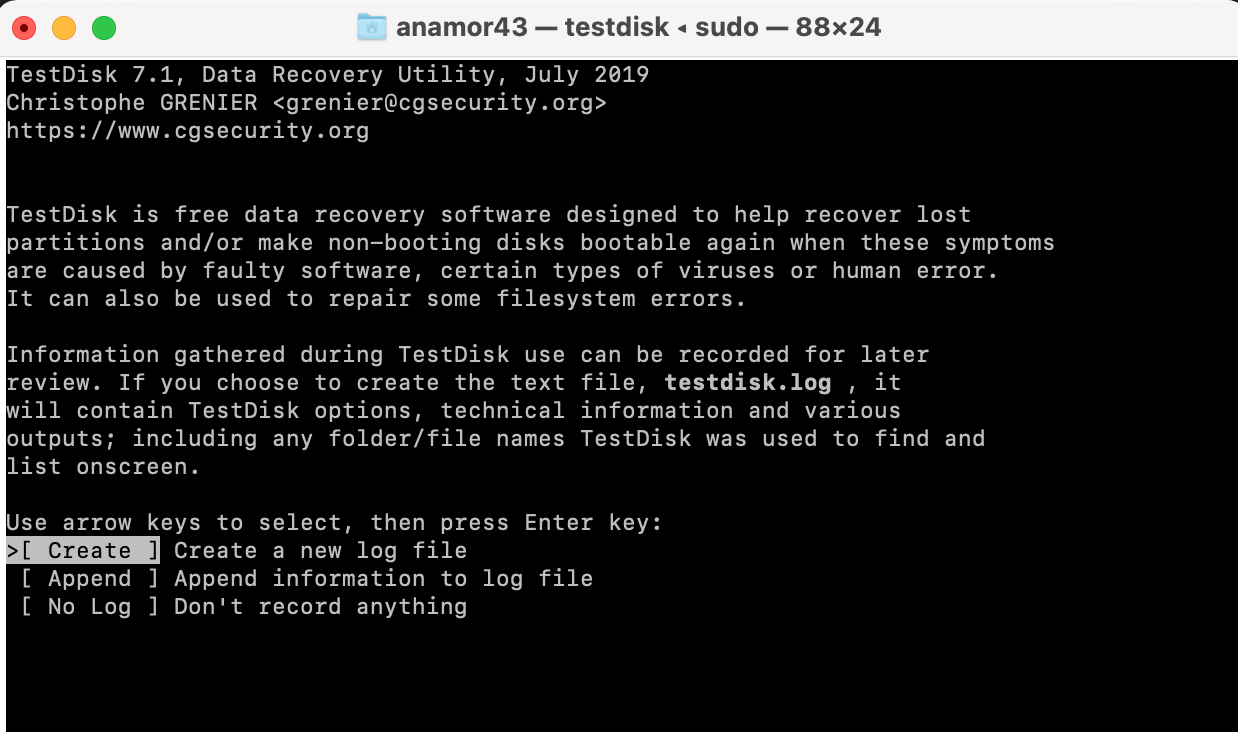
- Type
sudo testdiskin Terminal and hit Return to launch TestDisk. - Choose Create a new log file and hit Return.
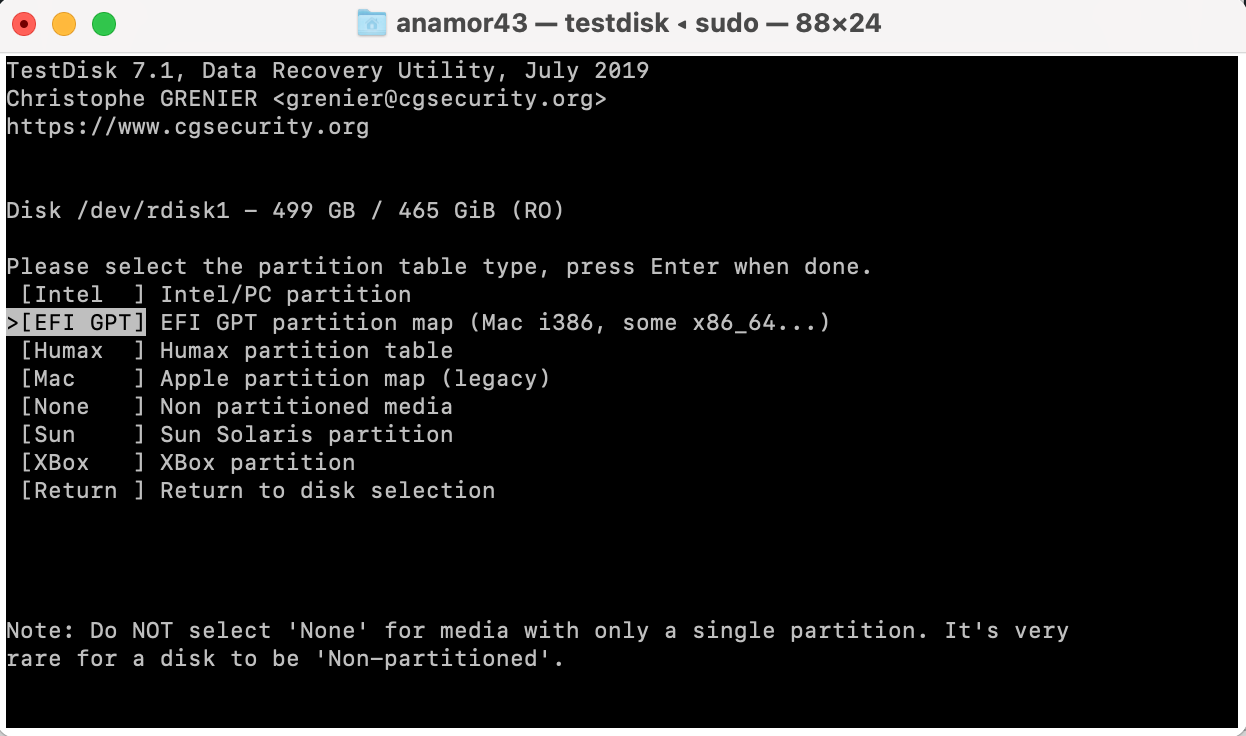
- Select the drive containing the lost or deleted partition.
- Select the partition table type and hit Return.
- Choose Analyse current partition structure and search for lost partitions, and hit Return.
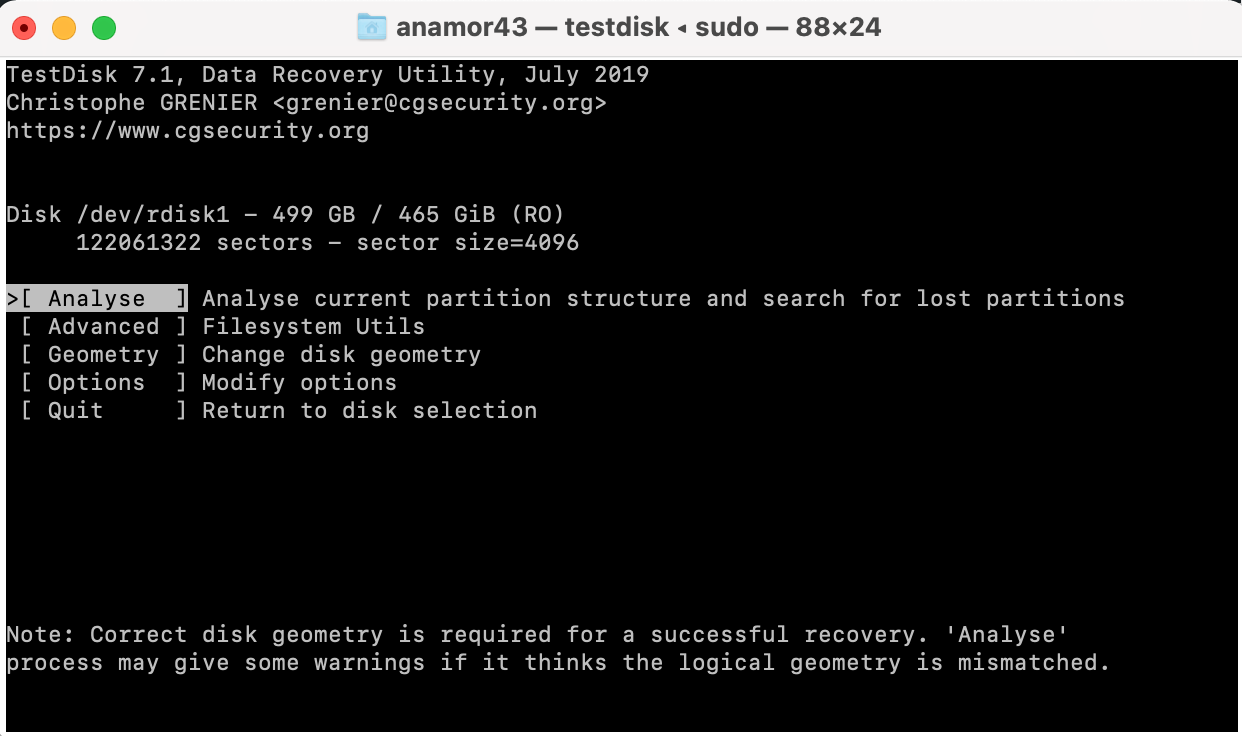
- Wait for the Quick Scan to finish to view the found partitions.
- If the scan revealed the lost partition, select it and choose the Write option. Otherwise, choose the Deeper Search option and hit Return.
How To Recover Data from HFS Partition on Windows
While Windows won’t let you explore the contents of an HFS formatted drive, third-party tools like Disk Drill can detect the drive and recover data from it.
Windows will probably prompt you to format the drive as soon as you connect it. DO NOT format the drive. Simply close the prompt and begin the data recovery process. If you opt to use Disk Drill, the data recovery steps will remain the same as the Mac. As a Windows user, you can also take advantage of Disk Drill’s free trial, that lets you recover up to 500 MB of data for free.
The Bottom Line
When it comes to restoring HFS/HFS+ partitions or drives, the data recovery results depend greatly on how fast you act and whether the data has already been overwritten or not. Therefore there is no solution that would guarantee a 100% recovery success rate.
It’s always a good idea to be prepared for the worst. And the best way to do that is regularly backup your data (for example, with Time Machine) so that in case you delete important files or lose a partition, you’ll have an easy way to bring back the data.


