 You may be stumped if you’re trying to access your hard drive, only to be met with the error message “The system cannot find the drive specified” after every attempt. While this is cause for concern, you must be careful what actions you take next so as not to lose any of your data.
We’ll explain what this error message is, how it can appear, and what you need to do to resolve it. Read on to learn how you can fix the problem without compromising your data.
Table of Contents
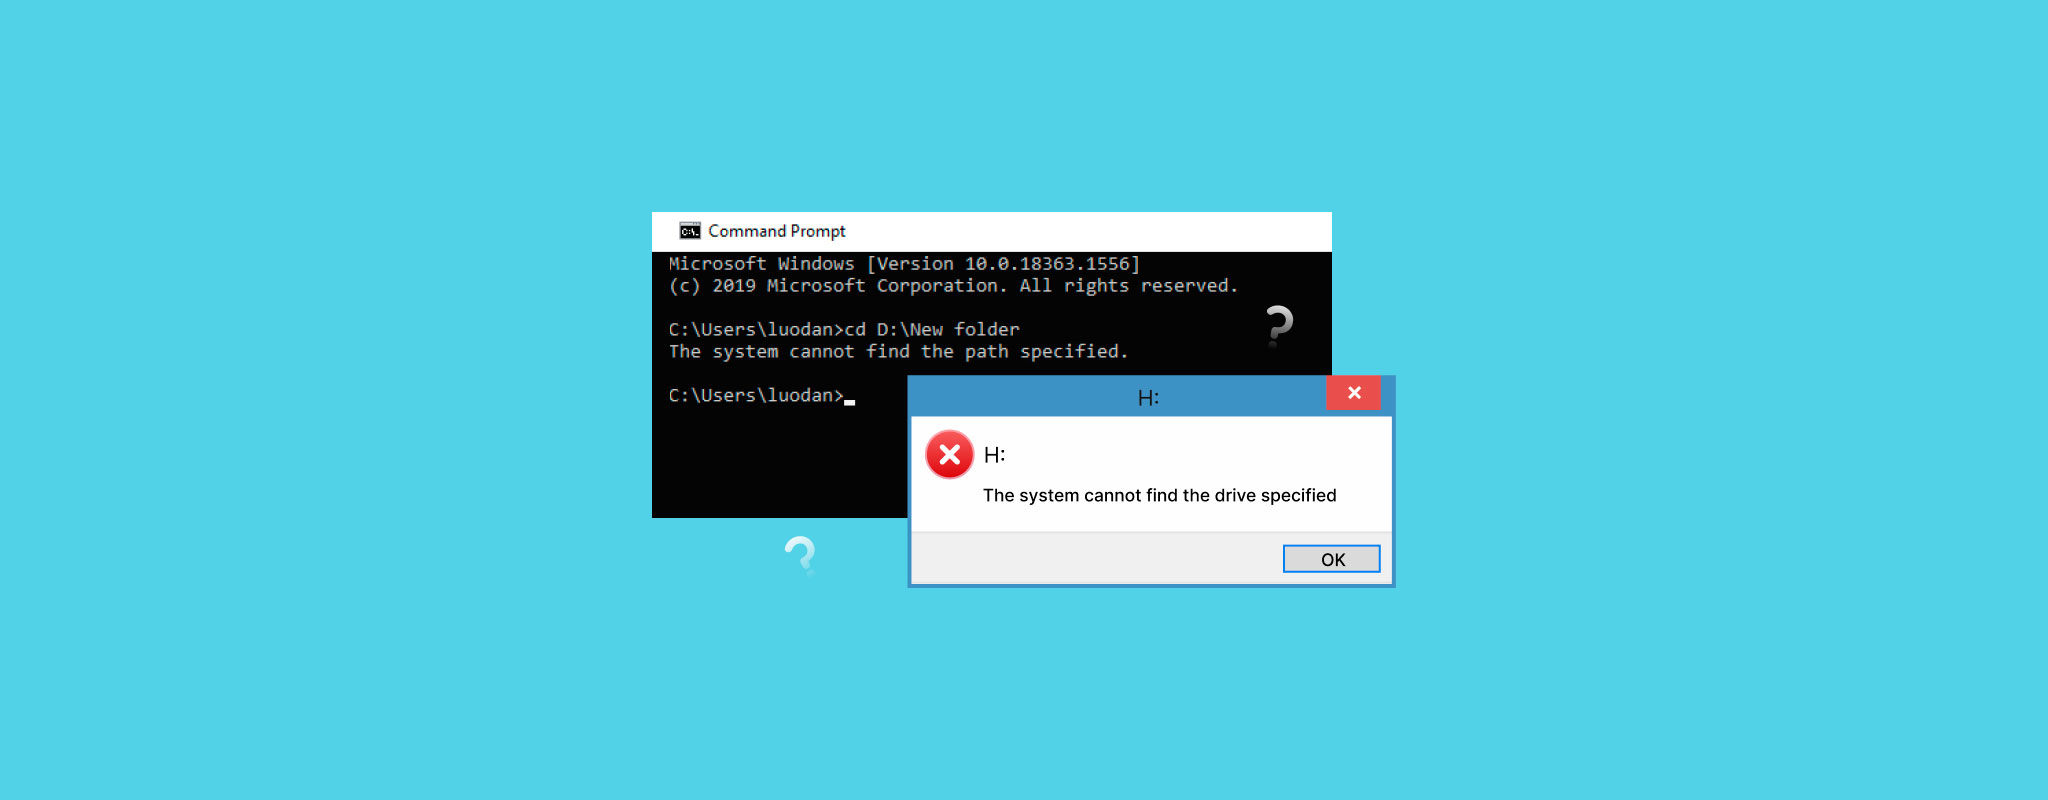
What is the Error “System Cannot Find The Drive Specified”
Sometimes displayed as “Error 15”, the “The system cannot find the drive specified” error message comes about whenever Windows cannot access the specified drive. Like when an external hard drive won’t mount on Mac, there are many possible reasons why Windows can’t detect or access the hard drive. We’ve listed some of the most common ones below:
| Problem | Description |
| ❗ Corrupted drive or system files | You may lose access to your drive if the file system or some critical system files become damaged or corrupted. |
| 🦠 Malware or virus attack | Malware can infect your computer and cause a number of problems, like damaging your file system or corrupting your device drivers. |
| ❌ Conflicting software | Software that hasn’t been configured to work together properly might be the cause. For example, some users reported compatibility issues between the Rockstar Launcher and Steam, causing this message to appear. |
| 📄 Lack of permissions | If your operating system doesn’t have the correct permissions to access the drive, this message can appear as a result. |
| ⚙️ Faulty factory reset | Some computer brands, particularly Dell and HP, may experience this problem after performing a factory reset. |
How to Avoid Losing Your Data While Fixing the Error
Fixing the problem immediately could negatively affect your data, as some fixes may end up irrecoverably overwriting it. Instead, you should start with data recovery to make sure your data isn’t at risk.
For this, we recommend Disk Drill. It’s a highly capable data recovery tool that’s trusted by many for its ease of use and excellent recovery performance in many data loss situations, like corrupted hard drive recovery. It’s supported on the latest version of Windows 11, but is also available on Windows 10, as well as older versions like Windows 7 (with Disk Drill 4).
Disk Drill can recover data even from disks that are unrecognized or inaccessible through File Explorer, as long as they’re visible in Disk Management and reading the correct size.
Follow these steps to recover data from your drive that is experiencing “The system can’t find the drive specified” error:
- Download and install Disk Drill to a working drive.
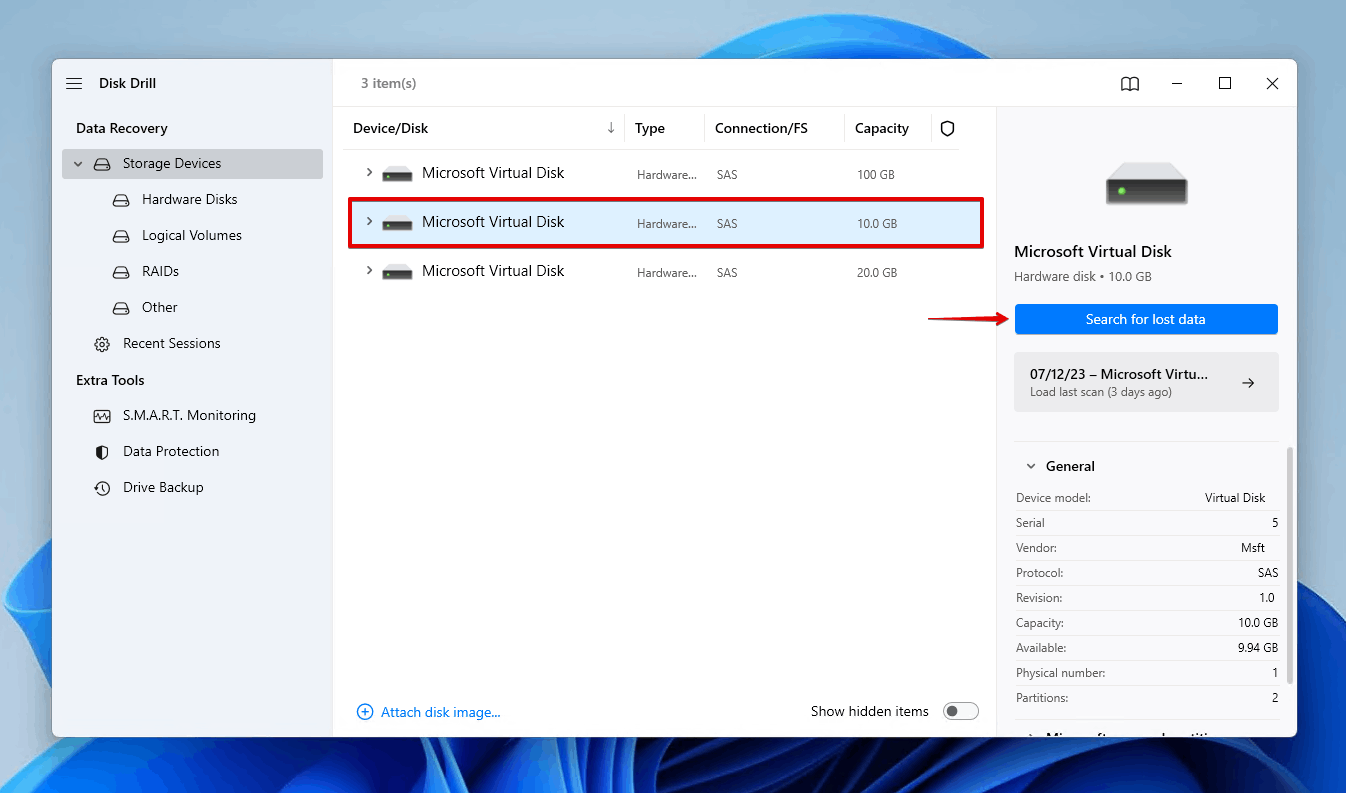
- Select the problematic drive, then click Search for lost data.
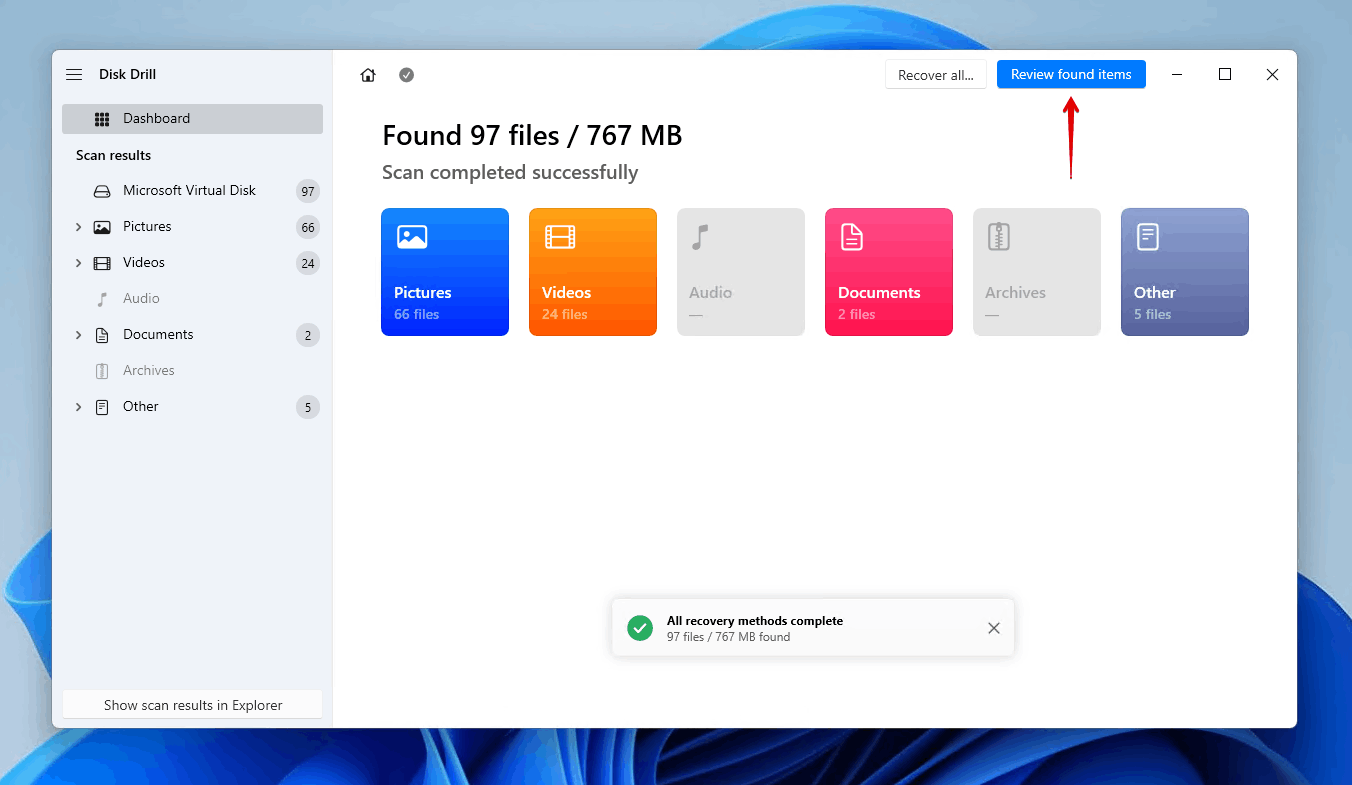
- Click Review found items once the scan is finished, or click Recover all to recover all data immediately.
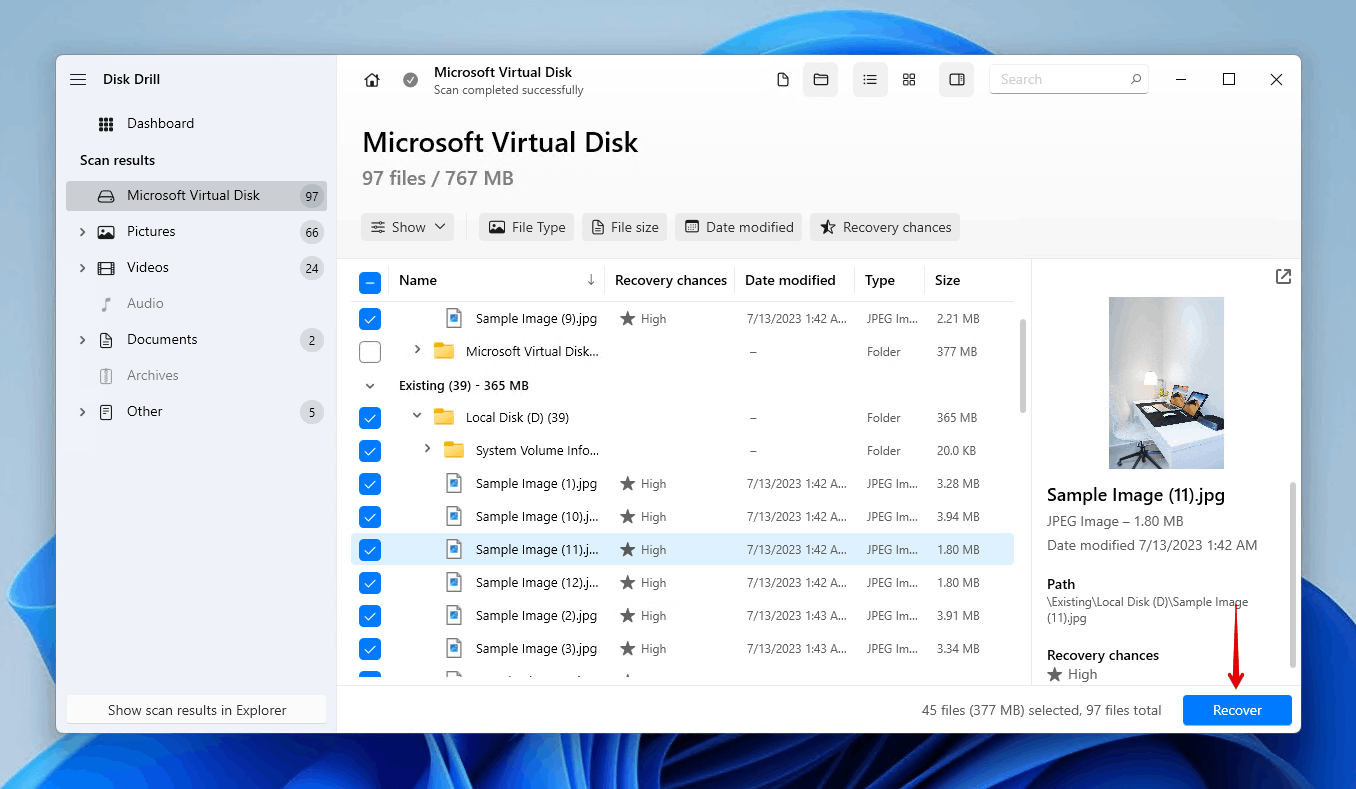
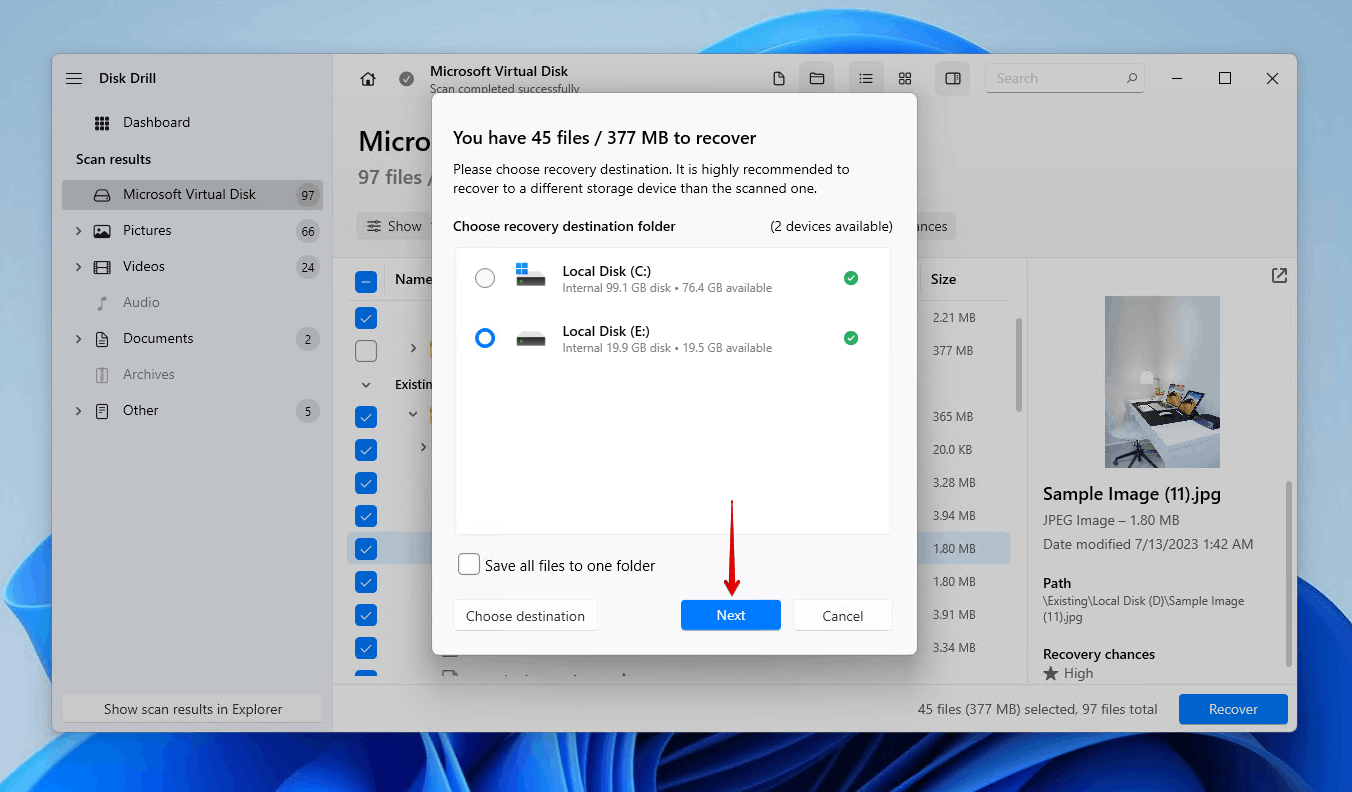
- Select the files you wish to recover. Much of your data is likely in the Existing section, but you may also find some data in the Deleted or lost section if some of your data was affected. When you’re ready, click Recover.
- Select a safe storage location for recovery, then click Next. You can recover up to 500 MB of data for free, but anything more will require a Disk Drill PRO license.
How to Fix “The System Can’t Find the Drive Specified” Error
Following the successful recovery of your data, you can begin troubleshooting the “The system can’t find the drive specified” error with peace of mind. The below methods have been proven to fix the problem, but you may need to work through each of them to find one that works for you.
Method 1: Reboot PC
As with most problems that occur, you should try restarting your computer first. If you’ve only experienced the error once when logging in, it may simply be a one-off glitch. Restarting your system gives it a chance to restart any essential services that may be stuck.
Method 2: Fix Registry Error
Mapped drives can also encounter this issue when you try to access them. User Account Control (UAC) is usually what causes this, specifically an issue with how the mapped drive is linked to the logon sessions that are created when you log in.
In such cases, you can easily fix the issue by updating an entry in the registry.
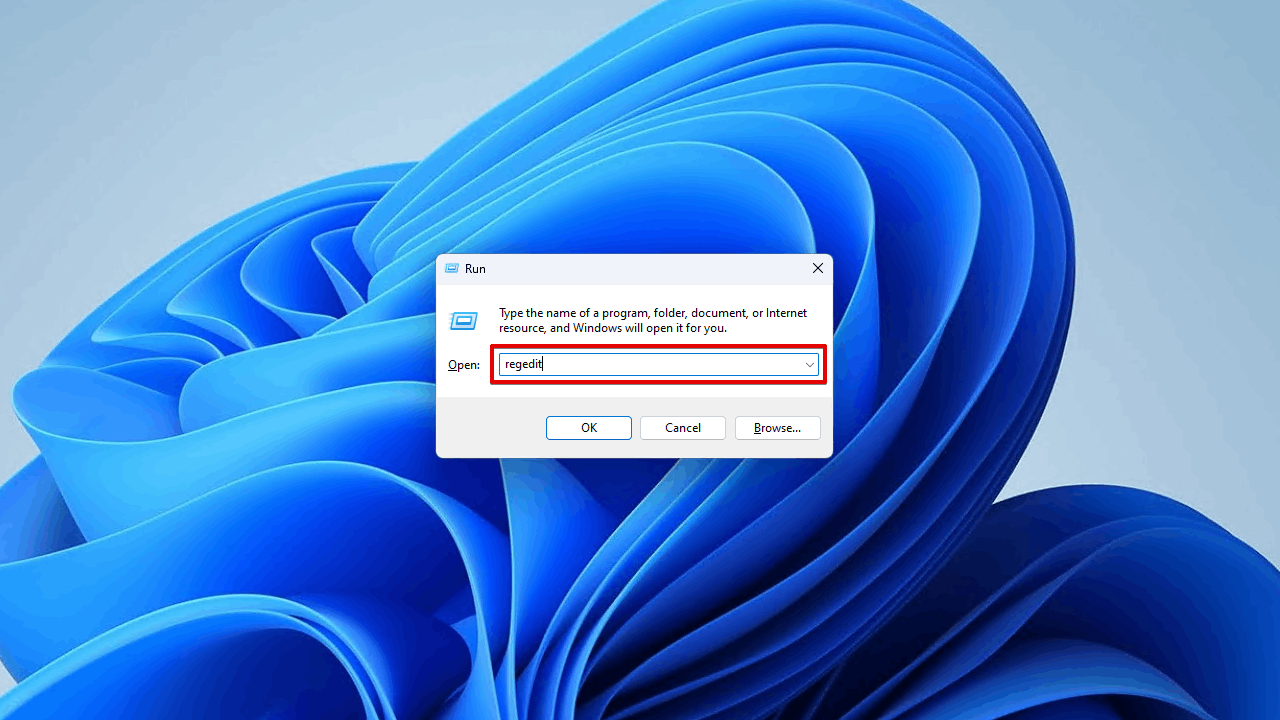
- Press Windows Key + R and type “regedit”. Press Enter.
- Click File, then Export to make a backup of your registry in its current state so you can easily restore it if you make a mistake.

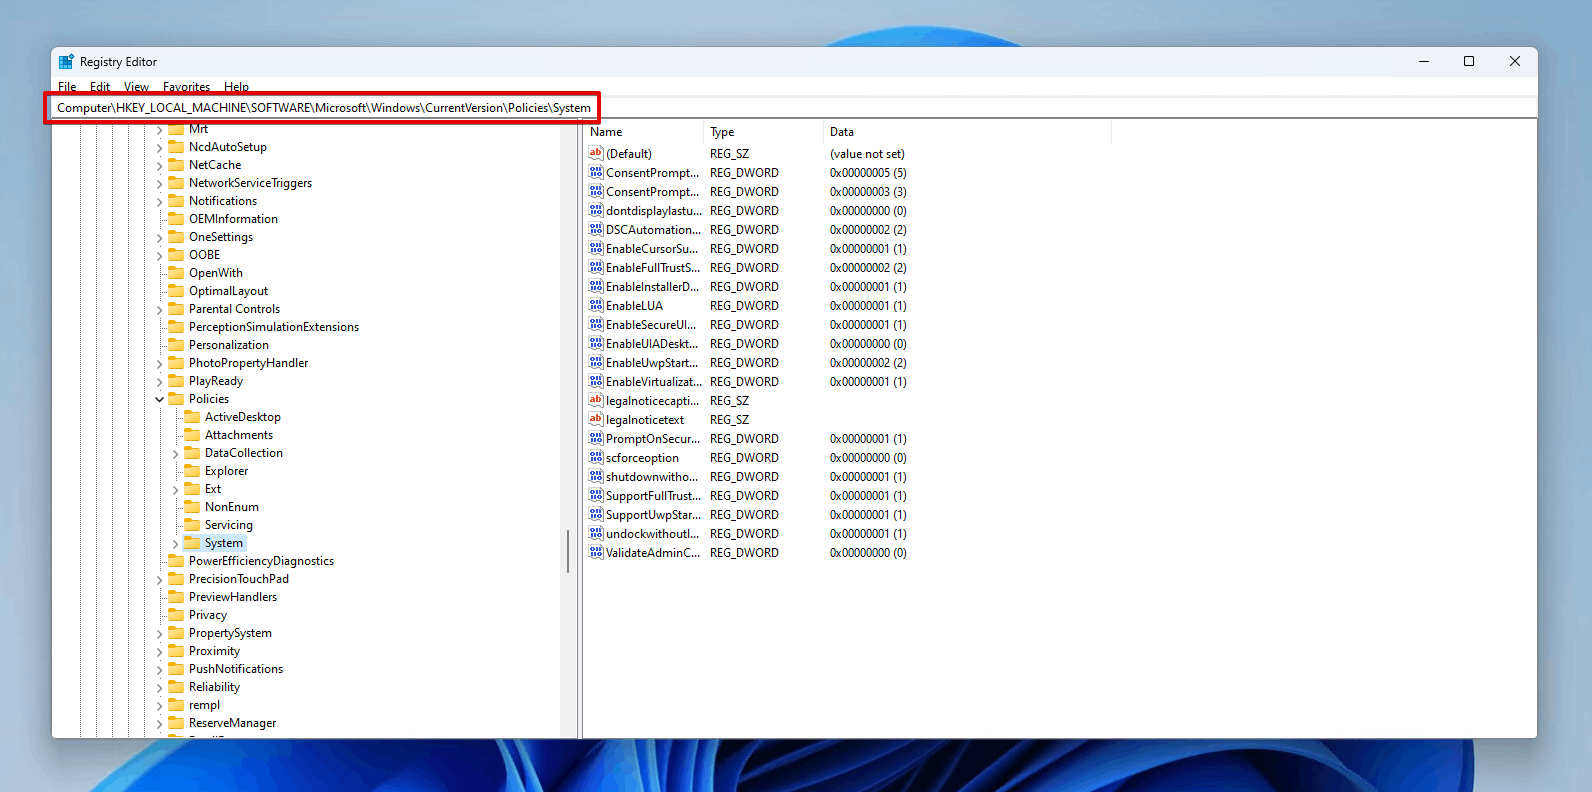
- Navigate to the following area:
Computer\HKEY_LOCAL_MACHINE\SOFTWARE\Microsoft\Windows\CurrentVersion\Policies\System
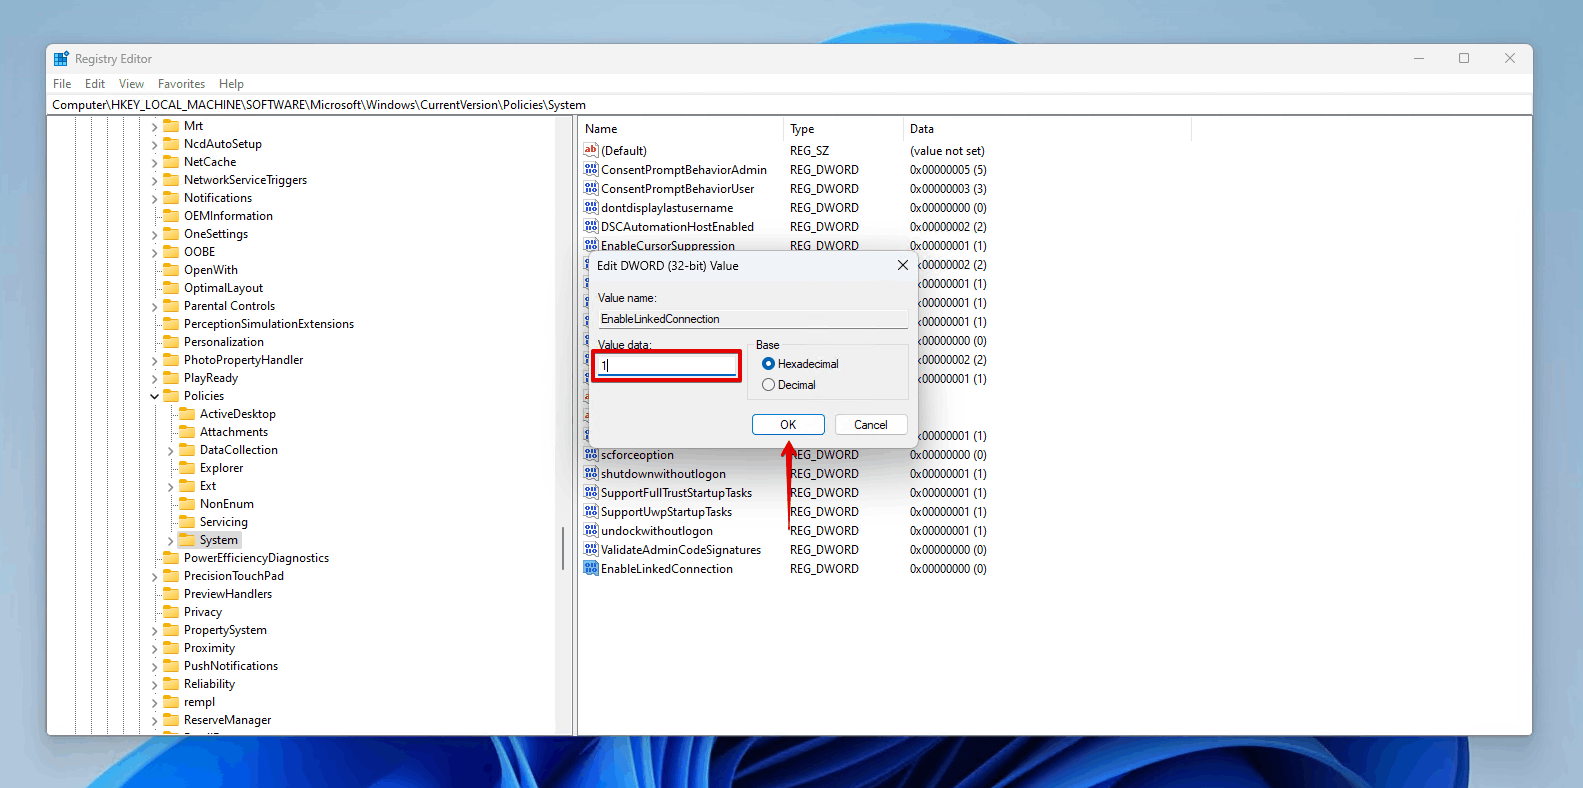
- Right-click a blank space, then click New DWORD (32-bit) Value. Name it EnableLinkedConnection.
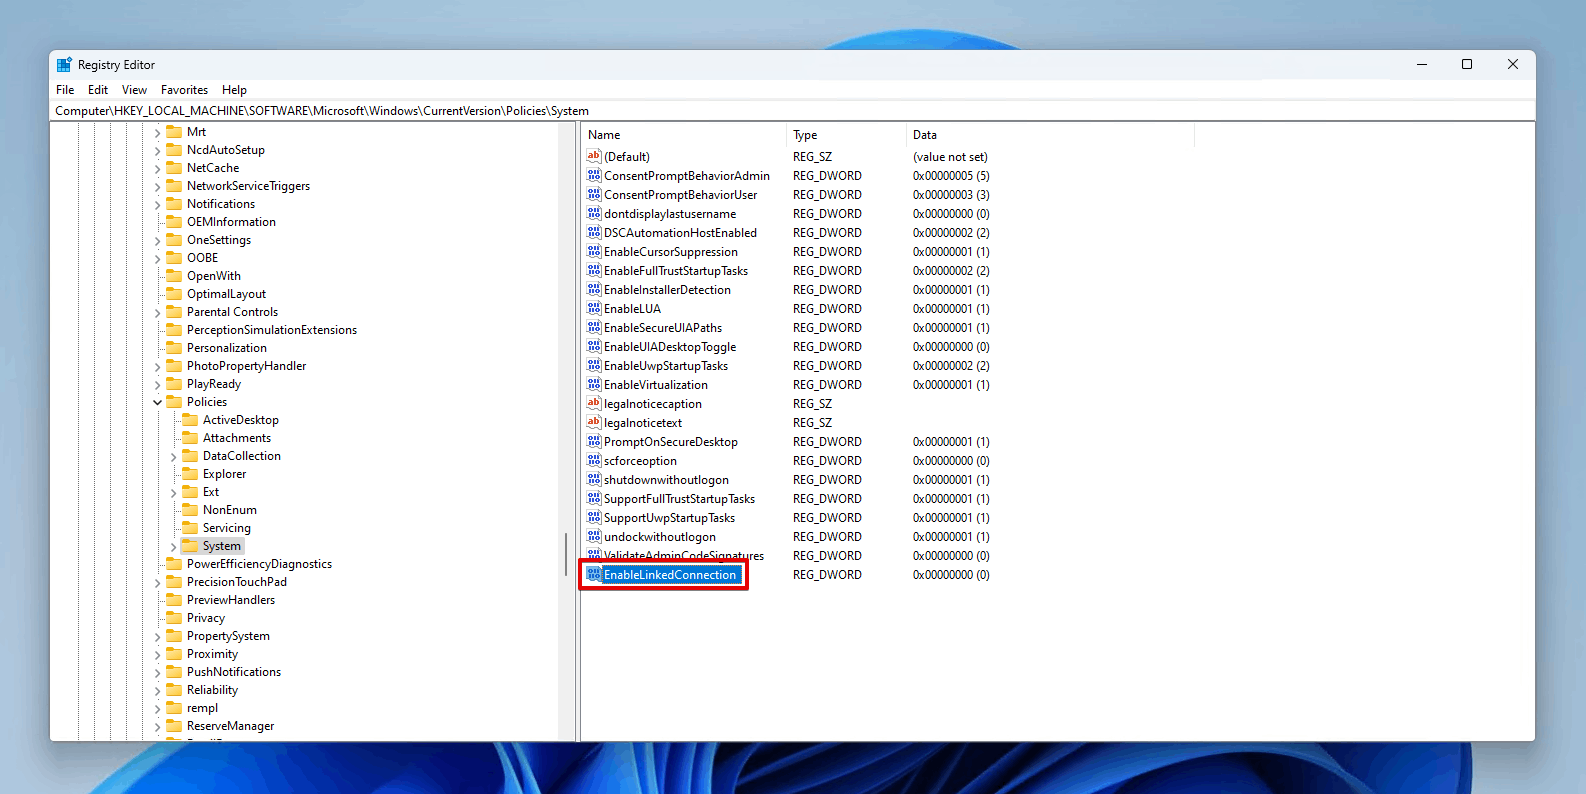
- Open the new registry entry and update the value to 1, then click OK.
Method 3: Give Correct Permissions to The Drive
Windows uses permissions to control what data each user has access to, as well as the system. If your system doesn’t have permission to access the drive, this error message will appear because the operating system is unsure why it cannot find the drive.
You can fix this by updating the permissions of the hard drive:
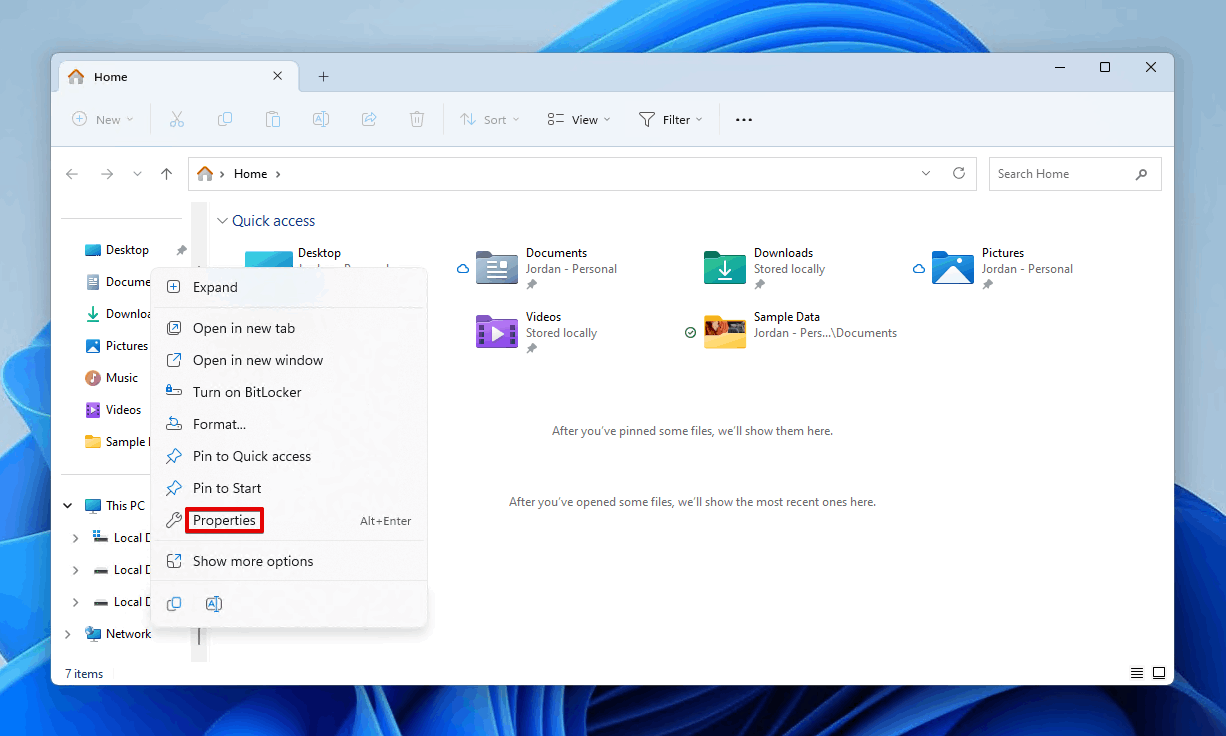
- Open File Explorer.
- Right-click the drive and click Properties.
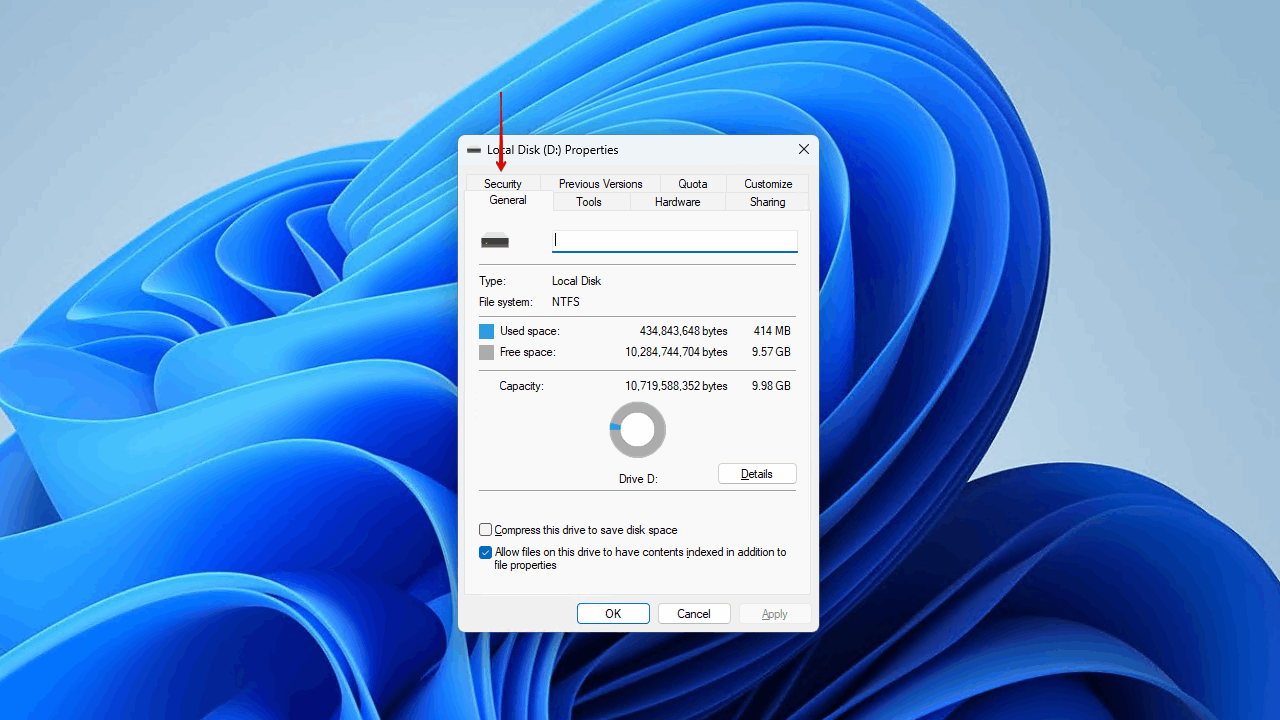
- Click the Security tab.
- Click Advanced.
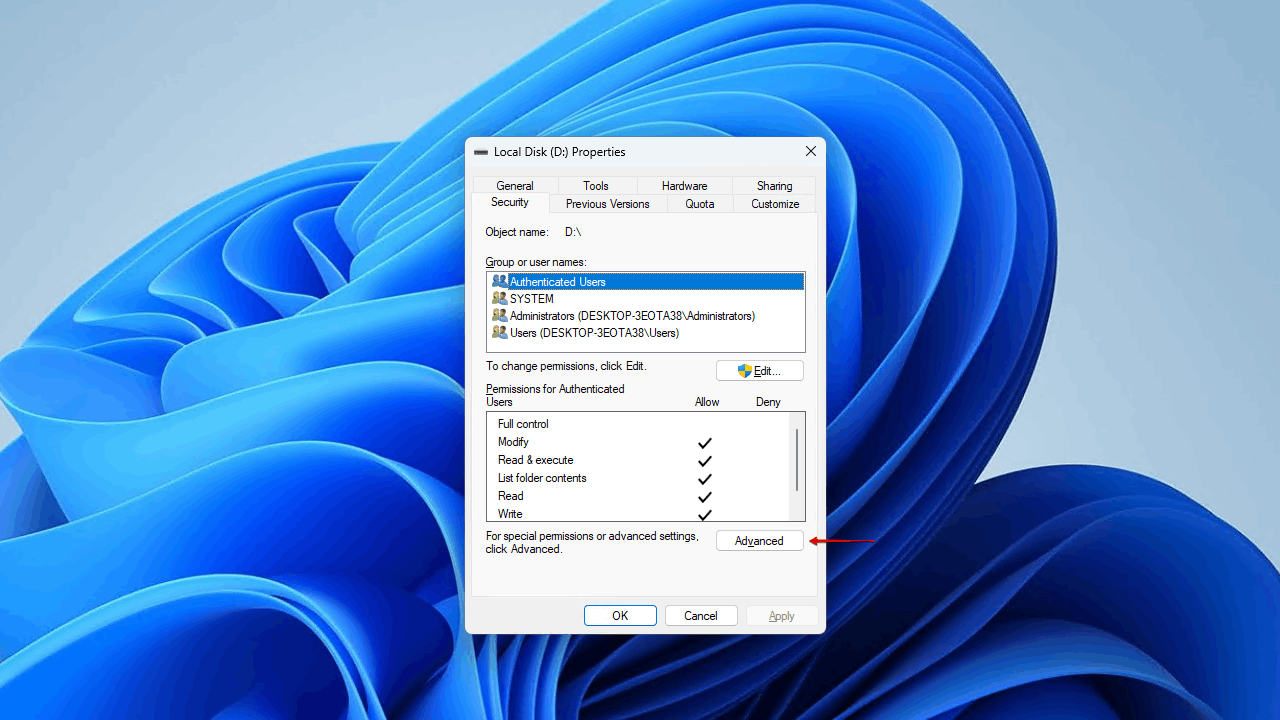
- Click System (or another user, depending on how you’re trying to access the drive) and click Edit. You may need to click Change permission first.
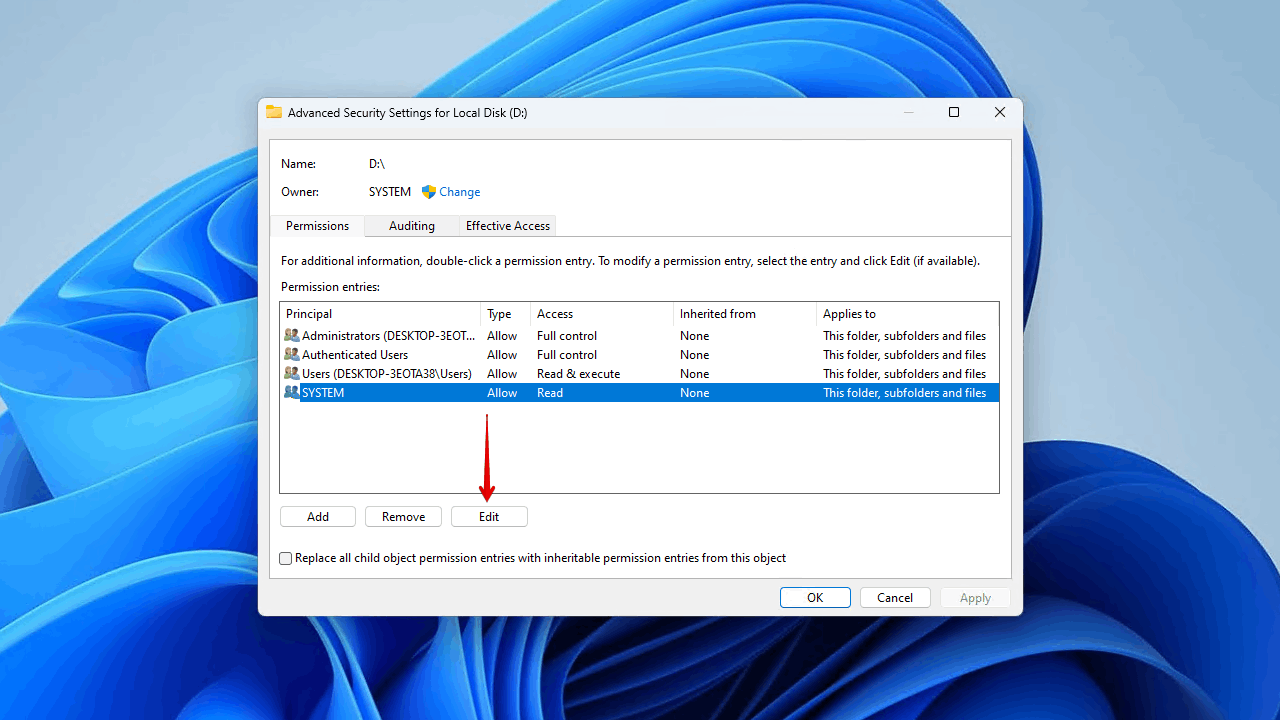
- Make sure Full control is ticked, then click OK.
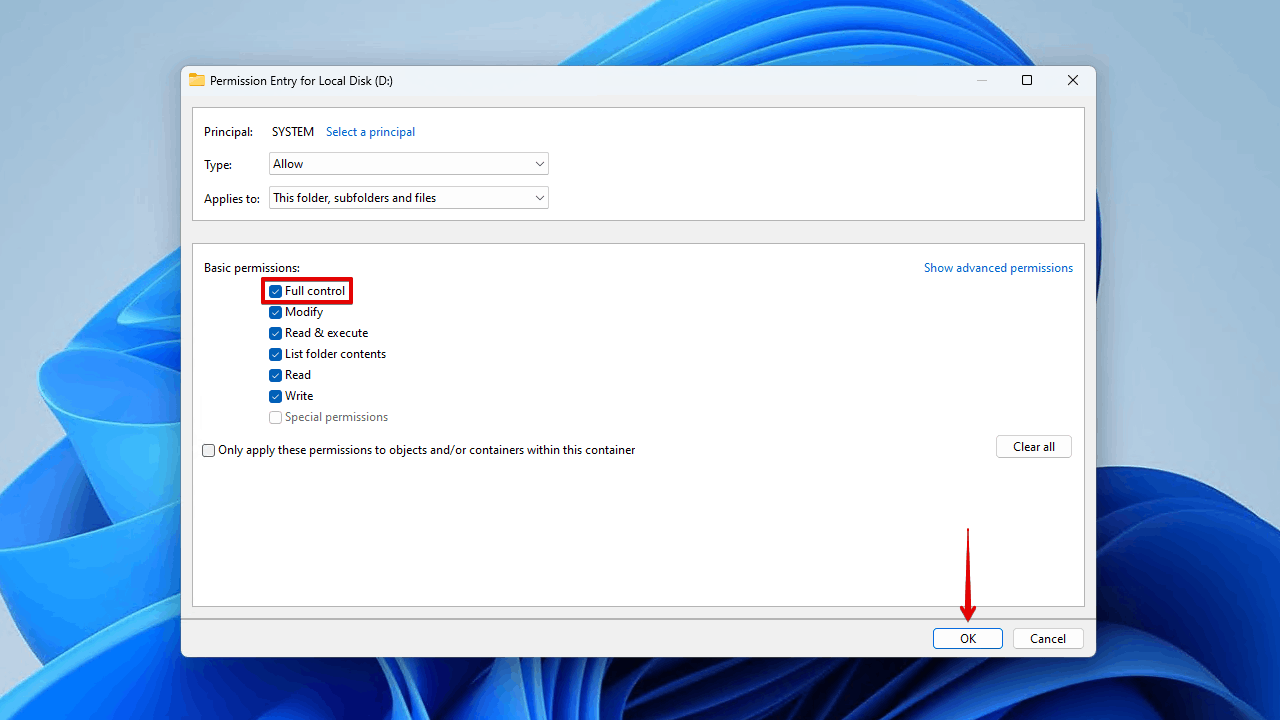
- Click Apply, then OK.
Method 4: Remove Recently Installed Software
Problematic software may have made some changes to your system. Try uninstalling any recently installed software to see if it fixes the problem.
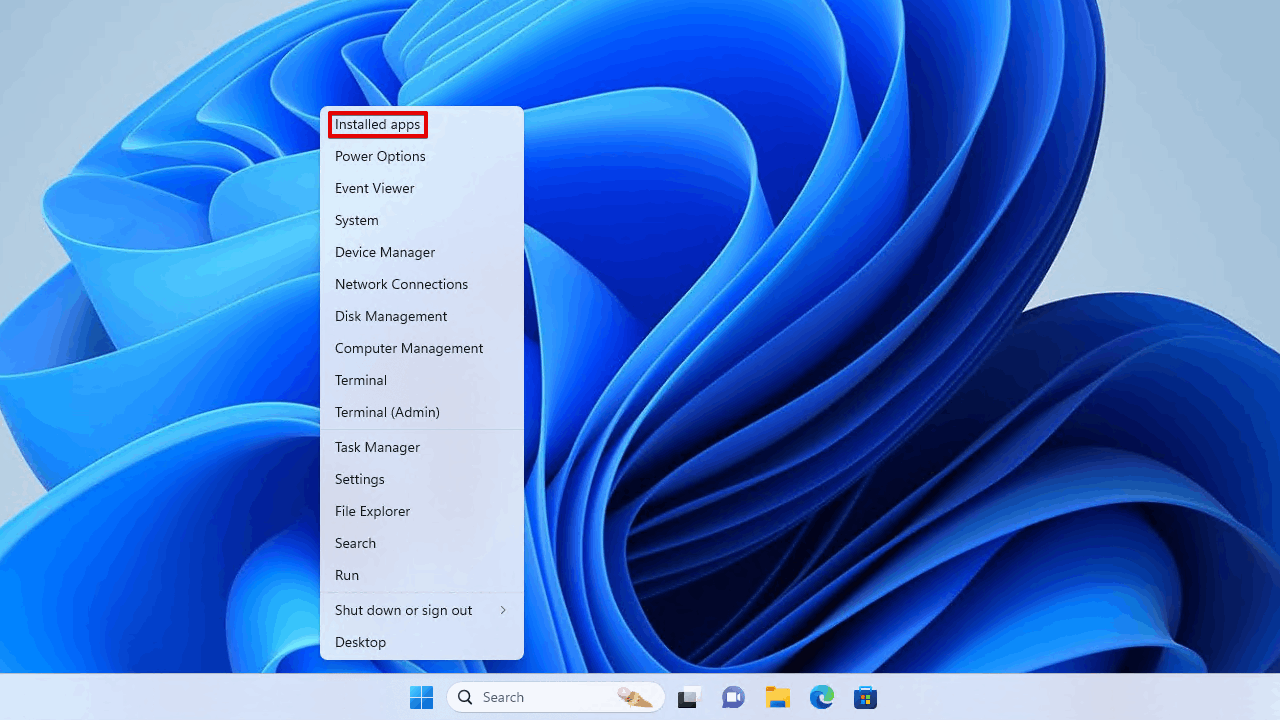
- Right-click Start and click Installed apps.
- Find the recently installed program(s) and click the ellipsis button. Click Uninstall.
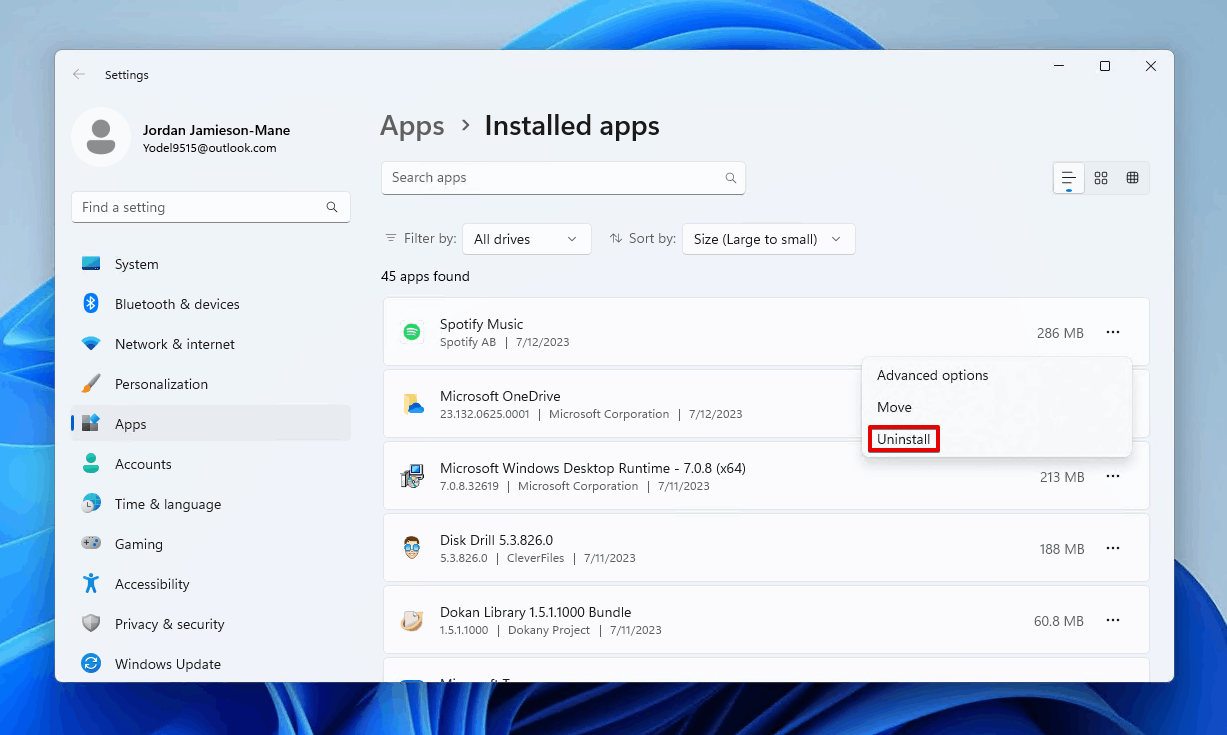
- Click Uninstall.
Once uninstalled, you can reinstall the software and see if the problem persists.
Method 5: Make Sure You’re Up to Date
Ensuring your operating system and system drivers are up to date ensures you’re receiving the latest updates and patches available to you. The problem causing the issue may have already been solved, and all you need to do is update.
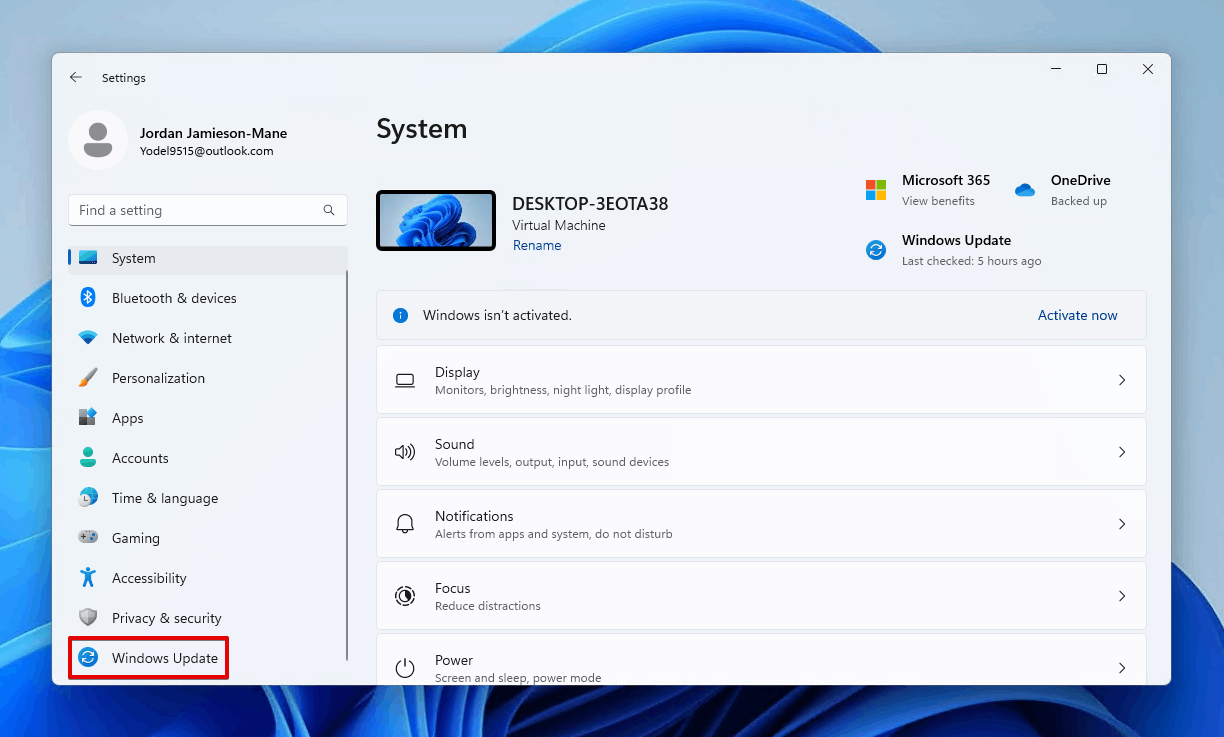
- Right-click Start and click Settings.

- Click Windows Update.
- Click Check for updates.
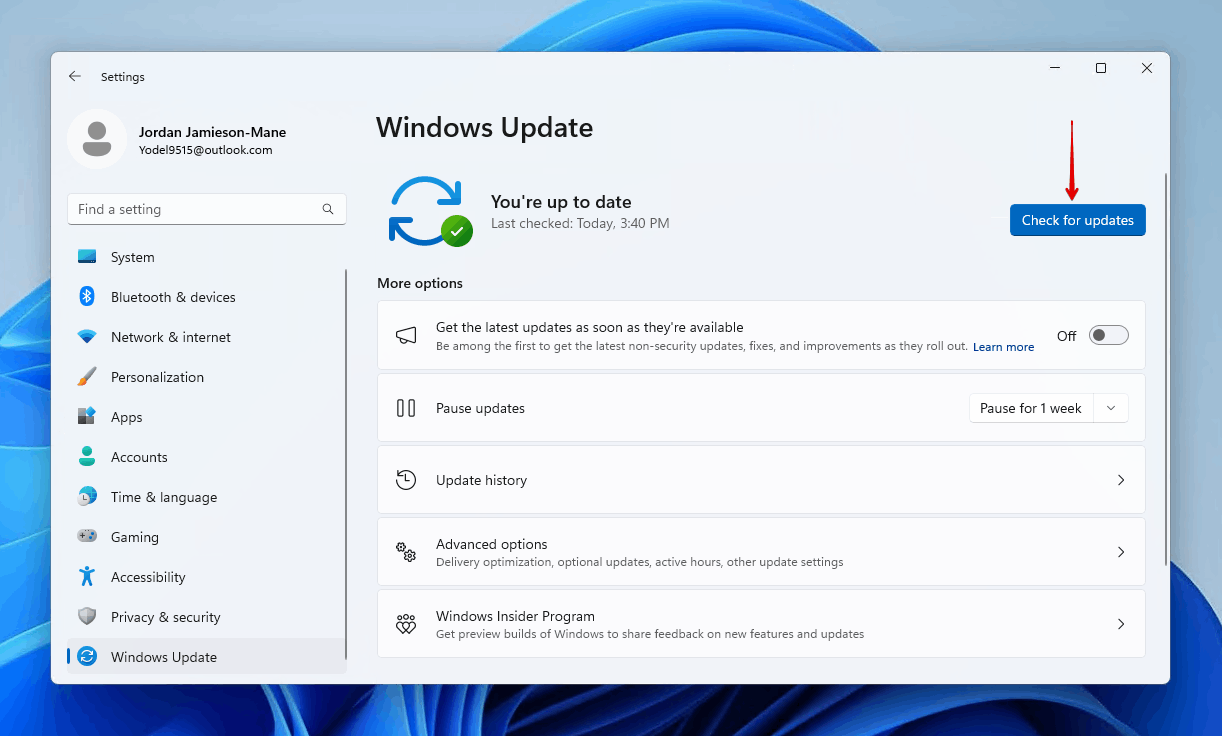
- Install any updates that are available.
Method 6: Fix Using Command Prompt
You can fix the issue from the command prompt through the use of two commands, SFC and CHKDSK. SFC is used to repair any system files that have been corrupted using a locally stored copy. Following that, CHKDSK is used to repair any file system-related issues with the drive.
Follow these steps to resolve the problem in CMD:
- Right-click Start and click Terminal (Admin).

- Type
sfc /scannow. Press Enter.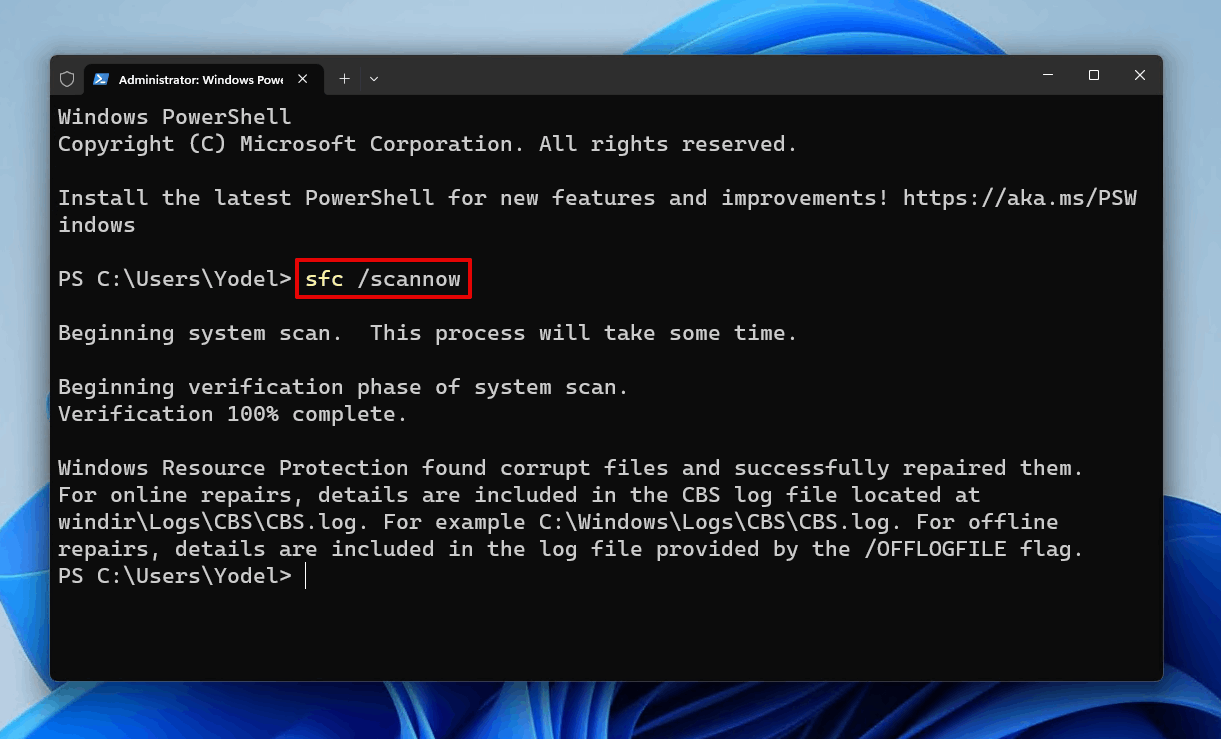
- Type
chkdsk *: /r. Replace * with your drive number. Press Enter.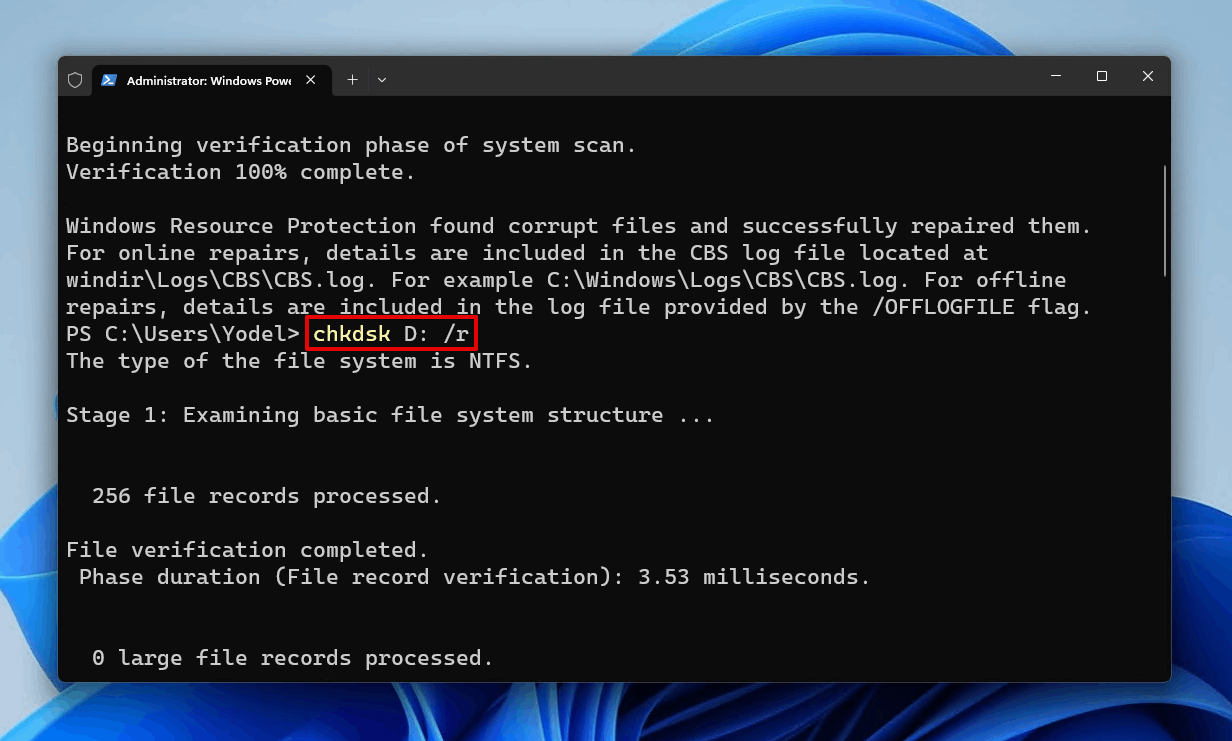
Method 7: Change Drive Letter
While uncommon, the problem can stem from the drive letter assigned to your drive. Windows has always relied on drive letters to navigate the storage devices attached to your computer, so if it’s a problematic or missing drive letter, you can quickly fix it in Disk Management.
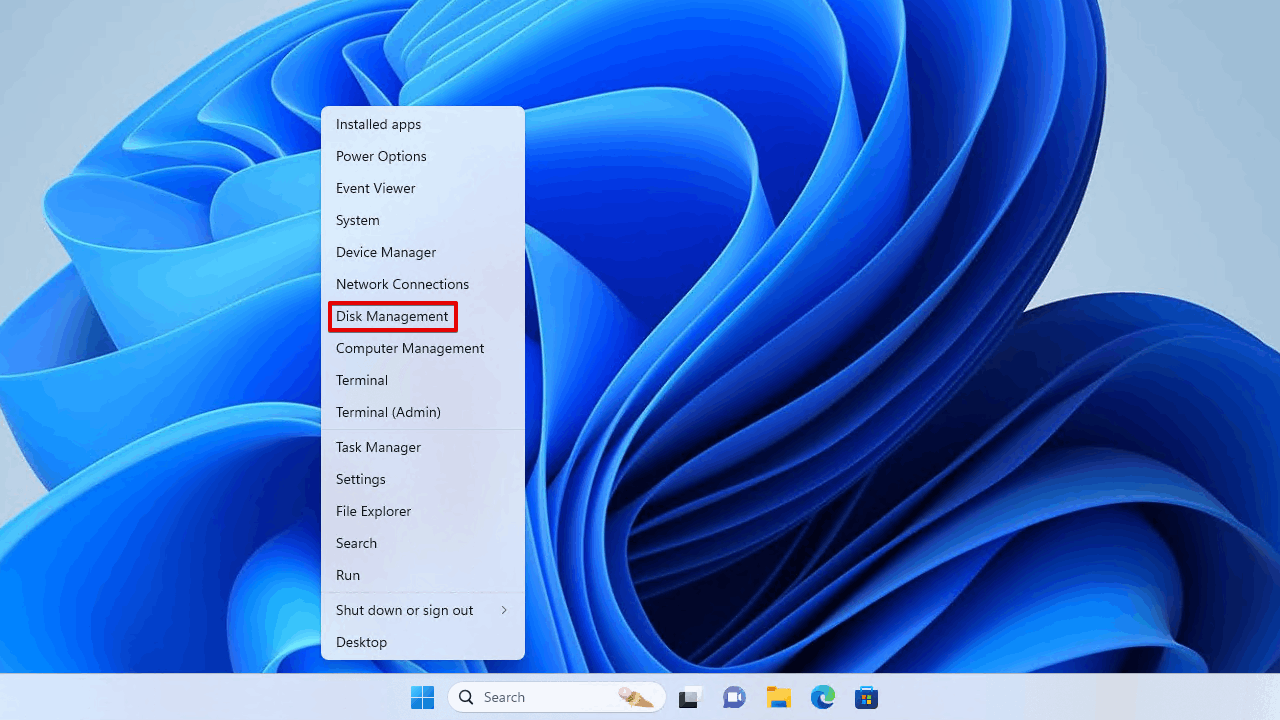
- Right-click Start and click Disk Management.
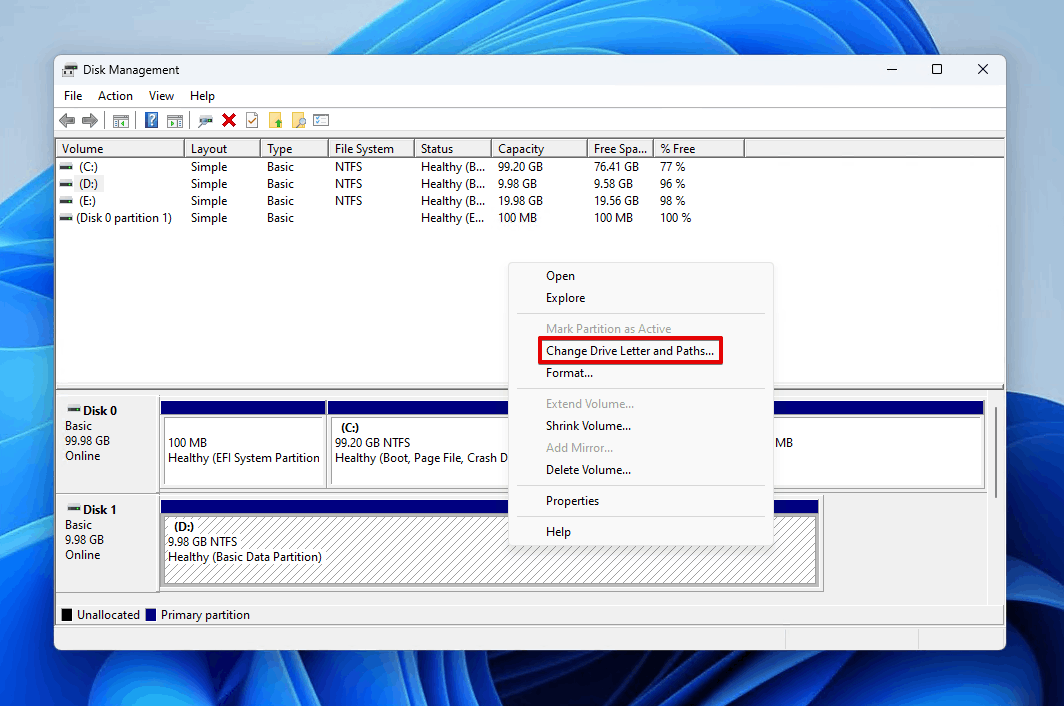
- Right-click the volume of your drive, then click Change Drive Letter and Paths.
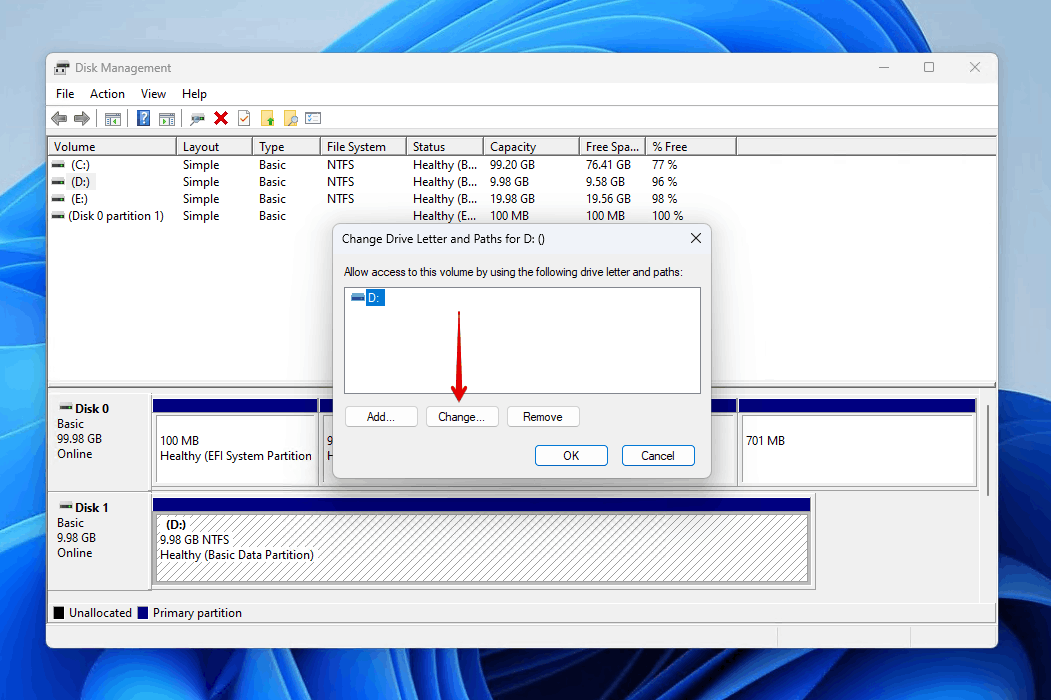
- Click the existing drive letter and click Change. If there is no drive letter, click Add instead.
- Select a drive letter from the dropdown menu, then click OK.
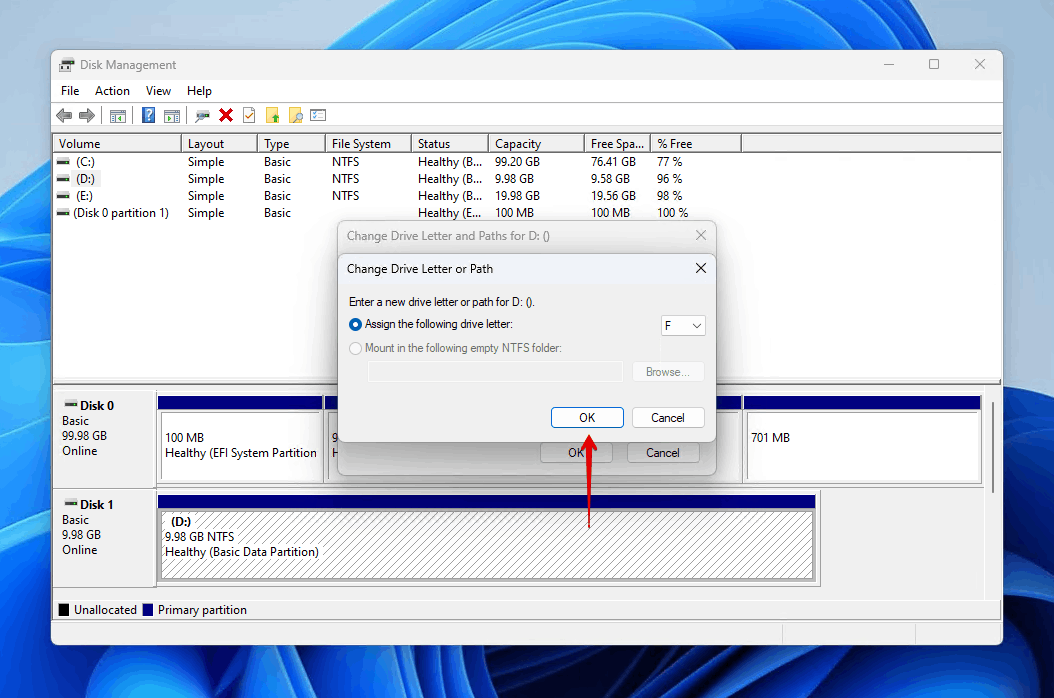
- Click Yes, then OK.
Method 8: Recreate Corrupted Partition
Of course, if none of the previous methods have worked, you can always just recreate the partition entirely if it’s corrupted. A corrupted partition can be deleted and you can create a brand new one from the unallocated space that is freed up.
We strongly recommend recovering your data now if you haven’t already done so, as recreating the corrupted partition will more than likely result in data loss.
- Right-click Start and click Disk Management.
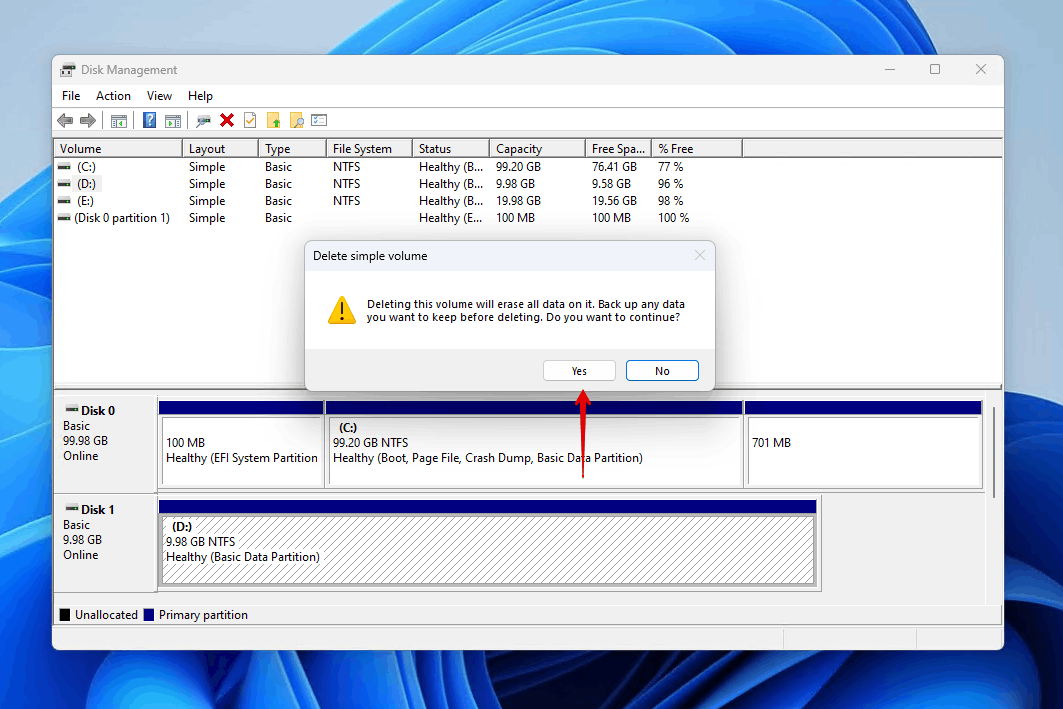
- Right-click the corrupted volume on your partition and click Delete Volume.
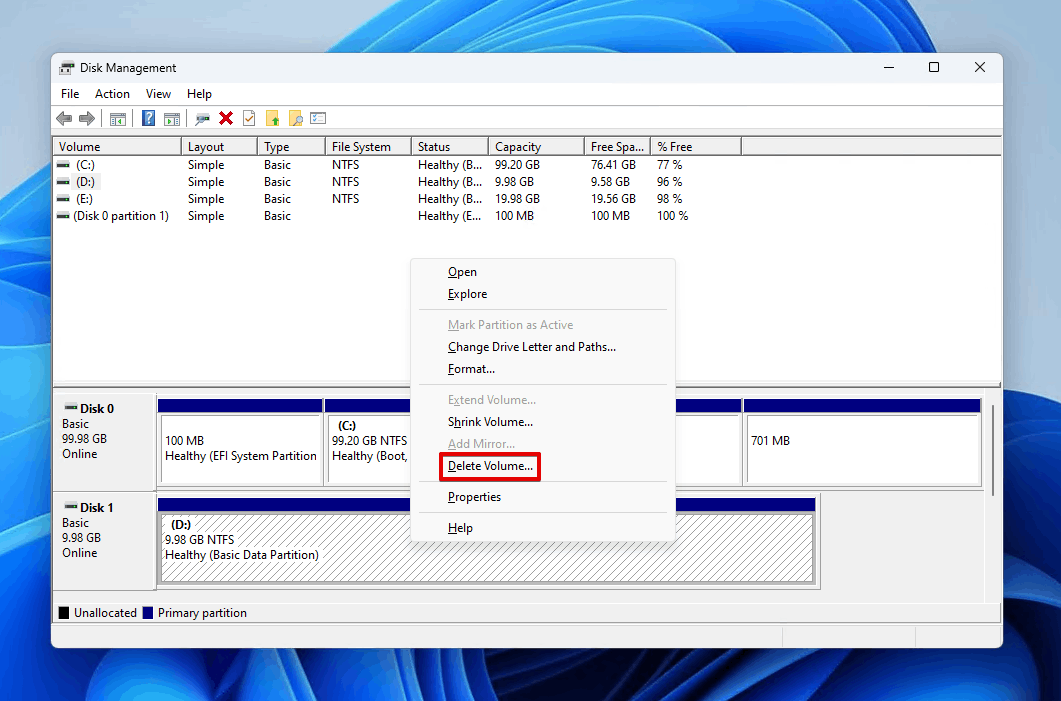
- Click Yes to confirm.
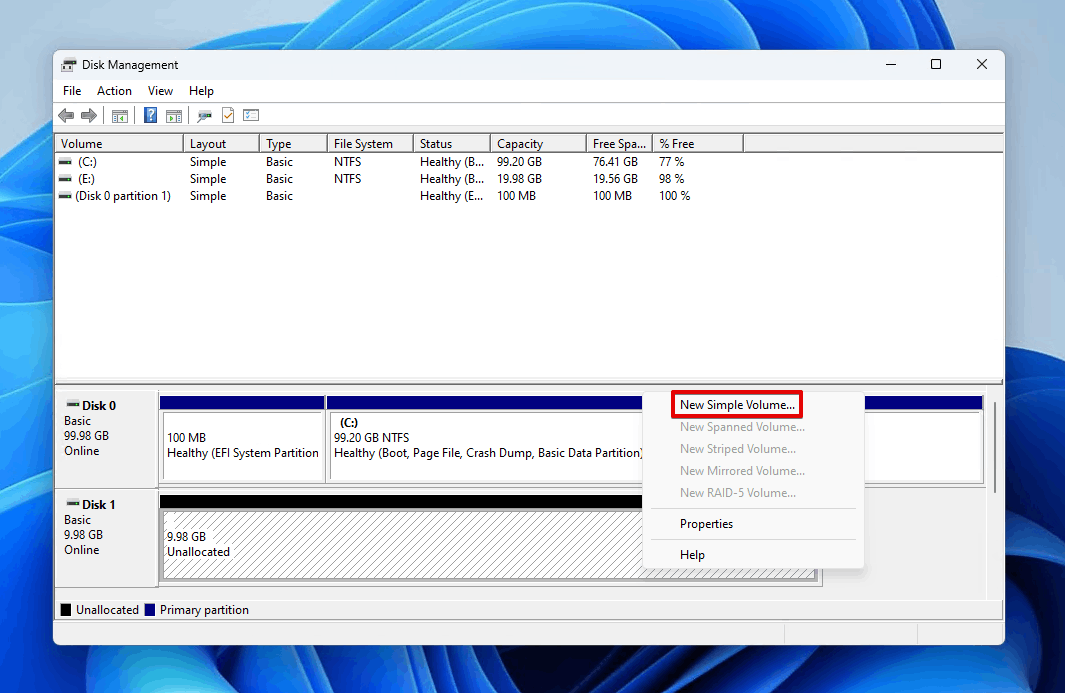
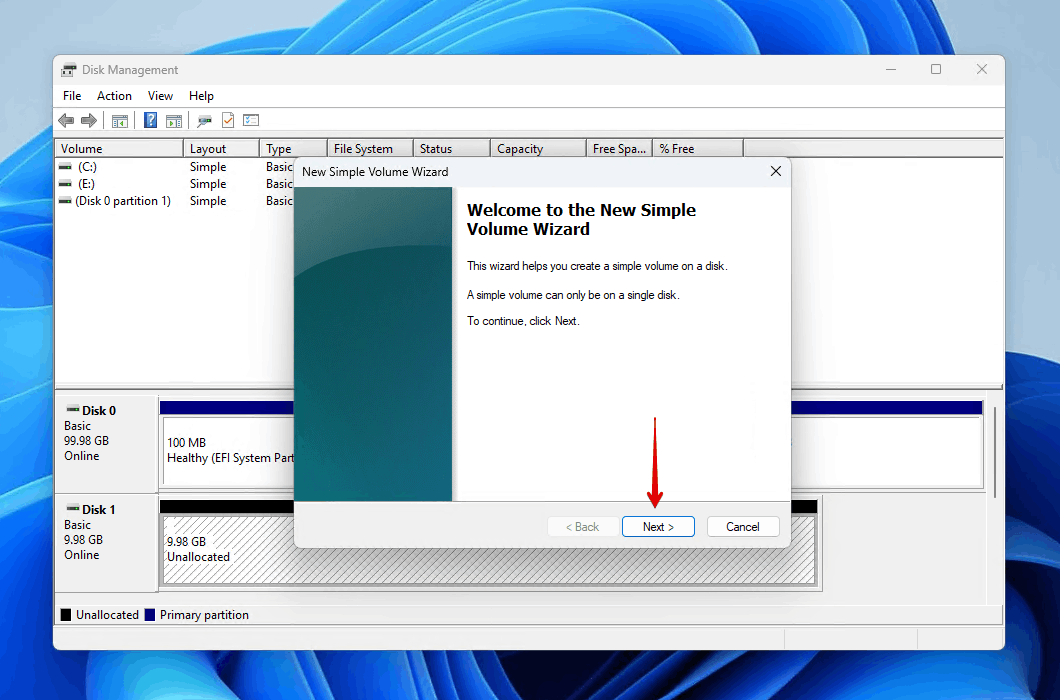
- Right-click the new unallocated space, then click New Simple Volume.
- Click Next.
- Click Next.
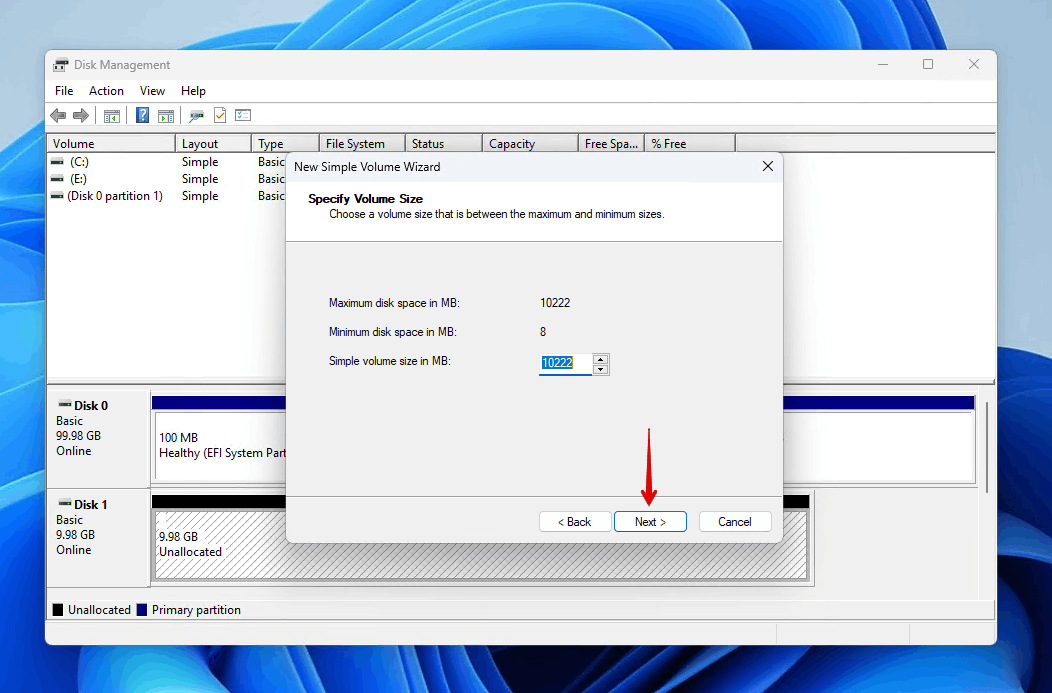
- Choose a drive letter, then click Next.

- Give the volume a label and choose what file system you want. Make sure Perform a quick format is ticked. Then, click Next.
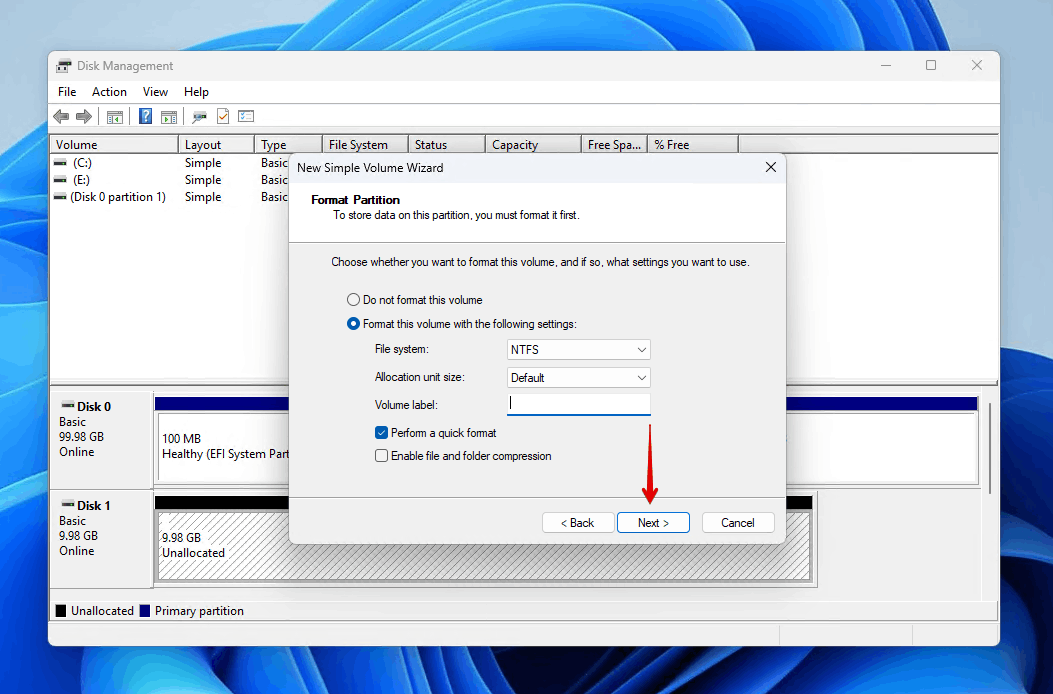
- Click Finish.
Method 9: Reinstall Windows
In extremely severe cases where the damage cannot be repaired with the aforementioned solutions, you can always perform a clean install of Windows. As long as the issue isn’t related to your hardware, this is almost guaranteed to fix the problem. However, it will also delete any data on the drive, so be sure to recover the data before proceeding with this method.
See the official Microsoft documentation for various ways you can reinstall Windows.
Conclusion
“The system cannot find the drive specified” error message is a generic message that appears when Windows, for some reason, cannot access the drive. When it appears, the first action you must perform is data recovery as there’s no telling if the hard drive will fail completely.
Once your data is recovered, there are numerous solutions available to fix the problem. You can start by trying to reboot your computer, but if that doesn’t work, you need to make sure Windows has the correct permissions to access the drive and you’re running the latest versions of your operating system and drivers. In situations where your drive is corrupted, you can fix it with SFC and CHKDSK or completely recreate the corrupted partition.
FAQ
- Press Windows Key + R. Type “regedit”. Press Enter.
- Click File, then Export to make a backup of your registry.
- Navigate to Computer\HKEY_LOCAL_MACHINE\SOFTWARE\Microsoft\Windows\CurrentVersion\Policies\System.
- Right-click a blank space. Click New DWORD (32-bit) Value. Name it EnableLinkedConnection.
- Open the new registry entry. Update the value to 1. Click OK.


