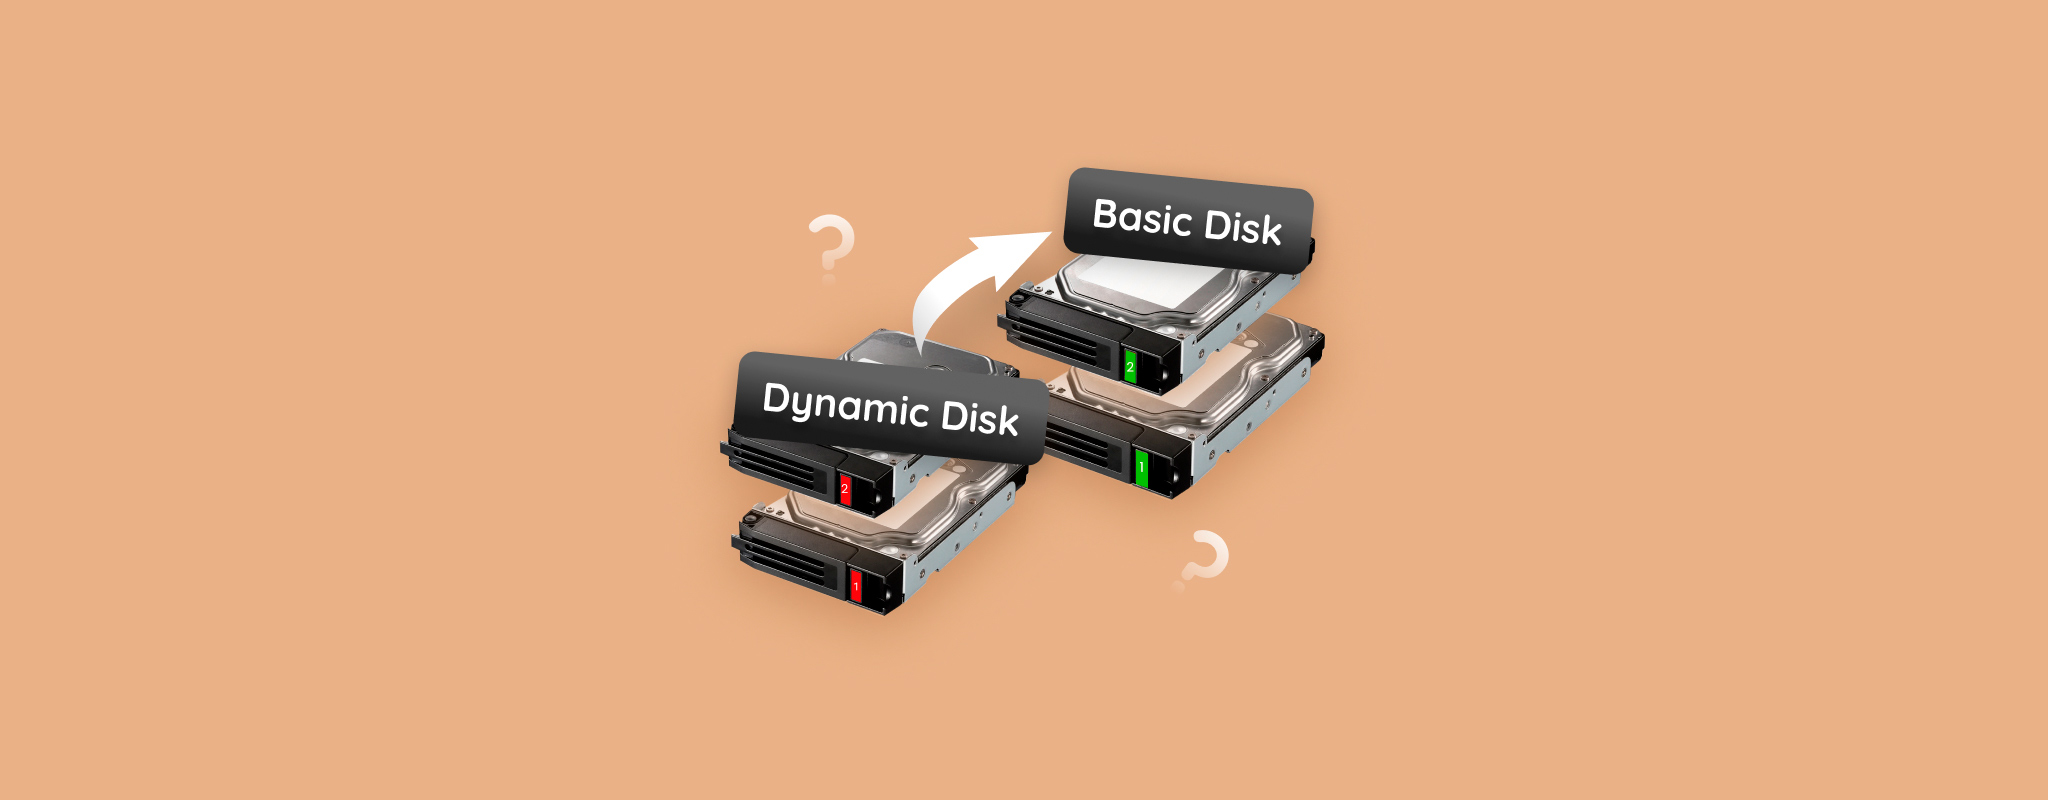
 If your hard drive has been operating as a dynamic disk intentionally or due to accidental conversion, reversing this decision should be done carefully. After all, converting it back to a basic disk erases all the data on your drive.
But with the right tools and processes, you can convert a dynamic disk to basic without losing data. This guide explains everything you need to know to simplify this process.
Table of Contents
Why Convert a Dynamic Disk to Basic?
Different reasons can drive users to convert from a dynamic disk to a basic one, from user preferences to disk issues like invalid dynamic disk errors. While both disk management configurations offer advantages, changing to a basic disk comes down to how you will use your device.
To provide clarity, let’s briefly differentiate the two and explore some of the reasons why users often choose to convert a dynamic disk to a basic disk:
| Reason | Description |
| Dynamic disks are more complex to manage | Dynamic disks offer more advanced features like disk spanning, disk mirroring, support for RAID volumes, and more. But basic disks should be enough for simple home and office setups, especially if you only need basic partitions. |
| Dynamic disks have been deprecated | Since March 2023, Windows no longer supports the use of dynamic disks. Instead, it recommends converting to a basic disk and using Storage Spaces. |
| Dynamic disks are less compatible | Dynamic disks are not supported on removable disks. Meanwhile, basic disks are compatible with operating systems and external devices, making them a better choice if you want to use your disk on other systems or devices seamlessly. |
Simply put, you’d want to stay with dynamic disks if you need or want more advanced features and flexibility for volume management. But consider switching to a basic disk if you encounter these issues, along with other reasons to switch:
- Your dynamic disk is causing problems for your operating system
- Your operating system does not support dynamic disks
- You have multiple bootable systems
- or you value a simpler configuration
Is It Safe to Convert Dynamic Disks to Basic?
Converting your dynamic disk to basic generally does not harm your disk. However, this involves deleting all the volumes from your disk, which can lead to data loss. As long as you back up your data before conversion and follow the conversion steps carefully, you can safely switch your hard disk to a basic configuration.
How to Avoid Losing Data When Converting Disk
The most straightforward way to avoid losing data when converting your disk is to back up your files beforehand. But if you need to convert to a basic disk due to inaccessibility, you must use data recovery software to recover your files.
We chose Disk Drill to demonstrate data recovery from a dynamic disk. Disk Drill is a reliable and feature-rich dynamic disk data recovery software that can scan your drive and even recover files from corrupted disks.
Its advanced deep scanning algorithm can also check for various file formats, from documents to photos and videos, among others. Additionally, its easy-to-use software makes it accessible even without extensive technical knowledge.
If you want to try out Disk Drill’s capabilities, the Windows trial version gives you the ability to recover up to 500 MB for free.
Follow these steps to recover data from a dynamic disk with Disk Drill:
- First, download the Disk Drill installer. Then, run the setup and follow its instructions for a successful installation.
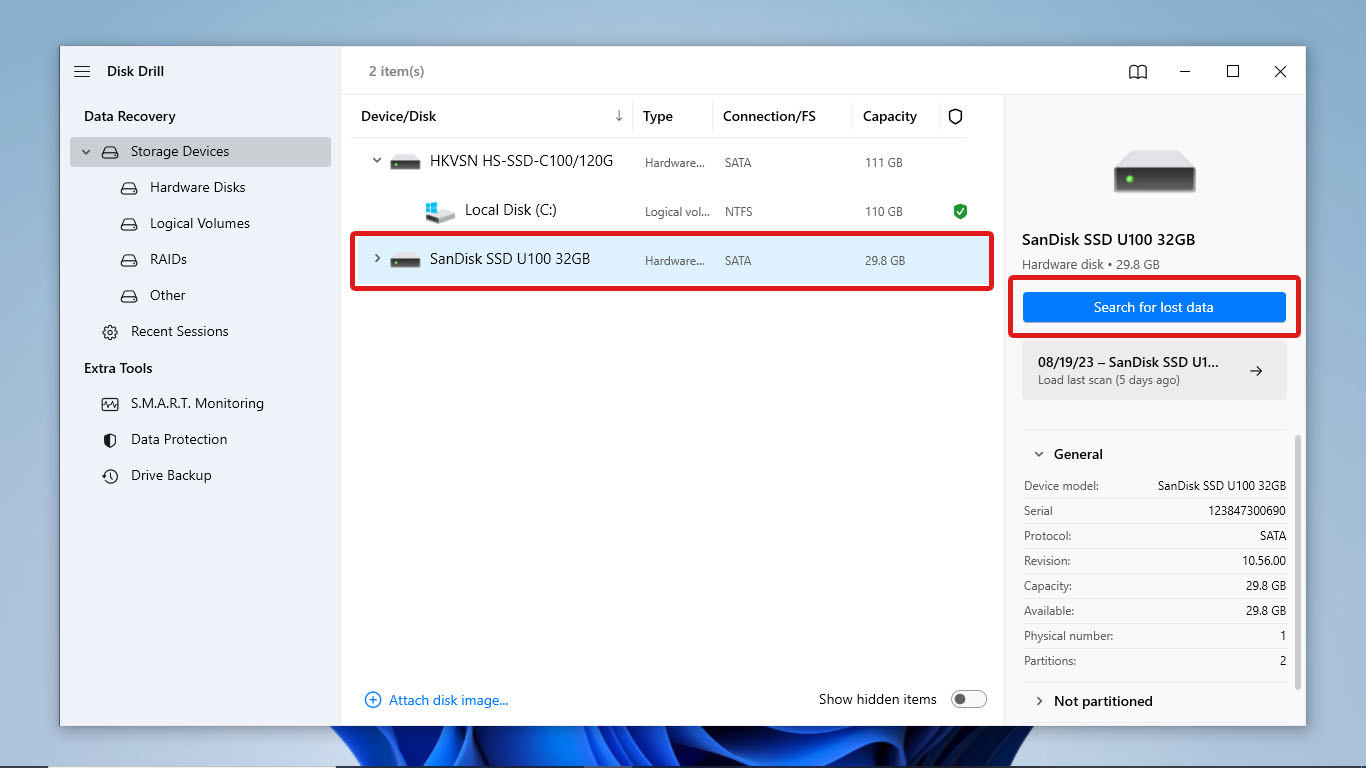
- After the installation, open the Disk Drill app. Once on the main screen, you should see a list of the drives you can scan. Select your hard disk and click Search for lost data to start the scan.
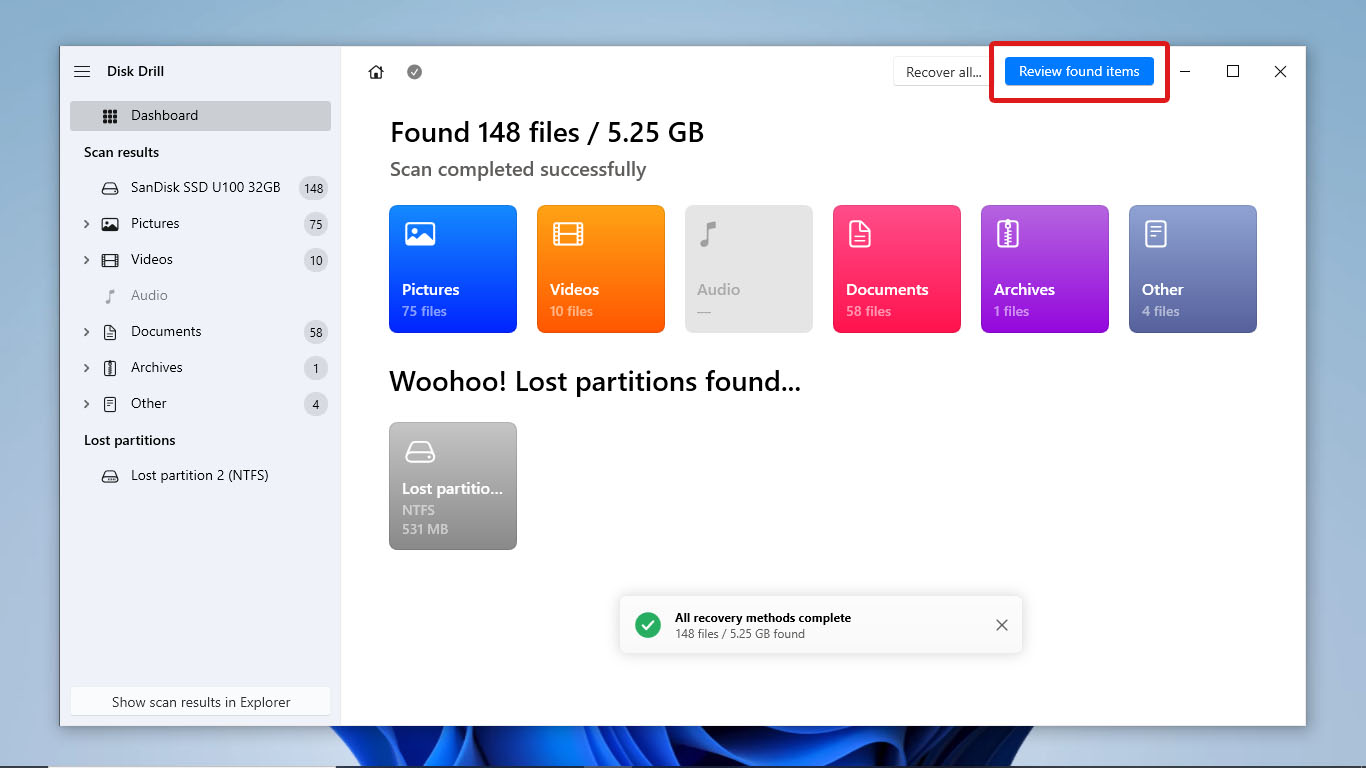
- After the scan is complete, click Review found items to browse all the files for recovery.
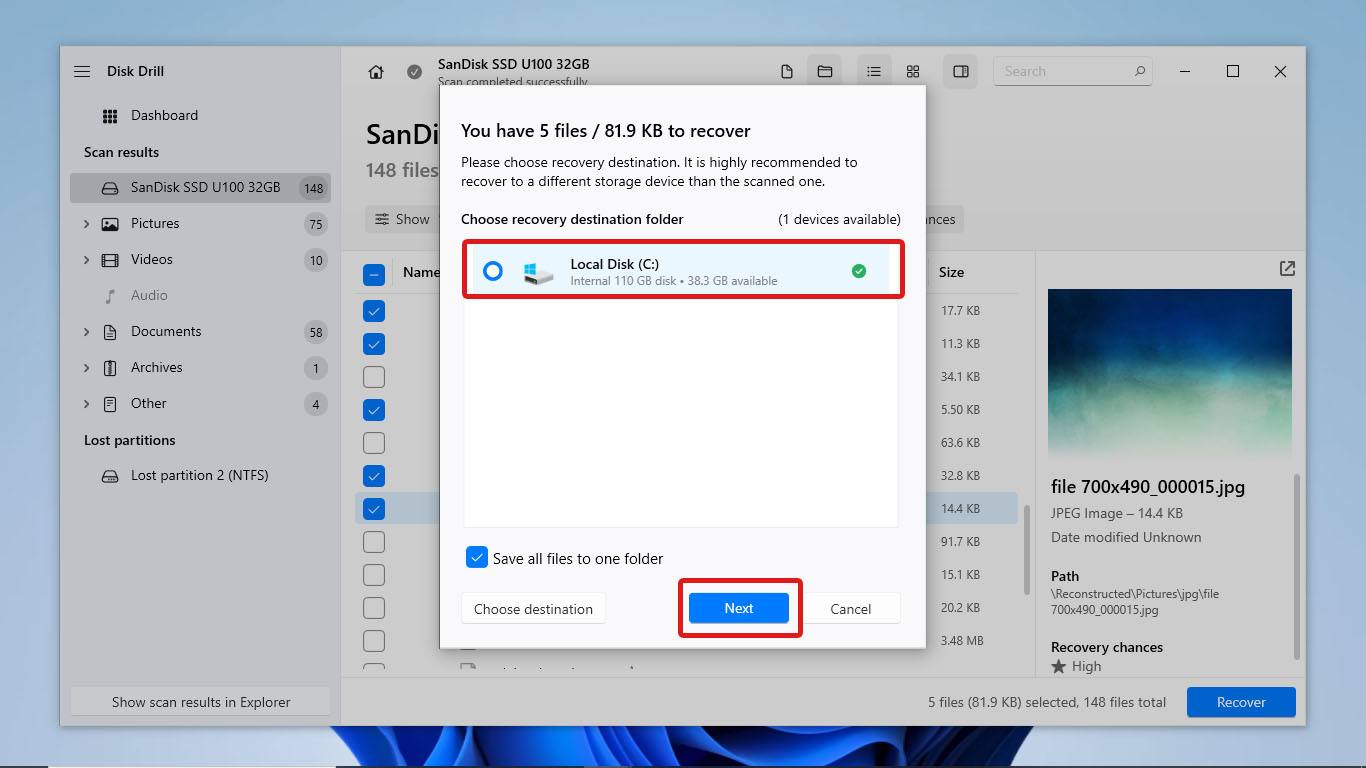
- Next, look for the files you want to recover using the search bar on the top-right part of the window or browse through the folders Disk Drill has scanned. Select all the files you want to recover and click Recover.

- Disk Drill will prompt for the location where you want to store your recovered files. Select a disk and click Next to begin recovery.
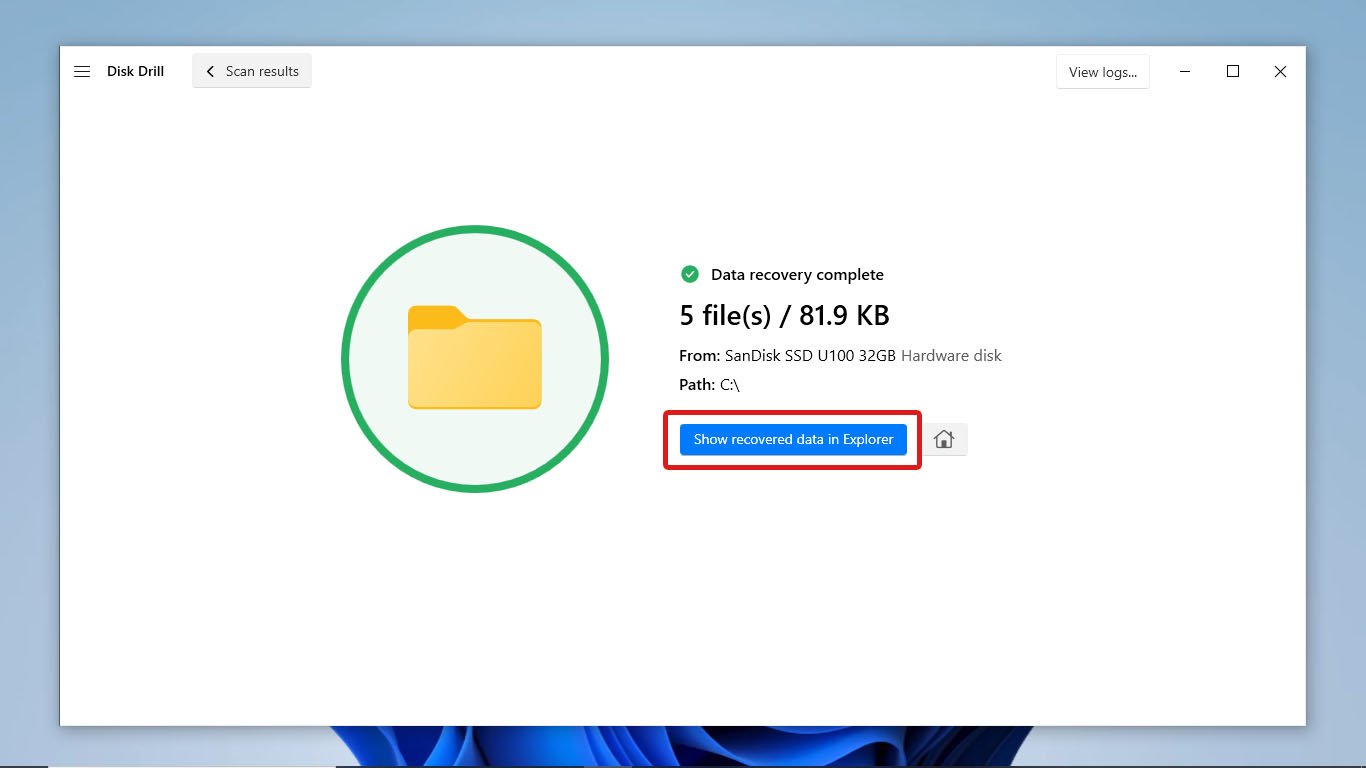
- Finally, Disk Drill will display the data recovery details after the recovery process. Click Show recovered data in Explorer to open the files in File Explorer.
How to Convert Dynamic Disk to Basic
After backing up your important files, you can now proceed to convert your dynamic disk into a basic one safely. Here’s how to do it in three ways:
Method 1: Manually Mark Disk as Basic via Hex Editor
A hex editor helps you convert dynamic disk to basic without data loss or formatting. A hex editor manually marks the attribute of your disk to a basic disk. However, make sure not to change the wrong values to avoid disk errors.
Convert your disk to basic with HxD using the following steps:
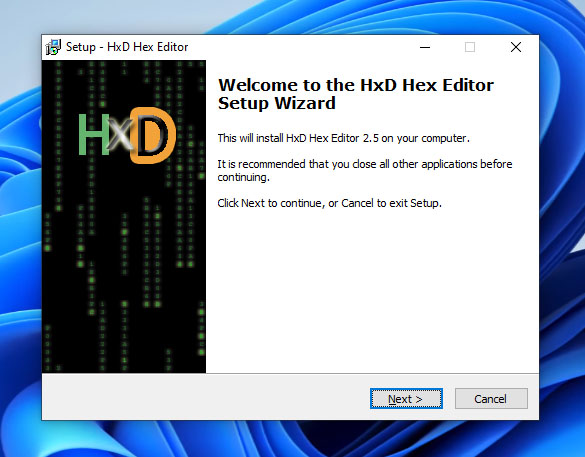
- To get started, download the free hex editor HxD from the MH-Nexus website. Then, run the installer and follow the installation steps.
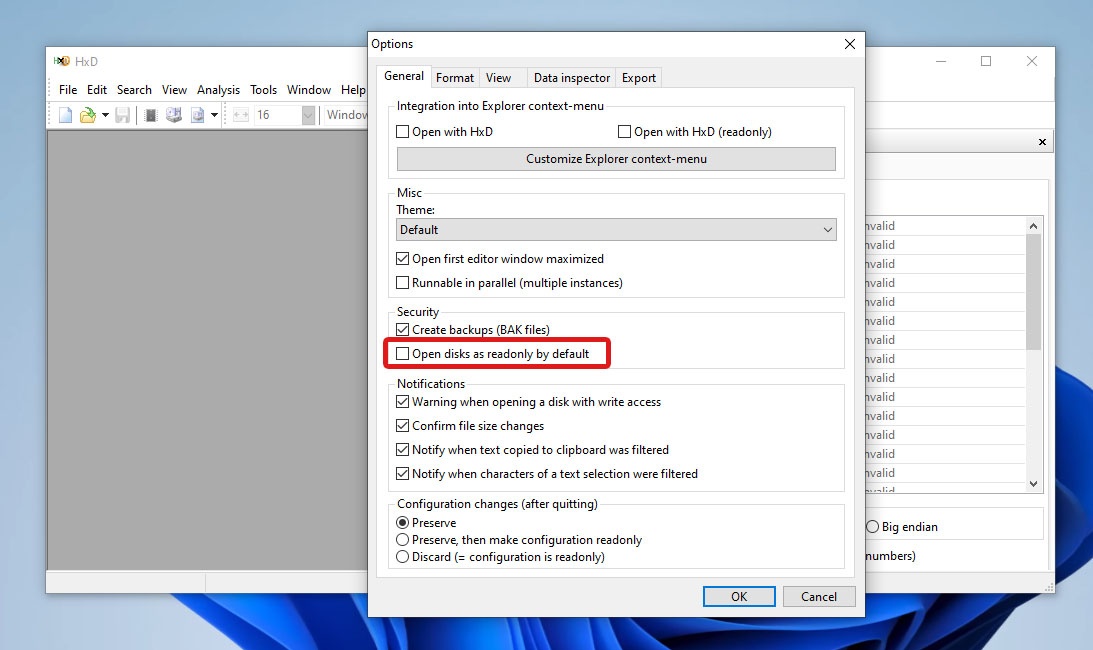
- Next, launch HxD with administrator privileges. Then, uncheck Open disks as readonly by default.
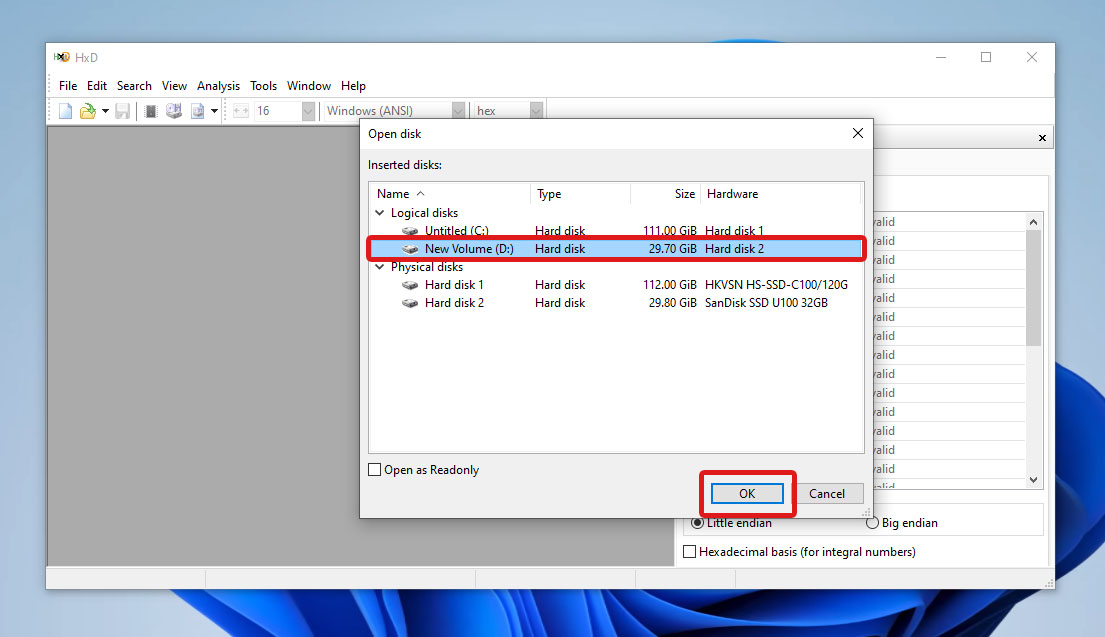
- Now, press Ctrl + Shift + D simultaneously to launch the Open disk pop up window. Then, select your disk and click OK.
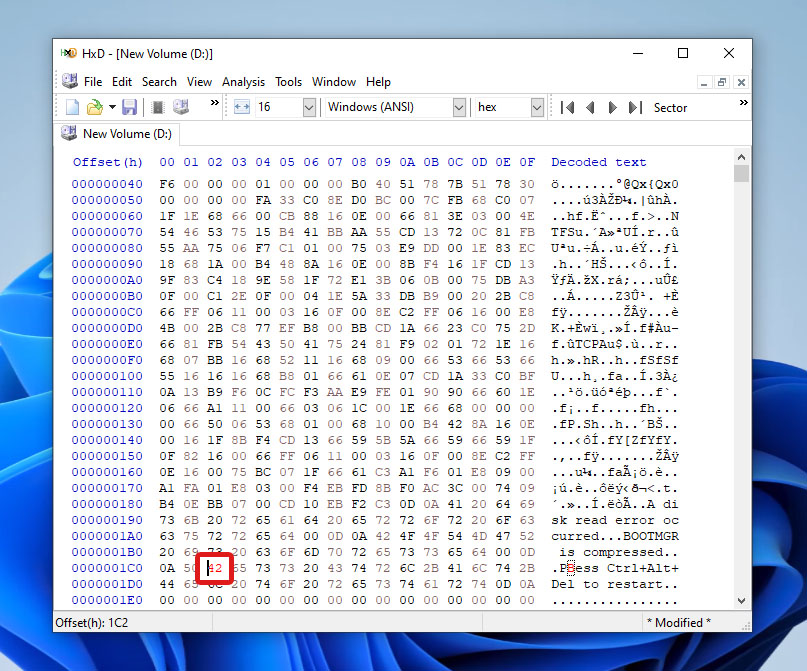
- In sector “00000001C0”, location 02, you should see a value “42”. This symbol indicates that your hard drive is configured as a dynamic disk. Replace the value with “07”, corresponding to a basic disk configuration.
- Finally, save your changes and reboot your PC.
Note that your system might require multiple reboots for the changes to take effect. If you still didn’t get access to your hard drive after the third reboot, revert your changes by editing the “07” back to “42”.
Method 2:Convert Disk from Disk Management
Disk Management is a built-in tool on Windows that houses different disk management tools, including a disk converter feature. However, it will ask you to delete all volumes on your disk before proceeding.
To use Disk Management to convert to a basic disk, simply follow the steps outlined below:
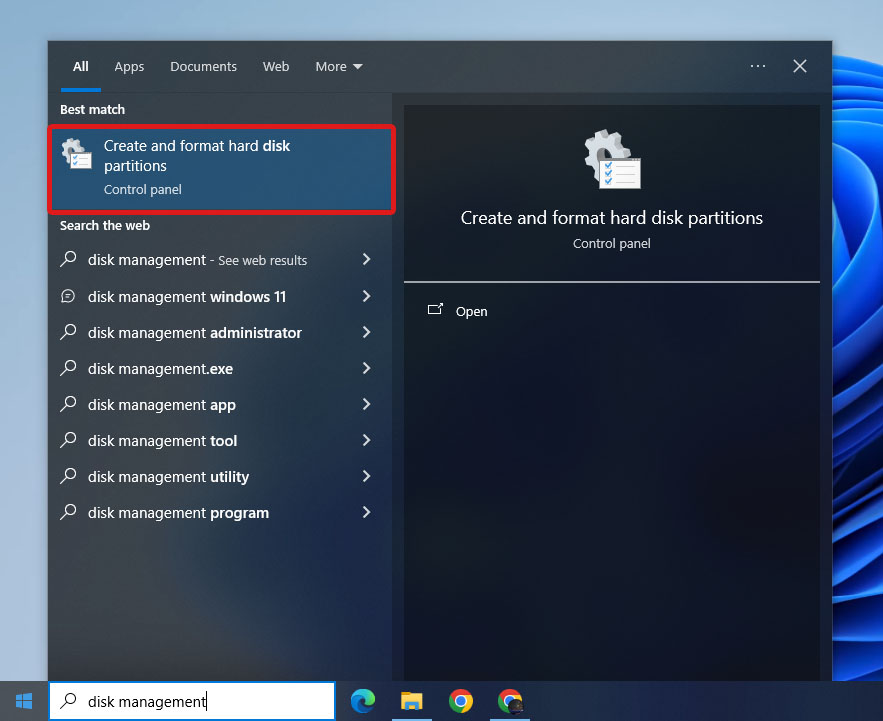
- Open Disk Management by searching “Disk Management” on the Start menu and selecting “Create and format hard disk partitions”.
- Next, select all the volumes on your disk and right-click on them. On the menu that appears, select “Delete Volume…”.
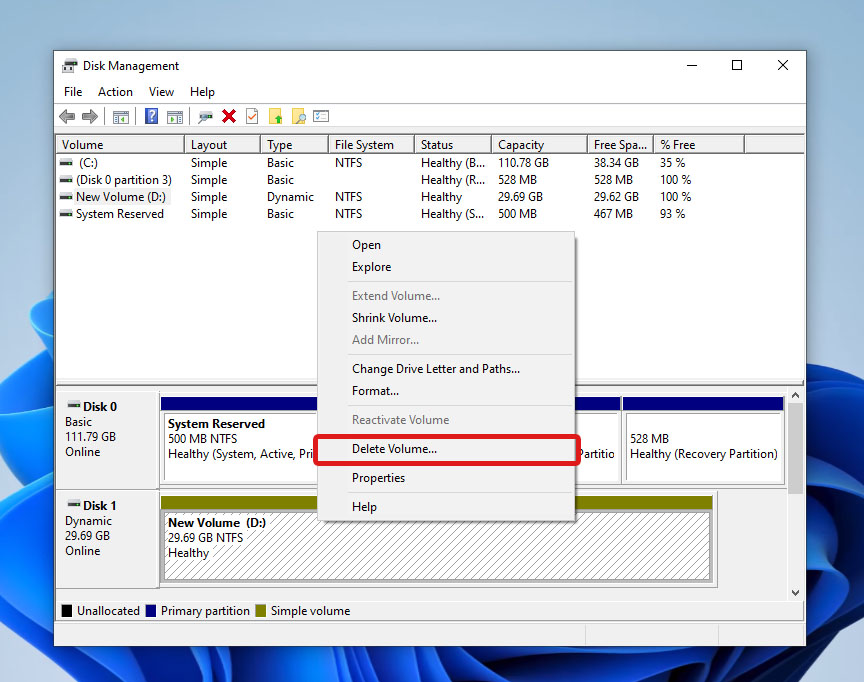
- After that, right-click on your disk and select “Convert to Basic Disk”.
Take note, though, that your disk might automatically convert back to a basic disk after deleting disk volumes.
Method 3:Convert Disk Using Command Prompt
Windows has a freely accessible utility called Diskpart that can manage your disks from the Command Prompt. Here’s a quick guide on how to change dynamic disk to basic by using Diskpart:
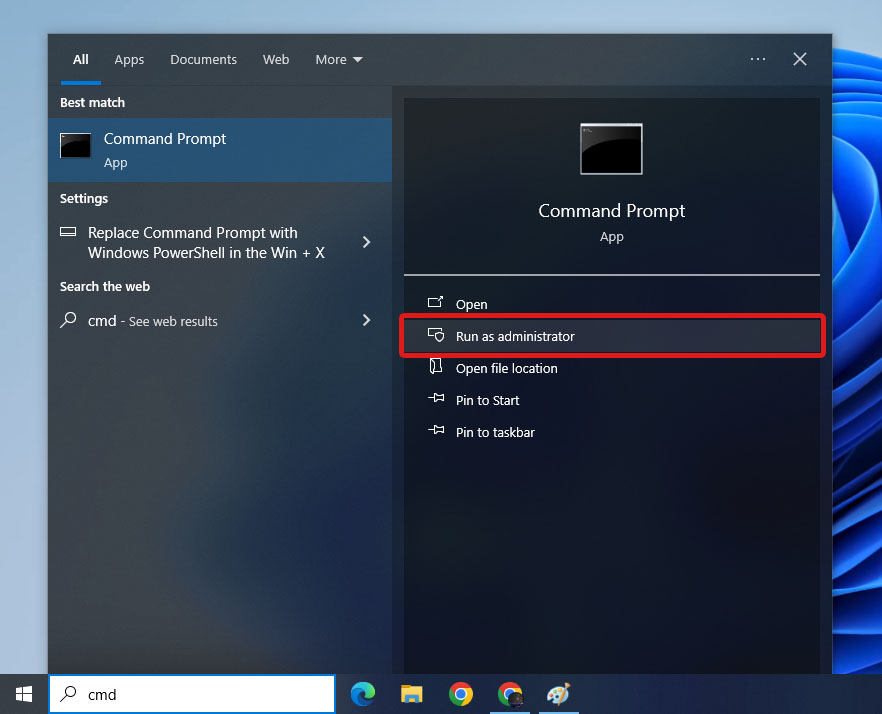
- To get started, run CMD as administrator.
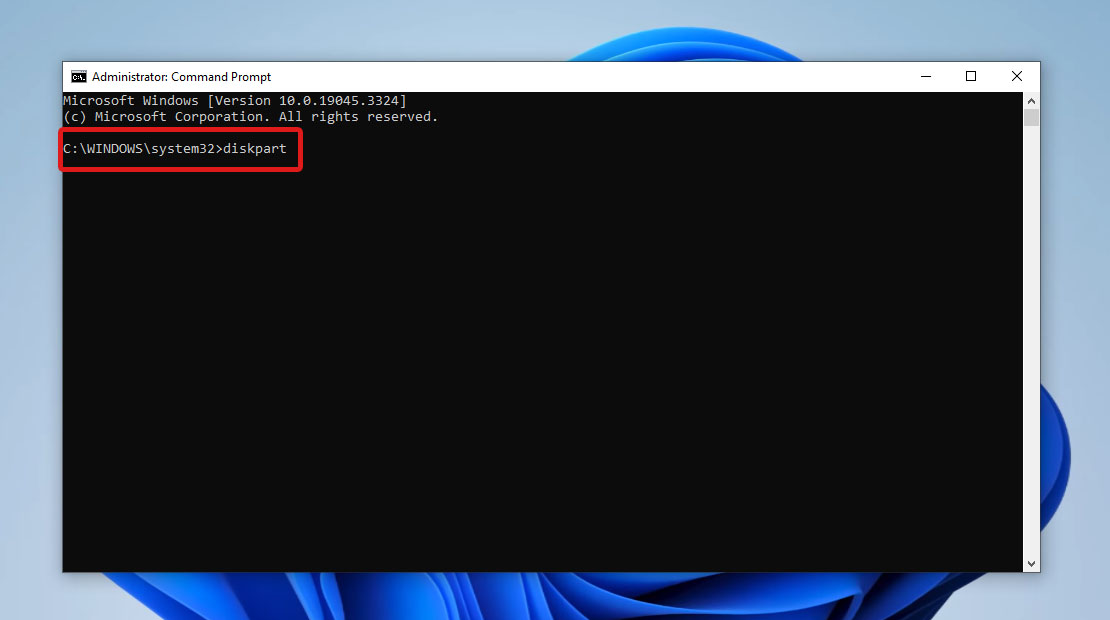
- Type
diskpartand press Enter to access the Diskpart utility.
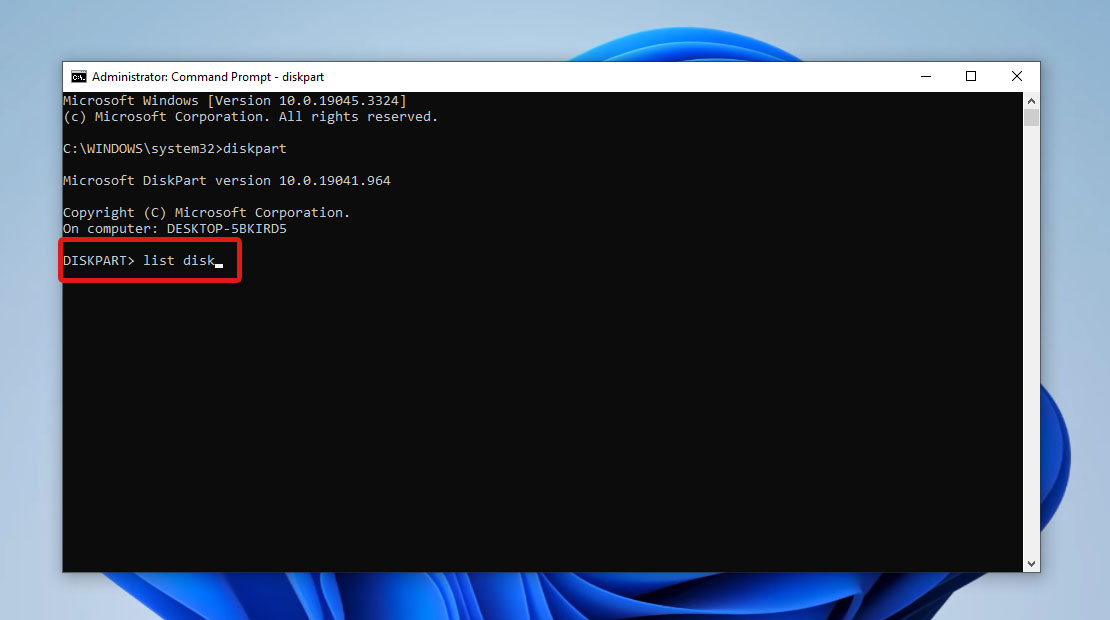
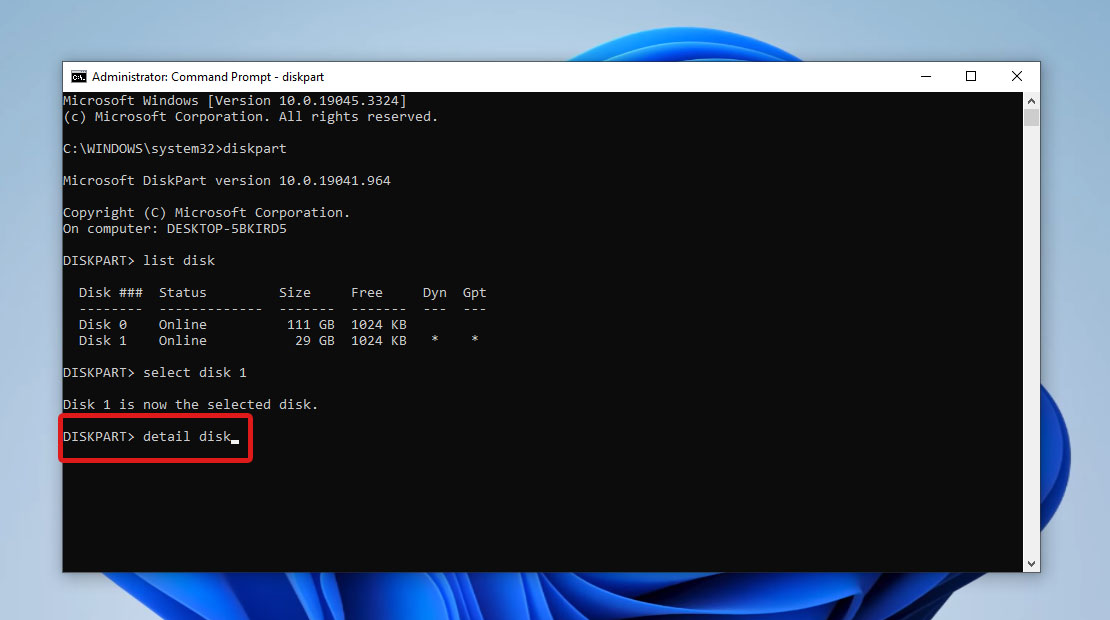
- Next, type
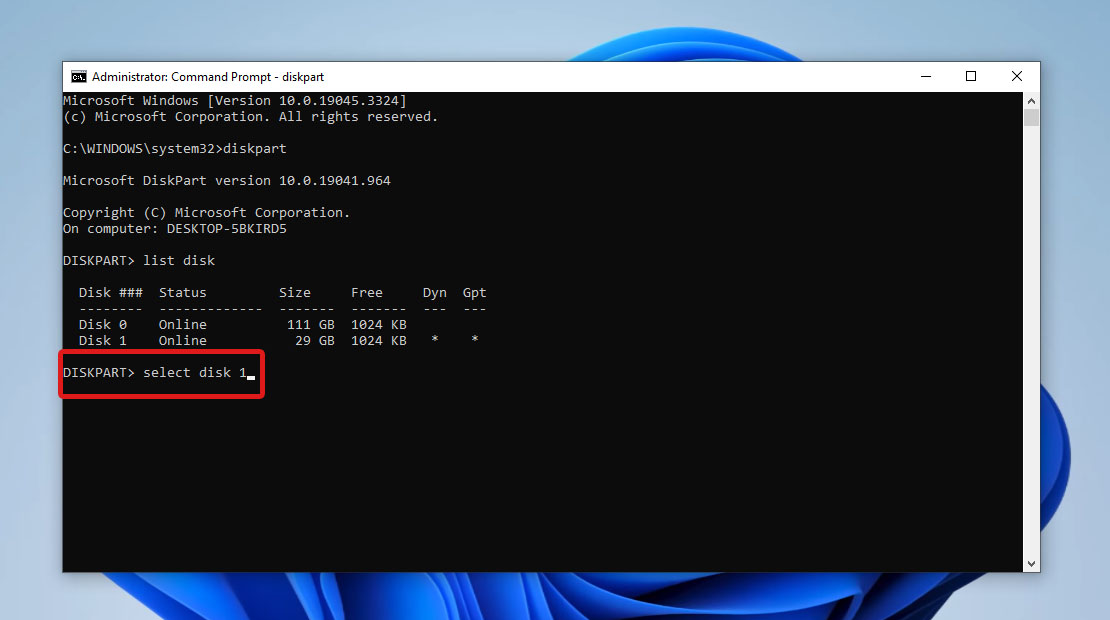
list diskand press Enter to view all the disks your system can recognize. Take note of the disk number of the drive you want to convert to basic.
- After that, type
select disk n, where n is the number of your disk. Then, press Enter.
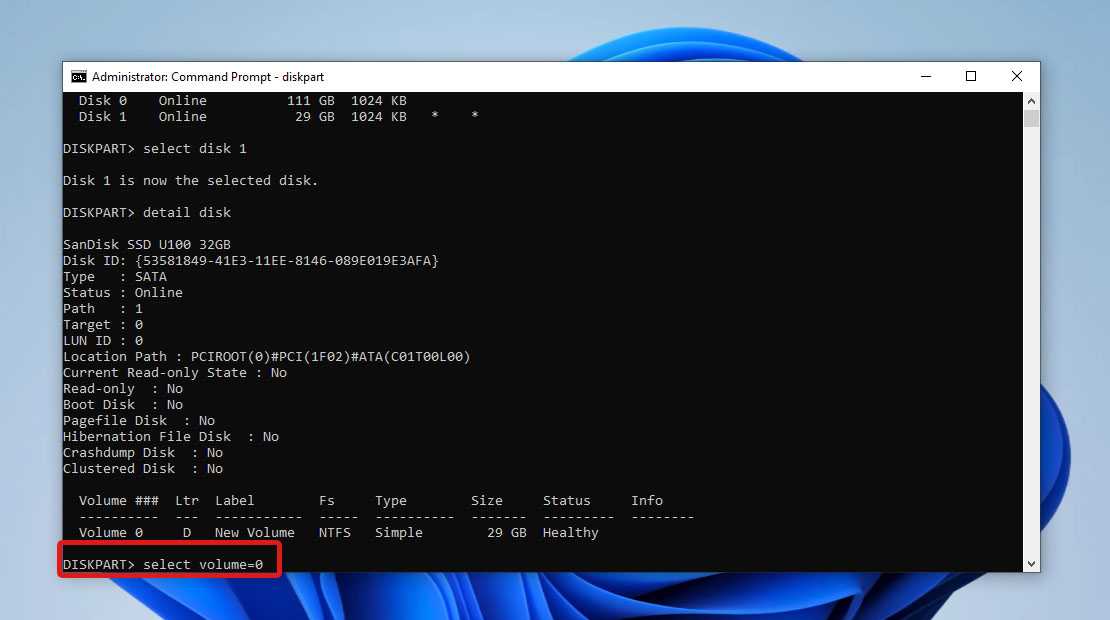
- View all the existing dynamic volumes by typing
detail diskand pressing Enter.
- Then, select an existing volume by typing
select volume= nand pressing Enter. Don’t forget to replace n with the volume number you are trying to delete.
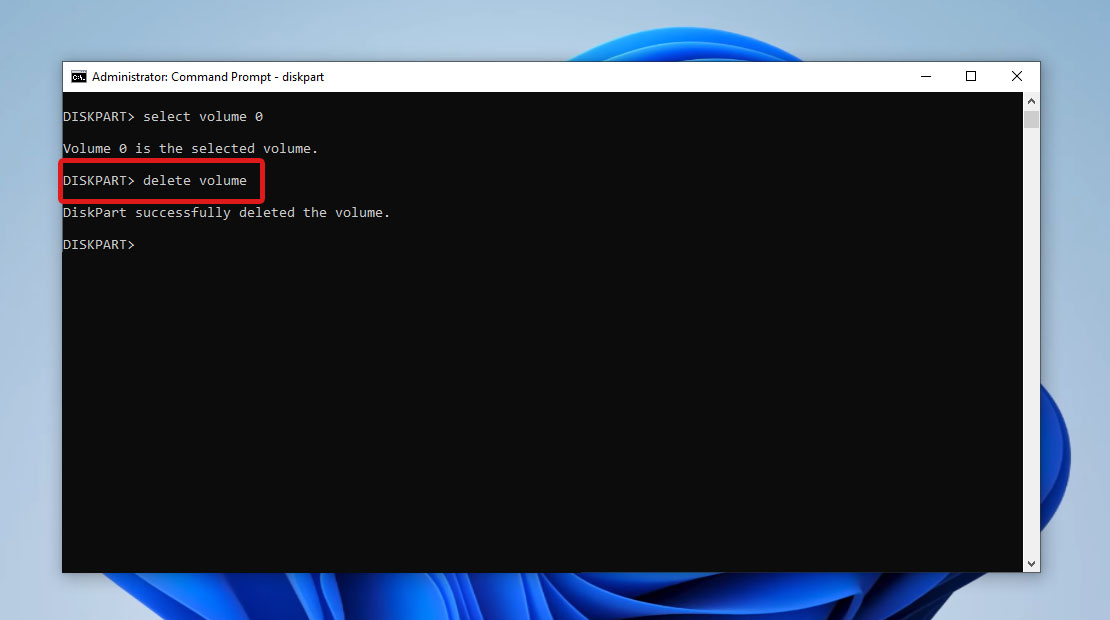
- Delete the volume currently selected by typing
delete volumeand pressing Enter. Do steps 6 and 7 for each dynamic volume available.
- Once all the volumes have been deleted, type
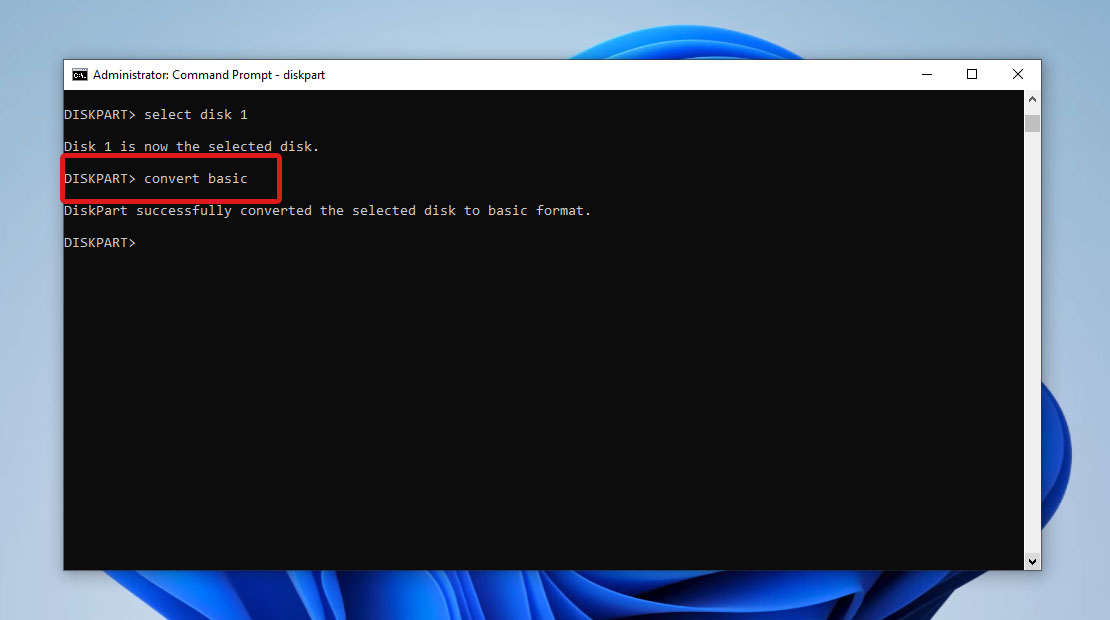
select disk nand press Enter. Replace n with the disk number of your dynamic disk.
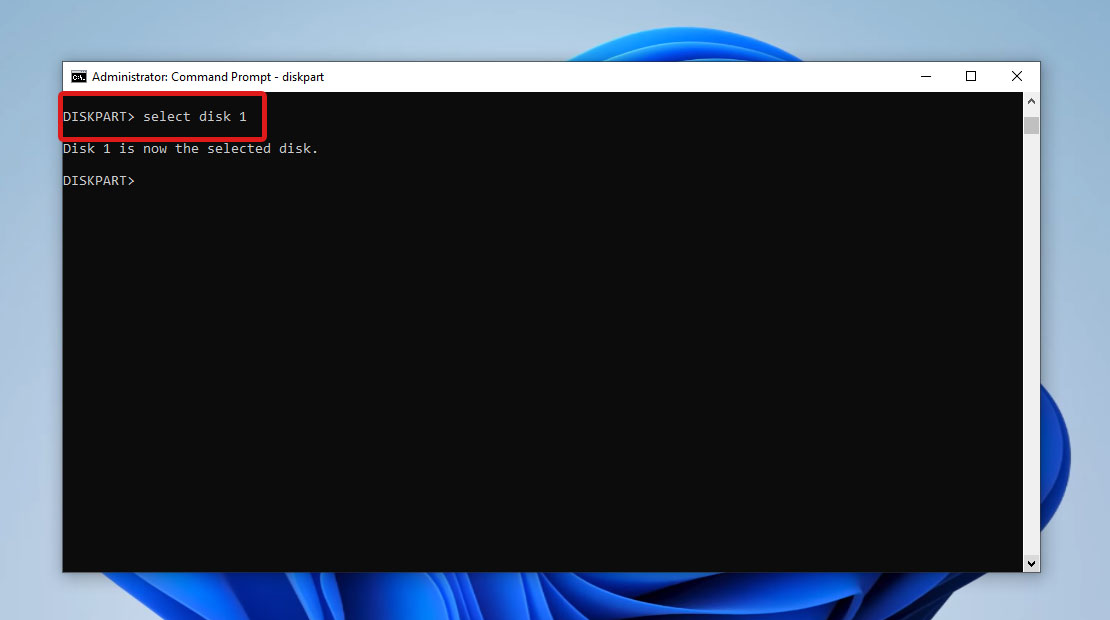
- Finally, type
convert basicand press Enter.
Note that these steps are applicable for Windows 7/10/11 systems.
Conclusion
While dynamic disks are more flexible and have more complex volume management features, there are instances where it’s necessary to convert to a basic disk. However, this switch involves deleting all dynamic volumes, which often leads to data loss.
To convert dynamic disk to basic without losing data, you can backup your files or use data recovery software like Disk Drill to recover files before conversion. Then, you can use Windows tools like Disk Management, Diskpart on the Command Prompt, or a hex editor to proceed with the conversion process.
FAQ:
- It cannot be switched back to a basic disk without erasing your data.
- It does not support multiple bootable systems or removable media, such as USB flash drives.
- Data recovery can be more challenging due to more complex volume configurations.


