 When your external hard drive is not accessible, it’s easy to go into panic mode. You might have important documents or old photos that you wouldn’t want to lose. If you see an error that reads “Access is denied,” there are ways to fix the error. In this guide, we’ll tell you the potential causes of the error, how to fix it, and, most importantly, how to safely recover data from the hard drive.
Table of Contents
Why is Access Denied for Hard Drive on Windows 10
Several reasons can cause the access denied error when trying to access an external hard drive. The most common reasons include the following:
| Reason | Description |
| 🙅 Permission Settings | If you don’t have permission to access the external hard drive, you’re likely to see the “Access is denied” error. |
| 🔒 BitLocker encryption | If you’ve enabled BitLocker encryption, but the BitLocker Encryption service isn’t running, you may not be able to access the hard drive. |
| 💻 Using hard drive on both Mac and Windows | If you use your hard drive on both operating systems, either of them could have tinkered with the drive’s file system resulting in access being denied. |
| 🚿 Improperly ejecting hard drive | Ejecting the hard drive improperly or abruptly while data is being written to it can result in corruption. If your hard drive has become corrupt, you might face trouble accessing it. |
| ⚠️ Hard drive corruption | Corruption can occur because of several reasons, such as abrupt power failure or a virus attack. Whatever the reason for corruption, you might encounter the access denied error if your hard drive is corrupted. |
How to Recover Data from an External Hard Drive When Access is Denied
It’s tempting to roll up your sleeves and start looking for fixes so you can regain access to the hard drive. However, you should first make sure you recover the data on your hard drive. This will ensure that you don’t lose the data in case you end up damaging the drive or overwriting any data when trying to fix it.
You can use data recovery software to recover existing data on the hard drive, but you’ll first need to check if a recovery tool will be able to scan the hard drive.
You can verify this from the Disk Management console. Press Win+R and type diskmgmt.msc to launch the Disk Management console. Look for the external hard drive in the console. If the hard drive size is listed correctly, the data recovery tool should be able to scan it.
Let’s talk about how you can scan and recover files from a hard drive that you can’t access using an intelligent recovery tool like Disk Drill Data Recovery.
Scanning the drive can exacerbate what’s otherwise a simple issue. Instead, scanning an image of the disk is a much safer bet. Disk Drill, unlike other tools, offers a built-in backup and scanning solution.
- Download Disk Drill and install it on your computer. The free version allows recovering up to 500MB of data.
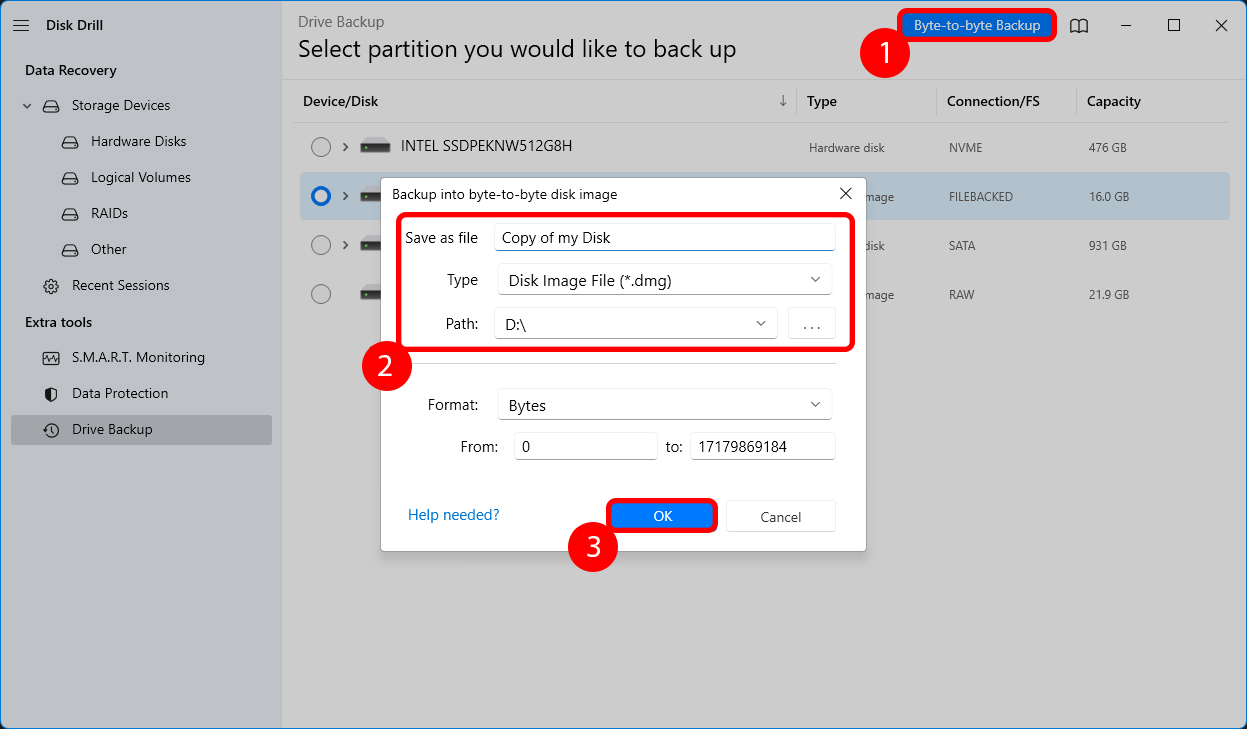
- Once Disk Drill has been installed, launch the app and switch to Drive Backup from the left sidebar. Select your disk from the list and click on Byte-to-Byte Backup. Name the backup file, pick a location for saving the file, and select OK.
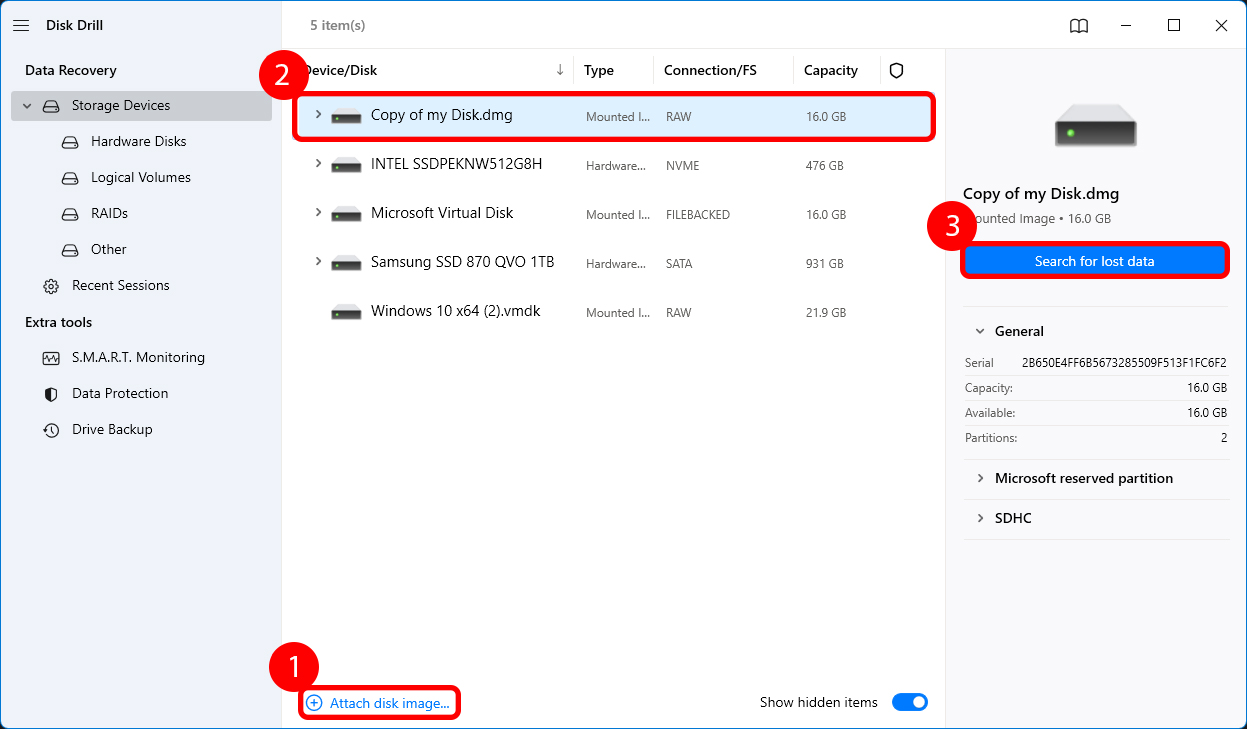
- Switch back to Data Recovery from the left sidebar. Select Attach disk image and select the .dmg file you created in the previous step. You’ll now see the image listed as a separate disk. Select it and click on the Search for lost data button.
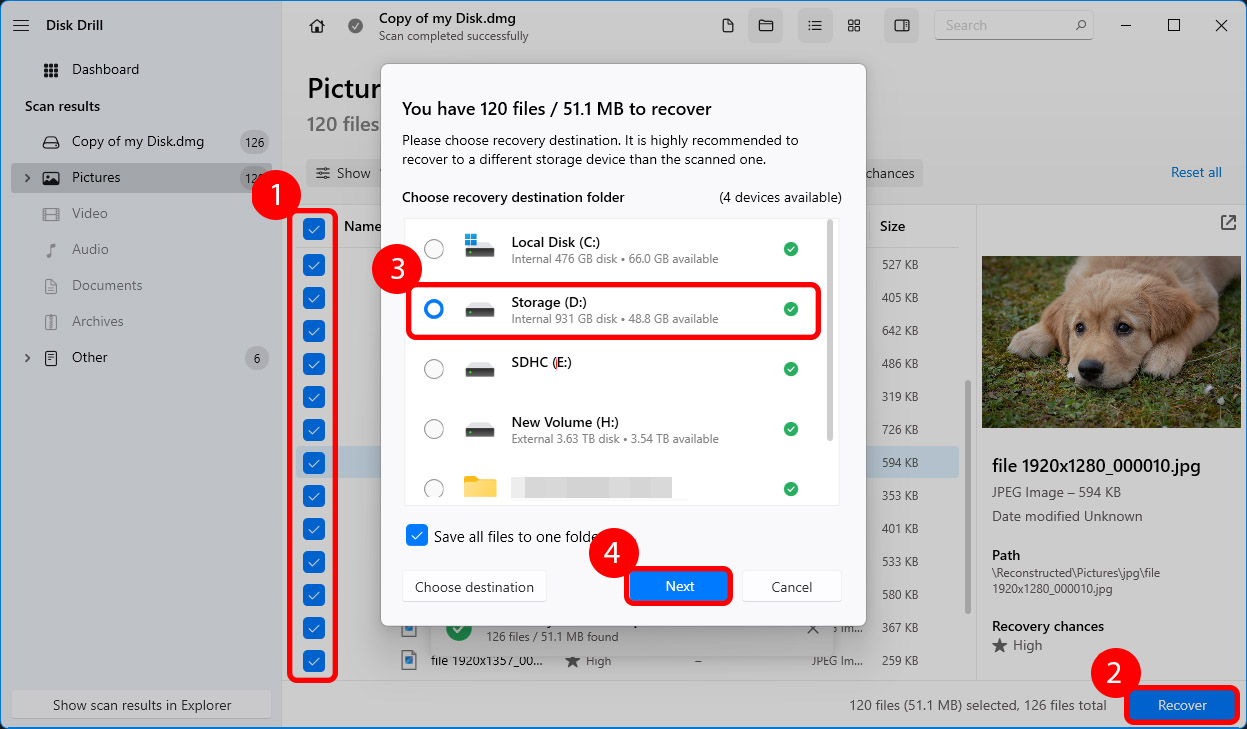
- Once the scan is complete, select the files you want to recover by checking the box next to their name. After selecting the files, click on the Recover button at the bottom. Select a location for recovering the files, and ensure that you don’t save the recovered files on the hard drive you’re trying to recover files from to avoid overwriting any data.
How to Fix Access Denied for External Hard Drive
Once you’ve recovered the important files from the hard drive, you can start fixing the drive so you can reuse it. The fix depends on what’s causing the problem, but if you don’t know the cause, just follow the fixes in the order they’re explained.
Method 1: Switch Computers and Check the Cable
Sometimes, the problem could be a hardware component like your computer’s USB port or the hard drive’s cable. Try plugging the drive into a different computer. If it doesn’t work, try using a different cable. Doing this will rule out your computer or the cable as problems.
Method 2: Change Permission for Accessing External Hard Drive
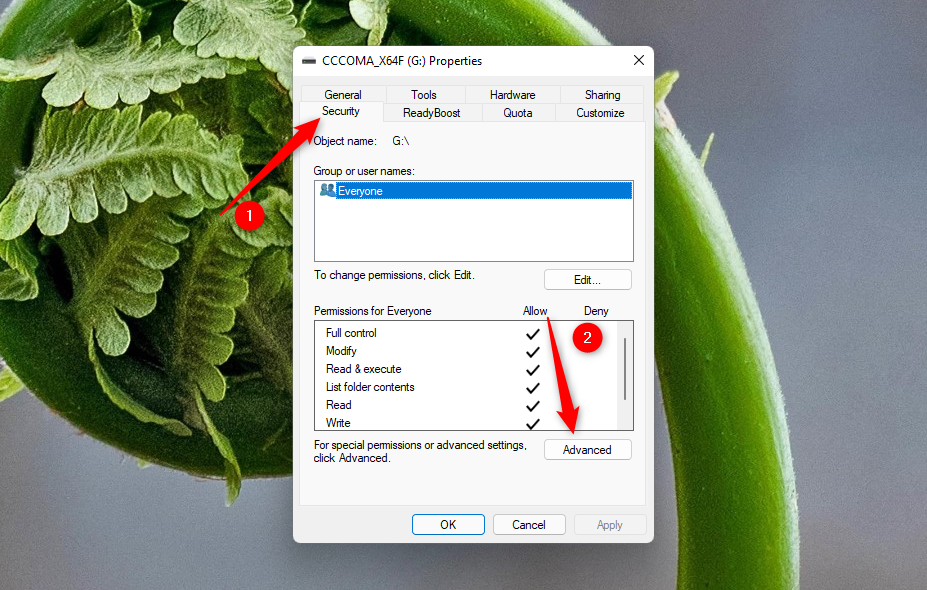
Another reason could be that you don’t have access to the hard drive, but it’s fairly easy to get permissions. Right-click on your hard drive and select Properties. Switch to the Security tab and click on the Advanced button.
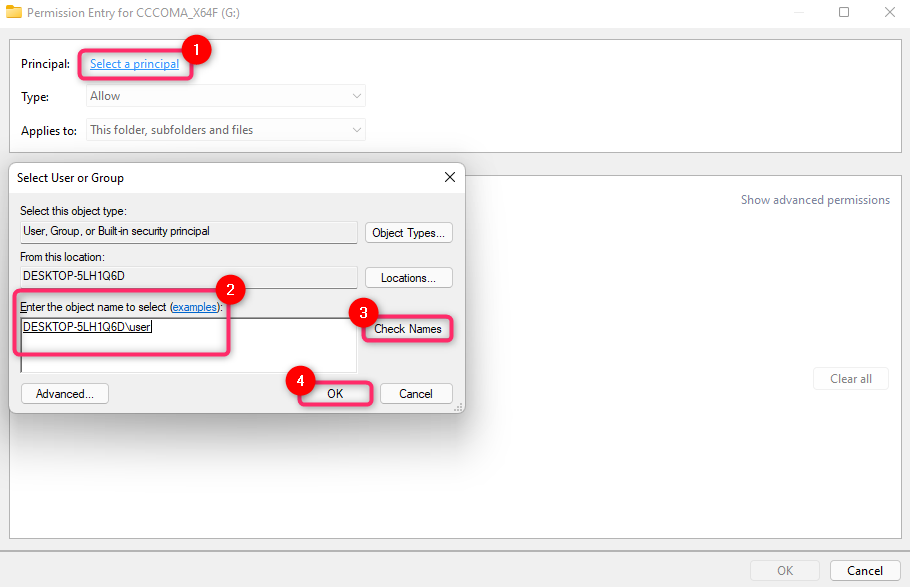
Select the Add button from the bottom. Then, click on Select a principal, and enter your username in the field called Enter the object name to select. Click on the Check Names button, and once your user name appears in the box, click OK.
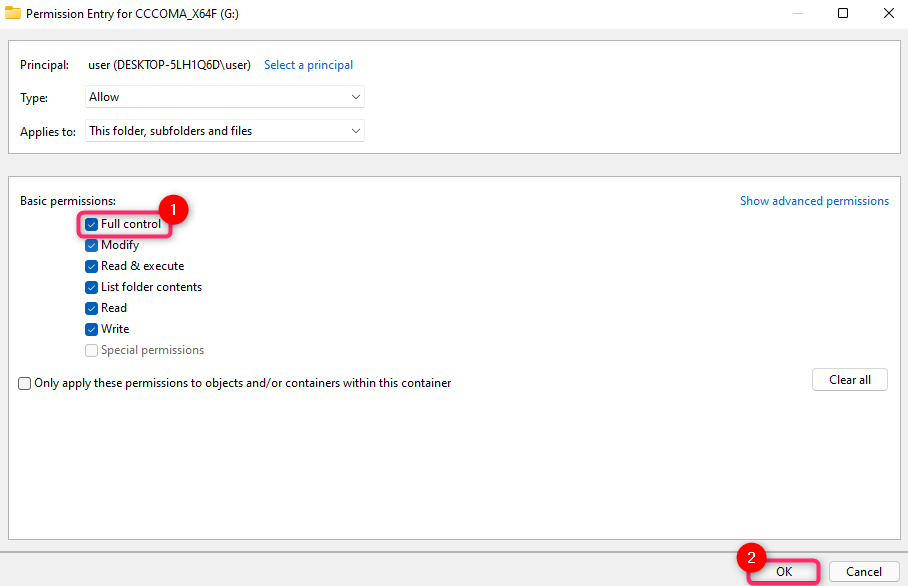
Check the box next to Full control and select OK.
Click on Apply and confirm that you want to continue when prompted. Next, click on the Change button next to the Owner tab. Insert your user name in the box just like you did before, click on Check Names, select OK and close all existing windows by selecting OK.
Method 3: Change the Drive Letter
Changing the drive letter might fix the issue in some cases. Go to the Disk Management console by pressing Win+R, typing diskmgmt.msc, and pressing Enter. Right-click on the external hard drive that shows the access is denied error and select Drive letter and paths.
You’ll see a small window pop open. Click on the Change button and select a drive letter from the dropdown.
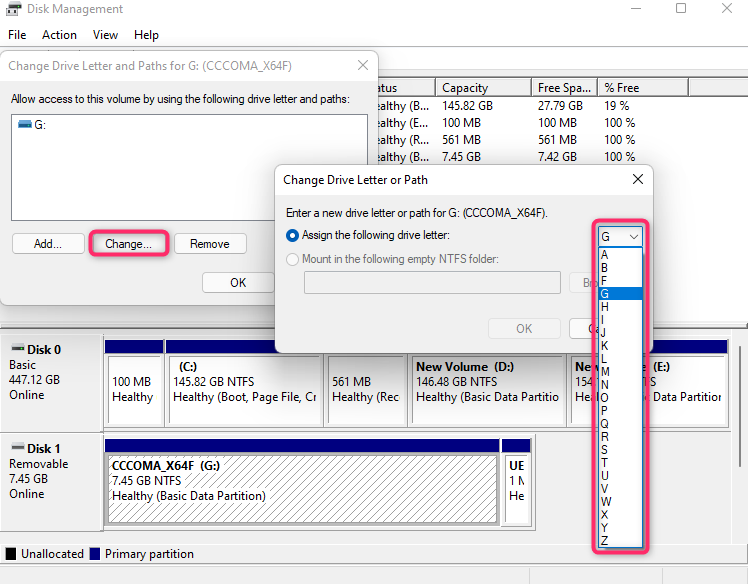
Press OK to close all windows.
Method 4: Check Disk Utility
Windows has a built-in utility that determines issues with the disk and tries to fix them automatically. If you still haven’t been able to figure out the problem, maybe Windows can.
Start by launching the command prompt. Press Win+R, type cmd, and press Ctrl+Shift+Enter.
Next, execute the following command:
chkdsk F: /r /x
(Replace F: with the relevant drive letter)
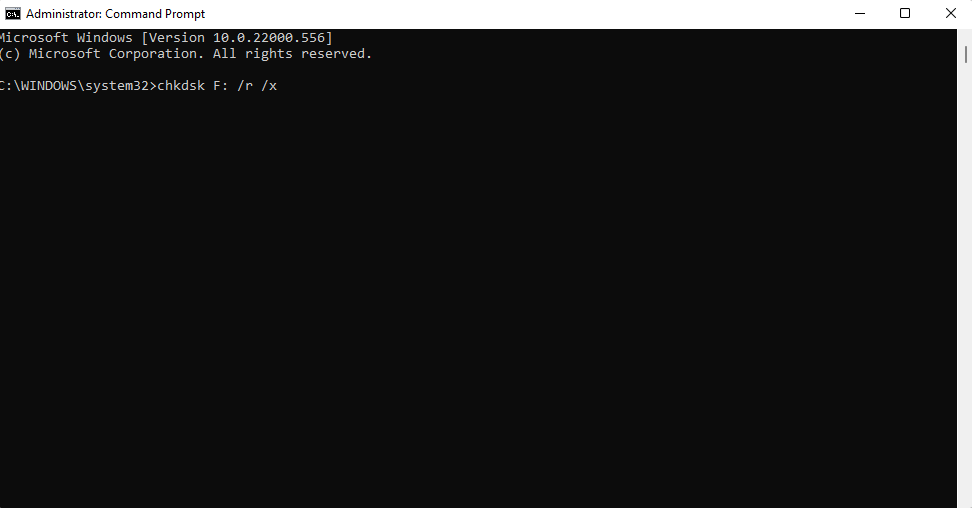
Once the scan completes, Windows will let you know what errors it found and fixed, if any.
Method 5: Format
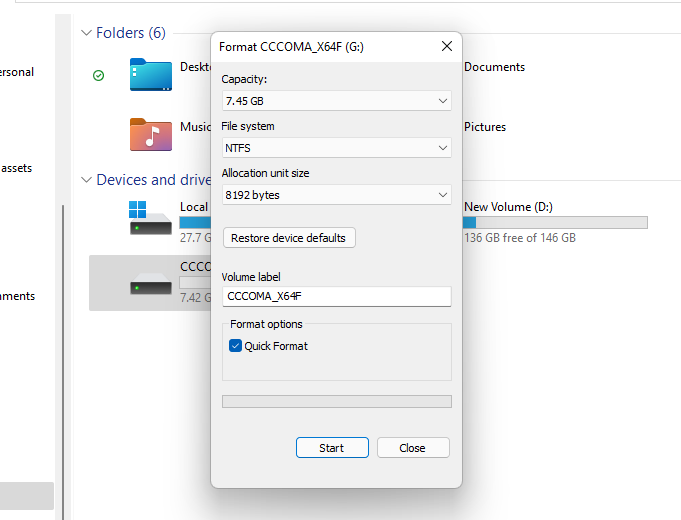
Formatting is usually the last resort because it will erase all of the data on your external hard drive. However, formatting is also a very effective method. If you’ve been able to recover the important files from your hard drive, it might make sense to format it.
Right-click on the external hard drive from the File Explorer and select Format. You can leave all the fields to their defaults, unless you want to change the file system or allocation unit size. Select Start at the bottom of the wizard and let the process complete.
FAQ:
- Right-click external hard drive > select Properties > navigate to Security tab
- Сlick on Edit > Click your username under Group or User Names
- Check boxes under Allow column > press OK > then click Apply
- Permission settings were changed.
- BitLocker encryption.
- You're using your drive both on Mac and PC.
- You've improperly ejected your drive causing it to malfunction.
- Your hard drive became corrupted due to some reason.
- Open Explorer.
- Right-click on Seagate external hard drive.
- Select Properties.
- Navigate to Security tab.
- Click on Edit. Here you can modify permissions for your Seagate external Hard Drive.


