When you create a bootable flash drive for installing Windows using the Media Creation Tool, you’ll notice that it renames the flash drive to “ESD-USB.” You can also use ESD files to create a bootable USB yourself.
ESD (Electronic Software Delivery) is a file that contains all the files required to install Windows on your PC. It’s similar to an ISO file, but relatively smaller in size.
Table of Contents
What is ESD USB?
ESD USB is the naming convention for bootable flash drives created using an ESD file. When your USB turns into ESD USB, Windows will remove the file system data, which means you’ll no longer have access to the files that were already present on the flash drive.
However, you can recover files from an external drive even when you can’t access them, as long as they haven’t been overwritten. Now that you know what ESD USB is, let’s talk about how to recover files from ESD USB and bring the external drive back to its previous state in the next sections.
Note: You should stop using the USB right away to avoid potentially overwriting files. Try to fix the USB drive and use it only after you’ve recovered important files.
How to Recover Data from Hard Drive Converted into ESD USB
It’s important to use an intelligent tool like Disk Drill to recover data from your ESD USB. Not only is it easy to use, but its deep scanning algorithms may also have a better chance of picking up the files that were deleted when your drive was turned to ESD USB.
Disk Drill can scan just about any file system and reconstruct your lost files. You can also preview the files Disk Drill scanned to make sure that they are working.
Create a byte-to-byte image of your drive using Disk Drill so you can avoid damaging your drive or overwriting any data. Follow these steps to backup your hard drive first before scanning your device:
- To get started, download Disk Drill and install it on your PC.
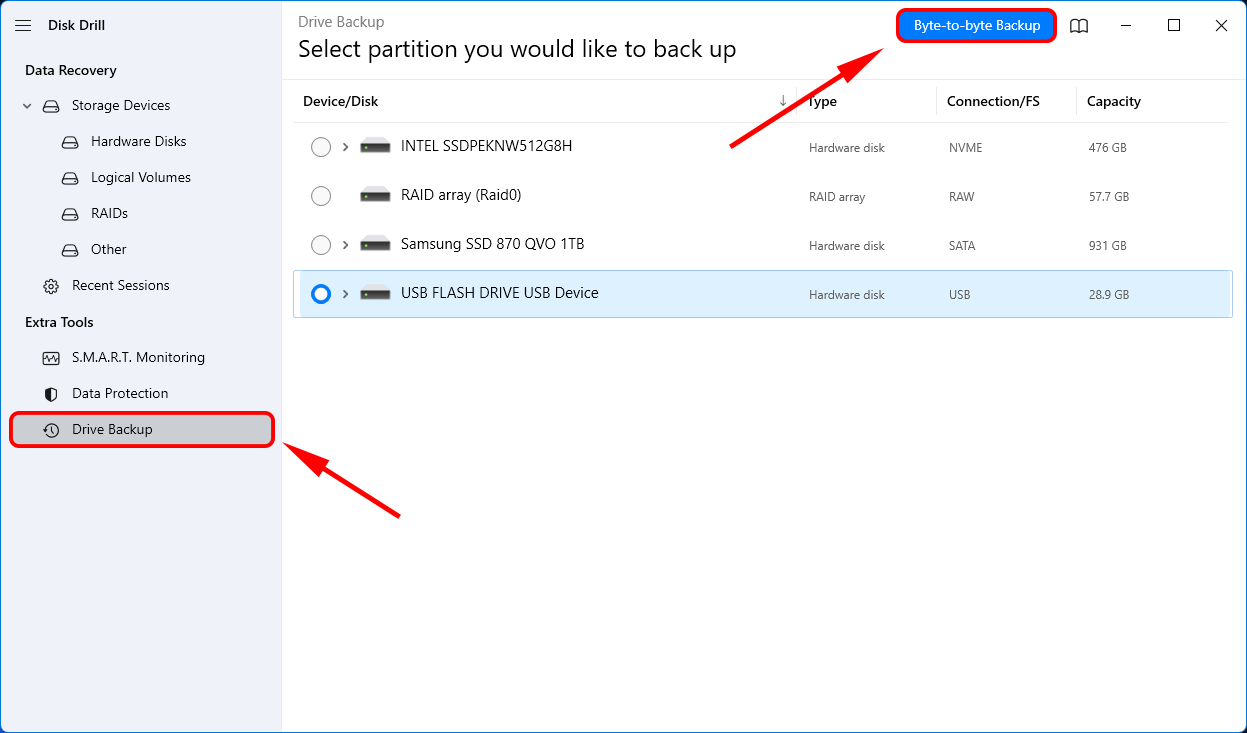
- Once successfully installed, launch Disk Drill. Select Drive Backup from the left sidebar.
- Next, select the drive you want to back up and click the Byte-to-Byte Backup button.
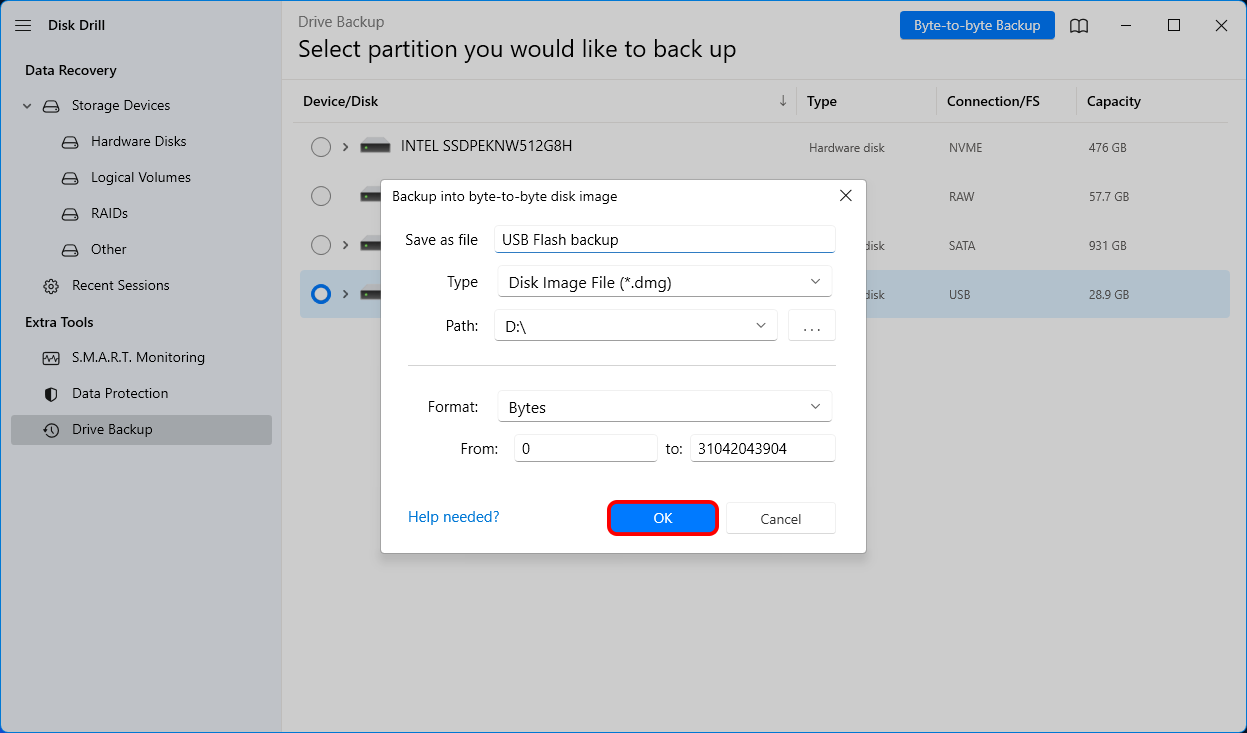
- In the pop-up window, choose the path where you want to save the backup. Then, click OK.
Once you have created the backup of your drive, attach it to Disk Drill and proceed to data recovery. Here’s how to do it:
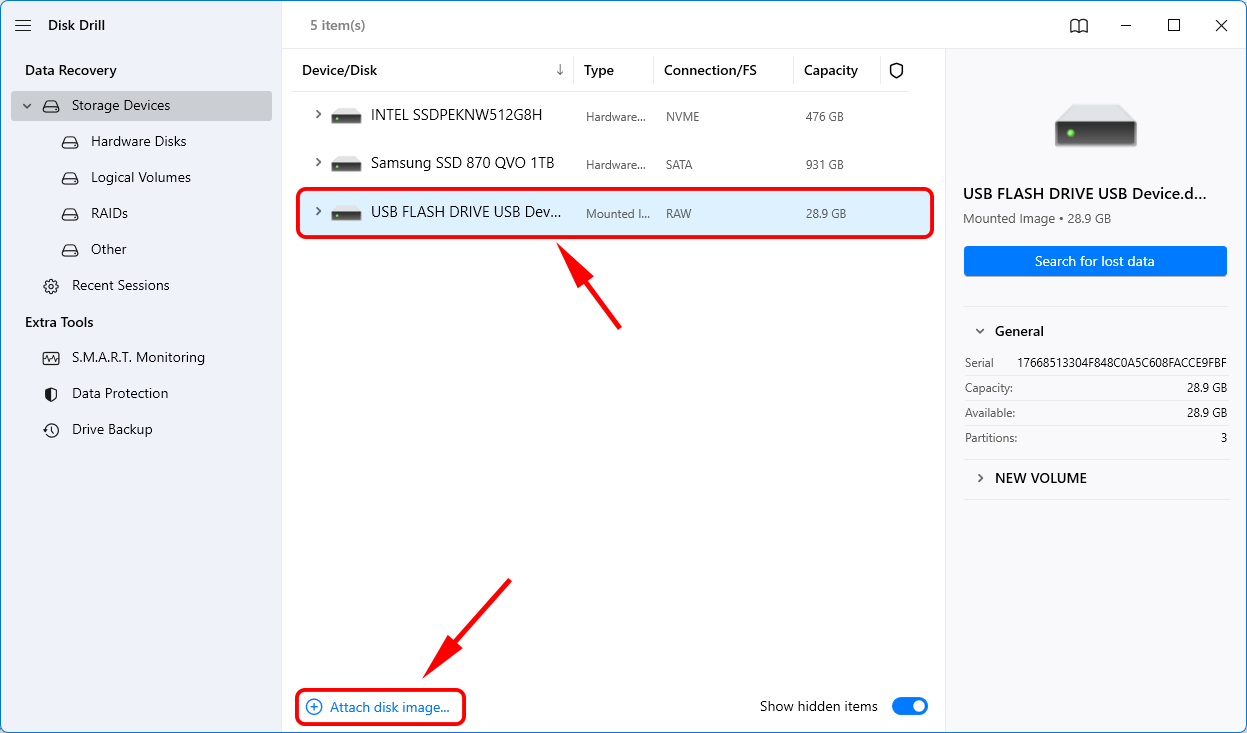
- On the left sidebar, click the Data Recovery tab to go back to the main window.
- Click Attach disk image and browse for your previously created backup file.
- Next, select your backup file and click Open. You should now see the image in the list of devices.
- After that, select your backup and click Search for lost data to start the scan.
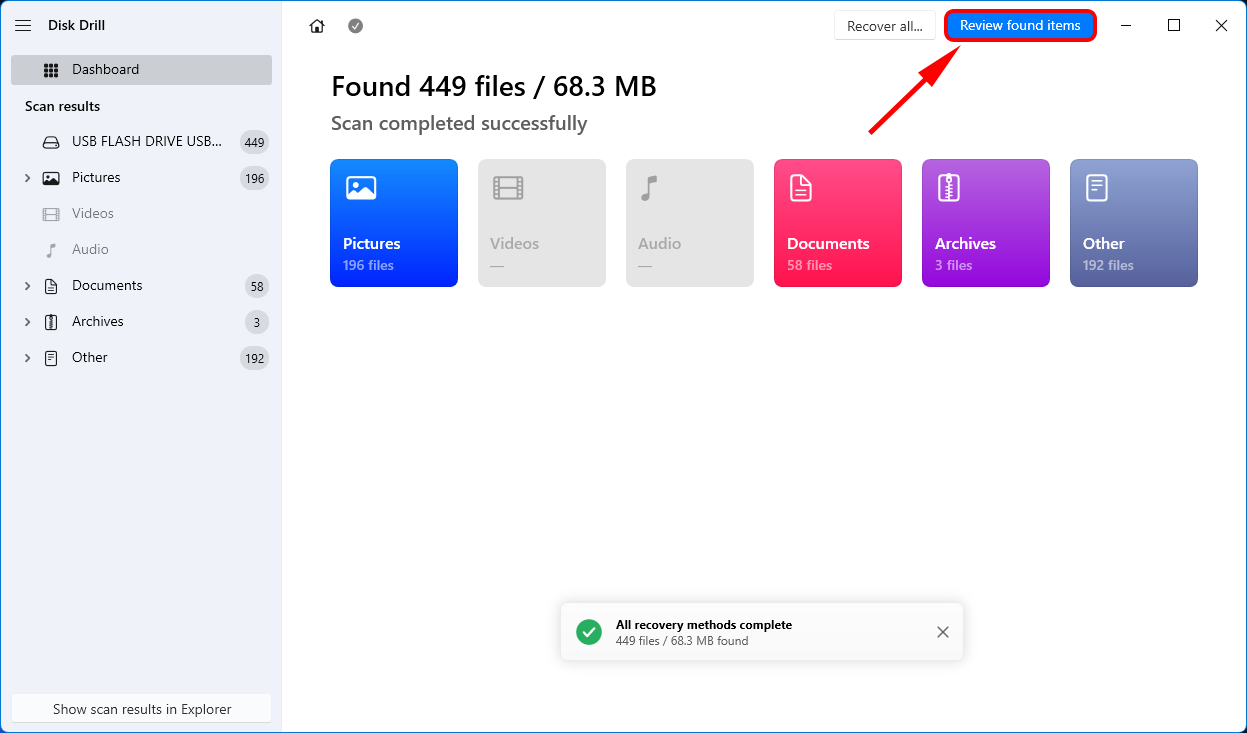
- Once the scan has finished, click Review found items.
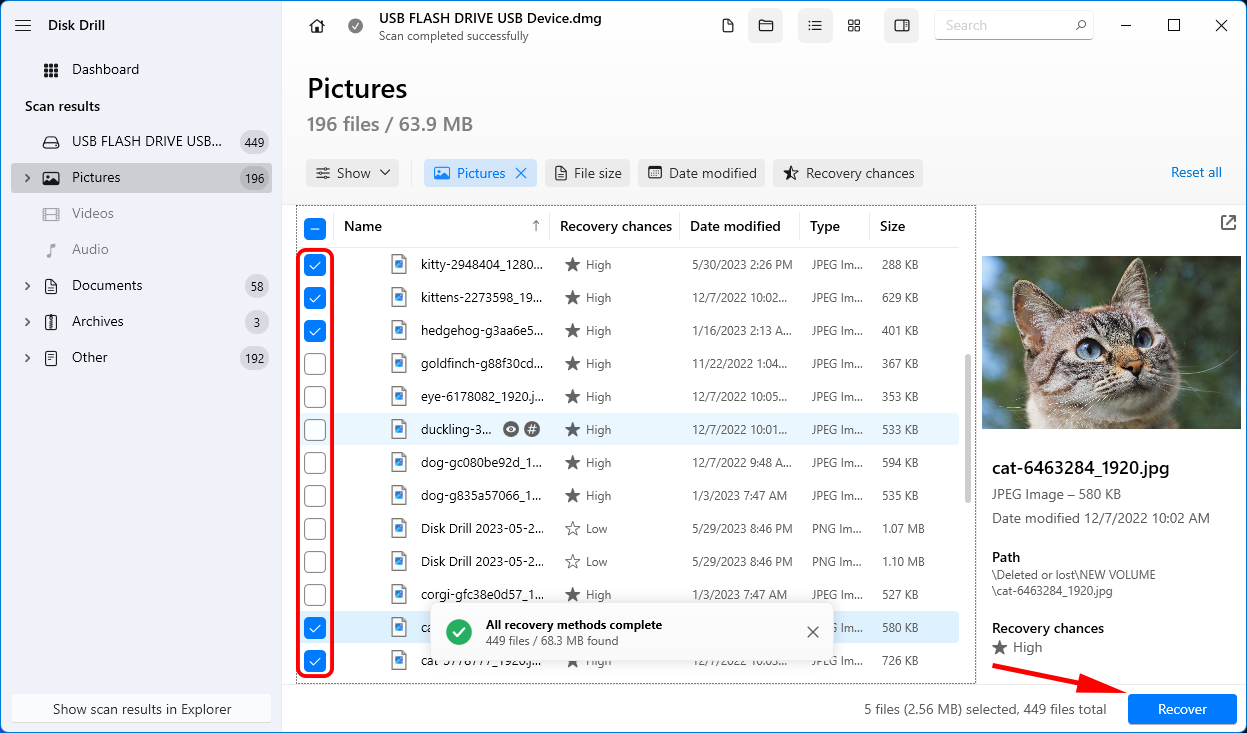
- Select the files you want to recover by ticking the checkbox beside their file names. After selecting the files, click Recover.
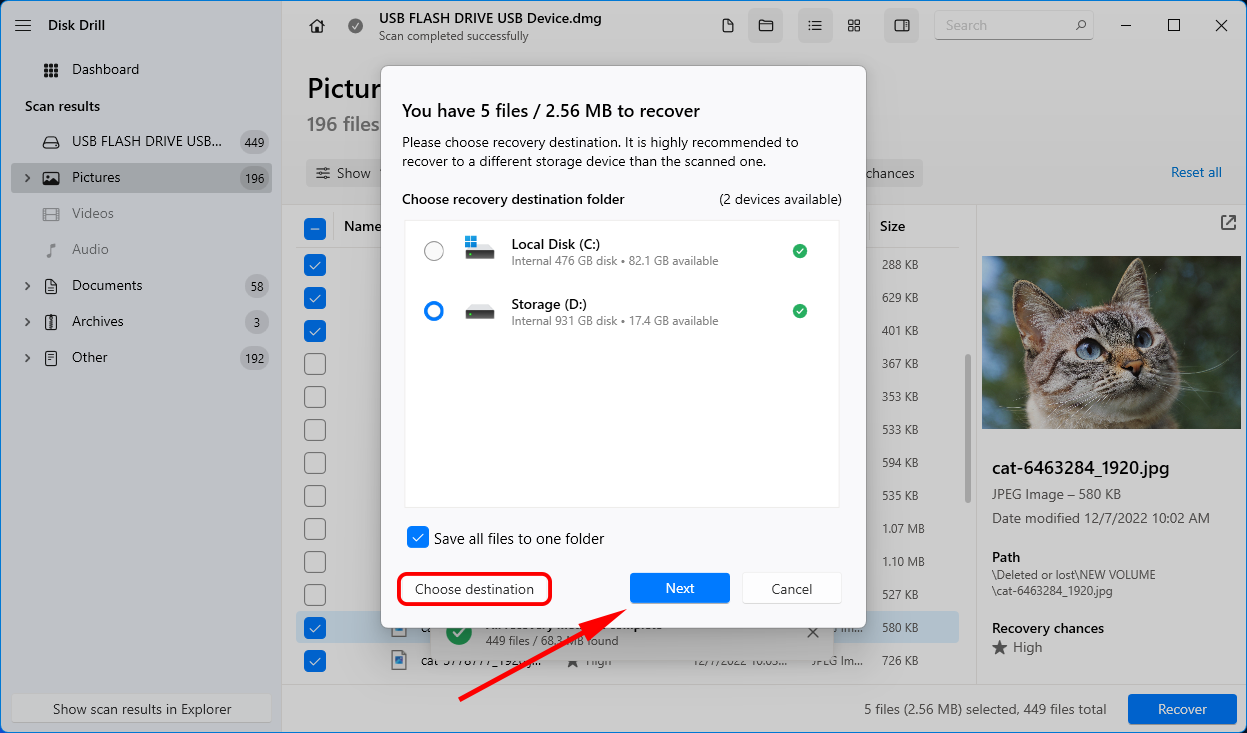
- Choose where you want Disk Drill to save the recovered files and click Next. Make sure you select a path different from the source drive (ESD USB drive, in this case) to avoid overwriting any data.
How to Revert ESD USB to Normal
Once you’ve recovered the files, you can start repairing the USB drive so you can use it like before. There are four ways to revert ESD USB to normal:
Method 1:Format Using Disk Management
Formatting is the easiest way to revert ESD USB to its normal state.
While you can also format the drive using file explorer, you might not want to format the entire drive, but just the portion of unallocated space. You can do this from the Disk Management console.
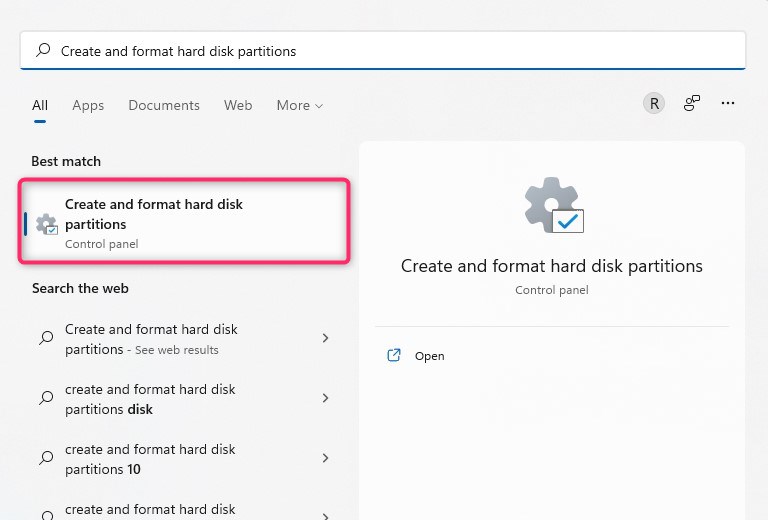
- Start by searching for Create and format hard disk partitions in the Start Menu and select the Best Match.
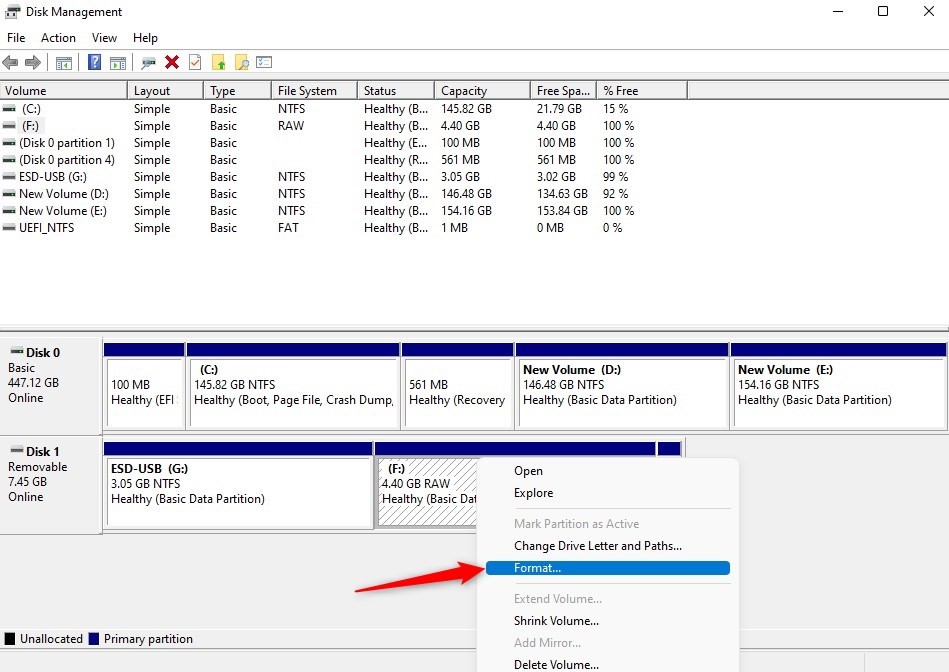
- Right-click on the space formatted as RAW and select Format.
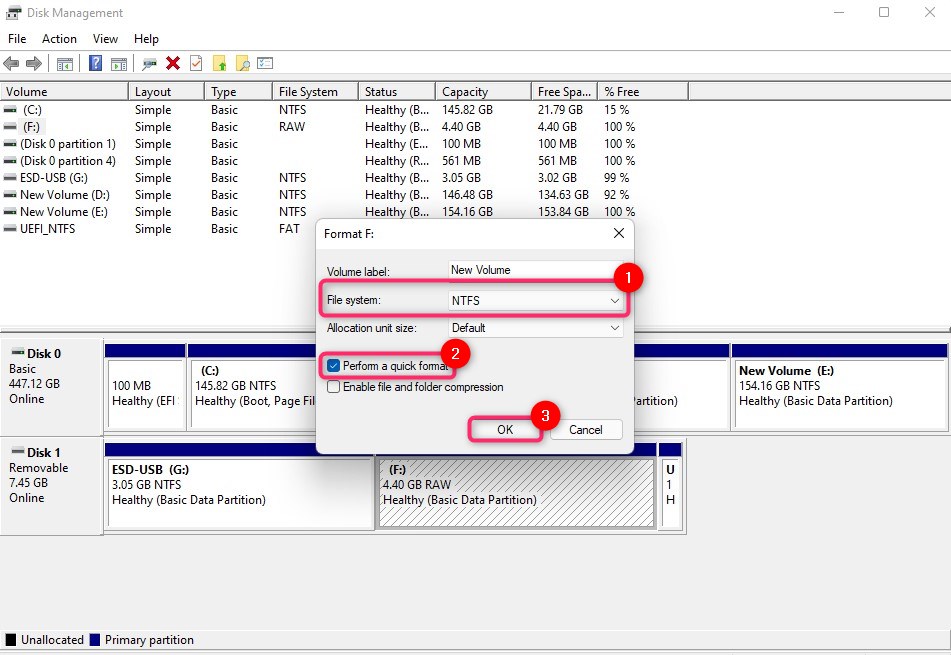
- Select file system, check the box next to Perform a quick format and click OK.
Method 2:Format Using Command Line
You can also format ESD USB using the command line. All you need to do is execute a set of commands in the specified order.
- Start by pressing Win + R, type cmd and press Ctrl + Shift + Enter. This will launch the Command Prompt with administrative privileges.
- Then, execute the following commands:
diskpart
list volume
You’ll now see your volumes listed in the Command Prompt window.
- Find the RAW volume on the ESD USB from the list. You can usually identify it by looking at the size and File System.
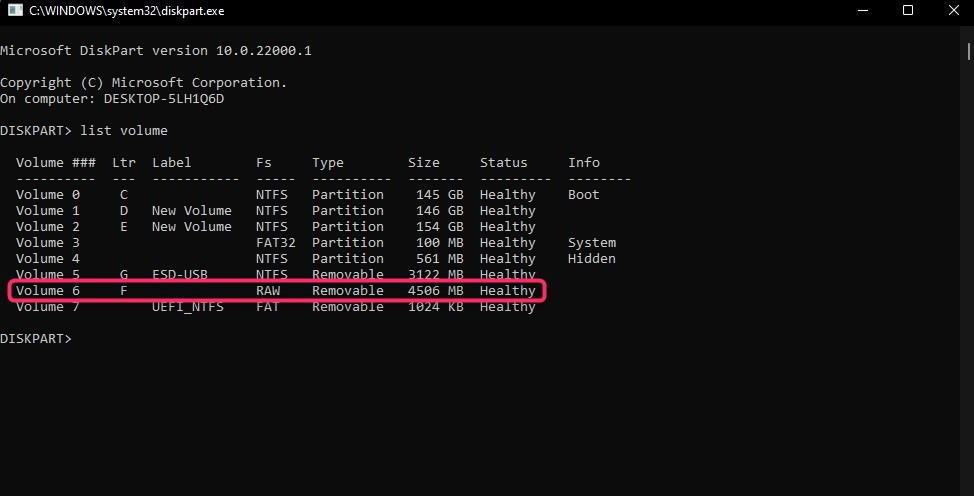 Note the Volume #.
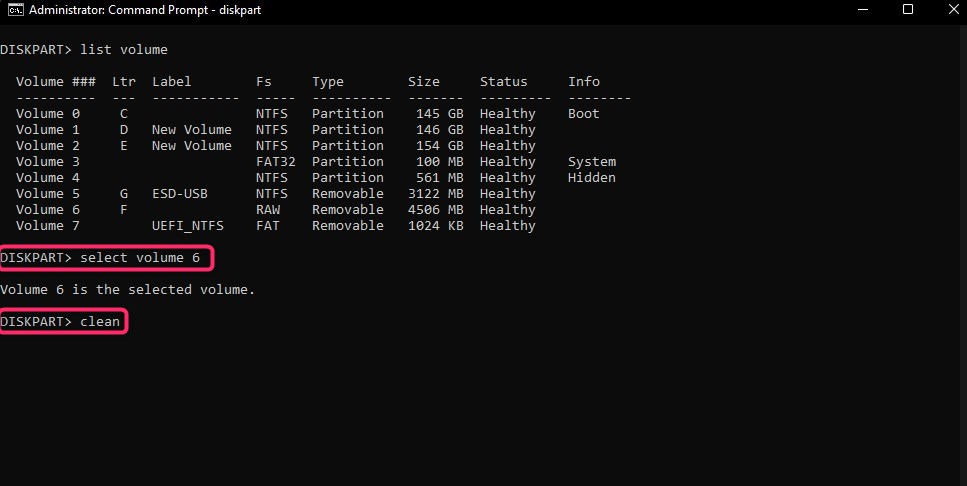
 - Then, execute the following commands in this order:
select volume 1
(change 1 with the relevant disk number)
clean
create primary partition
format fs=ntfs
assign
Once you’ve executed all commands, you’ll see the new partition in the File Explorer.
Method 3:Create a New Partition
If the space appears unallocated instead of formatted as RAW, you can create a new partition from the Disk Management Console.
- Launch the Disk Management console by searching for Create and format hard disk partitions in the Start Menu and selecting the Best Match.
- Right-click on the unallocated space in Disk Management and select New Simple Volume.
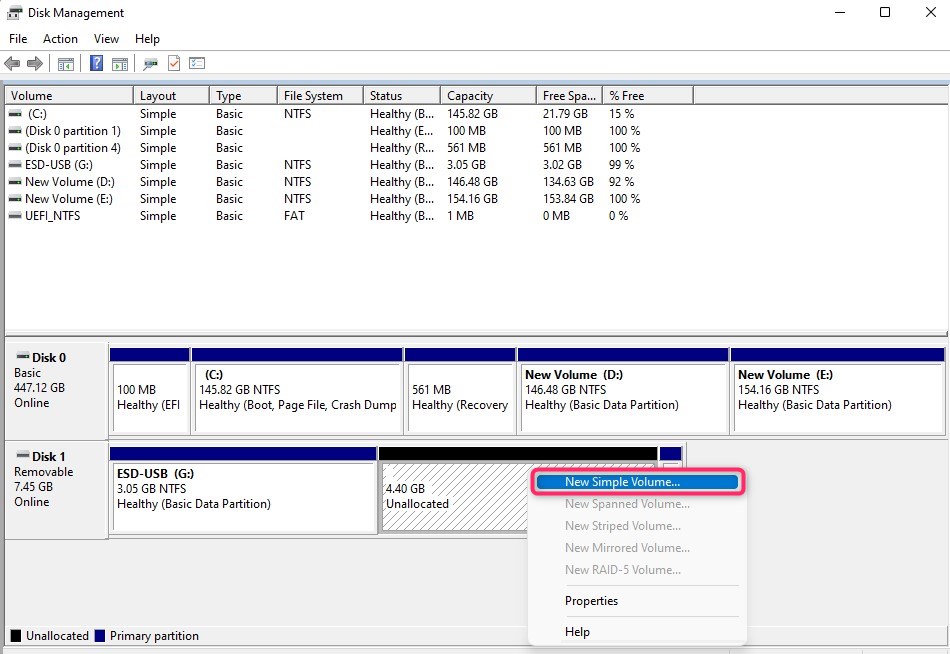
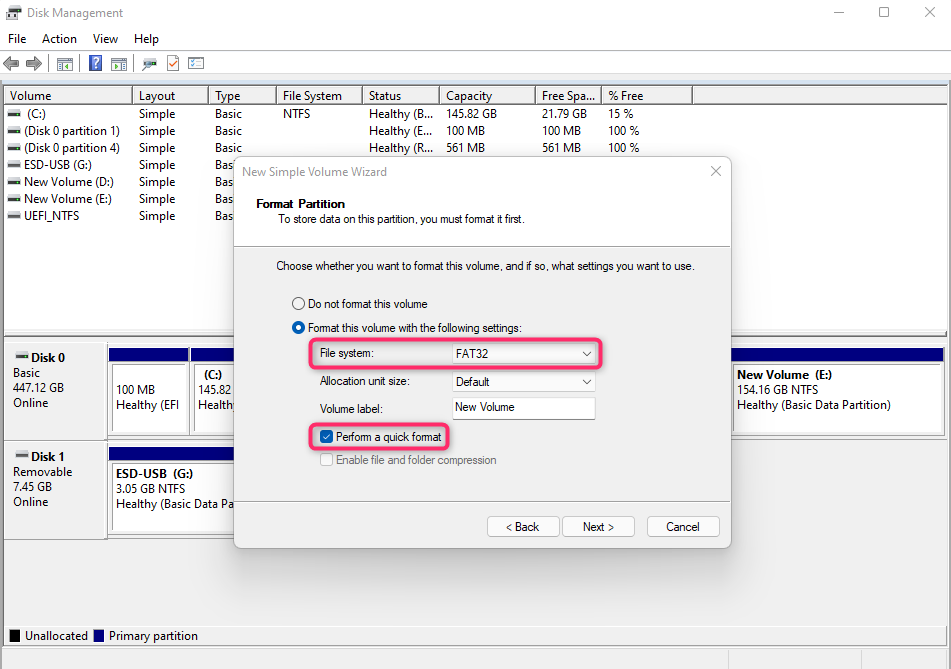
- Follow the instructions in the partition creation wizard. In the final step, you’ll need to select the file system and check the box next to the Perform a quick format option. If you select Do not format this volume, the volume will be converted into a RAW partition.
- Complete the wizard and that should resolve the issue.
Method 4:Bring Your USB Drive to the Repair Store
f all the methods we previously discussed did not recover your lost files, you might have to go to a specialized data recovery service provider. These professionals can get back the files that you had before your drive was formatted to ESD-USB. They should also take care of deleting the ESD-USB and restoring your drive to its original state.
Just remember that the chances of successful data recovery will still depend if the data you’re trying to recover have been overwritten after formatting to ESD-USB.
Conclusion
Fixing ESD USB is fairly easy and quick, but you must start by recovering important files that you’ve lost so you don’t end up overwriting them. Disk Drill can help you quickly get your files back, and even help you protect your files better in the future with robust features like Data Protection.
FAQ
- Open the Disk Management app from the Start menu.
- Locate your USB drive partition. Then, right-click and select Delete Volume.
- Open Disk Utility.
- Choose your USB drive. Then, select Erase and choose a new partition scheme.


