 Many Windows users regularly utilize the Disk Cleanup tool to free up storage space and potentially give a bump to hard drive performance.
But how exactly does it work? Does Disk Cleanup delete files permanently? And how does one use it without running the risk of losing important files?
In this guide, we will thoroughly discuss how the utility functions and walk you through the best way to use it safely and responsibly.
Table of Contents
What does the Disk Cleanup Utility Do?
Disk Cleanup is a built-in Windows tool that made its first appearance alongside the Windows 98 operating system. It works by scanning selected storage devices for files that it deems “safe to delete”, and then purges them. So what does Disk Cleanup delete?
These files may include internet browser cache files, temp files, dump files, log files, thumbnails, Recycle Bin contents, device driver packages, and more. It can also remove junk files and certain system files like Shadow Copies and Restore Points.
You can easily bring up the Disk Cleanup software in Windows 7/10/11 through the following steps:
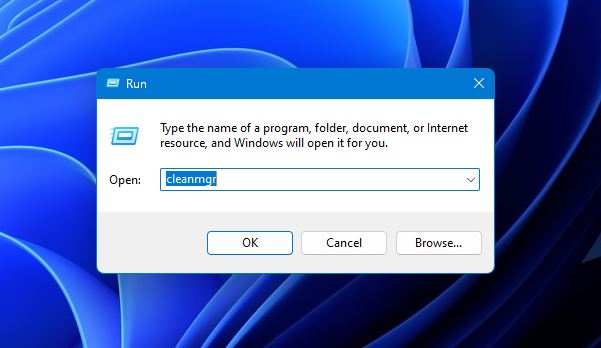
- To get started, launch the Run command by pressing the Windows + R keys simultaneously.
- Next, type in
cleanmgrand hit Enter.
How to Safely Use Disk Cleanup Tool on Windows
As previously mentioned, the Disk Cleanup Utility only removes selected files that it considers “safe” to erase, but that doesn’t necessarily mean that these files don’t contain anything useful.
For example, Disk Cleanup gives you the option to empty out your Recycle Bin, which may include some important data. You might also end up getting rid of some Restore Points in which your computer worked optimally.
That being said, always thoroughly review all the options you’ve selected in Disk Cleanup before proceeding with the operation. That way, you can avoid permanently getting rid of files you may need in the future.
To help figure out which files you should delete using Disk Cleanup and which ones you shouldn’t, we’ve outlined the sections below in order of files that are “not recommended to delete”, “delete depending on the situation, and “safe to delete in any circumstances”.
Not Recommended to Delete
Here are the Disk Cleanup categories that we suggest you don’t delete using the utility:
- Windows ESD Installation Files
- Recycle Bin Files
These options may include files that are potentially crucial for either the user or the Windows operating system. The Recycle Bin, for example, may be housing some accidentally deleted files or ones that haven’t been backed up yet.
Removing Windows ESD installation files may save you some precious hard disk space, but doing so will hamper your ability to perform a factory settings reset.
Delete Depending on the Situation
Below is a list of files that are generally okay to delete unless you’re planning to use them for backup or troubleshooting purposes. Aside from that, they usually hold no value to the user.
- Windows Updates
- Windows Upgrade Log Files
- System Error Memory Dump Files
- System Archived Windows Error Reporting
- System Queued Windows Error Reporting
- DirectX Shader Cache
- Delivery Optimization Files
- Device Driver Packages
- System Restore Points
- Previous Windows Installation
- Temporary Windows Installation Files
As you can see, the aforementioned options include logs and reporting files to help explain certain system issues, as well as restore points and previous installation files that can be useful in rolling back changes to Windows.
If you have no intention of using them, getting rid of them using the Disk Cleanup command should be fine.
Safe to Delete in Any Circumstances
You can go ahead and safely tick these categories whenever you run Disk Cleanup:
- Windows Defender Files
- Downloaded Program Files
- Temporary Internet Files
- Temporary Files
- Thumbnails
These options are comprised mostly of temporary and downloaded files, along with thumbnails that are automatically generated by Windows when necessary. You can go ahead and delete these files through Disk Cleanup without worry.
How to Recover Files Deleted by Mistake in Disk Cleanup
If you happen to run Disk Cleanup and prematurely get rid of some important files, there’s a method that could help you get them back.
Keep in mind that this method works primarily for files that were erased from the Recycle Bin. What you’ll need to do is utilize an effective data recovery program, like Disk Drill.
Disk Drill sports some of the highest recovery rates on the market and is exceptionally accessible to both technical newbies and novices. It also works with the majority of storage devices available and can handle any file type.
To top it all off, you can test out all of the app’s features through its free trial and retrieve up to 500 MBs worth of data (for Windows users). Here’s a quick and simple step-by-step guide on how you can restore files deleted through Disk Cleanup using Disk Drill:
- Download and install the latest version of Disk Drill.
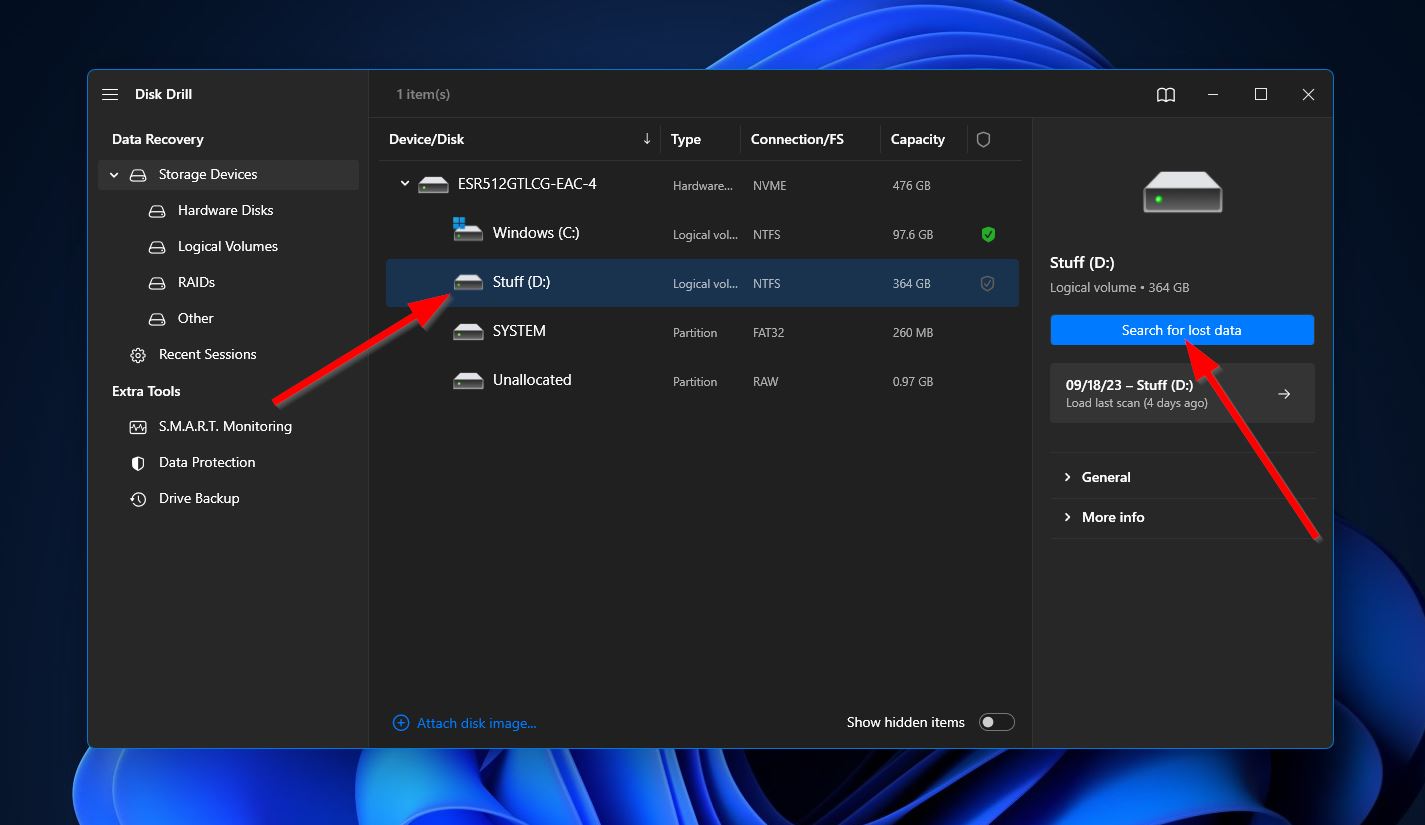
- Launch Disk Drill, then select the storage device the deleted files were last in before being moved to the Recycle Bin. Click “Search for lost data” to continue.
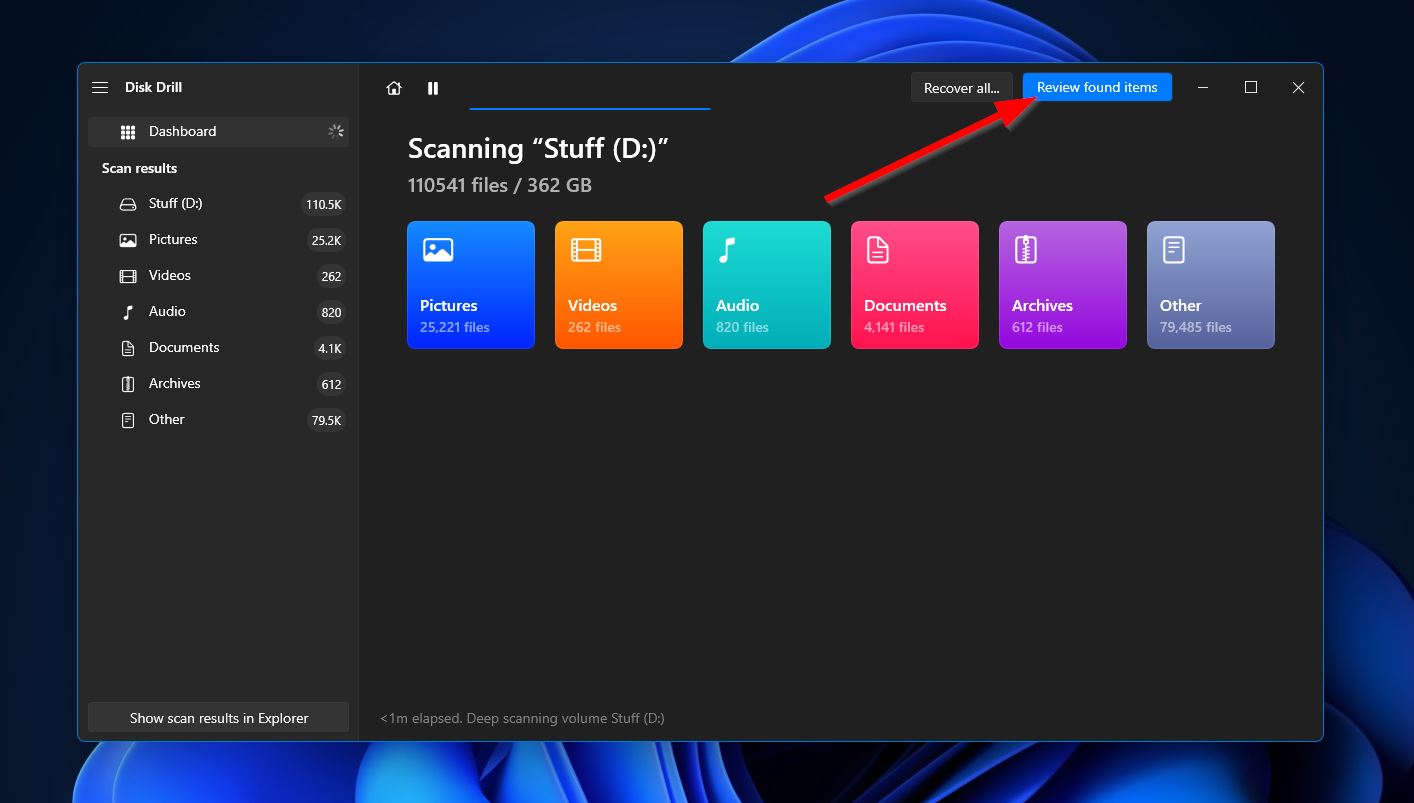
- After that, the program will start scanning your select devices for files it can potentially retrieve. To move on to the next step, click the “Review found files” button in the top-right corner.
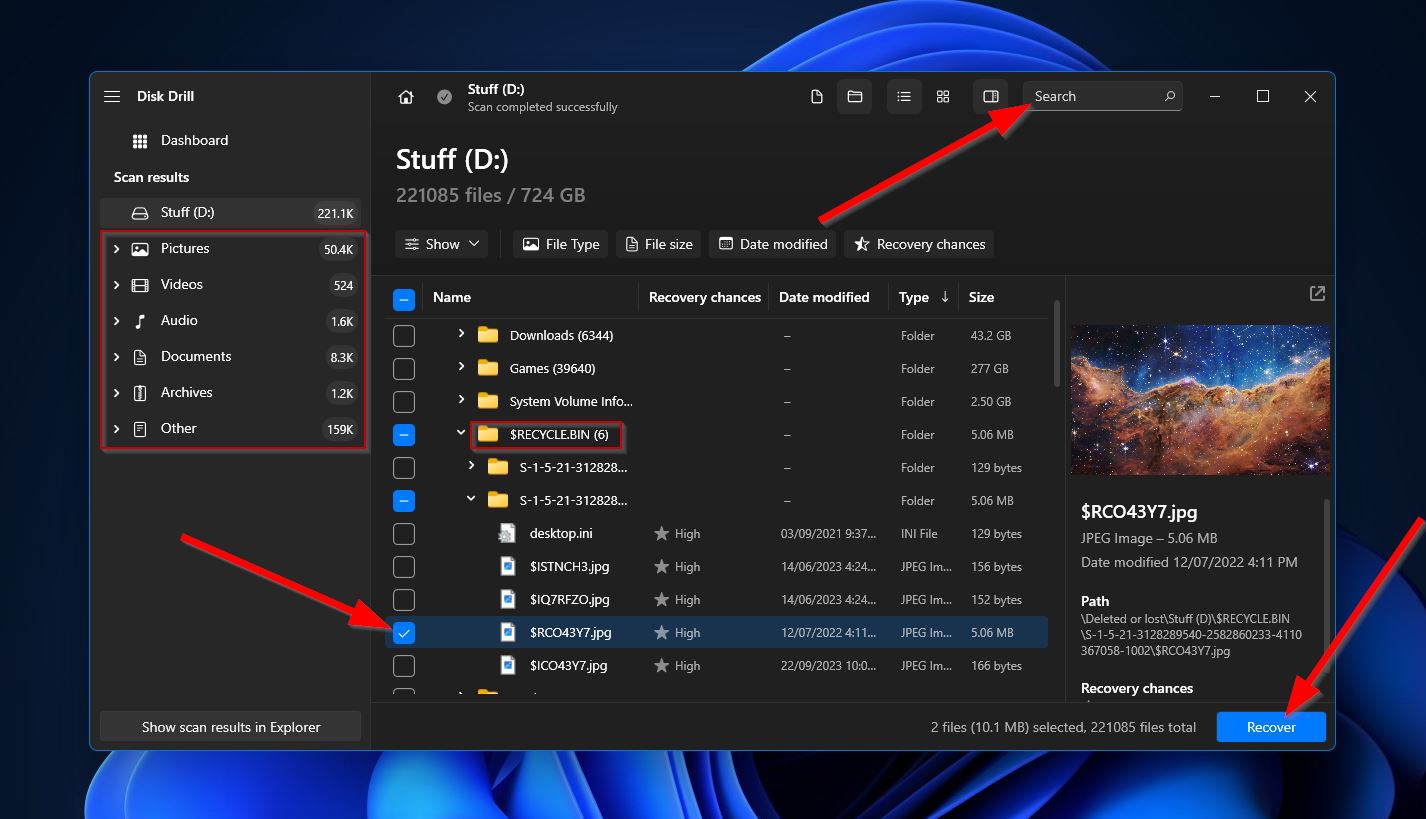
- Once you get to the results screen, chances are, you’ll be faced with a whole lot of results. You can narrow down the items by picking a category on the left, or by using the search bar at the top right. A nifty tip is that the search bar accepts file extensions as well as names. From there, you should see a Recycle Bin folder where your lost files may be located. After you find the files you want to rescue, tick the checkbox on the left of their names, then click the “Recover” button to move along.
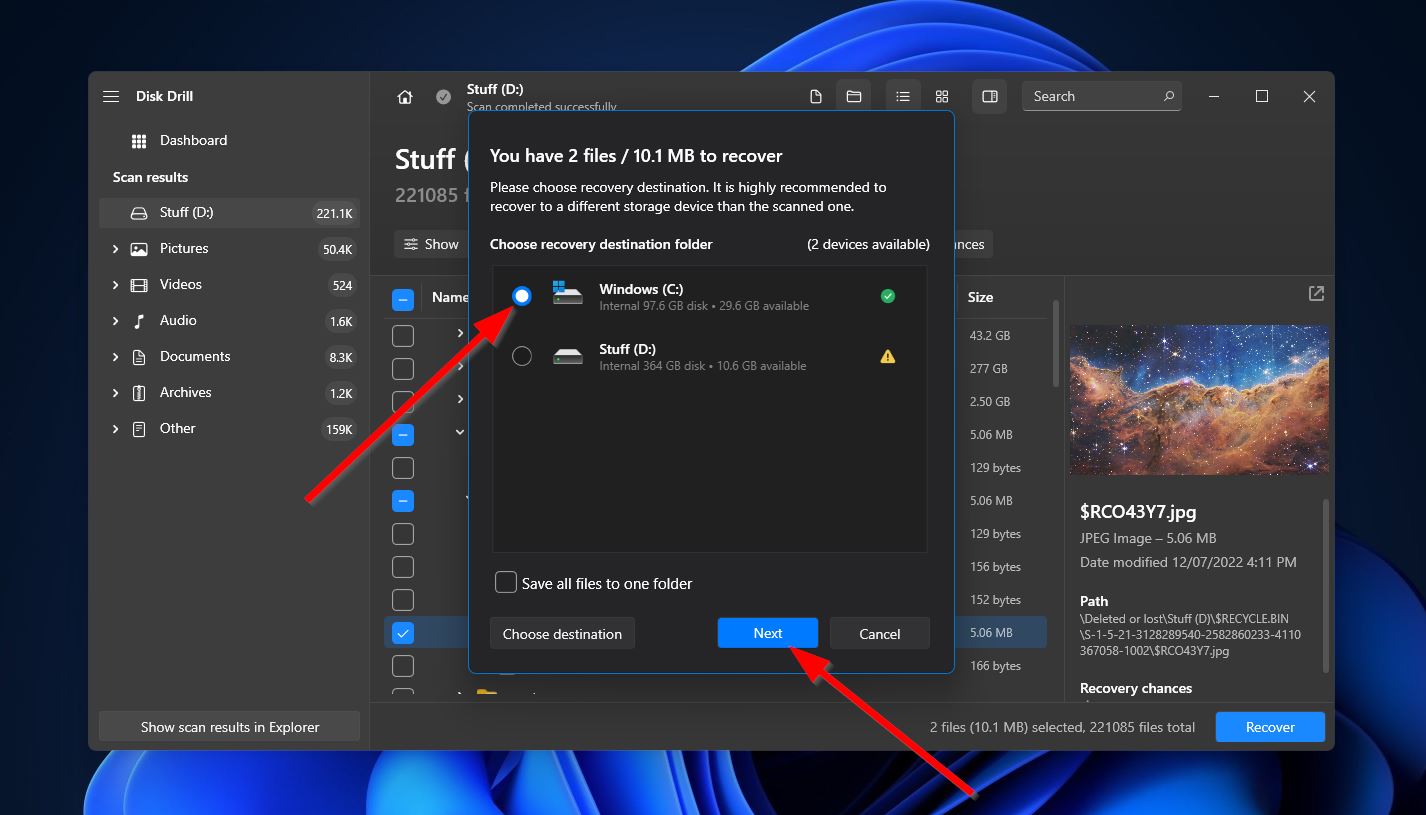
- Upon clicking, you’ll get a small pop-up asking you to choose the destination for your retrieved files. This has to be on a different device than the one you’re recovering from. Hit “Next” to continue.
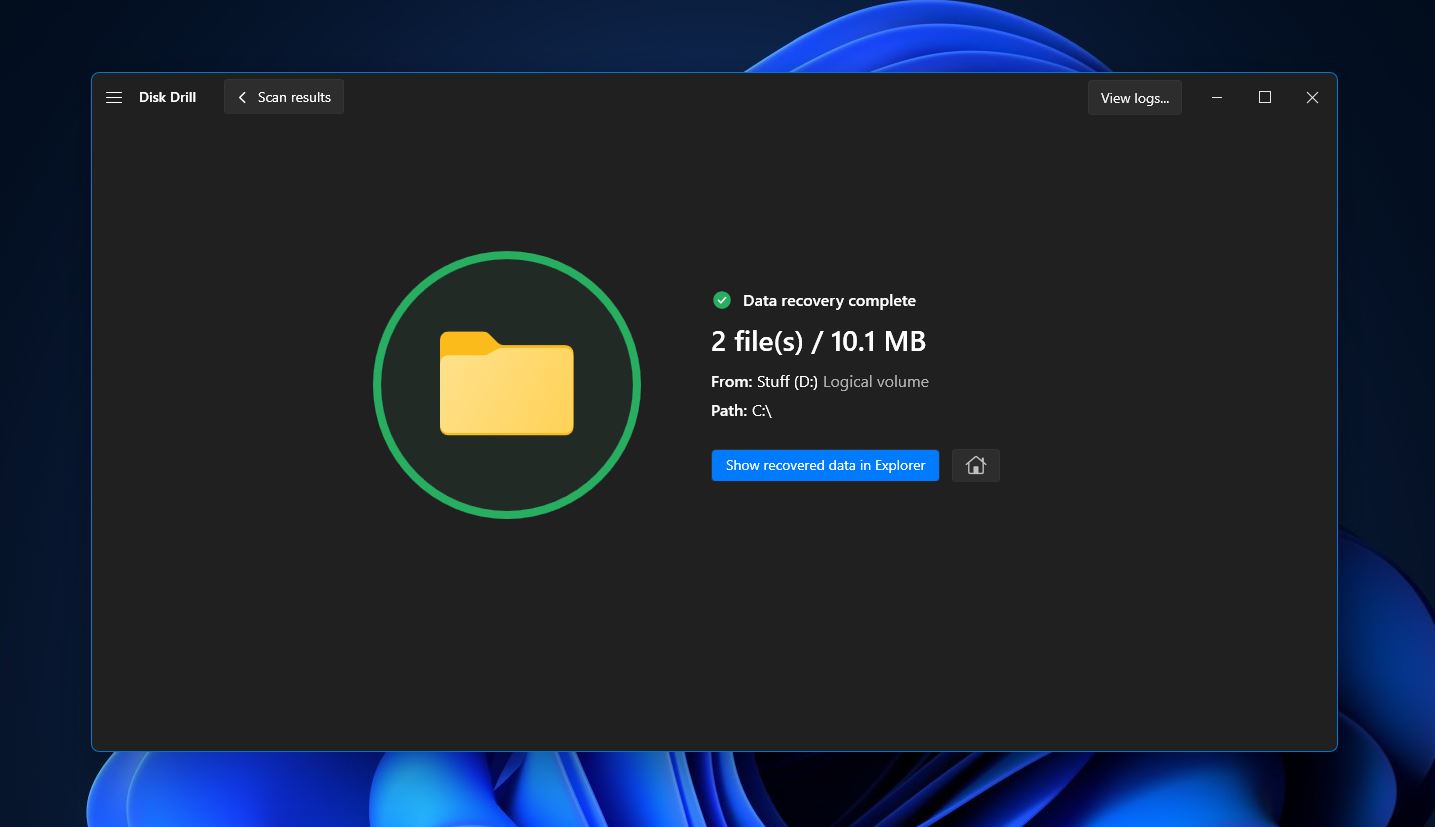
- Finally, Disk Drill will try to get your deleted files back. If successful, you’ll see a completion message and a button labeled “Show recovered data in Explorer”. Click it if you want to open the folder where your rescued files were saved.
Conclusion
Disk Cleanup certainly is a handy tool that can effectively help you reclaim some precious space from your storage device. Moreover, it can assist you in clearing up some needless clutter so your device can run more efficiently. But you’ll want to approach the tool with caution in order to avoid accidentally deleting some important files.
Simply follow the guide above to decide which files are safe for you to delete and which ones you should consider keeping. If you happen to use Disk Cleanup to empty out your Recycle Bin tool, you can try using a data recovery program like Disk Drill to recover files from Recycle Bin.


