
Microsoft Outlook is a very popular email client that’s used by millions around the world. As reliable as it is, emails can become lost as a result of accidental deletion. What happens when an important email goes missing from your inbox?
Thankfully, there are a few options available to you for recovering lost emails. In this article, we’ll guide you through what methods you can use for Outlook email recovery. We’ll also show you some ways you can protect your emails from accidental deletion going forward.
Table of Contents
5 Ways to Recover Deleted Emails in Outlook
When it comes to performing Outlook email recovery, each case is different. Therefore, we’ve included a table below which you can use to jump to the section that best describes your situation.
| Recovery case | Solution |
| I’ve just deleted the email manually | Undo Deletion With a Keyboard Shortcut Restore From Deleted Items |
| I’ve deleted a few emails that I need to recover | Restore Specific Emails from the Backup Restore From Deleted Items |
| I accidentally deleted my Outlook backup | Recover a Deleted Outlook Backup |
| I deleted a lot of my emails and need to restore my entire inbox. | Restore the Entire Backup |
| I need to restore a deleted email but I cleared my Deleted Items folder | Recover Deleted Items From Server Archive Folders Restoring Specific Emails from the Backup |
Method 1: Undo Deletion With a Keyboard Shortcut
Pressing CTRL + Z on your keyboard will undo the last action you made. Alternatively, you can click the undo button in the top left of the window. For instance, when you delete an email, it’s automatically sent to your Deleted Items folder. When you press CTRL + Z on your keyboard, that email will be restored to its original location. This function can be used to reverse most actions, like moving an email to another folder or correcting a mistake in an email. It’s one of the easiest ways to recover deleted items in Outlook.
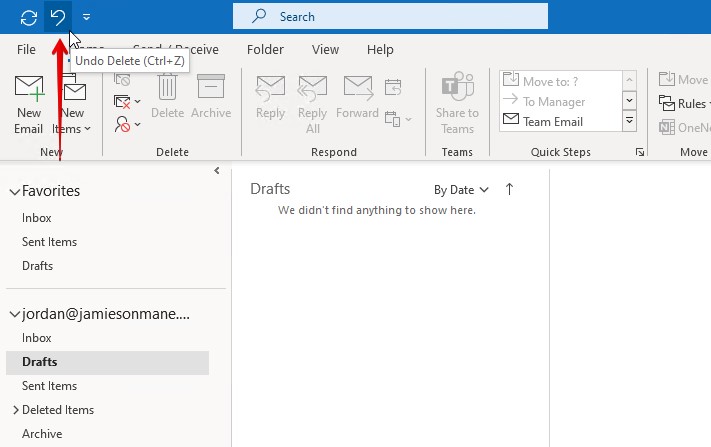
Bear in mind that this will only undo your most recent action. For example, if you were to delete two emails one after the other, pressing CTRL + Z will only restore the most recently deleted email. The first email will still reside in the Deleted Items folder.
Method 2: Restore from Deleted Items
When an email is deleted in Outlook, it’s first sent to the Deleted Items or Trash folder (depending on your Outlook version). For Outlook.com users, any deleted emails will be permanently deleted after 30 days. Similarly, emails in your Junk folder will reside there for 10 days before being deleted. For Outlook for Desktop users, it will remain here until the folder is emptied manually or automatically based on your inbox settings.
Note: The below instructions will work for Outlook.com and Outlook for Desktop.
Here’s how you restore deleted emails from the Deleted Items or Trash folder:
- Open Outlook on your computer.
- Click the Deleted Items folder in the left panel.
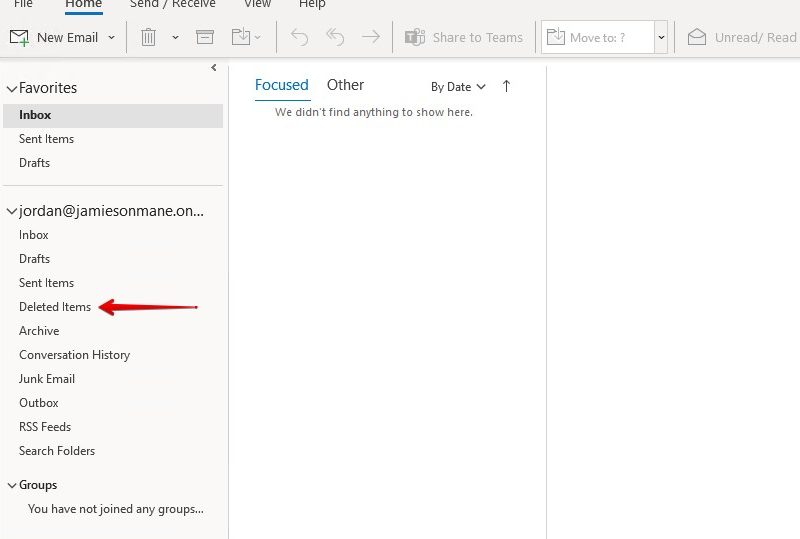
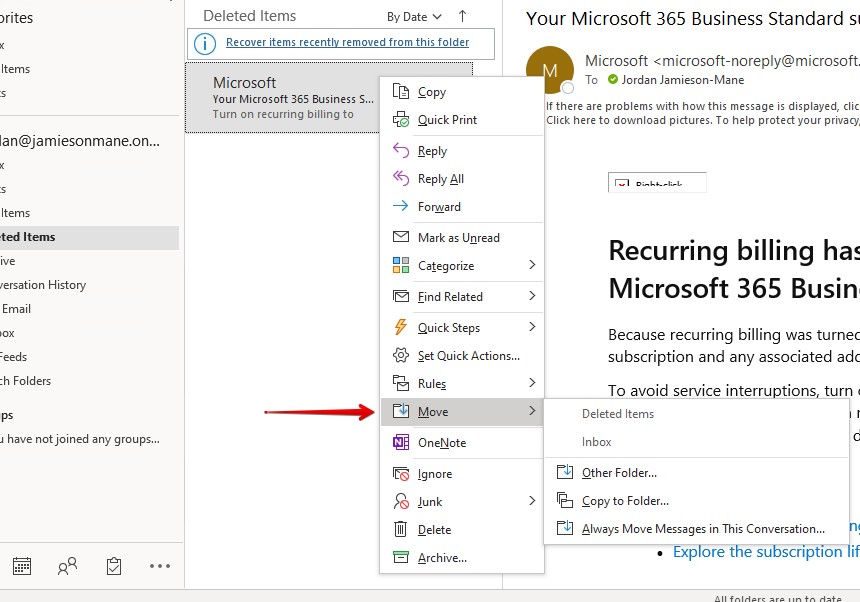
- Select what emails you want to restore. To select multiple, hold CTRL and click each email. Right-click, hover over Move, and select where you want to restore the emails.
Method 3: Recover Deleted Items From Server
The Recoverable Items folder is a hidden folder that contains emails that have been deleted from the Deleted Items folder, as well as items that were permanently deleted using Shift + Delete. It gives you another chance at recovering your emails if you cleared your Deleted Items folder. This only works on desktop versions of Outlook 2007 and above.
If you have a Trash folder instead of a Deleted Items folder, your account type will not support this type of recovery.
- Open Outlook on your computerand ensure you are connected to your mail server.
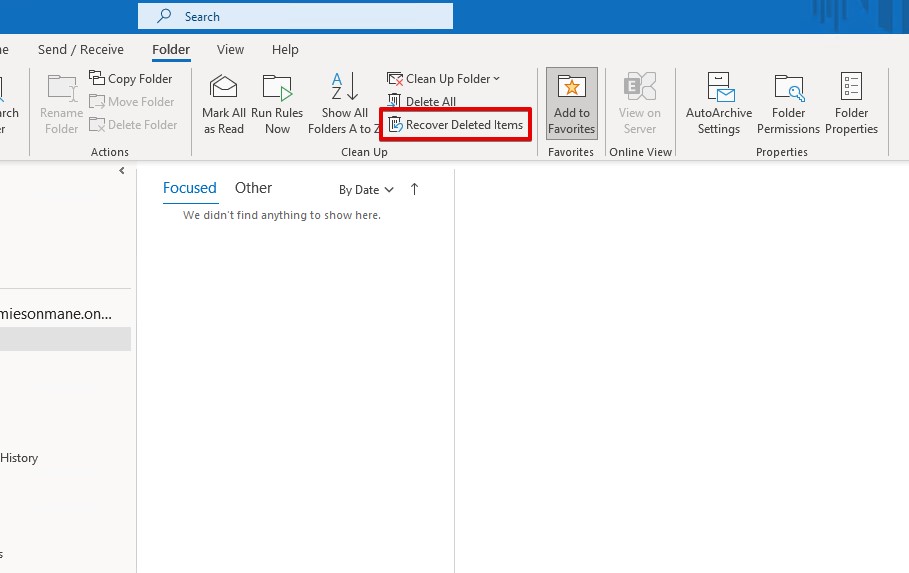
- Click the Home tab, then click Recover Deleted Items From Server.
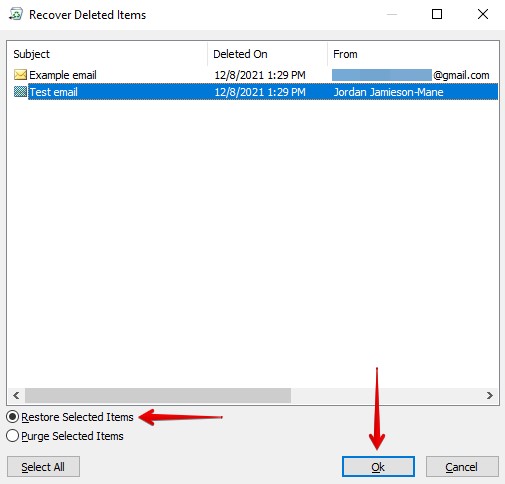
- Go to the Folder tab and click Recover Deleted Items.
- Select the email you want to restore. If you want to select multiple, hold CTRL while you click each one. When ready, make sure the Restore Selected Items radio button is selected and press OK.
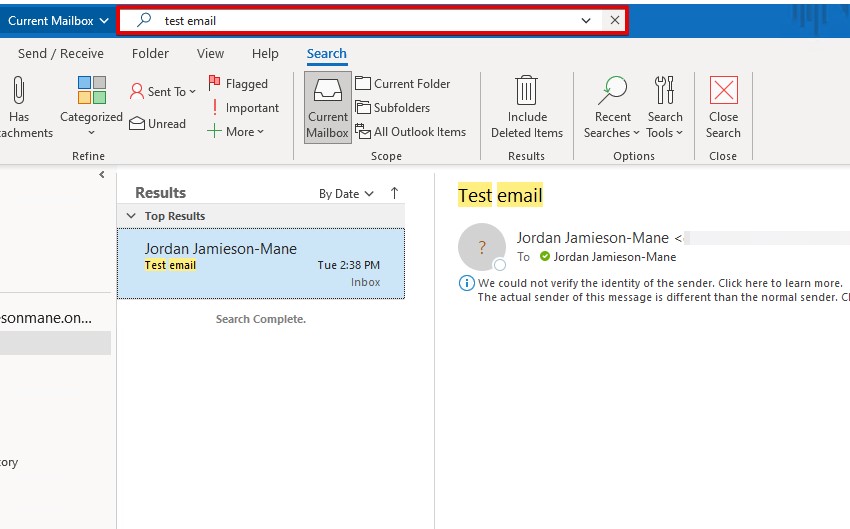
- The file will be restored to its original location. However, to be sure, use the search function available in Outlook to confirm. This same search function is useful if trying to find a deleted email in Outlook.
If the emails you were looking for aren’t appearing in the Recoverable Items list, you can contact your company’s administrator who may be able to recoverthem from a backup or through the eDiscovery Center.
Method 4: Restore From Backup
Outlook allows you to export your emails to an Outlook data file (PST). This allows you to free up space in your inbox without permanently deleting the emails you want to keep a record of.
If you created an Outlook backup, or you have the AutoArchive feature enabled, you have a few options more options for restoring Outlook items.
Archive Folders
First, let’s try restoring your deleted emails from the Archive folder. The Office 365 version of Outlook includes the AutoArchive feature. AutoArchive, when enabled, periodically archives the contents of your inbox or folders. It can be configured to send old emails to your default Archive folder, or it can move them to a PST file to clear up some space in your inbox. We’ll show you how to restore emails from a PST file later in the article.
The Archive folder is available on Outlook 2007 and above. Use these steps to retrieve old emails in Outlook from the default Archive folder:
- Open Outlook.
- In the left panel, click Archive.
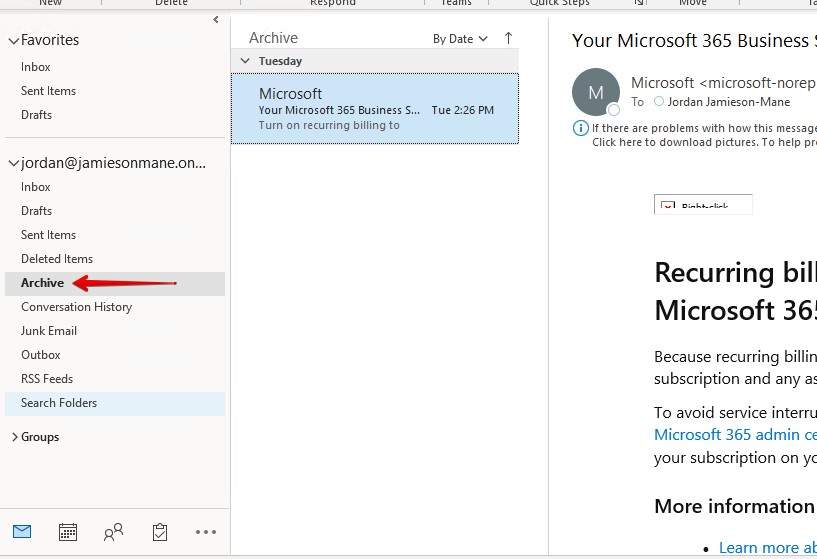
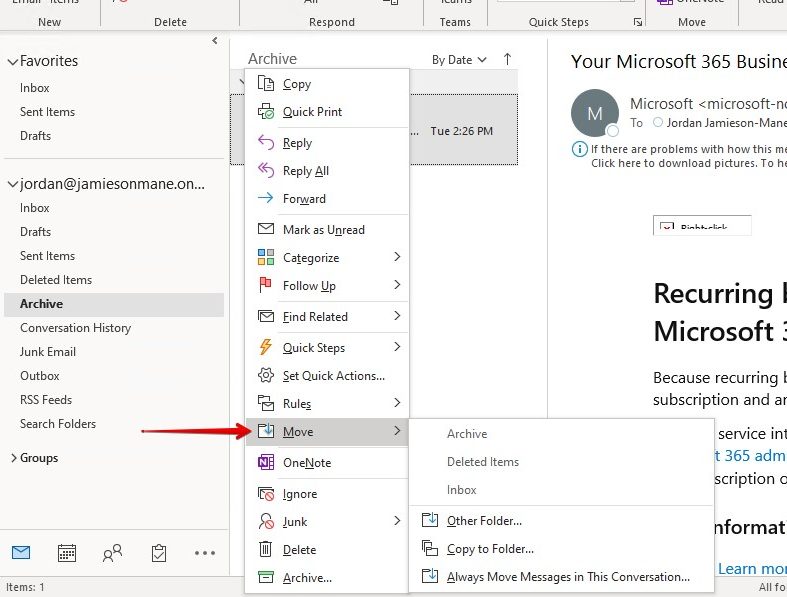
- Select what items you want to recover, then click Move to and select a folder.
Restoring the Entire Backup
If you can’t find what you’re looking for in the Archive folder, you can manually restore your Outlook backup and find the emails there.
Note: If you’re only looking for a few specific emails, try the next method instead.
Follow these steps to retrieve deleted emails from an Outlook backup.
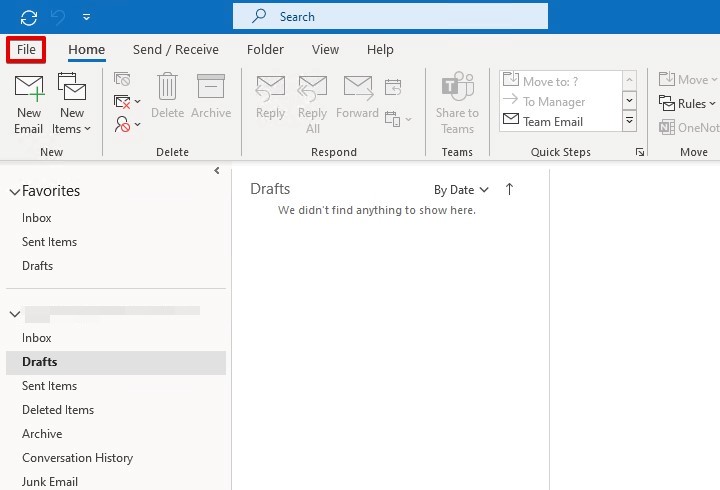
- Click the File tab.
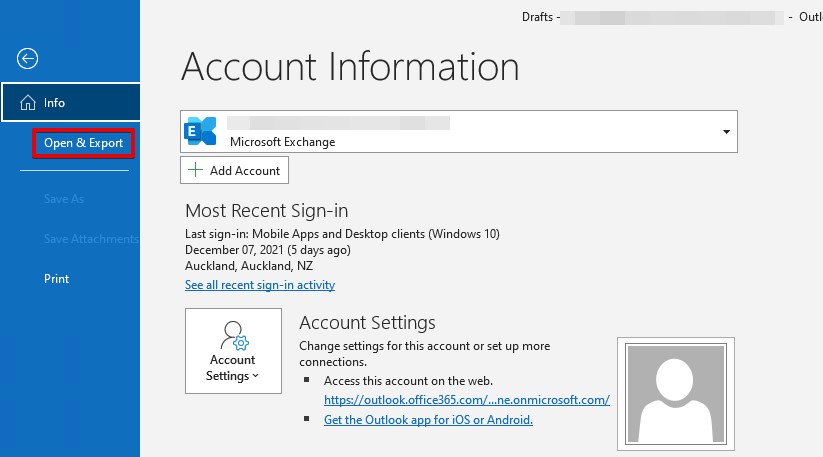
- Click Open & Export.
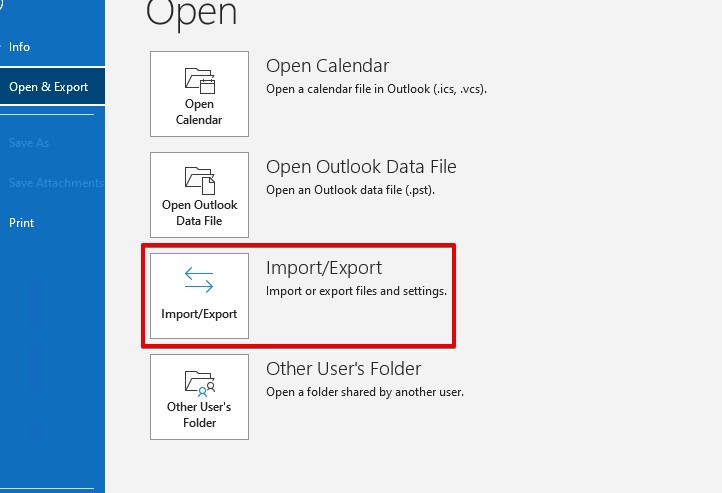
- Click Import/Export.
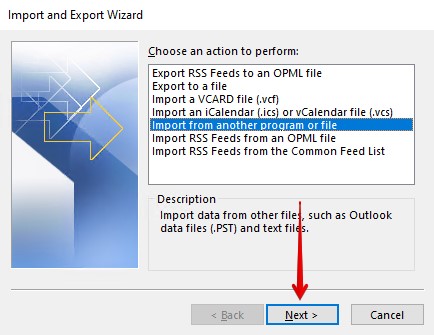
- Leave the option Import from another program or file option selected and click Next.
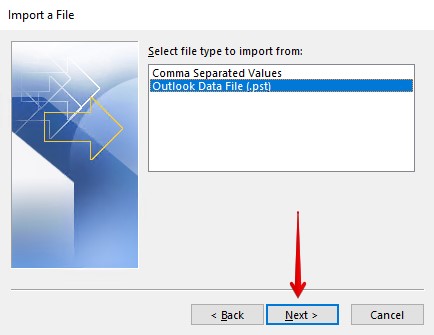
- Select Outlook Data File (.pst) and click Next.
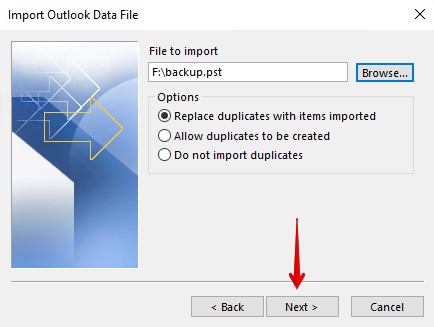
- Click Browse and select your PST backup file. Under Options, choose how you want to treat duplicates (if any). Click Next.
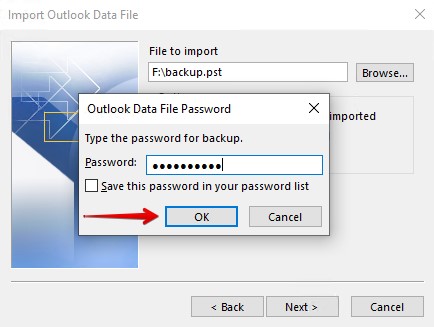
- Input your password and click OK.
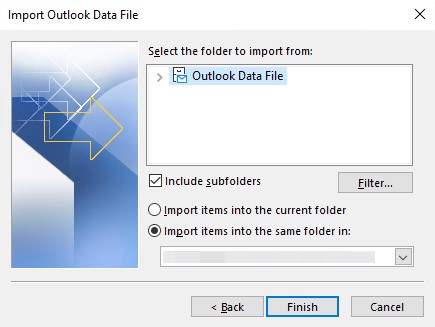
- Choose where you want the imported files to go, then click Finish.
Restoring Specific Emails from the Backup
Restoring the entire backup can be bothersome if you only need to recover a few emails. Follow these steps to restore only marked emails:
- Click File, then Open & Export.
- Click Open Outlook Data File. Select what backup file you want to restore emails from.
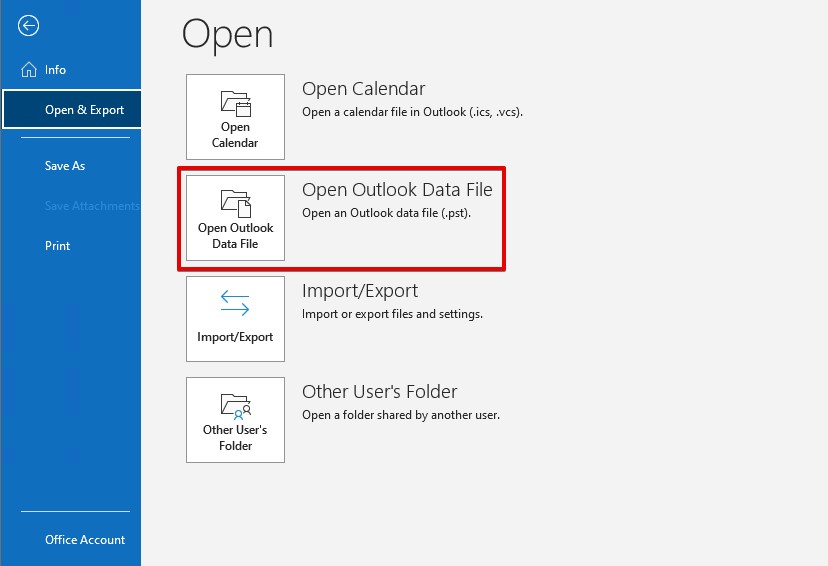
- Expand the Outlook Data File section in the left panel. Here you will find all of the files in your backup. Simply drag and drop them to your inbox folders to restore an item.
Method 5: eDiscovery
This method only works for users on an Office 365 Enterprise subscription. eDiscovery is a Microsoft tool that’s used to find data for legal cases that will be used as evidence. It also doubles as a recovery solution, as it knows how to recover permanently deleted emails in Outlook. Bear in mind that this can only be performed by IT administrators who belong to the eDiscovery Manager role group in the Microsoft 365 compliance center.
See the official Microsoft documentation for running a Content search in Microsoft 365 compliance center and exporting the Content search report.
How to Recover a Deleted Outlook Backup
Keeping an Outlook backup is by far the best way of ensuring you can quickly restore deleted emails if they ever become lost. However, they’re not impervious to becoming lost themselves. In a data loss situation like hardware failure or a virus attack, your PST file may become lost or deleted.
In such cases, you will need to use a data recovery tool. For tasks like this, we prefer to use Disk Drill to recover the file. It’s a data recovery tool for Windows 11 that’s favored by many, as it excels at recovering a large number of file types in addition to PST files. Plus, it’s super easy to use, allowing even beginners to recover their lost PST backup in no time.
Follow these steps to recover your Outlook backup using Disk Drill:
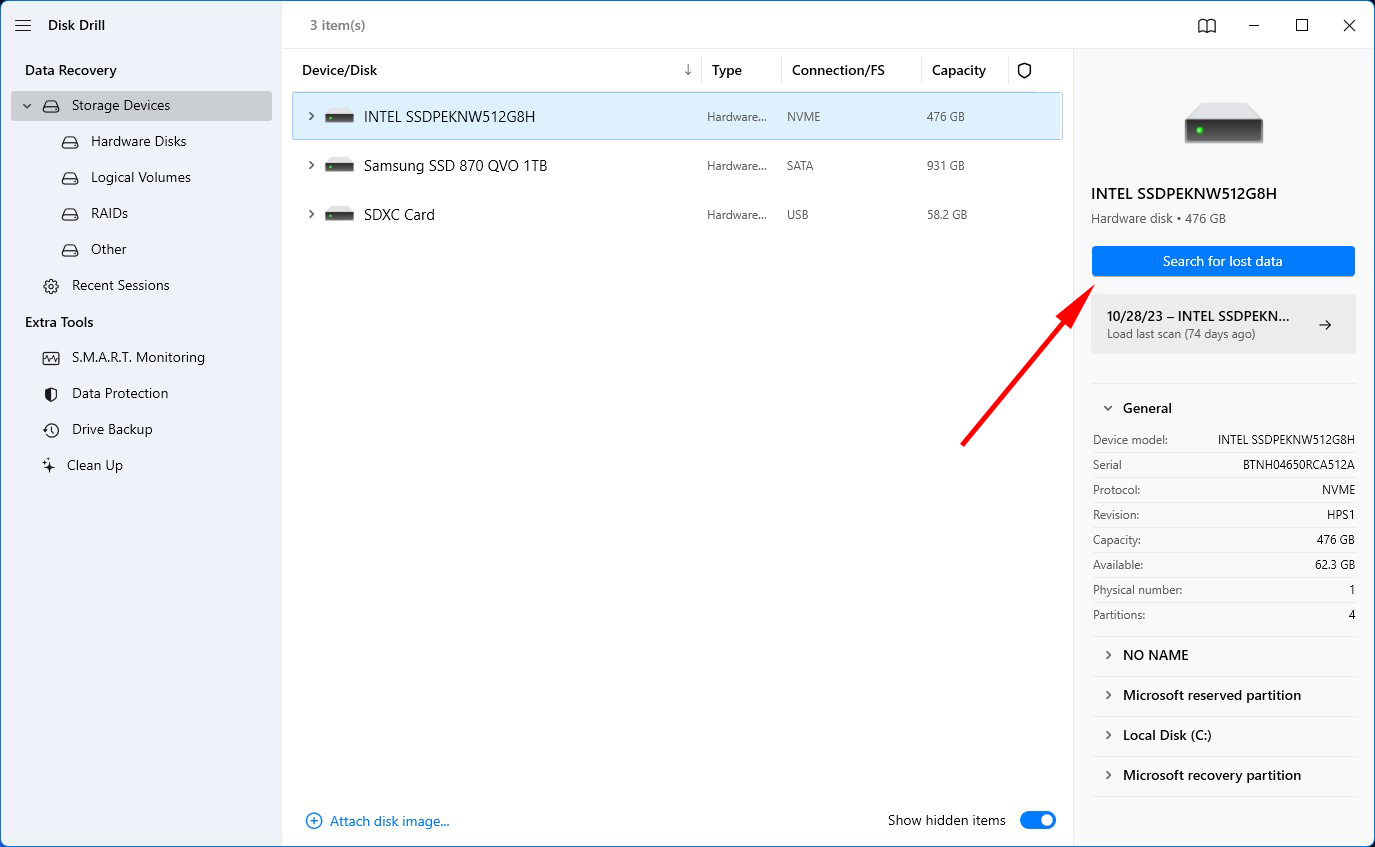
- Download and install Disk Drill. Open it.
- Select the disk that contained the Outlook file (this is typically your C: drive) and click Search for lost data. The scan will begin.
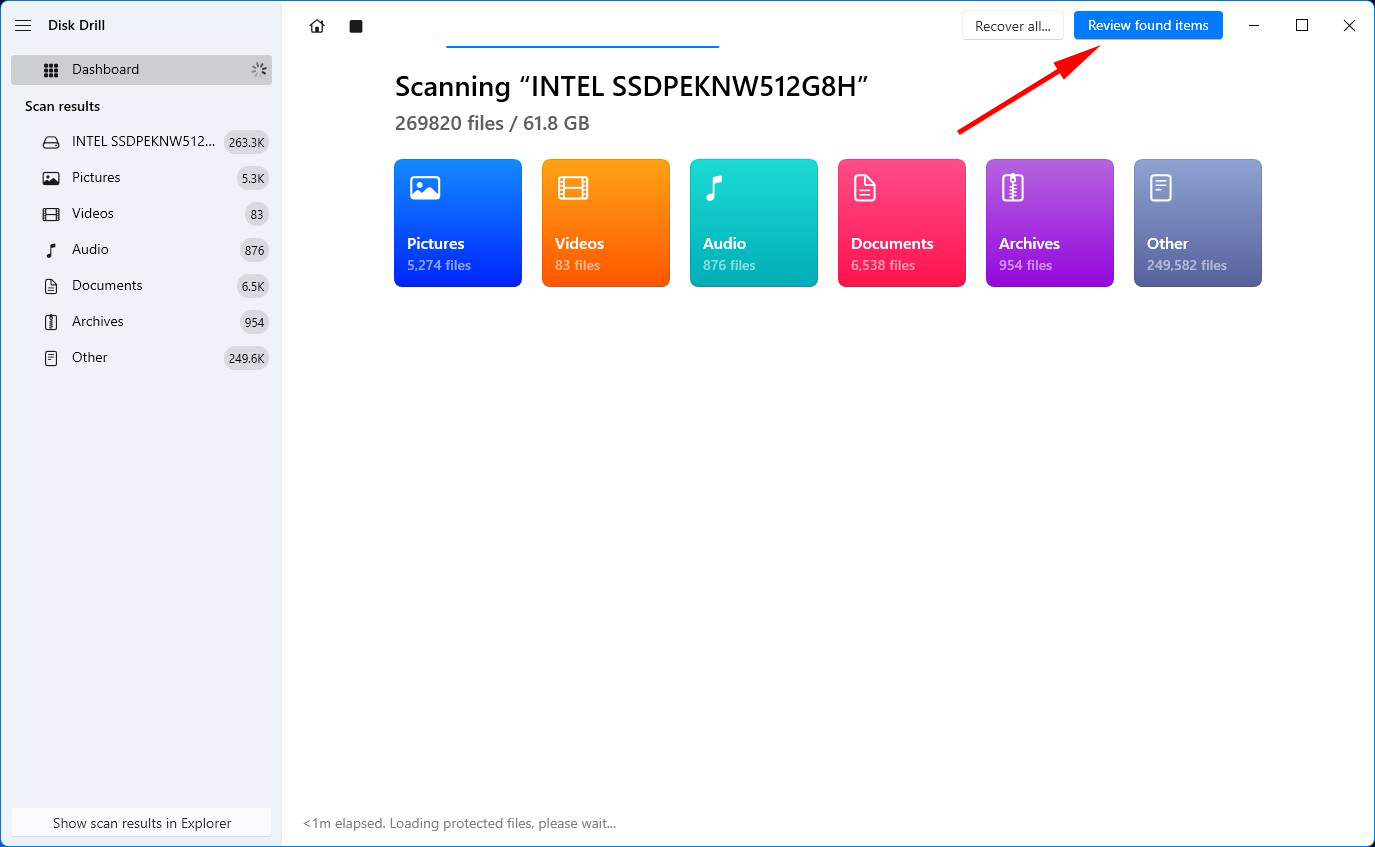
- When the scan has finished, click Review found items.
- Locate and mark your PST file. By default, it’s located at C:\Users\USERNAME\Documents\Outlook Files. You can also use search window in the top right. Click Recover when ready.
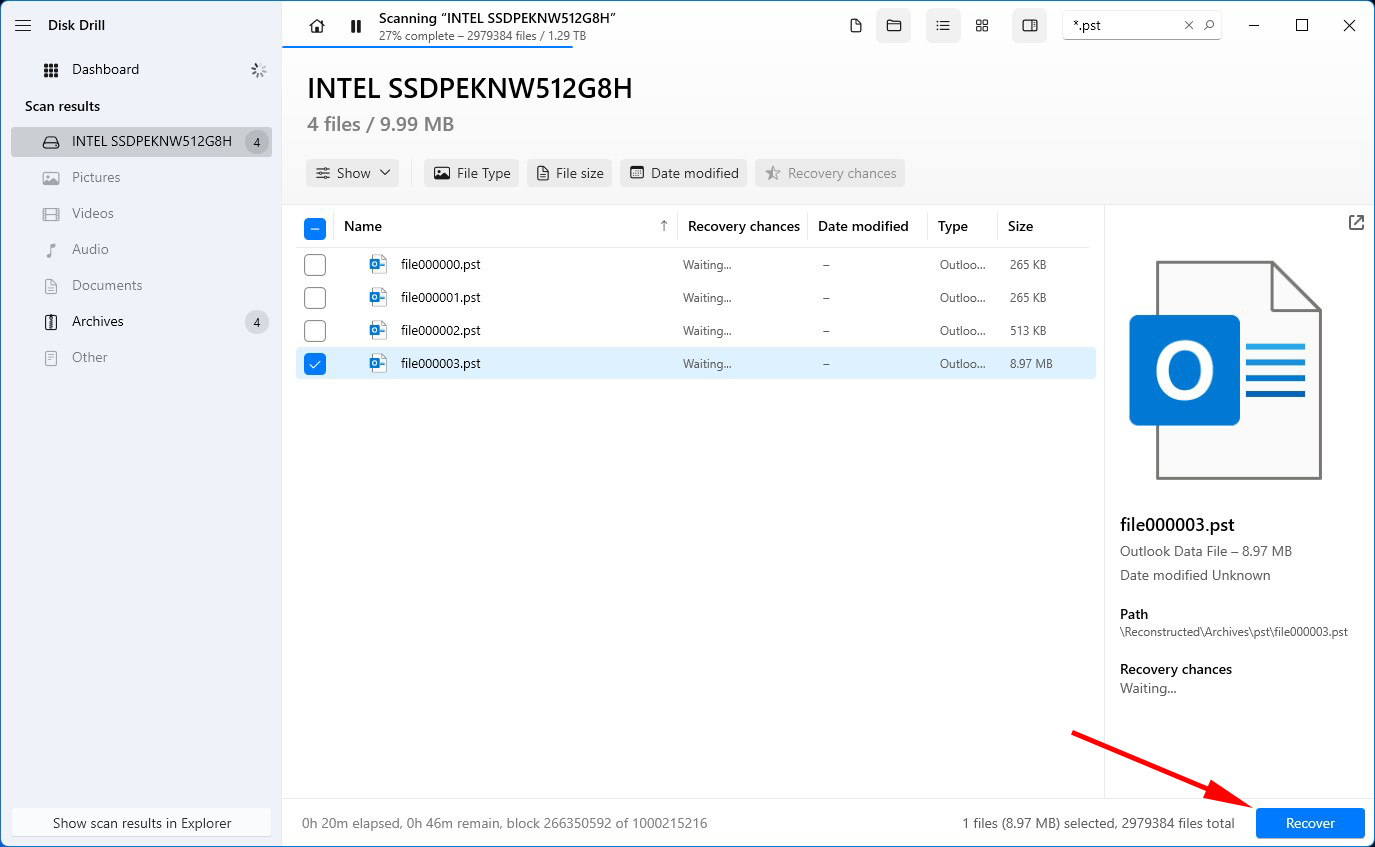
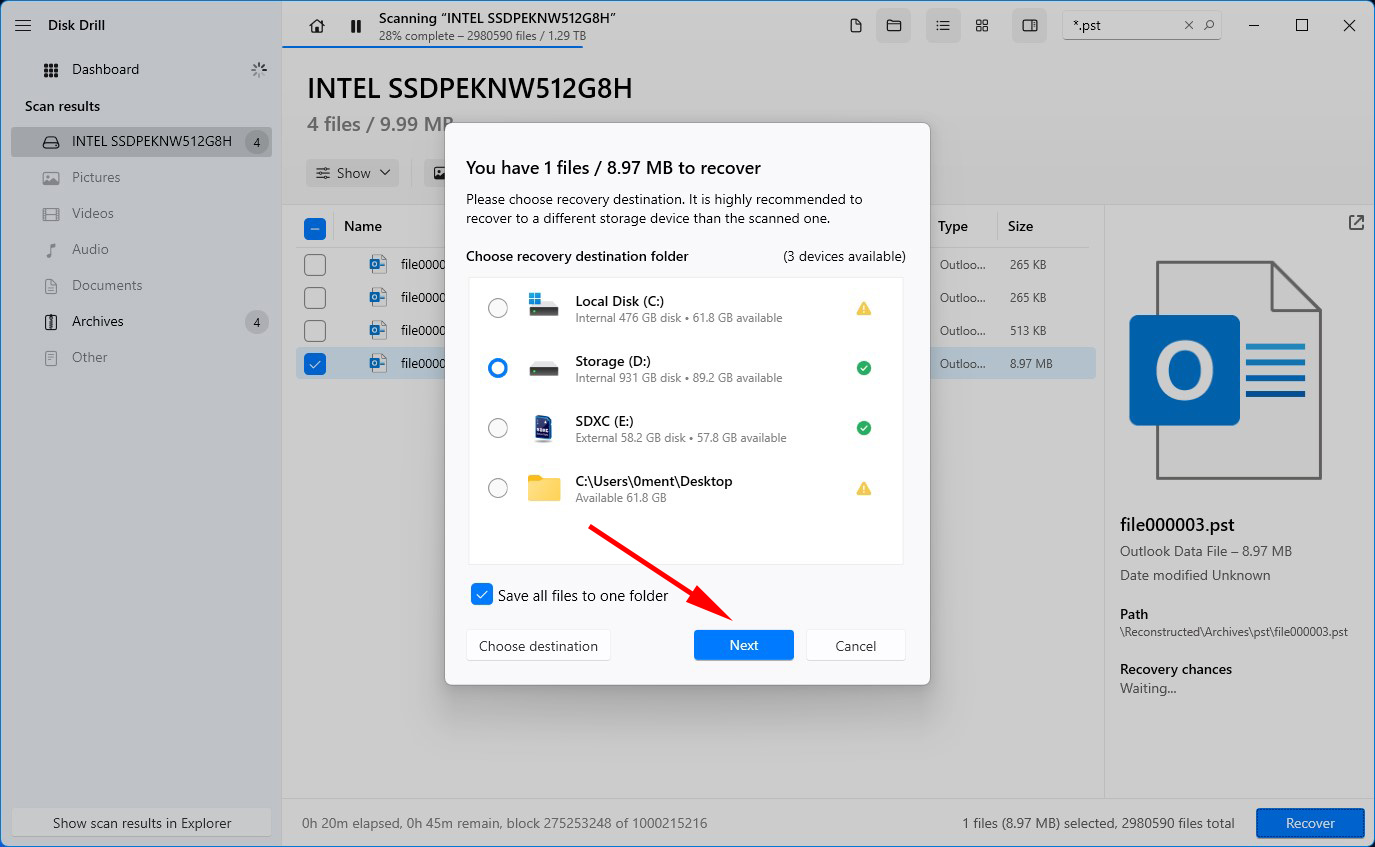
- Select a separate physical partition for recovery and click Next.
Once the PST file is recovered, you can use it to restore the emails inside to your inbox. In the next section, we go over how you can restore Outlook emails from your PST backup.
How to Protect Outlook Emails from Deletion
Without a doubt, the best way to protect your Outlook emails is by backing them up. Having a copy you can restore makes recovery easy and guaranteed. Let’s look at a few effective methods for backing up your emails.
Auto-Forwarding
Auto-forwarding involves setting up a secondary email address that you have all incoming mail forwarded to. It’s available in all versions of Outlook. When the email comes into your main inbox, a copy is immediately sent to another email address as a backup. If the email is deleted, you can simply restore a backup copy from the second email address.
This will require a secondary email address. Additionally, your company must allow auto-forwarding in their anti-spam policies, otherwise forwarded emails will be rejected by the receiving server.
To set up auto-forwarding of all emails to your other email address, follow these steps.
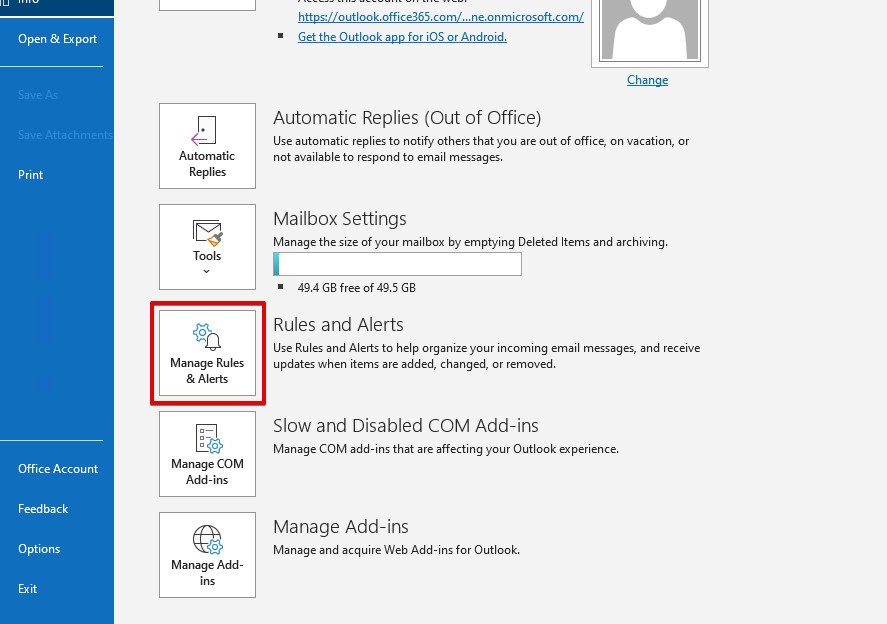
- Click File.
- Click Manage Rules & Alerts.
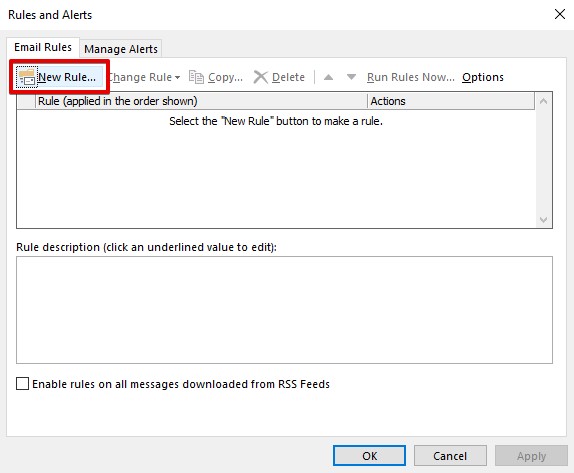
- Click New Rule.
- Select Apply rule on messages I receive. Click Next.
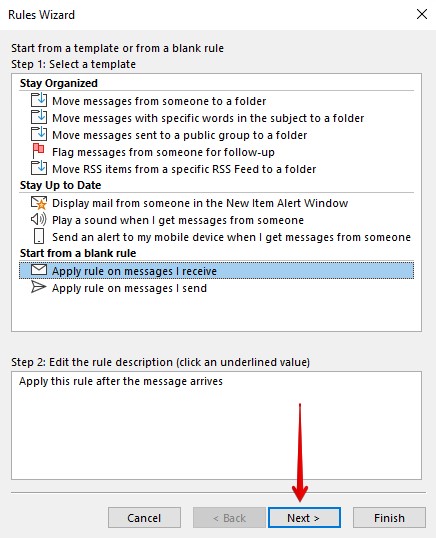
- Click Next.

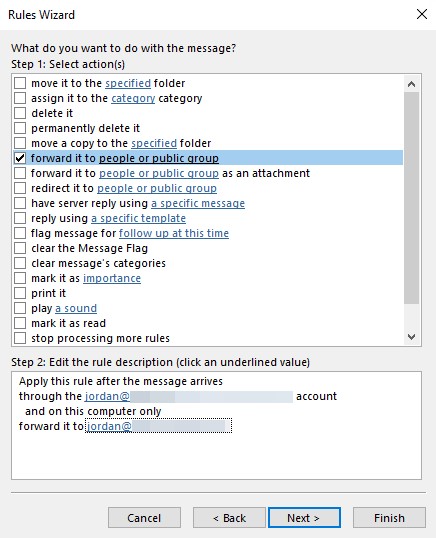
- Select forward it to people or public group. In the Step 2 box at the bottom of the window, specify the account that will receive the forwarded messages. Click Next.
- Click Next unless you want to specify exceptions.
- Give the rule a name and click Finish.
If your company doesn’t allow auto-forwarding, you can try applying a condition on step five. Select the through the specified account condition and select your account in the box at the bottom of the window. However, emails will only be forwarded once they’re received by the desktop client, meaning your computer must be on and Outlook must be open in order for forwarding to work.
AutoArchive to PST
Outlook uses the PST file extension for backups. AutoArchive is a feature that can run periodically and move older emails to a PST backup, freeing up space in your inbox without permanently deleting its contents. It can be applied to your entire inbox or specific folders if you only want to back up some items.
While your emails are backed up in the PST file, you should also consider backing up the actual PST file so it’s protected in the event of data loss.
Follow these steps to set up AutoArchive in Outlook 365:
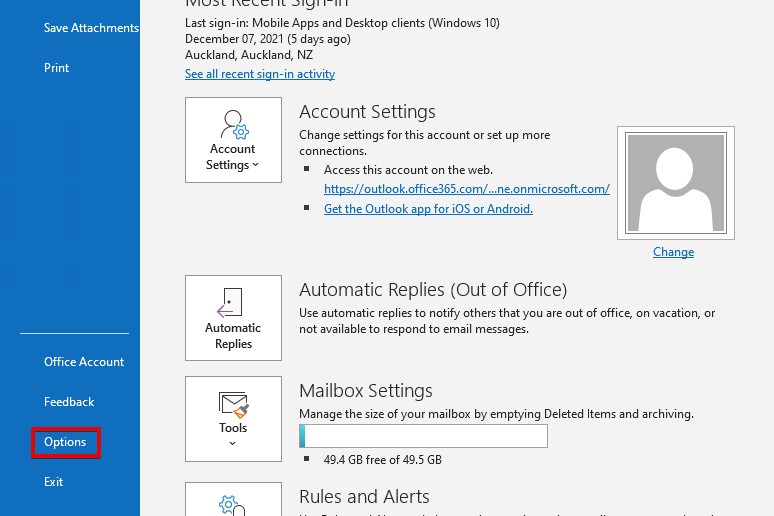
- Click File, then Options.
- Click Advanced, then AutoArchive Settings.

- Tick the Run AutoArchive every option. Specify how often you want AutoArchive to run.

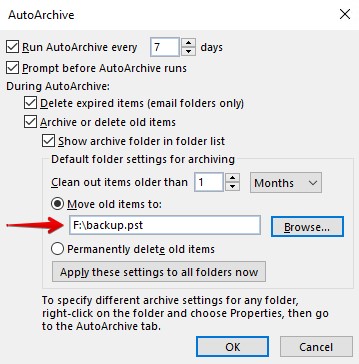
- Ensure the Move old items to option is selected and click Browse to specify the PST file you’ll be using. You can also specify how old items must be before they’re archived.
- Click Apply these settings to all folders now if you want all folders to adhere to these settings.
- Click OK.
Export/Import Backups
Manually performing an export of your inbox will copy its contents to a file rather than move them like AutoArchive would. This allows you to keep the original in your inbox while also retaining a copy in a PST file.
The below instructions will guide you through exporting to a PST file:
- Click File.
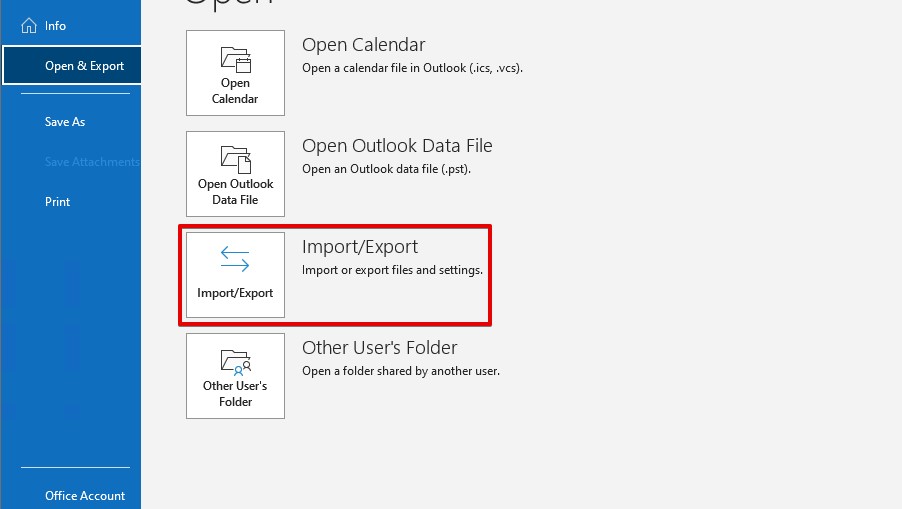
- Click Open & Export, then Import/Export.
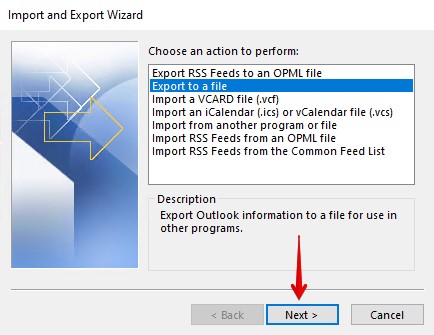
- Select Export to a file and click Next.
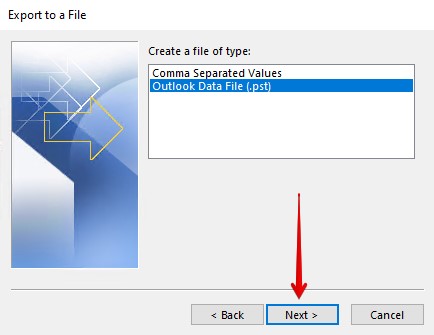
- Select Outlook Data File (.pst) and click Next.
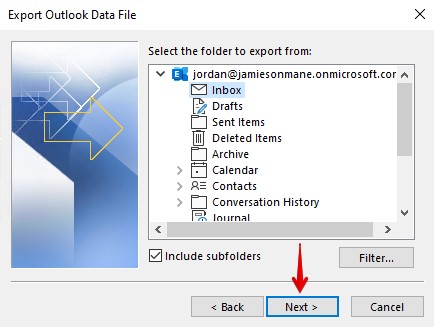
- Select the folder you want to export. Click Next.
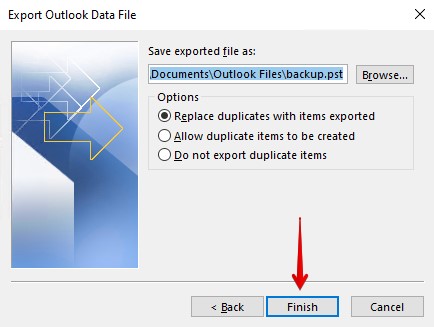
- Choose where you want to save the file and click Finish.
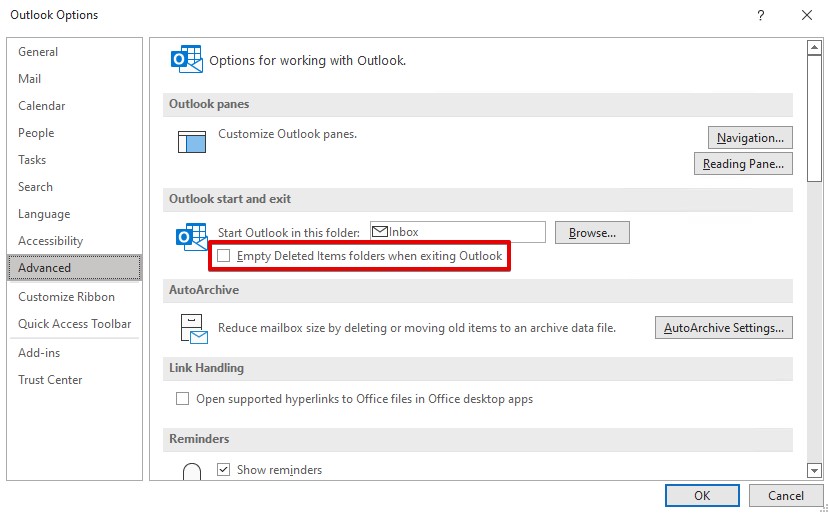
Disable Auto-Deletion
Auto-deletion, when enabled, will automatically delete items from your Deleted Items folder upon exiting Outlook. This can be troublesome if you need to recover something from the Deleted Items folder after you’ve already closed the program.
To avoid this, you can disable auto-deletion entirely. Follow these steps:
- Go to File, then Options.
- Click Advanced and ensure Empty Deleted Items from folders when exiting Outlook is unticked. Click OK.
Conclusion
No doubt you have a number of important emails that are too valuable to be lost. If you’ve accidentally deleted an email and need to get it back, you can do so using the methods outlined in this article.
We recommend starting with a simple Undo command using CTRL + Z. If that doesn’t work, check your Deleted Items folder, or try recovering the deleted items from the server. Should you have a backup, you can restore a copy of the email from there. Lastly, if you have an Office 365 Enterprise subscription, you may have the option of recovering it using eDiscovery.
FAQ
- Open Outlook on your computer.
- Click the Deleted Items folder in the left panel.
- Select what emails you want to restore. To select multiple, hold CTRL and click each email. Right-click, hover over Move, and select where you want to restore the emails.
- Click Folder, then New Search Folder.
- Select Old mail.
- Click Choose to specify the age of the items you’re searching for. In the Search mail in dropdown, specify whether you want to search your main inbox or a PST file.
- Click OK.
- Click Folder, then New Search Folder.
- Select Old mail. Click Choose to define the age of the items to pull. In the Search mail in dropdown, choose where you want to search.
- Click OK.
- Click the dropdown option on the Deleted Items folder in the left panel.
- Right-click the deleted folder and click Move Folder. Move the folder out of Deleted Items to restore it.
- Click the Junk Email folder in the left panel.
- Select the emails you want to restore. Hold CTRL and click each email to select multiple.
- Right-click a marked email and click Move. Select which folder you want to move them to.


