 A high Reallocated Sector Count should be taken seriously. If you notice the count has increased over a short period of time, it’s best to replace the drive. However, it can be tricky to read the value and determine when it is time to ditch the drive. In our guide, we’ll take a look at the problem and whether there’s a way to fix a high Reallocated Sector Count.
Table of Contents
What Is Reallocated Sector Count
Sectors are the smallest physical storage areas on your disk – usually 512 Bytes in size. Inevitably, some sectors of the hard drive become unfit to store data, i.e., the disk is unable to read, write, or verify the data in the sector. To secure your files, the disk moves the data from these sectors to other, error-free sectors in a special reserved area (spare sectors). Additionally, all further operations to the problematic sector are redirected to the corresponding spare sector.
While reallocated sectors are part of the normal wear and tear of a hard disk drive, these factors can cause an unusual increase in their number:
- Physical damage and mechanical issues on the drive.
- Forced shutdowns and power cuts.
- Old hardware.
- Heavy usage of the drive for extended periods.
- Existing bad sectors.
A rapid rise in the Reallocated Sector Count often indicates a failing drive that should be replaced as soon as possible. To see the reallocated sector count for your hard drive, you’ll need to use tools like Crystaldiskinfo, or the Disk Utility in UNIX-based OSes. You can use these tools to view the S.M.A.R.T. (Self-Monitoring, Analysis, and Reporting Technology) report of your drive.
We’ll take a detailed look at what the relevant S.M.A.R.T. values mean and indicate, in the section below.
How Many Reallocated Sectors Are Bad?
To see the Reallocated Sector Count for your HDD, you need to install S.M.A.R.T. monitoring tools. There is a dedicated field called, you guessed it, “Reallocated Sector Count,” that lets you know the number of reallocated sectors on your disk.
Here’s how to properly read the Reallocated Sector Count field and the associated values:
- Open Crystaldiskinfo or any other S.M.A.R.T. monitoring tool and look for the “Reallocated Sector Count” value.
- The Reallocated Sector Count’s Current and Worst values should ideally be 100, 200, or 253, depending on the drive’s manufacturer. The Reallocated Sector Count Threshold value will typically be 10 or 36. Regardless, it is the minimum acceptable value, i.e., the Current and Worst values should be more than the Threshold value.
- Lastly, take a look at the Raw values section. Ideally, it should be 0. This indicates that 100% of the spare sectors are available for use, and you have nothing to worry about. However, if the value exceeds zero, you need to be cautious and back up all important data.
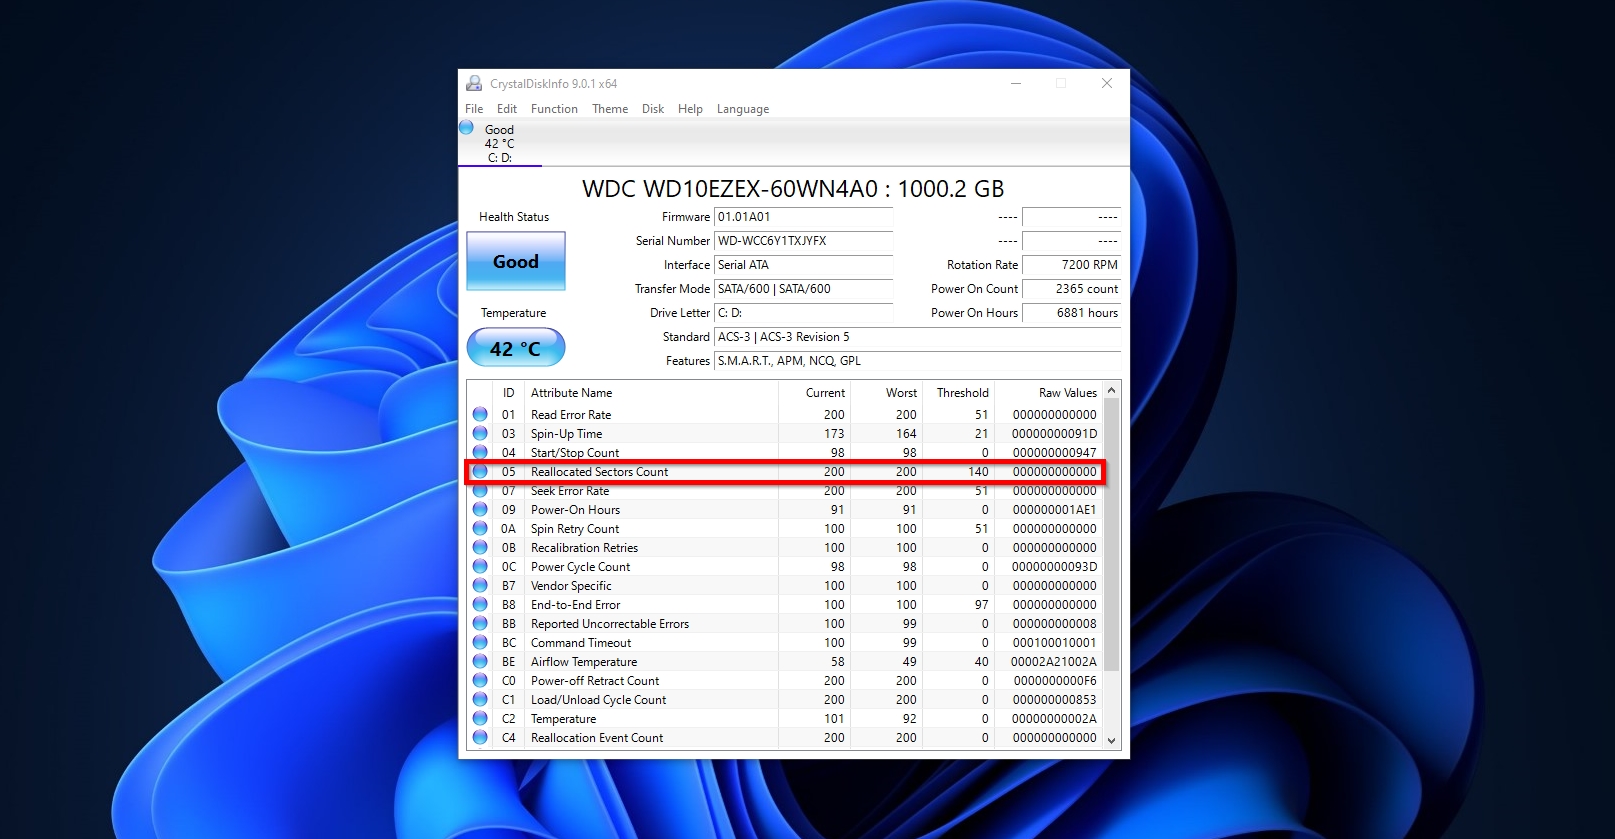
When it comes to the Reallocated Sector Count, the exact numbers do not tell the whole story. The number of spare sectors differs across hard disk drives. In some drives, 20 reallocated sectors could signal trouble, whereas some disks get by just fine with a reallocated sector count of over 1000. The thing you need to look for is a consistent increase in the Raw values of the Reallocated Sector Count field, over a short period of time.
It’s also a good idea to take a look at the Current Pending Sector Count and Reported Uncorrectable Errors S.M.A.R.T. values as well. This will help you to create a more comprehensive view of the drive. If the Raw values for these fields are more than zero, your drive could be on the fast lane to failure.
How to Fix the Reallocated Sectors Count Warning
Once a sector has been reallocated, the hard drive won’t store any information about the original one. Therefore, there’s no way to fix reallocated sectors on your drive.
Reallocated sector count warnings are typically not a cause for immediate concern unless the count goes up substantially and other critical S.M.A.R.T. values have also gone up. But, if you notice any of the aforementioned issues, you must migrate your data to a new drive as soon as possible, if you want to keep your data intact.
It’s recommended that you create a disk image of the drive, rather than copying the contents of the drive manually to the other drive. This prevents partial data loss because a failing drive could have trouble copying and moving files. If you already lost some data, you can use data recovery programs to scan the disk for recoverable data.
Usually, you would need two separate programs – one to create a disk image of the drive, and a data recovery program to scan the disk for deleted files. But, in our tutorial, we decided to use a program that lets you create a disk image as well as recover data – Disk Drill. The program lets you create a disk image of your drive for free, and it also comes with a cutting-edge data recovery algorithm that can recover data from your drive as long as it’s detected by your PC. Windows users can recover up to 500 MB of data at no cost.
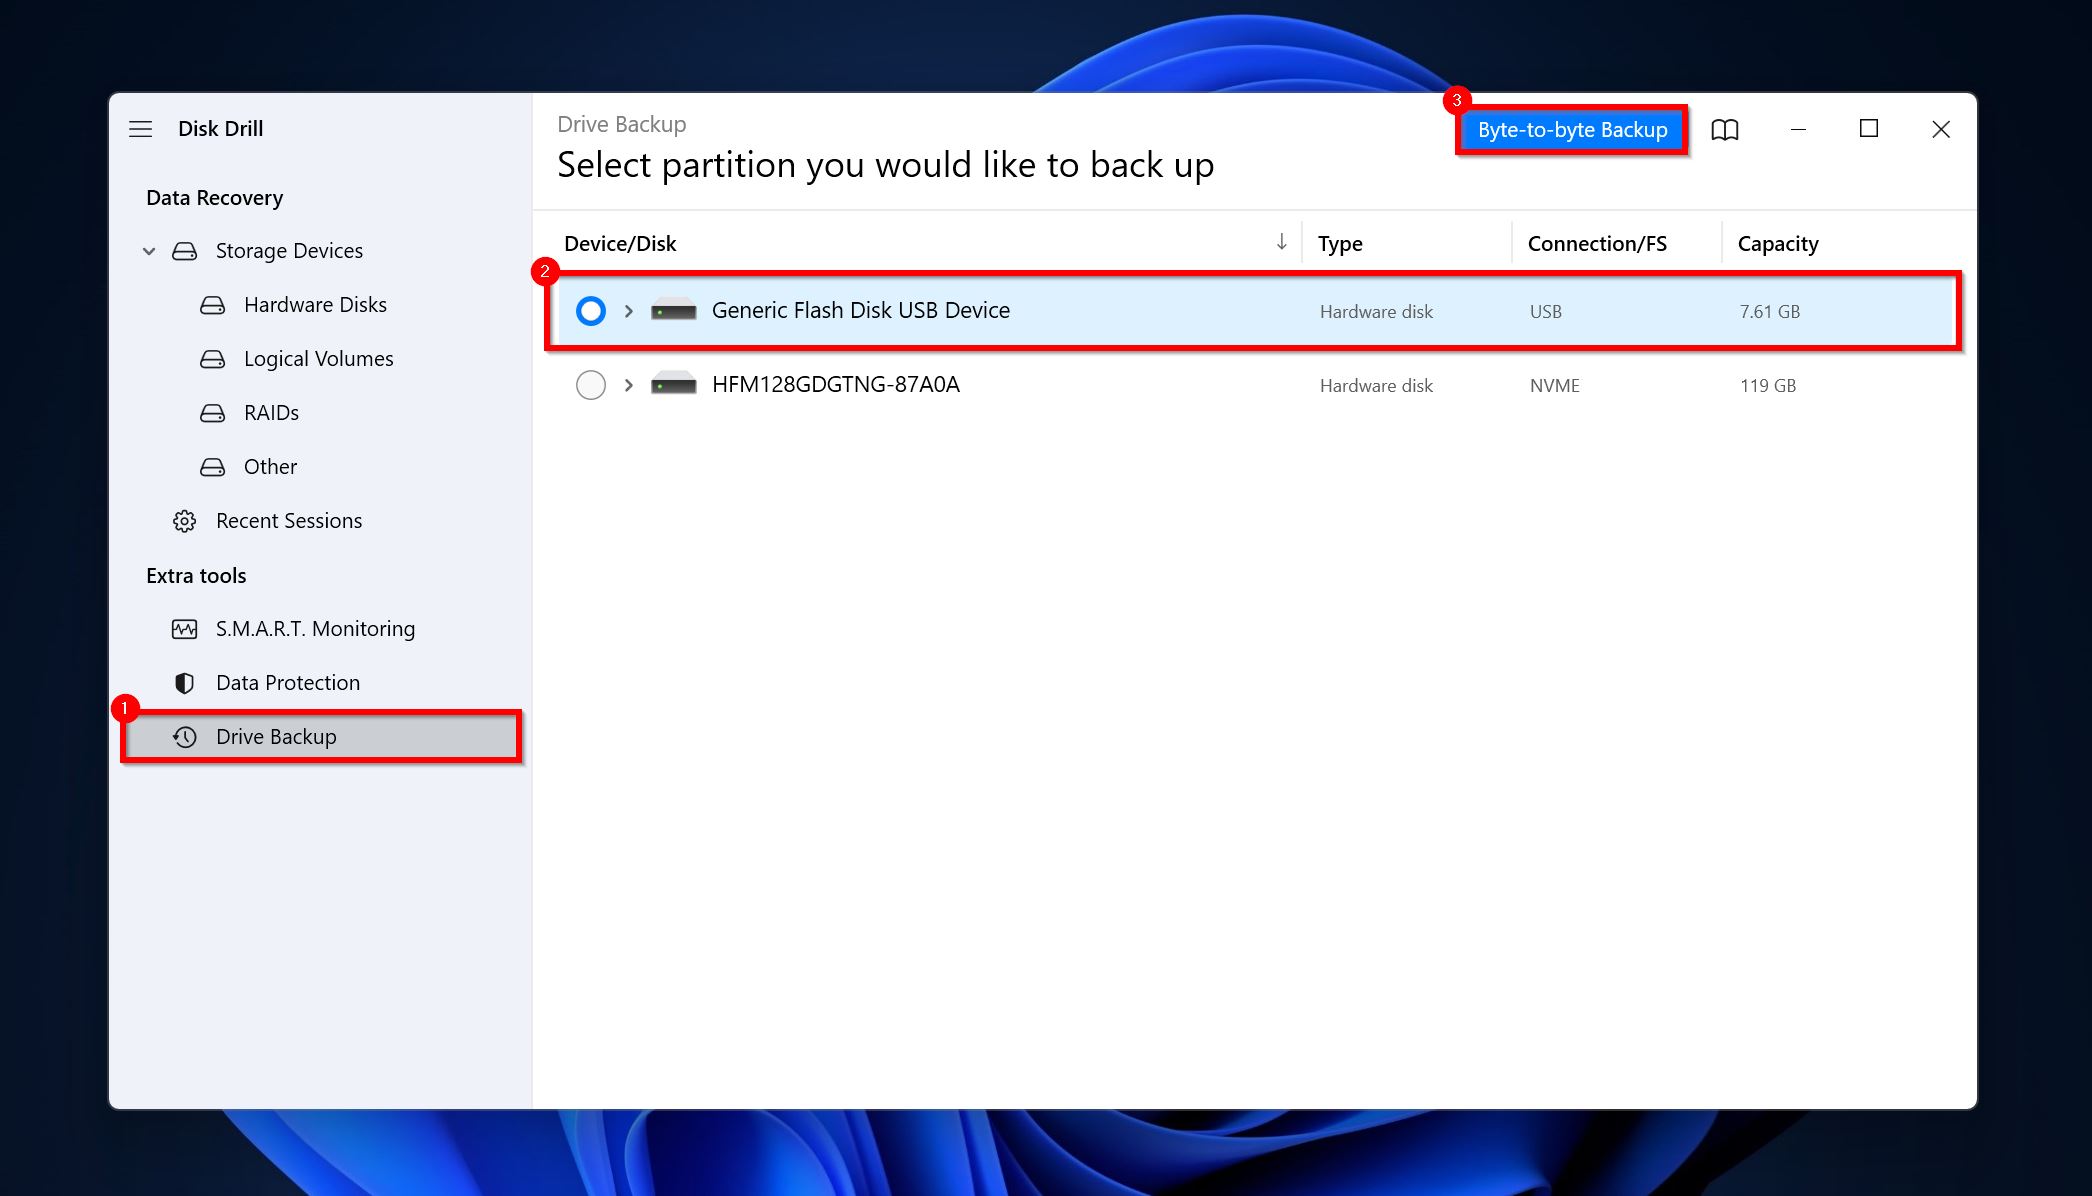
Creating a Byte-to-byte Backup in Disk Drill
The Byte-to-byte Backup feature in Disk Drill creates a byte-level copy of your disk, i.e., a disk image of the drive.
Here’s how to use the feature:
- Connect an external storage drive to your PC that has enough free space to store the problematic drive’s disk image. If your PC is not booting and the drive in question is an internal HDD, use a disk enclosure to connect it to a working computer.
- Download Disk Drill and install it. Don’t install the program on the problematic drive.
- Open Disk Drill, and go to Drive backup under Extra tools. Select the disk with the high reallocated sector count, and click on Byte-to-byte Backup.
- Choose where you’d like to save the disk image and click OK.
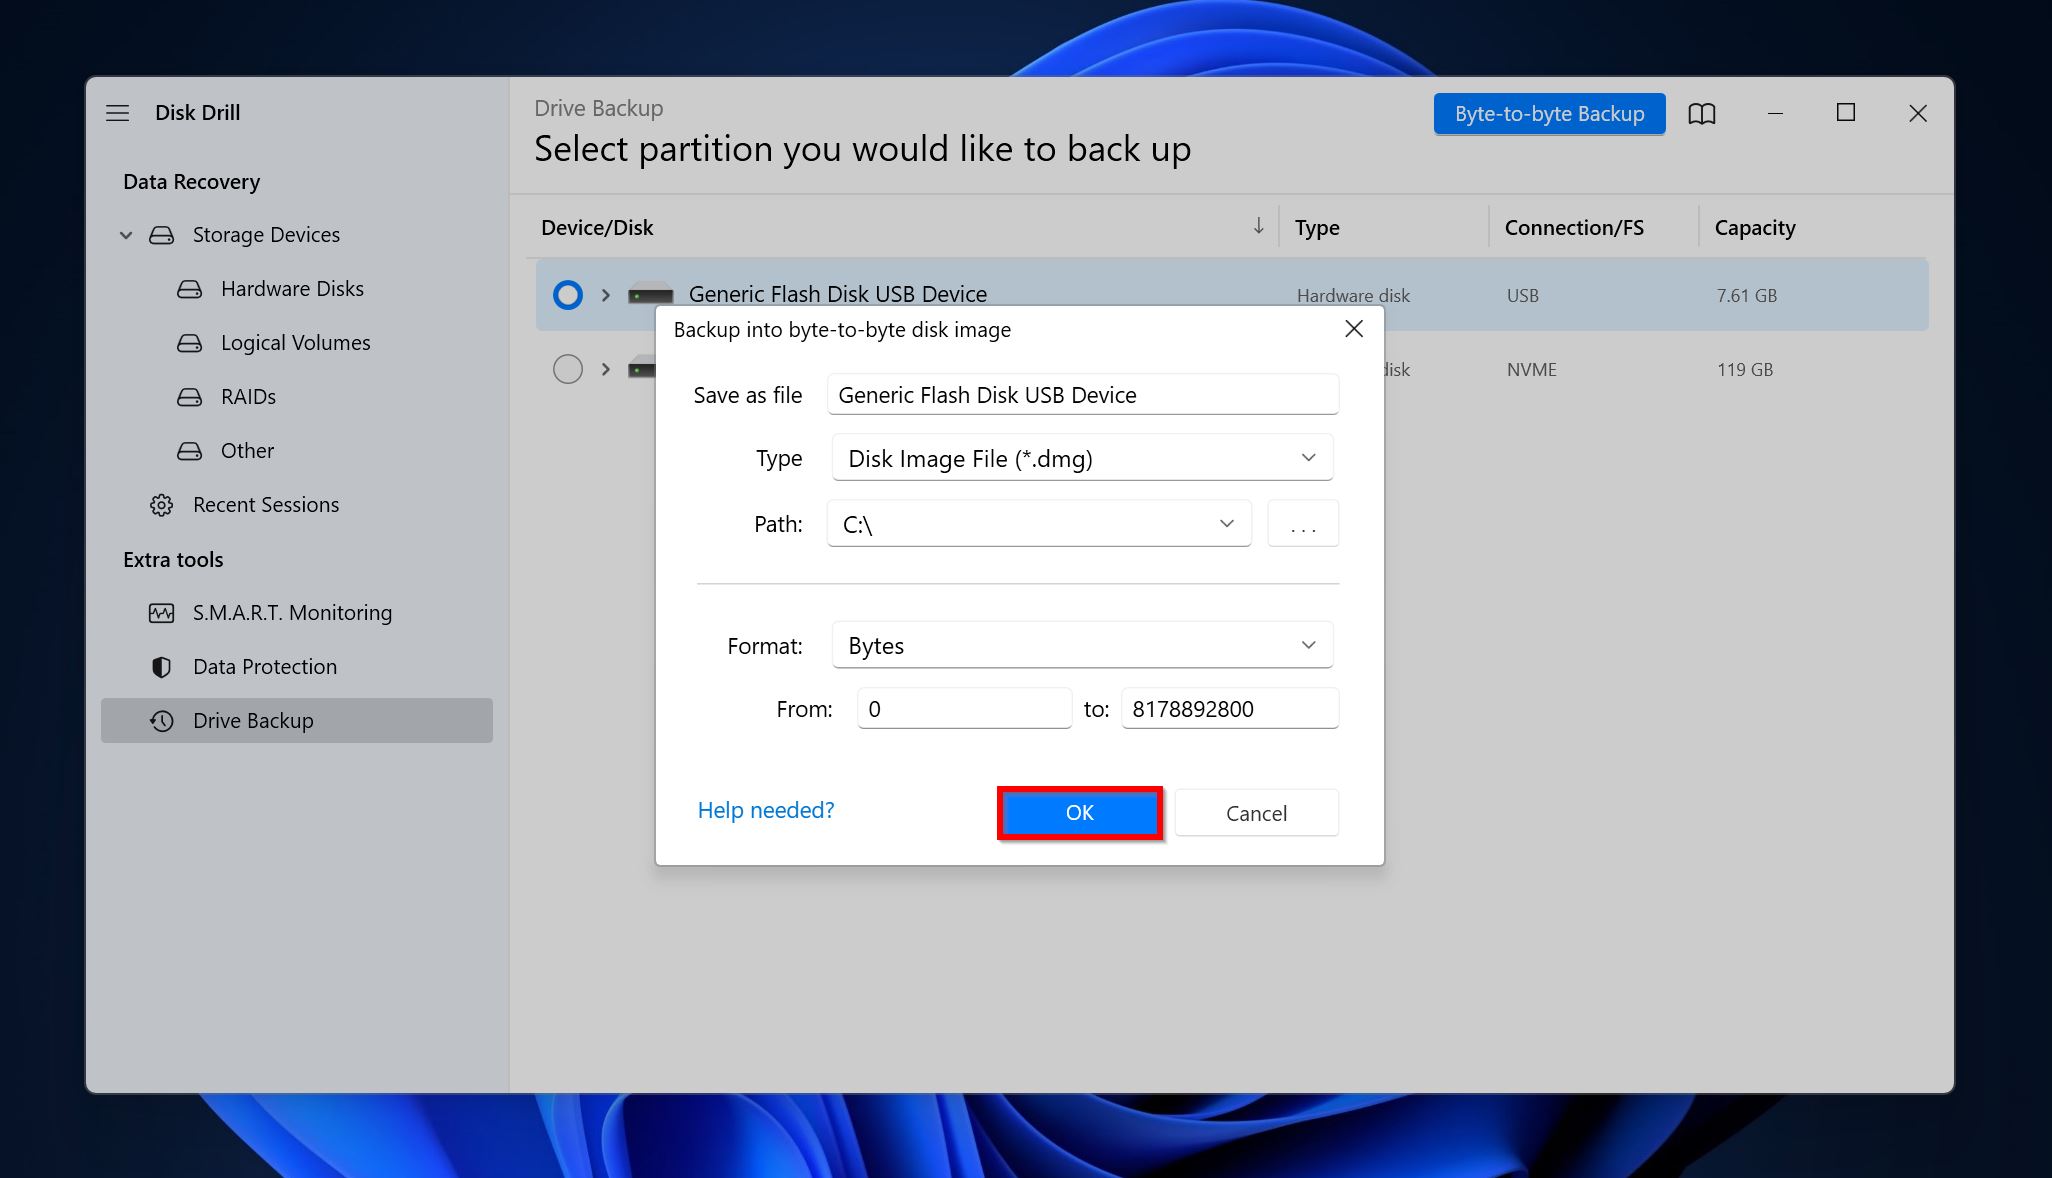
- Disk Drill will create a disk image of the drive.
Recovering Data Using Disk Drill
It’s a good idea to scan the disk image you created for recoverable data, instead of directly scanning the affected drive, because data recovery scans are quite stressful to the drive.
To scan and recover deleted data from your drive, follow these steps:
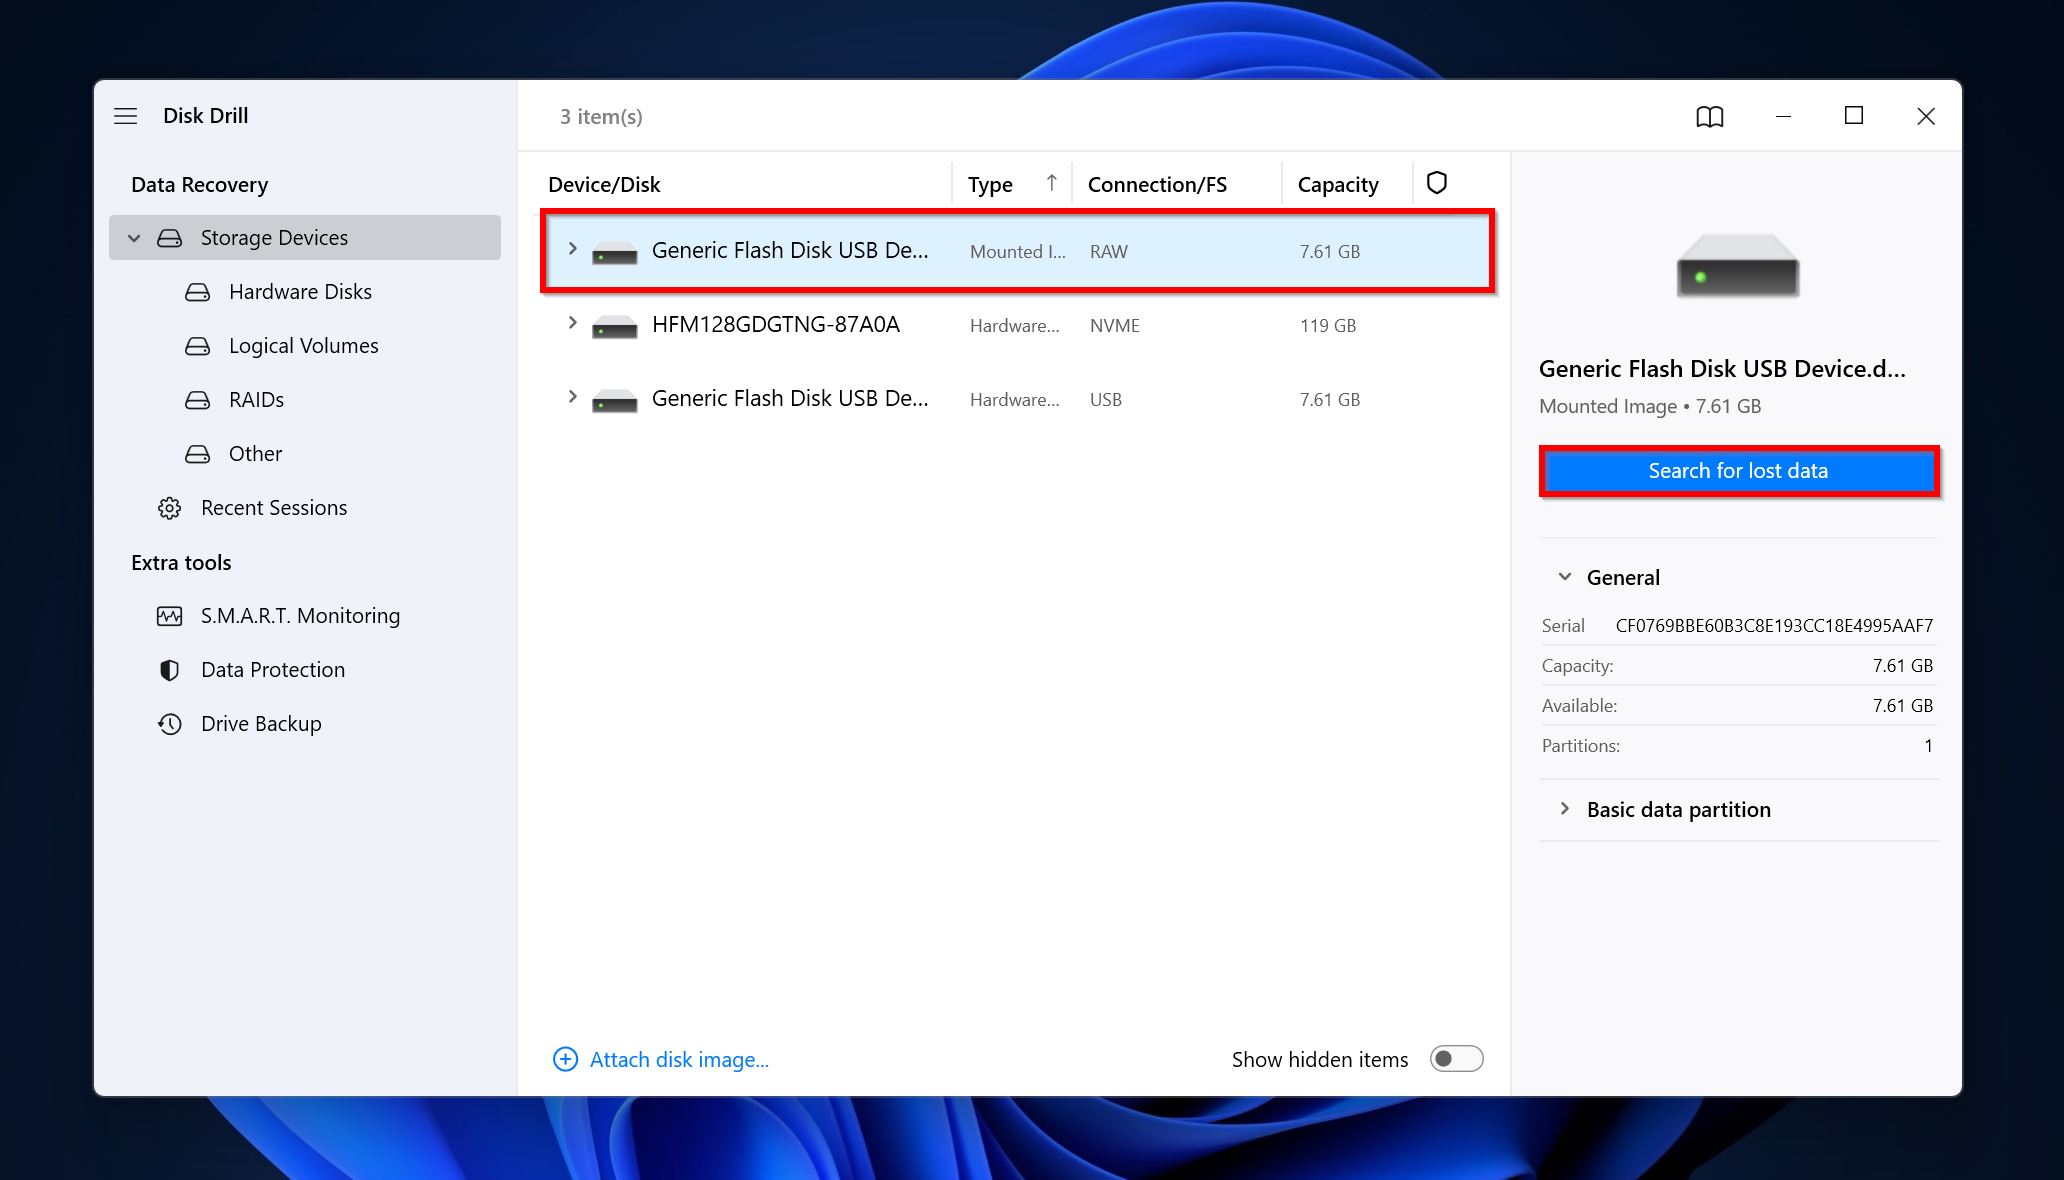
- Open Disk Drill and ensure you’re on the StorageDevices section under Data Recovery. Click on Attach disk image, browse for the disk image you created earlier and double-click on it. It’ll show up as a mounted image in Disk Drill.
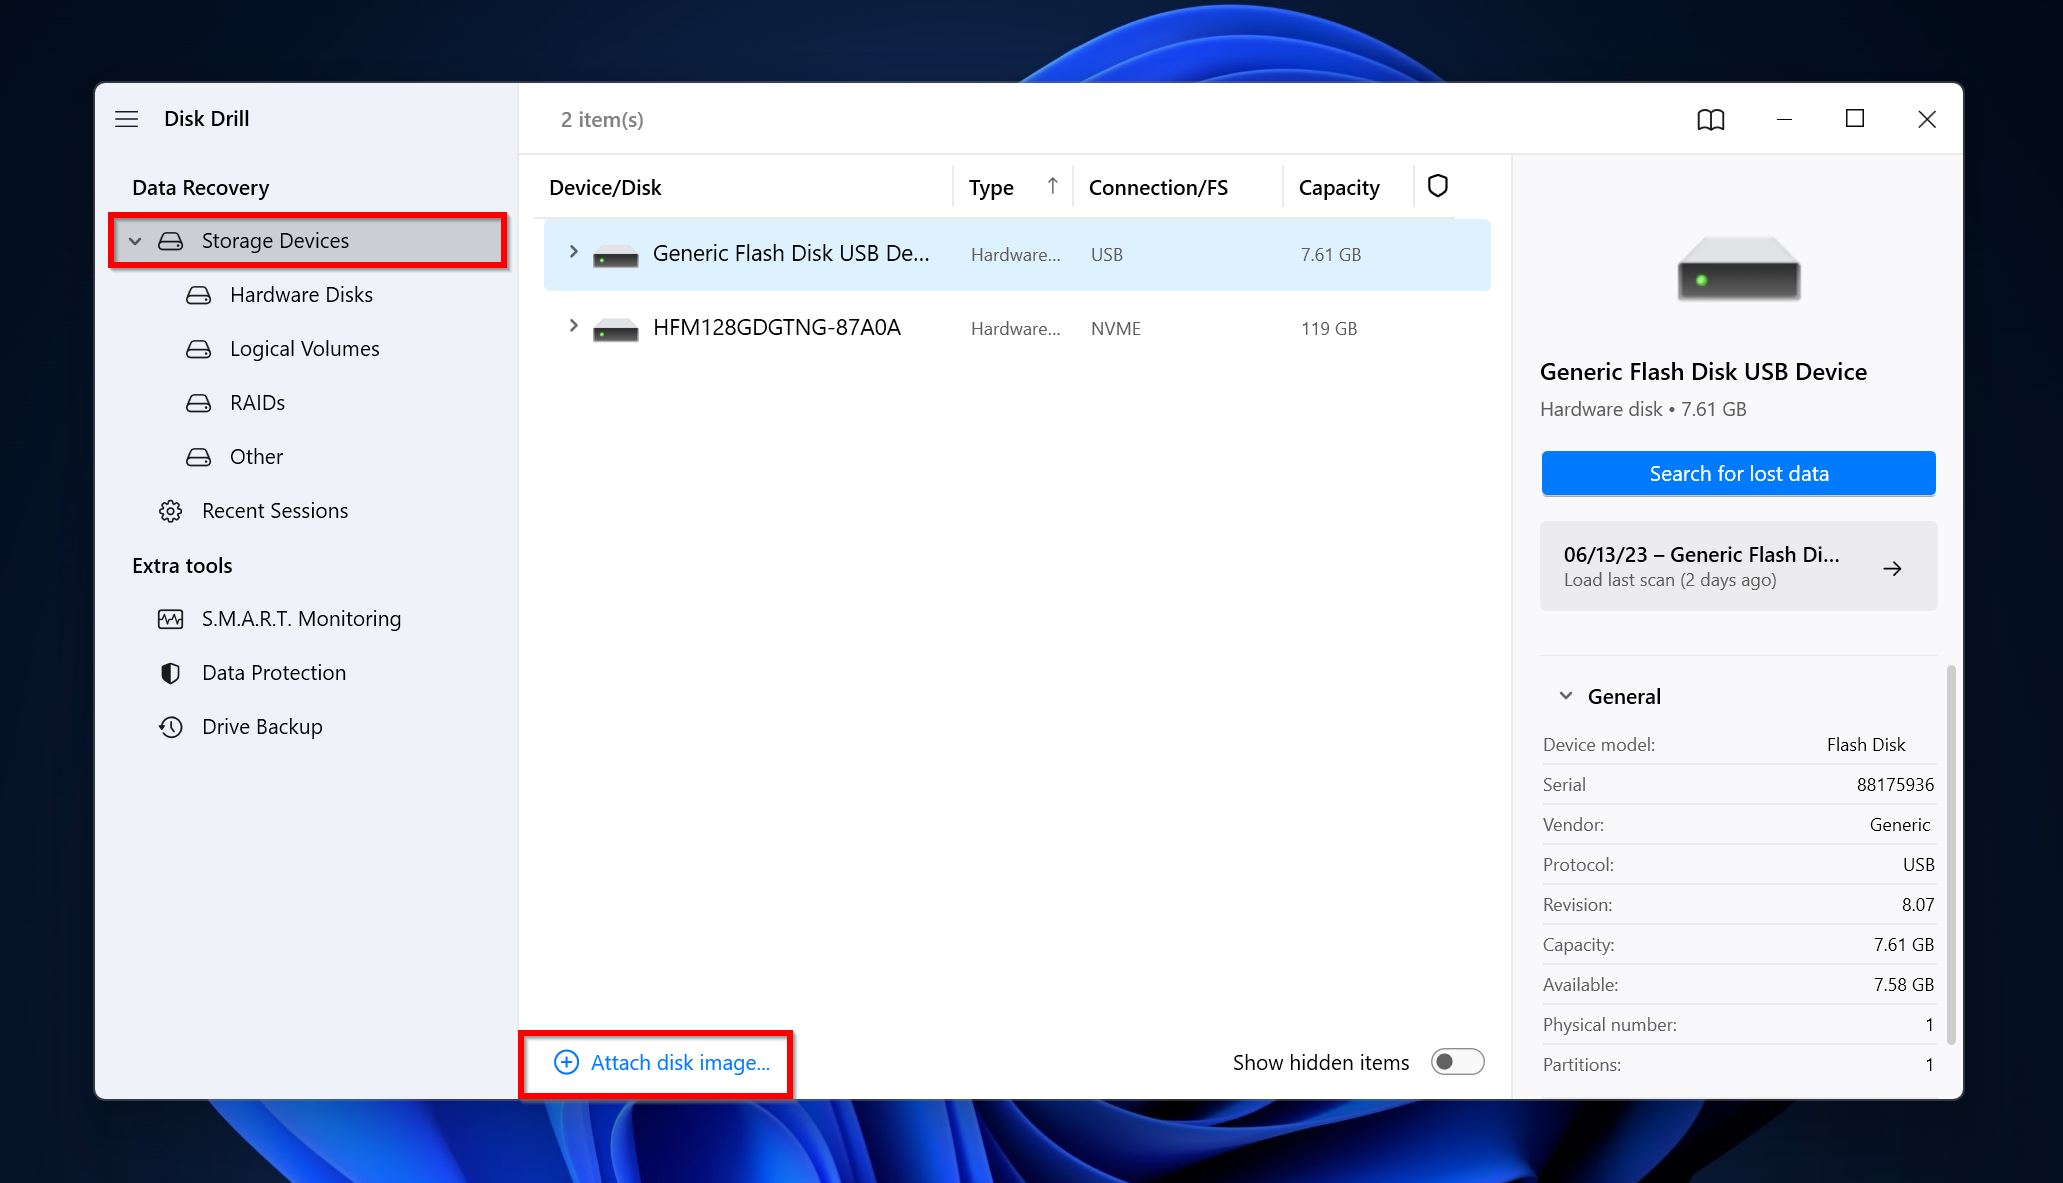
- Select the mounted image and click on Search for lost data.
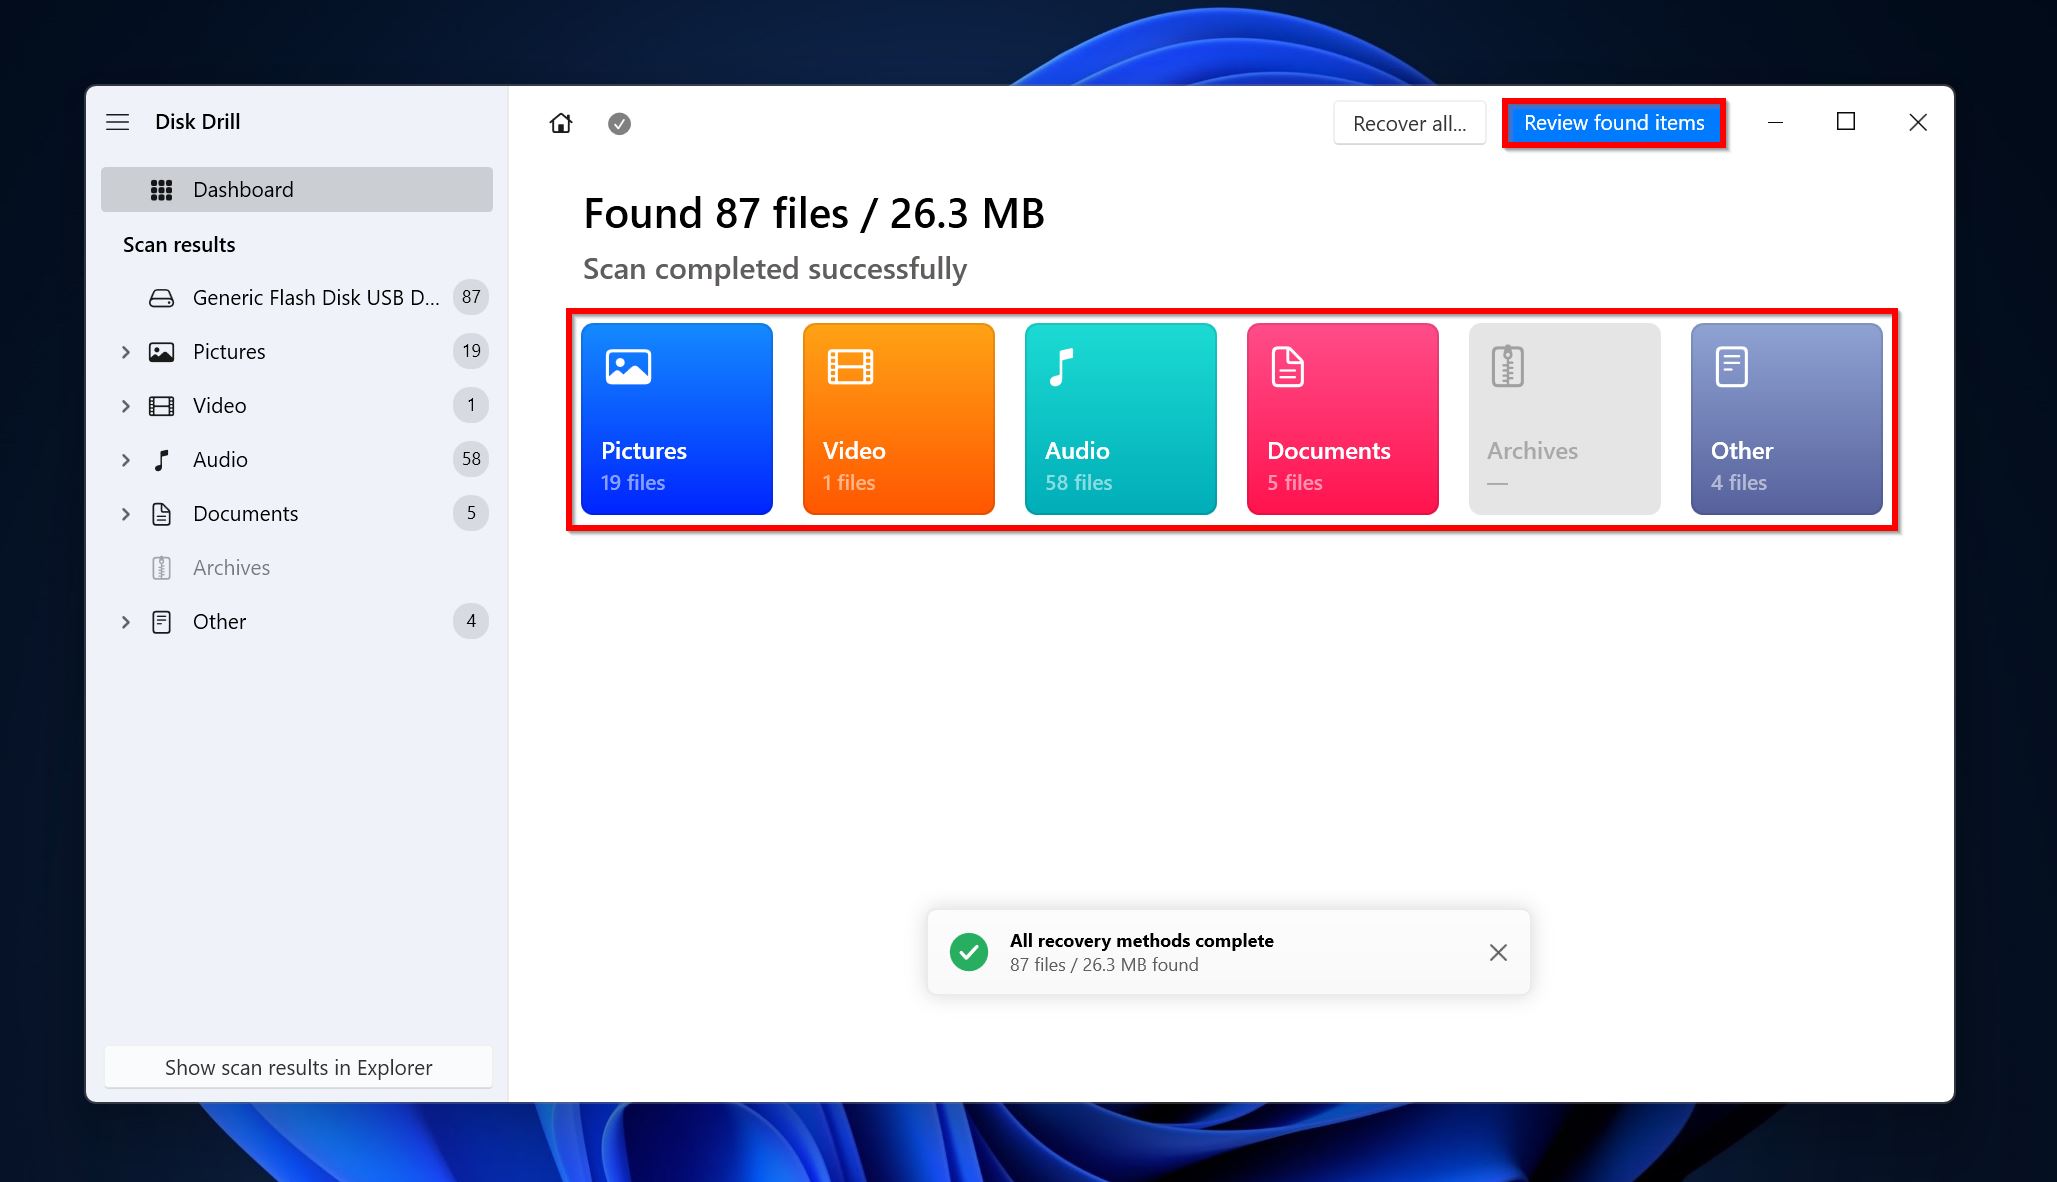
- Click on Review found items or directly filter out the results by clicking on the relevant file type (Pictures, Video, Audio, Documents, Archives, and Other).
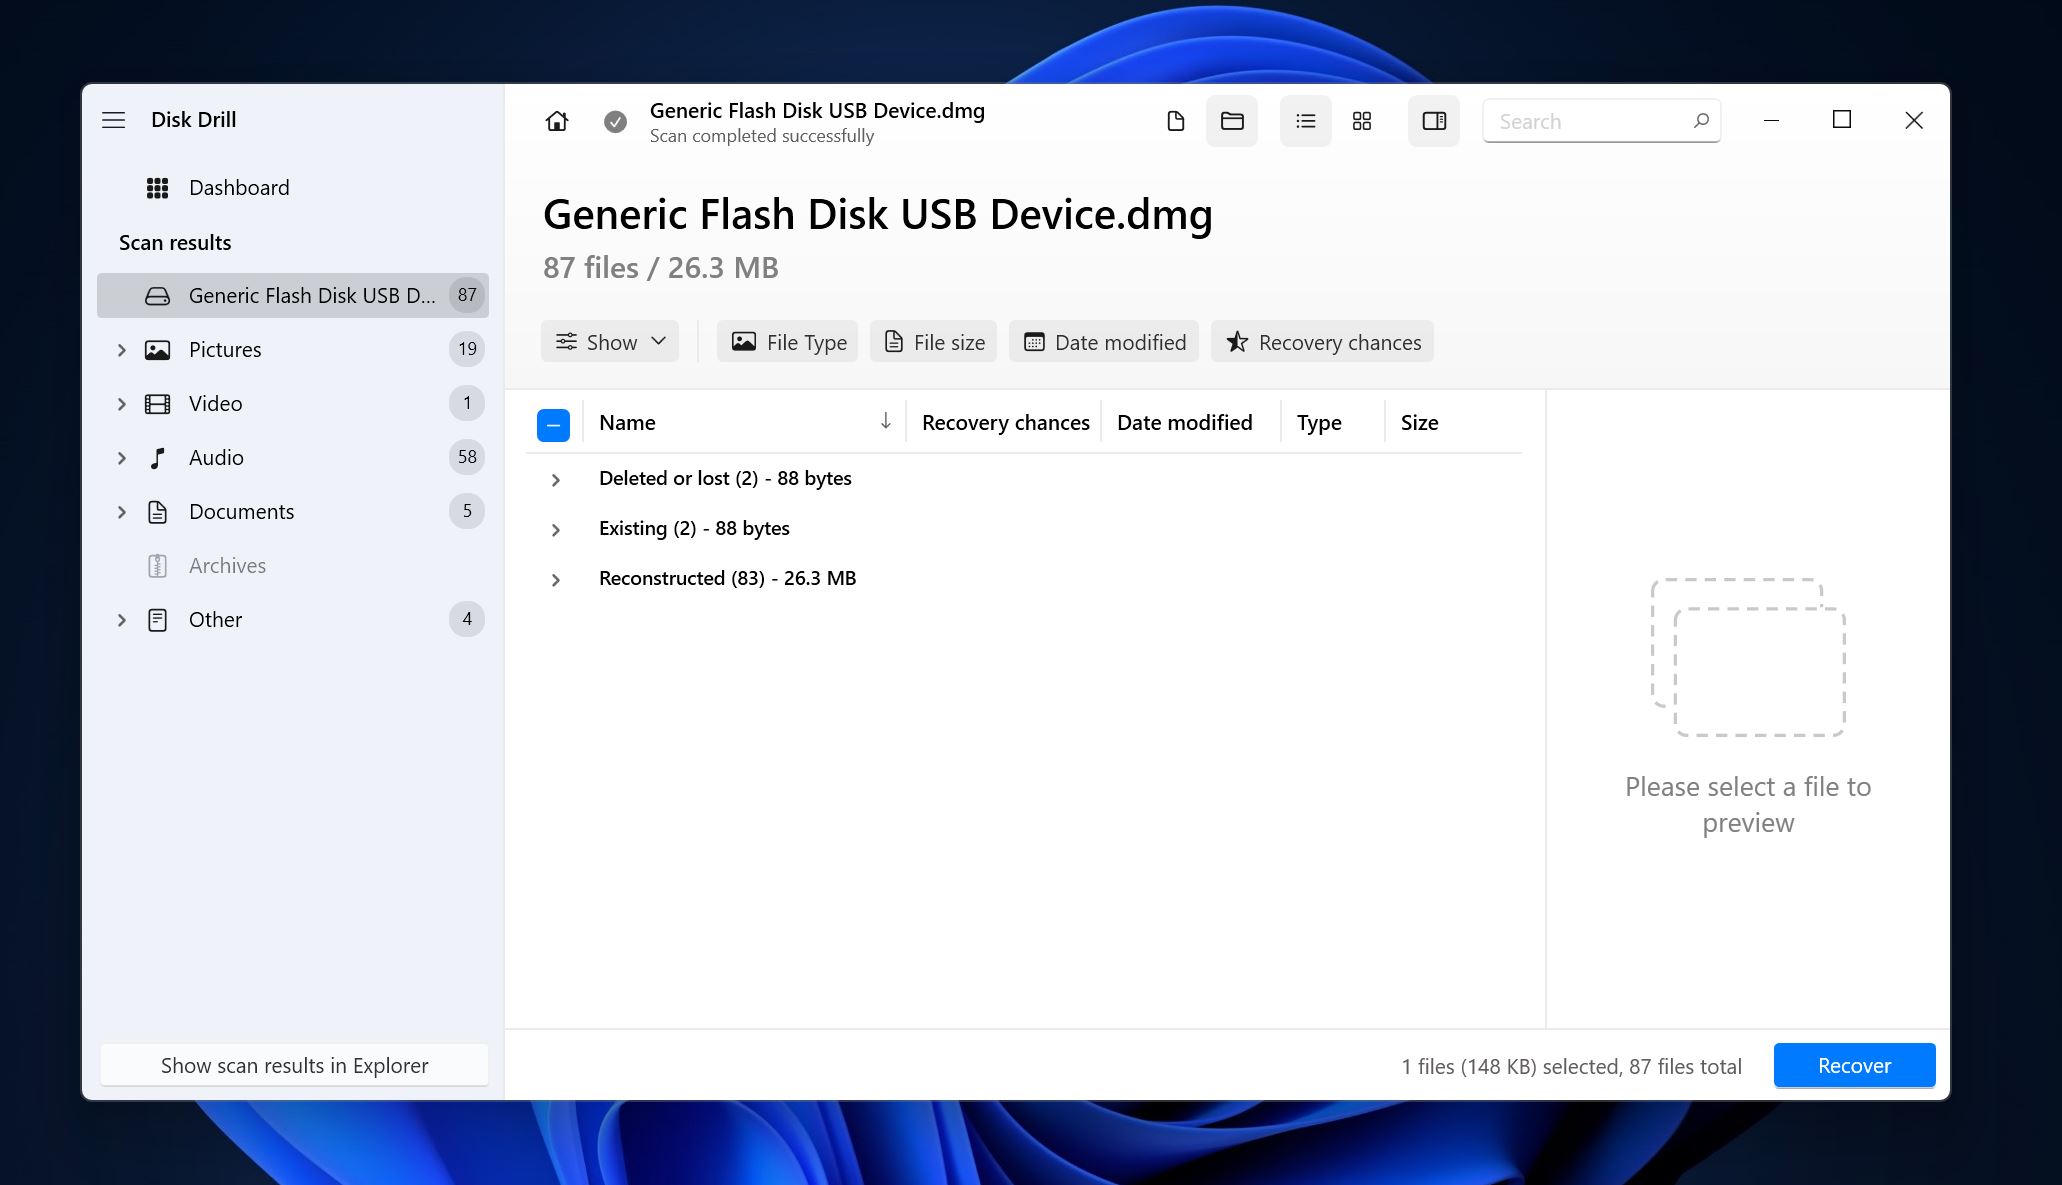
- Expand the Existing section to view currently present files on the disk. You can select and copy them to the working drive. Expand the Deleted or lost and Reconstructed sections to view files to view deleted files that are recoverable.
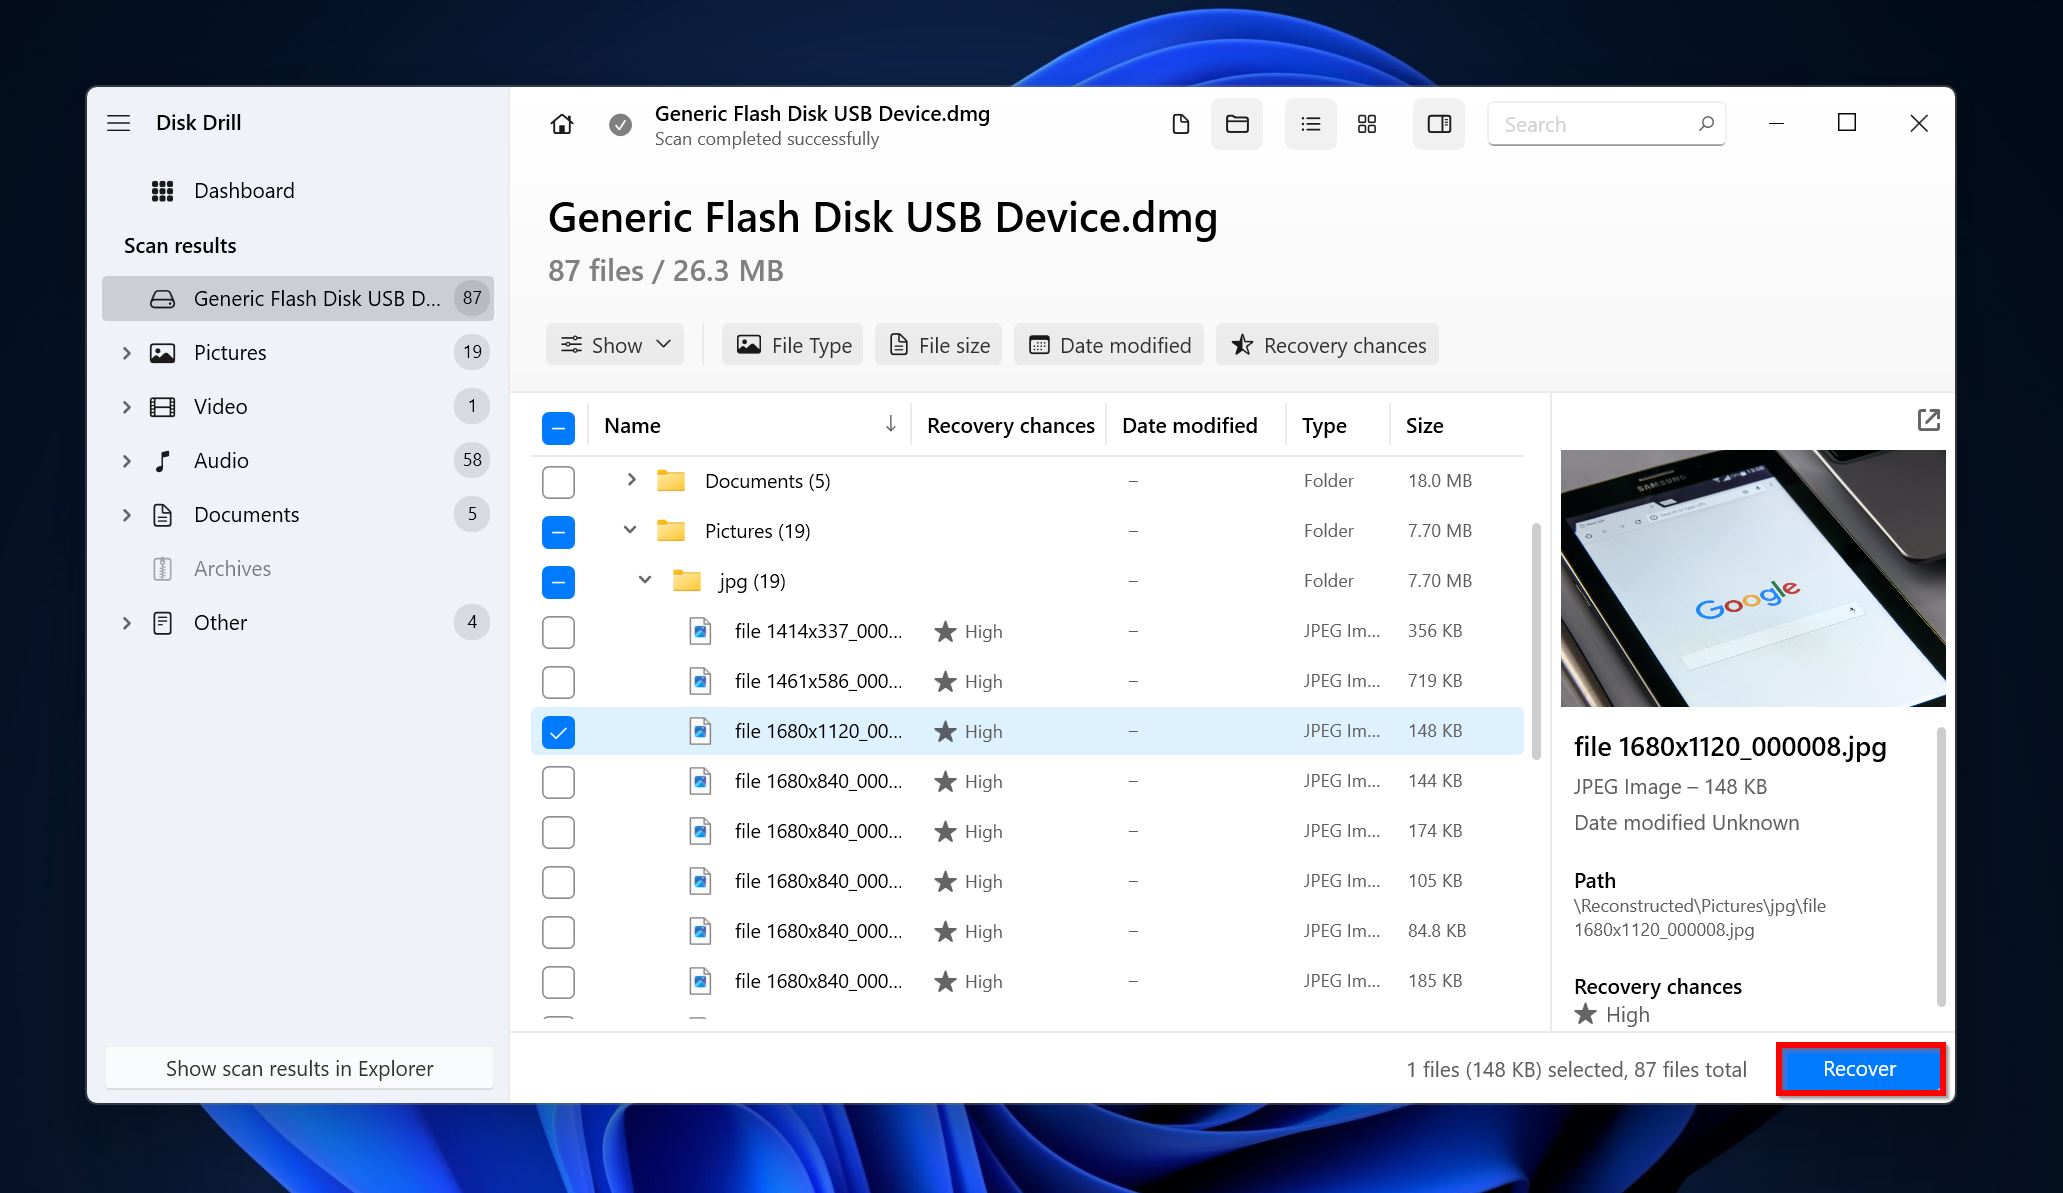
- Select the files you wish to recover or want to copy to the working drive. Disk Drill displays a preview of the currently selected file, however, you can manually preview a file by clicking the eye icon next to the filename. Click on Recover to confirm your selection.
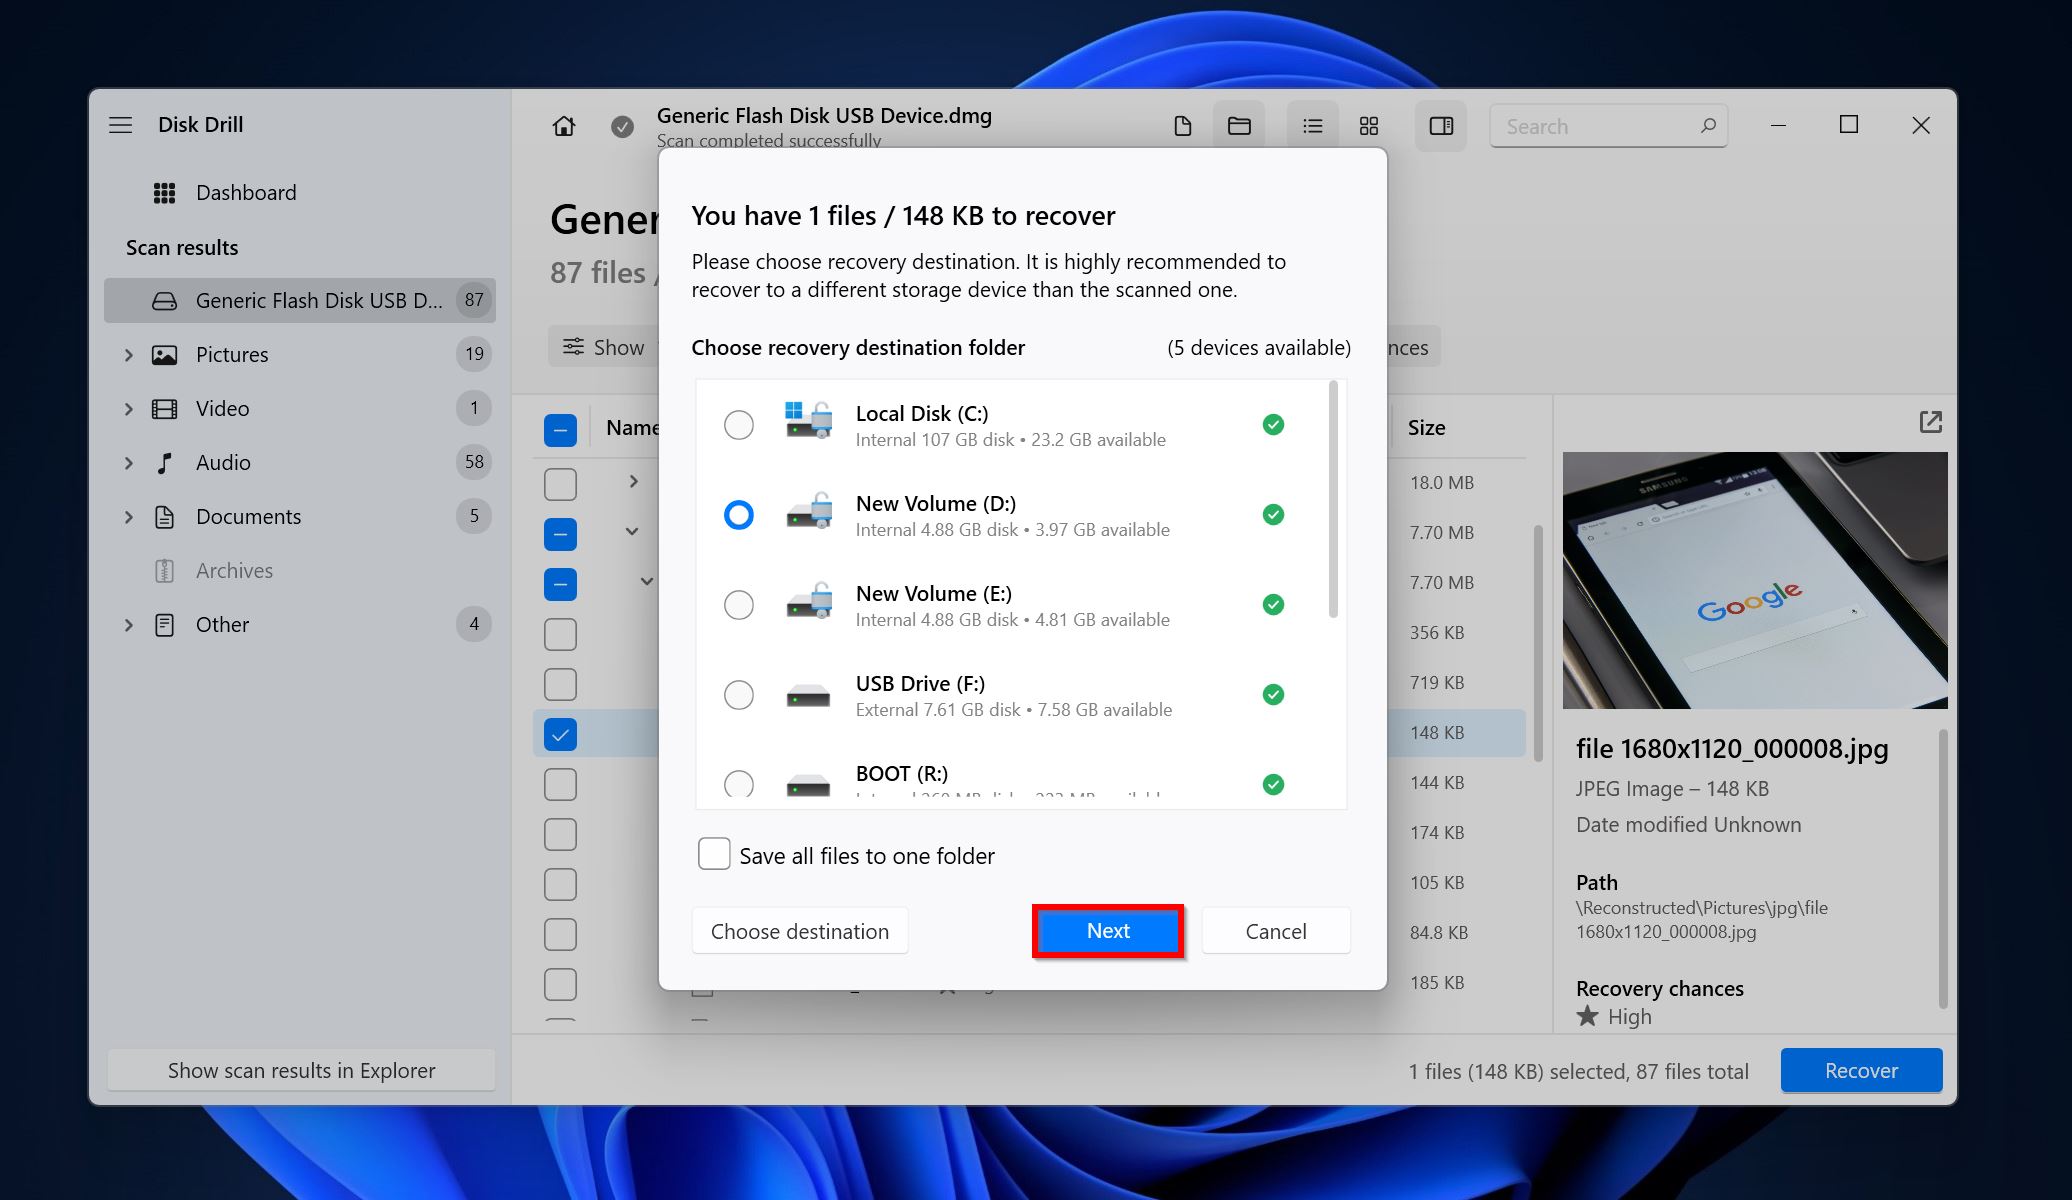
- Pick a recovery destination for the files and click Next.
- Disk Drill will copy/recover the selected files.
Conclusion
The Reallocated Sector Count can increase unexpectedly, and unfortunately, there’s no sure-shot way to fix the error. We recommend you regularly back up all your important files and store the backups on local storage drives as well as a cloud destination. If you noticed the issue showed up after the drive was physically damaged, it’s best to skip DIY data recovery and contact a professional data recovery service.


