 Did your computer crash while you were in the middle of working on an OpenOffice document? While this may seem like a nightmare, fret not. OpenOffice is an open-source office productivity suite for documents, presentations, spreadsheets, etc. It has in-built features to help restore your lost or deleted files.
What’s more, there are other available methods to help you out of tricky data-loss situations. Follow the instructions in this article to perform OpenOffice Document recovery in a few simple steps.
Table of Contents
Why is It Possible to Recover OpenOffice Files
Recovering OpenOffice files is possible thanks to how your PC operates.
Even while working on an unsaved OpenOffice file, your computer saves a temporary file of the document. This file goes through constant rewriting on your hard drive as you make new changes.
After you close the OpenOffice file, the document might appear to be lost, but there is still a copy left on the drive. This copy gets marked as free space, indicating that it could get overwritten with new data. To successfully recover your file, it’s critical to act promptly to prevent the OS from overwriting fresh data on the freely marked space.
How to Recover an OpenOffice Document
Whether it’s a sudden power cut or accidental deletion, this section explores four methods to help you retrieve lost documents.
From built-in features to professional recovery tools, keep reading to discover these methods:
Method 1: Use AutoRecovery Feature
If your AutoSaved document doesn’t open when you restart the program, you can follow these steps to recover previous versions of your OpenOffice document:
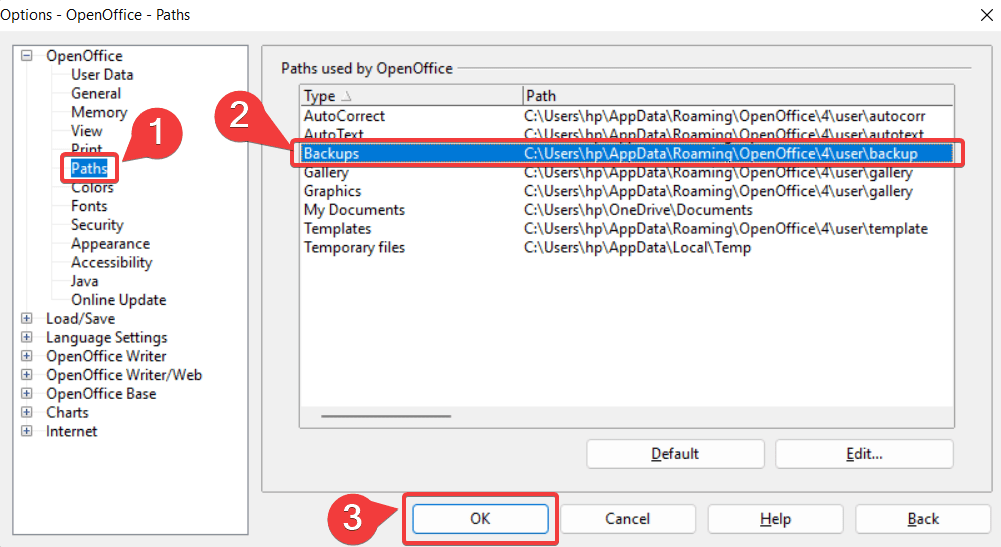
- Select Tools > Options, then go to Load/Save > Paths option.
- Note the location mentioned besides the Backups option. The AutoRecover backups are stored in this directory. The default path is
C:\Users\Username\AppData\Roaming\OpenOffice.org\Version number\user\backup
The path mentioned above also works as the backup folder for your OpenOfiice temp files. You can access this path to recover previous versions of your document if you wish to restore deleted or unsaved files.
- Go to Windows Explorer and access the backup directory. Now, double-click on the preferred file to open it and save the recovered OpenOffice document to the desired location.
If you aren’t able to retrieve the OpenOffice document via the steps mentioned above, it’s quite likely that you haven’t enabled the AutoSave function.
Remember that AutoSave saves your documents or files at regular time intervals. Thus, if your file crashes and you lose some data, you would be asked to restore the autosaved version of the document whenever you open the program next.
Here are the steps you can follow to enable the AutoSave feature:
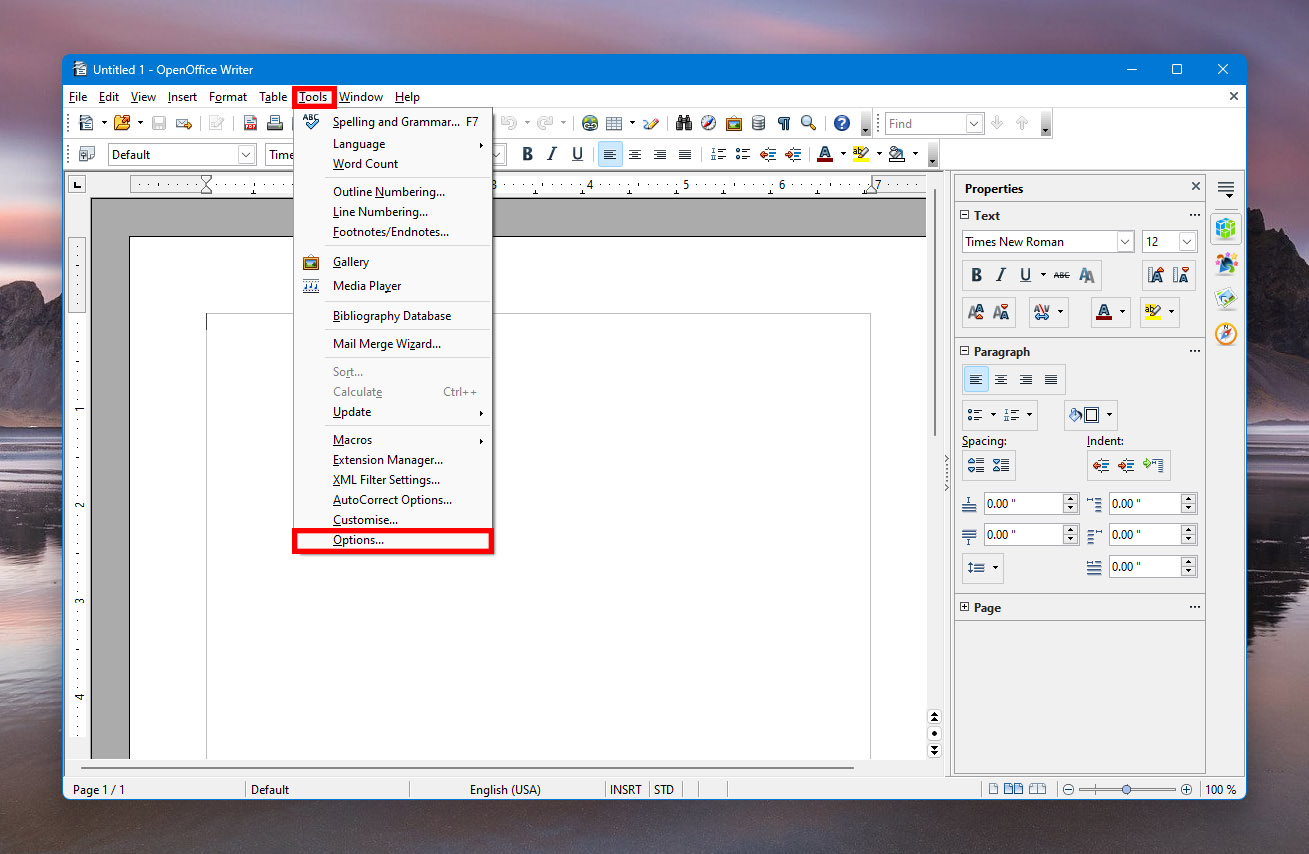
- In the OpenOffice Writer program, click on Tools and then Options from the drop-down menu.
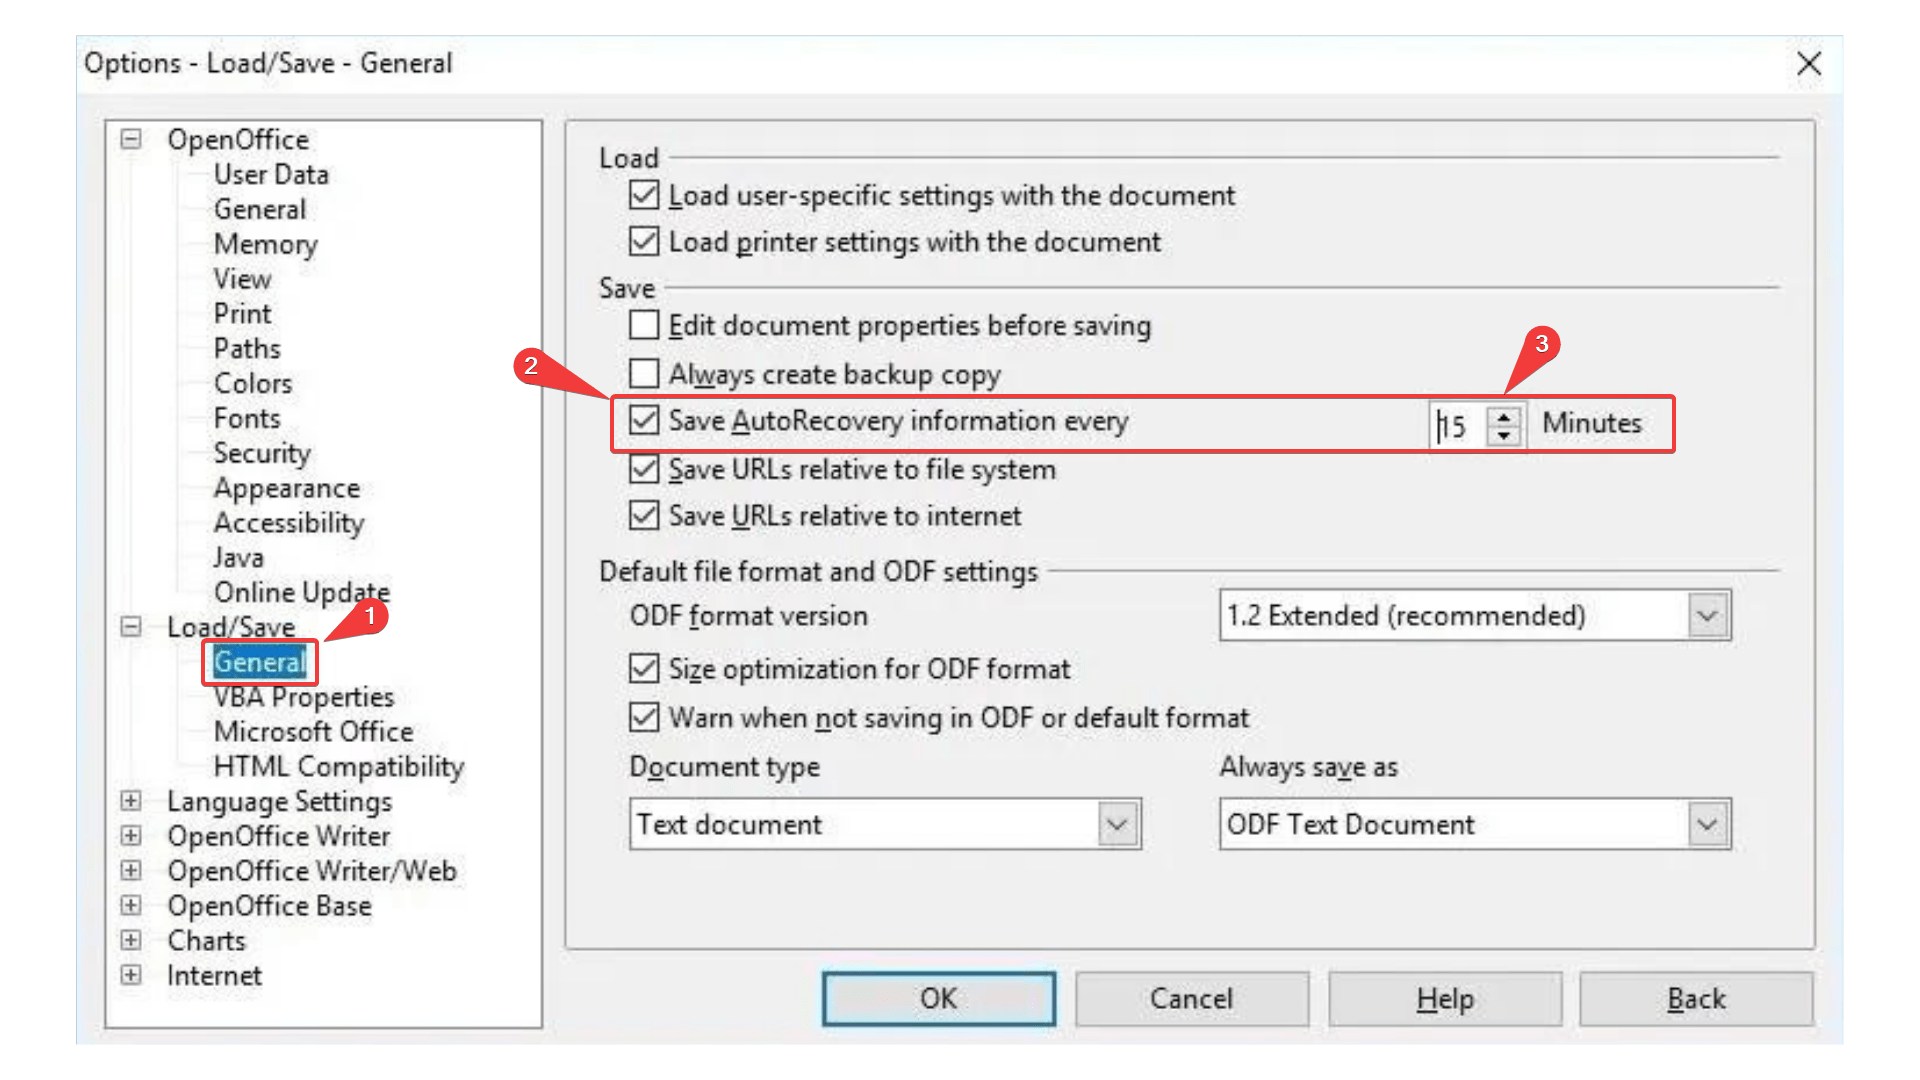
- Click the Load/Save option in the window that opens and then select the General option.
- Go to the Save block and check the Save AutoRecovery information every option. Now, set the time interval in minutes (say, every 5 minutes) to enable AutoSave.
Method 2: Use Professional Data Recovery Tool
The AutoSave feature works effectively in situations such as program crashes, system errors, etc. However, this method has its limitations. Sometimes, if your OpenOffice document is corrupted or if you’ve accidentally deleted it, AutoSave might not be able to find your document.
In such cases, it’s best to use professional data recovery software to restore the OpenOffice document. While other methods might recover deleted or unsaved files, software like Disk Drill can do the job in other tricky data-loss situations too.
Disk Drill is an industry-leading data recovery software that offers users a free trial across Windows and Mac operating systems. Moreover, you can recover absolutely any file type with Disk Drill, such as audio, photos, videos, documents, etc. It also allows users up to 500 MB of free data recovery.
Let’s take a go through a detailed guide on performing OpenOffice data recovery with Disk Drill:
- Download and Install Disk Drill from the official website. After the installation is complete, provide your administrator’s credentials and launch the application.
- Once you’ve completed the basic set-up and configured the settings to your computer you can begin your data recovery process.
- Select the drive from which you wish to recover the OpenOffice document.
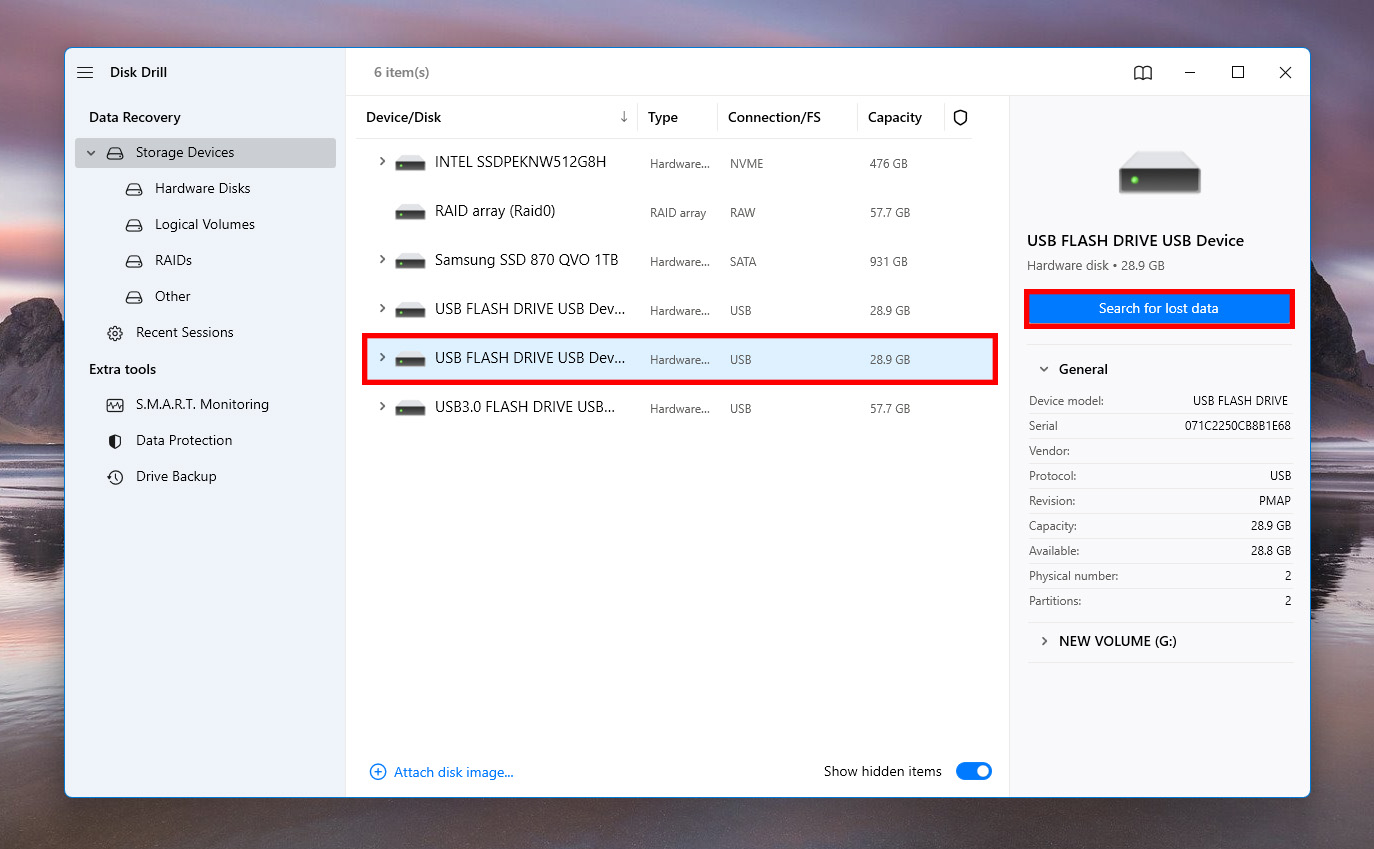
- Now, click on Search for Lost Data. While Disk Drill’s sophisticated algorithm scans through your device, you can preview files that have been scanned already and filter through the scan results.
Pro Tip: You can pause, save or resume the scan at any point. Disk Drill also allows you to mount scanning results as a disk, and you can pause or save your search results for another time. This makes the recovery process more manageable.
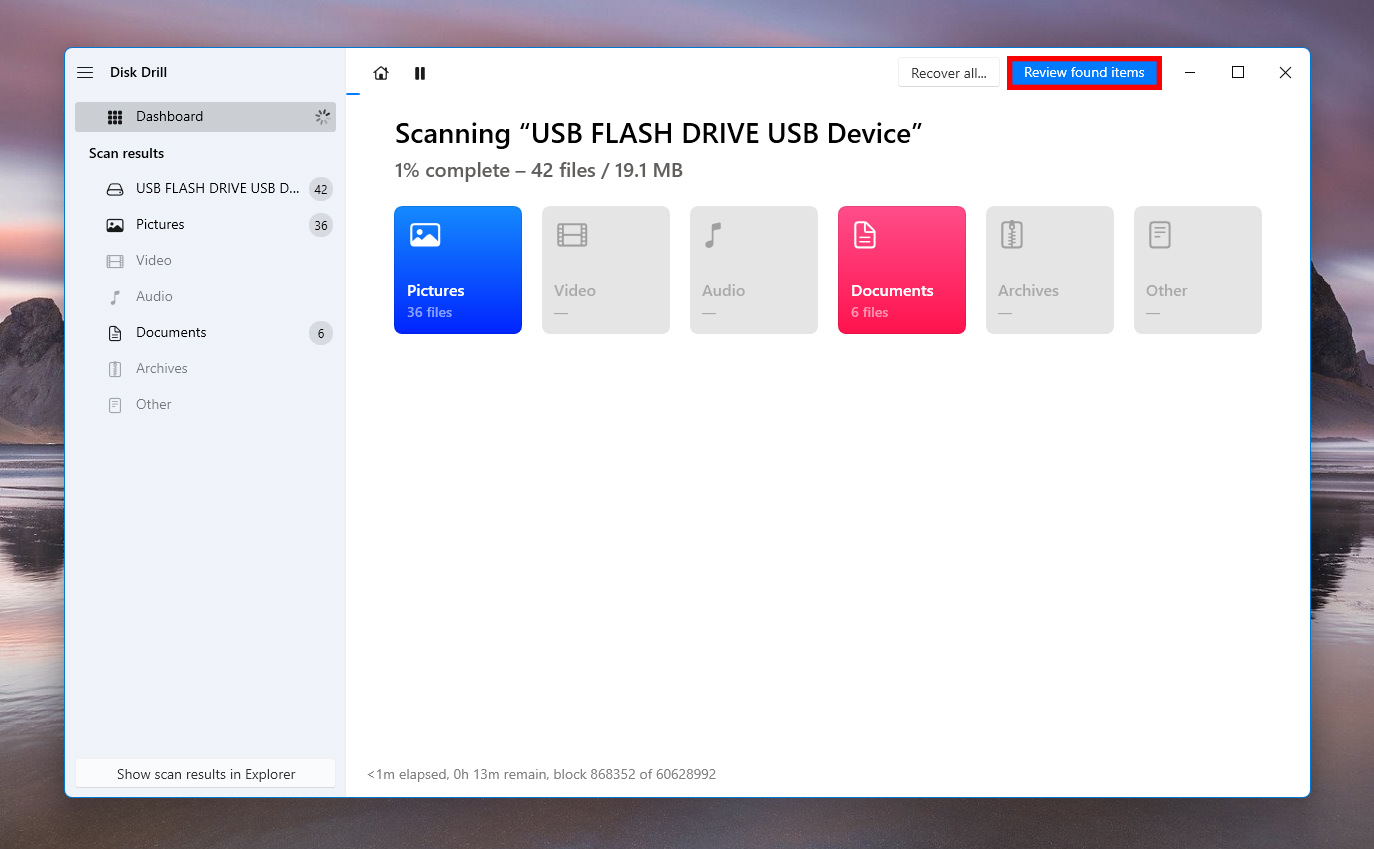
- Once the scan is complete, go to Review Found Items and select the OpenOffice document you wish to recover.
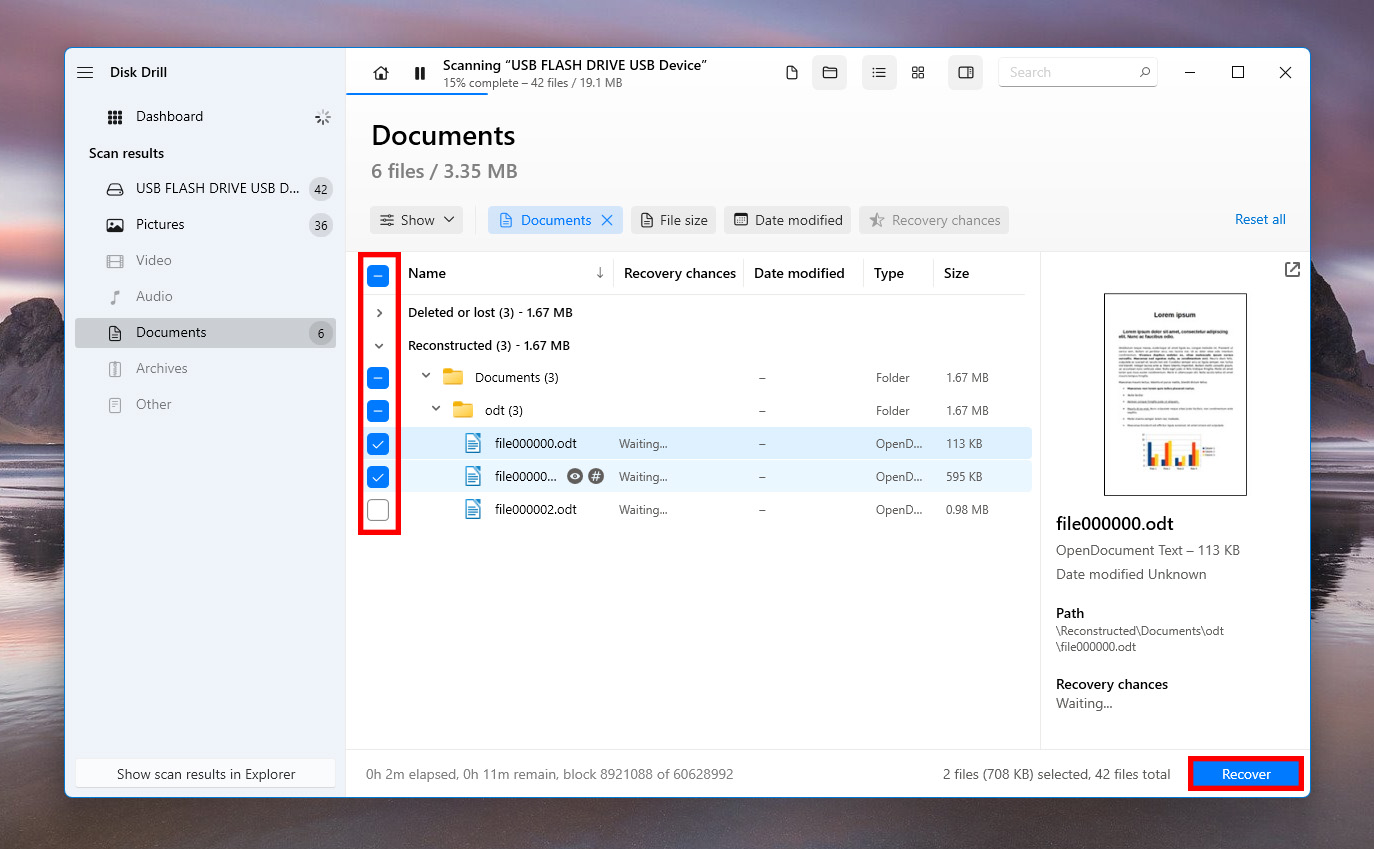
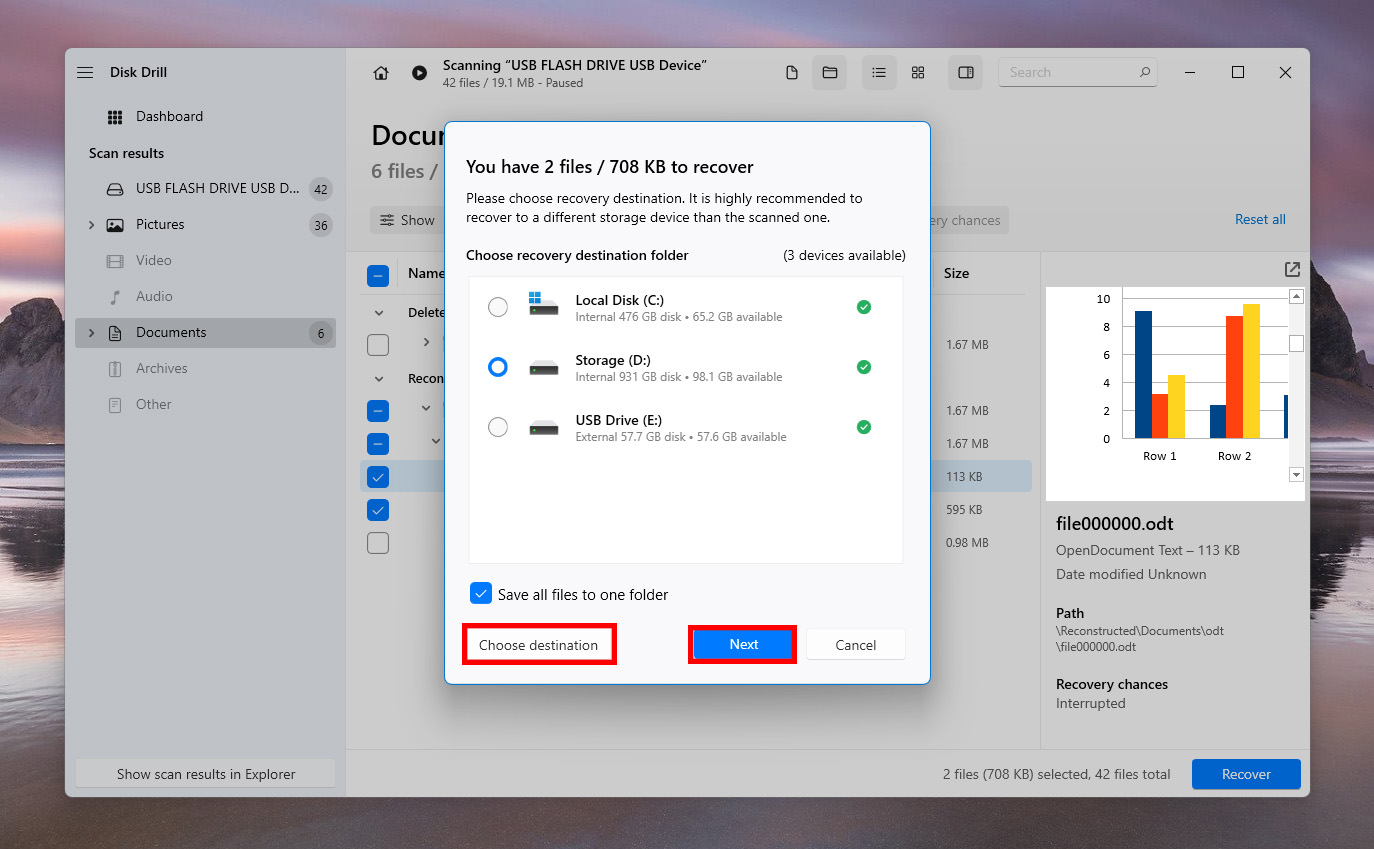
- After you’ve made your choice, select the recovery location. The recovered files will be saved there. Finally, click on Next.
You can use Disk Drill to recover your OpenOffice documents without any hassles. It’s a secure software solution that allows convenient data recovery for beginners and provides users with additional features that make the data recovery process quite efficient.
Method 3: Recover from the Recycle Bin
A quick method that can help you restore your deleted OpenOffice documents is to navigate to the Recycle Bin on your system.
While OpenOffice doesn’t have a trash bin of its own, any deleted documents or files go to the recycle bin of your operating system. The Windows Recycle Bin temporarily holds your deleted OpenOffice documents until you clear them out. So, you can use this solution to restore all your deleted files in a few simple steps.
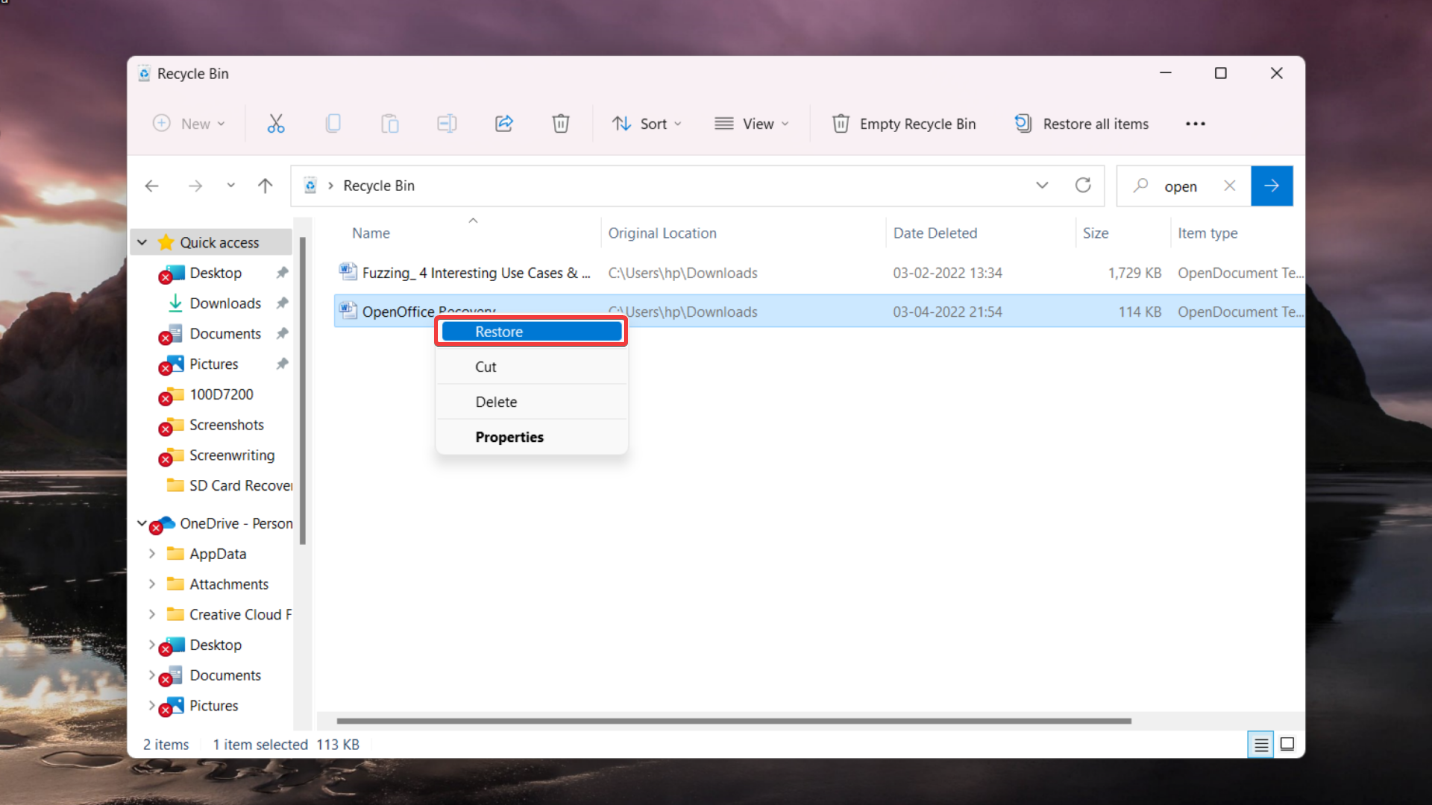
- Find the Recycle Bin icon on your desktop.

- Once you’ve opened the folder, search for the OpenOffice document you wish to restore.
- Right-click on the selected file. Now, use the Restore option to send the file back to its original location.
Method 4: Recover from Previous Versions
There’s another in-built computer technique that can help you recover OpenOffice temporary files. If you haven’t enabled the AutoSave feature, you can attempt to recover unsaved OpenOffice files using this technique.
Windows has an emergency backup feature that is meant to assist you in unexpected data loss scenarios or when you need file backups. Turn on the File History option to look for suitable backup folders and retrieve your OpenOffice documents.
Let’s go through this recovery method:
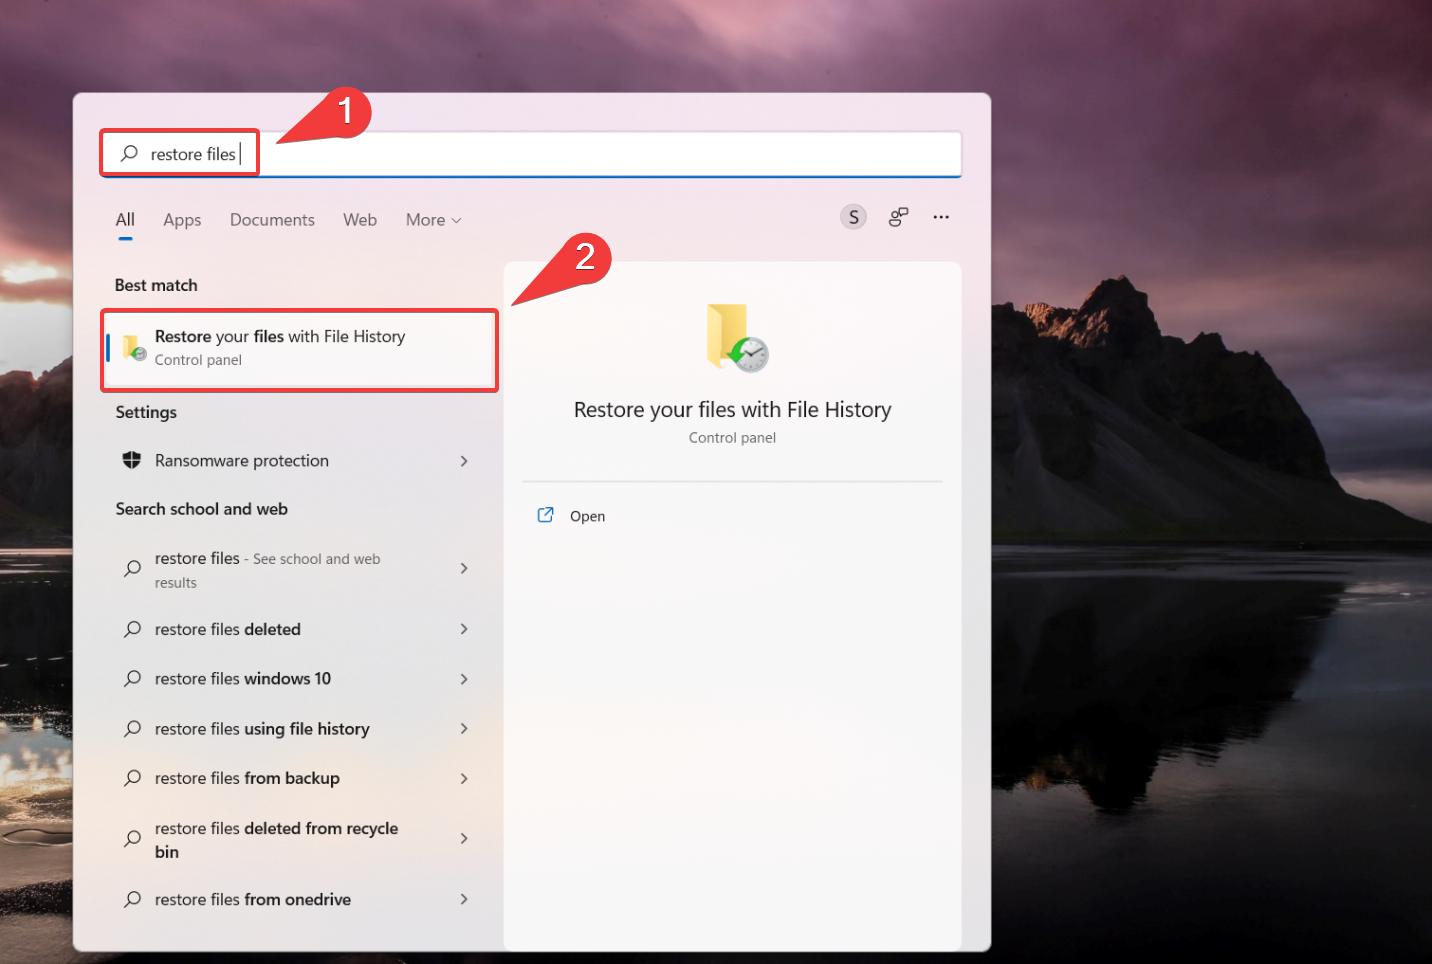
- Open the Windows search tab and type in Restore your files using File History. It will redirect you to the Control Panel.
- Ensure that the File History option is turned on. If the option is off, select an internal or external drive to backup all your information and data, then turn it on.
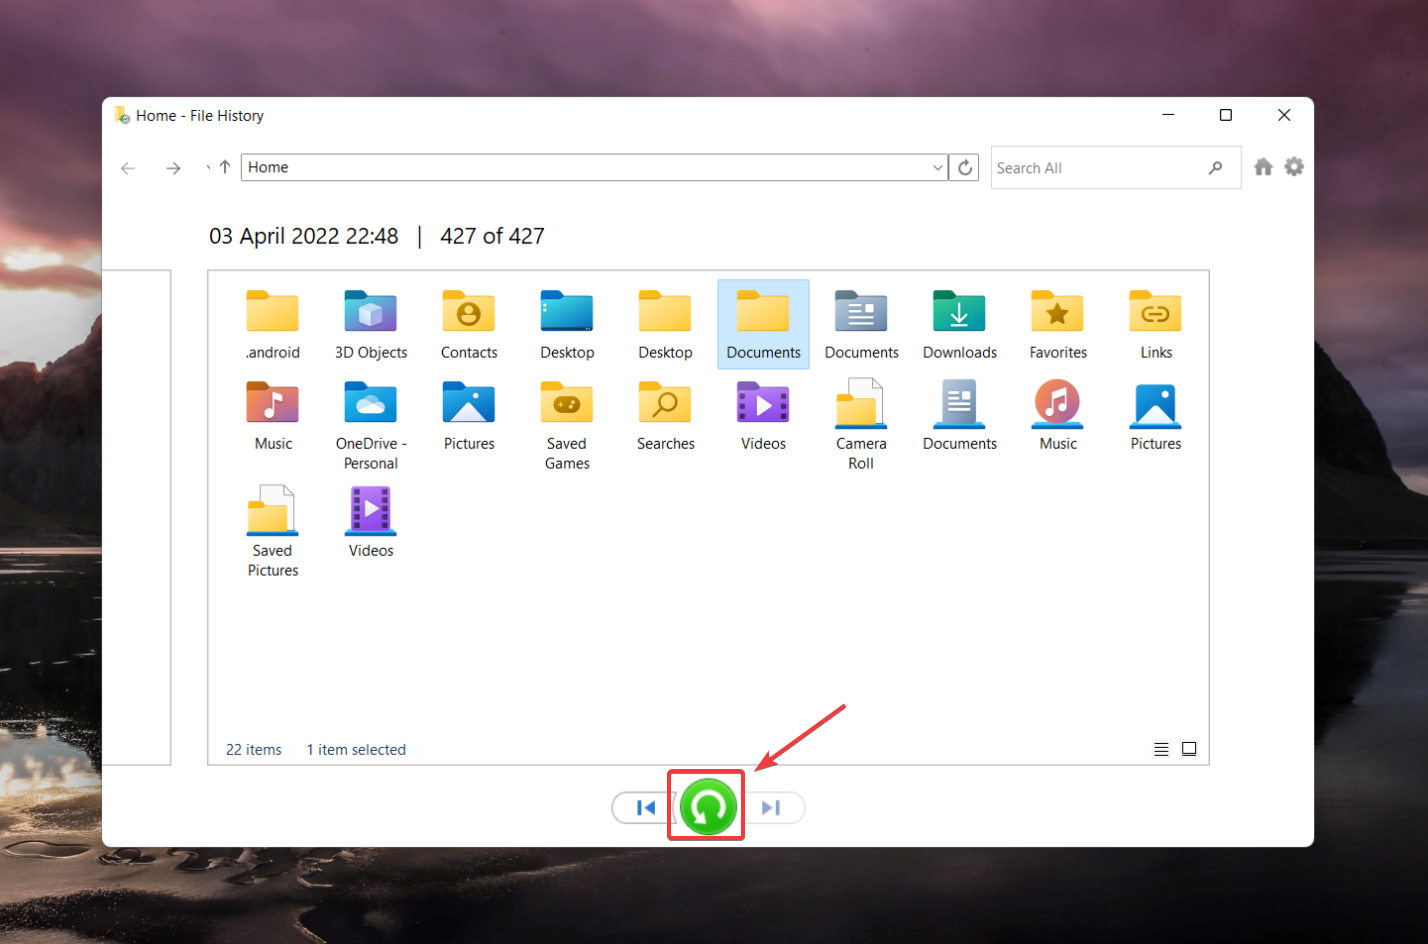
- Now, select the Restore personal files option. Look through the available backups and locate the OpenOffice document or a previous version of the document you want to recover.
- Now, click on the green Recover button. Your file will then be restored to its original location.
This article gives you a detailed insight into how to recover your OpenOffice document. While there are various data recovery methods to retrieve your deleted or unsaved OpenOffice files, ensure that you enable the AutoSave feature to recover them easily. Most of these solutions are quick, reliable, and effective and help restore your OpenOffice documents successfully.
How to Repair Corrupted OpenOffice Files
If you have recovered Open Office files but can’t open them due to file corruption, you are not alone. Sometimes, the file format for OpenOffice Files, i.e. ODT gets corrupted and displays an error message saying – “The file .odt is corrupt and therefore cannot be opened.”
If you face this issue, here are three viable solutions to quickly repair your ODT corrupted files.
Method 1:Insert the Corrupted File Into a Blank Document
A simple yet effective trick to fix corrupted ODT documents is using the Insert feature of Open Office Writer:
- Open a blank document.
- Go to the Insert tab in the taskbar.
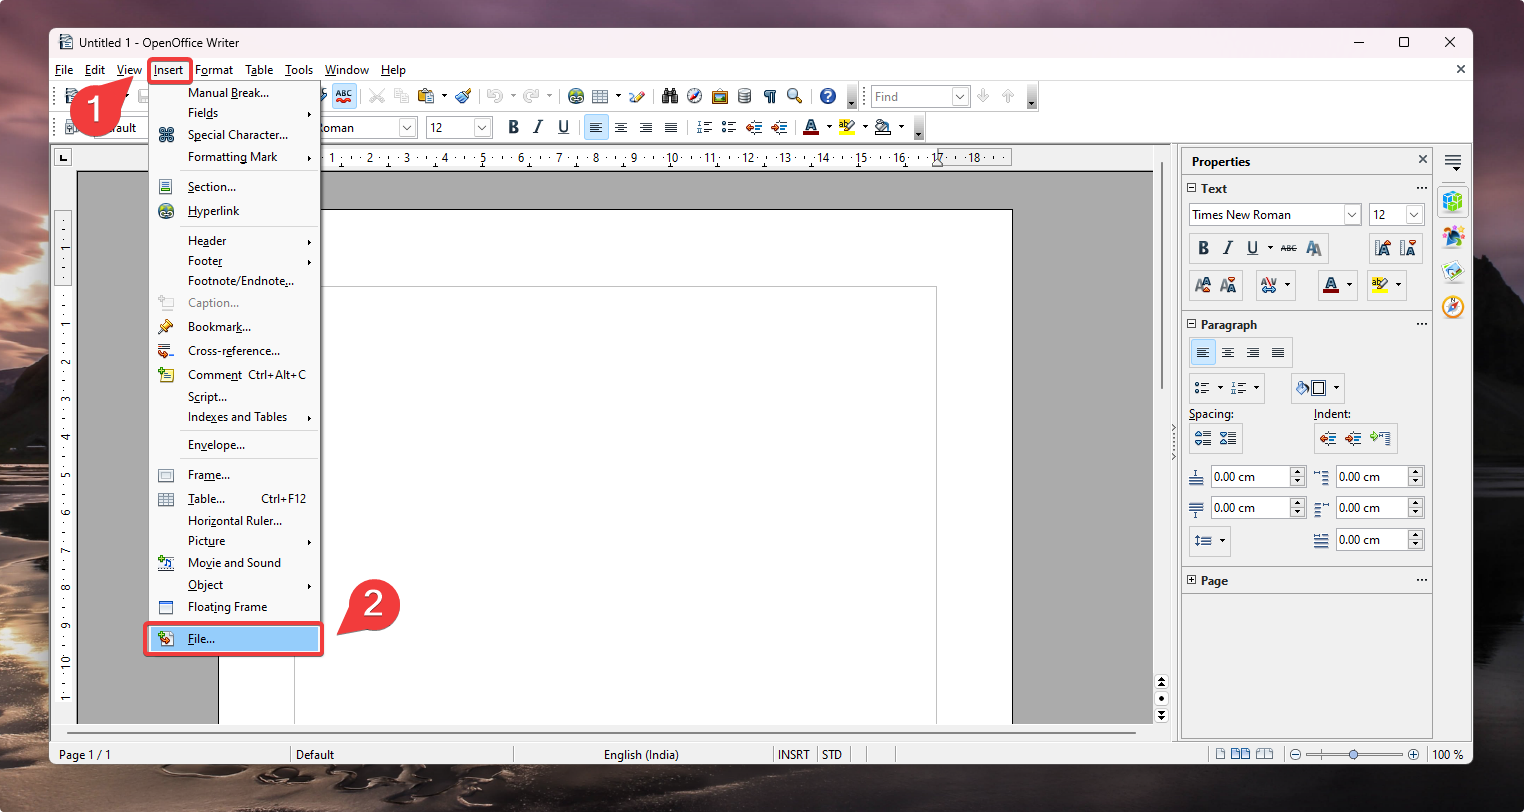
- Select “File” and choose your corrupted document.
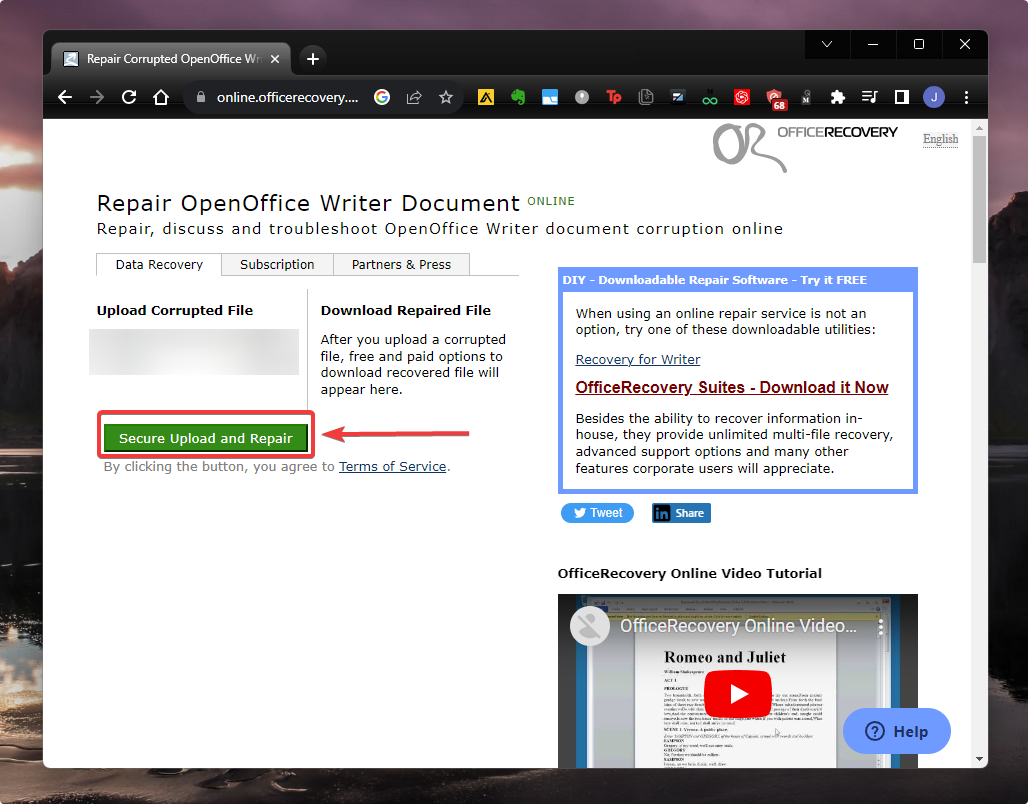
Method 2:Fix ODT files with the Repair OpenOffice Writer Document Utility
Repair OpenOffice Writer Document Utility is a web-based tool specially designed to fix corrupted ODT files hassle-free.
- Go to the online tool to access it.
- Click “Choose File” under the Data Recovery section and select your corrupted file.
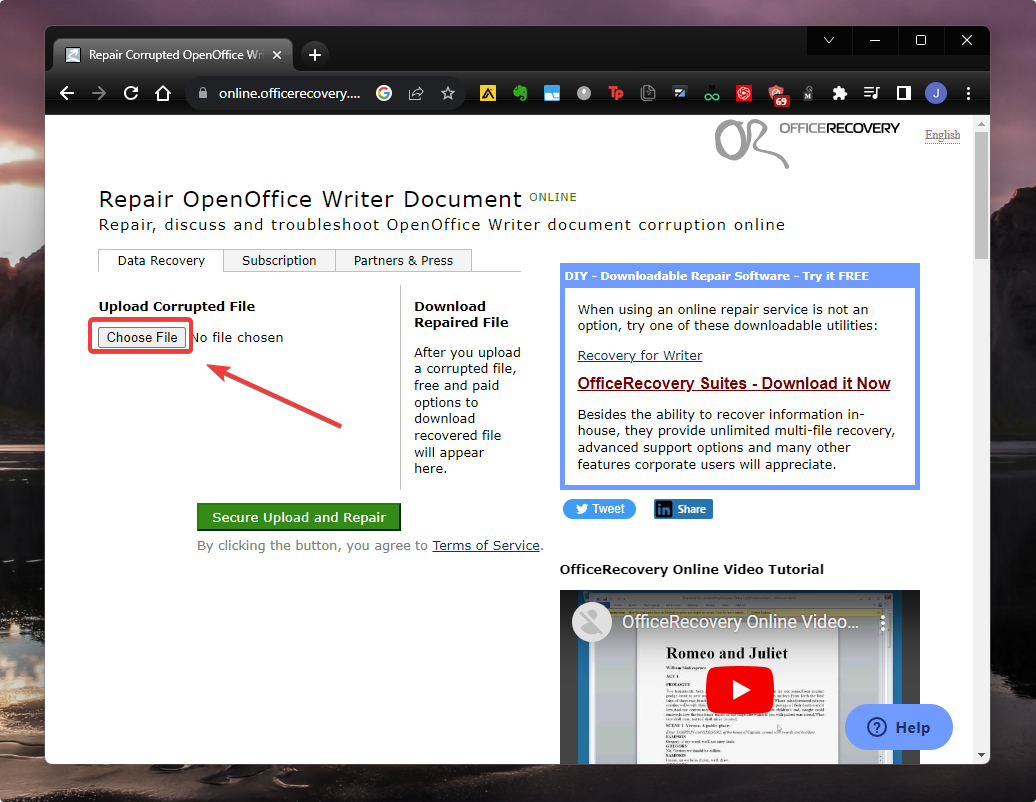
- Click the green button displaying “Secure Upload and Repair”.
Method 3:Convert the ODT to a ZIP File
While this is not a straightforward solution, renaming the ODT file extension to ZIP will allow you to extract the XML file from the archive that contains all the text and formatting:
- Go to File Explorer and open the folder with the corrupted ODT file.
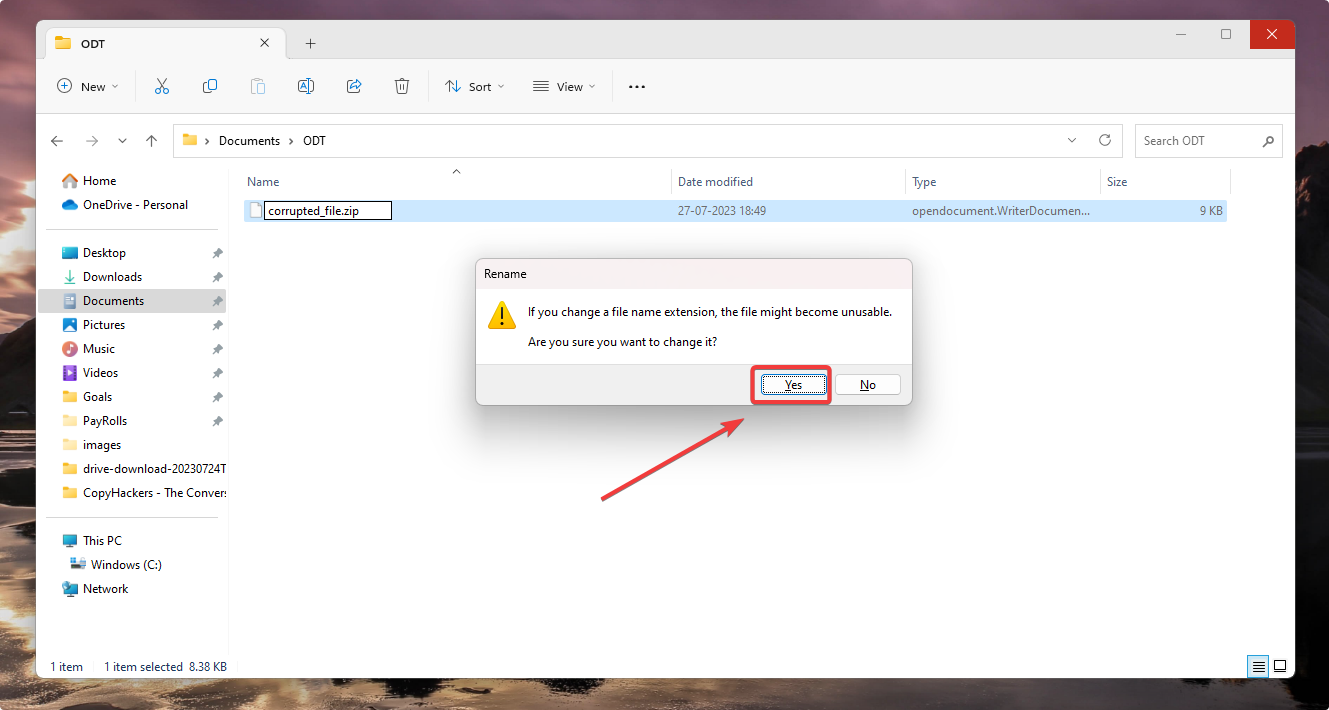
- Right-click the ODT file and “Rename” the file extension with ZIP.
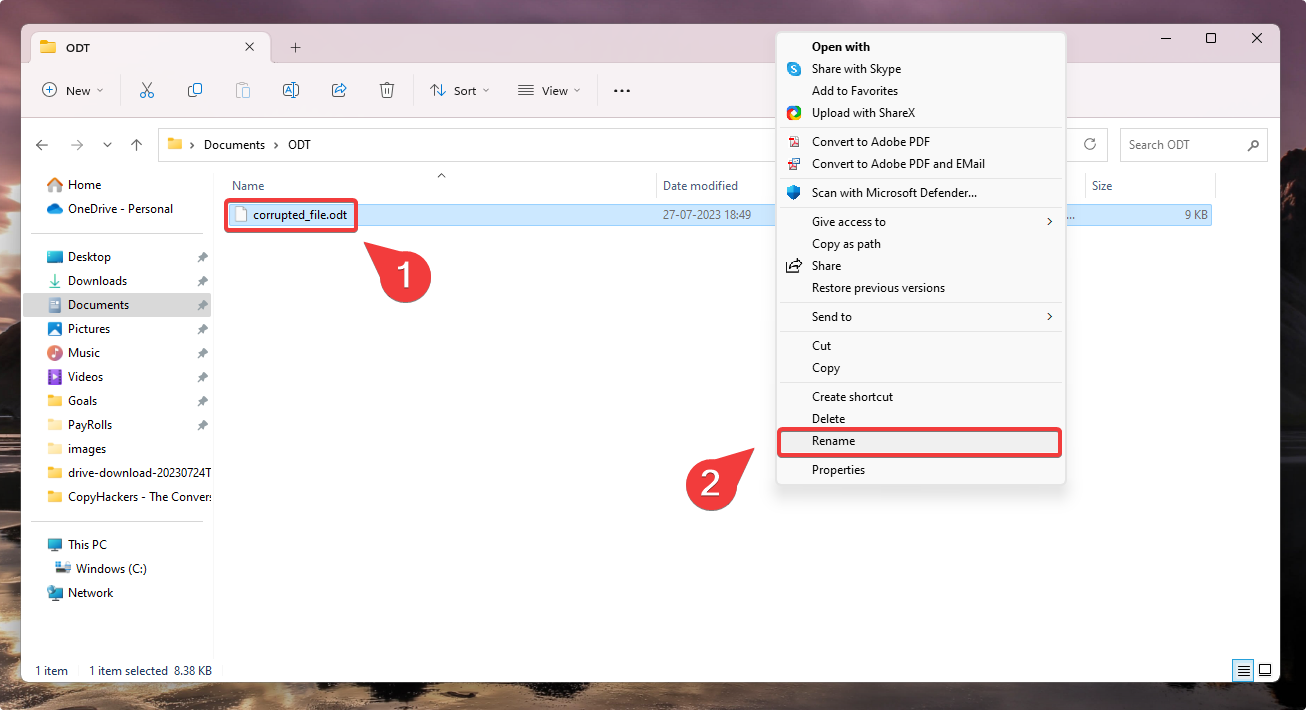
- Press Enter and hit “Yes” to confirm the remaining process.
- Double-click the new ZIP file and select “Extract All”.
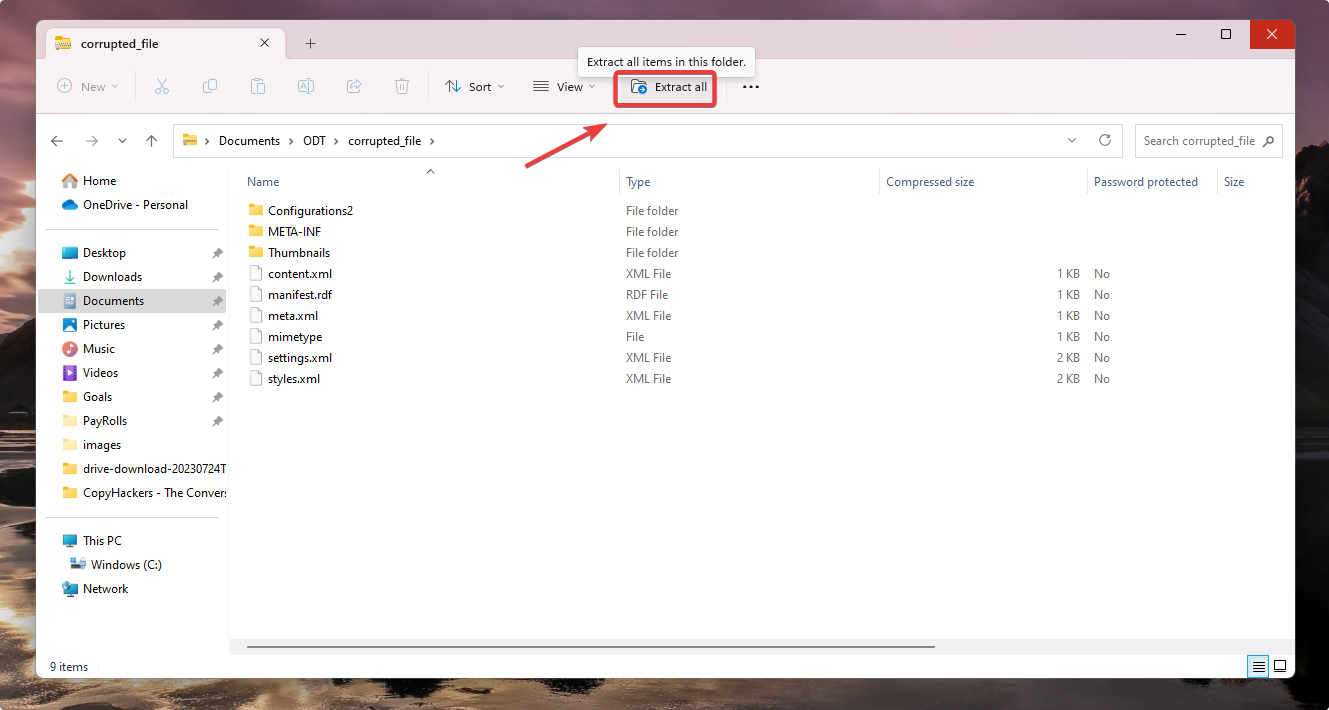
- Choose a location for the folder and click “Extract”.
- Look among the files and open the extracted file named “content.xml”.
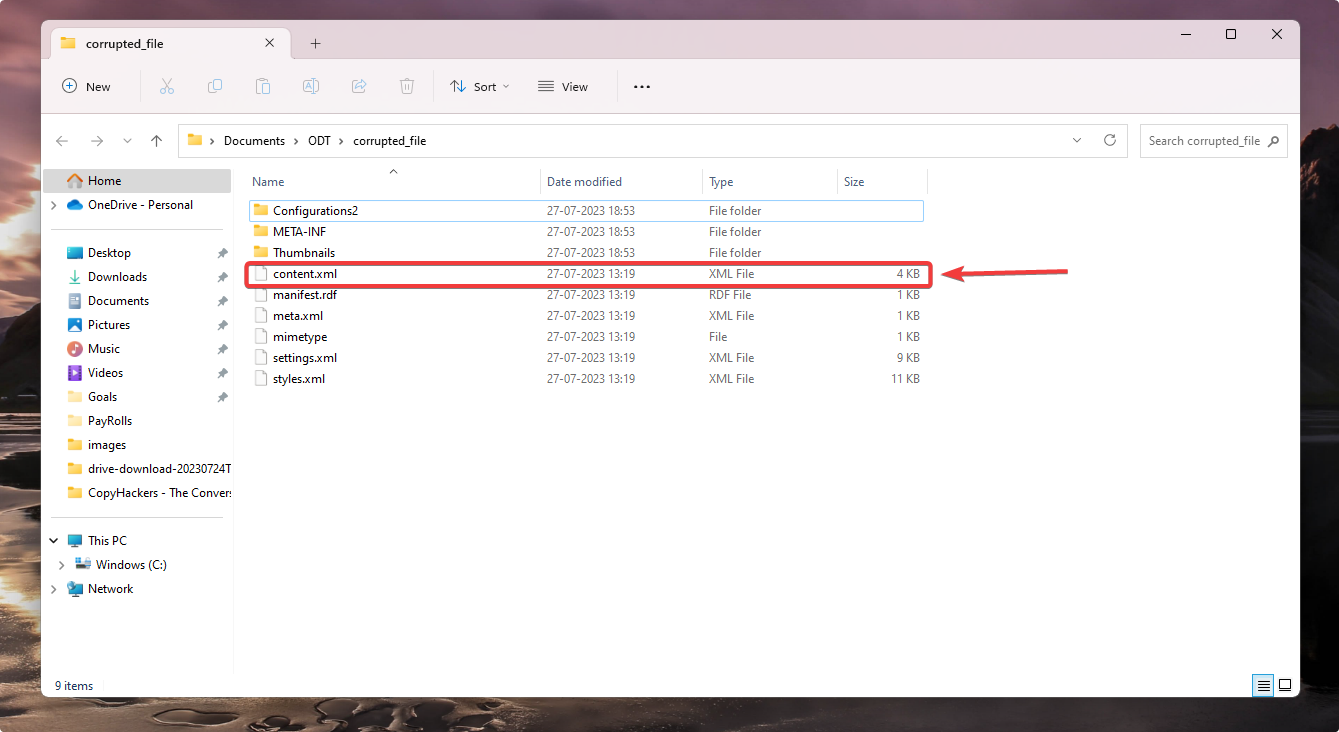
- Right-click the content.xml file and select Open with – Notepad.
- Copy and paste the XML text into a blank Open Office document.
- Select “File” and then “Save as” an ODT document.
Conclusion
Recovery of OpenOffice Documents is certainly possible through various methods, but the choice of method typically depends on your situation. Start your recovery process with the built-in features (AutoSave, Backup), and if they fall short, you can try using reliable data recovery software like Disk Drill.
Remember to enable the AutoSave and Backup feature to minimize the risk of potential data loss.


