 Losing WordPad documents can be unsettling, especially if they contain important information. It’s easy to recover WordPad documents — learn the process in this guide. Whatever the reason, we will explain how you can recover WordPad documents within minutes.
Table of Contents
What Can Lead to Loss of WordPad Documents
WordPad doesn’t come with an auto-save feature. If your system crashes when you’re creating the document, you might lose it. You might also lose WordPad documents because of other reasons like filesystem corruption or accidental deletion.
In the event that you lose some WordPad files, you’ll need to be able to identify them while you try to recover them. For that, you’ll need to know the types of files WordPad can create. Here’s a quick list of file extensions your WordPad file may be in:
- Rich Text Format (.rtf)
- Document (.doc)
- Text (.txt)
- OpenDocument Text (.odt)
How to Recover Deleted WordPad Documents
The exact method you should use to recover deleted WordPad documents depends on the cause. Below are some methods you can try to restore WordPad documents.
Method 1: Recover WordPad Documents from the Recycle Bin
If you’ve accidentally deleted a WordPad document a short while ago, it’s worth checking the Recycle Bin. Provided you didn’t delete the file permanently (using the Shift + Del shortcut).
To recover the WordPad document, launch Recycle Bin, right-click on the files you want to restore, and select Restore.
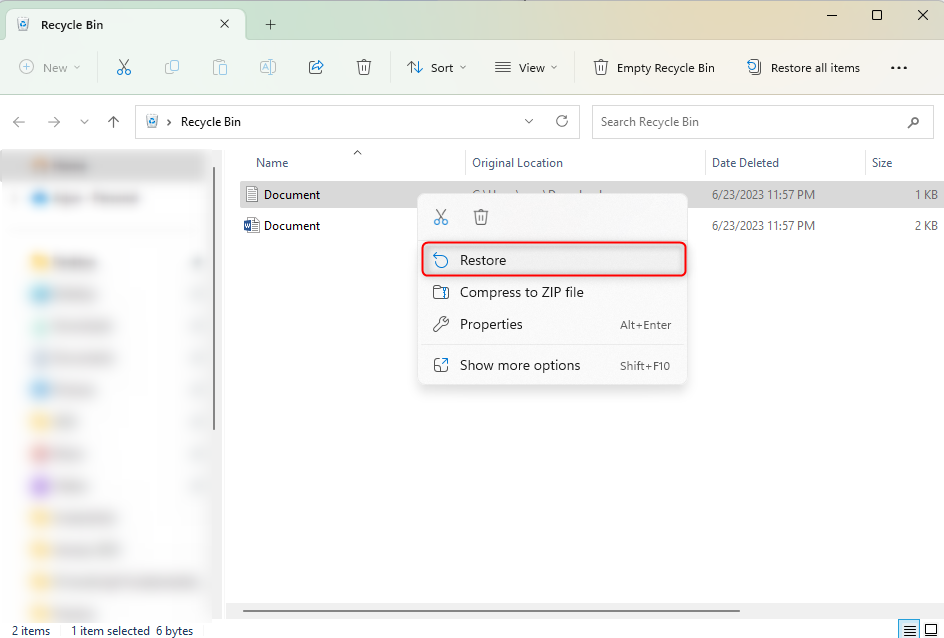
You’ll now see the files you just restored in the folder where they were originally saved.
Method 2: Recover WordPad Documents with Data Recovery Software
If you’ve permanently deleted WordPad documents or lost them because of other reasons like file system corruption, data recovery software might help.
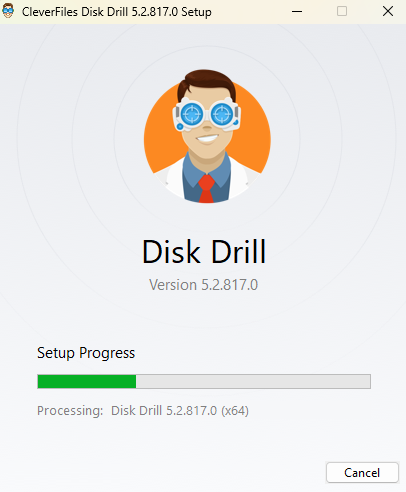
We recommend Disk Drill since it offers an extensive feature set for data recovery, such as the ability to filter the results of a scan by category and create an image of the disk to prevent further damage.
Here’s how you can use Disk Drill to recover deleted WordPad documents after a crash, accidental deletion, or any other logical or physical errors with the hard drive:
- Download Disk Drill and install it on your PC.
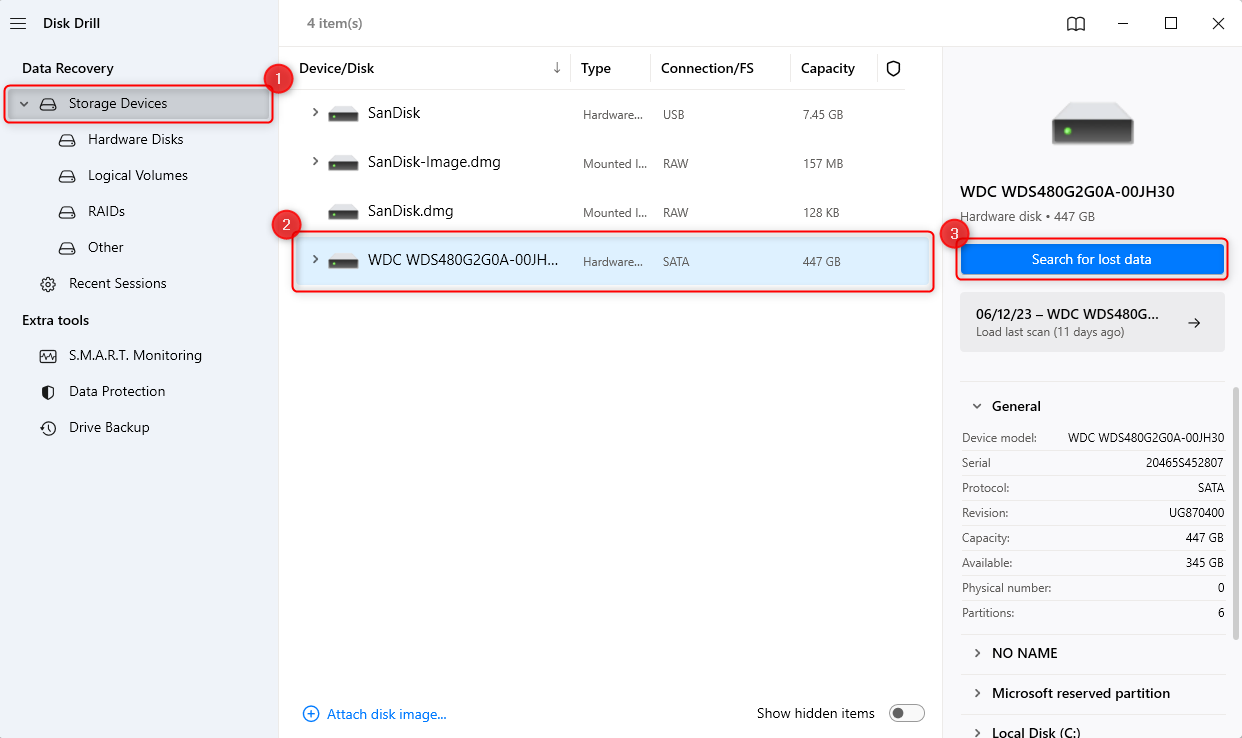
- Launch Disk Drill and select the disk drive where you had saved the WordPad document.
- Click on the Search for lost data button to start the scan.
- When the scan completes, you’ll see a list of files Disk Drill found on the drive. Select Documents from the left sidebar to filter the results. You can also filter by file extension, such as .rtf or .txt, by typing the extension in the search bar.
- Select the files you want to recover by checking the box to their left.
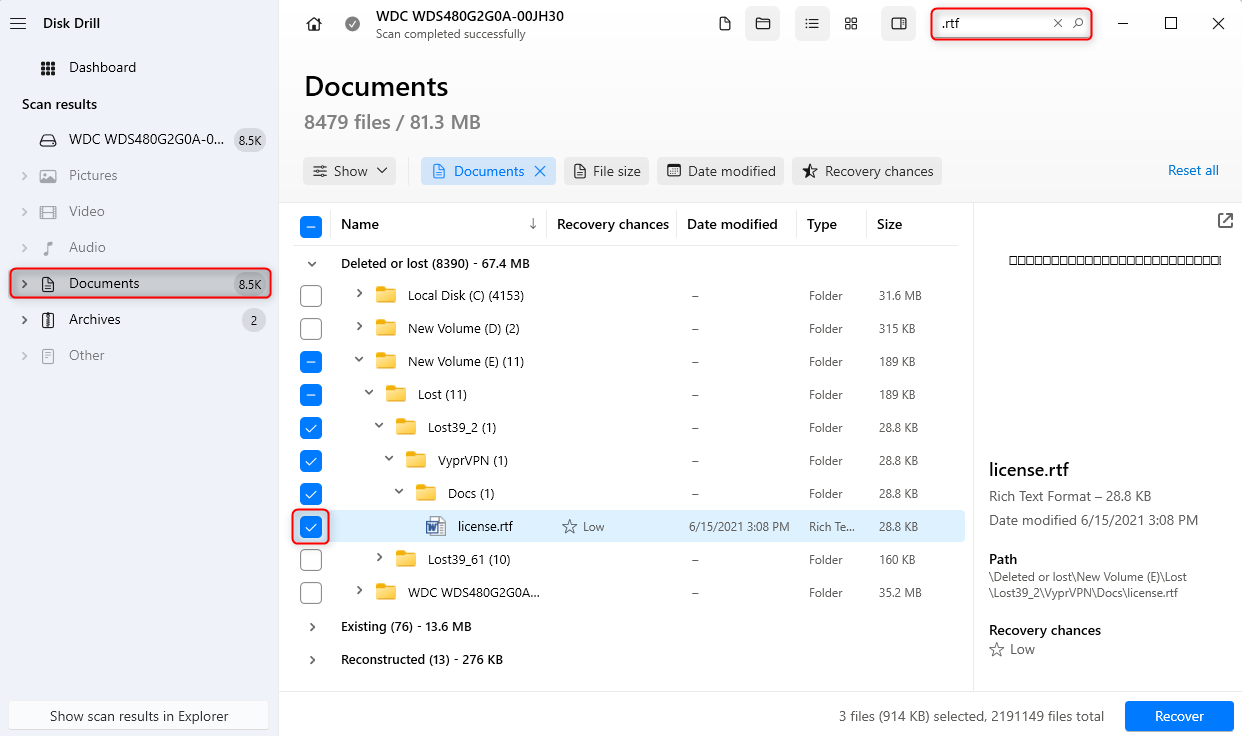
- Click the Recover button, select a recovery location that’s different from the source drive (to prevent overwriting data), and press Next.
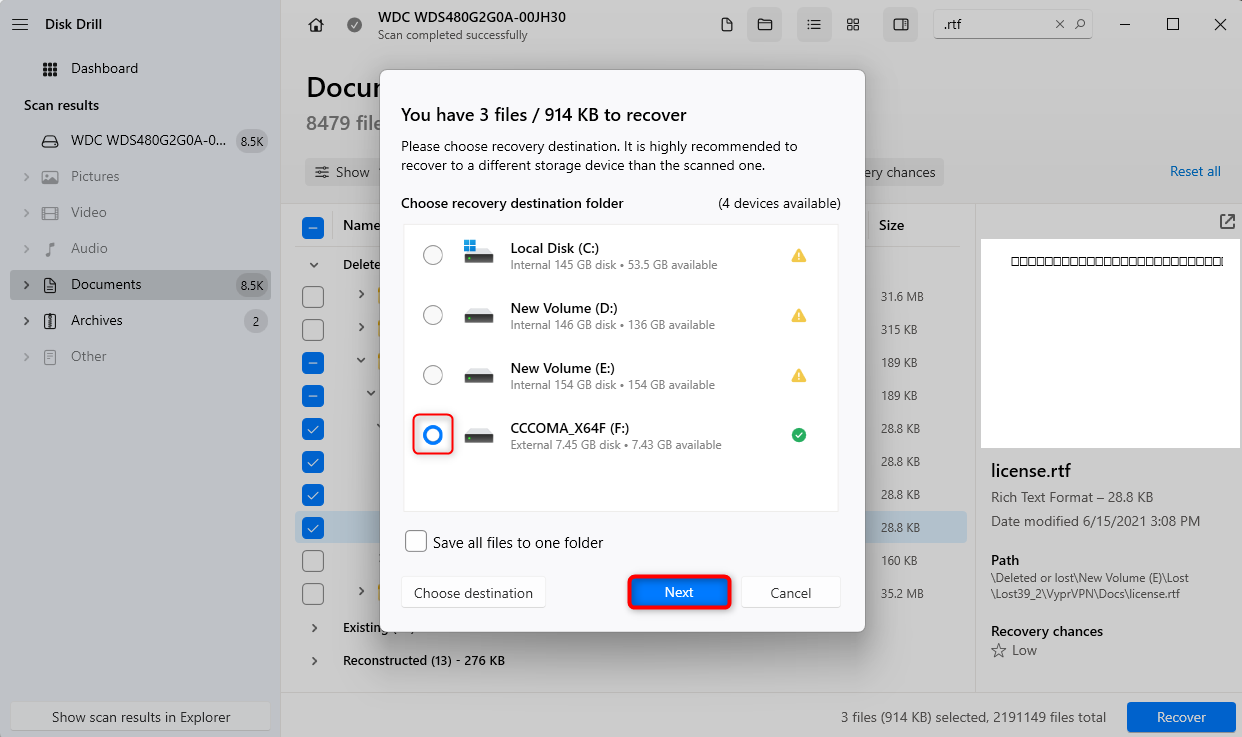
When you’re done, you’ll see the recovered WordPad documents in the location you selected in the last step.
How to Find and Recover Unsaved or Crashed WordPad Documents
Windows might have saved a previous version of the file you’re trying to recover. So if you made changes to the WordPad file but didn’t have a chance to save the file, you can use one of the methods we discuss below to recover the unsaved WordPad file.
Note: For this to work, you’ll need to have saved the file at least once.
Method 1: Recover WordPress Document from the Previous Version
To restore an unsaved WordPad file’s previous version:
- Right-click on the WordPad file and select Restore previous versions. On Windows 11, you’ll need to expand the context menu by clicking Show more options.
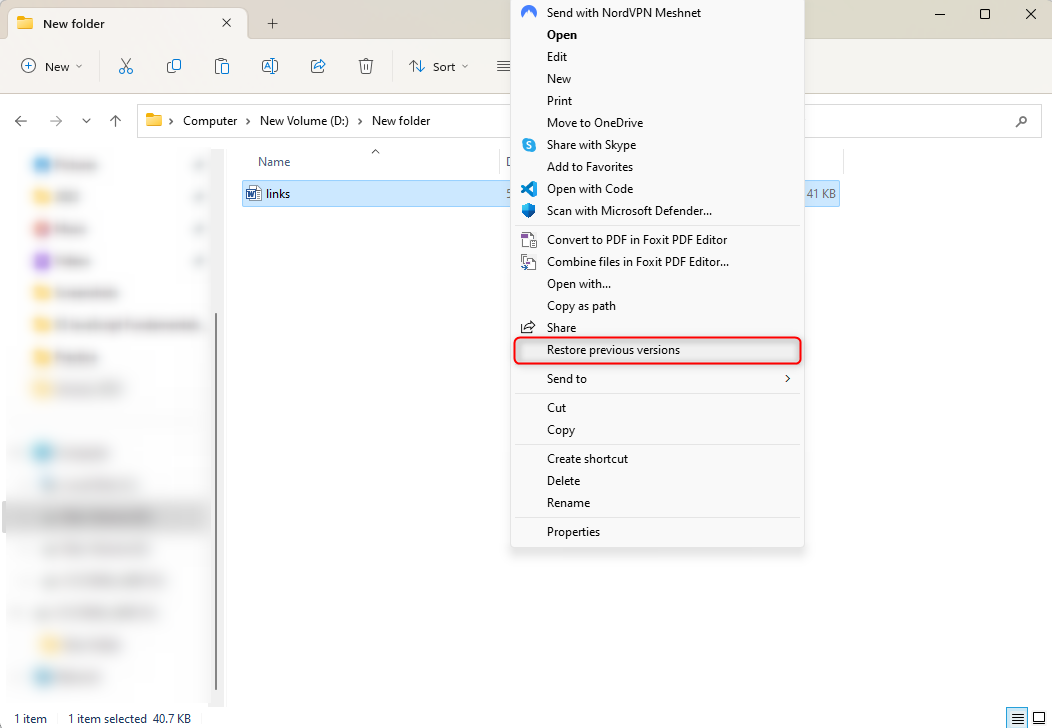
- If Windows has a shadow copy (called a previous version) of the WordPad file, you’ll see it here. Double-click on the copy to open it and verify it’s the copy you want to recover.
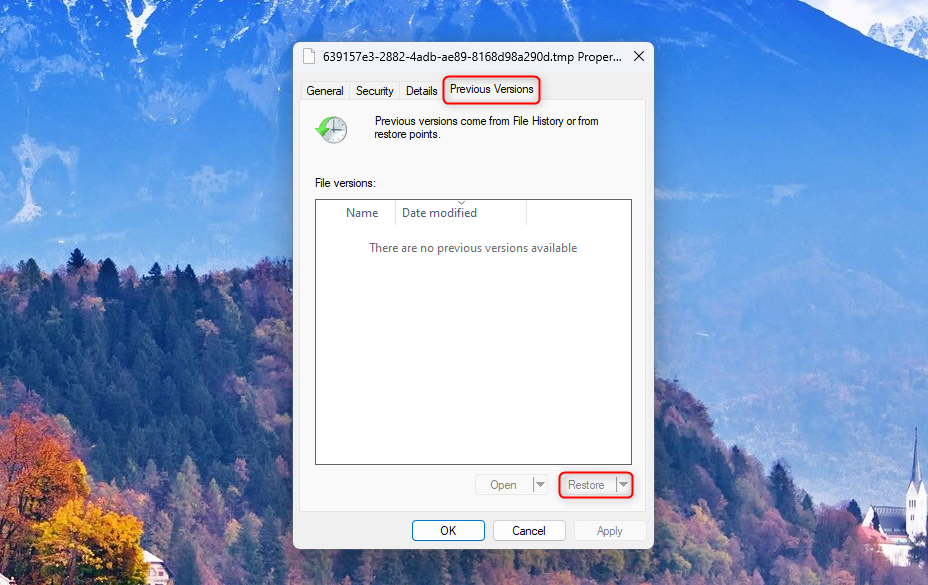
Note: Previous versions are created by Windows Backup or saved as restore points. However, you can’t preview files backed up by Windows Backup.
- Select the latest copy and click Restore.
Once you’re done, you should be able to access the file in your chosen location.
Pro tip: If the Restore button is grayed out and you can open the file, save the file manually to a different location.
Method 2: Restore the Previous Version With the File History
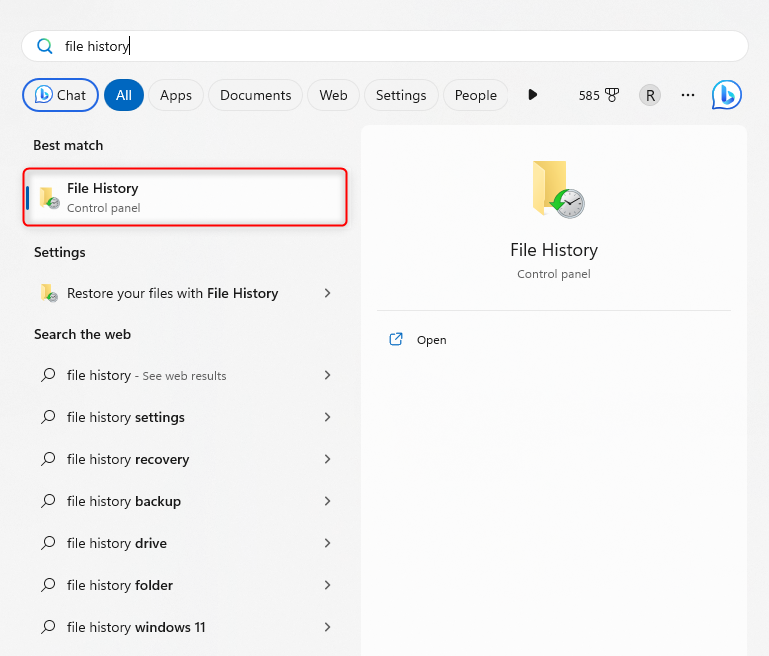
Another method similar to the previous one involves using a built-in Windows feature called File History. However, the method only works if you’ve manually enabled File History on your computer. The feature isn’t enabled by default.
If File History is enabled on your computer:
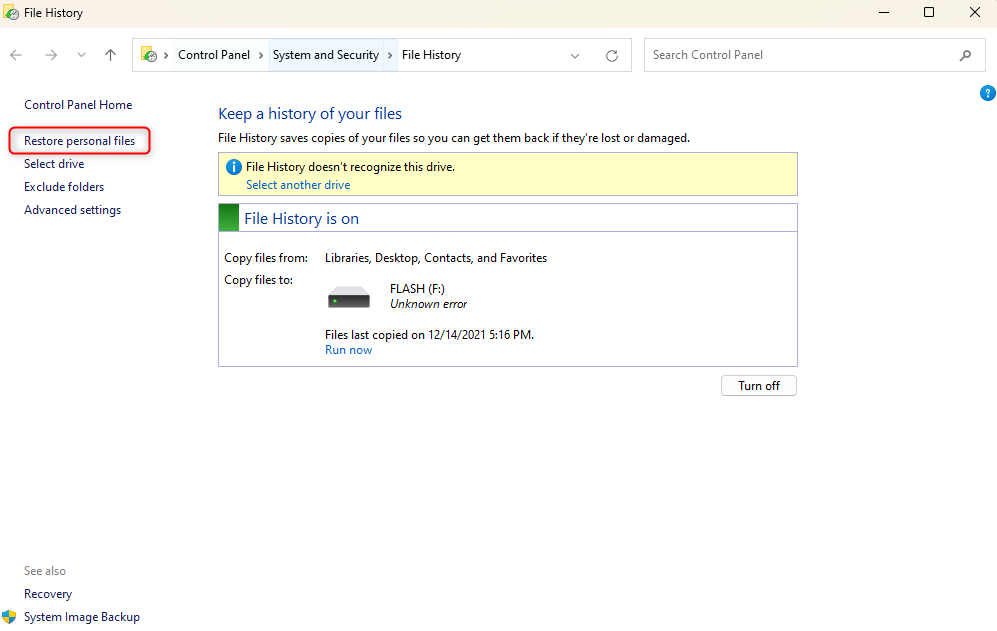
- Search for File History in the Start Menu and select the Best match.
- Select Restore personal files from the left sidebar.
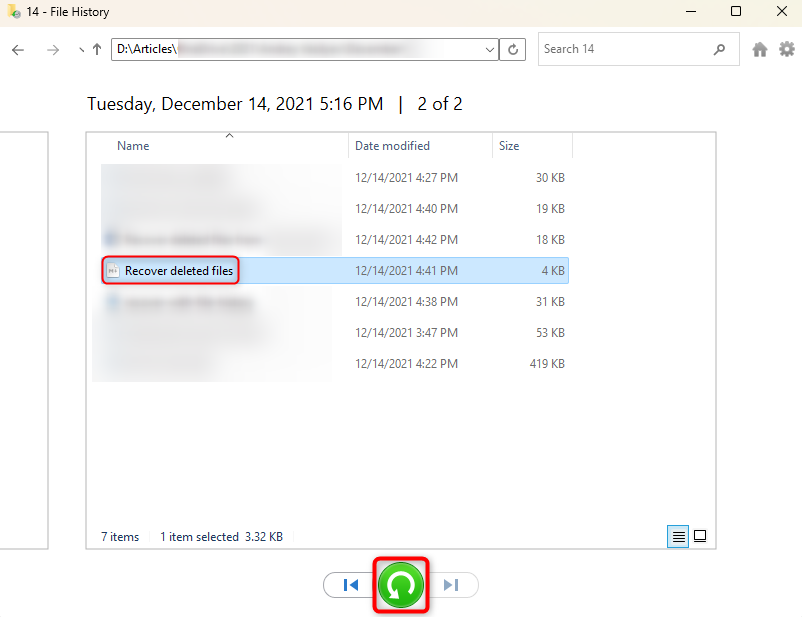
- Navigate to the location where the WordPad file you want to restore is saved.
- Select the file and click the green button at the bottom to restore the file to its original location.
When you’re done, check the file’s location and you’ll see the WordPad file’s previous version there.
Method 3: Recover Unsaved WordPad File from the Temp Files
If you were modifying the WordPad document using Microsoft Word, the application might have saved it as a temporary file. You can use one of the two methods below to see if the WordPad file is in the temporary files on Windows.
Using the Run Command
This method works best if you recently modified your file. To view the temporary files:
- Press Win + R, type %TEMP%, and press Enter to open the TEMP folder.
- Right-click in the whitespace and select Sort > Date modified.
- Start searching for your file from the most recently modified files.
- When you find it, change the file extension to .asd or .odt and restore it.
Using the File Explorer
You can perform the previous method using File Explorer like so:
- Press Win + E and navigate to C:\Users\user\AppData\Local\Temp (assuming Windows is installed on drive C).
- Sort the files by the time of modification by right-clicking in the whitespace and selecting Sort > Date modified.
- Search for your file.
- Change the file extension to .asd or .odt and restore it.
Using the Start Menu
You can also try to search for your file using the Start Menu like so:
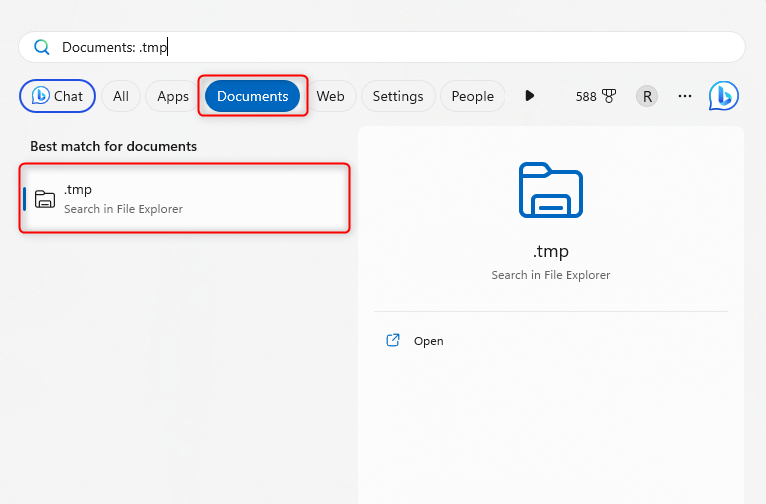
- Search for .tmp in the Start Menu.
- Select the Documents tab at the top.
- Click on the .tmp folder.
- Sort the files in this folder by date modified by right-clicking in the whitespace and selecting Sort > Date modified.
- Search for your file and restore it.


