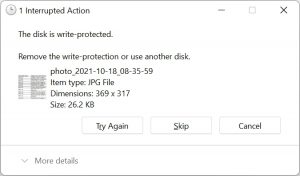
 When you are trying to copy your files or media from your SD card, are you getting an error message that says your SD card is write-protected?
Don’t worry! We are going to help you remove the write protection on your Micro SD card using your Windows PC or Macbook.
Table of Contents
What Is Write Protection on a Micro SD Card?
The write protection feature on your Micro SD card allows you to protect your files from being replaced or deleted. When the Micro SD card is write-protected, you can view the data but you cannot copy or move the data from the SD card to your computer.
So, in simple terms, when the Micro SD card is write-protected, you can read the SD card data, but the write operation is suspended. So how do we get rid of the write protection on your Micro SD card, and why did it happen in the first place?
Before we take off the write protection of your Micro SD card and discuss why it was activated, we should recover the files first.
How to Recover Data from a Write Protected SD Card
Your Micro SD card could have turned on write protection for various reasons. It could be due to a virus attack, your PC is failing to read the SD card, your SD could be damaged, and many other reasons that led your SD card to automatically enable the write-protect feature to protect your files from being lost forever. Therefore, we would recommend you recover and create a copy of your data before you remove write protection from your Micro SD card.
This tutorial is applicable for both Windows and Mac OS, although there are a few feature differences between the two platforms. You can recover up to 500 MB of data for Windows in its free trial. On the other hand, the Mac OS Disk Drill version can scan memory cards directly from your phone.
Recovering the data is pretty easy and simple with the Disk Drill SD card recovery tool. It is extremely user-friendly and helps you recover all your data seamlessly. We will help you with a step-by-step process to recover your SD card data.
- Download the Disk Drill for your Windows and install using administrator credentials. Once you have installed the software, you will be able to restore 500 MB of data using the trial version.
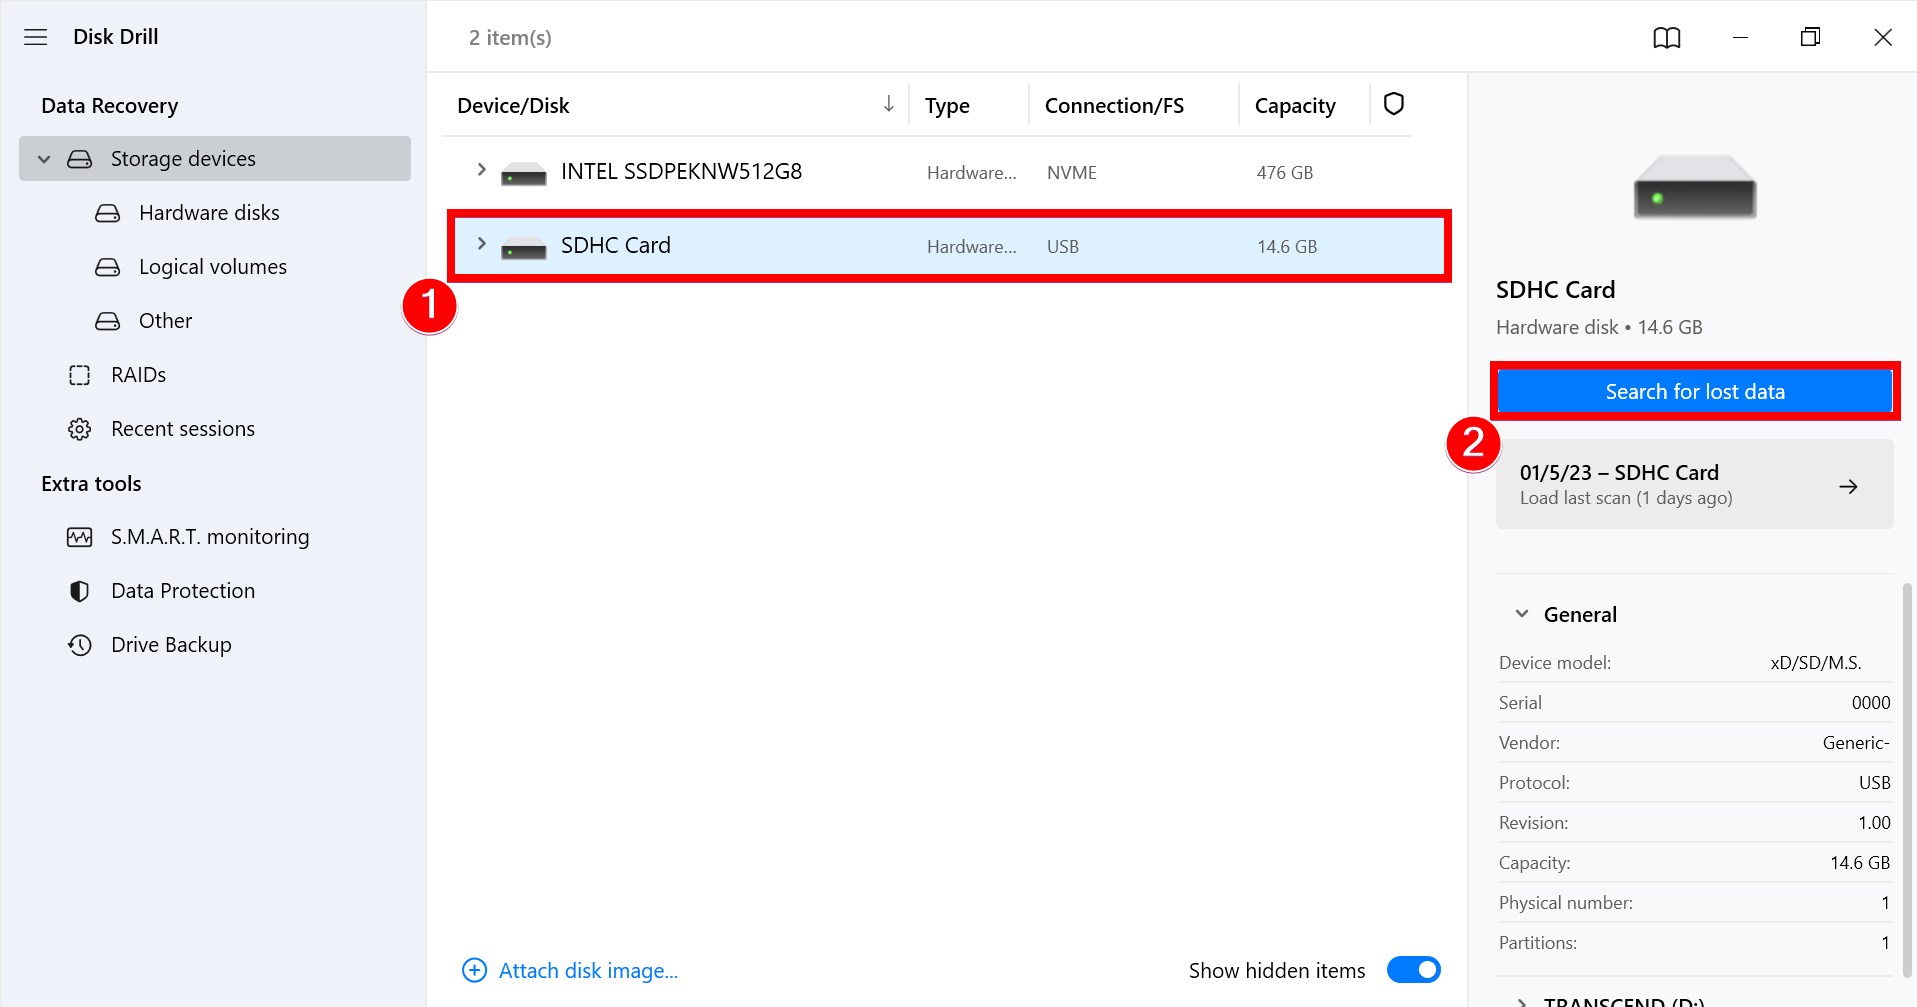
- Select the Micro SD card you wish to restore data from. Click on “Search for lost data” to continue.
- Now, Disk Drill will start to locate files and will also split them into multiple categories such as photo, video, audio, and document. You can also pause in-between the search to recover a particular file or wait until the full search has been completed to recover everything.
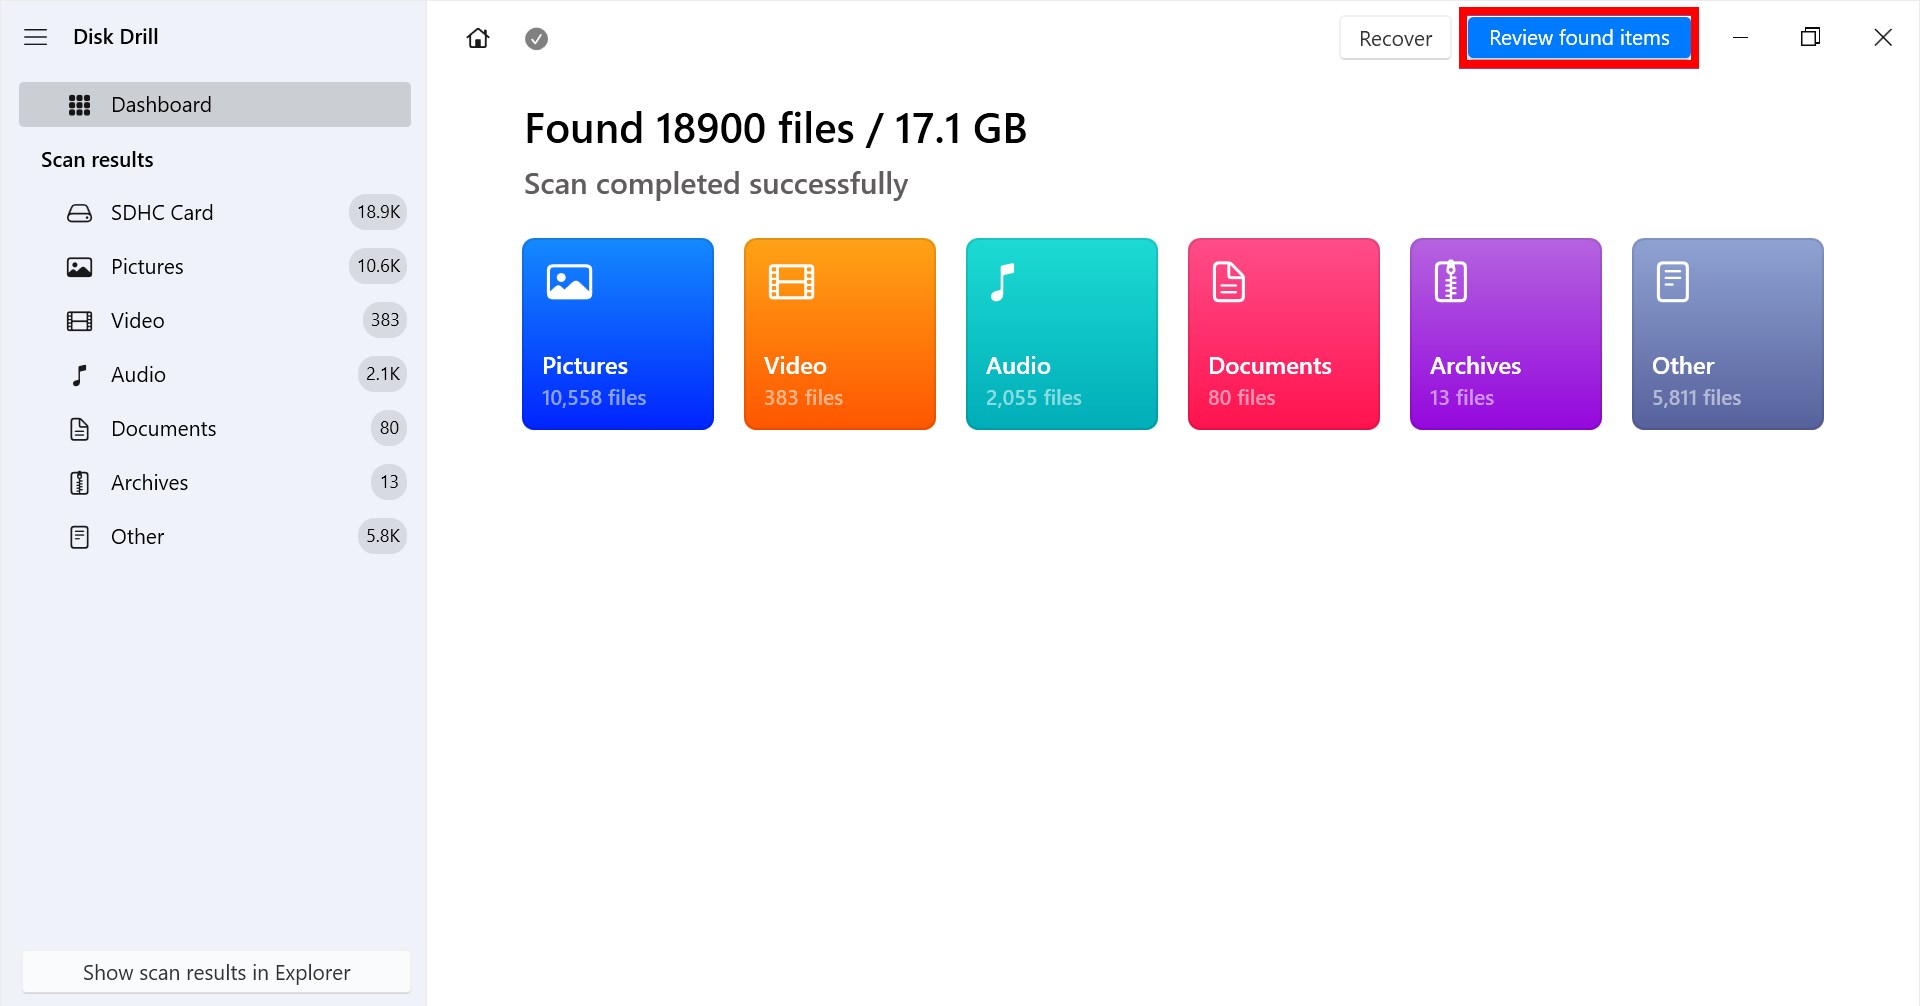
- Once the scan is completed, you can either select the important files and click on “Recover,” or if you are trying to recover everything, click on the “Recover all” prompt.
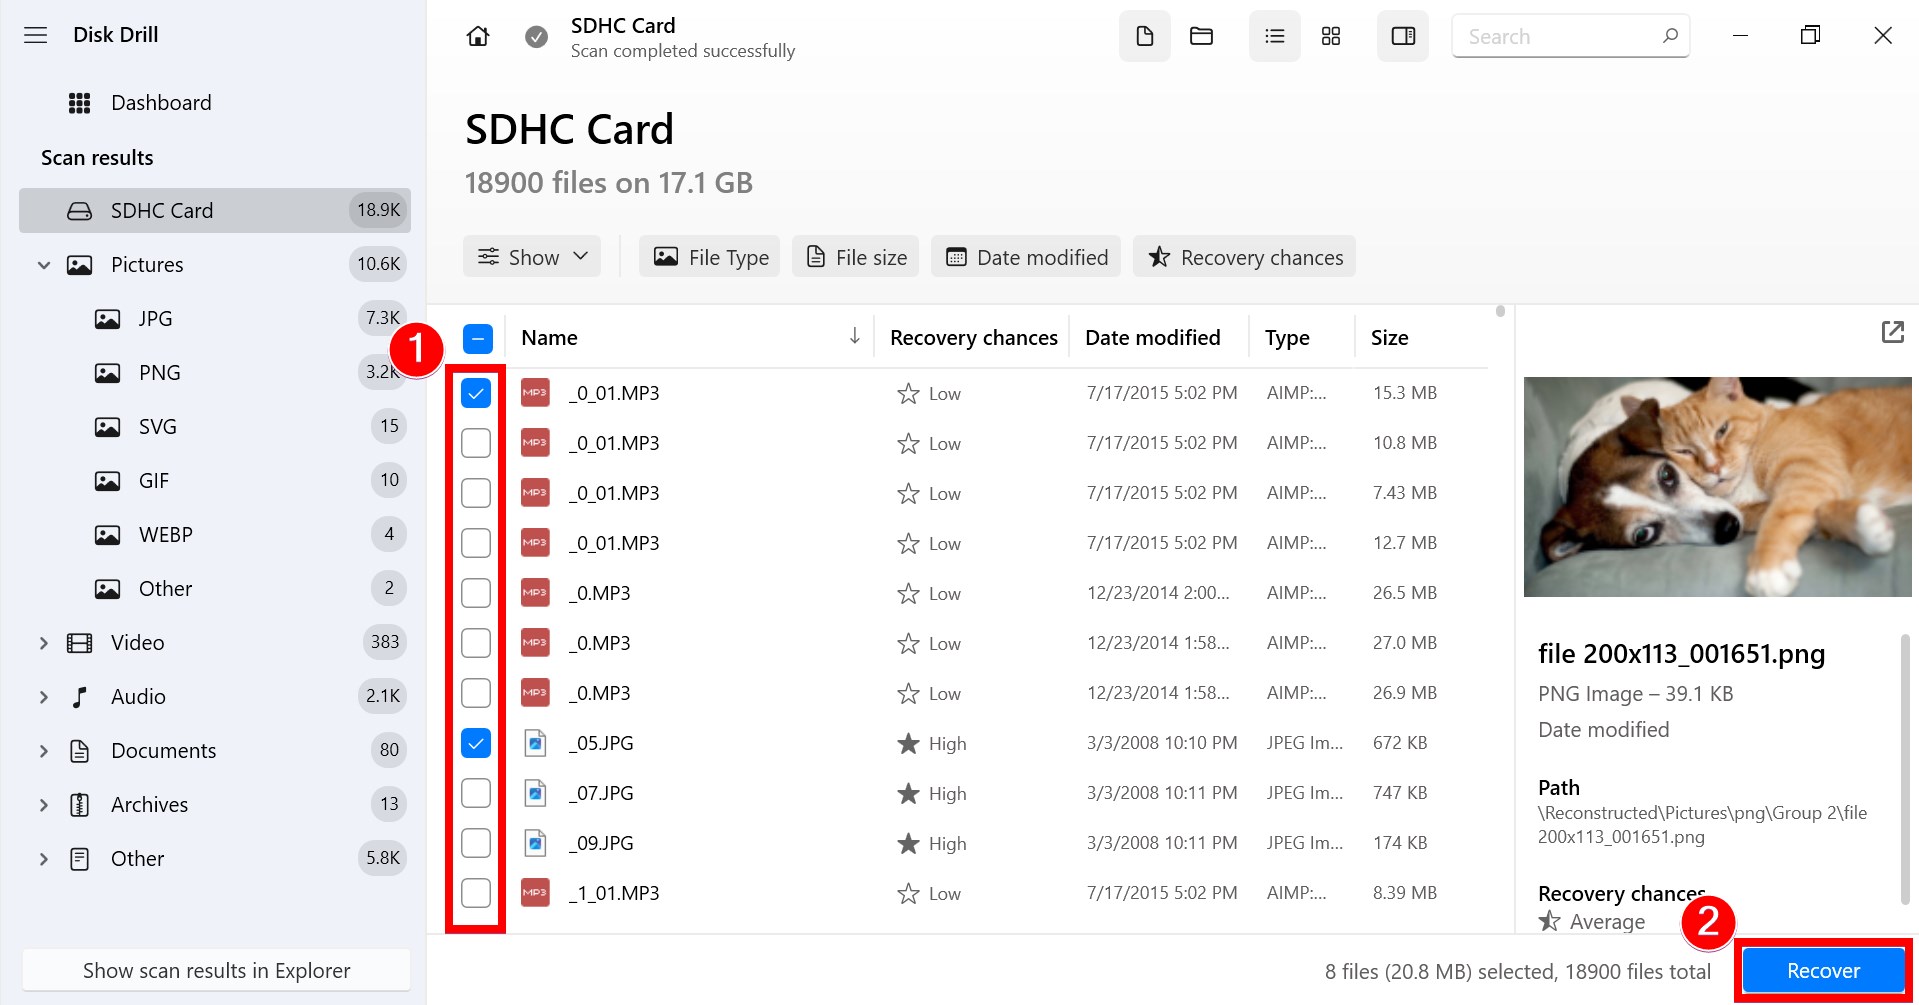
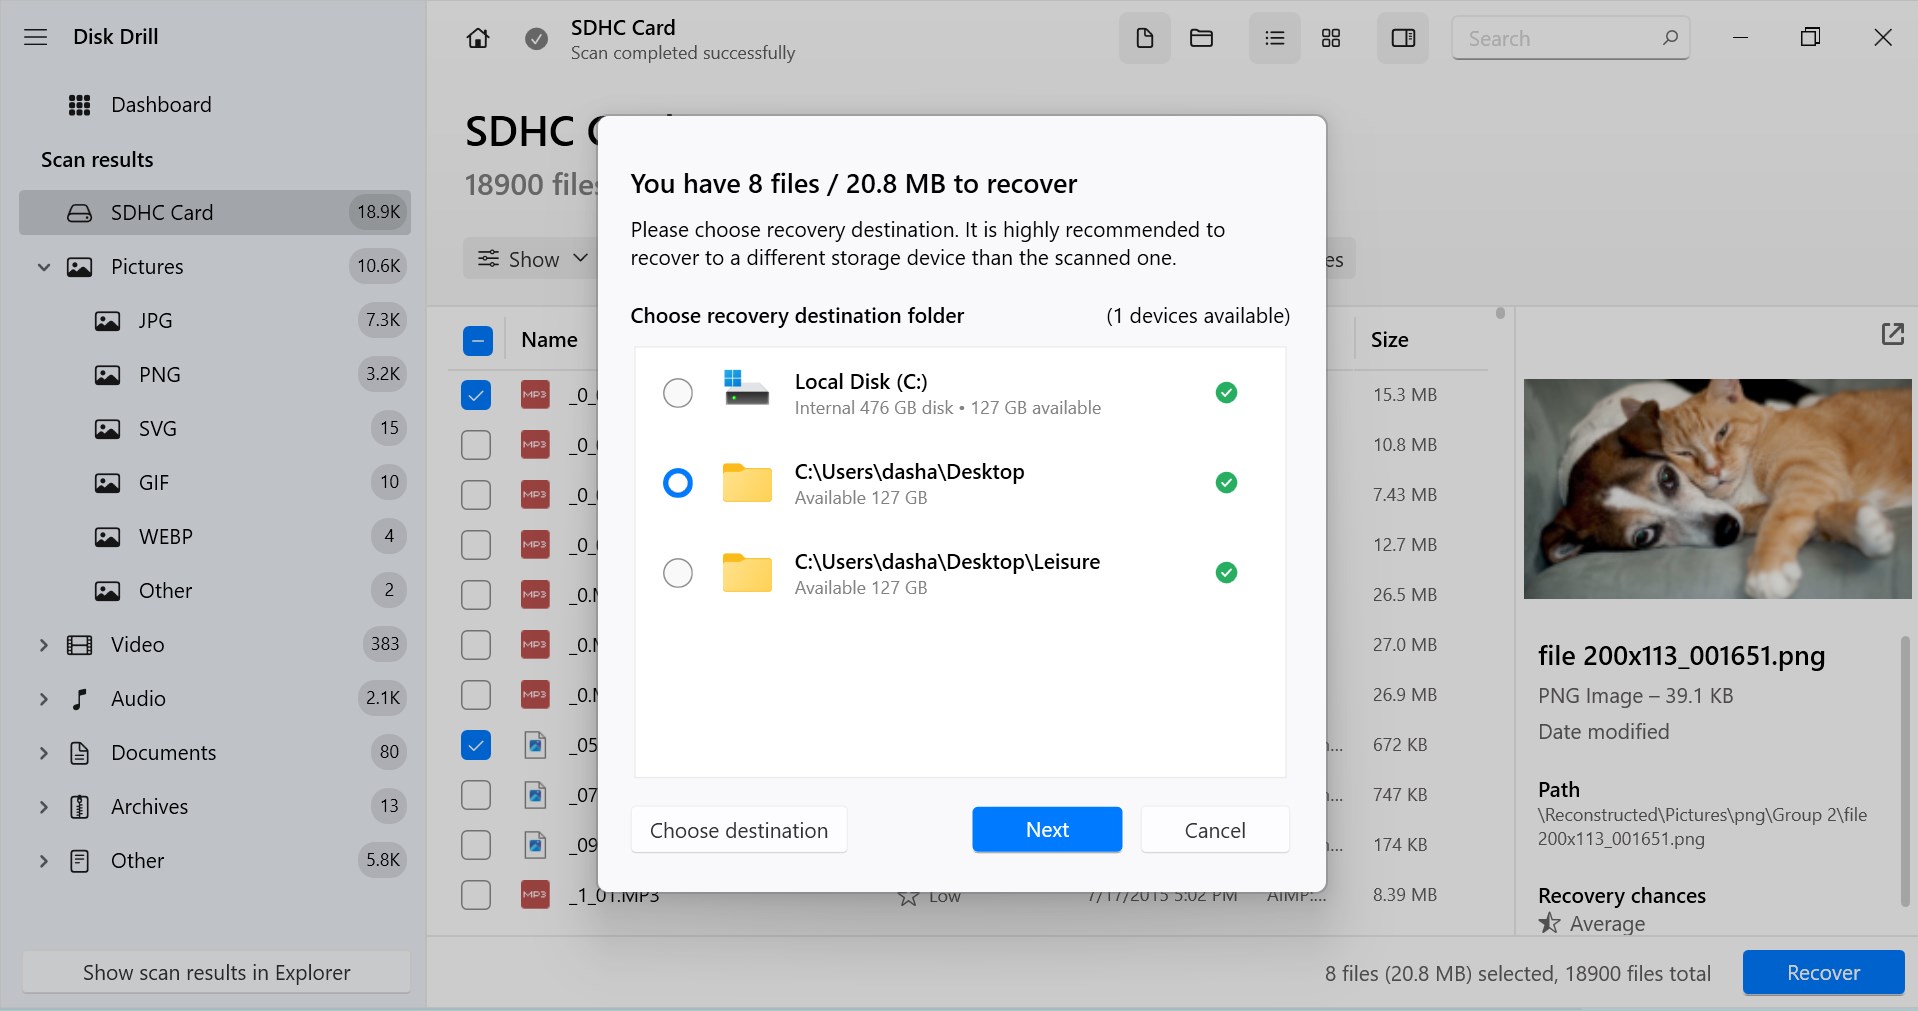
- After you have selected Recover, you will be prompted to select a location you want to save the data. Save the data on any of your Local Disk, but avoid saving the files again on your Micro SD card, as you can corrupt the data and lose it forever.
How to Remove the Write Protection on a Micro SD Card on Windows
So now that we have recovered your files, how do we remove write protection from the Micro SD card? In this section, we’ll explain how you can do this on Windows using built-in functionalities and utilities such as DiskPart and the Registry Editor.
Method 1: Check the Lock Switch
Some SD card manufacturers have a manual write-protection switch on their Micro SD cards. The first thing you have to do when you get a write error on your PC is to remove the SD card from the external/internal card reader and check if the lock switch is turned on, disabling the write feature.
If it isn’t, push it down to turn off the Micro SD card write protection feature and connect it to your PC to confirm if you can copy/move files to your SD card. If this still hasn’t fixed the issue, you could try other solutions, such as.
Method 2: Use Diskpart Program
Using the Diskpart program, you should remove the write protection of your Micro SD card. You could do that by using the command prompt on your Windows PC.
- Connect your Micro SD card to your computer.
- Click on the Start button ⊞ and search for the command prompt. Or you could also open the command prompt by pressing the Win+R key and typing “cmd” in the Run box. Once done, click on “Ok” to open the command prompt.

- In the command prompt window type
diskpartand hit the Enter key.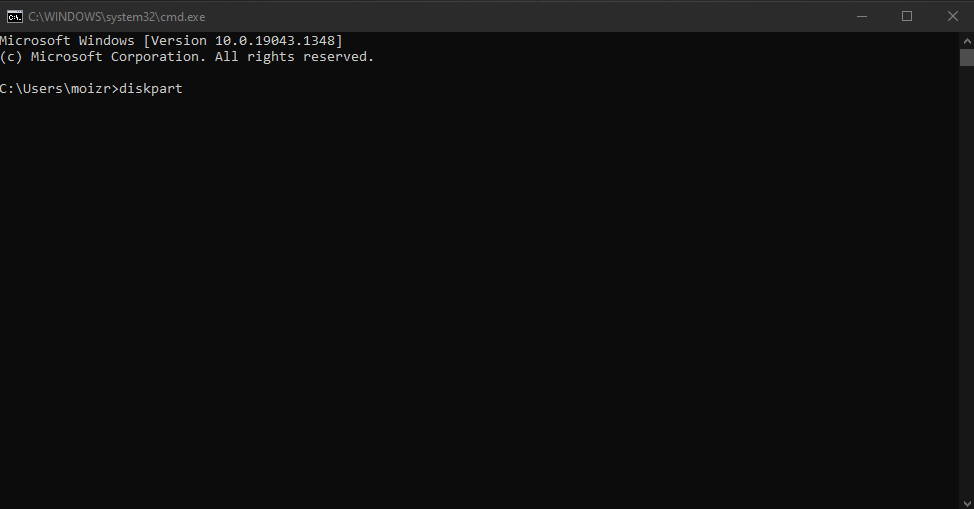
- Now, type the following commands and press the Enter key after each line to remove the write protection from the Micro SD card.
list diskselect disk #(In the place of # write the number of your write-protected SD card that the command prompt shows. Most of the time it is, “disk 1”. )attributes disk clear readonly
- Wait for the process to complete and then type
exitand close your command prompt. This should remove write protection from the Micro SD card.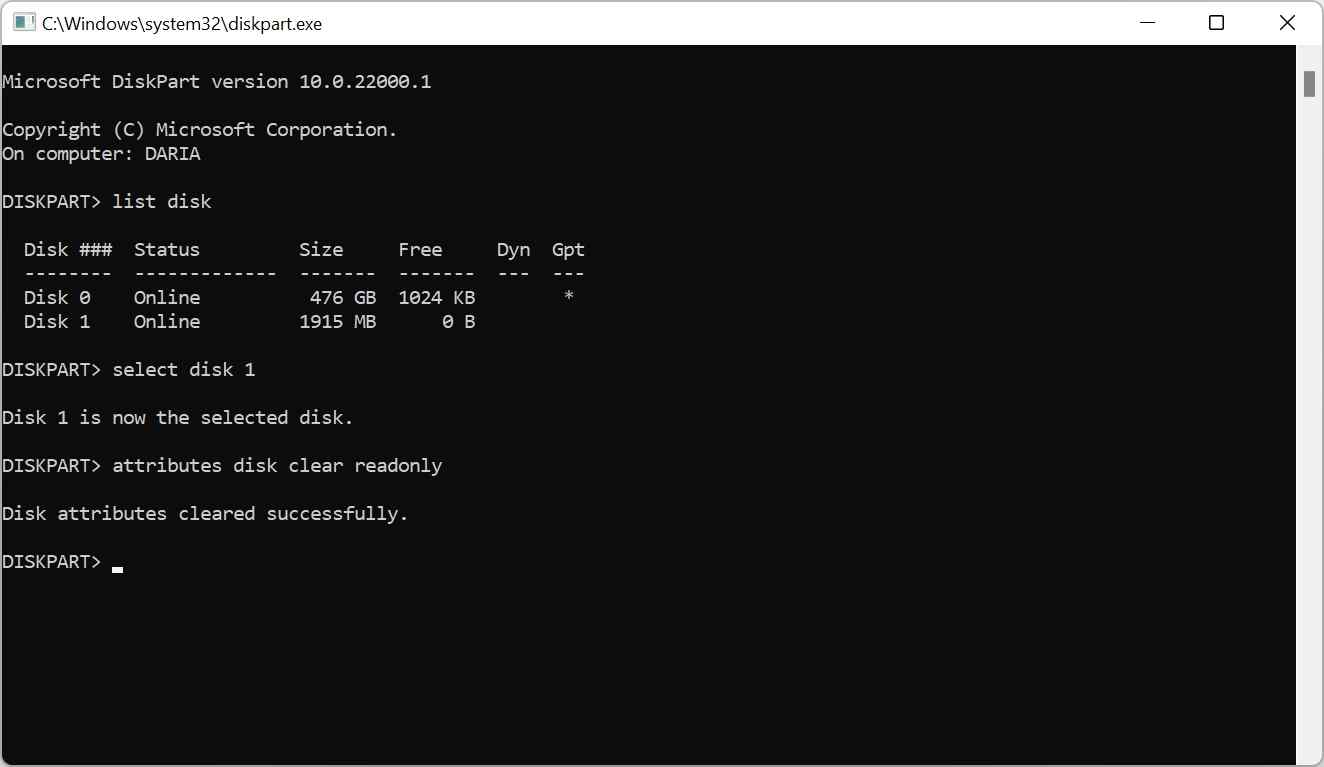
And if this still didn’t turn off write protection on your Micro SD card, we have more tricks up our sleeves, and these should get you rid of the write protection on your Micro SD card once and for all.
Method 3: Edit Registry
Woah! Hang on! This isn’t a scary task, it’s pretty simple and easy if you follow the steps, plus you get to show some computer wizardry to your peers and brag about your computer skills.
Before we move ahead, make a backup of your registry, so that, if you accidentally make a mistake, you could use the backup to bring everything back to the original state.
- Connect your SD card to your computer.
- Open the Run window by pressing Win+R and type “regedit” and click on “ok” to open the registry editor
- Now copy-paste the following on the top bar and select StorageDevicePolicies folder.
HKEY_LOCAL_MACHINE\SYSTEM\CurrentControlSet\Control
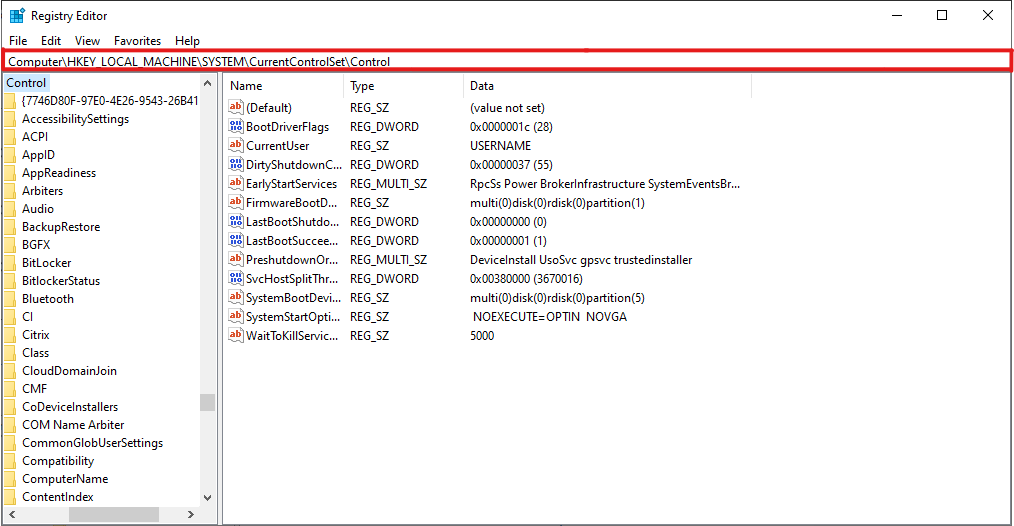
- If you don’t find the folder, you can right-click on the “control” folder, click New ➝ Key, and name it as StorageDevicePolicies.
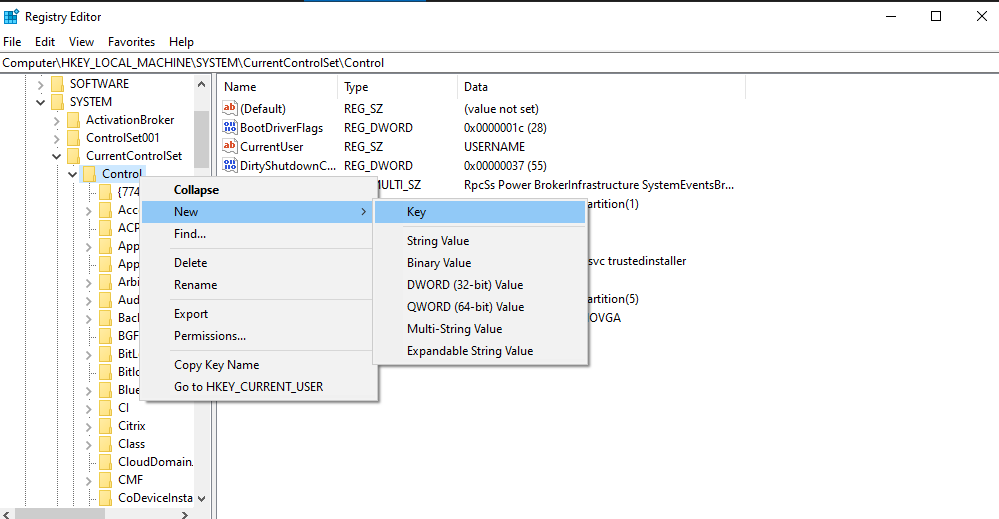
- Right-click on StorageDevicePolicies folder “New” ➝ DWORD (32-bit) and name it as “WriteProtect“.
![Creating a Dword [32-bit] to name is as WriteProtect](https://7datarecovery.com/blog/wp-content/uploads/2021/11/StorageDevicePolicies-new-D-Word-32bit.png)
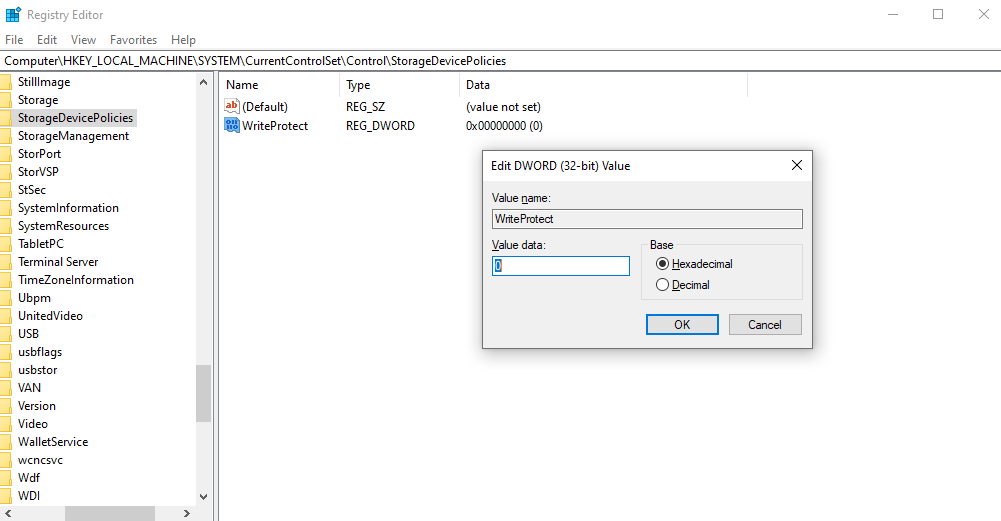
- Double-click on “WriteProtect” and change the value to 0 and click on “ok”.
- Close the Registry Editor and restart your computer to complete the process.
Method 4: Format SD card using Diskpart
If you’re still encountering write protection problems with your Micro SD card after the previous methods, you might have to resort to formatting your card. There are many ways to do this, and we’re going to focus on using DiskPart for this tutorial. Here’s what you can do:
- Run Command Prompt as Administrator by pressing the Windows key and searching for “Command Prompt” on the Start menu. Click the option “Run as administrator”.
- Type
diskpartin the Command Prompt window and press Enter to open the DiskPart utility.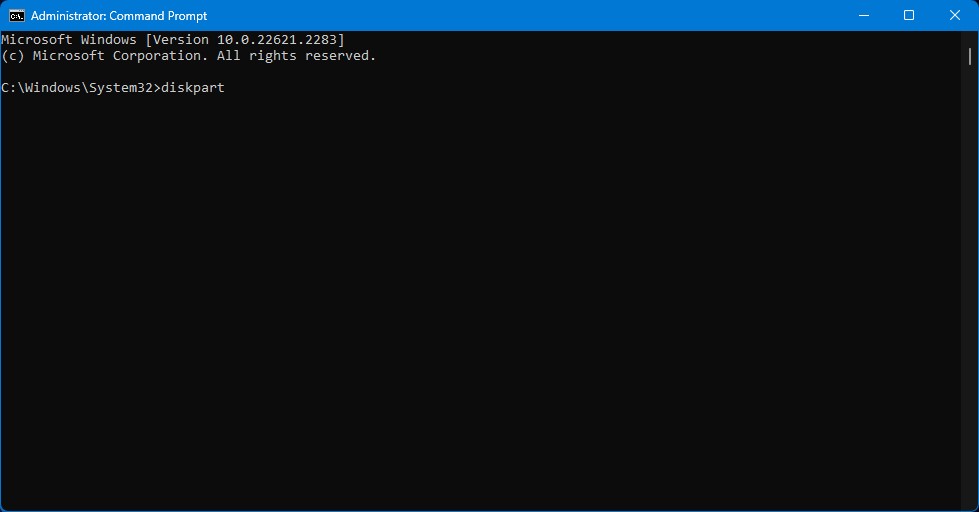
- Type
list diskand press Enter to display all available storage devices on your computer. Take note of your disk number.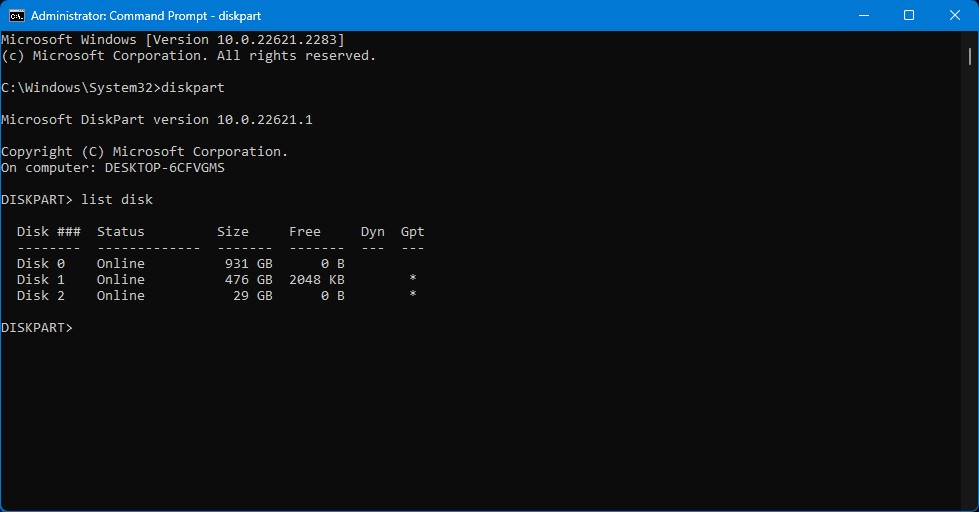
- Type
select disk n, replacing n with the disk number of your Micro SD card. Then, press Enter.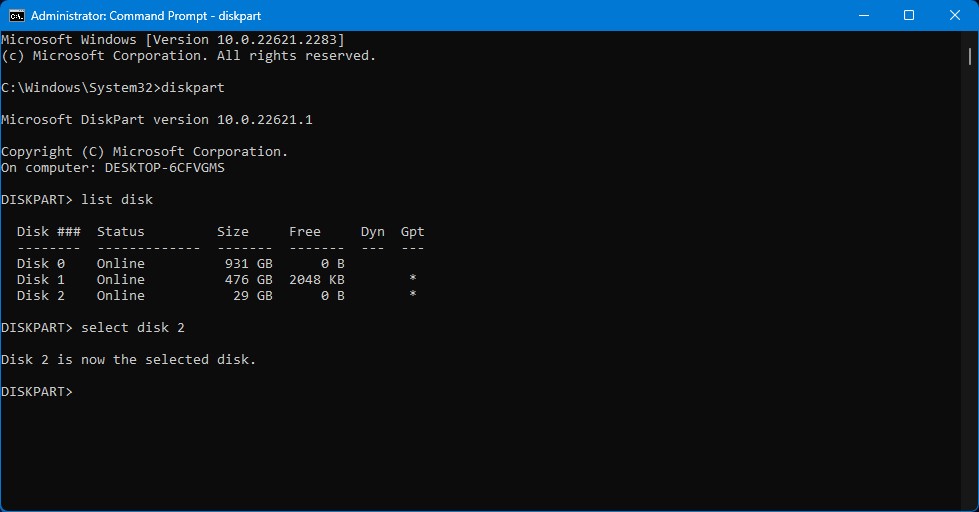
- Type
cleanand Press Enter to remove all partitions on your card.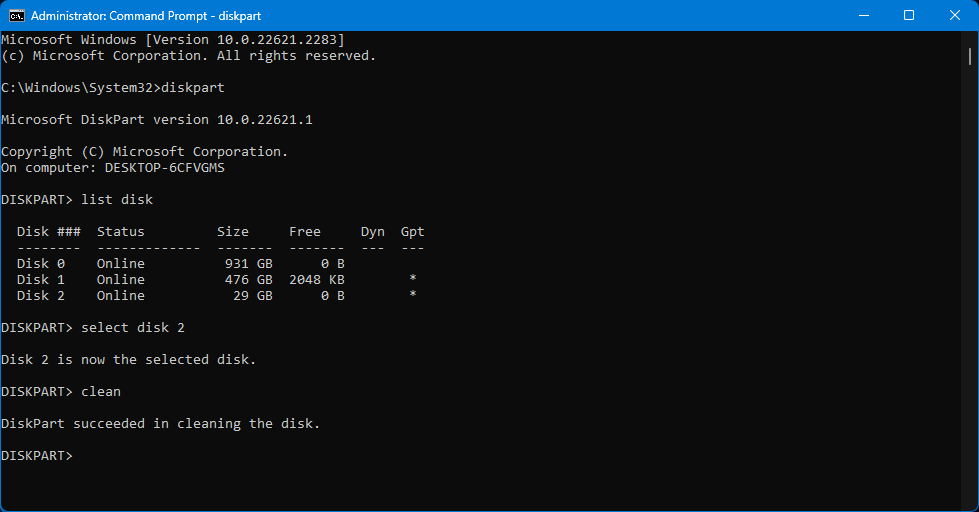
- Type
create partition primaryand press Enter to create a new primary partition.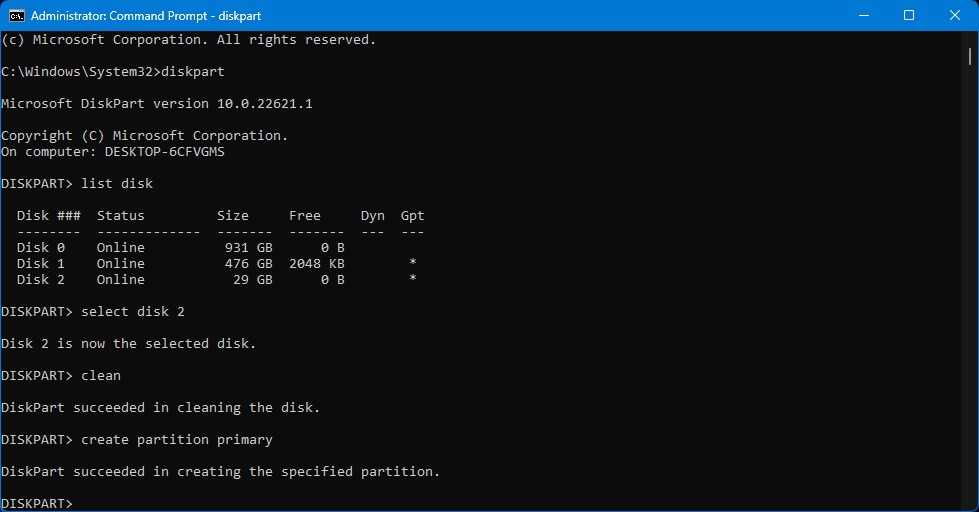
- Type
format fs=x, replacing x with the file system you prefer (e.g.,format fs=fat32). Then, press Enter.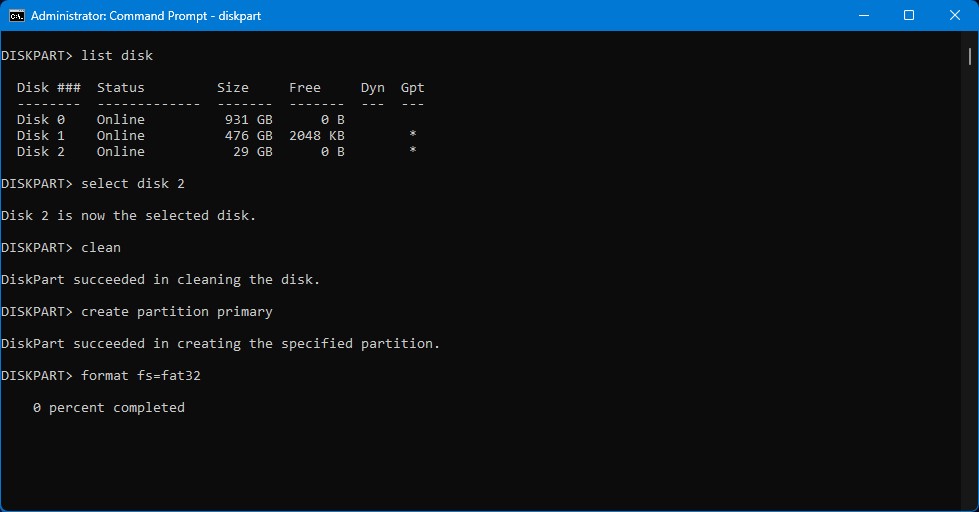
- Type
assign letter=N, replacing N with the drive letter you prefer. After that, press Enter.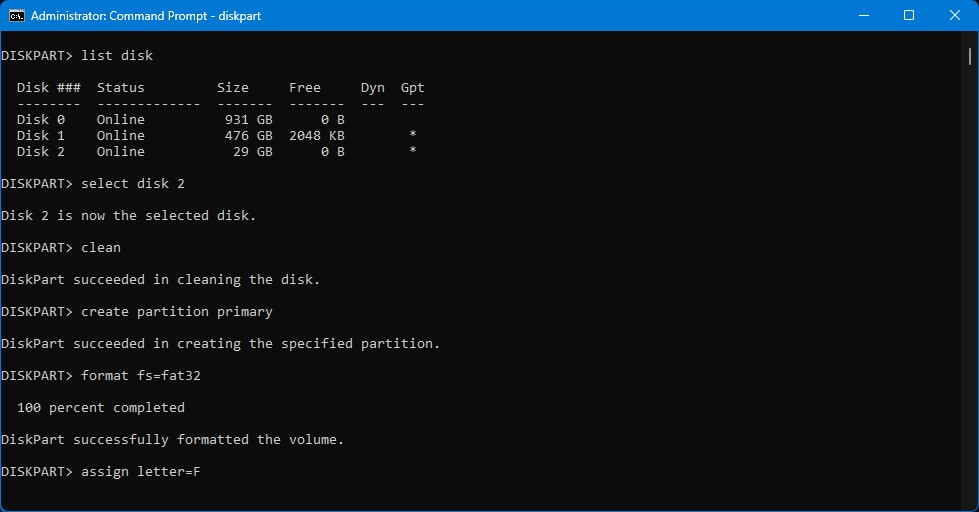
- Your Micro SD card should no longer be write-protected. Type
exitand press Enter to exit DiskPart.
How to Remove Write Protection from Micro SD Card on Mac
Team Apple? No worries! We also have ways to remove write protection from your Micro SD card for Mac users, all within the Mac system settings and built-in tools. Let’s explore each of them in this section.
Method 1: Change Permissions
Like in Windows, Mac provides a way to potentially remove the write protection from your Micro SD card by changing permissions. Simply follow these easy steps to do so:
- Connect your Micro SD card to your Mac using its card reader slot or an external card reader.
- Open Finder to locate your Micro SD card.

- On the left pane of Finder, right-click on your card and select “Get info”. Alternatively, pressing Command + I accomplishes the same task.
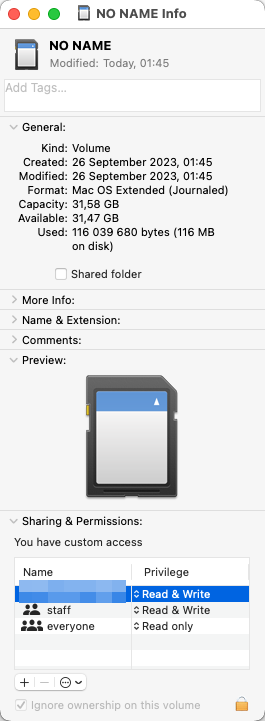
- Go to the “Sharing & Permissions” section and click on the Lock icon. Enter your Mac admin’s credentials when prompted to unlock the settings.
- Under the Privilege column, change the option to “Read & Write” for the user everyone.
Method 2: Run First Aid
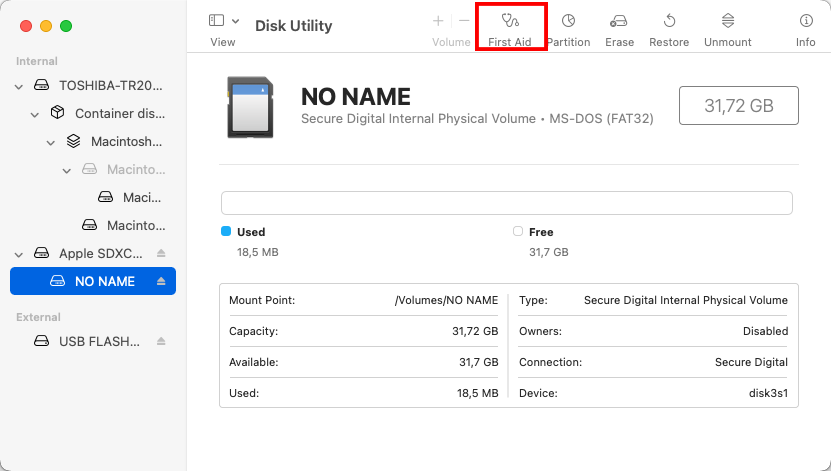
MacOS has a built-in utility, Disk Utility, which is similar to Disk Management on Windows. Within Disk Utility, there is the “First Aid” feature, which repairs disk errors that can remove write protection from your Micro SD card. Let’s dive into how to run this utility:
- Open Disk Utility by going to Applications > Utilities > Disk Utility.
- Select your Micro SD card under the External devices on the left pane. Then, locate the “First Aid” feature among the options at the top.
- Follow the instructions to run First Aid.
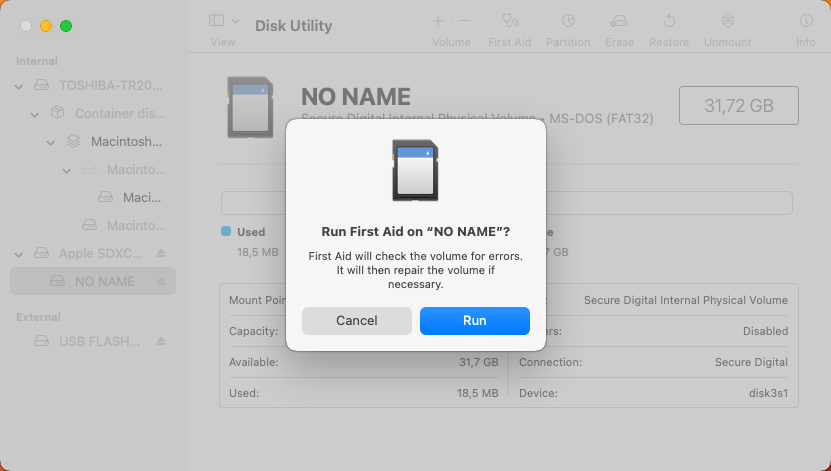
This enables Disk Utility to find and repair disk errors, including write protection issues. Once the process finishes, you can verify if your card is accessible now.
Method 3: Format The Card
Formatting your Micro SD card effectively solves the write protection issue you’re experiencing, especially if your card is formatted to an unsupported format on Mac, making it read-only (e.g., NTFS format). Format your Micro SD card with these instructions:
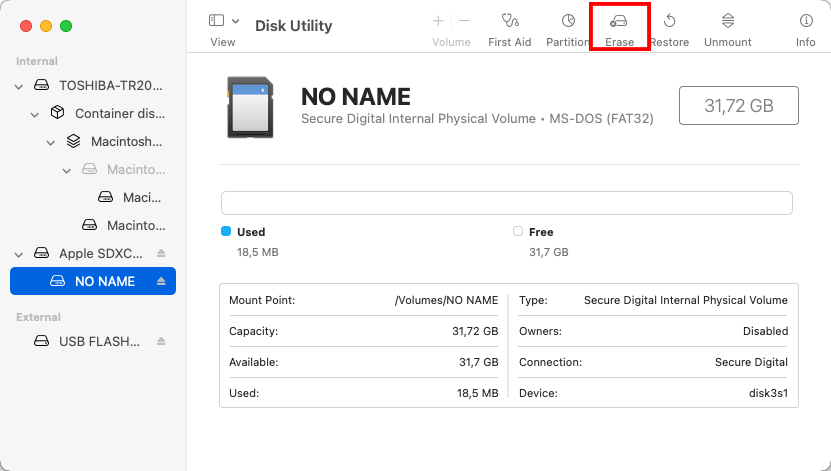
- Open Disk Utility by going to Applications > Utilities > Disk Utility.
- Under the External devices available on the left pane, select your card. Then, select “Erase”.
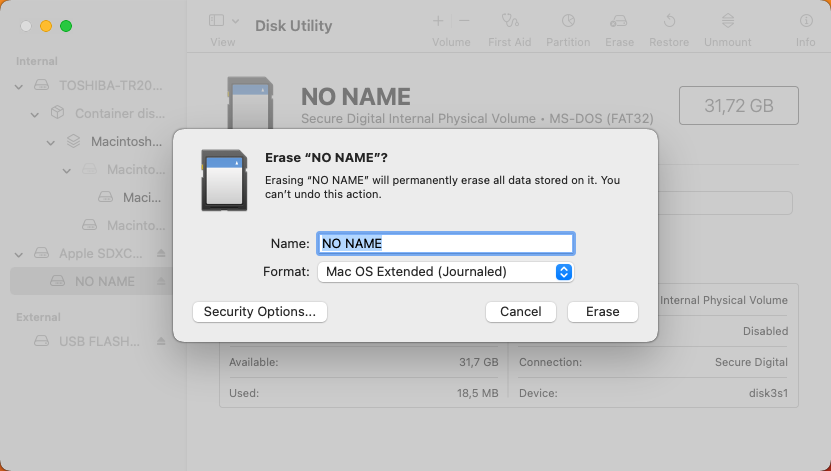
- Enter your preferred SD card name and the appropriate file system for your Micro SD card. Now, click the “Erase” button to confirm.
After formatting your card, all the information and data in the drive get deleted, including any write protection attributes that may be in place.
Conclusion
Whether you’re using Windows or Mac, this comprehensive guide has the first aid methods you need to easily remove write protection on your Micro SD Card by yourself.
Just remember to back up your files before changing any system preferences or formatting your device to prevent potential data loss. If necessary, you can rely on data recovery tools like Disk Drill to recover important files from your Micro SD card.
Using our easy instructions, you should be able to write data into your Micro SD card again in no time.


