
Just like any other SD card, your Sony SD card is subject to wear and tear, physical damage, and logical issues. These problems can occur regardless of which device you use the card on—cameras, computers, or gaming consoles.
In this guide, we’ll explain how you can recover data from a card that requires fixing, and how to fix it.
Table of Contents
Where Can I Use My Sony SD Card?
Sony SD (Secure Digital) cards can be used to store data on various devices. Following are devices you can use them with:
| Application | Description |
| 📹 Cameras | Sony SD cards are most commonly used on cameras. If you use cameras like A7Siii that support UHS-II cards, you can invest in a card like Sony’s SF-G series, which is the world’s toughest SD card. It’s far less likely to be rendered unusable because of physical damage than a typical SD card. They’re also expensive, though. |
| 🌐 Smart devices and IoT devices like security cameras | Most IoT devices like security cameras typically use microSD cards, so be sure to check which type of SD card your device supports. |
| 🎮 Gaming consoles | Consoles like Nintendo Switch have a slot of microSD cards, but if you want to use the card on bigger consoles like PS5, you’ll need to use an adapter. |
| 📺 Set-top boxes | Devices like Android TV box can read and write on SD cards, which means you can store media or use it as internal storage. |
| 💿 Blu-ray players | If you want to use an SD card on a Blu-ray player, check for the file systems it supports beforehand. |
| 📱 Mobile phones | For mobile phones, you need a Micro SD card, which is a smaller version of the SD card. Micro SD cards are also required for other devices where physical estate is limited, and inserting a full-sized SD card may not be viable. |
Regardless of the purpose you use your Sony SD card for, it could undergo some issues down the line.
If you’ve got some important data on the SD card, you should recover it before you fix the SD card so you don’t end up losing the data if something doesn’t go as planned. Let’s talk about how you can recover data from an SD card you can’t access in the following sections.
How to Recover Data From Sony SD Cards
You can try to recover data on Sony memory cards by using Sony’s data recovery app or third-party data recovery software. However, using your storage device after losing data can prevent you from successfully getting your files back.
If you can, avoid using your card after data loss and perform data recovery immediately. This helps prevent file overwriting and further data loss.
Sony Memory Card File Rescue
Sony has its own software for recovering files deleted from your Sony SD card. It’s free to use, but you’ll need to provide your Sony SD card model and serial number to be able to download it. Here’s how you can use Memory Card File Rescue:
- Go to the Download page.
- Select Next button from the bottom of the Download page.
- You’ll be asked for the Model name and the identification number or the download code.

- Click on the Download button for either Windows or Mac. Once the file downloads, launch it and finish the installation by following the on-screen instructions.
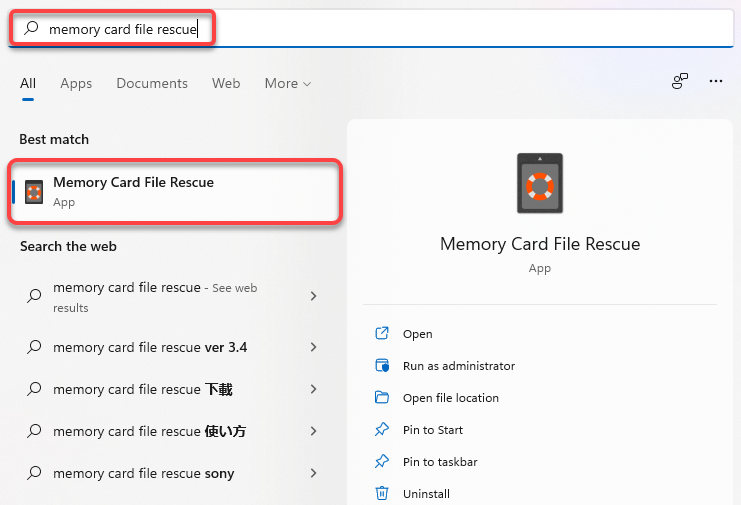
- Launch the tool by searching for memory card file rescue in the Start Menu and selecting the Best match.
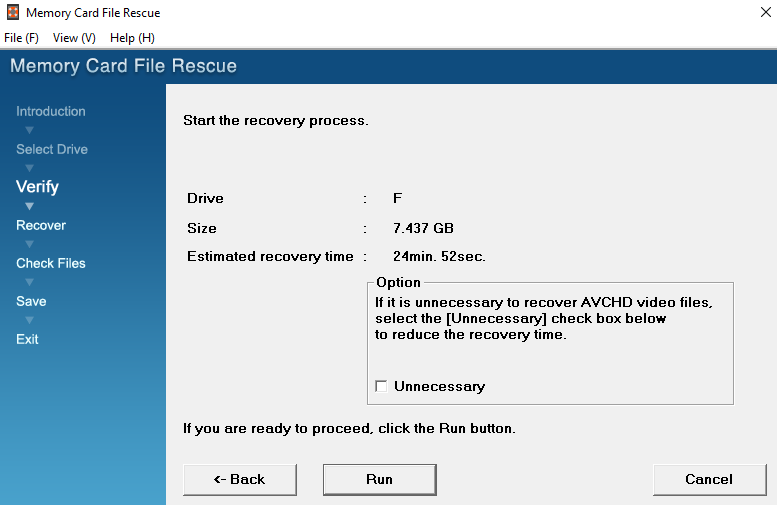
- Select Next on the app’s home screen. On the next screen, select the device you want to recover files from, and click Next again. On the following screen, you’ll see the Estimated recovery time. Click Run to start the process.
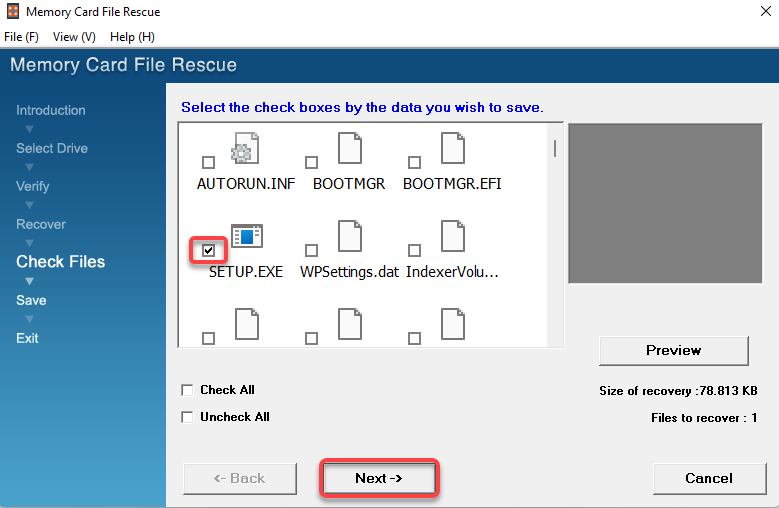
- Once the scan completes, you’ll see a list of files that Sony’s recovery software can recover from your SD card. Select the ones you want to recover and click Next.
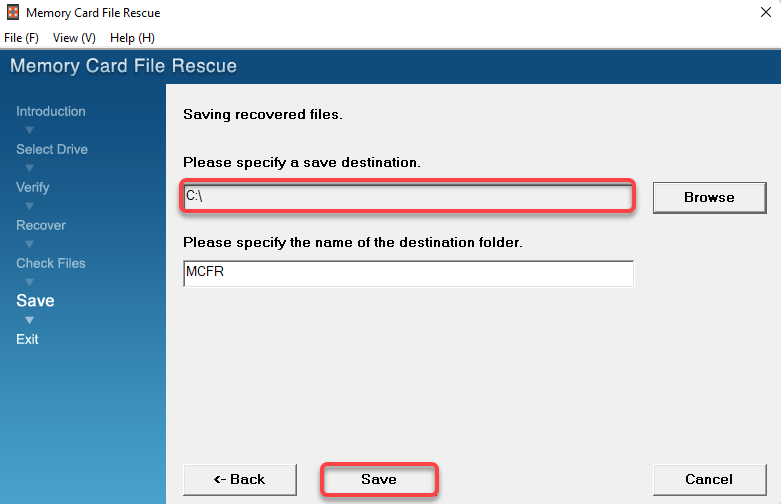
- Select a destination where you want to recover the files and select Save.
Sony’s SD card recovery software is rather limiting because of several reasons:
- You’ll need to enter the serial number for your SD card to be able to download the utility.
- Sony says the utility might not work very well for SD cards of other brands. While the utility estimated a total time of roughly 25 minutes, the scan took close to 20 minutes. That said, 20 minutes is still above average, especially if you intend to perform a quick scan.
- Speaking of quick scans, the Sony recovery software doesn’t offer an option for deep or thorough scans.
Disk Drill Data Recovery Software
Using Sony’s data recovery tool may be convenient, but it has limited features. On the other hand, Disk Drill supports scanning HFS+ file systems and various others such as FAT32, NTFS, exFAT, and more.
Unlike Sony’s data recovery tool, Disk Drill offers a preview of the image and video files it scans. Additionally, it allows you to save scan sessions, eliminating the need to scan the same storage device multiple times.
- Download Disk Drill, launch the setup file, and install it on your device. The free version allows recovering up to 500MB of data.
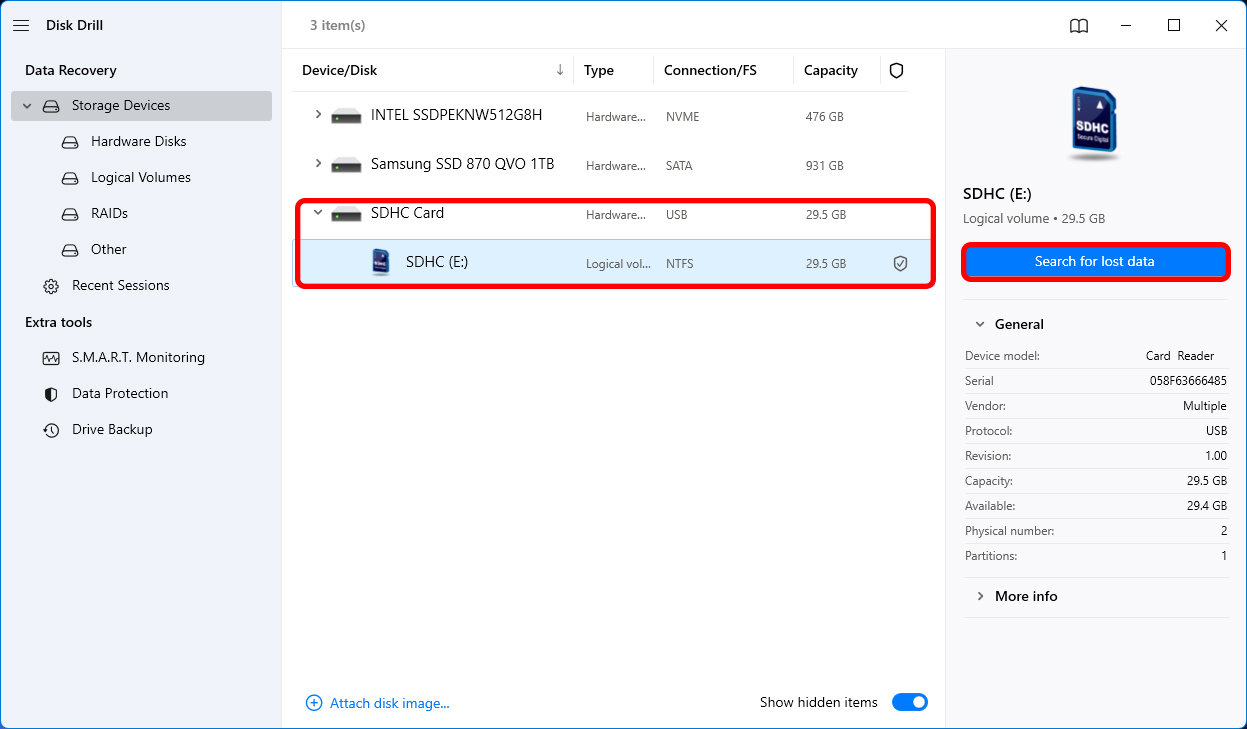
- Once you’ve launched Disk Drill, select the Sony SD card from the app’s main screen. Then, click on the Search for lost data button to start scanning the SD card.
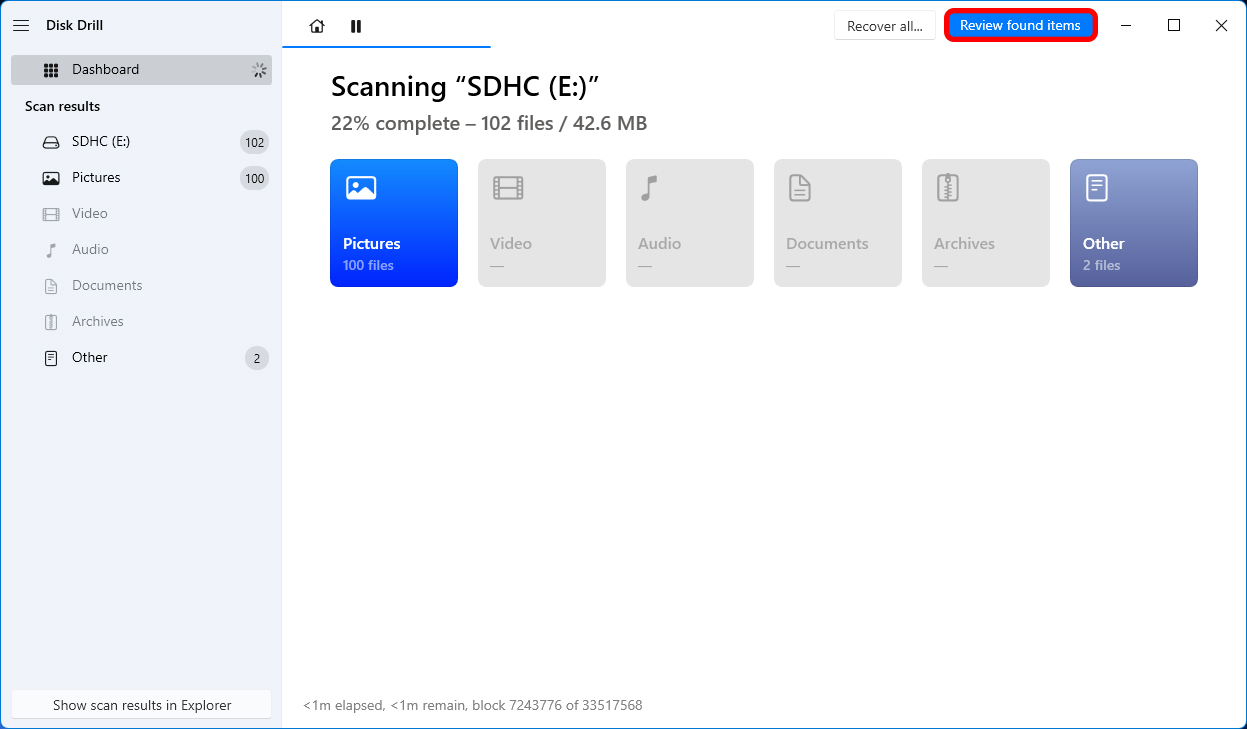
- Unlike Sony’s recovery software, you don’t need to wait until the scan completes to start previewing the files when using Disk Drill. While the scan runs, just select Review found items to view the files that the scan detects in real-time.
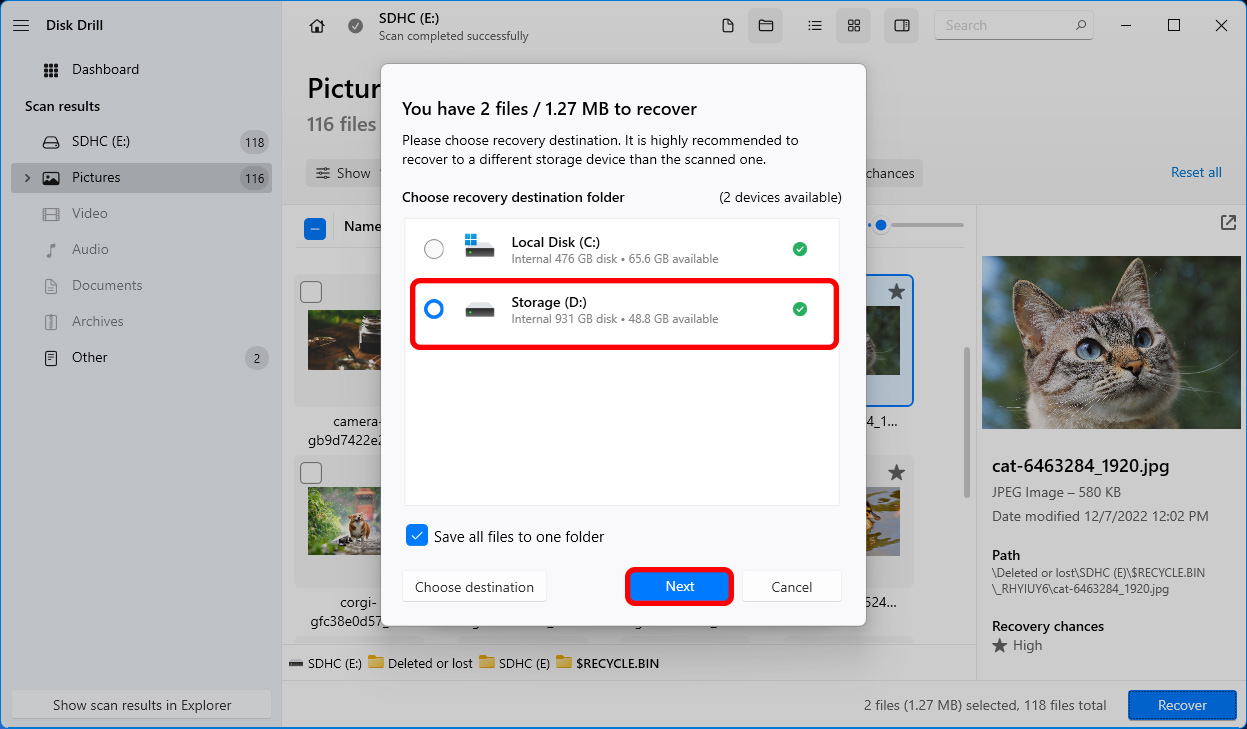
- When you find the files you’re looking for, you can simply select them and click the Recover button at the bottom.
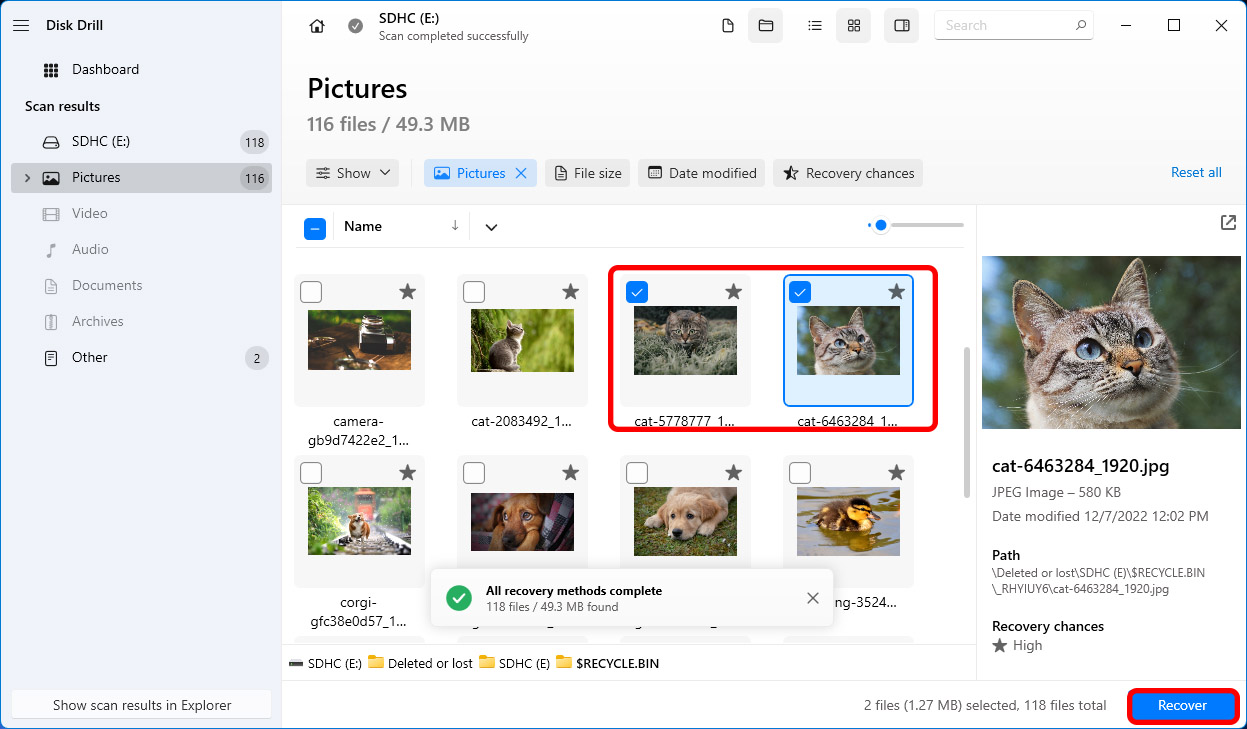
- You’ll see a small window pop up after clicking the Recover button. Select the recovery destination for your files, but be sure not to select a location on the SD card because that could result in overwriting of data. Once you’ve chosen a location, select OK.
How to Fix Problems With Sony SD Card
Once you’ve recovered data from your Sony SD card, you can start fixing it. There are a few ways to fix it based on the nature of the problem.
Method 1: Try Inserting it into Another Device
Sometimes, your laptop or PC’s card reader may be to blame. The easy fix is to try inserting the SD card into a different computer or device. If the SD card works, you know it’s the computer’s problem, not the card’s.
You should also check the SD card’s filesystem. If it’s formatted as HFS+, it won’t work on Windows and it will immediately ask you to format the SD card when you insert it. Try inserting the card into a Mac, and it should work fine. If you want to use the card on both Windows and Mac, format the SD card as exFAT or FAT32.
Method 2: CHKDSK Command
Your SD card might not work when it has bad sectors or filesystem errors. Fortunately, they’re fairly easy to fix in most cases with the built-in Windows utility called CHKDSK. CHKDSK (Check Disk) is a command-line utility that checks for bad sectors and filesystem errors, and fixes them automatically. Here’s how you can use it:
- Launch Command Prompt with Administrative Privileges by pressing Win + R, typing cmd, and pressing Ctrl + Shift + Enter.
- Type the following command and press Enter:
chkdsk /r /x
That’s it. The utility will find and fix issues automatically.
Method 3: Update the Drivers
If your SD card’s driver has become corrupt or outdated, your PC might not detect the SD card when you insert it. The fix is to simply update the drivers; here’s how you can do that:
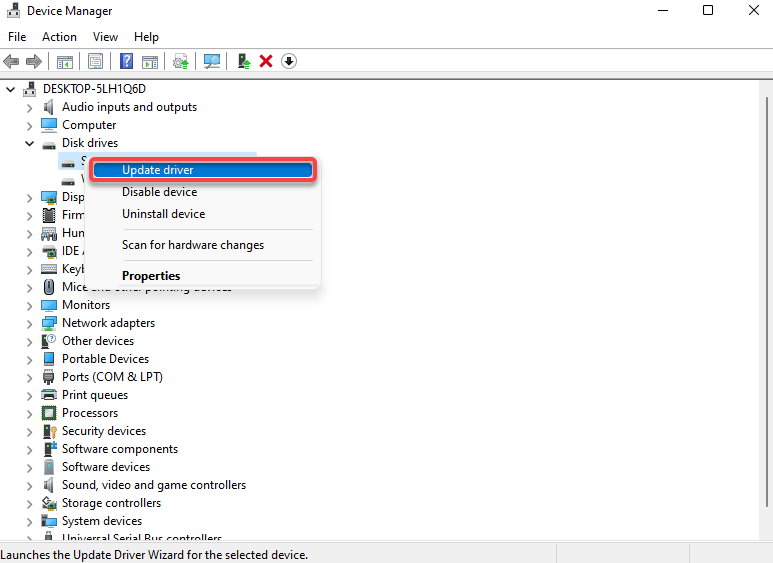
- Press Win + R, type devmgmt.msc, and press Enter. Doing this will launch Device Manager.
- Look for your SD card reader on the list. It will usually be either under Disk drives. Right-click on the driver and select Update driver.
- You’ll see an option to download drivers automatically or manually. Windows isn’t great at finding drivers automatically, but it’s still worth a shot. If it doesn’t work, just use the manual option by selecting Browse my computer for drivers.
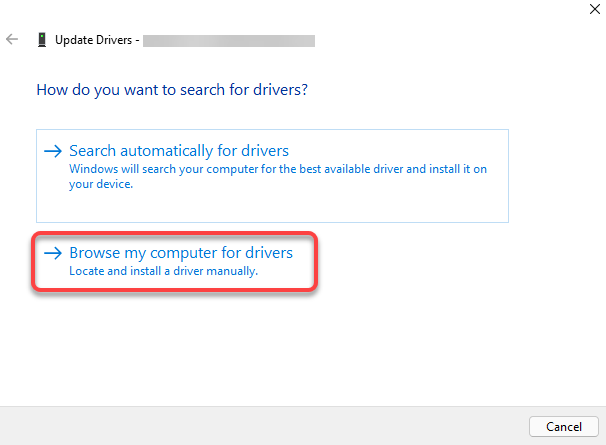
- After you choose the manual option, you’ll be asked for installation files for the drive. You can download the files from the manufacturer’s website. When you’re done, select Next and let the wizard finish installing the drivers.
Conclusion
When dealing with data loss on your Sony SD card, you have two methods for data recovery: using Sony’s data recovery software or relying on a third-party file recovery app like Disk Drill.
Both methods are easy to follow, but it’s essential to choose the one that suits your needs best. Remember to initiate the data recovery process as soon as possible to increase your chances of successfully retrieving your lost data.


