 USB drives can run into a number of issues. One such problem is the “Access is denied” error that appears whenever you connect your USB. When this occurs, you will be unable to access your USB or any of the data on it. Any shortcuts to it will prompt a message saying that the location is not available.
There are multiple solutions you can implement to get your USB fixed up and working again. Read on to see how to fix the access denied to USB drive error.
Table of Contents
Why Is Access Denied to USB Drive
One might assume the access denied to USB drive error appears due to incorrect permissions. While this can be the source of the problem, it isn’t always so. Rather, there are a few common problems that this error derives from:
| Reason | Description |
| 🙅 Permission Settings | If you don’t have permission to access the external hard drive, you’re likely to see the “Access is denied” error. |
| 🔒 BitLocker encryption | If you’ve enabled BitLocker encryption, but the BitLocker Encryption service isn’t running, you might not be denied access to the hard drive. |
| 💻 Using hard drive on both Mac and Windows | If you use your hard drive on both operating systems, either of them could have tinkered with the drive’s file system resulting in access being denied. |
| 🚿 Improperly ejecting hard drive | Ejecting the hard drive improperly or abruptly while data is being written to it can result in corruption. If your hard drive has become corrupt, you might face trouble accessing it. |
| ⚠️ Hard drive corruption | Corruption can occur because of several reasons, such as abrupt power failure or a virus attack. Whatever the reason for corruption, you might encounter the access denied error if your hard drive is corrupted. |
If any of the above problems sound familiar, it can help narrow down what solution you need to try next in order to resolve the USB drive is not accessible error.
How to Fix USB Drive Where Access Is Denied
Unless you’re aware of what exactly is causing the problem, we recommend going through each solution methodically to ensure you’re performing full troubleshooting.
Method 1:Scan for Viruses
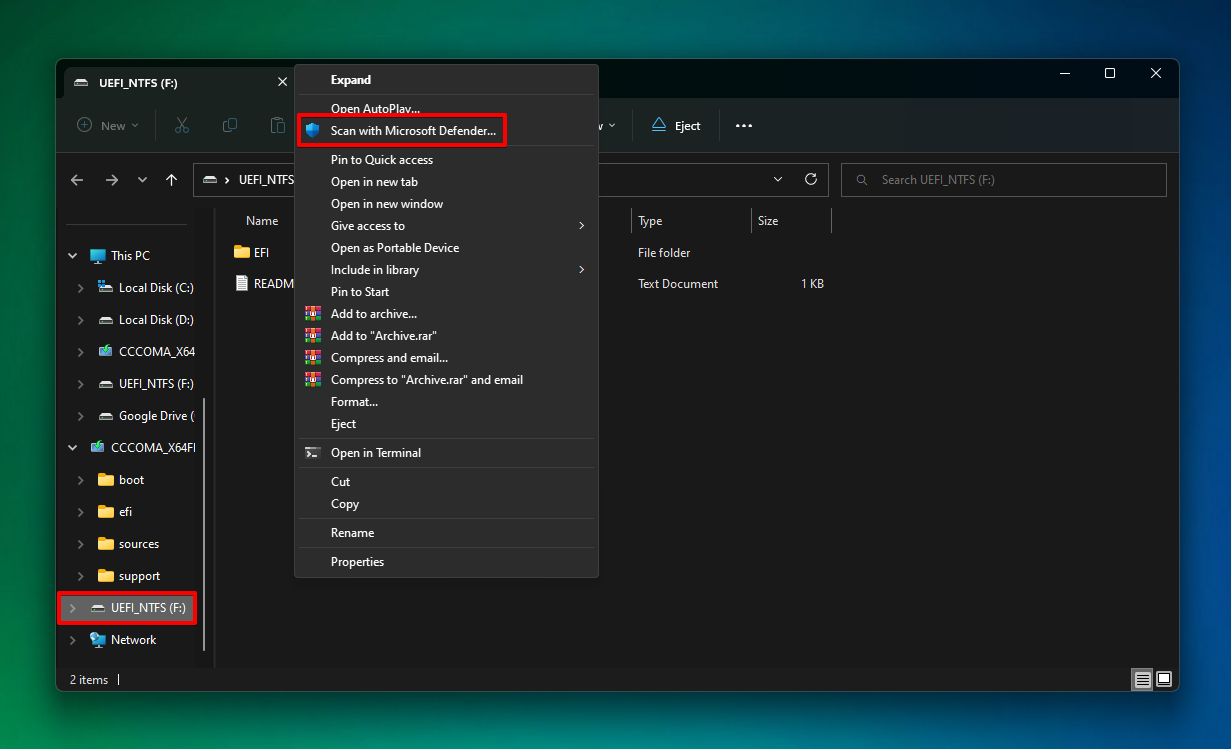
Scanning for viruses should be done first since it’s quick and easy. Unlike back in the day when you had to spend time carefully looking for an antivirus to download (or potentially purchase), Windows 10 and 11 come with one by default. Windows Security is a full antivirus program that can scan and remove viruses for free. Here’s how you can do so:
- Right-click your USB in File Explorer, then select Scan with Microsoft Defender.
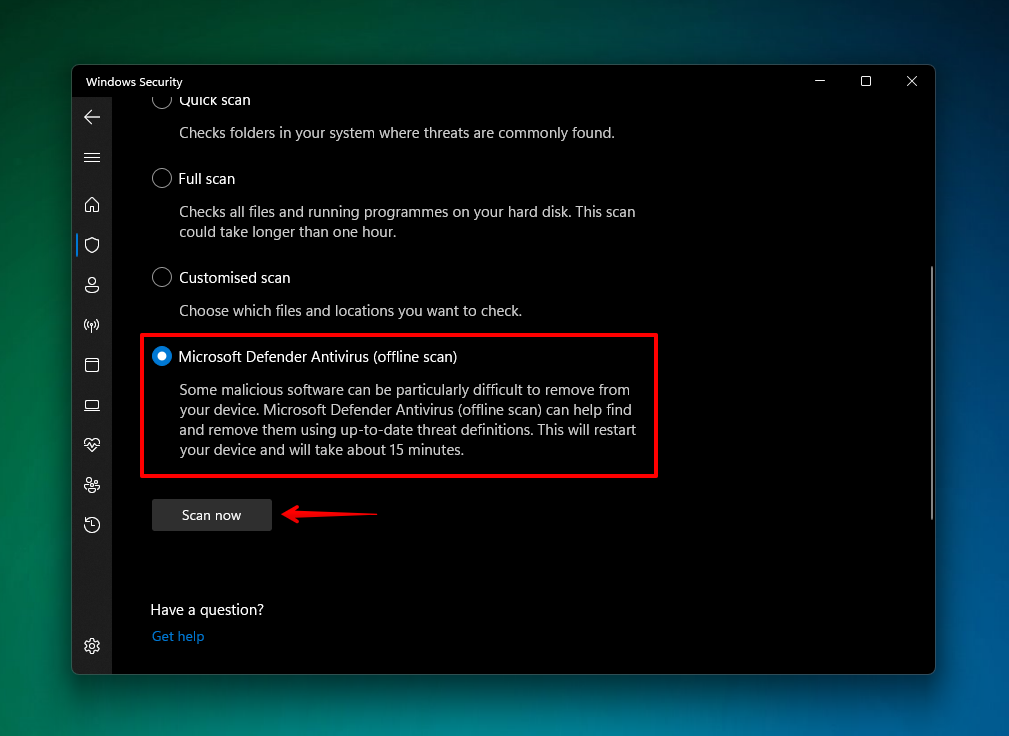
- If you want to do a more comprehensive scan, select Microsoft Defender Antivirus (offline scan), then click Scan now.
Method 2:Disable Antivirus and Reconnect
Sometimes your antivirus can make a false reading and actually cause problems rather than solve them. Kaspersky, for example, includes Device Control which can restrict certain devices from connecting properly when enabled.
By disabling your antivirus and reconnecting the USB, you can see if the USB drive access is denied error originates there. Follow these steps to disable Windows Security:
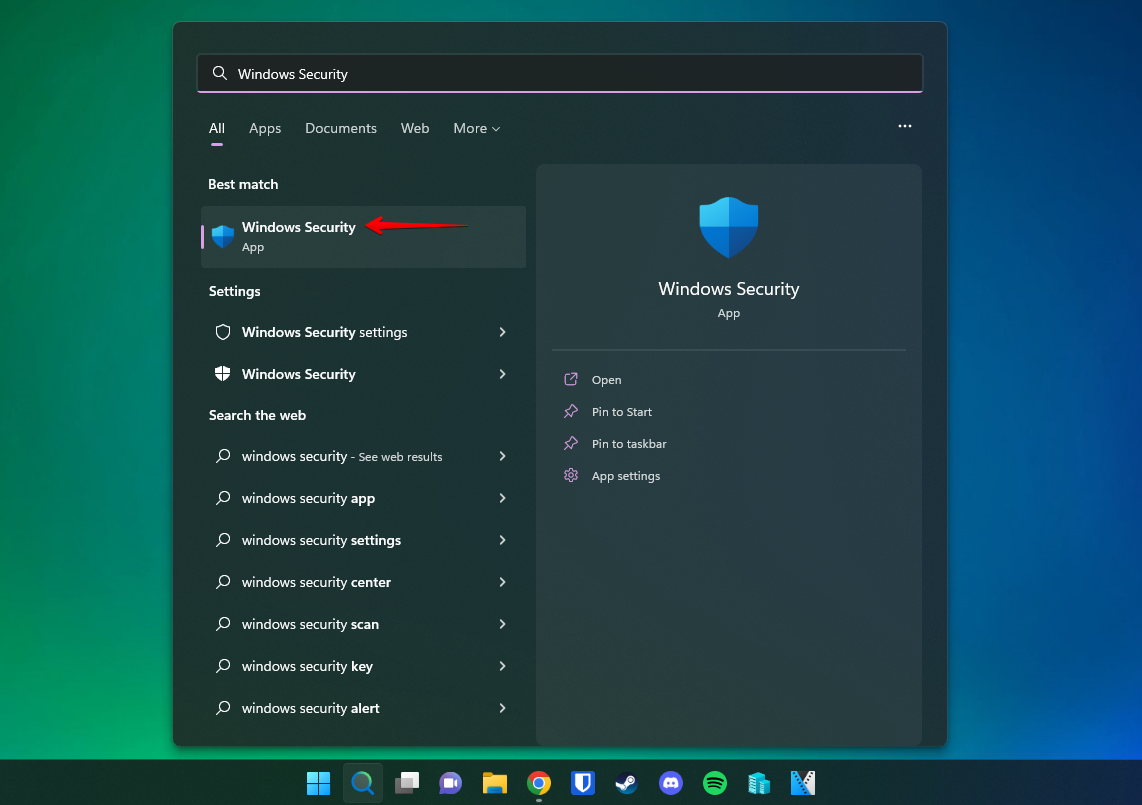
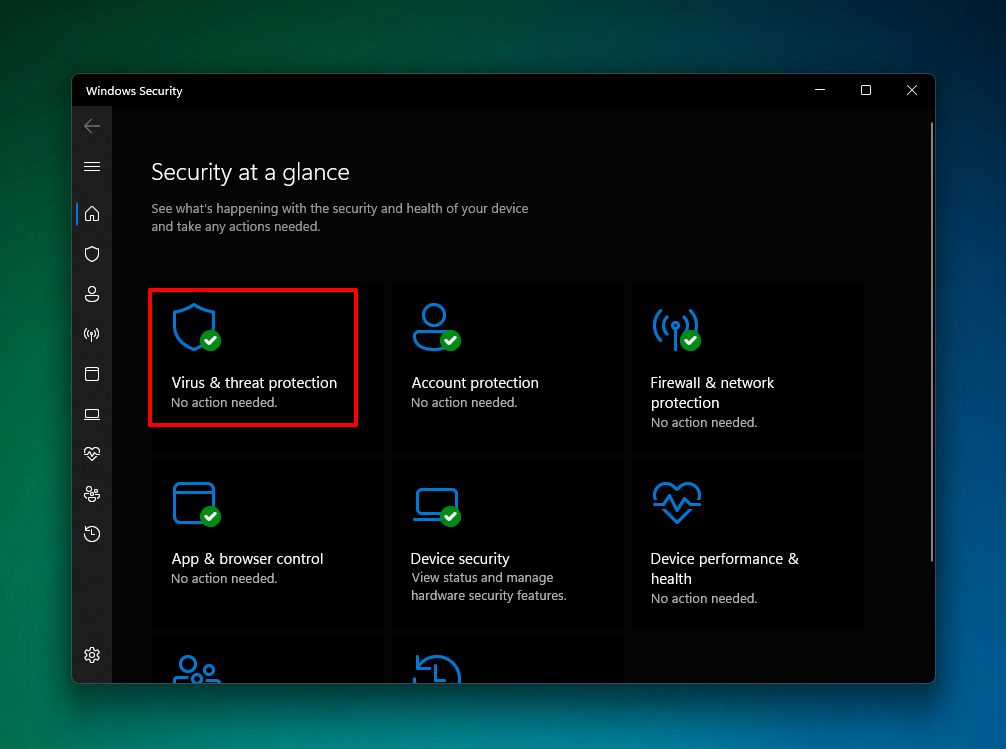
- Press Windows Key + S and search “Windows Security”. Open the app.
- Click Virus & threat protection.
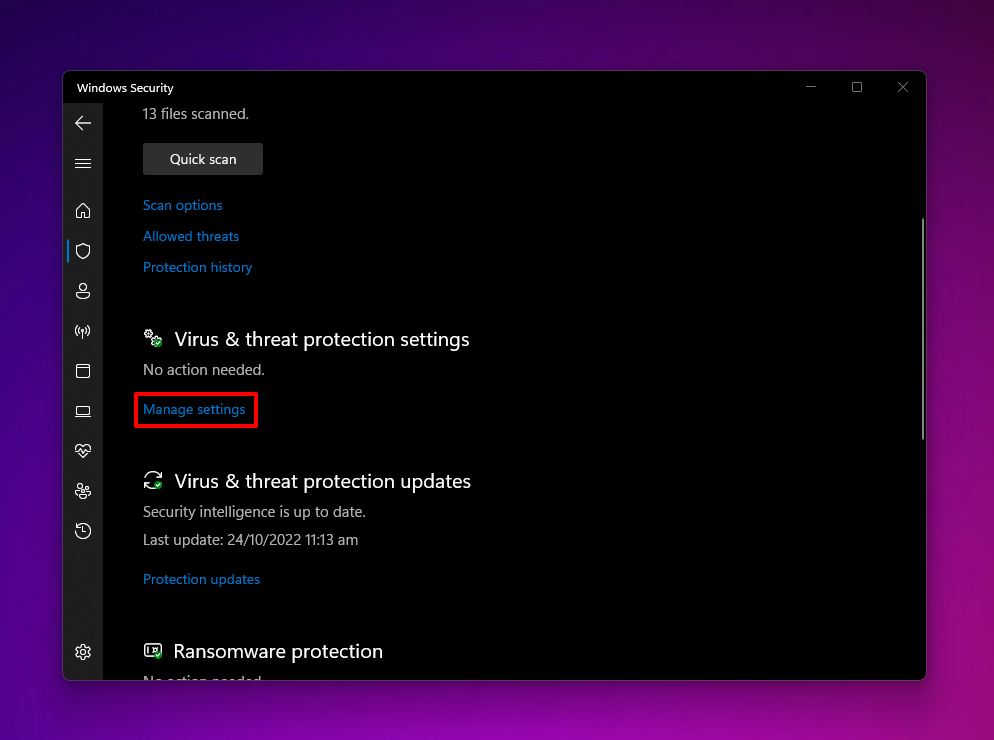
- Click Manage settings.
- Disable Real-time protection. Confirm the action if prompted by UAC.
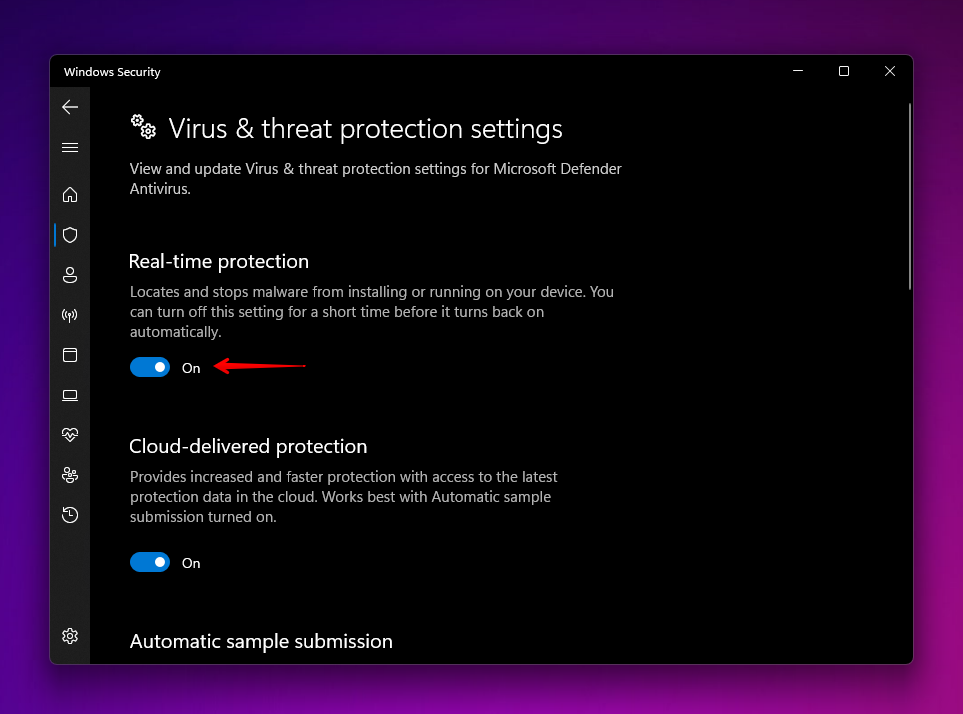
- Eject the USB safely then reconnect it.
Method 3:Assign a Drive Letter
No drive letter means no access. Windows relies on drive letters to know where to find your data and what storage devices they reside on. Thankfully, assigning a drive letter is super easy and can be done in just a few seconds.
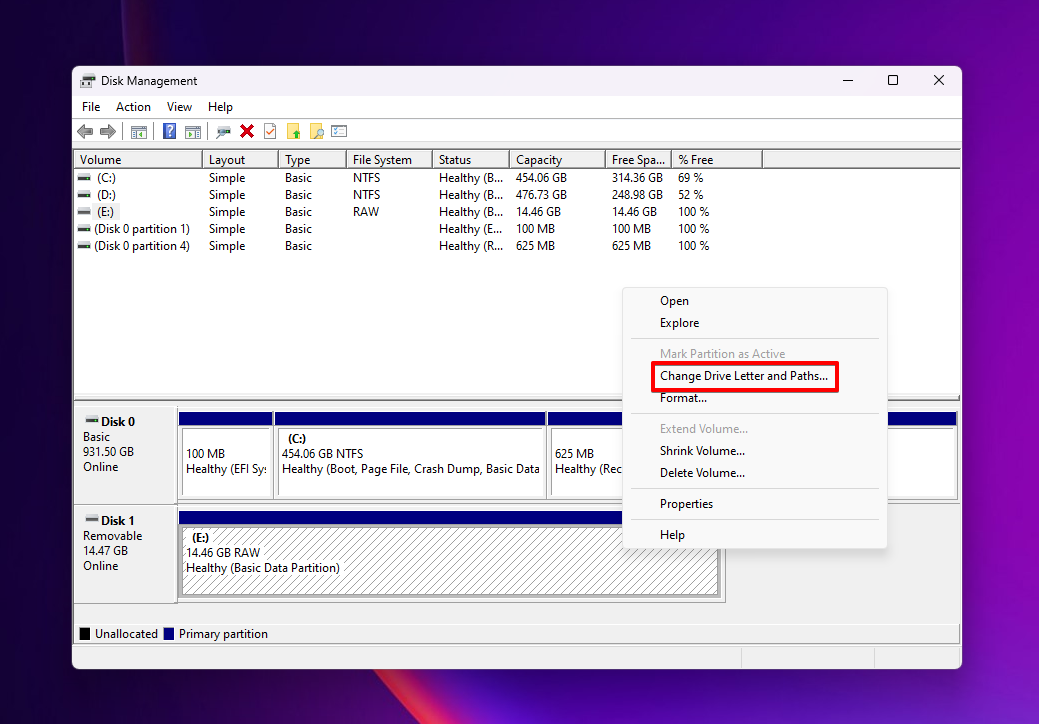
- Right-click Start and select Disk Management.

- Right-click the USB volume, then click Change Drive Letter and Paths.
- Click Add.
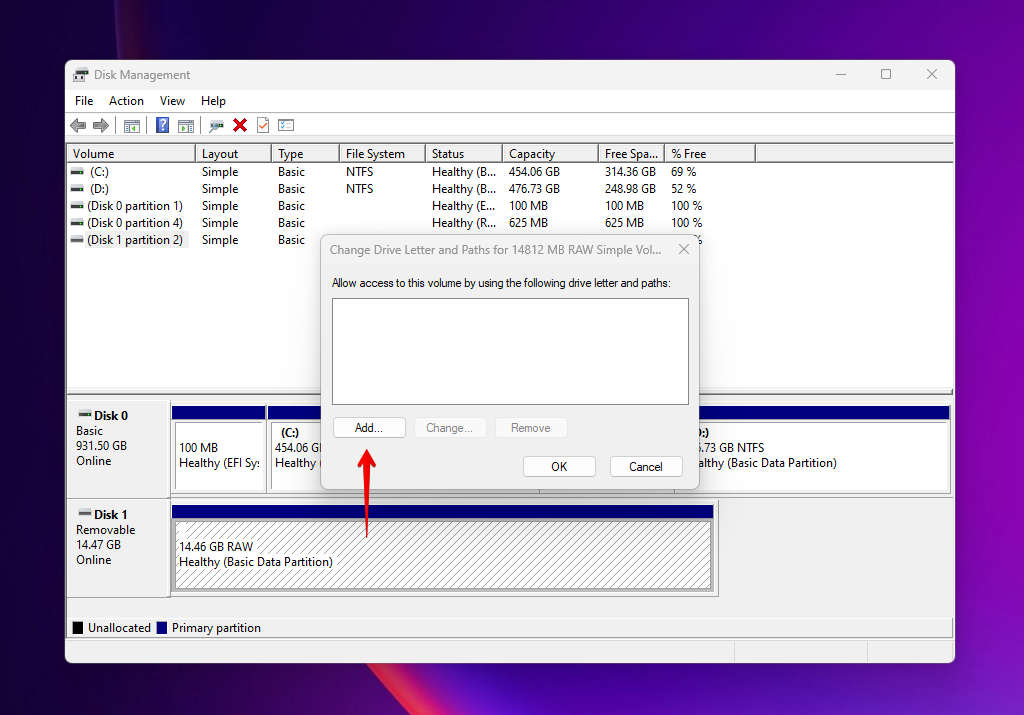
- Select a drive letter and click OK.
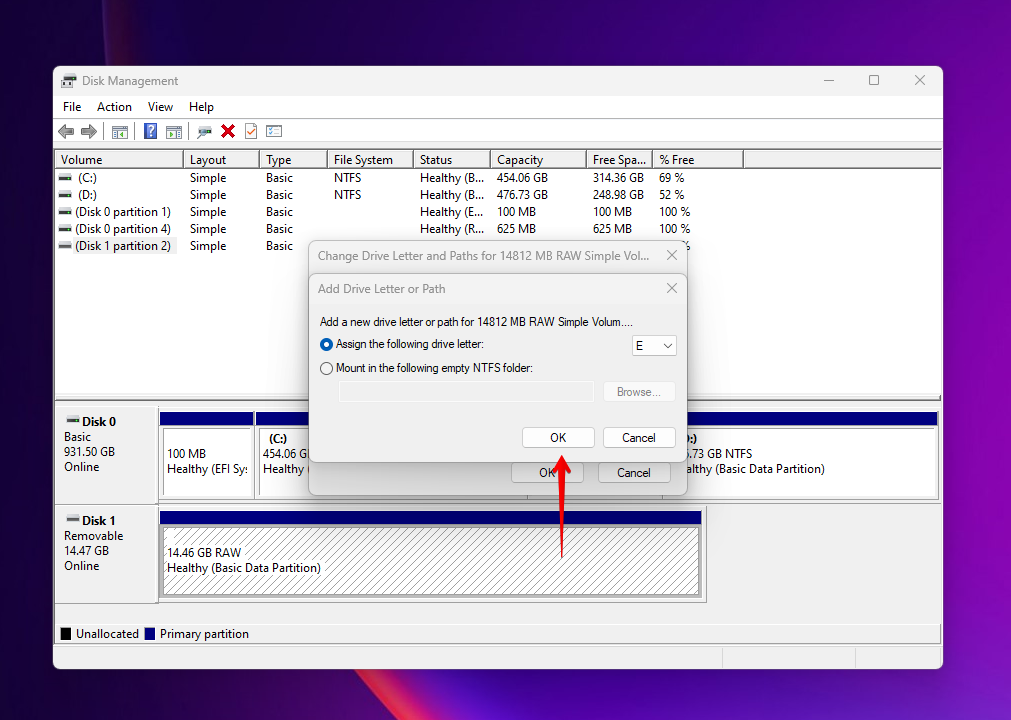
- Click OK again.
Method 4:Change Drive Permissions
Each drive has permissions for who can access the storage device on the machine it’s connected to. If you do not have access to read the device, Windows will say flash drive access is denied.
USB drives with the FAT32 file system will not have a security tab as it is not supported.
If you can’t access the flash drive due to incorrect permissions, follow these steps:
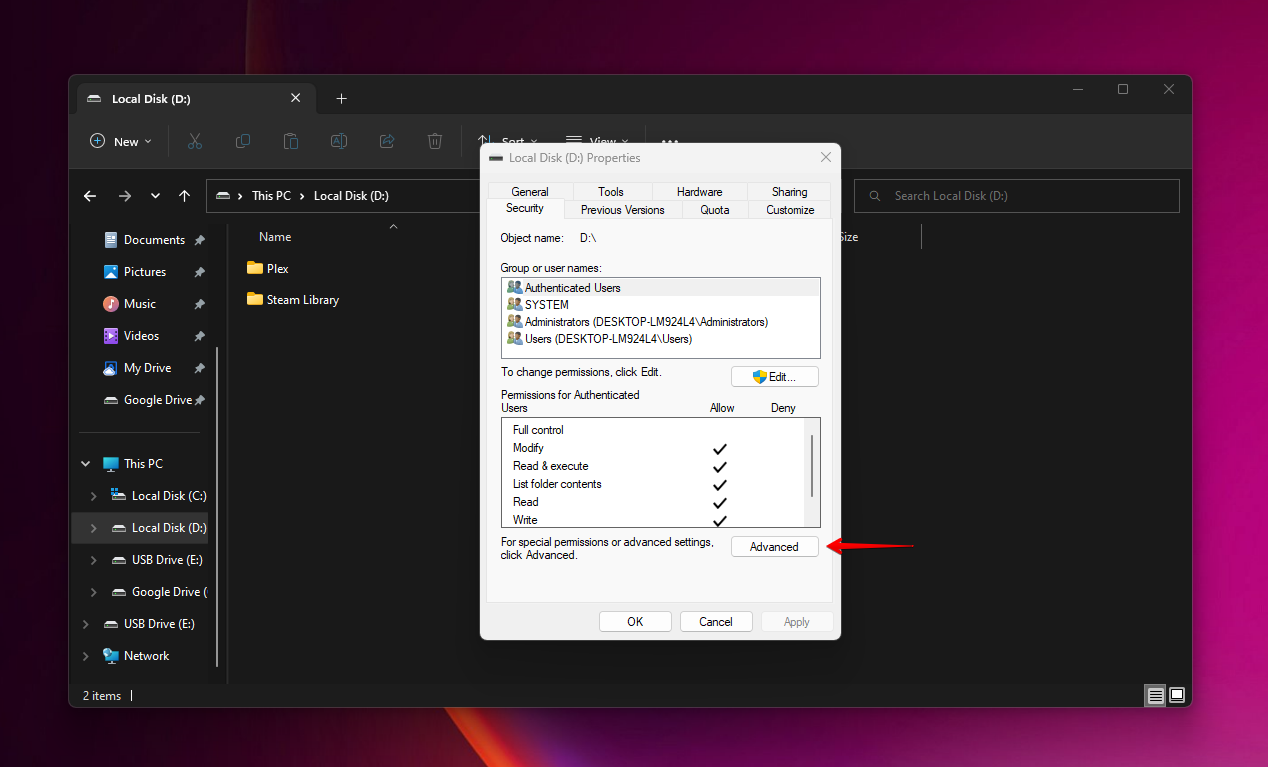
- Right-click the drive and select Properties.

- Go to the Security tab and click Edit.
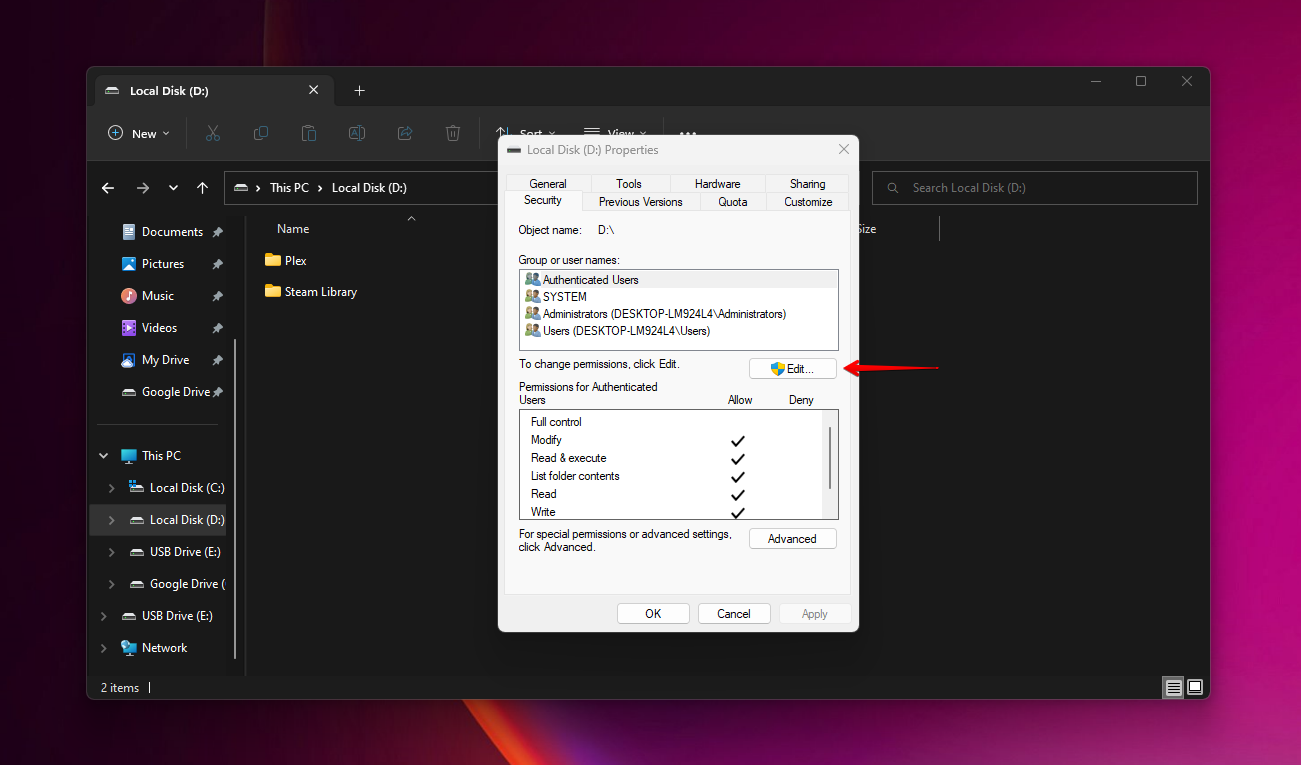
- Ensure Full control is set to Allow for Authenticated Users.
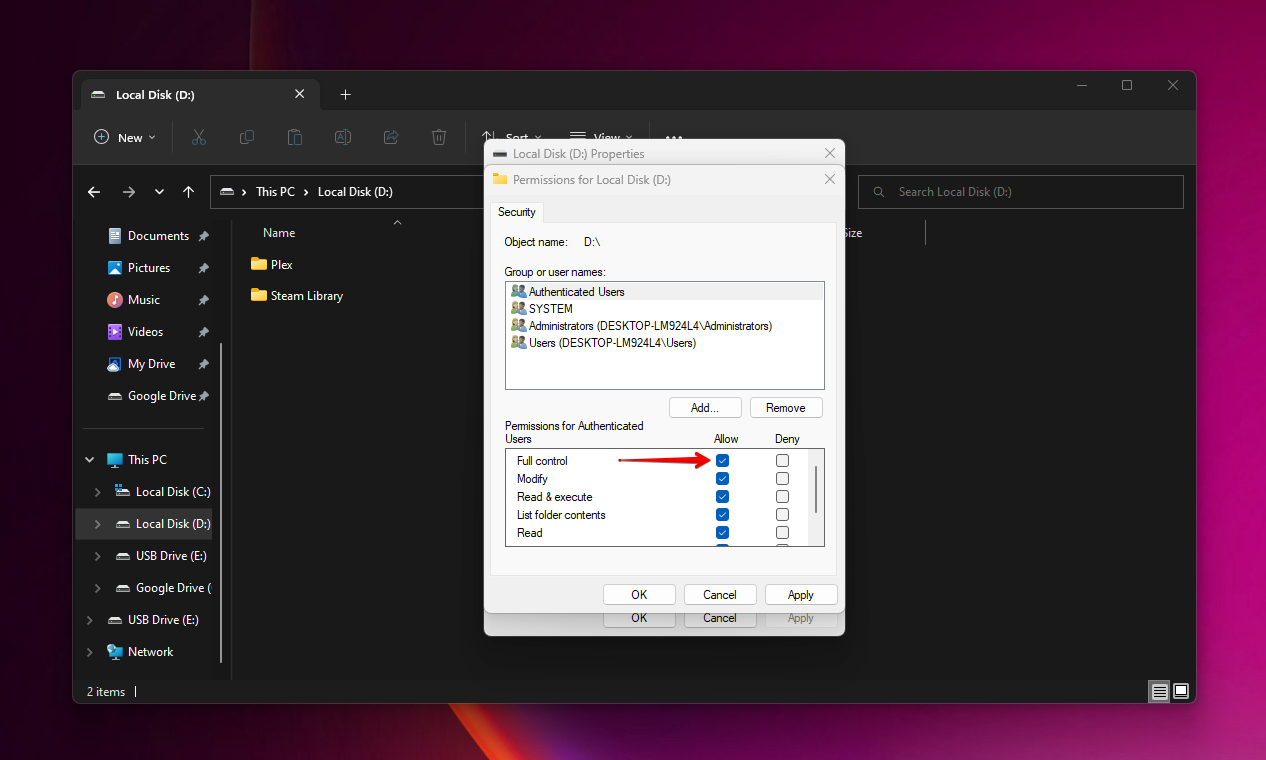
- Click Apply.
Method 5:Edit Permissions
If you’ve updated the permissions but still receiving the message, you can instead specify the permissions for your user account in the Advanced section.
- Right-click the drive and select Properties.
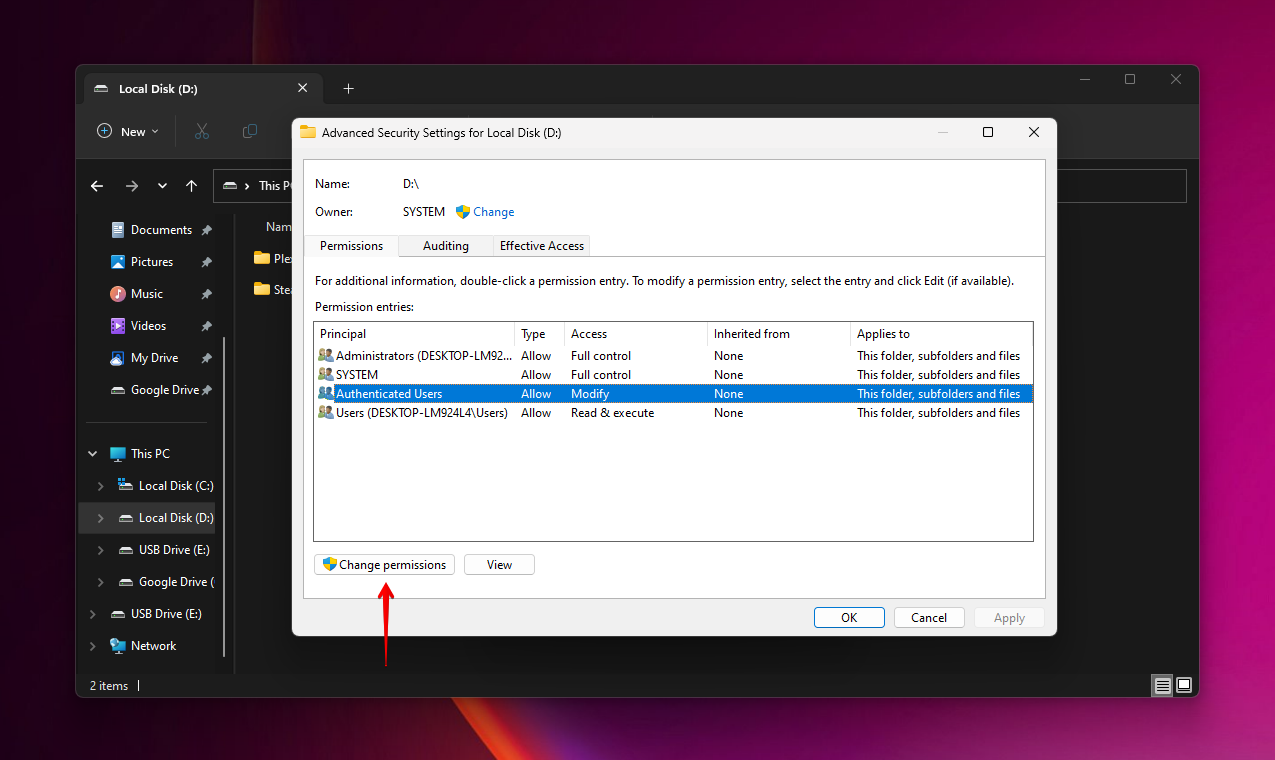
- Go to the Security tab and click Advanced.
- Click Change permissions.
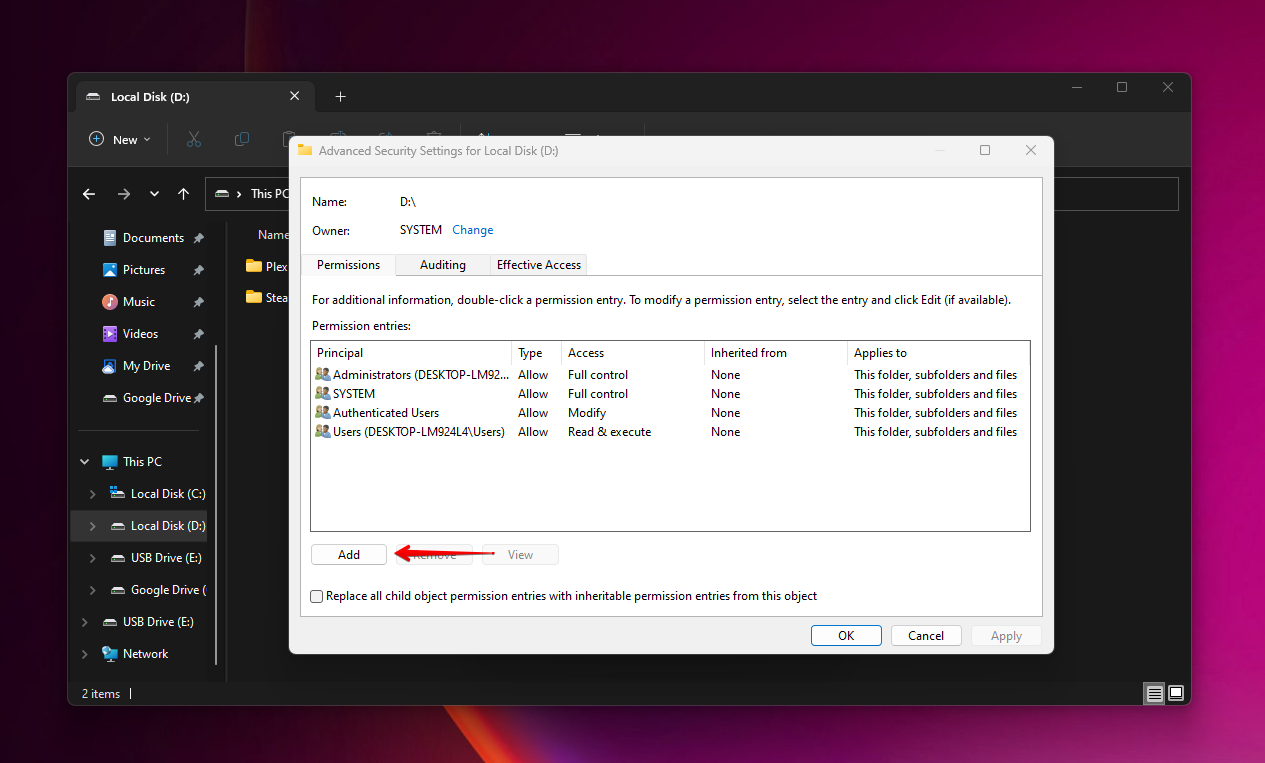
- Click Add.
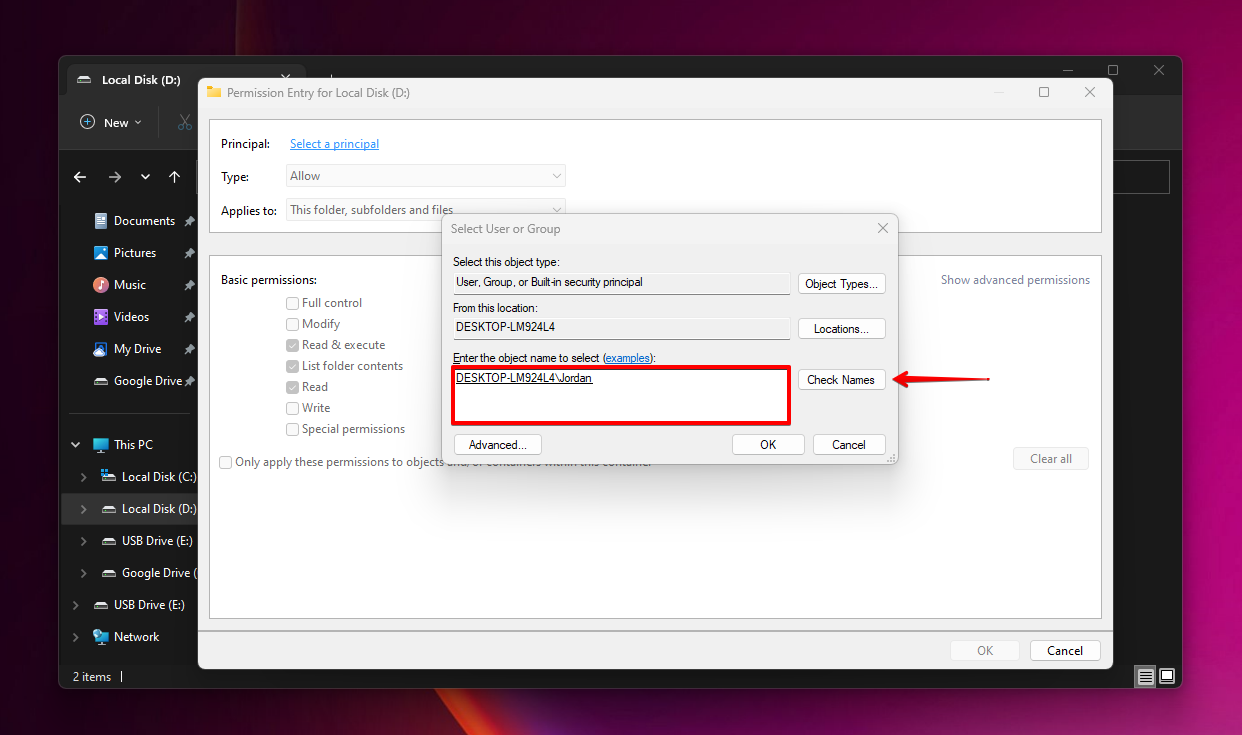
- Click Select a principal.
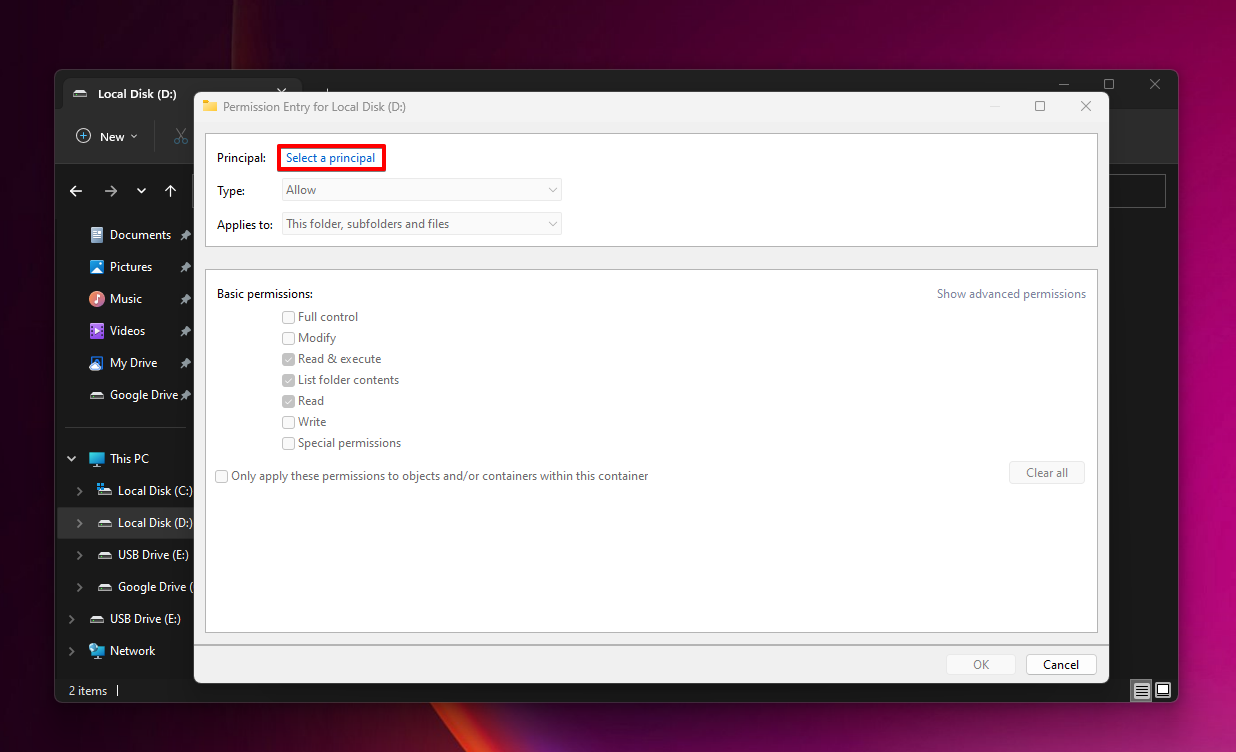
- In the textbox, enter the name of your user account and click Check Names. Click OK.
- Ensure Full control is selected, then click OK.
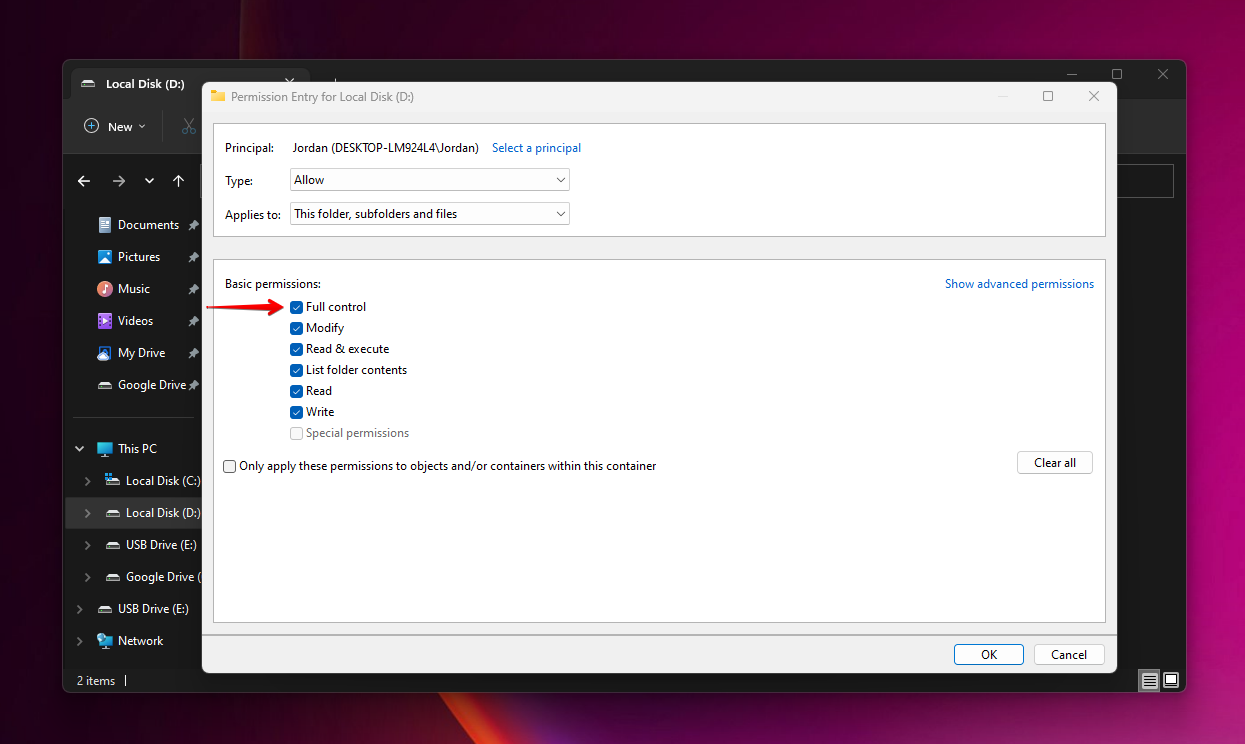
- Click Apply.
Method 6:Repair with CheckDisk
CheckDisk (CHKDSK) is a command that can scan for errors on your USB and potentially fix them with the right parameters. If you’ve ever used the Windows error-checking tool on a storage device, you may be surprised to know that it’s actually just CheckDisk with a user interface.
Here’s how you can repair your USB using CheckDisk:
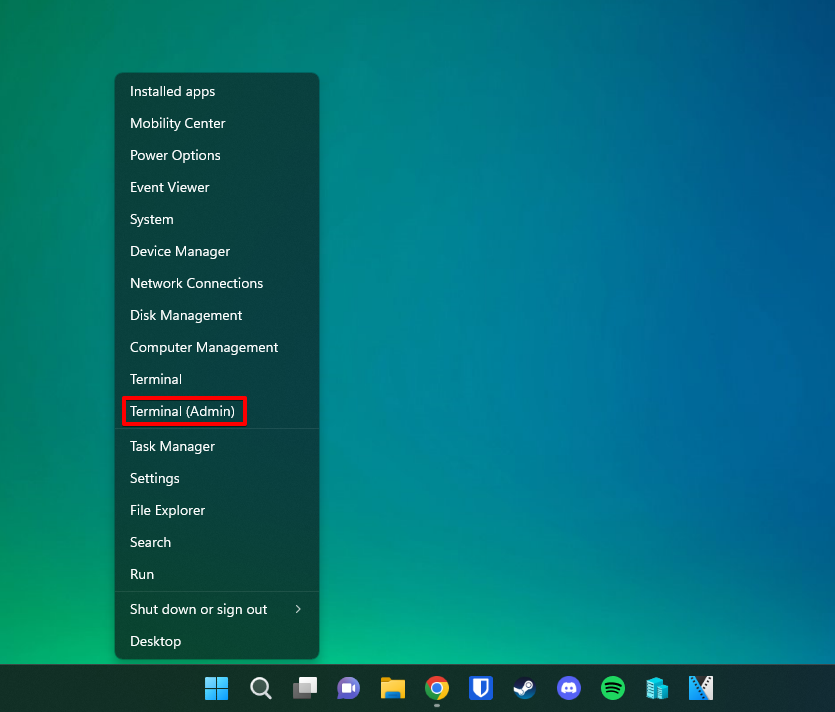
- Right-click Start and select Terminal (Admin). On Windows 10, this will instead be Windows PowerShell (Admin).
- Type
chkdsk *: /r. Replace * with your USB’s drive letter. Press Enter.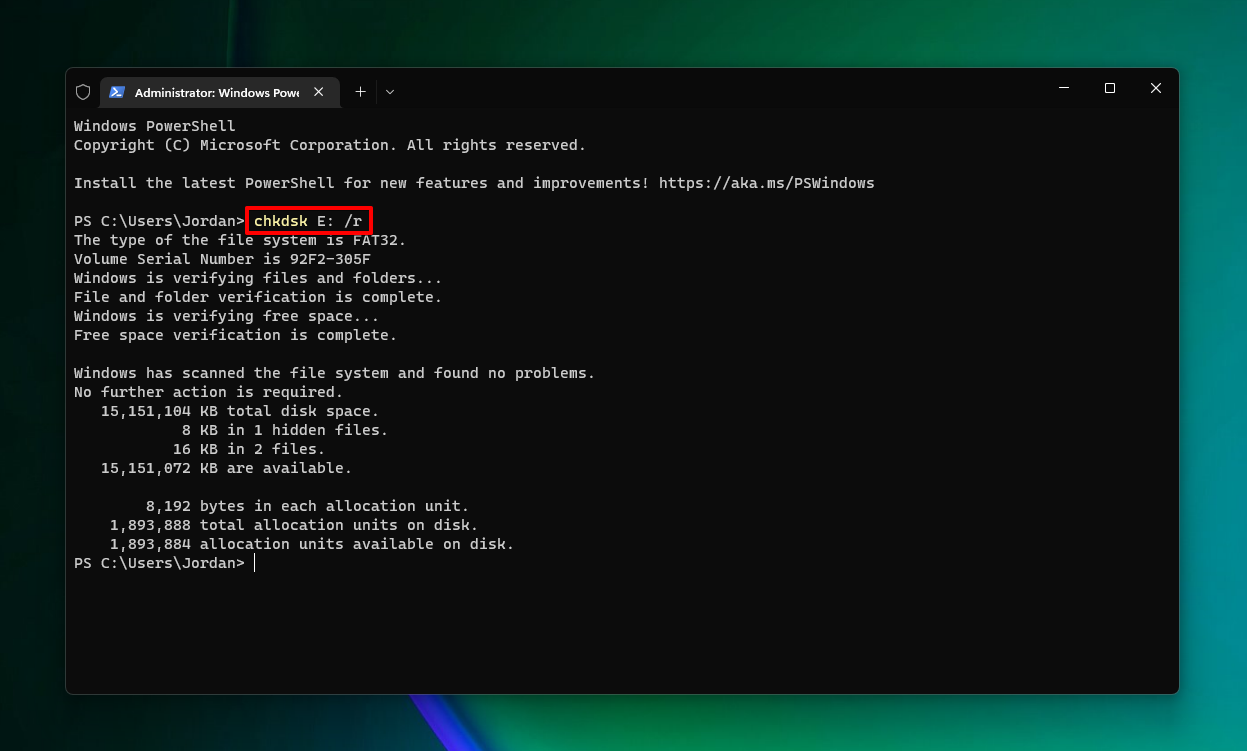
Method 7:Remove the USB from Device Manager and Reconnect
Your USB settings can become damaged or corrupted. When this happens, problems begin to occur, such as this error that states the USB drive is not accessible. Removing the USB from the Device Manager is the same as resetting the drive back to its factory settings. Upon reconnection, it will use its default settings.
This is how it’s done:
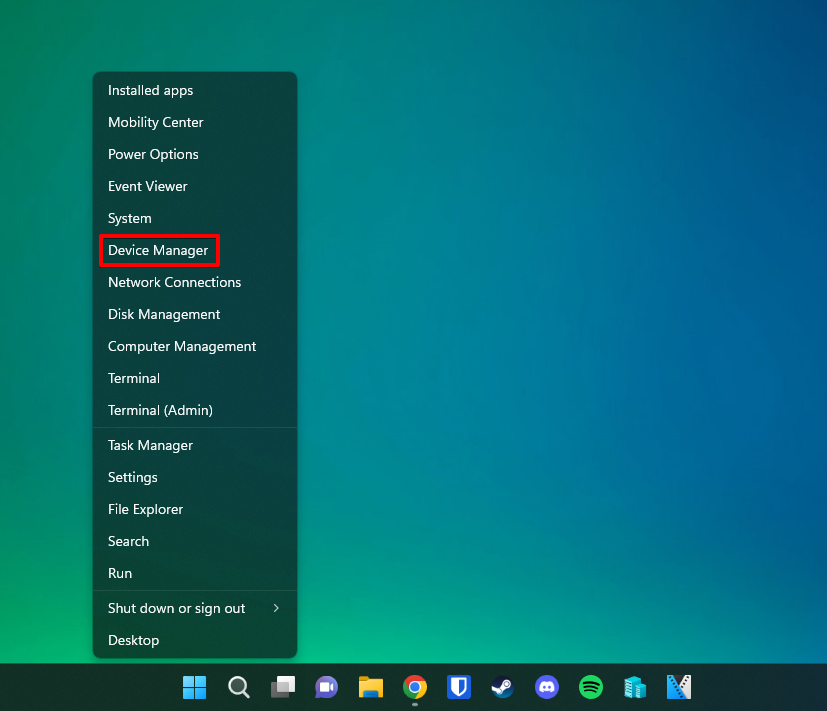
- Right-click Start and select Device Manager.
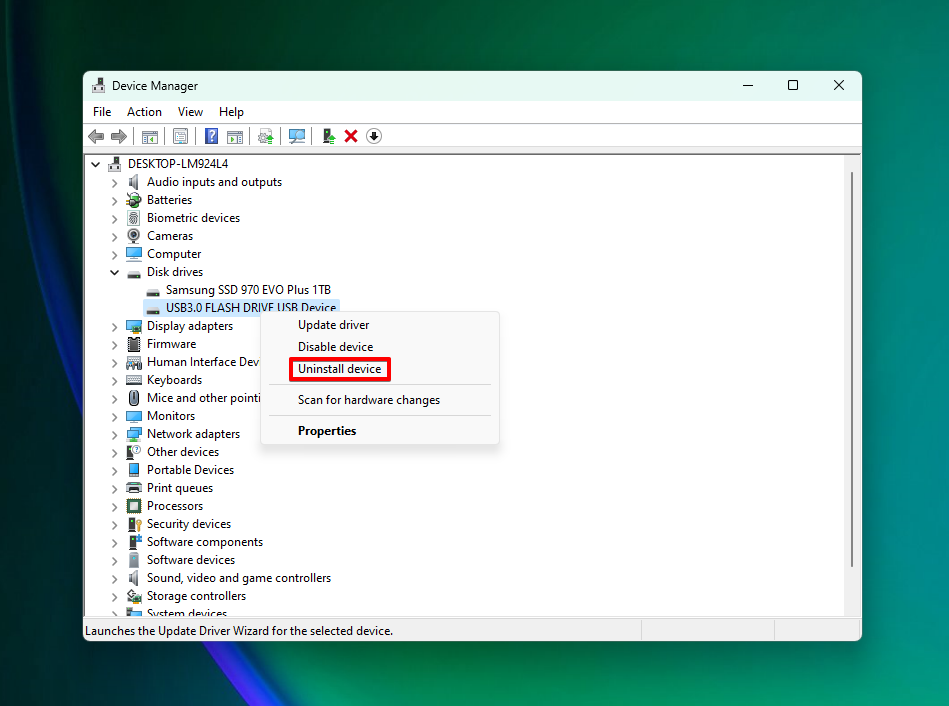
- Expand the Disk drives dropdown. Right-click your USB and select Uninstall device.
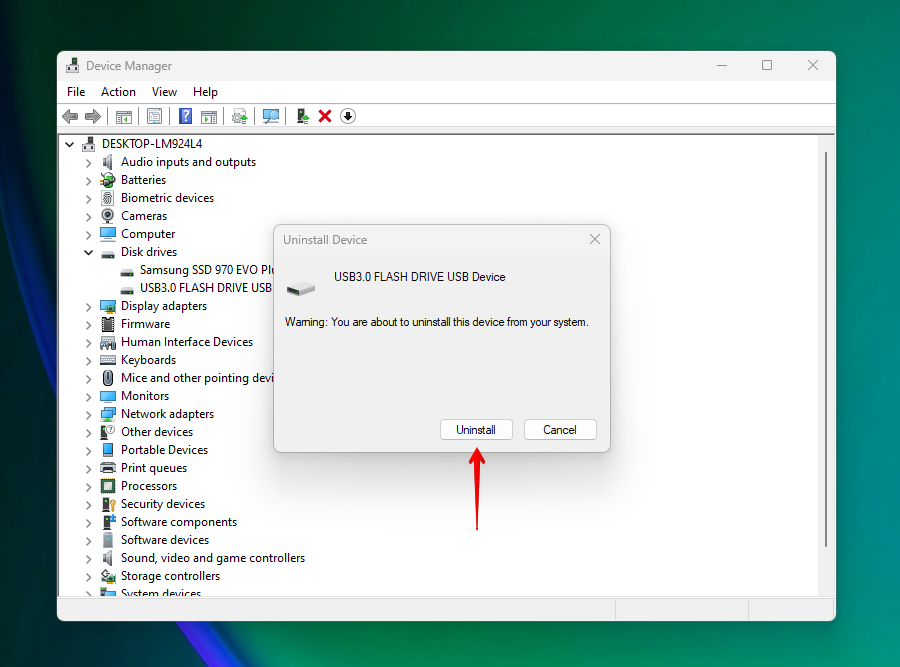
- Click Uninstall.
- Disconnect the USB drive and reconnect it.
Method 8:Edit Registry
The Windows Registry is used to store settings relating to various items, including Windows, device drivers, and applications. For us, we’re going to focus on finding the entry item for our USB in the MountPoints2 registry entry, which stores USB device data.
You must be careful what actions you take in the registry. Making a mistake, like deleting the wrong entry, can cause severe problems. Therefore, we recommend you back up your registry first. It’s easy and only takes a few seconds.
- Right-click Start and select Terminal (Admin). On Windows 10, this will instead be Windows PowerShell (Admin).
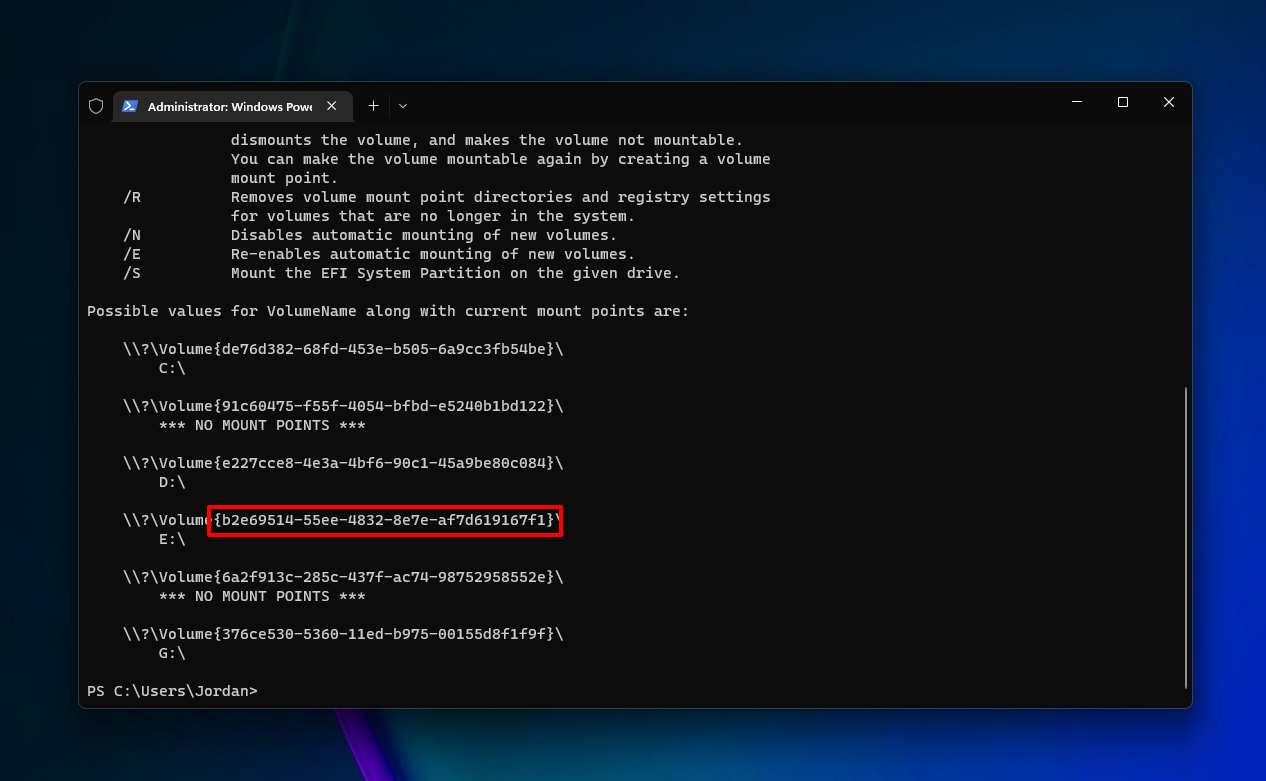
- Type mountvol.exe and press Enter. Make note of the GUID associated with your USB.
- Press Windows Key + R and type
regedit. Press Enter.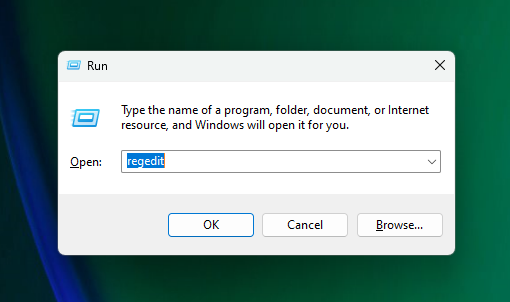
- Navigate to the path:
HKEY_CURRENT_USER > Software > Microsoft > Windows> CurrentVersion > Explorer > MountPoints2
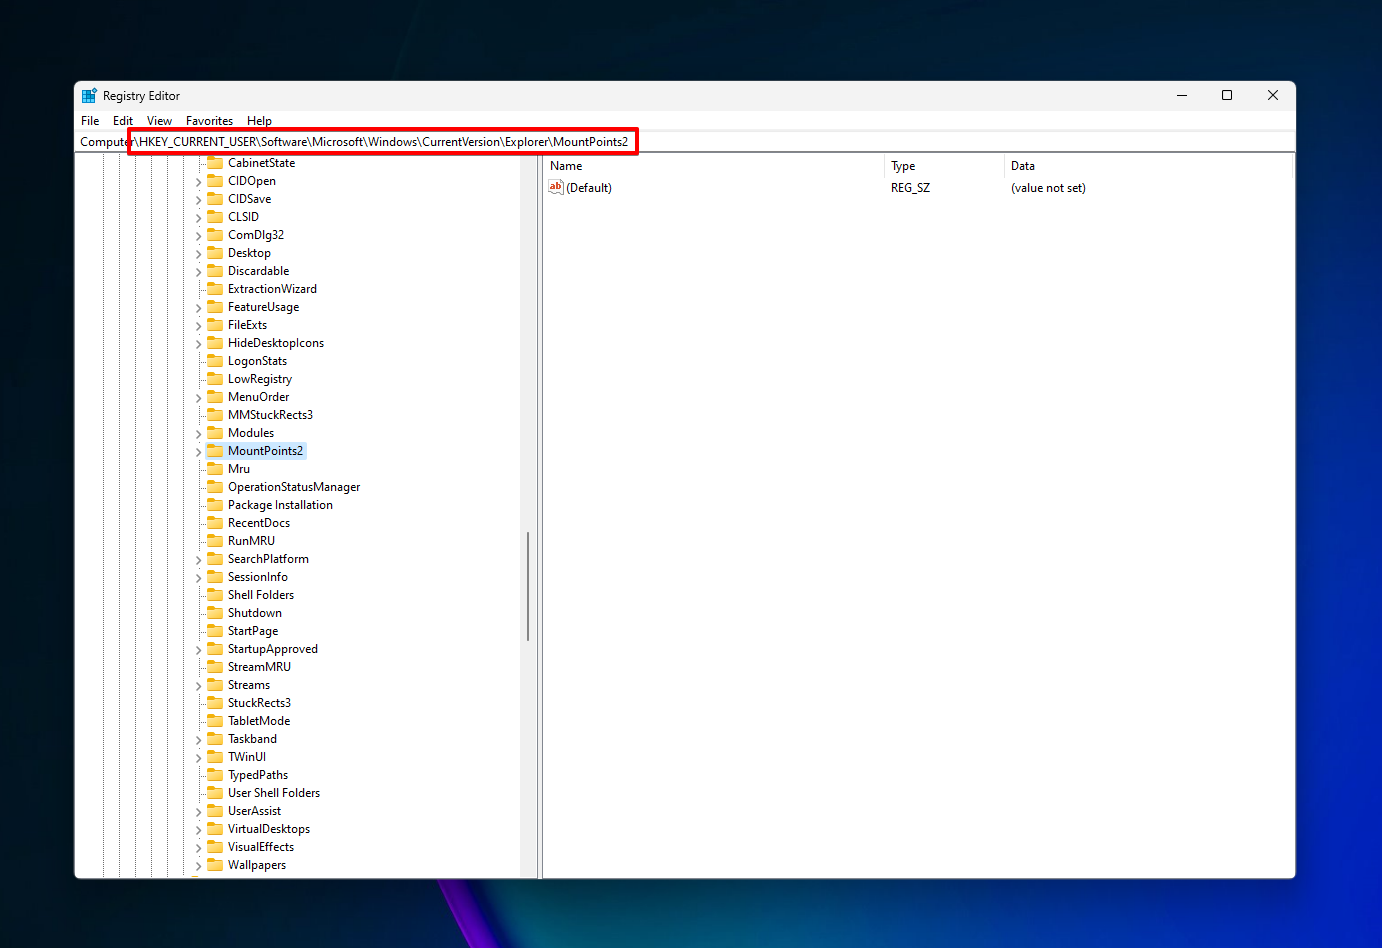
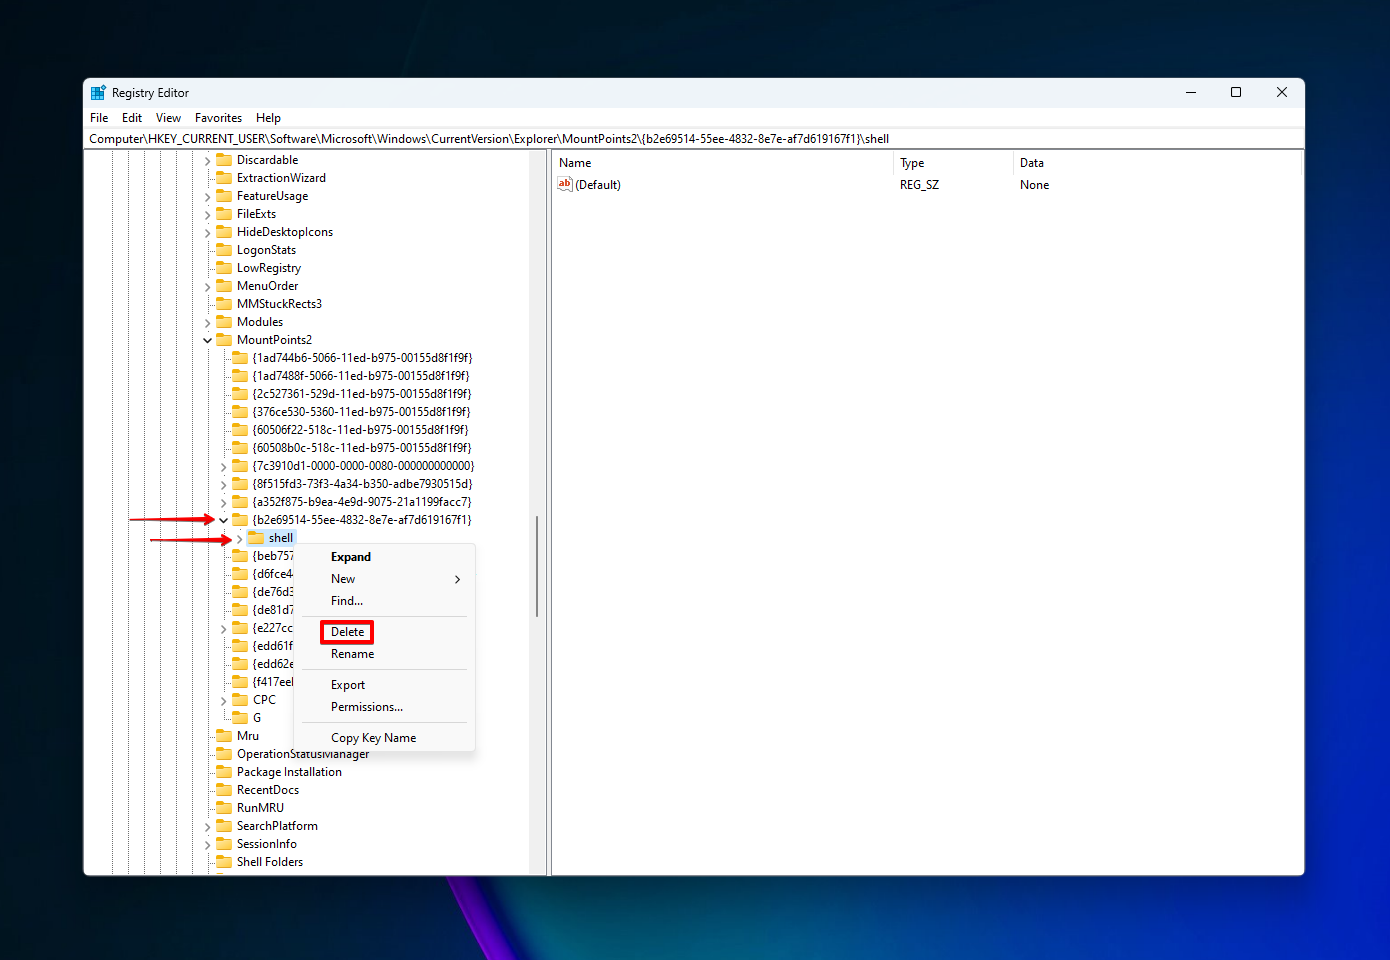
- Select the directory that has the drive letter of your USB and delete the shell subcategory. If you cannot see the drive letter, use the directory that has your USB’s GUID instead.
- Show hidden files then delete autorun.exe if it is present on the USB.
Once you do this, you will need to remove your USB, reboot your computer, then reconnect the USB for it to show.
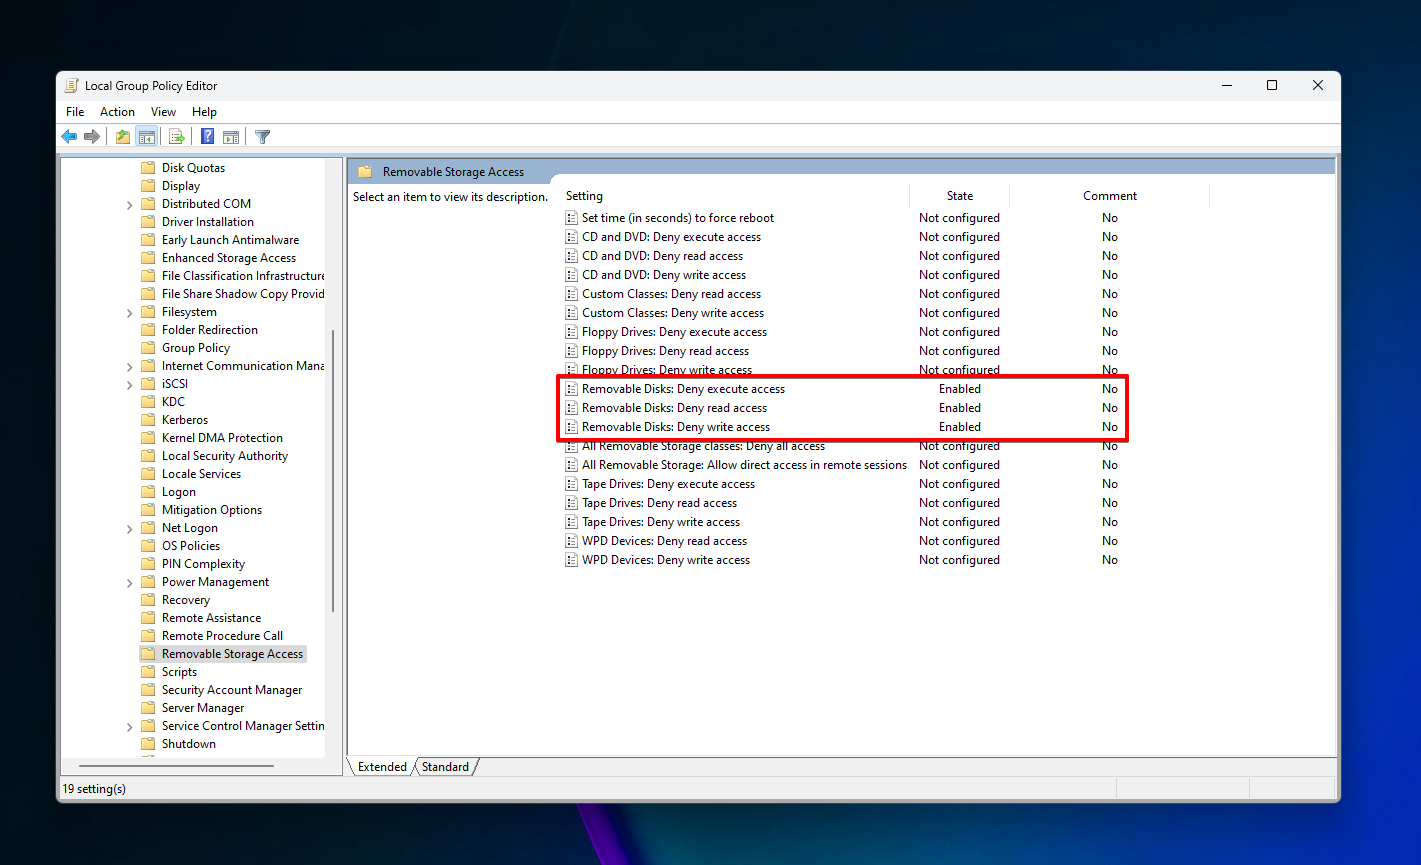
Method 9:Enable with Group Policy Editor
The Local Group Policy editor allows you to edit Group Policy Objects (GPOs) that dictate what actions you can and cannot take on your Windows machine. Here, we will be seeking our three GPOs that may be preventing you from accessing your USB and updating them if necessary.
- Press Windows Key + R and type
gpedit.msc. Press Enter.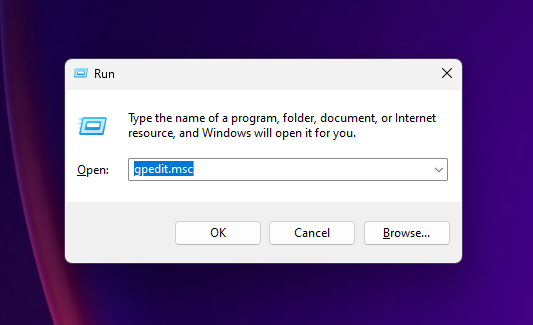
- Navigate to the path:
Administrative Templates > System > Removable Storage Access
- Ensure Removable Disks: Deny execute access, Removable Disks: Deny read access, and Removable Disks: Deny write access are all set to Allow.
- To push through the updates, open a Terminal (Admin) or Windows PowerShell (Admin) window and run the
gpupdatecommand.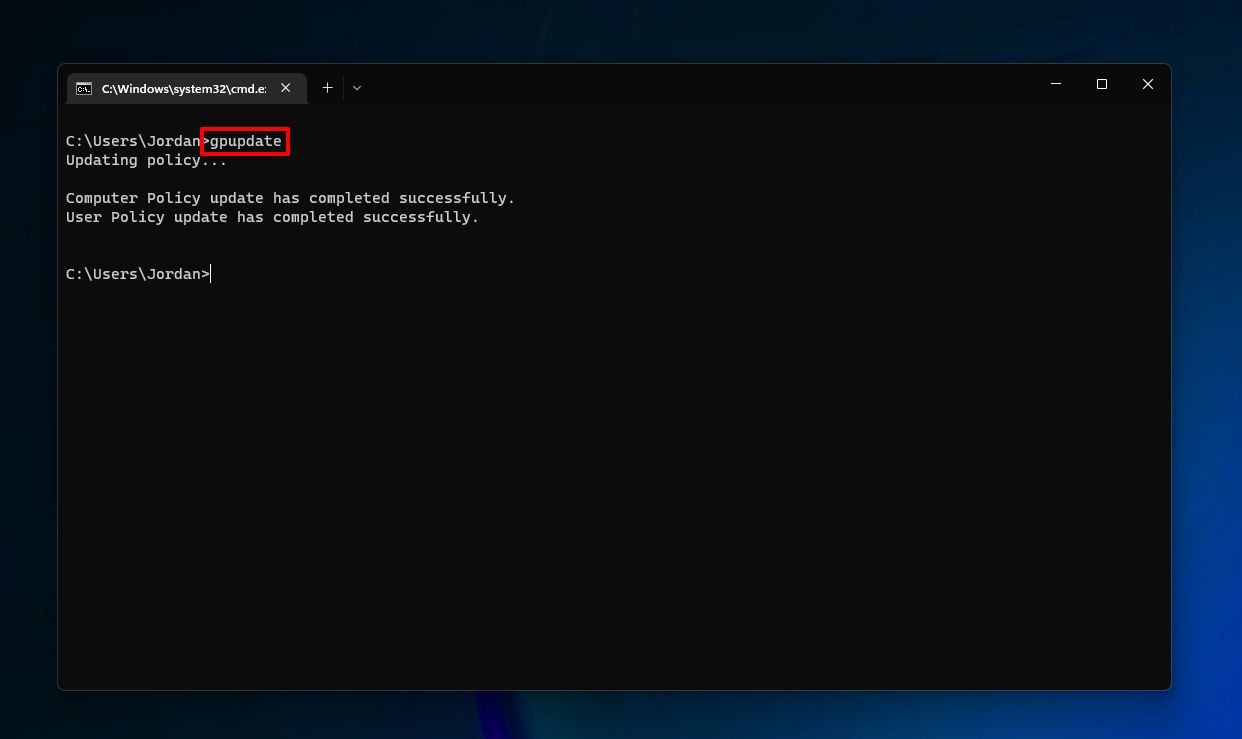
Method 10:Format the USB
Of course, if none of the solutions from our list worked, you can always format if Windows cannot access the USB drive. Formatting is synonymous with factory resetting and basically involves wiping the USB back to its original settings, including deleting any data on it.
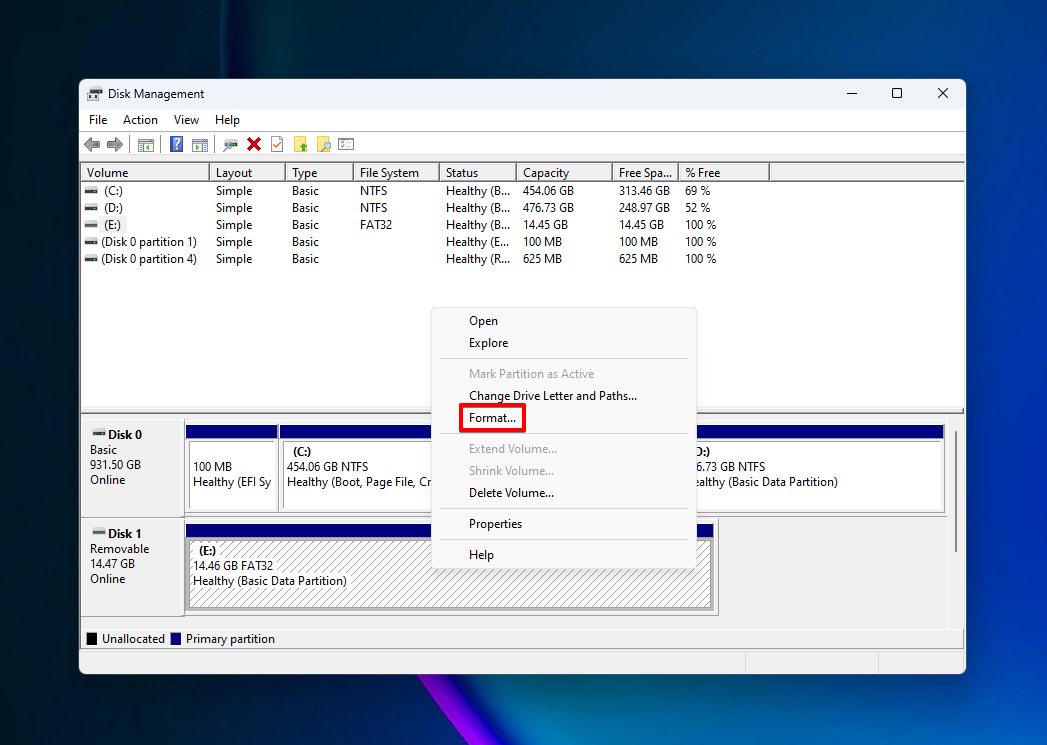
- Right-click Start and select Disk Management.
- Right-click the volume of your USB and click Format.
- Ensure Perform a quick format is selected and press OK.
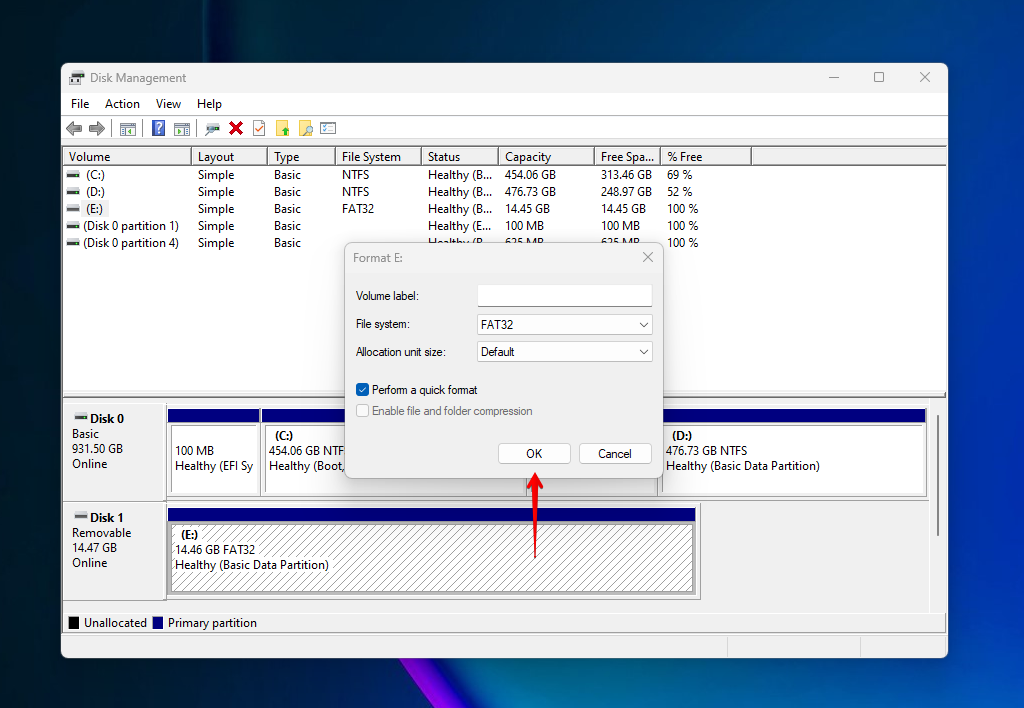
- Click OK again.
How to Recover Data Lost After Fixing USB Access
Following the format of your USB to correct the “Access is denied” issue, you can restore the data that was deleted with the format using data recovery software. Such tools are specially designed for data loss cases such as this. For this, we recommend using Disk Drill, as it has a proven track record of successful recoveries and it’s easy to use for users of any level.
Follow these instructions to recover your lost data using Disk Drill:
- Download and install Disk Drill.
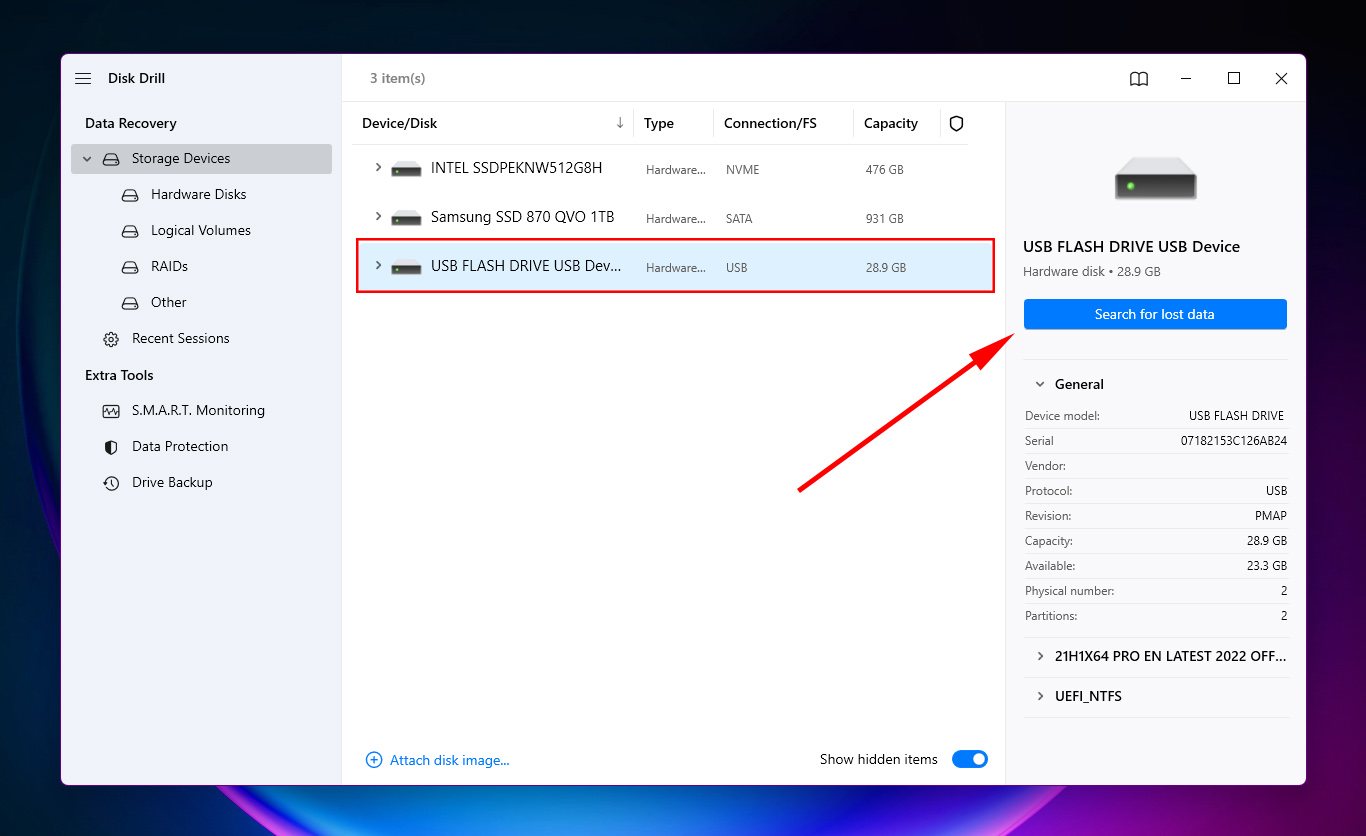
- Select the USB drive from the list of devices, then click Search for lost data.
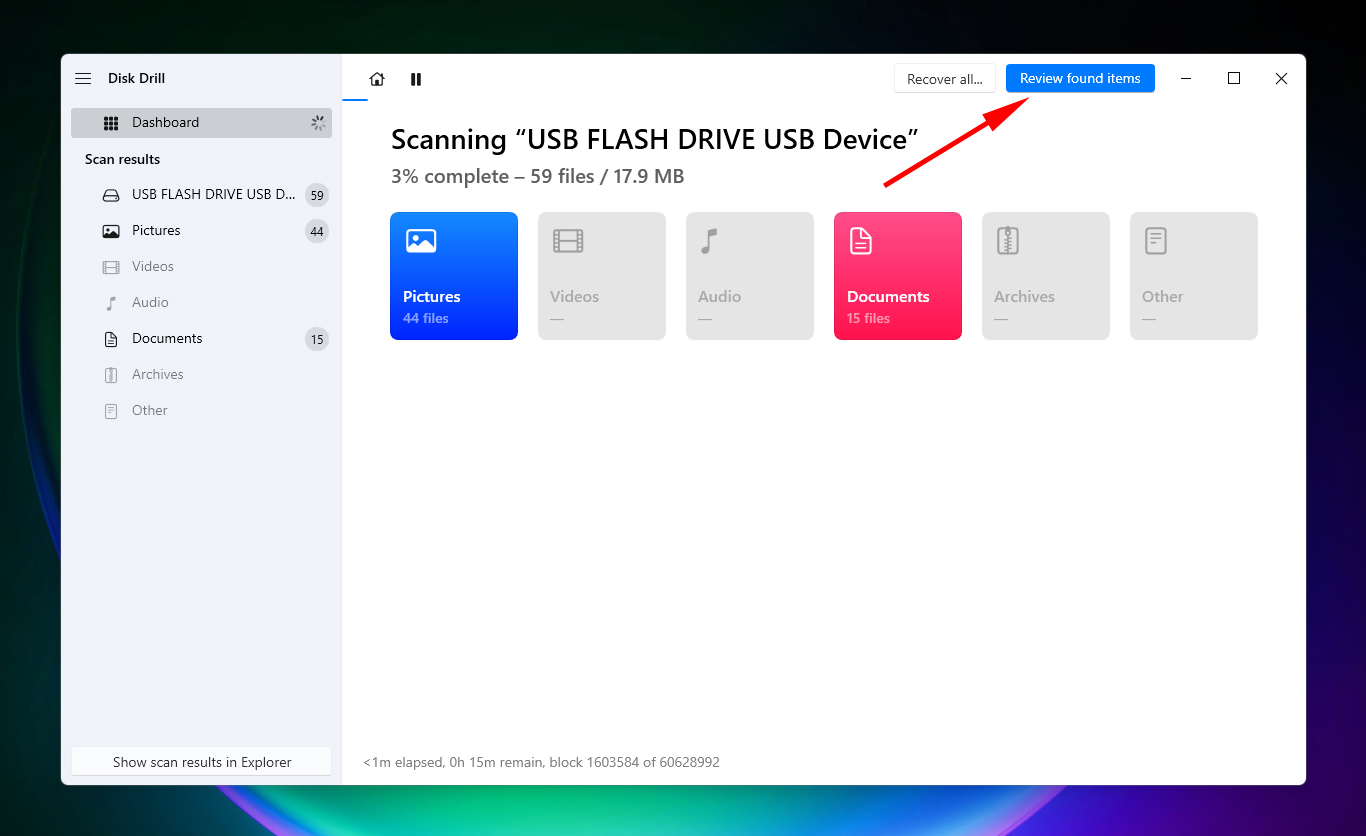
- Click Review found items upon completion of the scan.
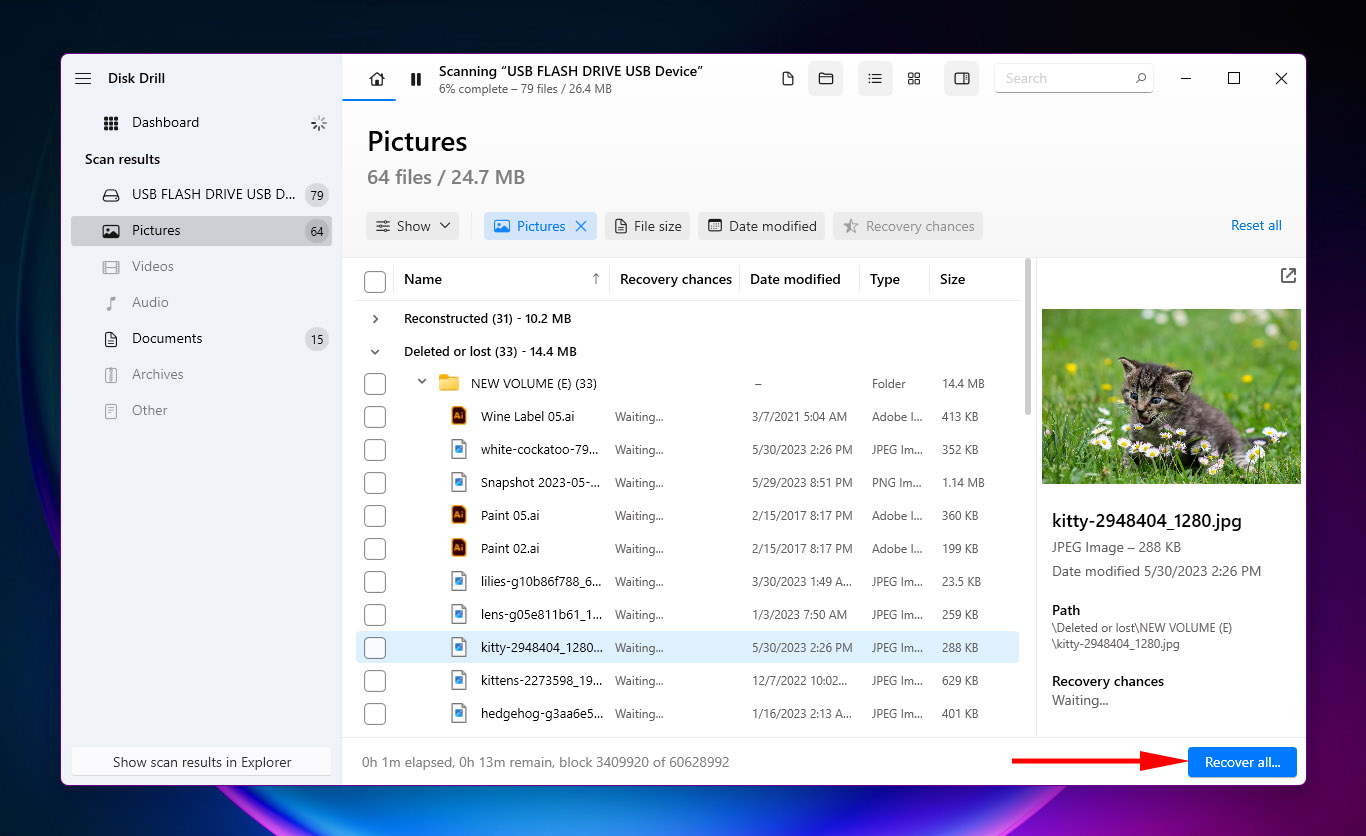
- Select the files that you would like to recover. Take note of the Recovery chances column which hints at what data has the best chance of recovery. When you’re ready, click Recover.
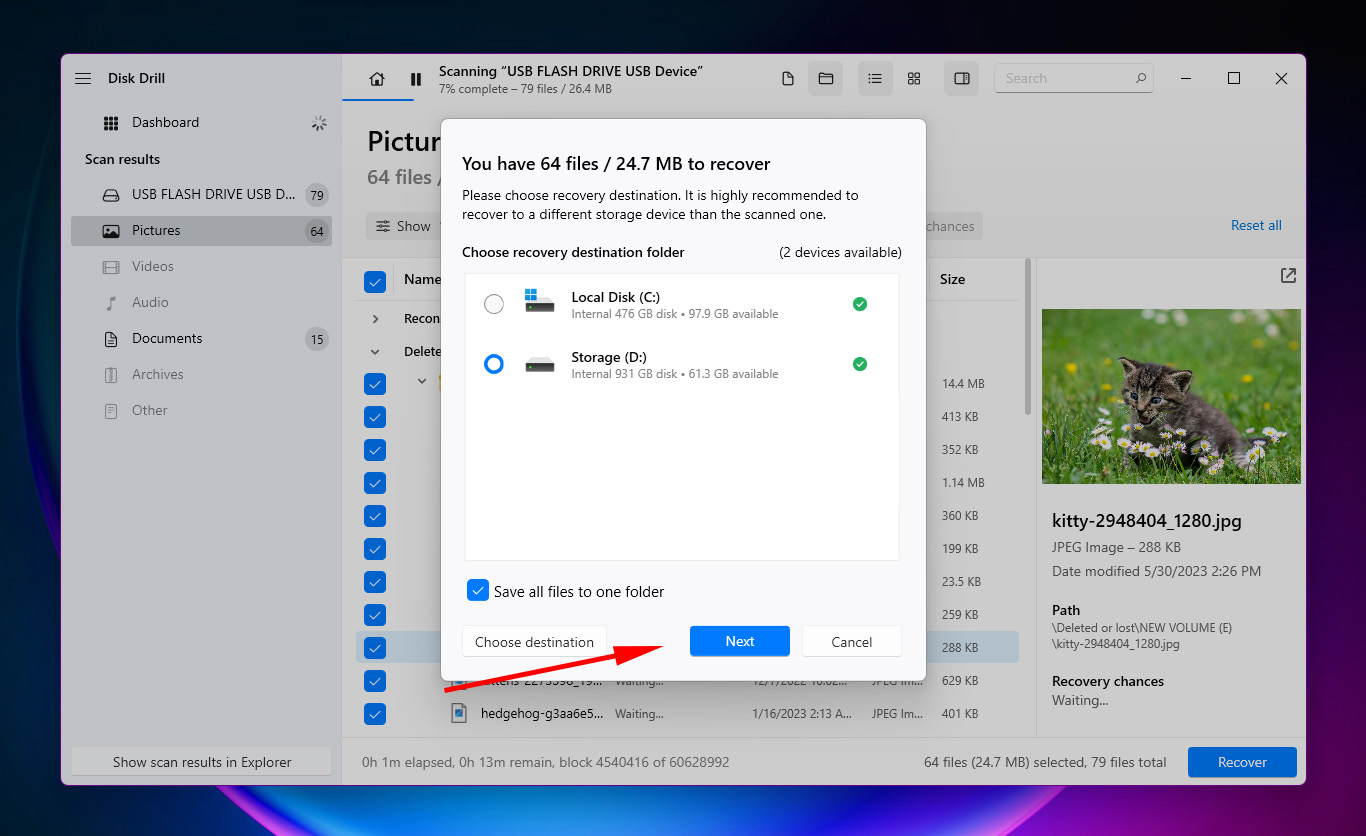
- Select a recovery destination. Make sure you don’t restore the files back to the same USB you’re recovering from, as it could cause them to be corrupted. When ready, click OK.
Conclusion
The “Access is denied” issue appears when something is preventing you from accessing the data on your USB drive. Preliminary checks include making sure the USB is free of viruses and ensuring it has a drive letter assigned. Following this, you should check the permissions of your USB to ensure your account has read/write access. If even that doesn’t work, you can try repairing the USB with CheckDisk and uninstalling the device so new drivers can be installed upon reconnection.
If none of the fixes work, you can always format the USB to reset it. Although your files will be deleted in the process, you can recover deleted files from a flash drive afterward.


