 Although XQD cards aren’t as common as they used to be, they remain a reliable and convenient method of storage for cameras that support them. However, they are not invulnerable to data loss, and you must act quickly if you want to recover your lost photos and videos should they disappear.
Read on to learn how you can recover deleted files from XQD cards.
Table of Contents
What Is an XQD Card
XQD cards were developed as the successor to CompactFlash. They were created to fulfill the growing needs of camcorders and cameras that were beginning to shoot in high definition and high resolution.
As they are designed for prolonged heavy use in various environments, their durability is exceptional, being shockproof, magnet-proof, anti-static, and more resistant to physical damage. Additionally, they offer transfer speeds up to 1 GB/s (version 2.0), ensuring they don’t bottleneck the performance of higher-end cameras.
Although XQD cards were succeeded by CFexpress cards, they remain a durable and reliable form of storage for videographers and photographers alike. However, they’re not impervious to data loss. If you have an XQD card that has recently faced data loss, you need to begin XQD card data recovery immediately.
How to Recover Files From an XQD Card
Even if your photos and videos aren’t appearing, there’s a chance that they still reside on the XQD card, waiting for recovery. In order to get them back, you need to use a data recovery tool like Disk Drill. We’ve chosen Disk Drill due to its trustworthiness and reliability in recovering data from a wide range of supported devices and file systems. It also works great as free XQD card recovery software, as it allows you to recover up to 500 MB of lost data before you need to upgrade to a paid tier.
Follow the steps below to perform XQD card data recovery using Disk Drill:
- Download and install Disk Drill.
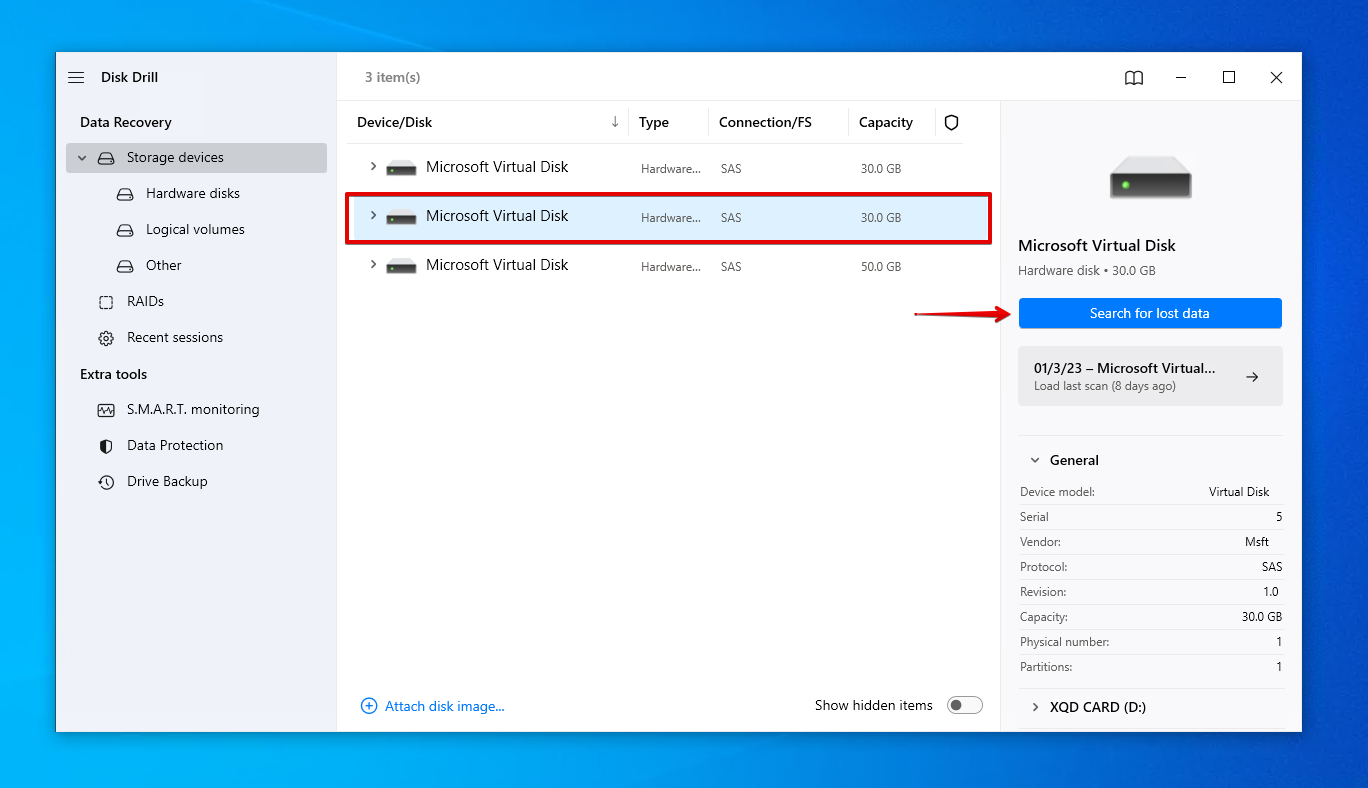
- Connect your XQD card to your computer and select it from the device list. Click Search for lost data.
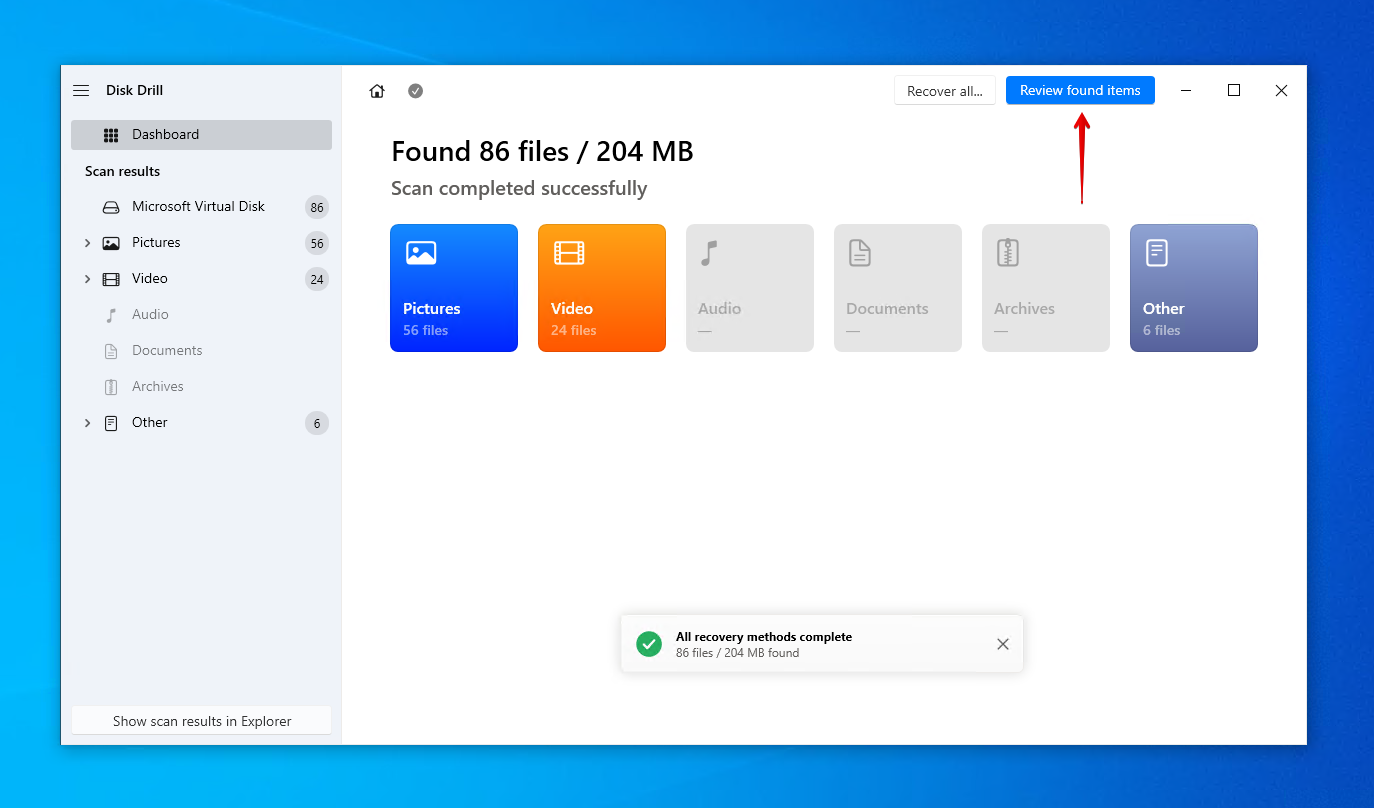
- Click Review found items once the scan is finished. Alternatively, if you just want to recover everything that was found, click Recover all.
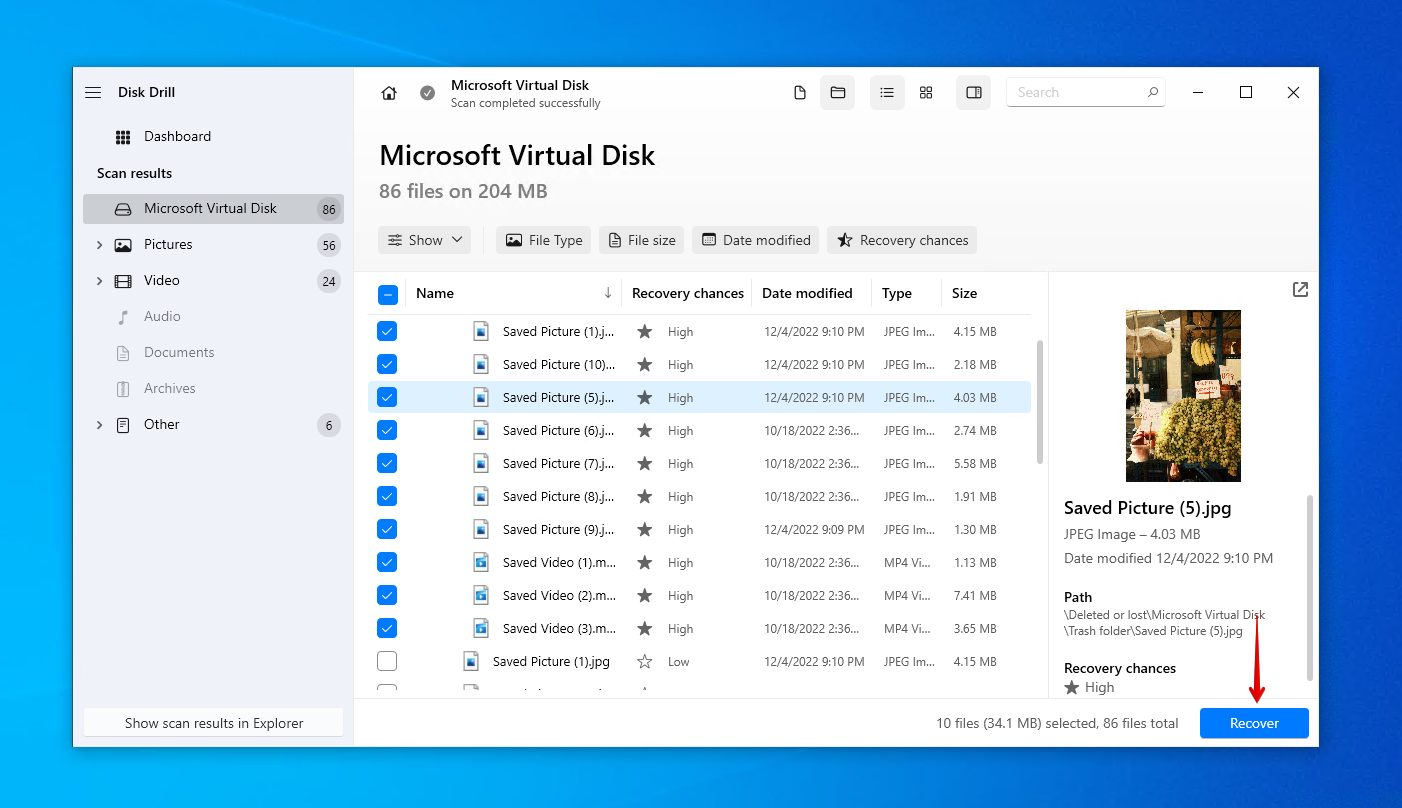
- Mark the files that you want to recover. Make use of the preview function to confirm your files are intact. When you’re ready, click Recover.
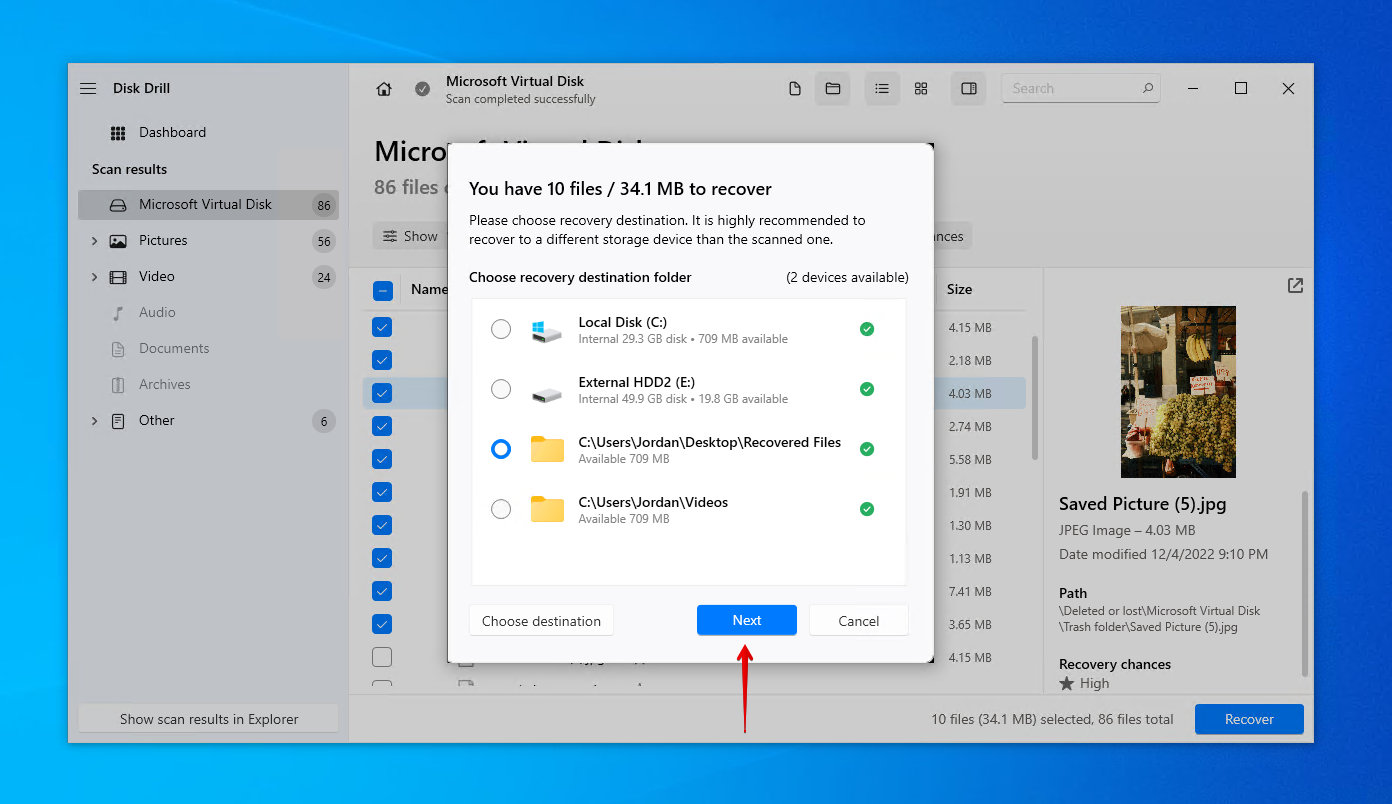
- Select an appropriate recovery location. Do not choose a location on the same XQD card you’re recovering from. Click Next to complete recovery.
As demonstrated, it’s really easy to recover deleted photos from an XQD card, videos too. Disk Drill is useful for other forms of portable flash storage too, as it’s commonly used to recover deleted photos from SD cards that have suffered from data loss.
How to Prevent Data Loss From XQD Cards
There are actions you can take to actively care for your XQD card and the data stored on it to reduce the chances of a data loss event occurring. Take a look at our recommended tips below:
| Suggestion | Description |
| 💽 Make backups | Backing up your data is the only guaranteed way of protecting it against data loss. If your XQD card faces a similar event in the future, a copy of your data can easily be restored, saving you the time it takes to perform data recovery. |
| ⏏️ Eject safely | When disconnecting your XQD card from your computer, always be sure to eject it safely. Doing so will ensure delicate read-write operations have been stopped. Immediately removing the XQD card without doing so safely can result in data or file system corruption. |
| ❄️ Be wary of temperatures | XQD cards have a specified operating temperature range. Anything outside of this can damage the card. For example, a Sony XQD card (G Series) has an operating temperature of -13 to 149°F / -25 to 65°C. Therefore, if you’re a traveling photographer, take note of the conditions you’re shooting in. |
| 🗃️ Store it somewhere safe | Although XQD cards are made to be rigid and durable, going the extra mile to keep them safe can prolong their life. Consider getting a storage case for your XQD cards and other portable flash media, so they’re always organized and protected. |
Of all of the suggestions mentioned above, making backups is the most important. You can do this simply by copy/pasting your files to another storage medium, uploading copies to a cloud service like OneDrive or Google Drive, or using a Windows backup utility like File History or Backup and Restore.
FAQ:
- Connect the XQD card to your computer.
- Right-click Start and open Disk Management.
- Right-click the volume of your XQD card and click Format.
- Choose the desired file system and make sure Perform a quick format is selected. Click OK.
- Click OK.


")
