 CHKDSK is one of the most commonly recommended fixes to troubleshoot different drive errors, but it unfortunately cannot scan a RAW drive. You will most likely encounter the error “The type of the file system is RAW. CHKDSK is not available for RAW drives” when you try to use this tool on a drive that has become RAW. So what can you do in this situation instead?
In this guide, we’ll explain what it means when CHKDSK is not available for RAW drives and what you can do to repair your RAW drive and perform a safe RAW drive data recovery.
Table of Contents
What is a RAW Drive?
A RAW drive can be any internal or external storage device that has an unsupported, corrupted, or unrecognizable file system. File system errors cause your computer to be unable to access or interact with your drive.
Your drive can become RAW due to different reasons, including partition table or disk errors, accidental formatting, and corruption due to interrupted write operations.
In most cases, this leads to CHKDSK not working on RAW drives, since it does not know where the partition starts and where it ends. Plus, Windows doesn’t know what to check for in a storage device in a RAW state.
How to Avoid Losing Data on Your RAW Drive
While the easiest and most reliable way to fix a RAW drive is to format it, this process leads to the deletion of all your data in that drive. To avoid this, we recommend using reliable data recovery software like Disk Drill, which is capable of safely scanning a drive without a recognizable file system.
Disk Drill is a powerful data recovery tool versatile enough to scan, find, and even reconstruct fragmented files from different storage devices. It can scan and recover RAW SD cards, hard drives, USB drives, and more. With the Windows free trial version of the app, you can try out its features and recover up to 500 MB of data.
Here’s a step-by-step guide on how to recover data from your RAW drive before attempting repairs:
- To get started, download the Disk Drill installer from the Cleverfiles website and open the file to initiate installation. Then, follow the instructions to successfully install the app.
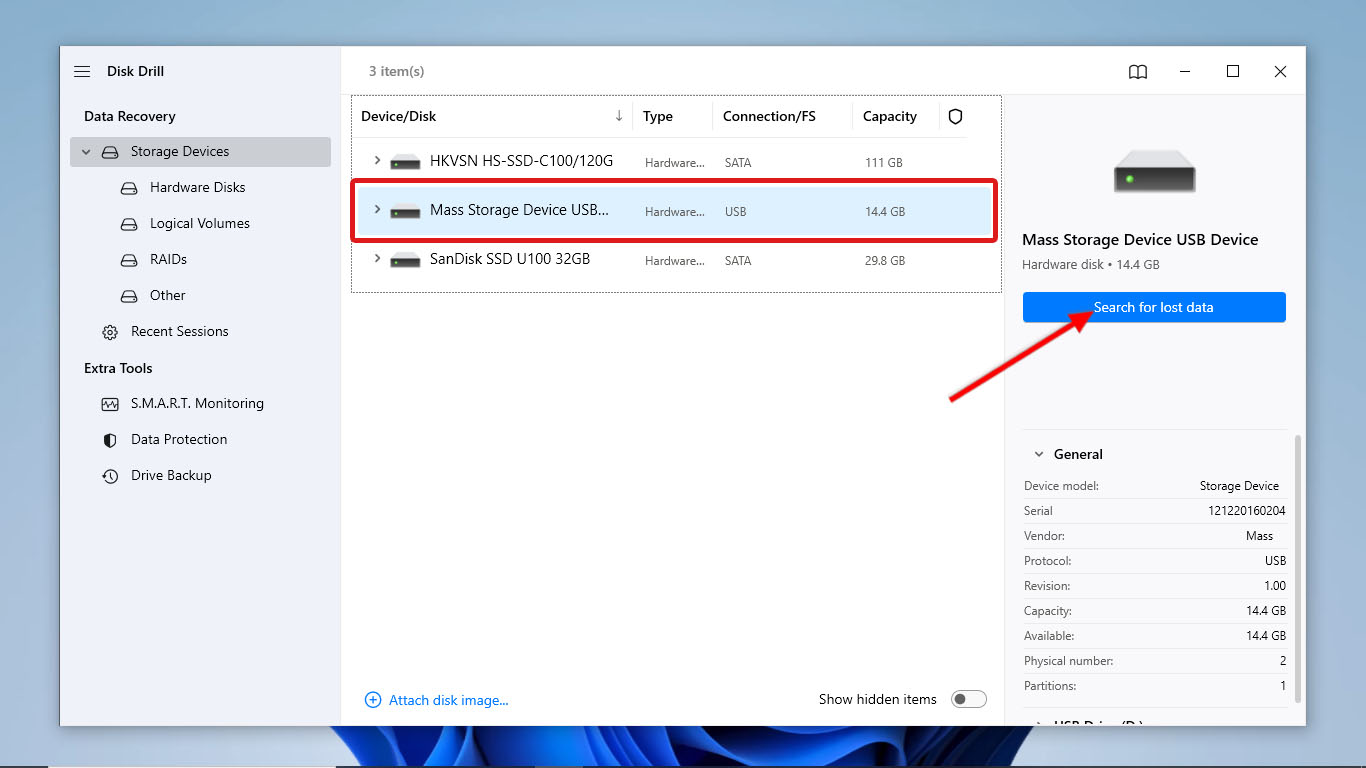
- After a successful installation, open Disk Drill. On the list of devices you can scan, click on your RAW drive to select it. Next, click Search for lost data to start the scan.
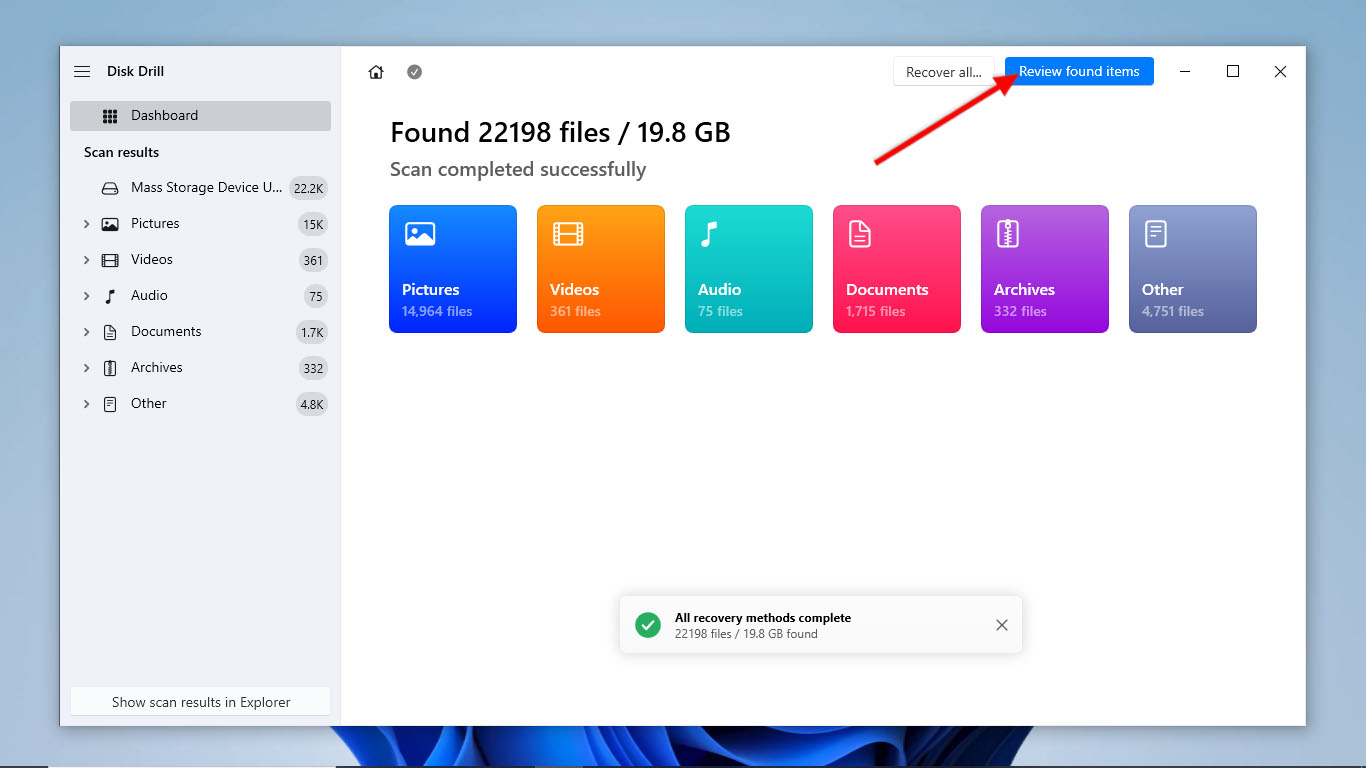
- As the scan proceeds, you can click Review found items to preview the files Disk Drill found so far. You can also let the scan finish first before clicking the same button to review scanned files.
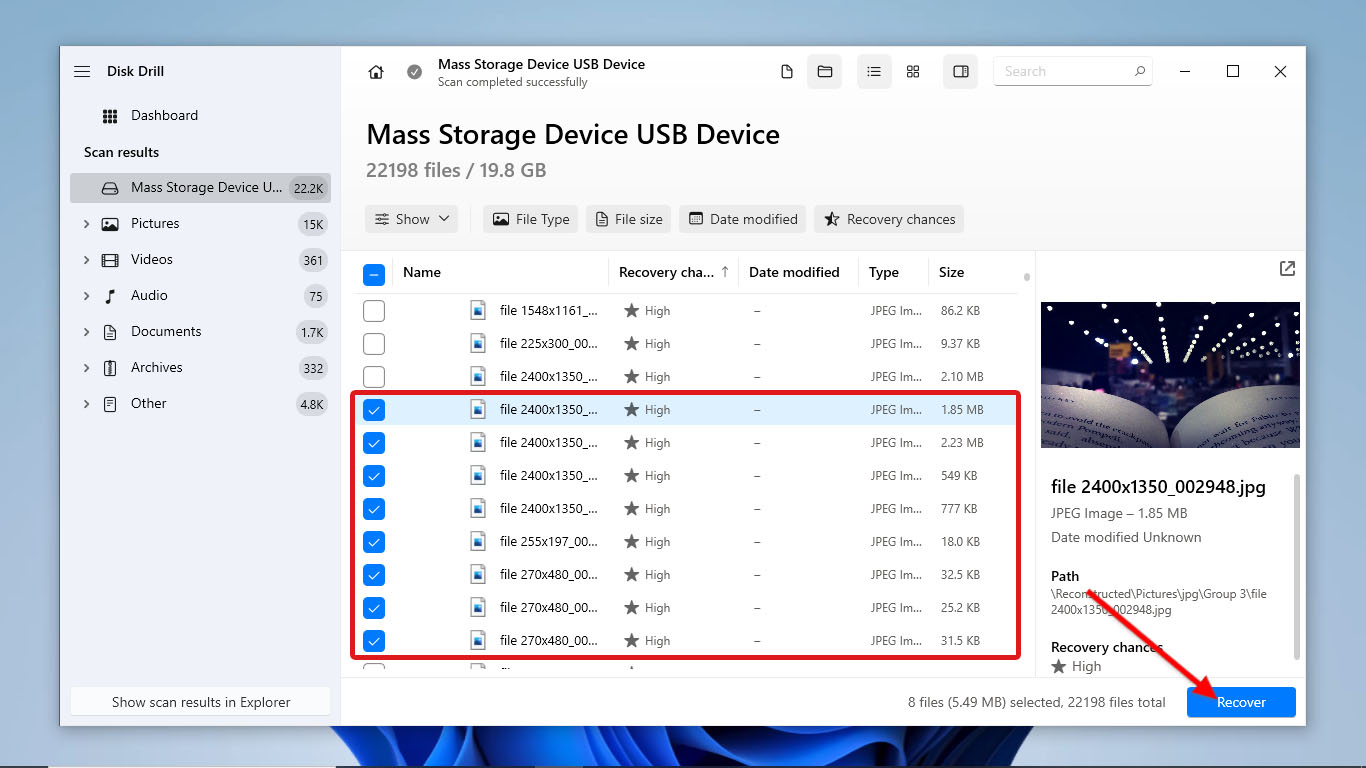
- Next, browse through the scanned files or search for particular files to recover using the search bar at the top right corner of the window. Tick the checkboxes beside the file names of the ones you want to recover. Once you’re done with the selection, click Recover.
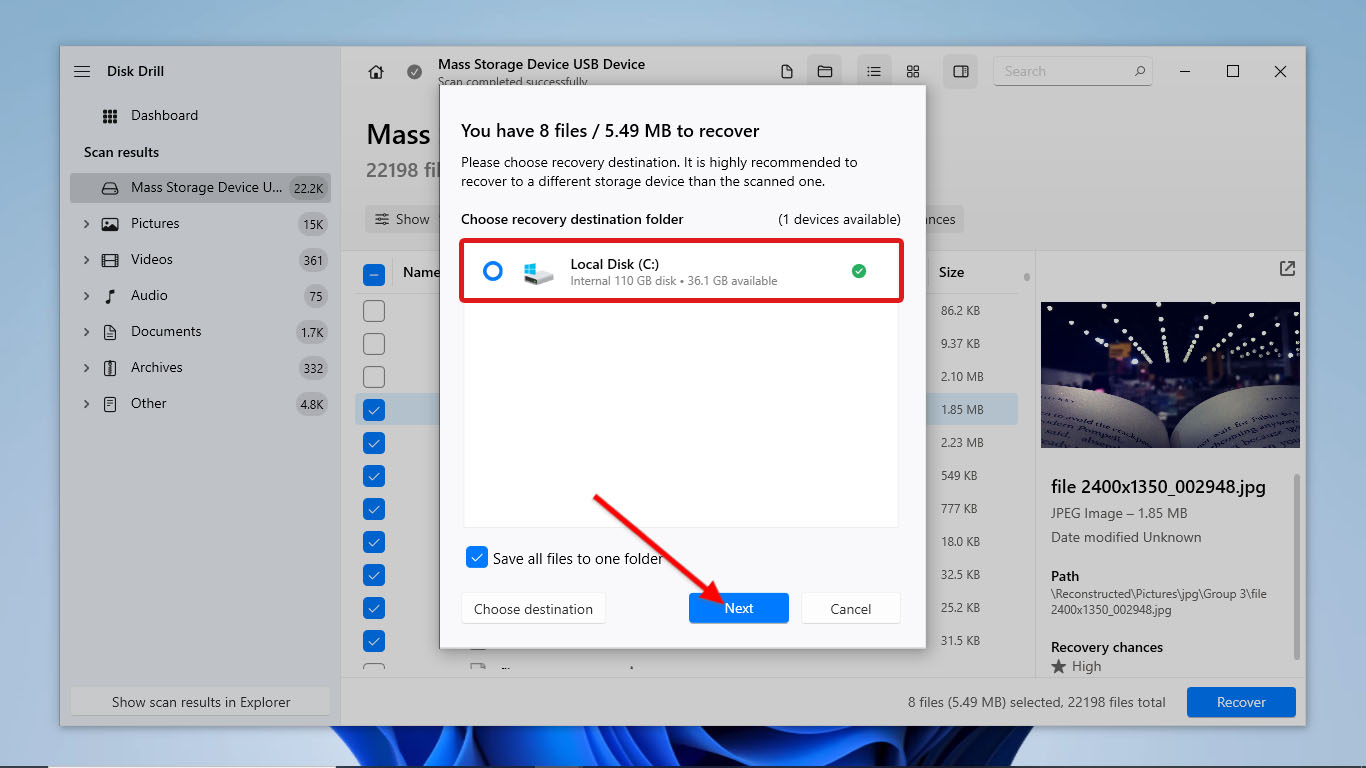
- Select the destination drive for your recovered files. Remember to choose a different drive than the one you’re scanning to prevent any further data loss. After selecting the location for your recovered files, click Next.
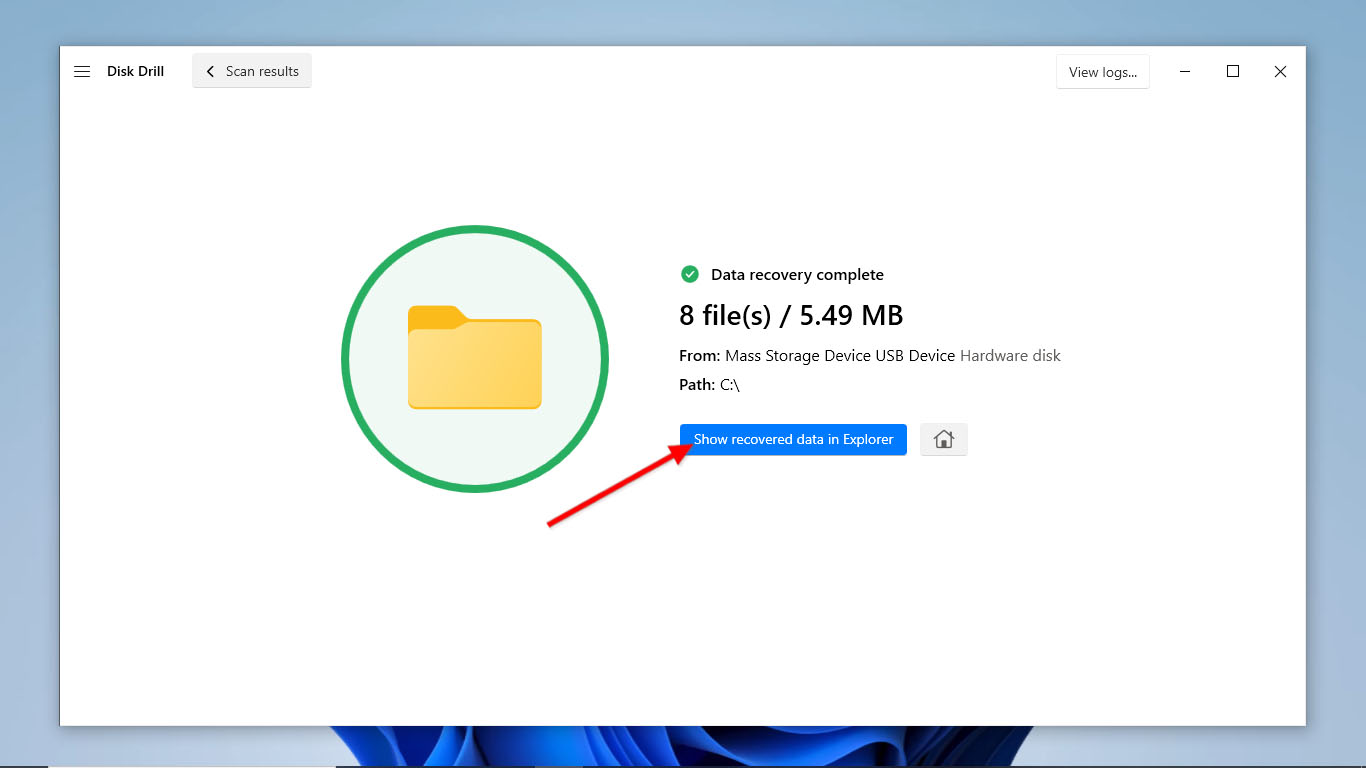
- Finally, the recovery process begins. It might take a couple of seconds to a few minutes to finish, depending on how many files it is attempting to recover. After the process, Disk Drill would display the number of files it successfully recovered. You can browse them in File Explorer by clicking Show recovered data in Explorer.
How to Fix a RAW Drive
Once you have recovered your files, you can now attempt to fix your drive without worrying about data loss. To repair RAW drive, Windows has a selection of tools and an easy process available.
But if you don’t want to resort to formatting right away, we’re here to provide alternatives that will help you repair your RAW drive.
Method 1: Recreate the Partition Table Using TestDisk
Using an open-source recovery program called TestDisk, you can try to recover a lost partition and fix RAW drive without format. TestDisk is a command-line tool that can recover partitions and scan and repair drives.
To recover your partition with TestDisk, simply download its zip from the CGSecurity download page and do the following:
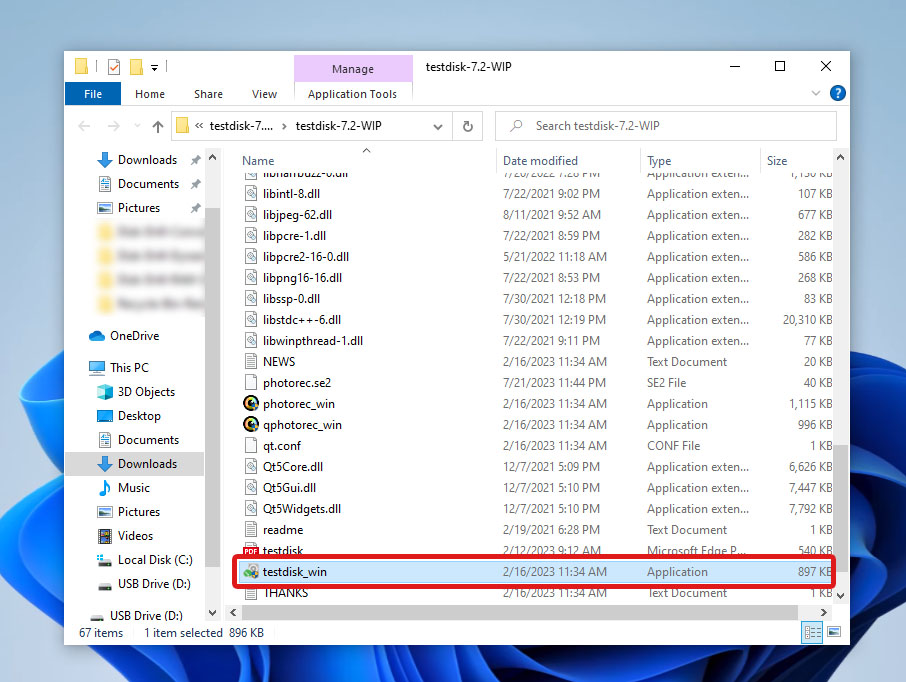
- Extract the contents of the TestDisk zip you downloaded and open testdisk_win.exe. You can navigate through the program and select options using the arrow keys and Enter key.
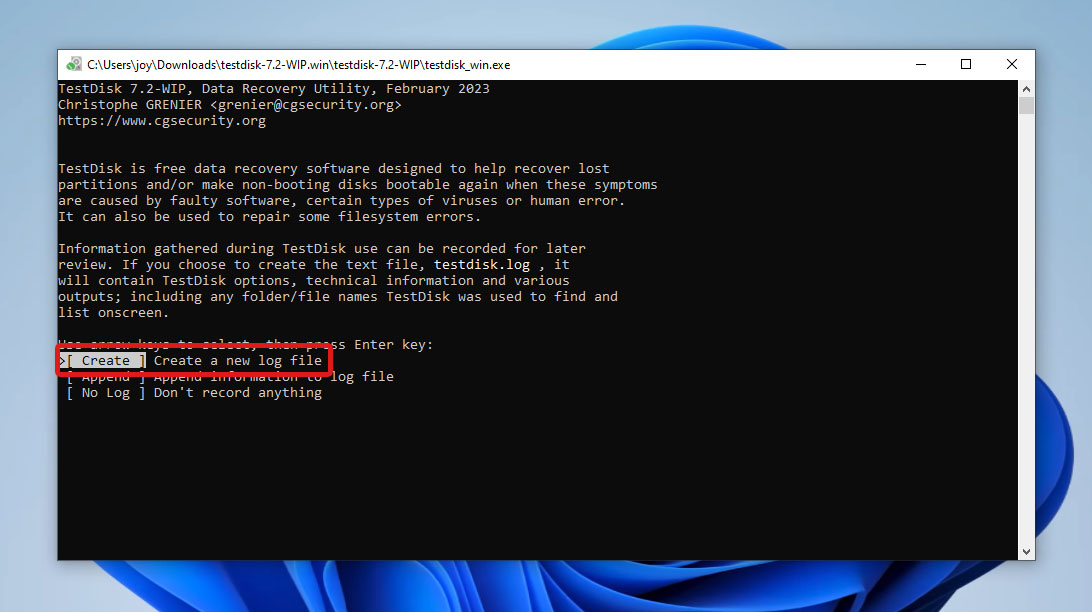
- Select the [Create] option and press Enter to create a new log for your session.
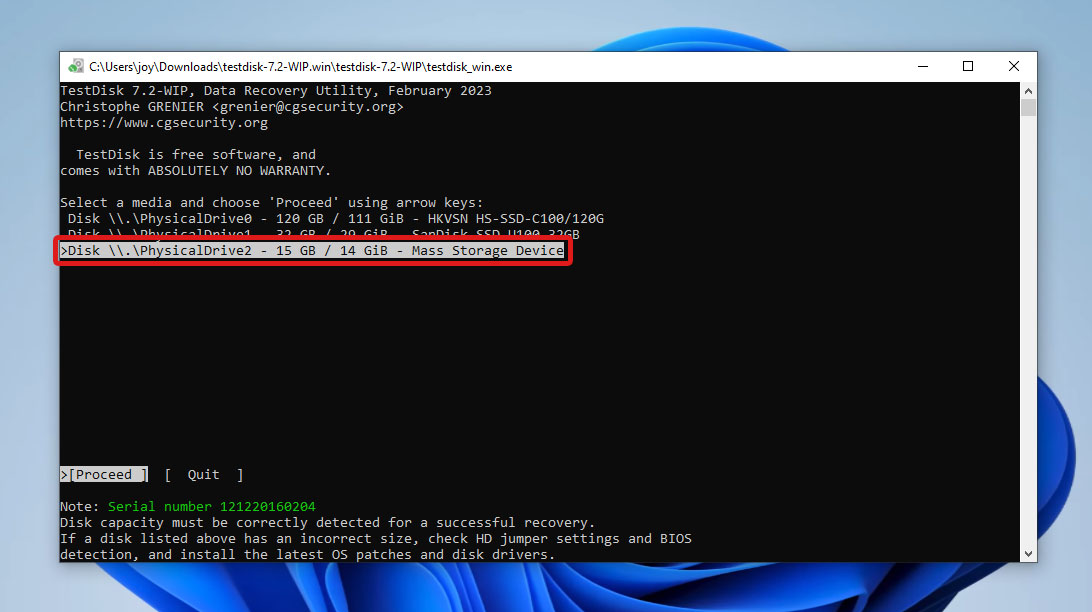
- After that, you should see a list of drives available on the current screen. TestDisk only shows each drive’s file size and file system, so choose the one that matches your RAW drive. Then, press Enter.
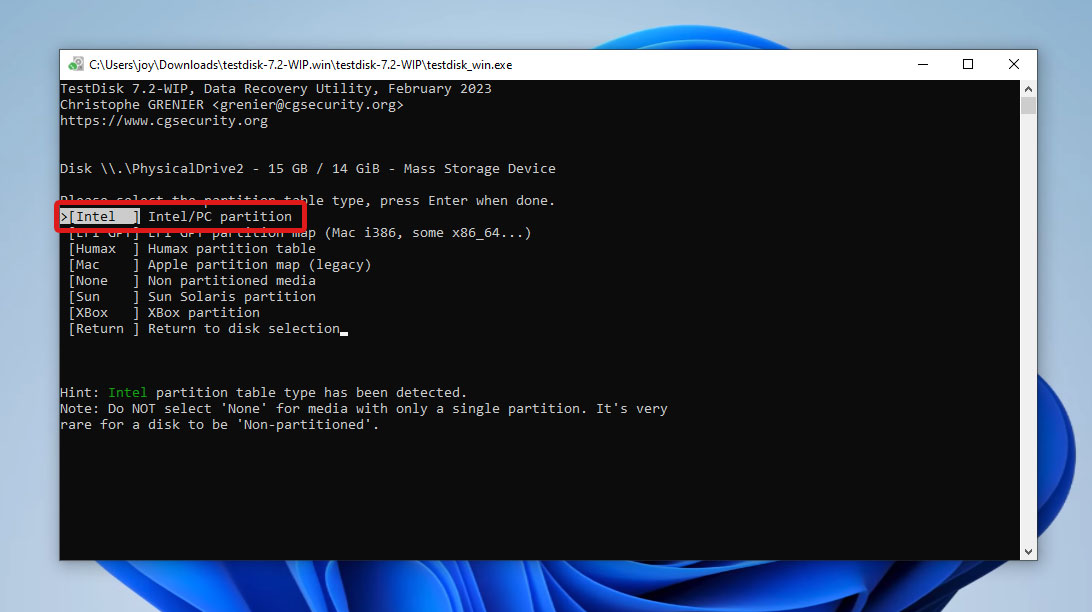
- Now, choose the partition table appropriate for your drive and press Enter. You can choose the one selected by default, as TestDisk automatically detects the correct partition for your device.
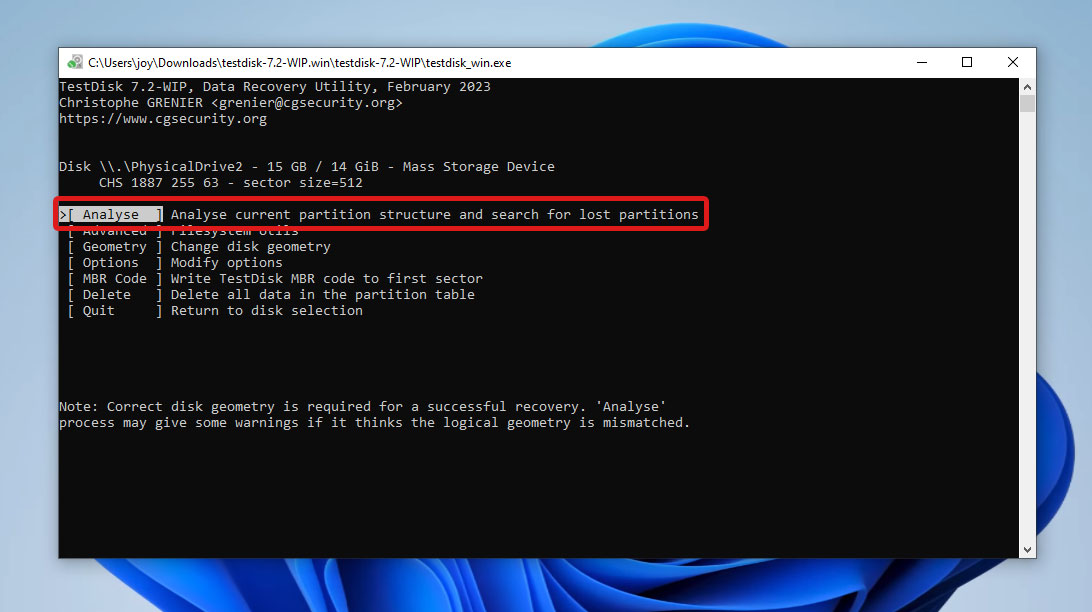
- Next, choose Analyse and press Enter. This allows TestDisk to analyze if your drive partition is damaged or its entry is corrupted. This also lists your drive’s current partition table.
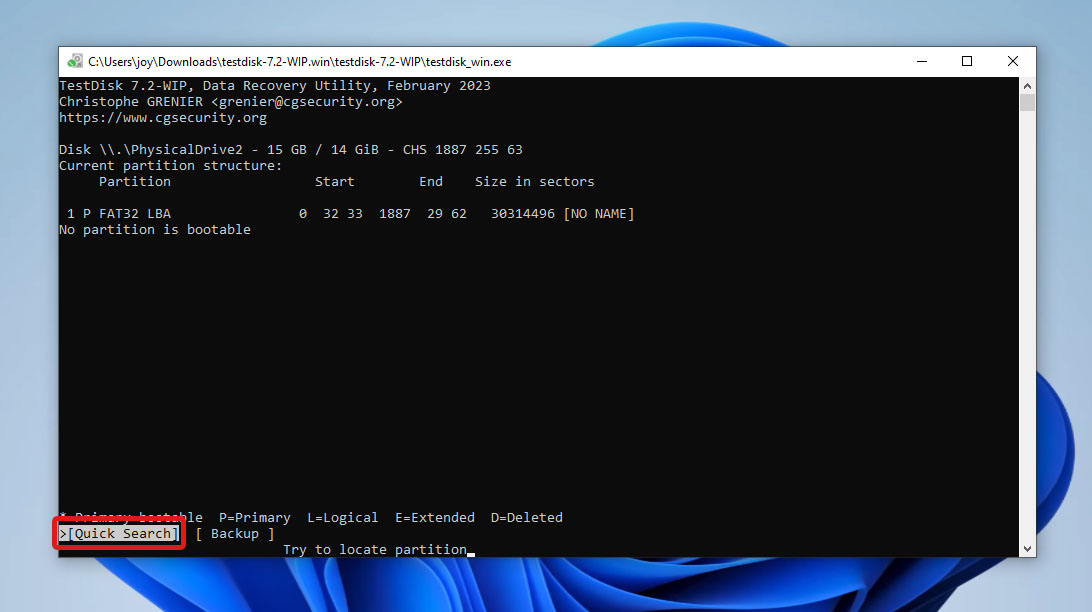
- Once the analysis is complete and no particular partition error is recorded, you can proceed to Quick Search to allow TestDisk to find all partitions from your drive.
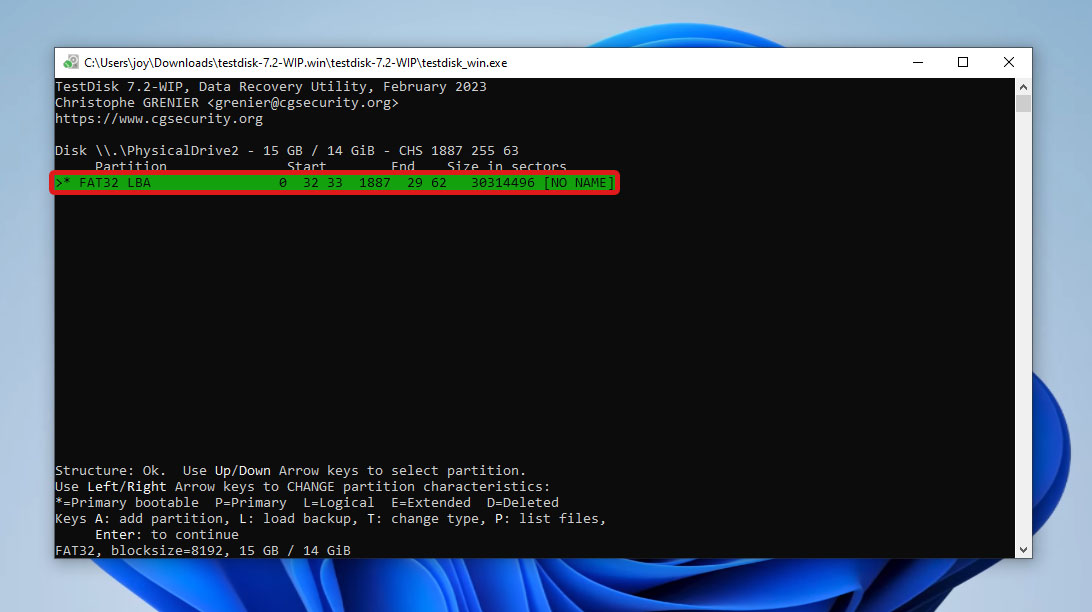
- If TestDisk found your drive’s previous partition, select it and press Enter.
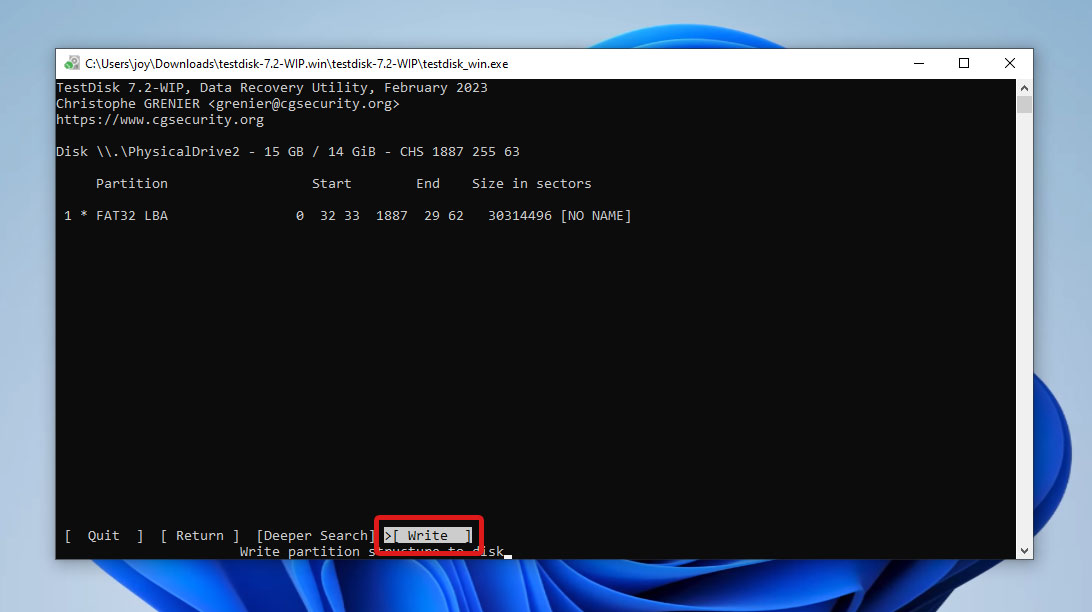
- Finally, select Write and press Enter to finalize your partitions and write them in the partition table. Press Y to confirm, then press OK.
If you still can’t find your partition, choose [Deeper Search] to enable a deeper scan. However, it will take as long as a few hours for this kind of scan to finish. Also, make sure that your computer will not sleep in the process.
Reconstructing your partition table should make your drive accessible again. However, if this method does not fix your issue, consider formatting your drive using these three methods: File Explorer, Disk Management, or DiskPart.
Method 2: Format RAW Drive from File Explorer
Formatting a RAW drive from File Explorer (formerly known as Windows Explorer) is a straightforward task for Windows 7/ 10/ 11. Simply follow these steps to proceed:
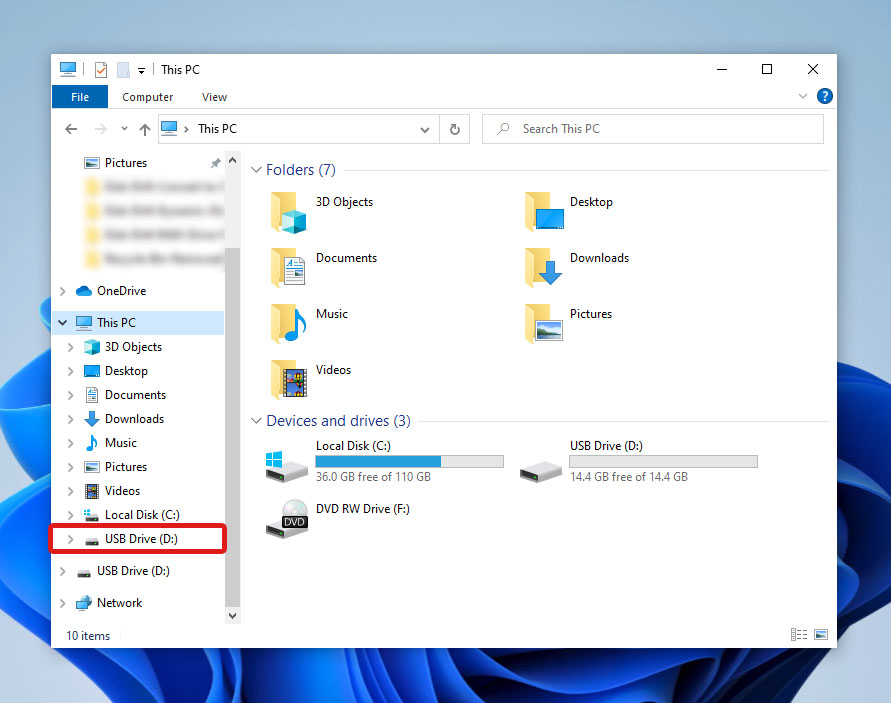
- Connect your storage device and open File Explorer. You should see your device on the left pane or the list of devices if you navigate on This PC.
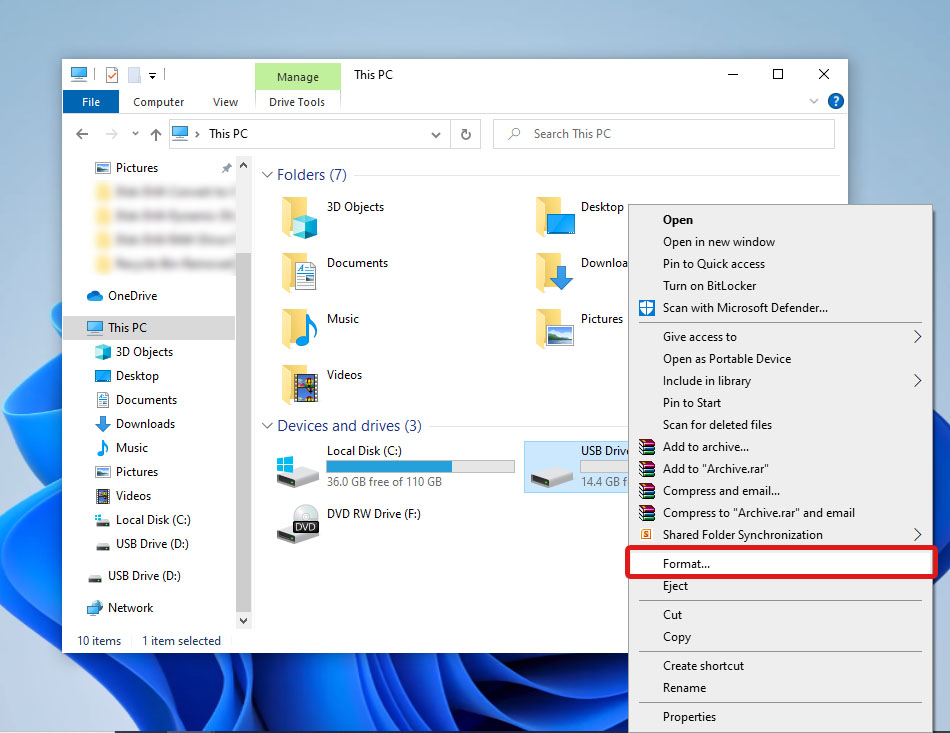
- Right-click on your RAW drive and select Format.
- Choose what file system you want (e.g., choose NTFS if you need to convert RAW to NTFS), the name of your drive, and if you prefer a longer or a quick format. Then, click Start.
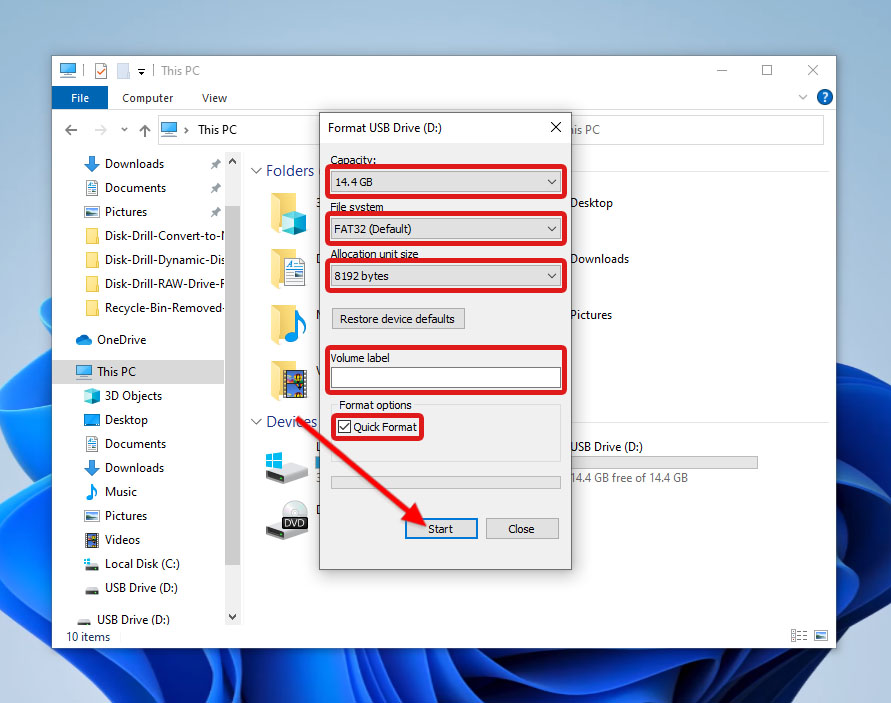
The format process should be over after a few moments, depending on your format options. Once the process is done, your drive should be empty and accessible again.
Method 3: Format RAW Drive from Disk Management
Disk Management is another handy Windows utility that can manage all the drives connected to your computer. To format a RAW drive using Disk Management, follow these steps:
- Press Windows + R to open the Run dialog box. Then, type diskmgmt.msc and press Enter. Alternatively, you can right-click on the Windows icon on the Start menu and select Disk Management.
- On the list of drives in Disk Management, right-click on your RAW drive and select Format.
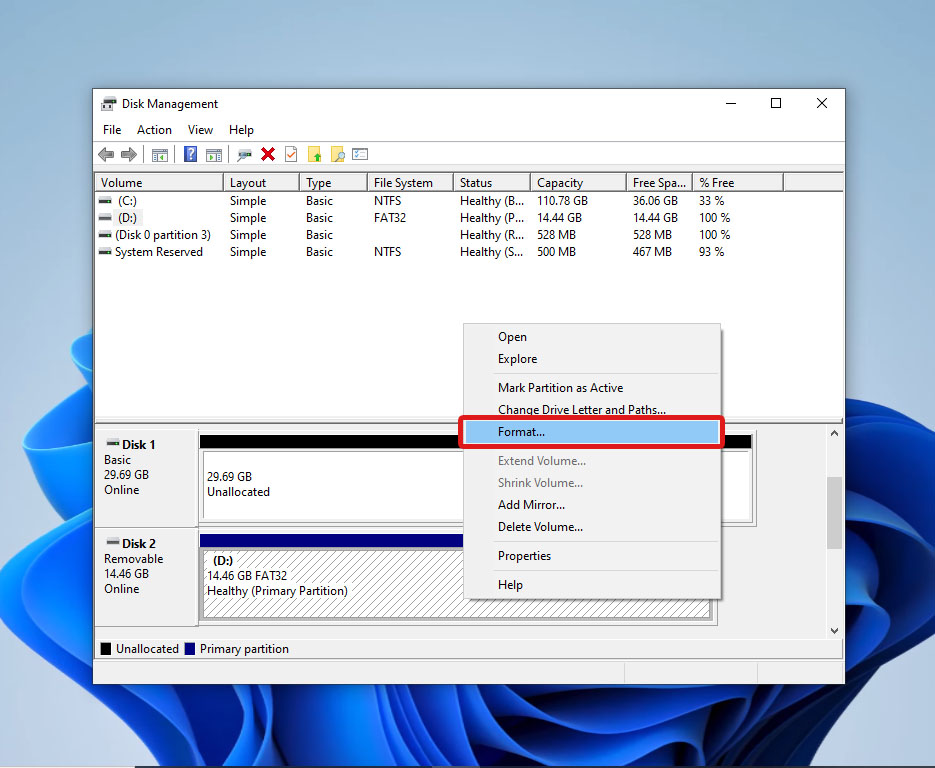
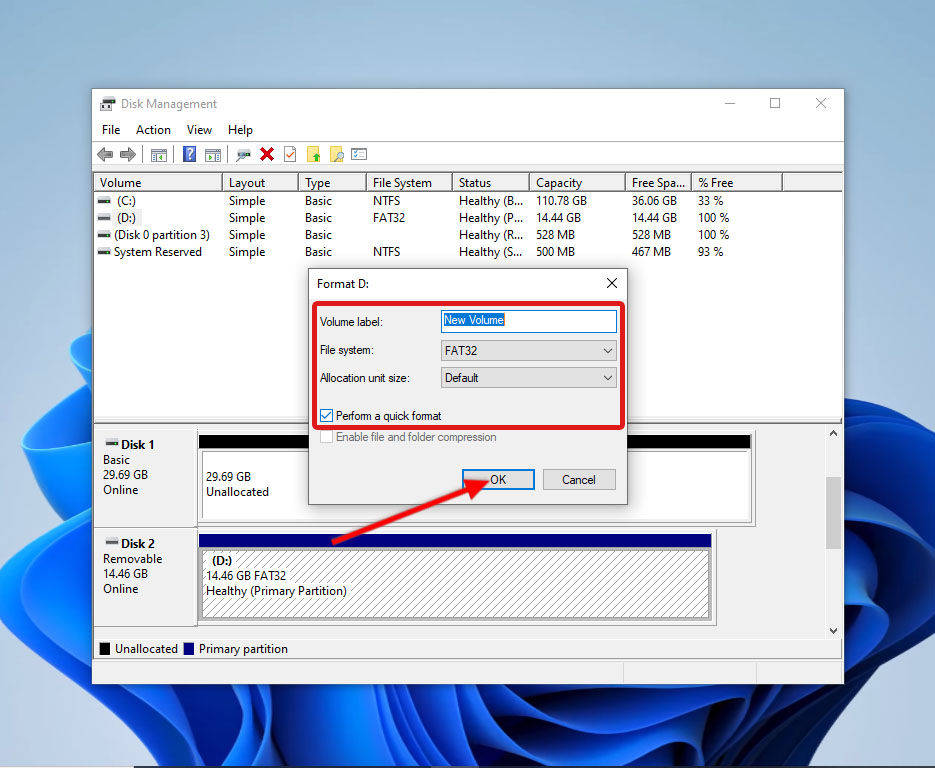
- Select the file system and other information in the dialog box and click OK to begin formatting your device.
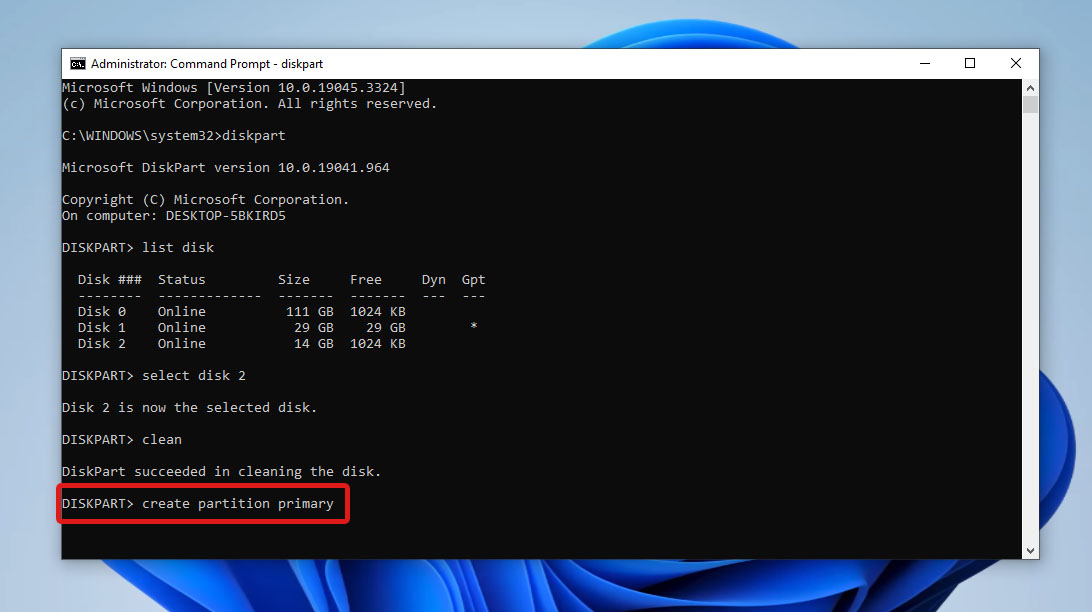
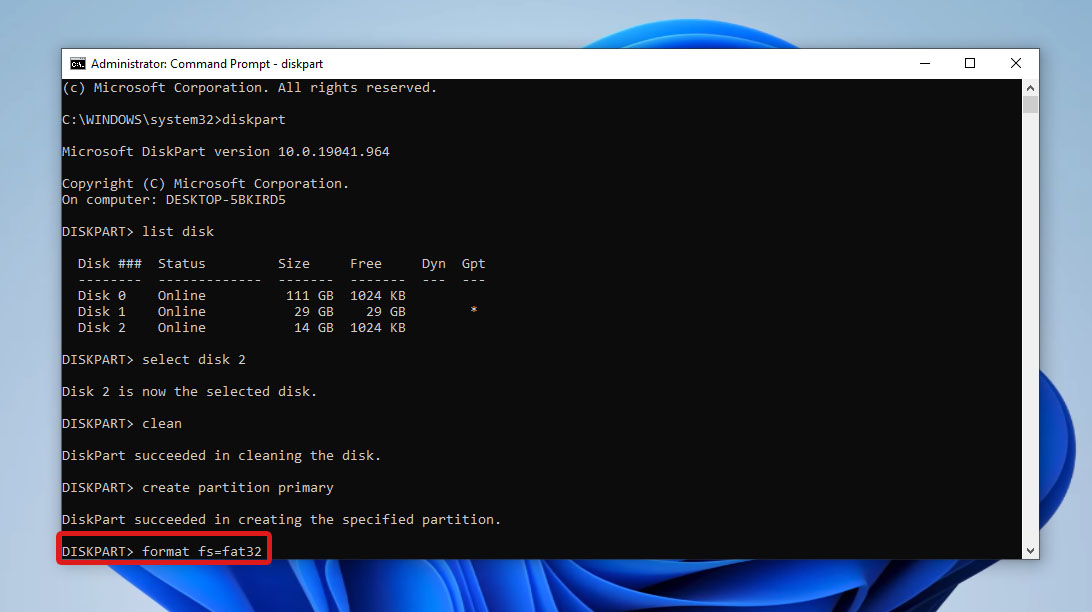
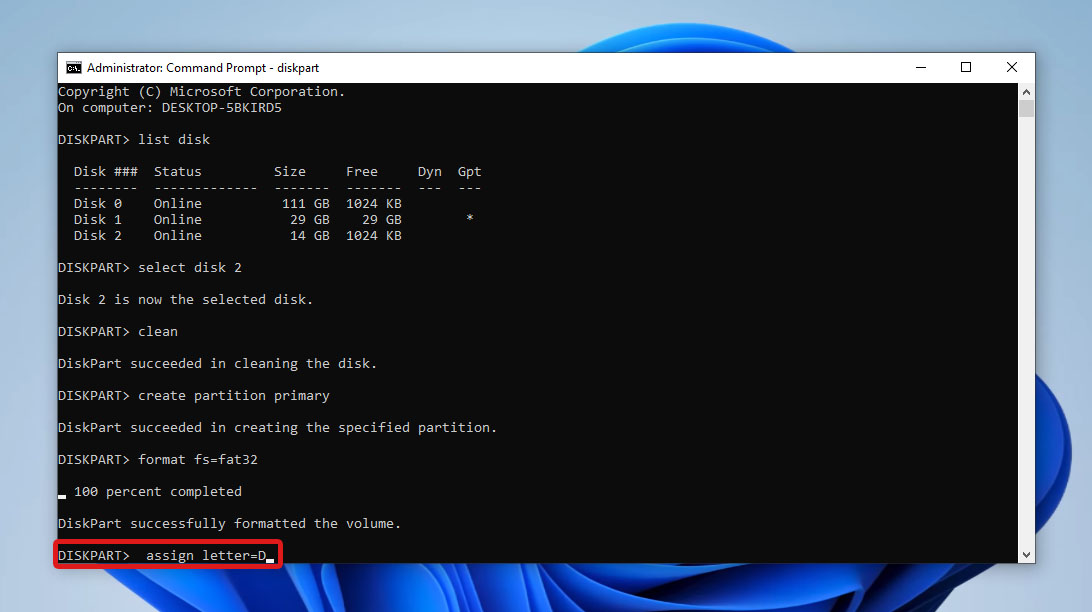
Method 4: Format RAW Drive from Command Prompt
The Command Prompt serves as a channel for Windows’ multitude of utilities for just about any troubleshooting and management on your computer. One of the tools you can use on the command line is DiskPart, which acts as a disk manager for all your connected drives.
Fix RAW drive with cmd using these steps:
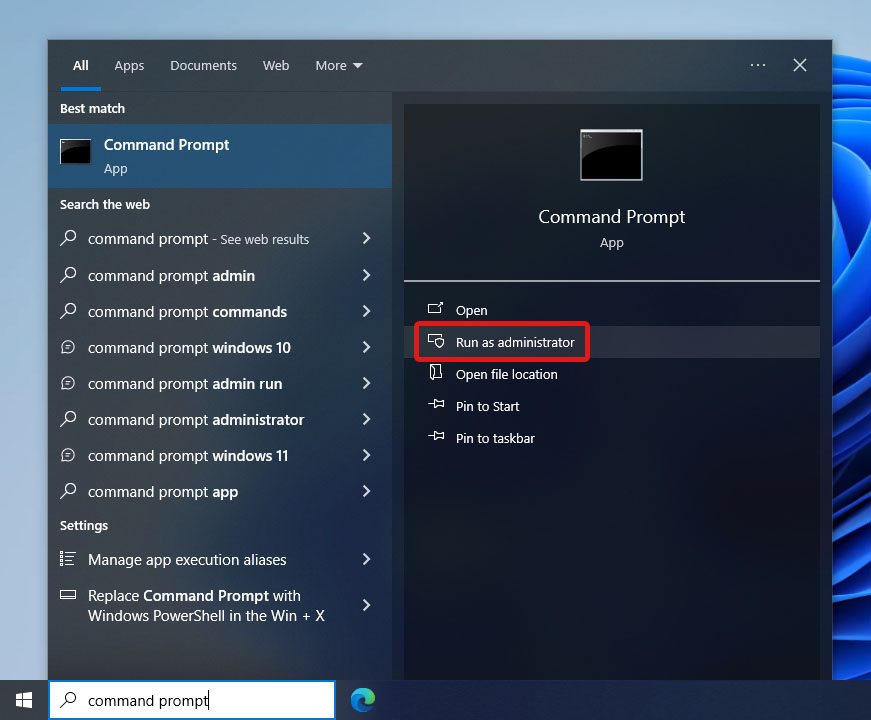
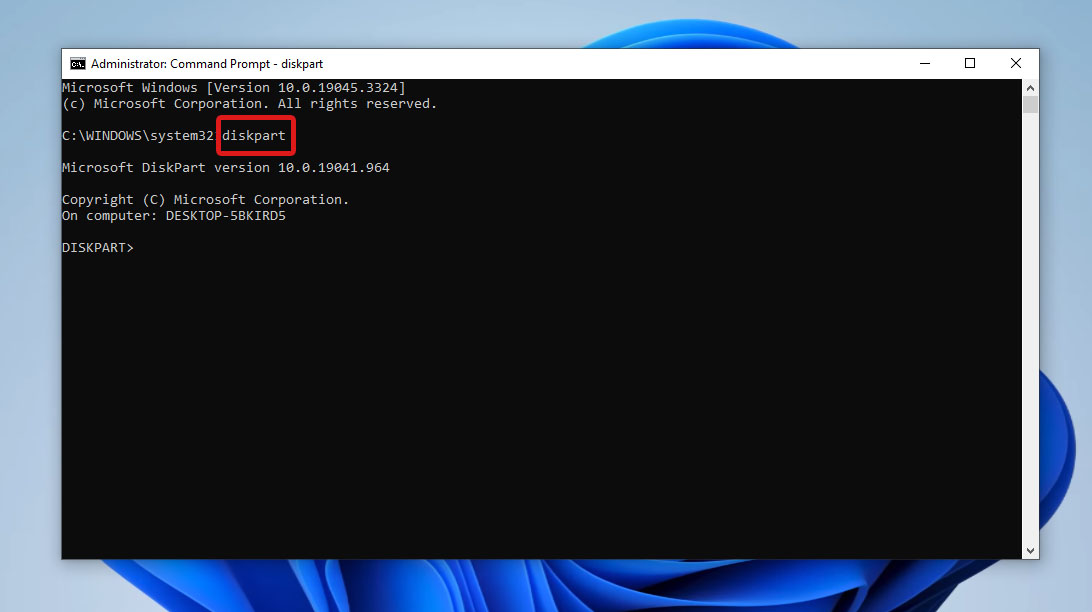
- First, open the Command Prompt as Administrator.
- Then, type
diskpartand press Enter.
- Type
list diskand press Enter. This displays all the drives available on your computer.
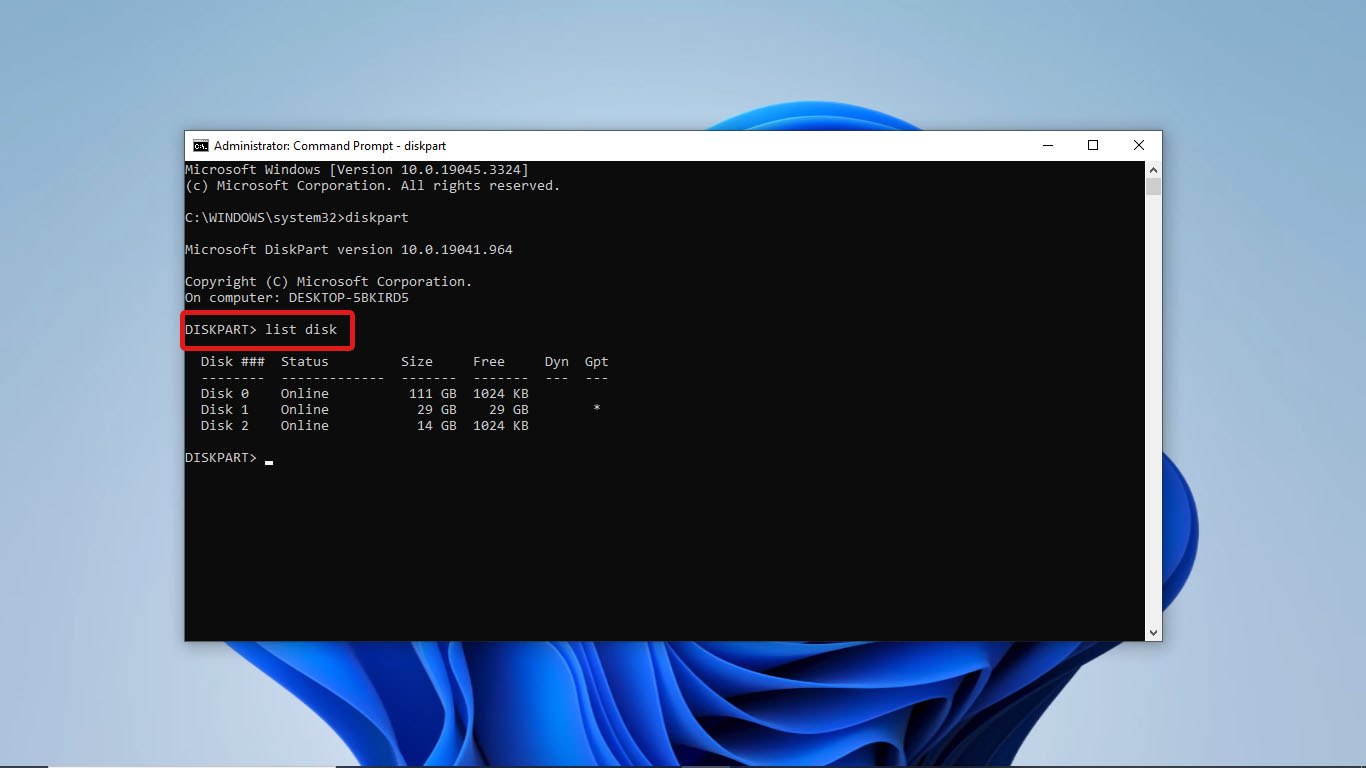
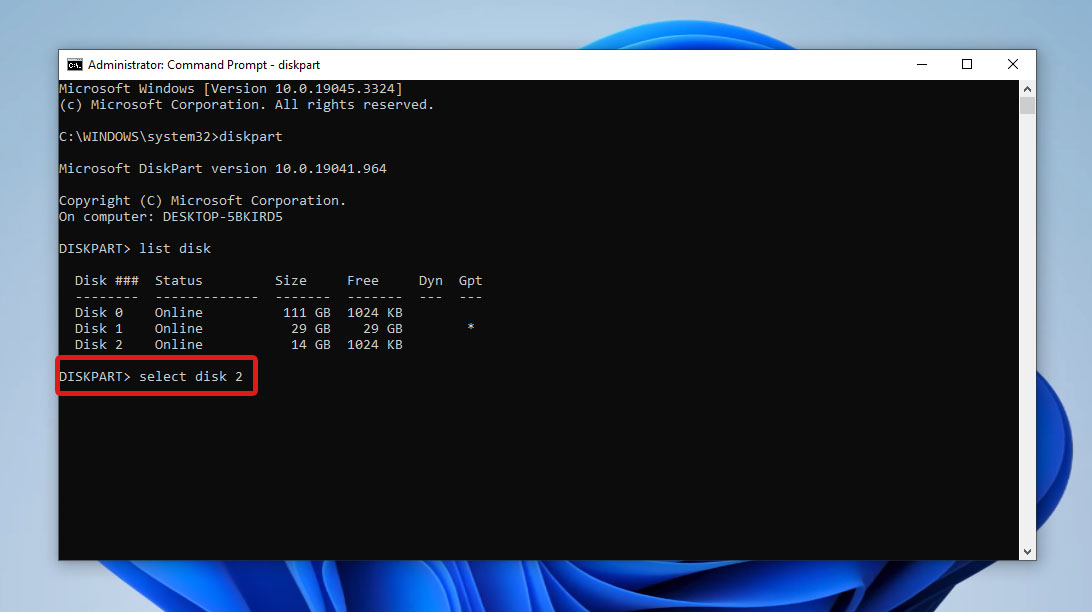
- Identify your RAW drive and take note of its disk number. Then, type
select disk n, where n is the disk number of your drive.
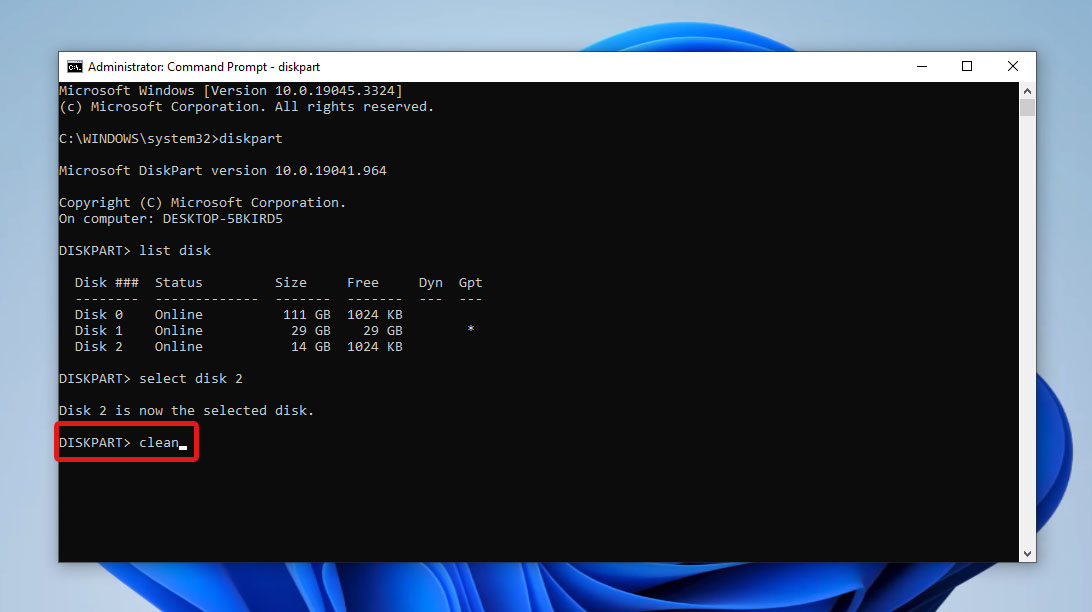
- Type
cleanand press Enter. This prepares your drive for the format process by erasing all the data on it.
- Next, type
create partition primaryand press Enter.
- After that, type fs=[file system], where [file system] is the one you want to format your drive into.
- Type
assign letter=X, where X is your desired drive letter.
- Finally, type
exitto quit the command line tool.
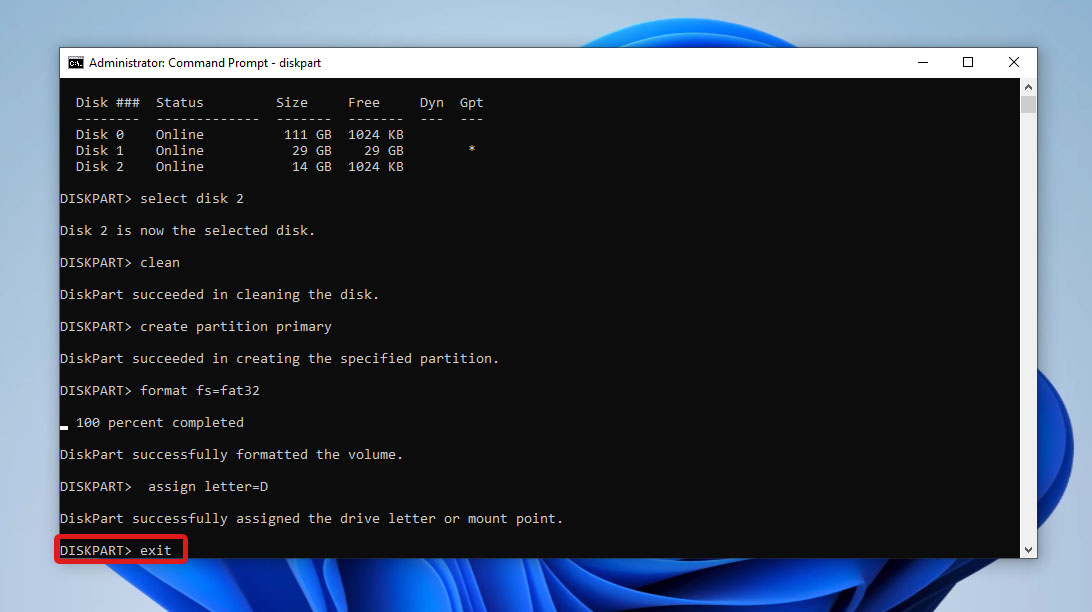
This process to repair the RAW drive creates a new partition, formats the device into a new file system, and assigns a new drive letter to it. Once it’s done, you can check your drive again to verify if you can access it now.
It’s important to note that if your drive fails to be formatted or your files are not recovered by our methods, they might be damaged more than expected. In this case, you can send the drive to a professional data recovery service for a better chance of successful recovery and repair. However, this may cost significant money and still does not guarantee a successful repair.
Conclusion
CHKDSK is a convenient tool for scanning a file system for errors but it can’t scan a RAW drive. The error “the type of the file system is raw. CHKDSK is not available for raw drives” will appear as you try to scan the drive using this tool.
To repair a RAW drive, your best option is to format it. But if you have important files on your drive, relying on a powerful data recovery tool like Disk Drill to recover drives from a RAW drive is your ideal solution.
Once you recover your important files, you can either recreate the partition table using TestDisk or format your drive in the File Explorer, Disk Management, or Command Prompt using DiskPart. But if all these methods don’t work, you can bring it to a professional data recovery service to attempt repairs and data recovery.
FAQ:
- Connect your device and open File Explorer
- Right-click on your RAW drive and select Format.
- Choose your desired name, file system, and quick scan preferences.
- Finally, click Start.


")
