 Maxtor is a pretty popular internal and external hard disk developer that’s been around for more than 40 years. Established in the early 1980s, the company was later acquired by storage media juggernaut Seagate in 2006. While Maxtor devices have generally been met with solid reviews in terms of quality and reliability, there’s still a decent chance that their storage devices may encounter data loss scenarios.
In this guide, we’ll teach you some of the best methods for Maxtor data recovery.
Table of Contents
Reasons for Maxtor Hard Drive Data Loss
There are various situations that can lead to data loss in your Maxtor hard drive, and these situations directly affect the potential of data recovery. Below are some of the most common data loss scenarios and the likelihood of Maxtor hard drive recovery if encountered:
| Reason | Description |
| 🔋 Power outage | A sudden power outage can cause many issues with your Maxtor hard drive, including corruption, file loss, and device damage. There are some tools and fixes for certain types of corruption, and file loss can sometimes be remedied by a good data recovery program. As for a damaged device, that’s best left for a quality data recovery service. |
| 💥 Physical damage | Physical damage to your Maxtor hard drive may lead to data loss or the device becoming inaccessible to a computer. These kinds of situations are generally beyond the capabilities of data recovery software, and your best chances of restoration are to seek out a competent data recovery service. |
| 🦠 Virus attack | Viruses and malware can wreak havoc on a storage device, causing issues ranging from file deletion/corruption to even the formatting of your drive. Therefore, getting rid of the virus/malware should be the top priority, and file retrieval can sometimes be facilitated by data recovery software, depending on what the virus/malware did to your files. |
| ⏏️ Incorrect ejecting of the hard disk | Prematurely ejecting your hard drive – especially when it’s in the middle of copying or accessing files – often leads to file transfer errors. In turn, this can cause file integrity issues or loss of data. While some data recovery programs can retrieve the missing data, there’s a high chance the rescued files will be damaged. So your best bet at getting your files back will be to restore them from a backup if you have one handy. |
| ⚠️ System Error | Similar to incorrectly ejecting your Maxtor external hard drive, if your operating system encounters a critical error while your storage device is in use, it can lead to issues like file corruption, data loss, and even device damage. |
| 🗃️ Premature formatting | It’s not uncommon for people to format their hard drives before backing up important information. If a “Quick” format was performed, that’ll erase the files from the Maxtor drive and allow you to update the file system. The good news here is that the data remains on the device until it’s overwritten, meaning you can get it back with a data recovery program before that happens. But if it was a “Full” format, the information wipe is permanent and cannot be restored. |
| 🩹 Accidental deletion of files | Accidental deletion is probably the most frequent cause of data loss in users and one of the simpler scenarios to restore. Checking your Recycle Bin should be your first course of action, but if it’s not there, then there’s a good chance that you can retrieve your deleted files by leveraging a competent data recovery program as long as the files have not been overwritten yet. |
How to Recover Lost Data From Maxtor Hard Drive
As you may have surmised from the table in the previous section, there are multiple ways you can approach Maxtor data recovery. Here are some of the most effective ways for you to restore your missing files:
Method 1: Unhide Files on Maxtor Hard Drive
Sometimes, files can still be available on a Maxtor hard drive but are simply hidden by a virus, for instance. Here’s how to unhide the files so you can access them again:
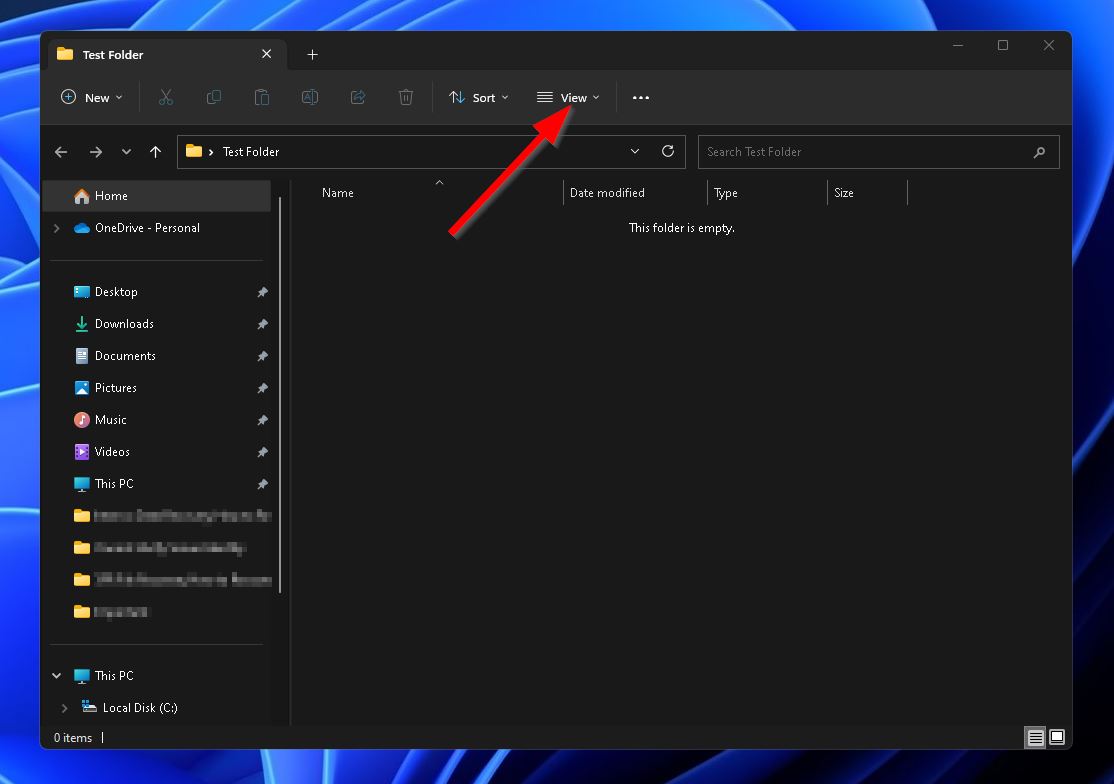
- To get started, open an instance of Windows File Explorer and navigate to the folder where your missing files were located.
- Next, click the View option on the toolbar near the top of the window.
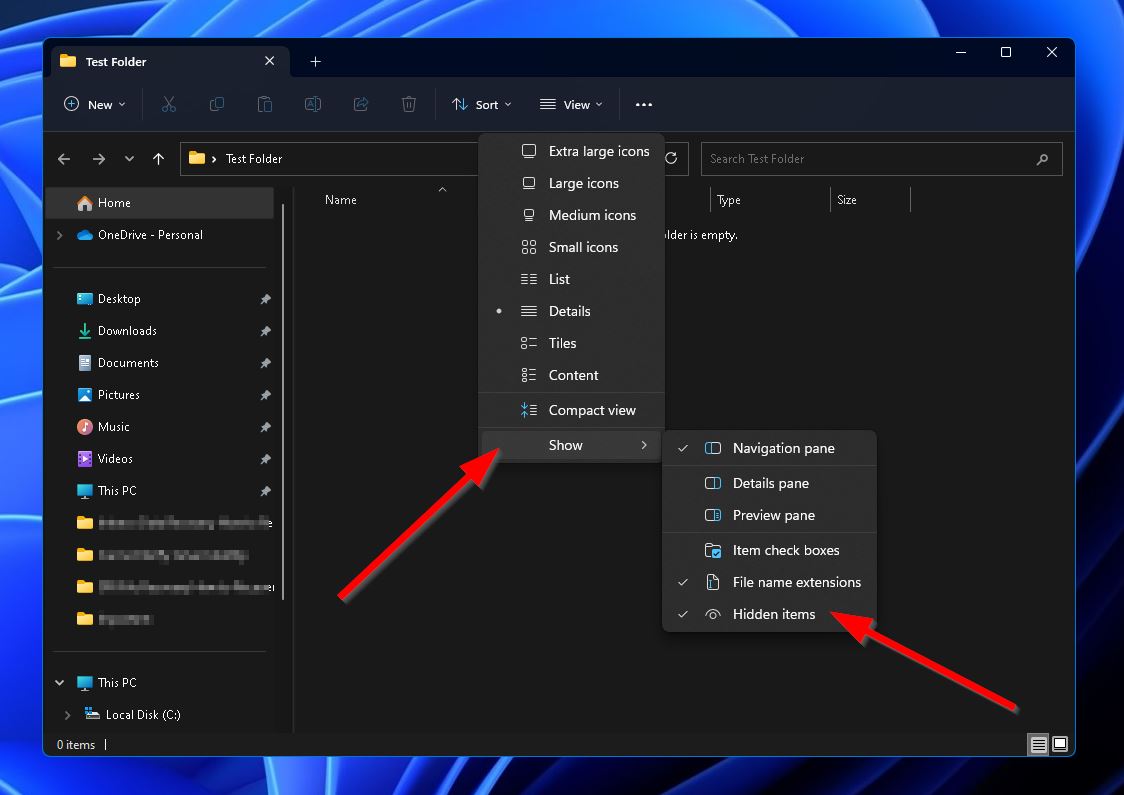
- Select Show and make sure the Hidden items option is toggled. Once it is, you should see a checkmark next to it. Any hidden files should now appear within that particular folder.
Method 2: Recover Data from Maxtor Hard Drive with Data Recovery Software
If showing hidden files in your folder didn’t do the trick, then your next move should be to seek the help of an exceptional data recovery program. Disk Drill comes highly recommended because of its unbeatable recovery rates, swift yet in-depth scanning ability, and easily manageable user interface.
Some of its additional qualities include the following:
- Wide support for almost every file type available – even RAW media that is typically used by specialized equipment.
- The ability to scan and potentially rescue files from corrupted or RAW drives.
- Additional security features, such as a Recovery Vault and a drive backup tool.
- It commits scans to memory, allowing you to pause, continue, or rerun scans at the click of a button.
If you’re having second thoughts about purchasing the app, Disk Drill has a trial version that includes all of the program’s features and allows you to recover up to 500 MB worth of files on Windows.
Follow the simple steps below to perform hard drive data recovery using Disk Drill:
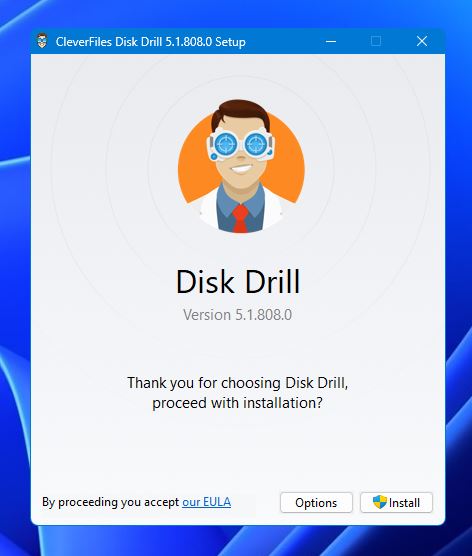
- Go to the Cleverfiles website and download the latest version of Disk Drill.
- Next, run the file you just downloaded and follow the provided instructions until installed.
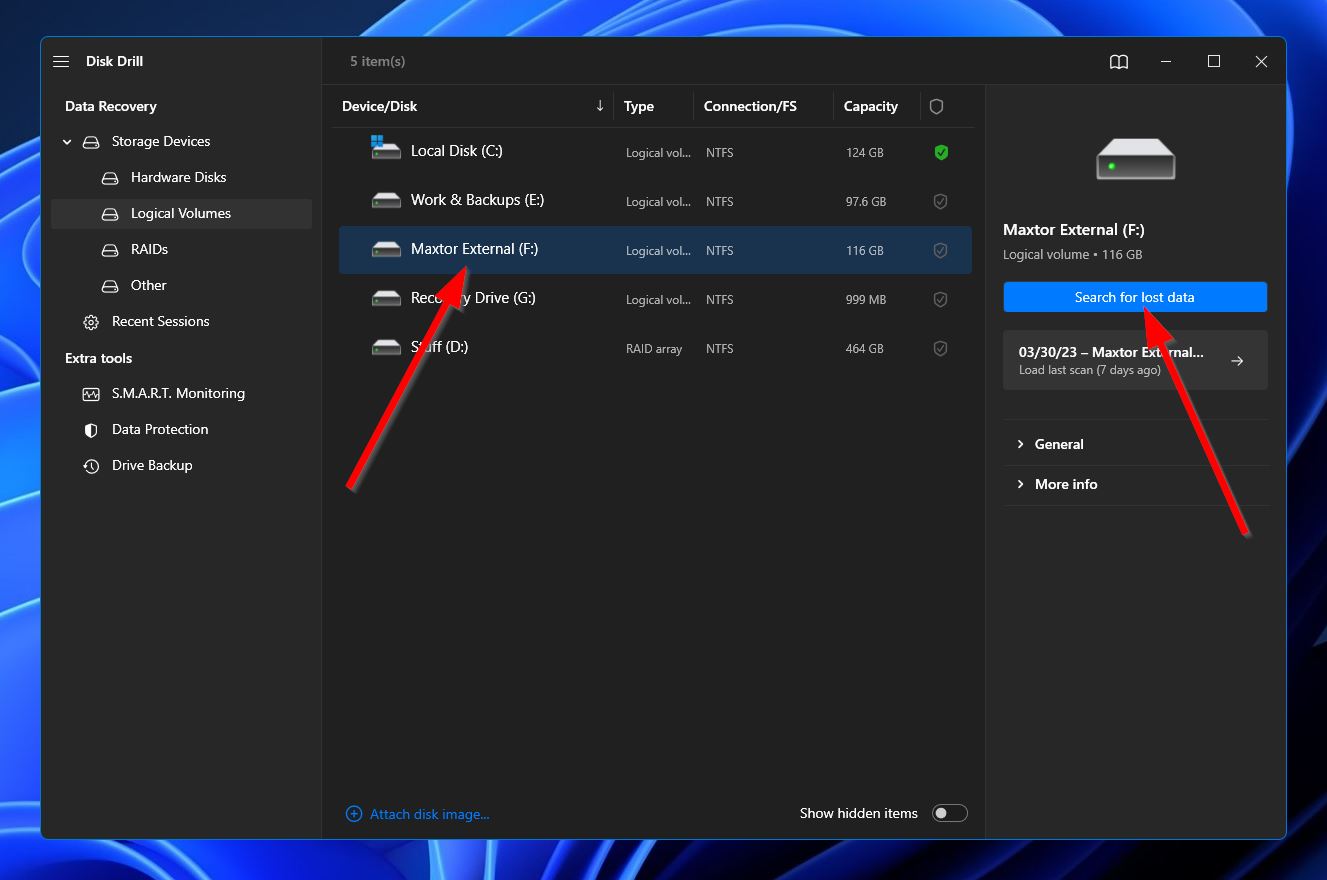
- Launch Disk Drill and select your Maxtor hard drive from the list of available storage devices. From there, click Search for lost data to start the scanning process.
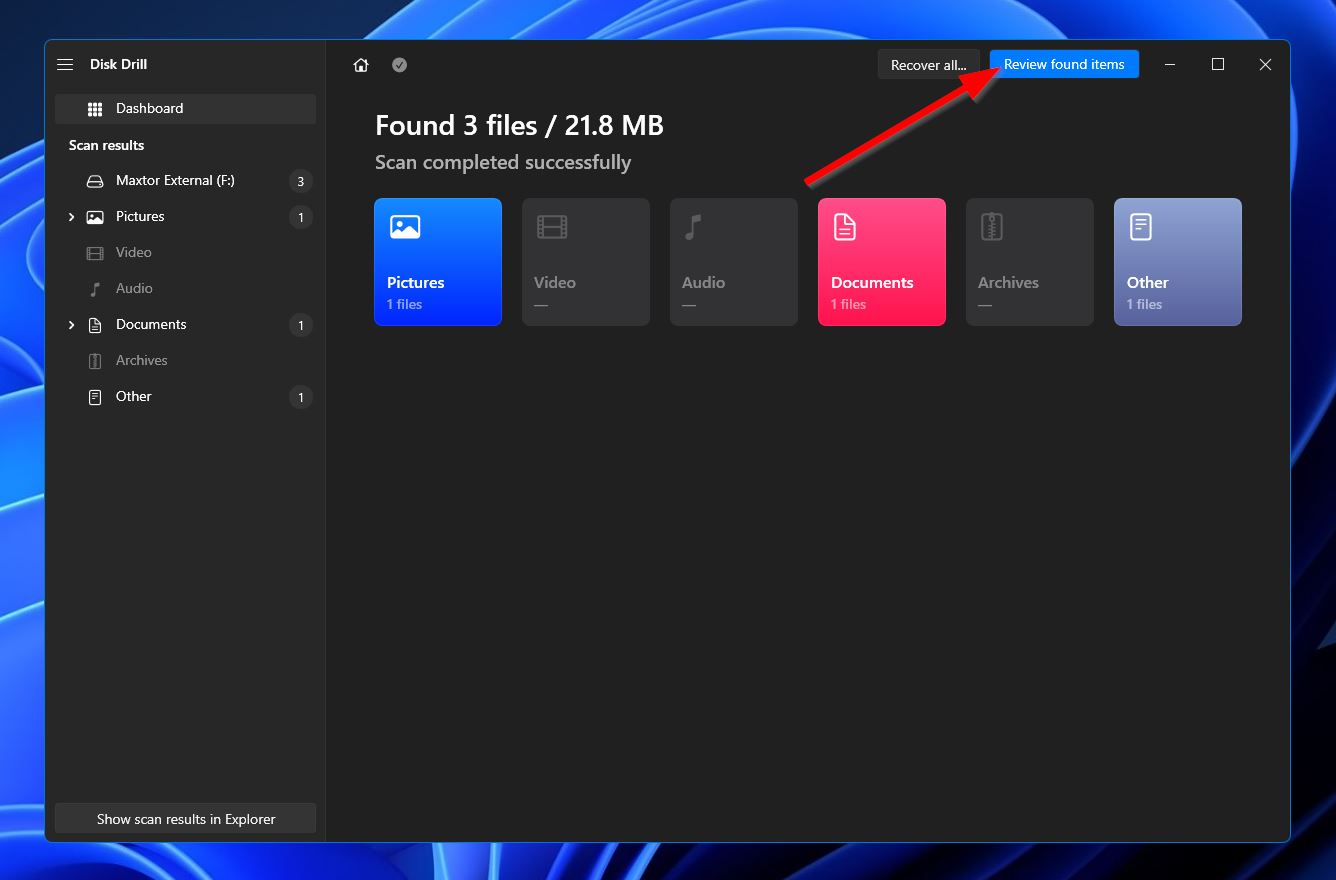
- The scan could take a while, depending on the total capacity of your Maxtor hard drive. While you wait, you can click the Review found items button on the top-right corner to pull up any files that have been located so far. Otherwise, wait for the scan to complete first and click the same button to move on to the next step.
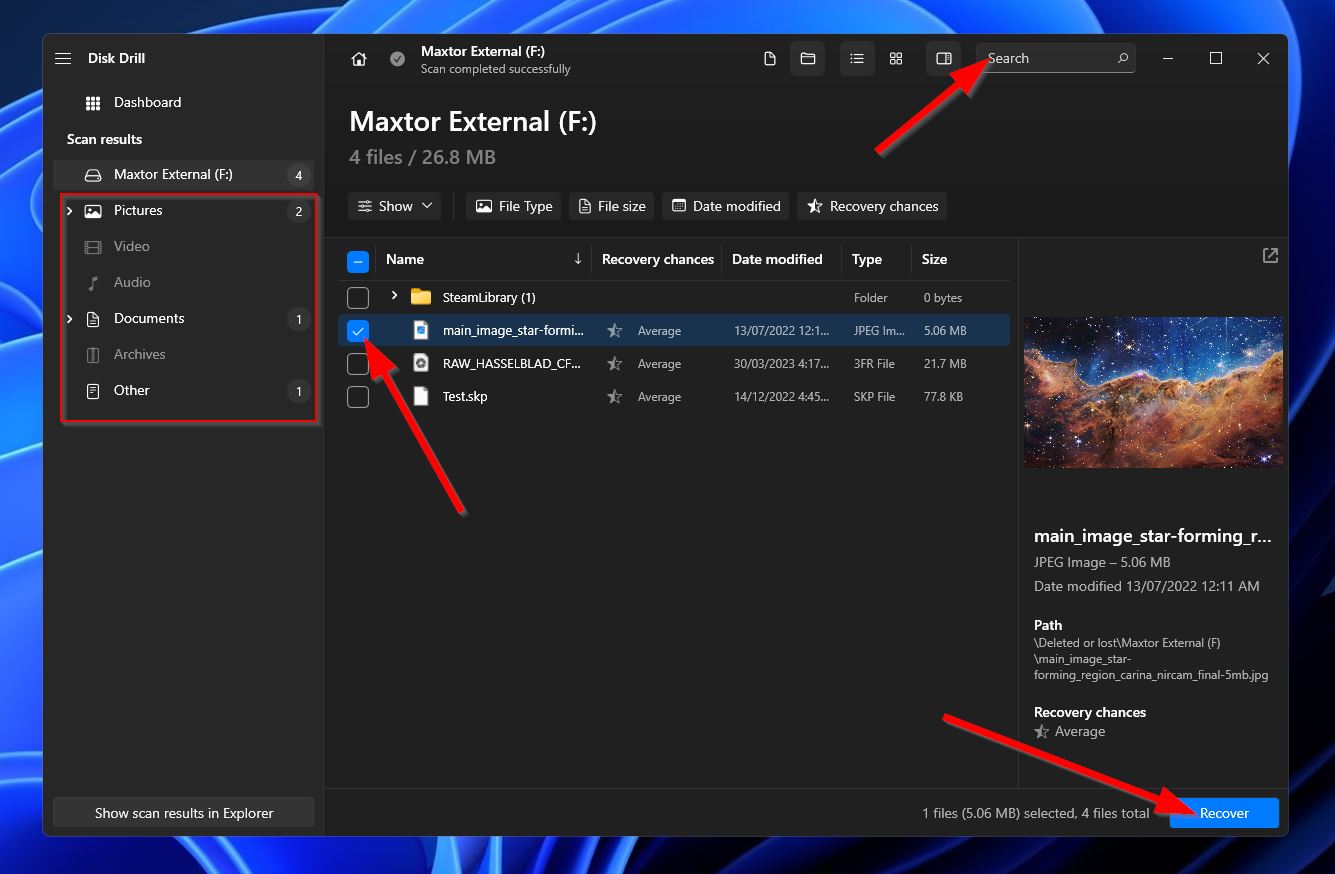
- After that, look through the files found in the results screen until you find the ones you’re looking to recover. You can use the filter options on the right-side panel and the search bar in the top-right corner to make the search a lot easier. Keep in mind that the search bar allows both file names and file extensions. Once you’ve found your files, mark them by ticking the checkboxes beside their file names, then click the Recover button to proceed.
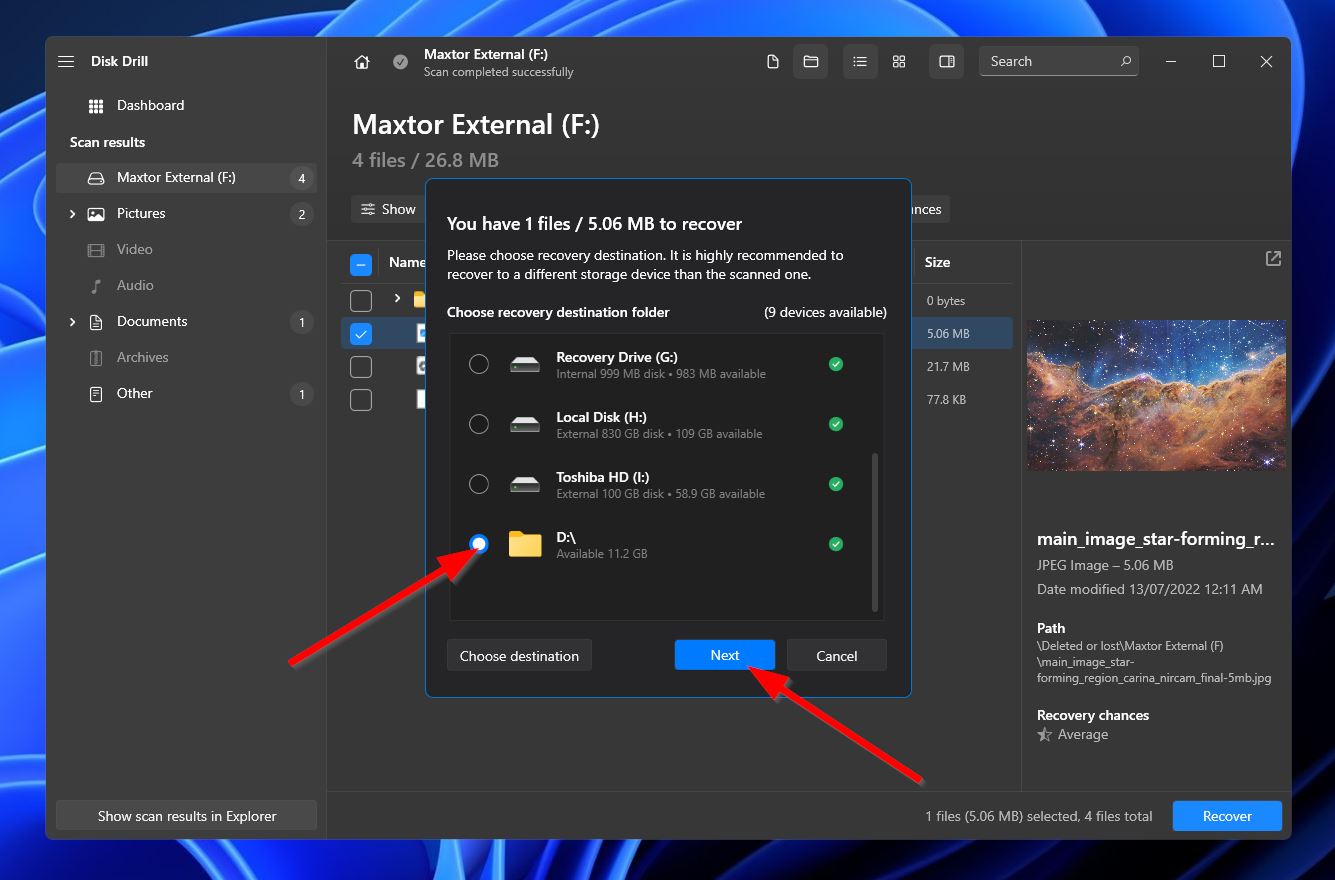
- Upon clicking, a small pop-up will appear, asking you to pick a destination folder for your recovered files. This has to be on a different device than the Maxtor hard drive you’re recovering from. When you’re ready, click the Next button to start the recovery.
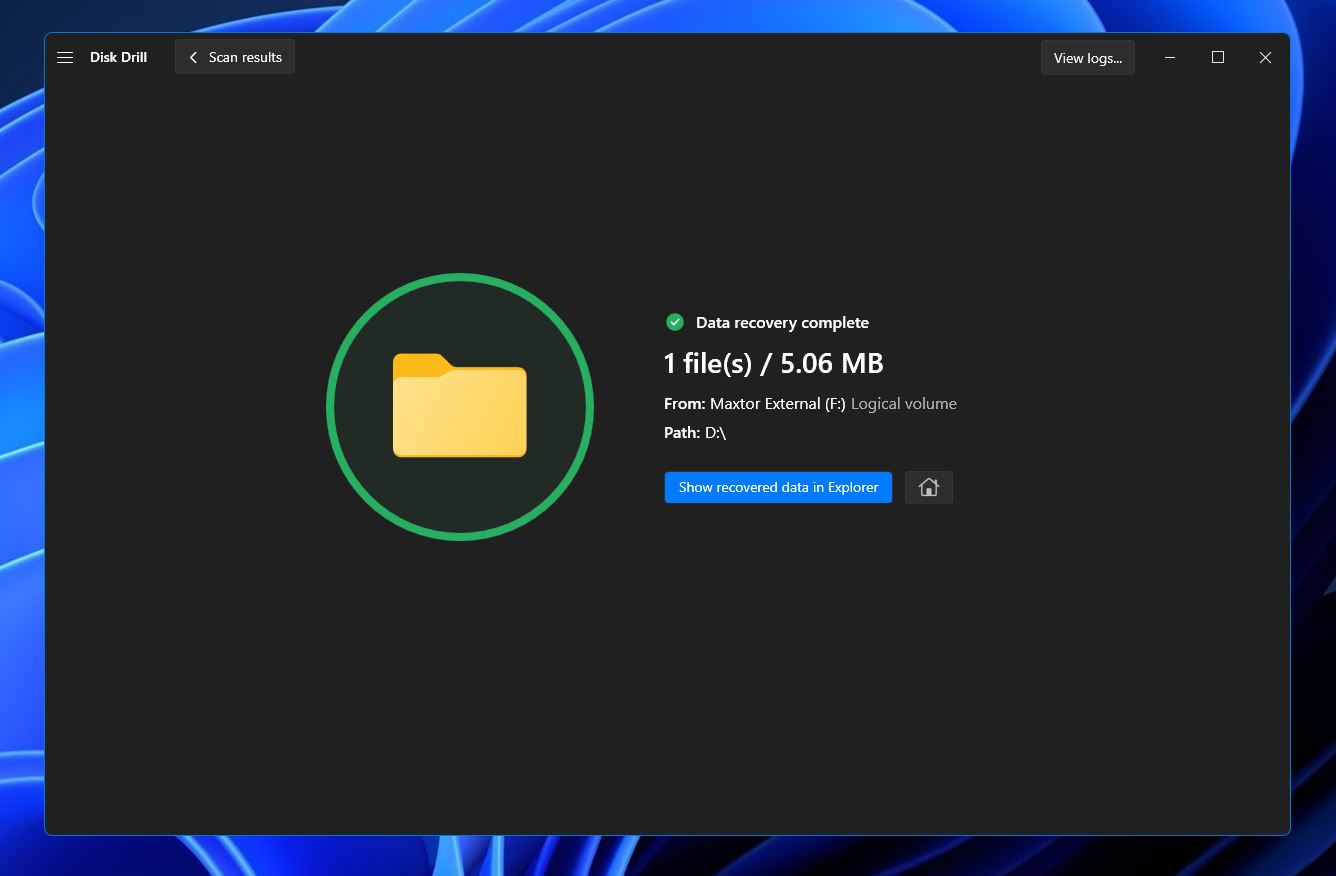
- If the recovery is successful, you’ll get a completion message with a Show recovered data in Explorer button that will take you directly to your files when clicked.
Method 3: Apply to Data Recovery Service
In case neither of the previous methods worked for your Maxtor hard drive, or you’re just not willing to attempt DIY recovery of important files, the smartest thing to do would be to reach out to an accomplished professional data recovery service in your area.
There are also some services that accept storage devices through the mail and offer free diagnosis prior to recovery.
How to Fix Maxtor Hard Drive that is Not Recognized on Windows
One of the more frequent issues that plague storage devices is when an operating system is unable to recognize the drive. This may happen due to a variety of reasons, including outdated drivers, loose cables, incomplete formatting, data corruption, and more.
We’ve included some fixes you can try so your OS properly recognizes your Maxtor drive.
Fix 1: Update Maxtor Drivers
The quickest and easiest remedy to an unrecognized storage device is to update its drivers to the latest version. Drivers allow your OS to communicate with a particular device, and if the one for your hard drive is outdated, the device may become unrecognized.
Here’s a quick step-by-step guide on how you can update the driver for Maxtor external hard drives on Windows 10 or 11:
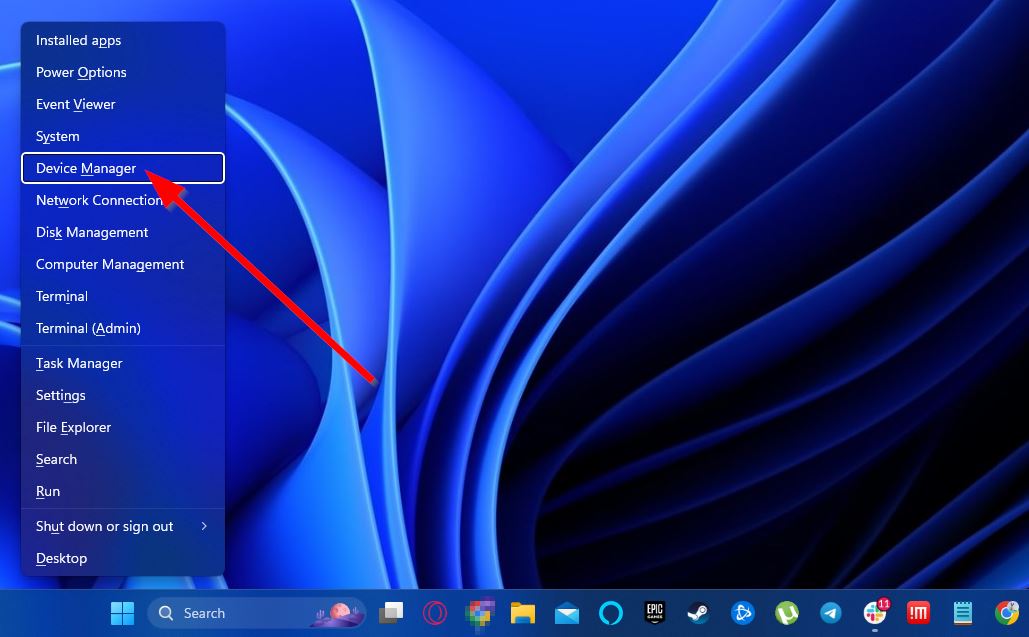
- Press the Windows + X keys simultaneously and click on Device Manager.
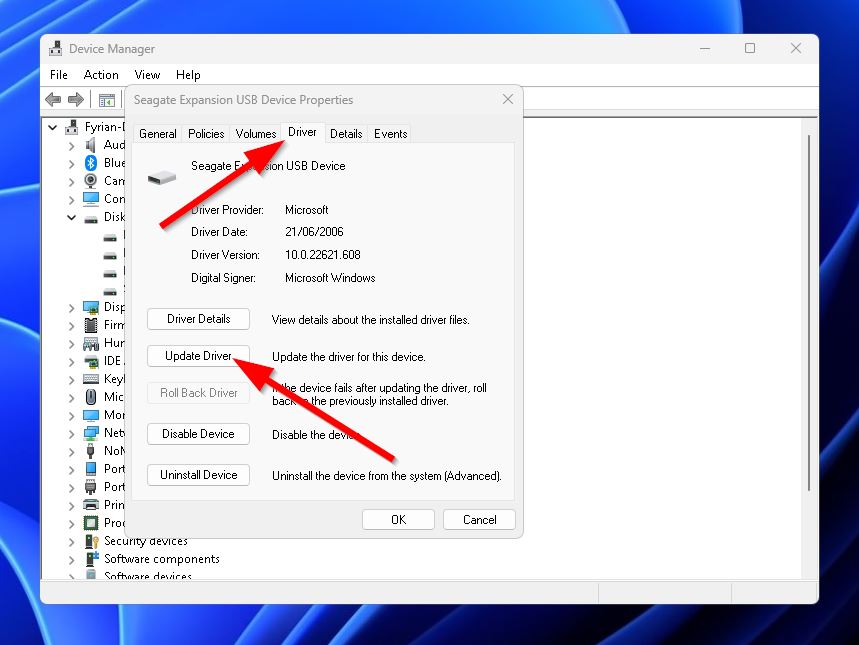
- Expand the Disk drives category and double-click your Maxtor hard drive.

- Then, head to the Driver tab and click on Update Driver.
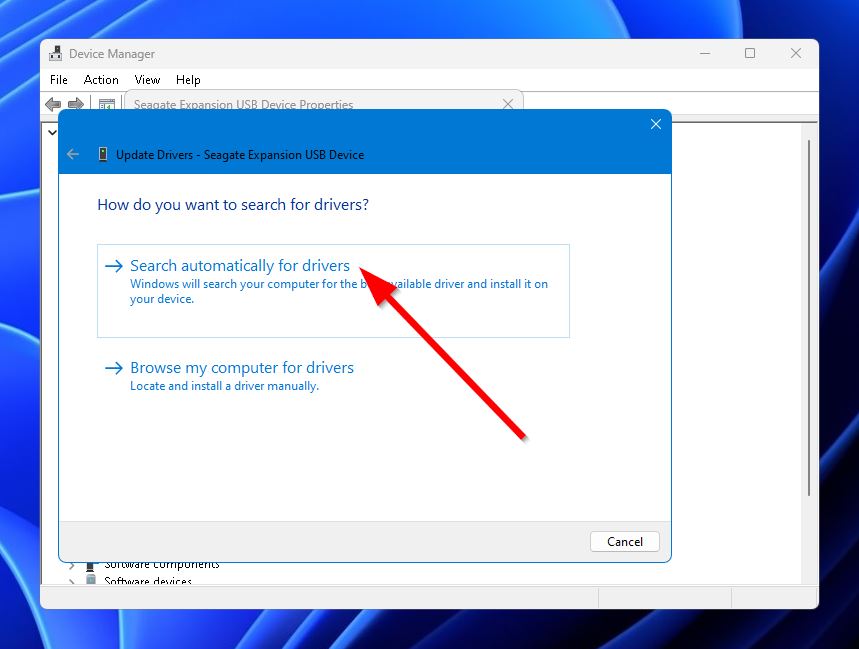
- After that, choose the Search automatically for drivers option. Windows will then explore the internet for the latest available drivers and install them for you.
Fix 2: Change the Hard Drive Letter
A drive letter needs to be assigned to a storage device, or else your operating system won’t be able to recognize it. There may be issues with the driver letter assigned to your Maxtor hard drive, and changing it may fix the problem of the device not being recognized.
Here’s how to change the hard drive letter assigned to your Maxtor device:
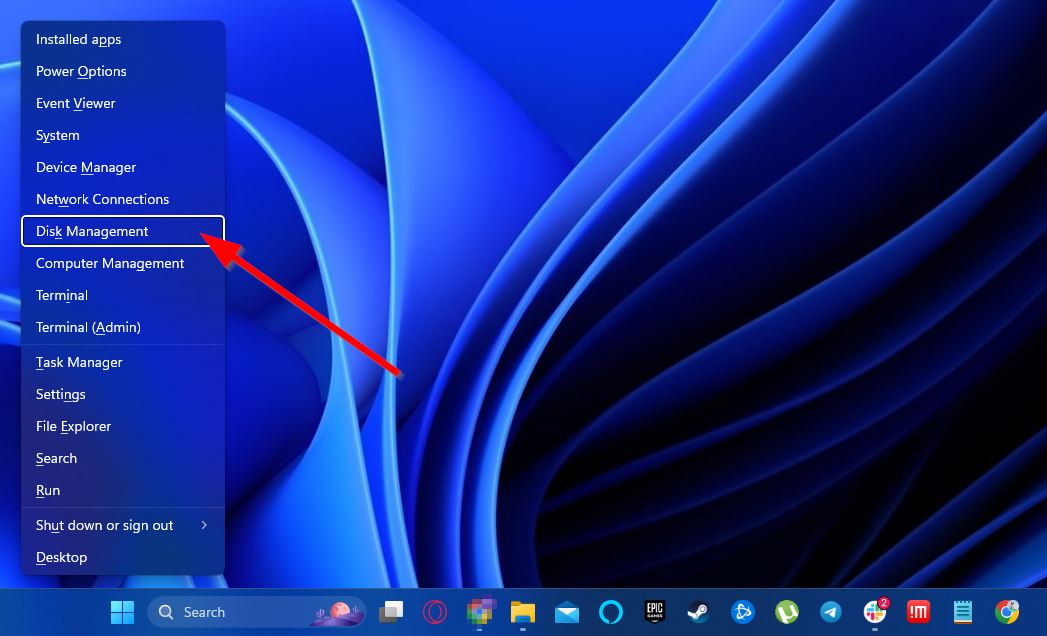
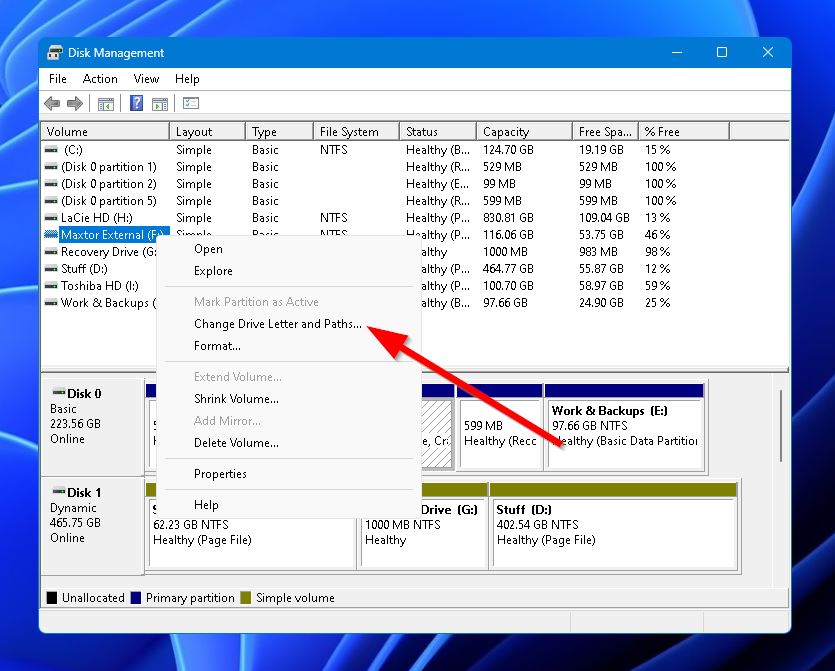
- First, press the Windows + X keys simultaneously and click on Disk Management.
- Locate your Maxtor drive in the list of storage devices, then right-click it and select Change Driver Letter and Paths.
- In the small pop-up window that appears, make sure the drive letter in the box is highlighted and click the Change button.
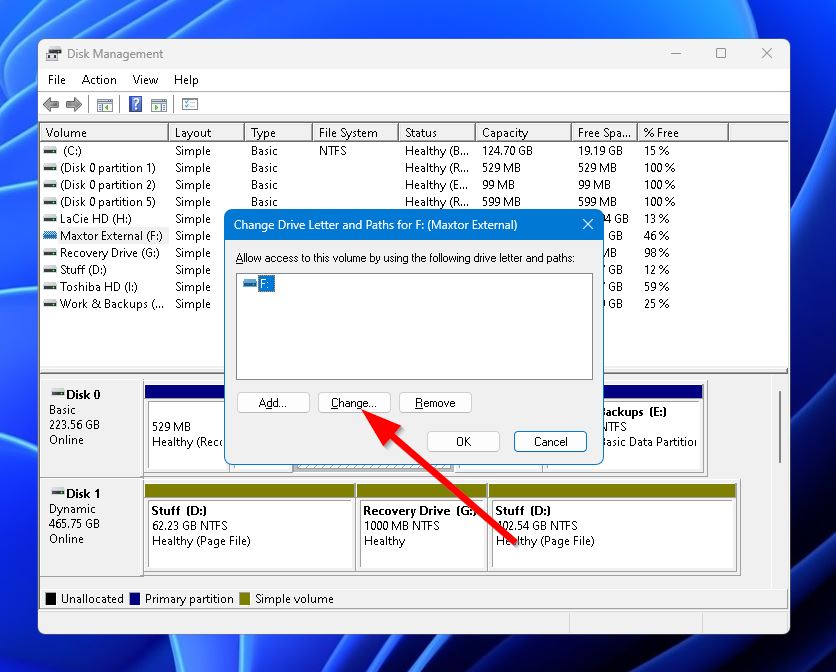
- After that, click the dropdown next to the Assign the following drive letter option and select the new drive letter you want your Maxtor storage device to have. Once you’ve decided, click the OK button to finalize the change.

Fix 3: Repair Hard Drive With chkdsk Command
Windows features a built-in tool called “chkdsk” that scans the integrity of storage devices and attempts to repair any system issues it comes across if possible. Your Maxtor hard drive being unrecognizable may be a symptom of these kinds of system issues, so it’s worth running a chkdsk scan to see if it can resolve the problem.
To repair hard drive with chkdsk Command, simply follow the steps outlined below:
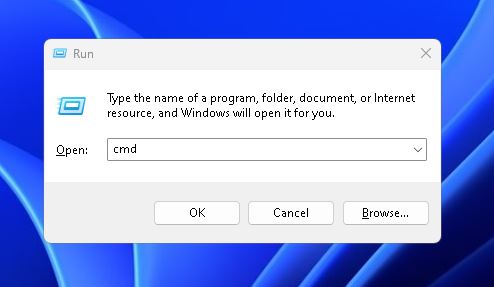
- Press the Windows + R keys to bring up the Run window. From there, type “cmd” and hit Ctrl + Shift + Enter to run a command prompt with admin privileges.
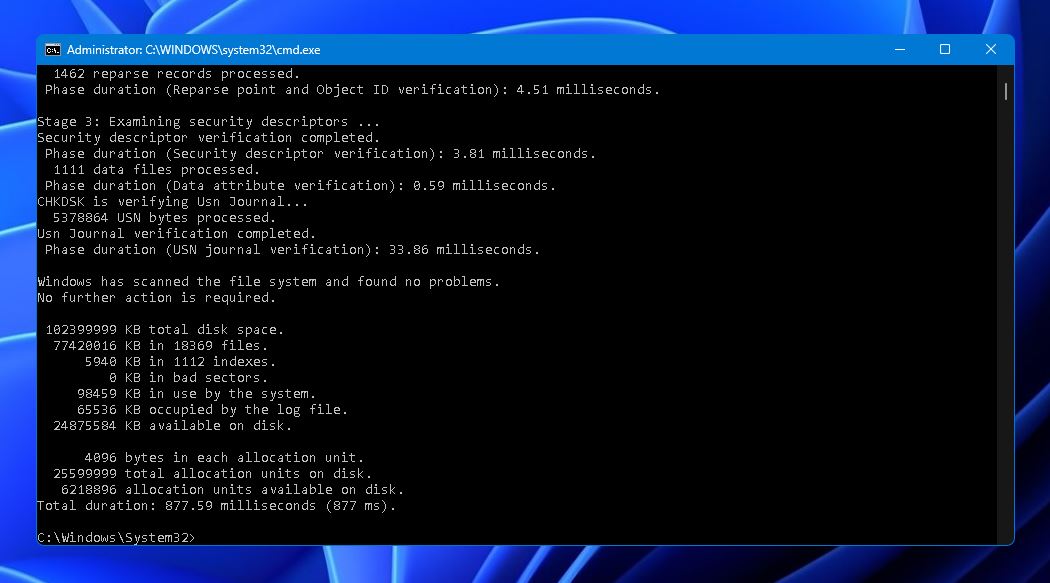
- Once the command prompt appears, type in “chkdsk” followed by the letter of your Maxtor hard drive and the colon symbol. For example, in our case, we typed in “chkdsk e:”.
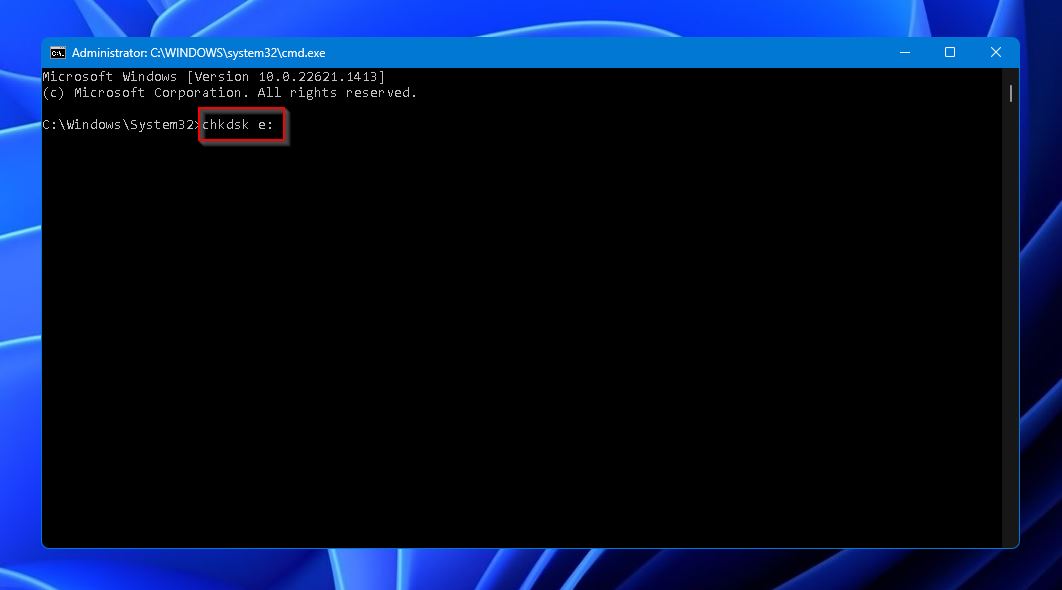
- Chkdsk will then scan your drive and repair any errors it finds.
Tips to Avoid Data Loss from Maxtor Hard Drive
Just like any other storage device, there are various things you can do to prevent data loss from your Maxtor hard drive. Here are some of them:
- Create regular backups: You never know when data loss may strike, so you should routinely create backups of important files just in case. The Maxtor drive manager program usually comes with Maxtor storage devices, and it includes an auto-backup feature that you might want to look into.
- Avoid physical damage to the drive: Physical damage is one of the hardest situations to recover lost data from, so make sure storage devices with important files are kept as safe as possible.
- Eject the disk safely: Abruptly removing a Maxtor portable hard drive can cause data loss or corruption, so you should always ensure that the device is ejected properly before you disconnect it from your computer.
FAQ:
- Connection issues
- Drive letter conflicts
- Unsupported file systems
- Outdated drivers
- Device damage
- Unallocated/uninitialized drive
- Download and install Disk Drill.
- Run the program and scan your Maxtor external hard drive.
- Choose the files you would like to recover.
- Select a destination location for your recovered files and hit Next.
- You’ll find your recovered files in the chosen destination.


