 Microsoft Project allows you to create comprehensive plans for your projects, from the allocation of resources to project monitoring. You usually save these details in MPP (the official Microsoft Project file extension) files on your local storage. Unfortunately, doing this makes them vulnerable to damage and loss.
Losing your Project files can be financially and legally disadvantageous. To avoid the worst scenarios, we will teach you how to recover Microsoft Project files using five different methods in the following sections.
Table of Contents
Reasons that Lead to Loss of Microsoft Projects
You can lose your Microsoft Projects for a variety of reasons. By determining these causes, you get to know what you should do to prevent further loss of your precious Project files.
- 🕷️ Malware attack: Malicious software is one of the primary reasons why most files on a computer get corrupted. Some are designed to damage the files, while others are meant to steal them.
- 👤 Human error: You could have accidentally deleted your Project files. Other instances where human error leads to the loss of Microsoft Projects include incorrect saving processes and faulty file transfers.
- 💥 Power surge: Your computer’s hard drive can be easily damaged due to power surges and unexpected shutdowns. Its processes stop abruptly, leading to corruption and the loss of data. In turn, your locally saved Project files might be affected.
- 🗃️ File system error: It might be your storage device that suffers from disk errors and bad sectors. Once this happens, the files are no longer accessible over time.
5 Ways to Recover Microsoft Project Files
Losing your Microsoft Projects can be detrimental to your work, but don’t worry. There are some ways you can recover them on your Windows machine. These range from simple solutions like checking your Recycle Bin and Temp folders to advanced options like using data recovery software.
Method 1: Check Recycle Bin
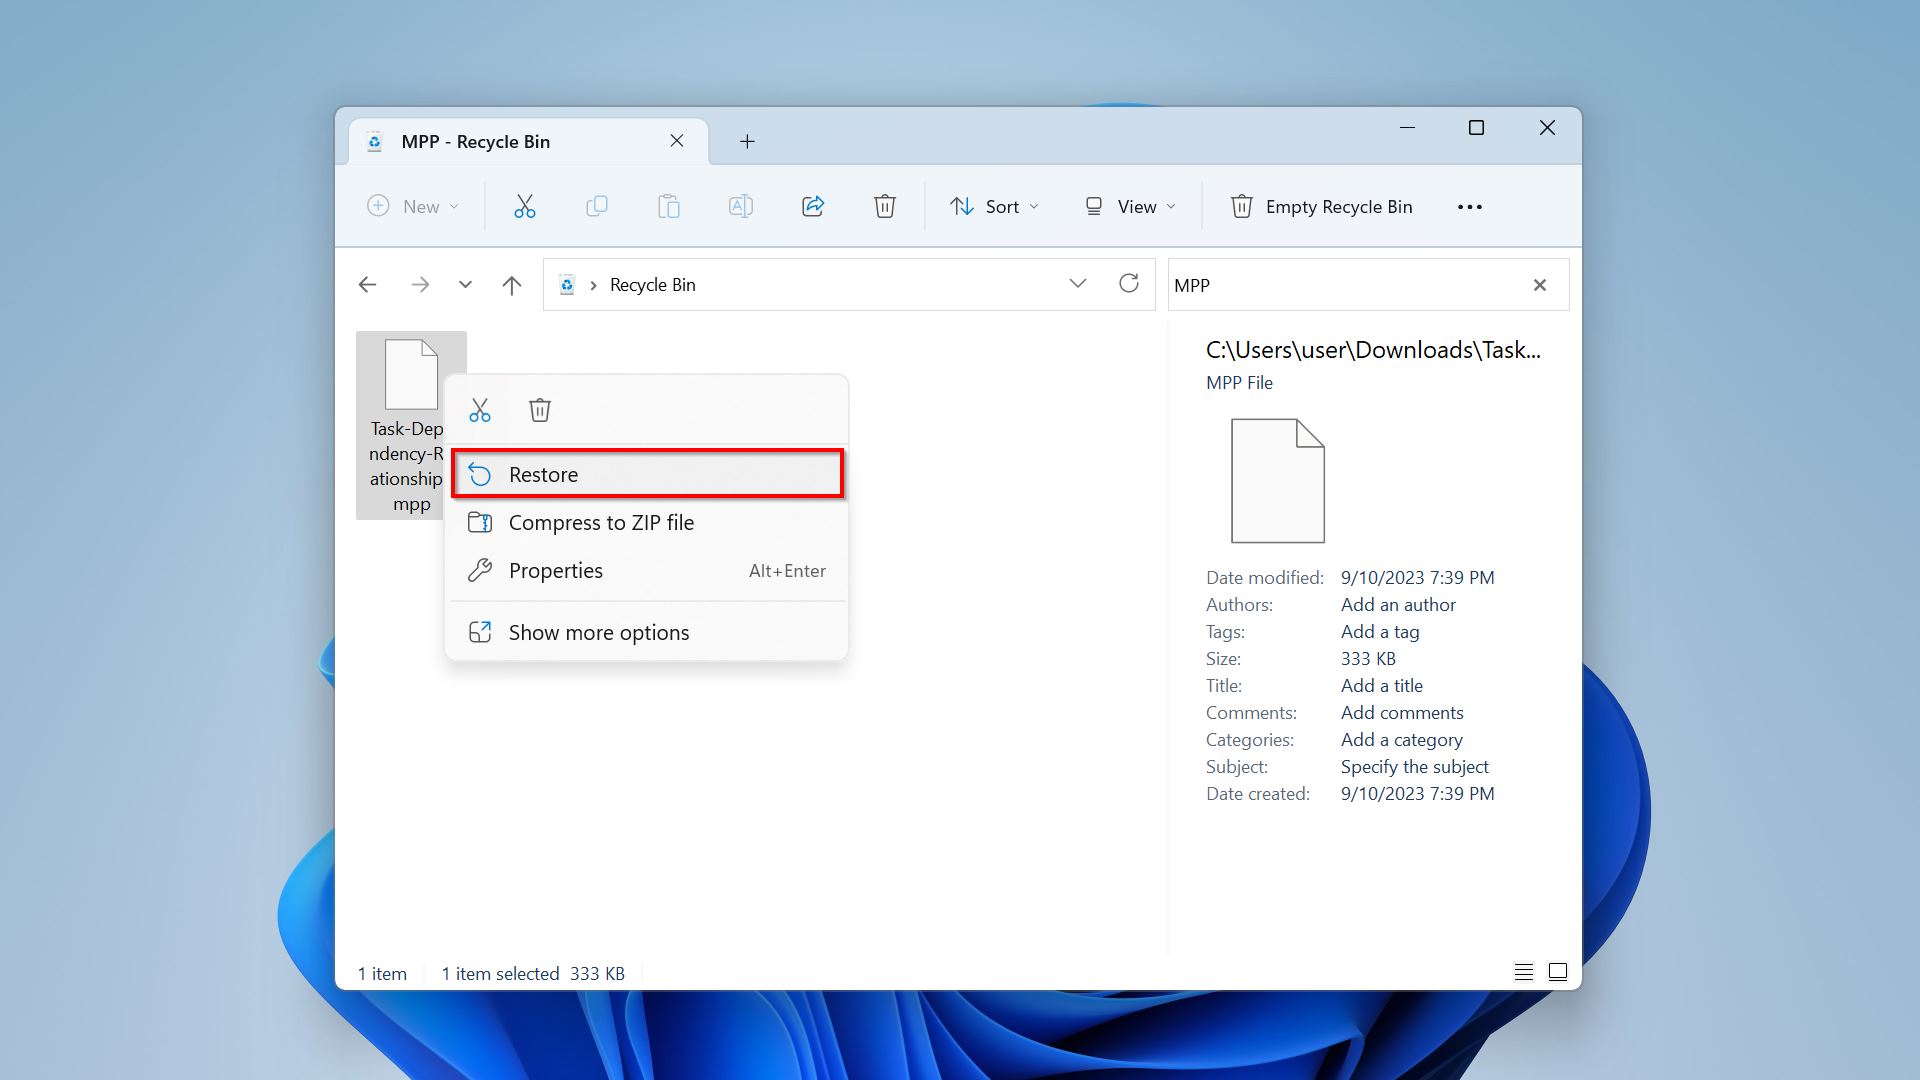
Before doing any in-depth checks on your computer, try checking the Recycle Bin first. This should be your first instinct when you want to restore your data, like your Word documents, important OpenOffice documents, and MPP files.
You may have accidentally deleted your Microsoft Project file. Unless you have set up your Recycle Bin to automatically remove files after a certain time, you should be able to find them there.
You can usually find the Recycle Bin on the upper-left portion of the desktop. But if you have disabled desktop icons, just type “recycle bin” on the Start menu or the Windows search bar.
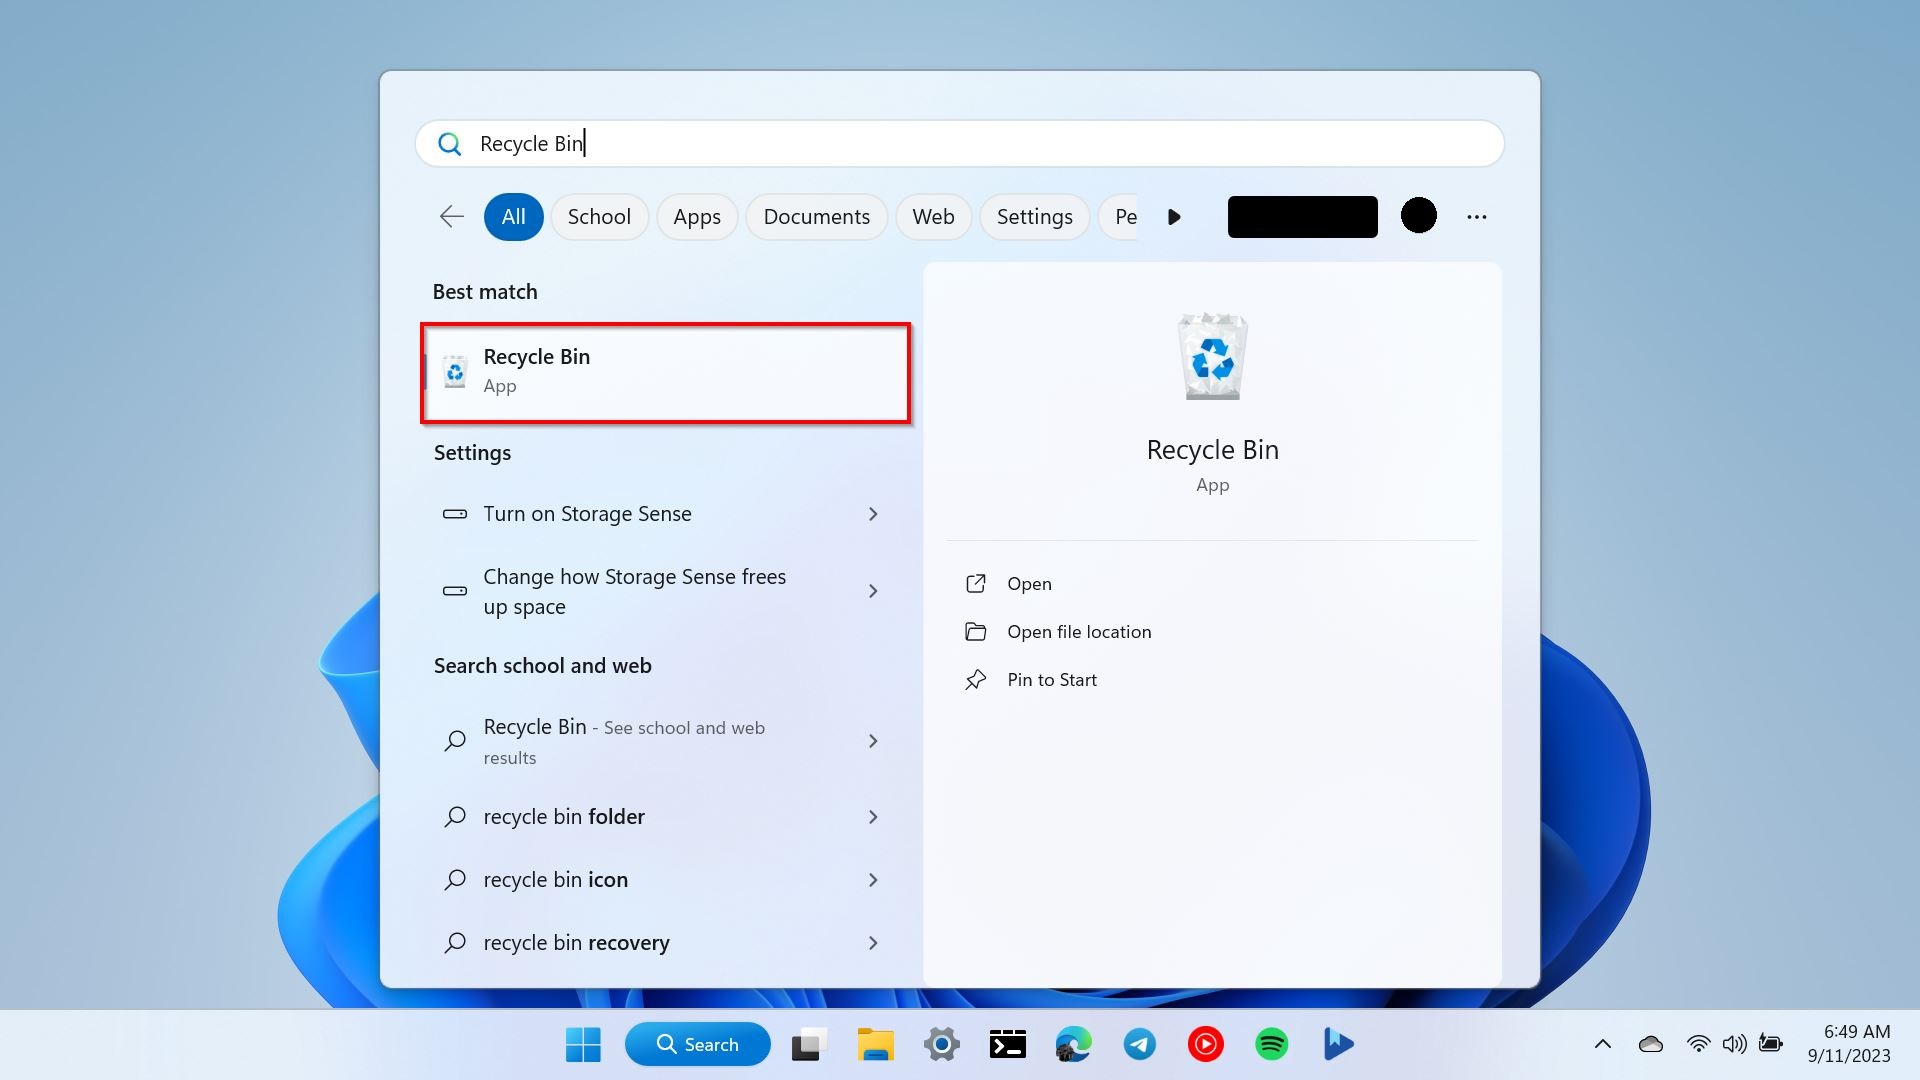
To recover your MPP files, right-click them and choose “Restore” from the context menu.
Method 2: Use a Professional Data Recovery Tool
If your file is missing in the Recycle Bin, the next best solution you can try is to use professional data recovery software such as Disk Drill.
Disk Drill’s free version lets you recover up to 500 MB of data on Windows. And it’s not just a Microsoft Project recovery tool—it can also recover more than 400 file formats.
The best part? You don’t have to be an expert to be able to recover your data. Use it quickly from the very moment you learn about your lost Project file. This way, your original data isn’t overwritten yet, and you’ll have higher chances of recovering it.
Here’s a quick and easy step-by-step guide on how you can use Disk Drill to recover your lost Microsoft Project file:
- Download and install Disk Drill for Windows. Preferably, install the software program on an external drive to prevent the data on your original storage from getting overwritten.
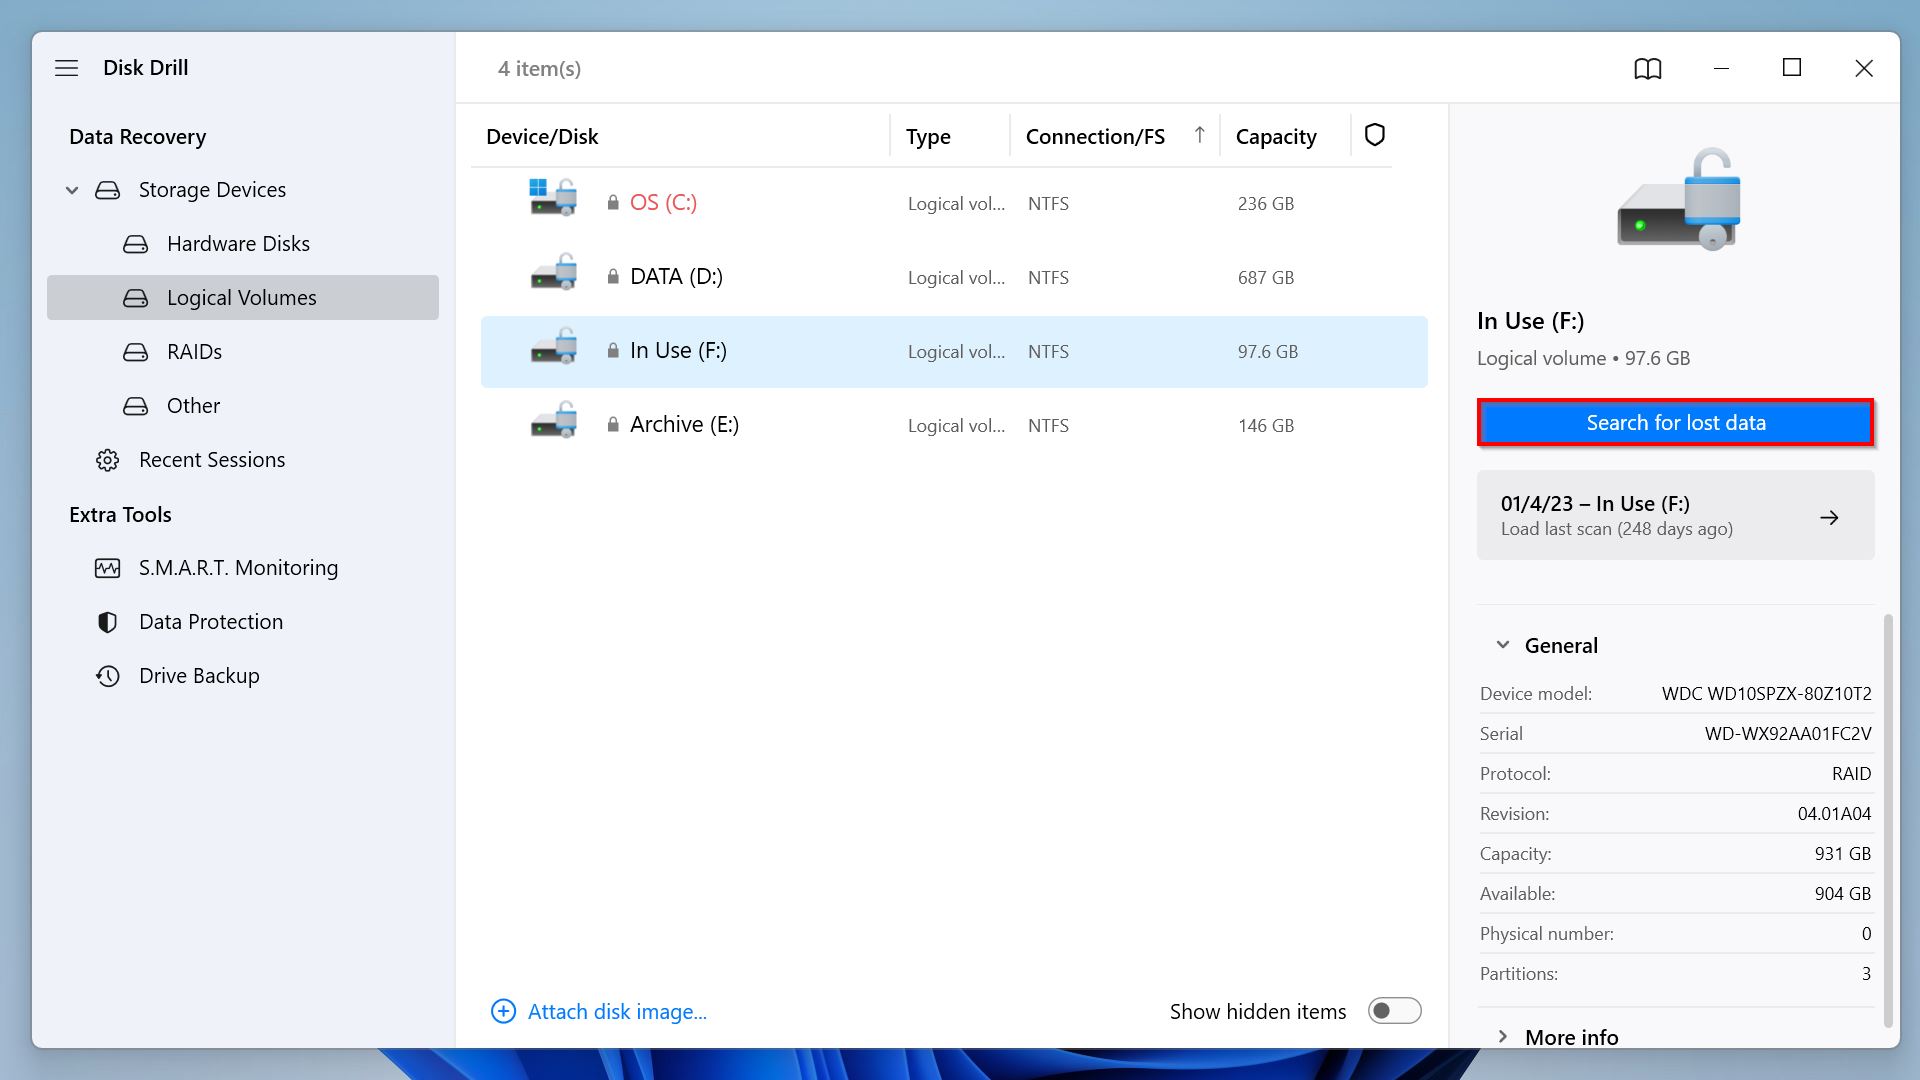
- Once the installation is done, open the app and navigate to the disk where your lost MPP file was originally saved. Next, click “Search for lost data” on the right side of the window.
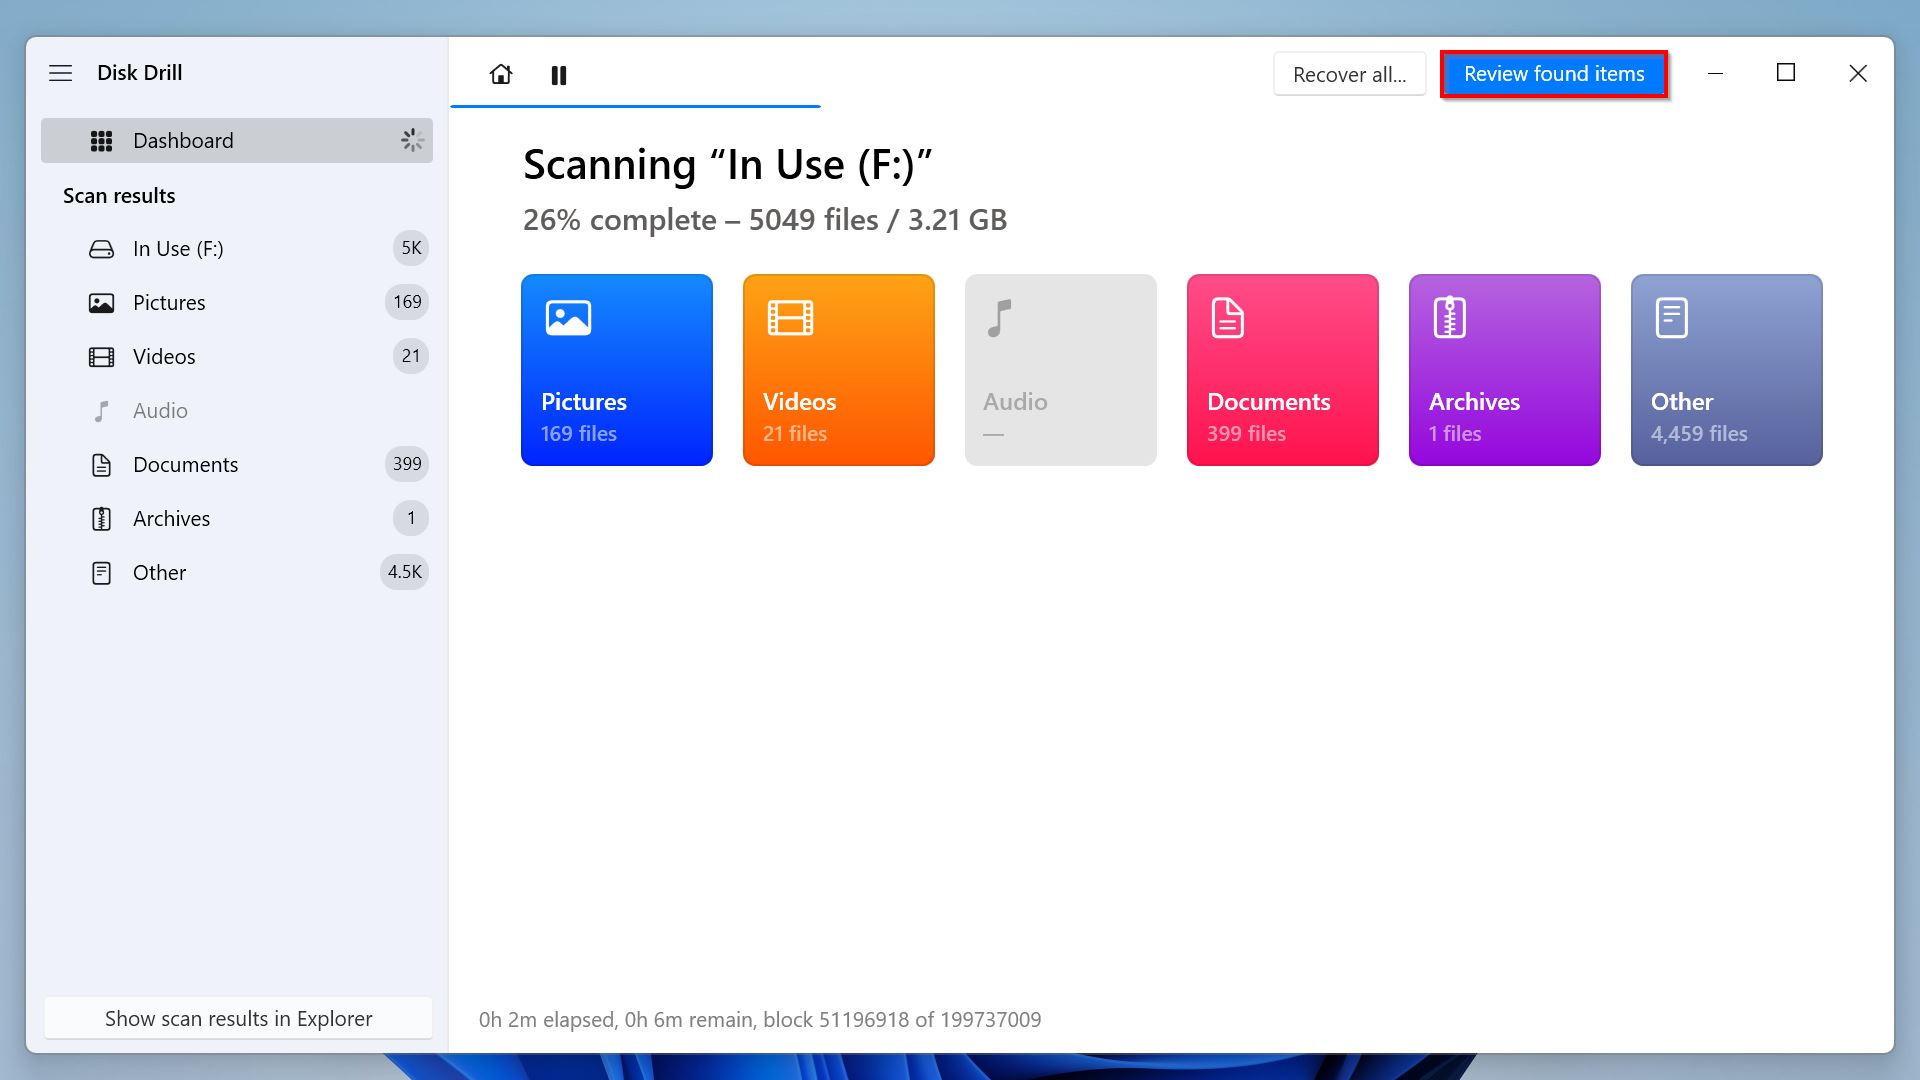
- After that, Disk Drill will now scan your chosen disk for all recoverable files. If you want to view the scan results, click the “Review found items” button at the top.
- Once the scan process is over, you will be redirected to the results page. Choose a category on the left pane to sort and organize the scan results. This narrows down your list when finding your MPP files. For this instance, click “Other.”
- Alternatively, you can directly use the search bar to look for recoverable Project files. Type relevant file extensions like “MPP” or “MPT.”
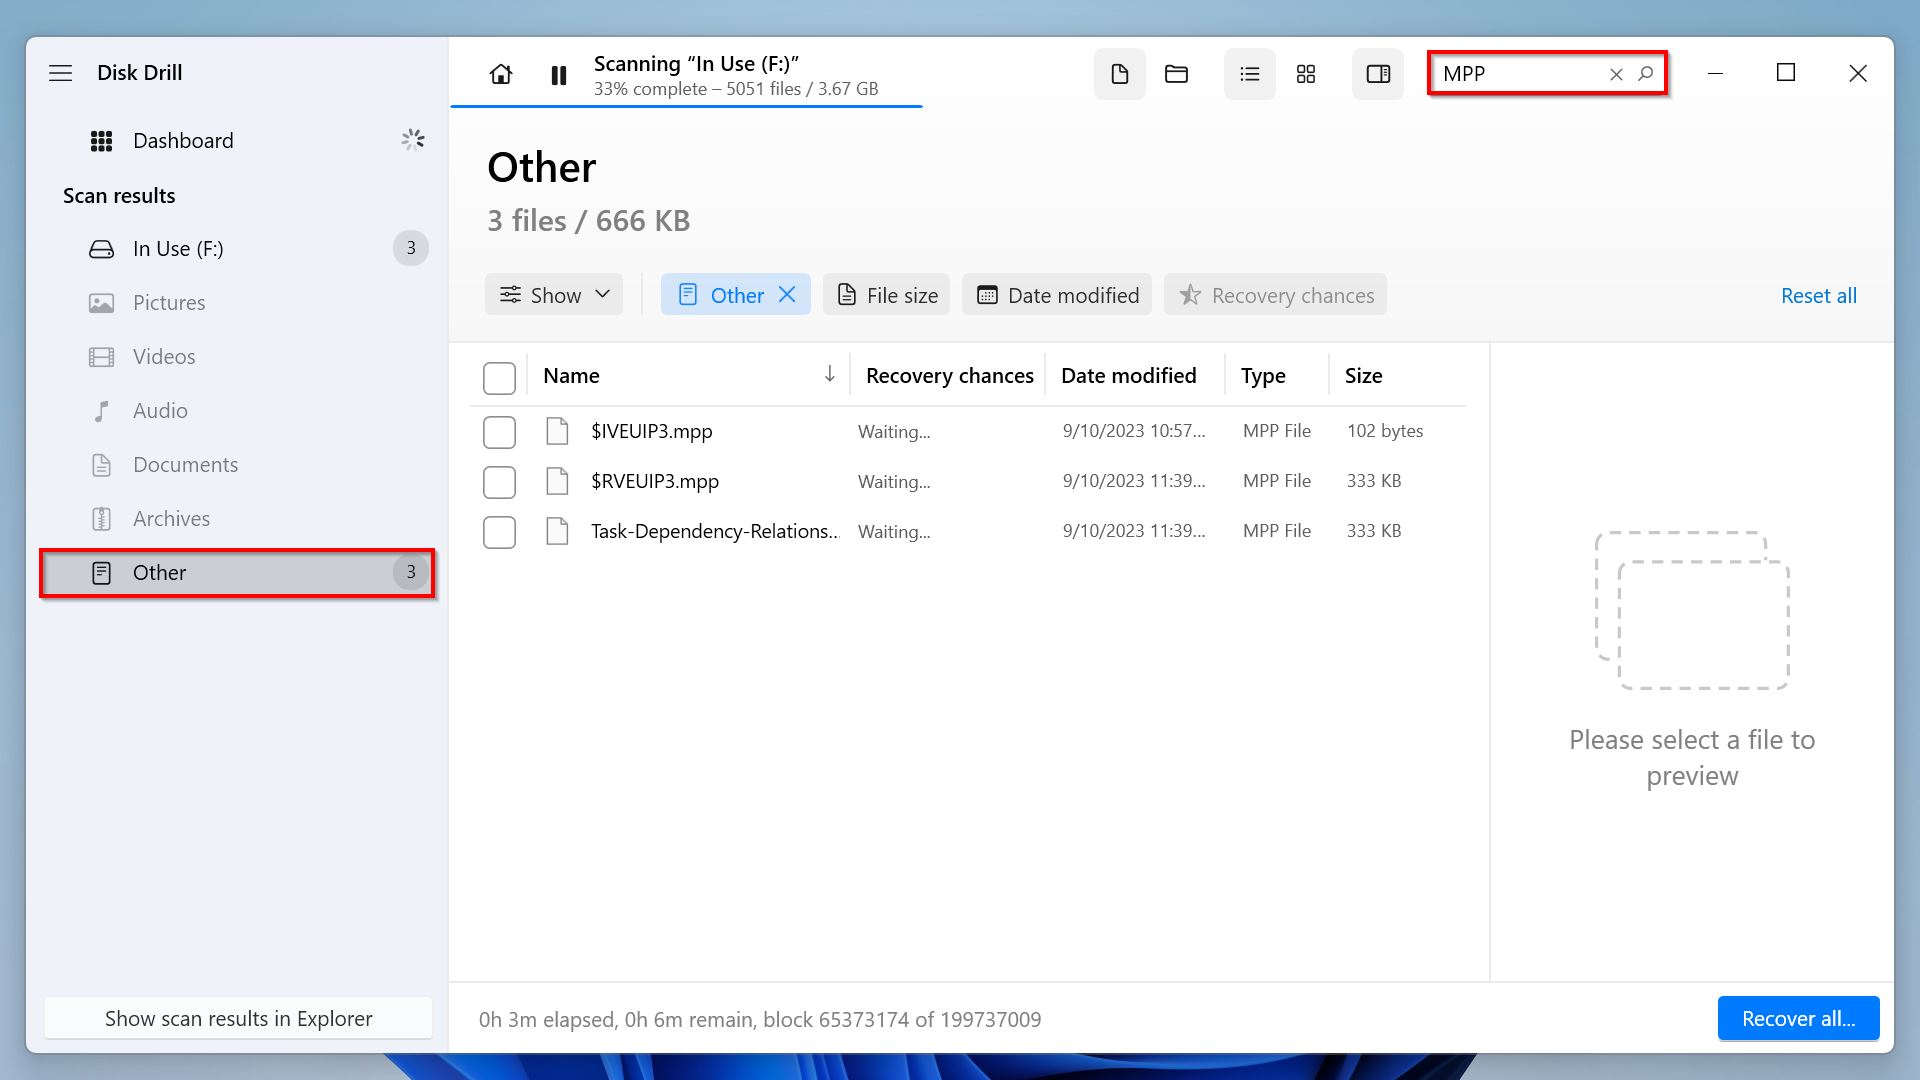
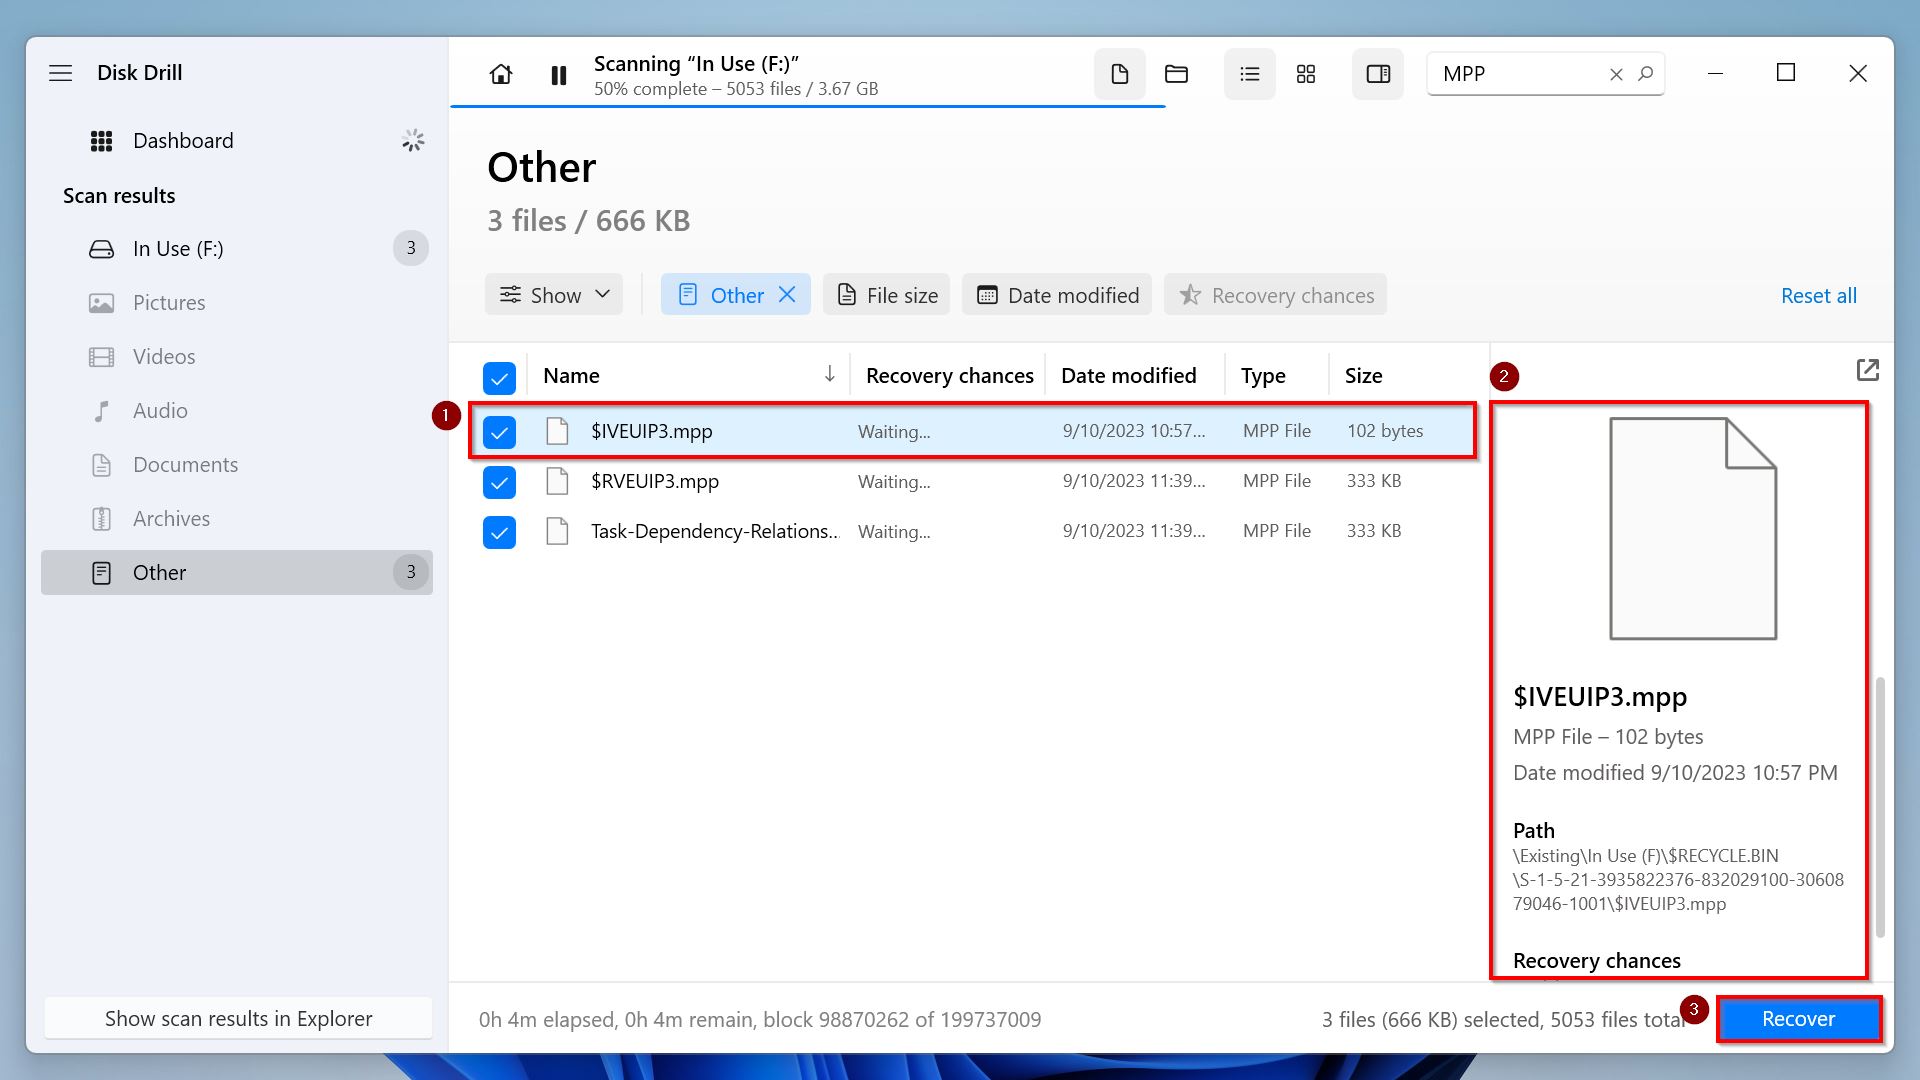
- Select your Project files and verify them using the preview and details at the right. If they’re indeed the ones you want to recover, tick their corresponding checkboxes and click “Recover.”
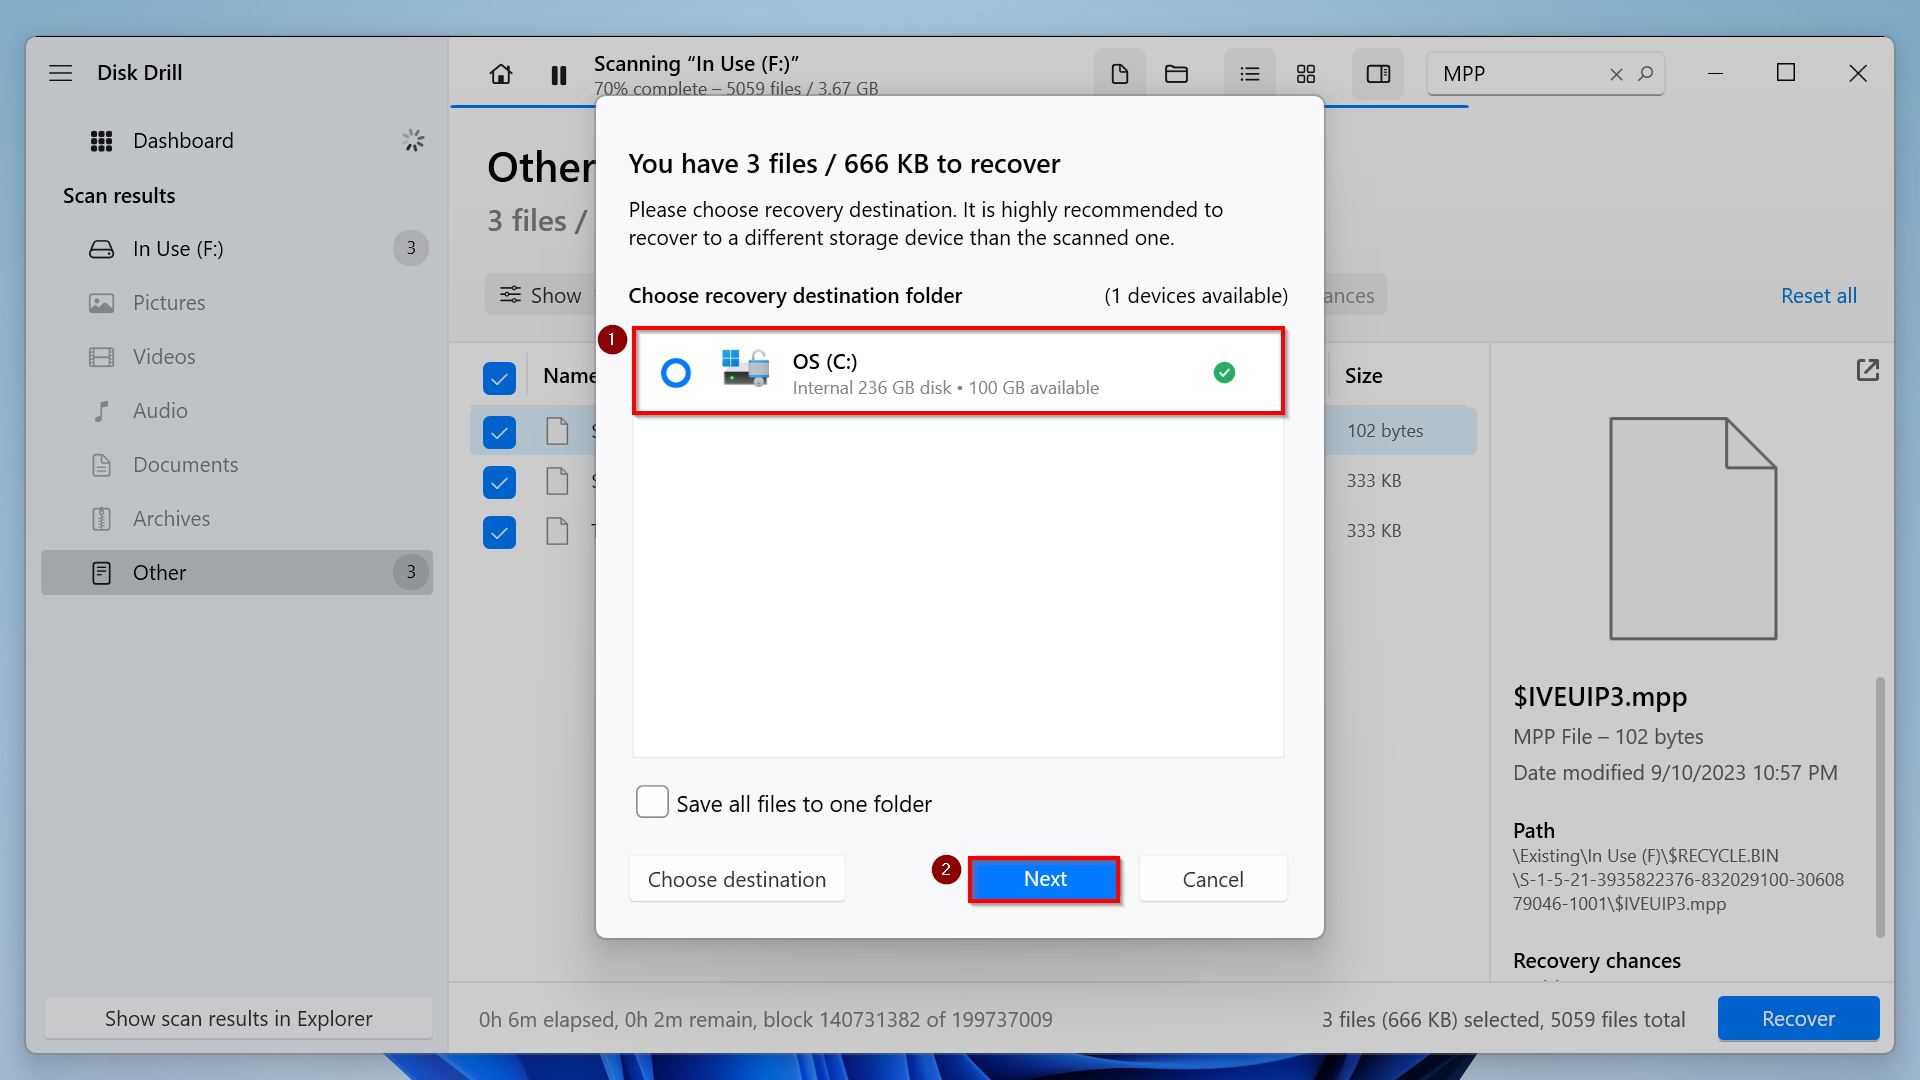
- Pick your preferred recovery destination and click “Next.” To avoid overwriting other recoverable data, make sure to use a separate disk as the destination.
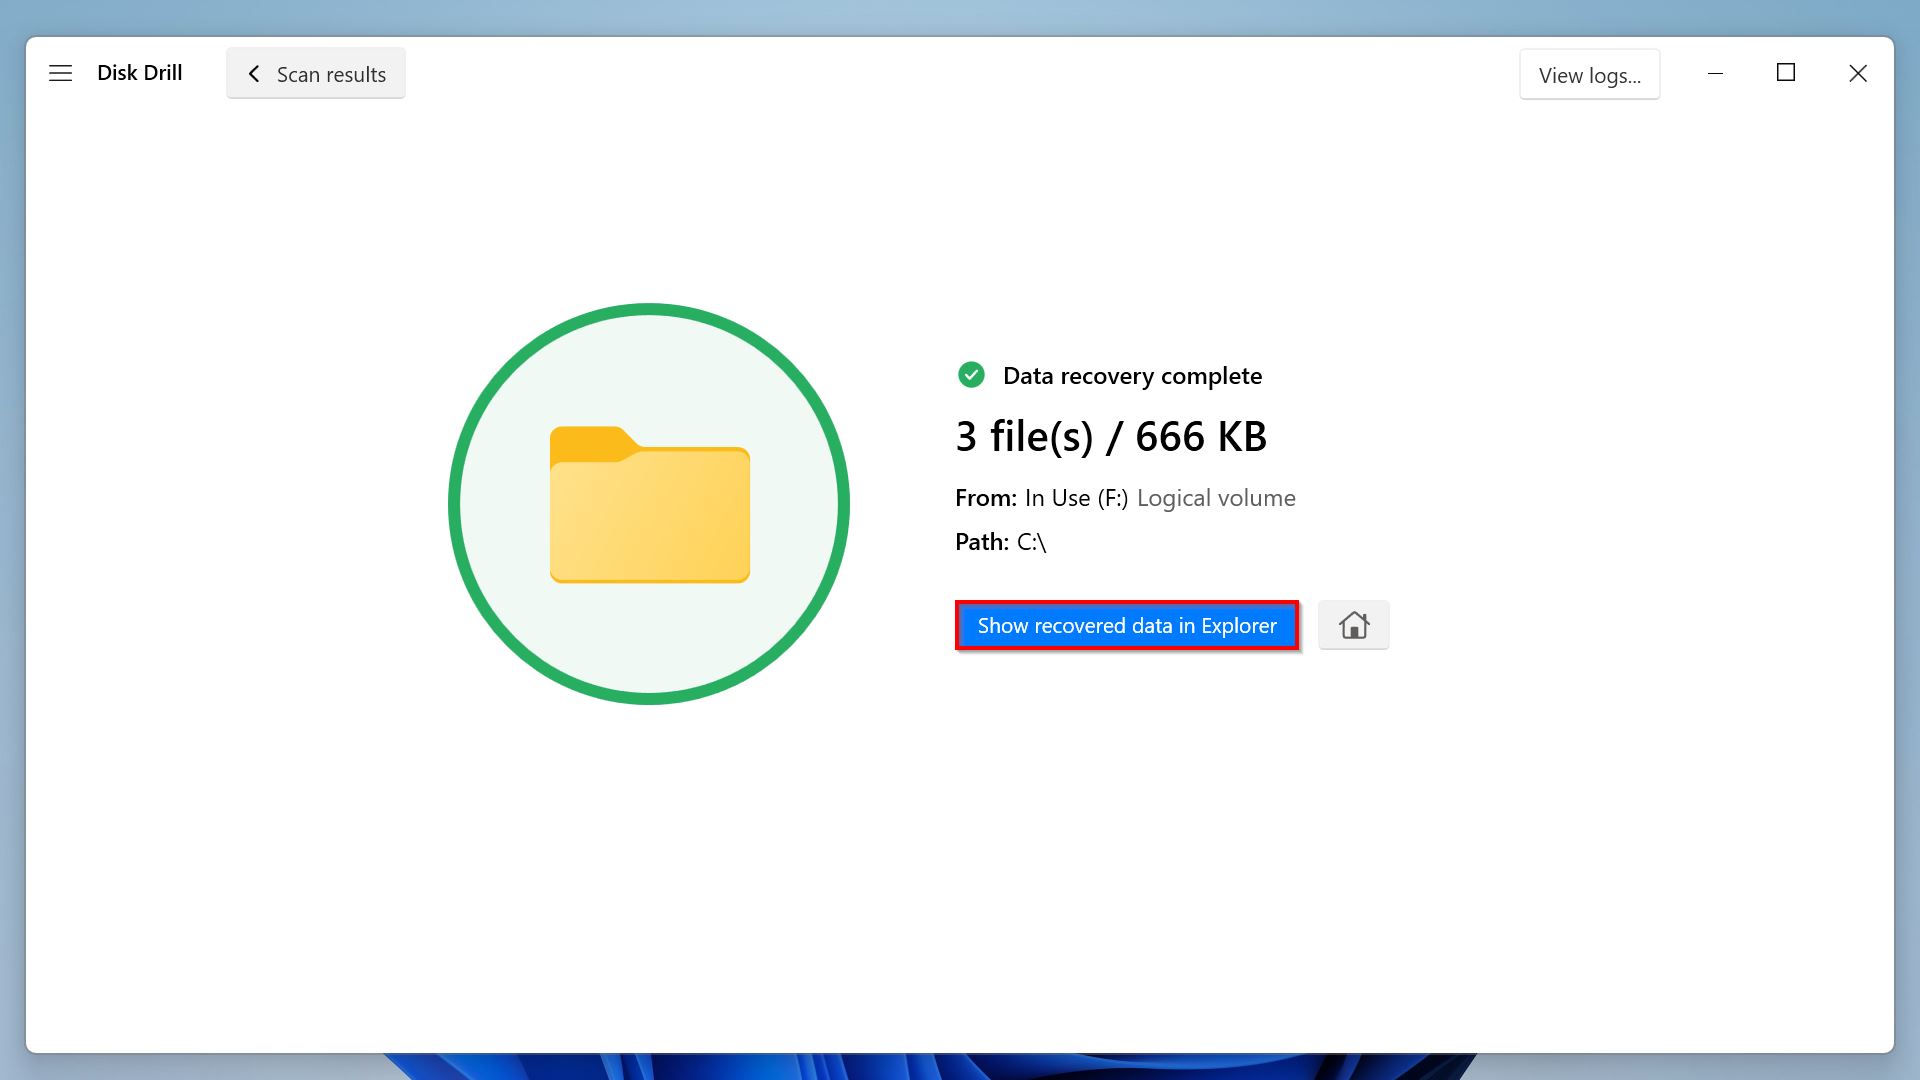
- Finally, once the data recovery is complete, you can click the “Show recovered data in Explorer” button to view your restored Project files.
Method 3: Restore Files from Backup
Backing up your data, including your Microsoft Project files, is a best practice you should always apply to prevent data loss. You can simply restore your damaged, deleted, or lost MPP files from the backup.
There are many ways to back up your data, like using external storage. If you have saved your Project files on a thumb drive, you can simply access that drive and restore the existing copy.
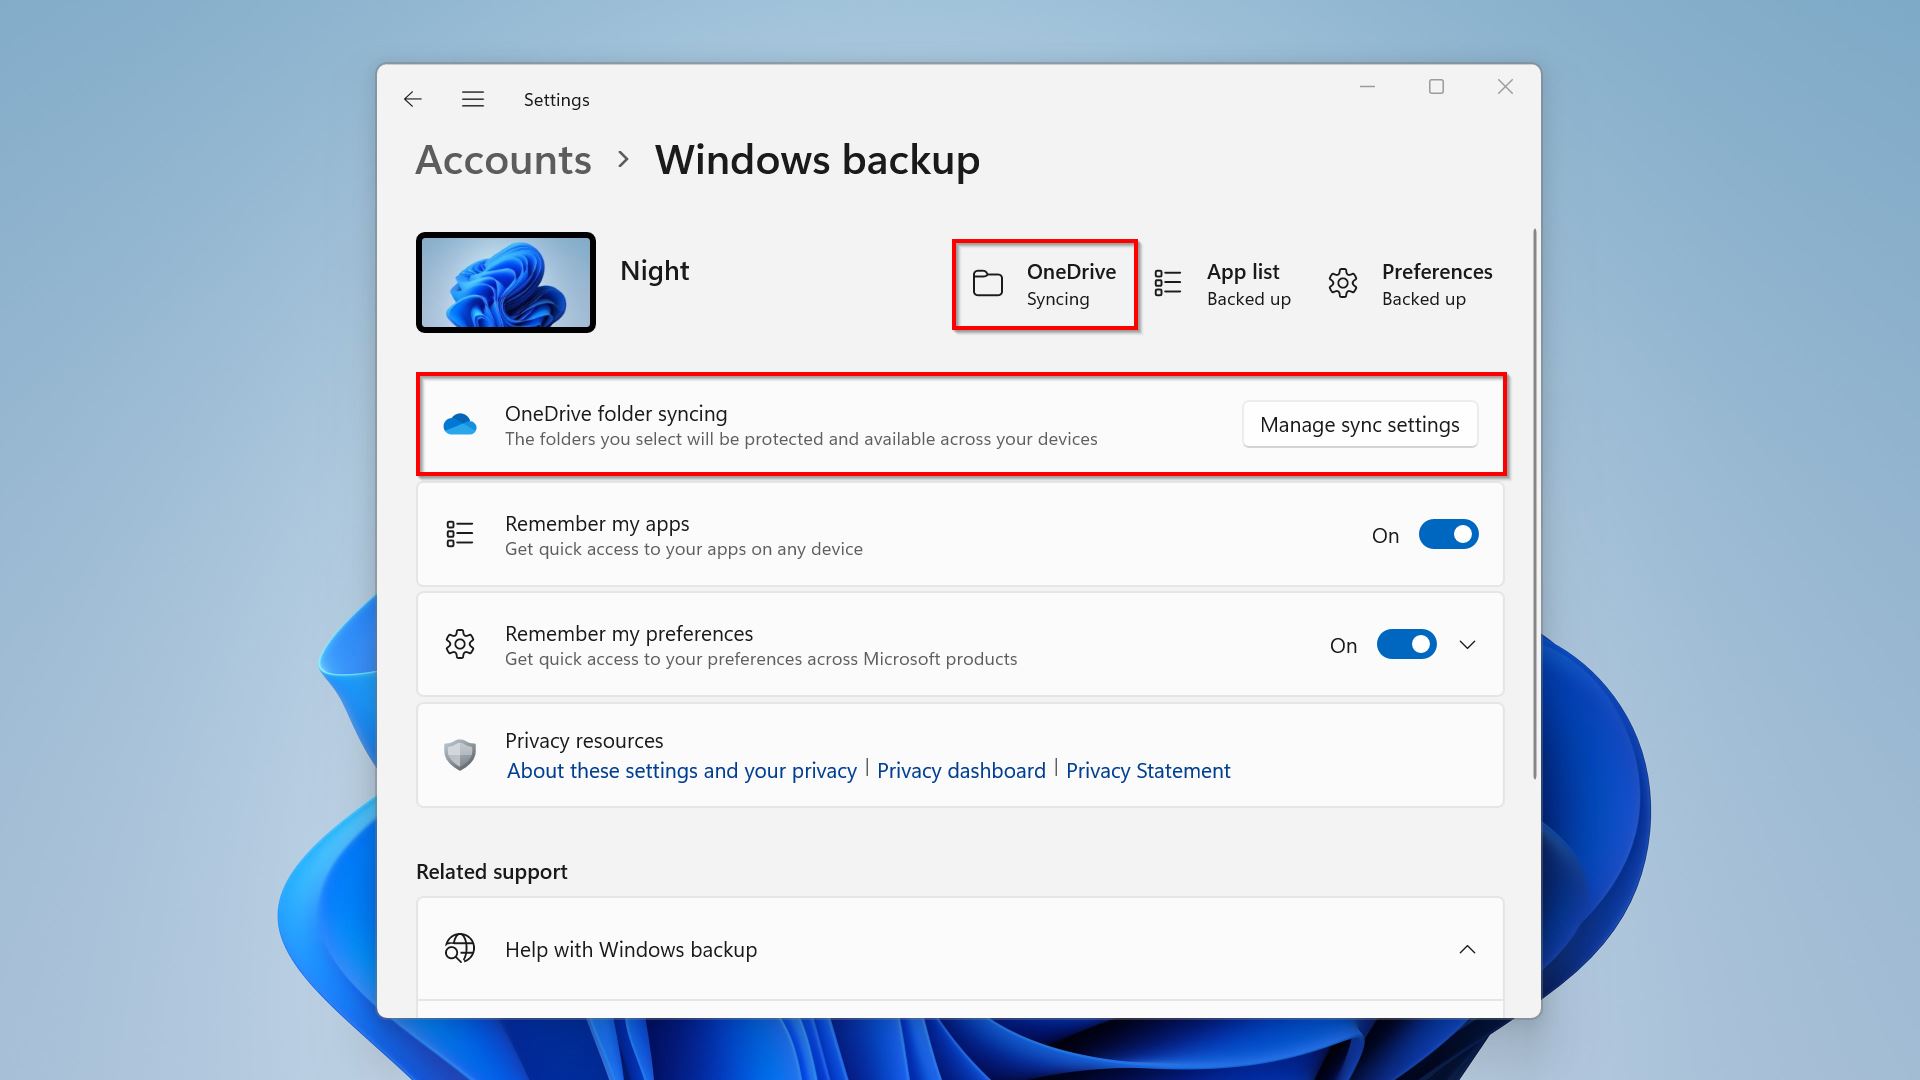
Meanwhile, you might also have enabled Windows backup before. This syncs your data with your OneDrive cloud storage. You can visit your cloud account and try to retrieve your MPP file there. To check if syncing is on, open the Settings app and go to “Accounts” > “Windows backup.”
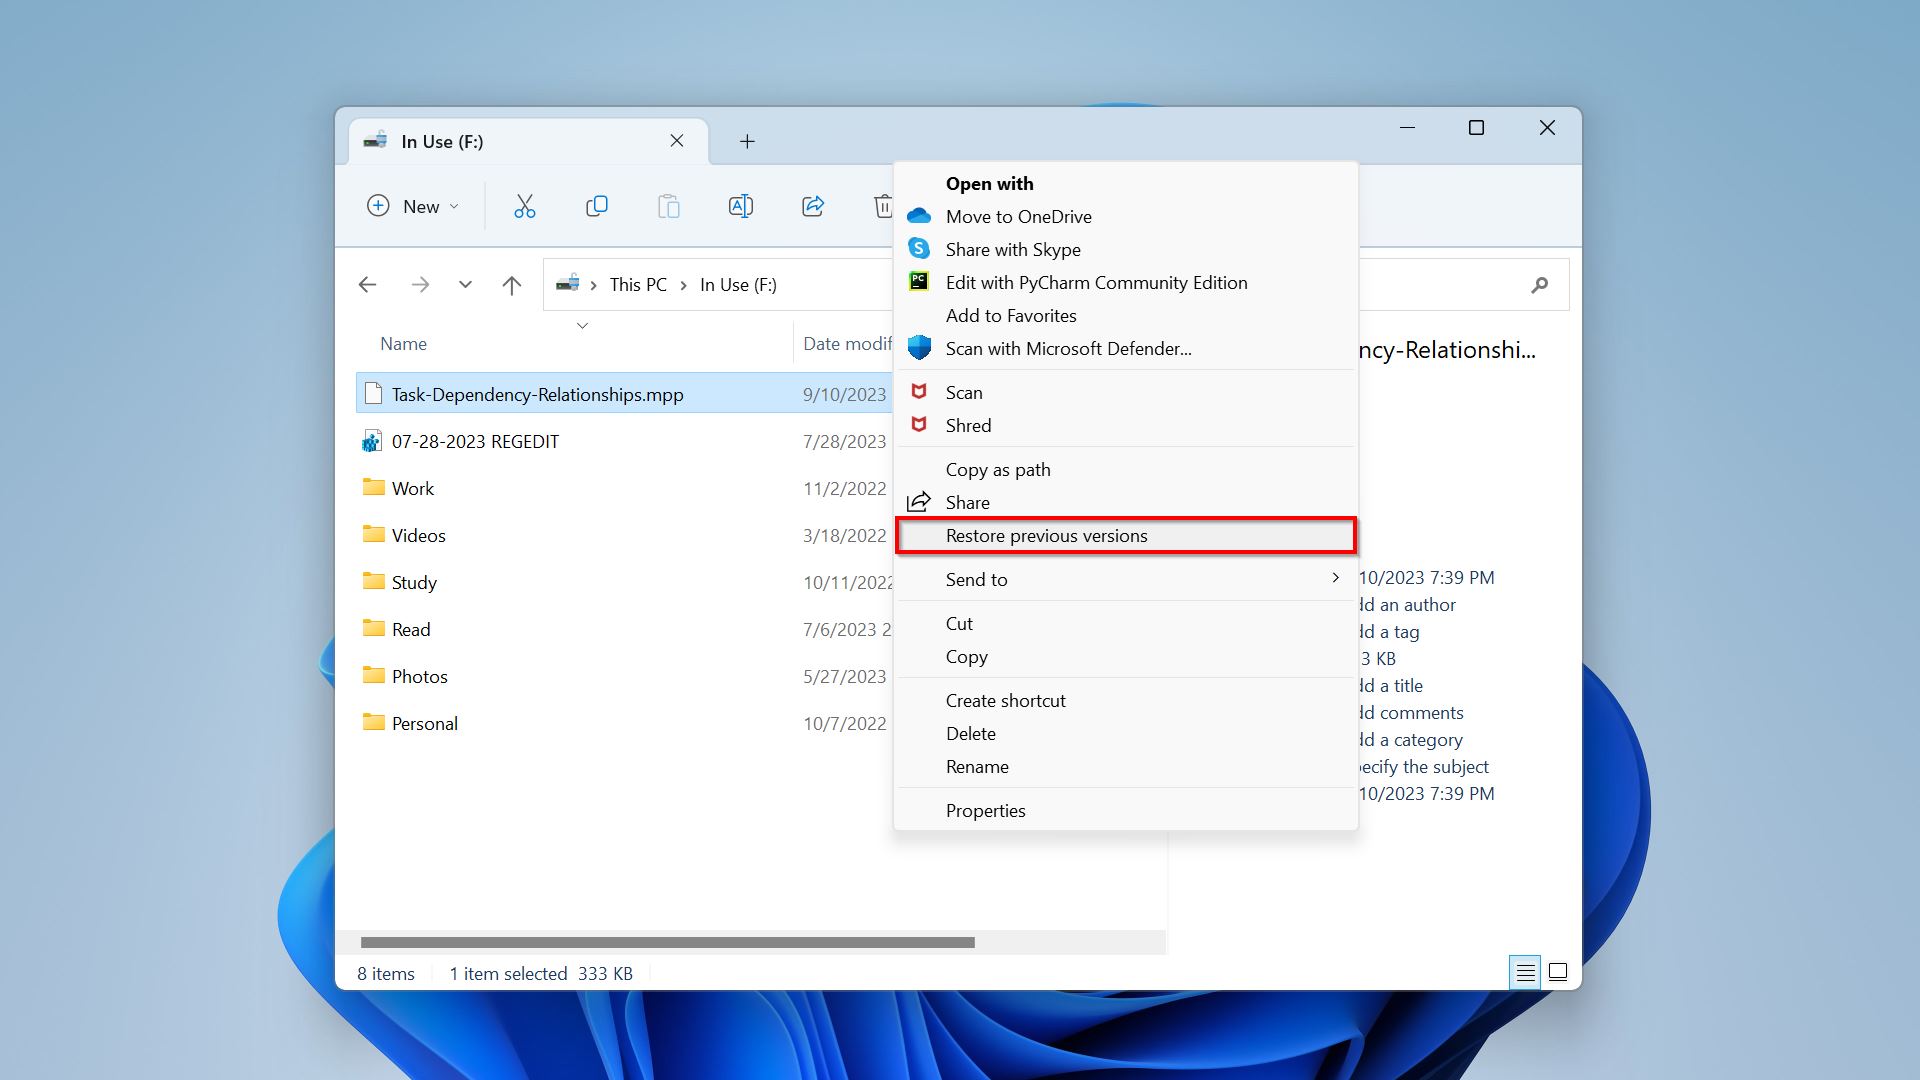
Restoring the previous versions of some files and folders might also help you recover your Project files. Note that this only works if File History is enabled on your Windows machine. To get started, simply follow the steps below:
- First, open File Explorer and navigate to your chosen file or folder.
- Right-click that file or folder and choose “Restore previous versions” from the context menu.
- Next, in the Properties window displayed for that file or folder, see if there are any previous versions available.
- If there is, select that version and click “Restore.”
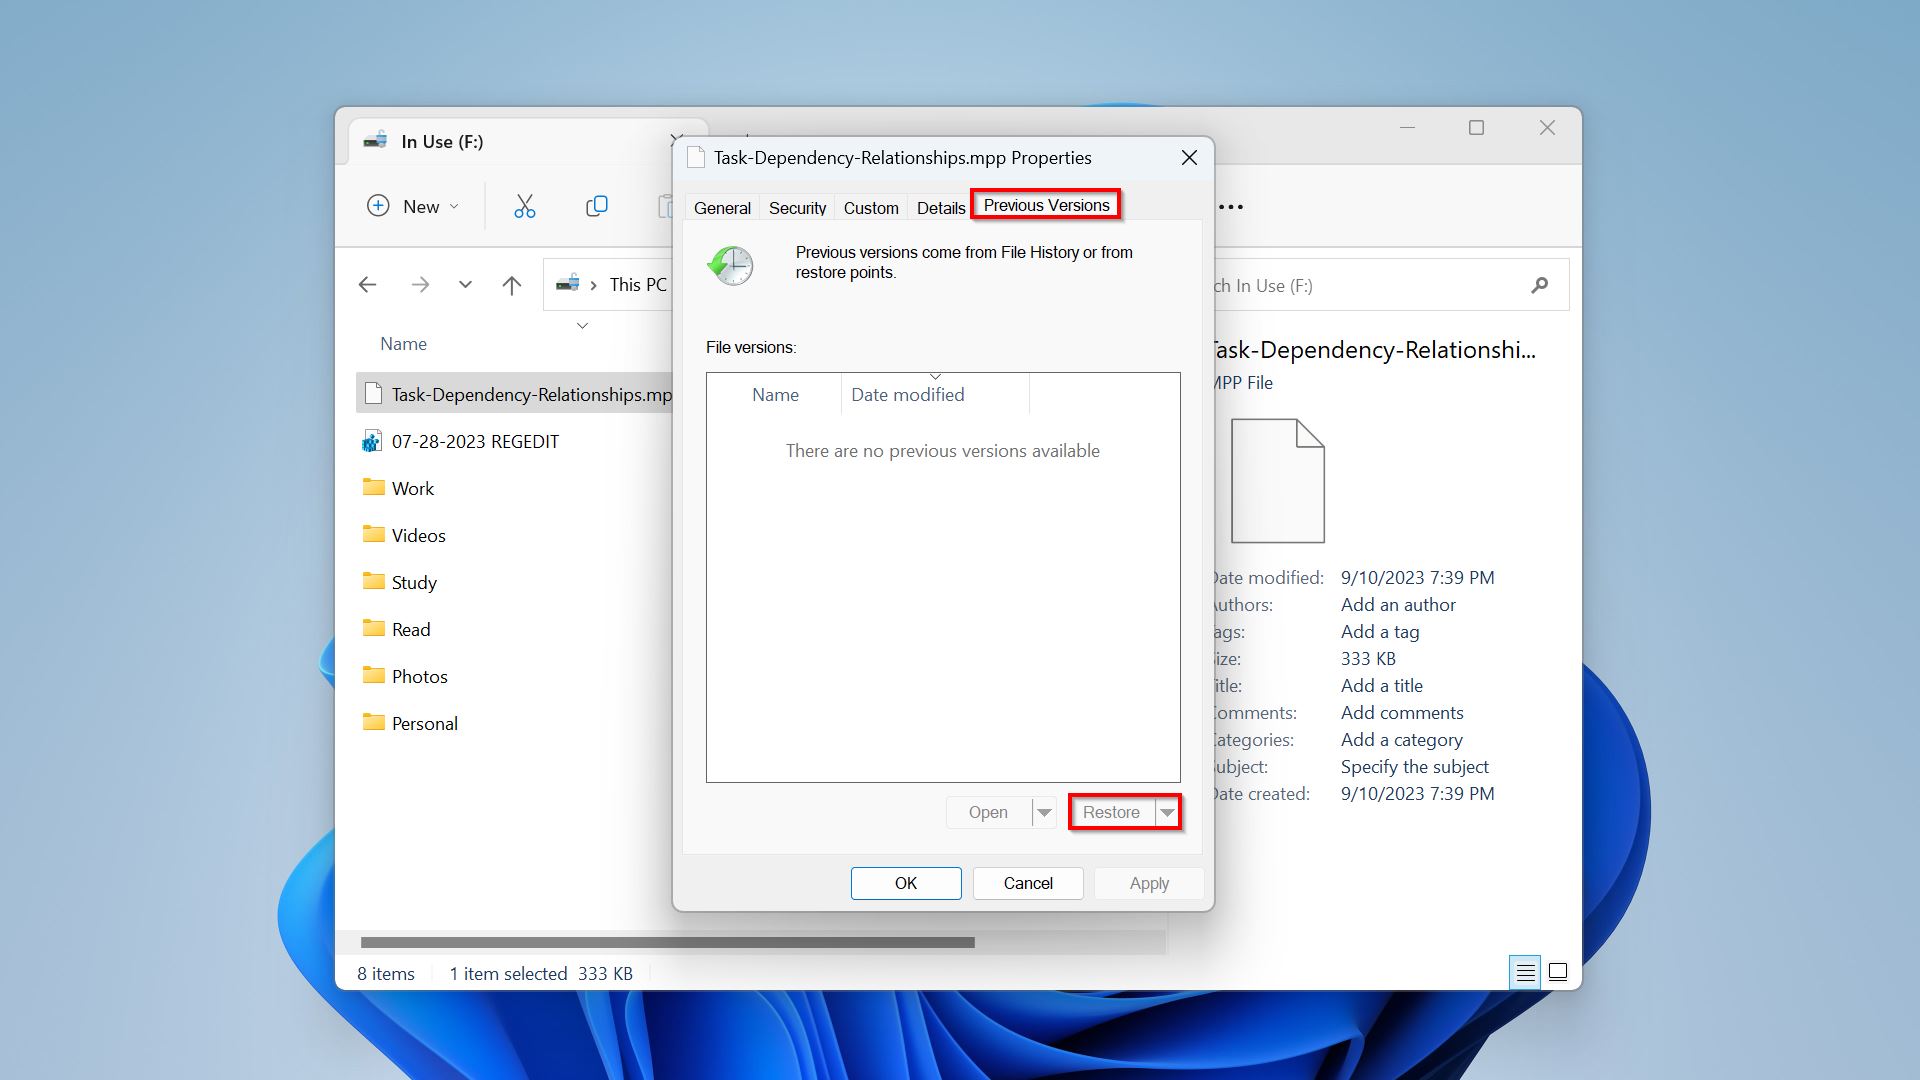
- Optionally, click the drop-down arrow beside the “Restore” button and choose “Restore to” to select a new recovery destination.
Method 4: Recover Files From the Temp Folder
If you weren’t able to save your Microsoft Project files, there’s a chance that you can find them in the temporary files folder on Windows. But where are MS Project temp files stored?
There are two ways for you to access the Temp folder and recover an unsaved MS Project file:
- Press Windows key + R on your keyboard and type “%temp%.”
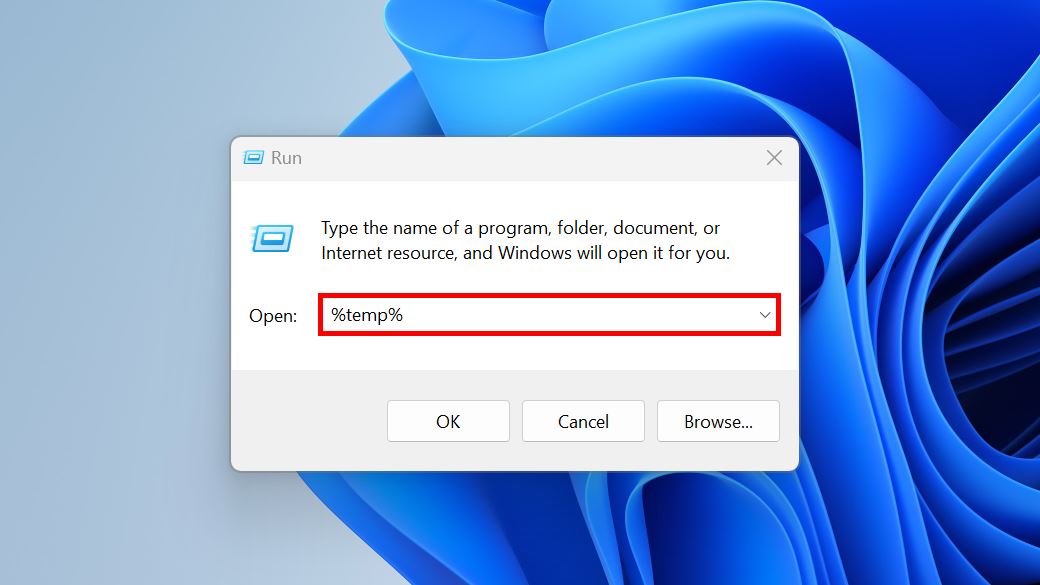
- Paste this file path to the address bar in File Explorer: “C:\Users\%USERNAME%\AppData\Local\Temp”
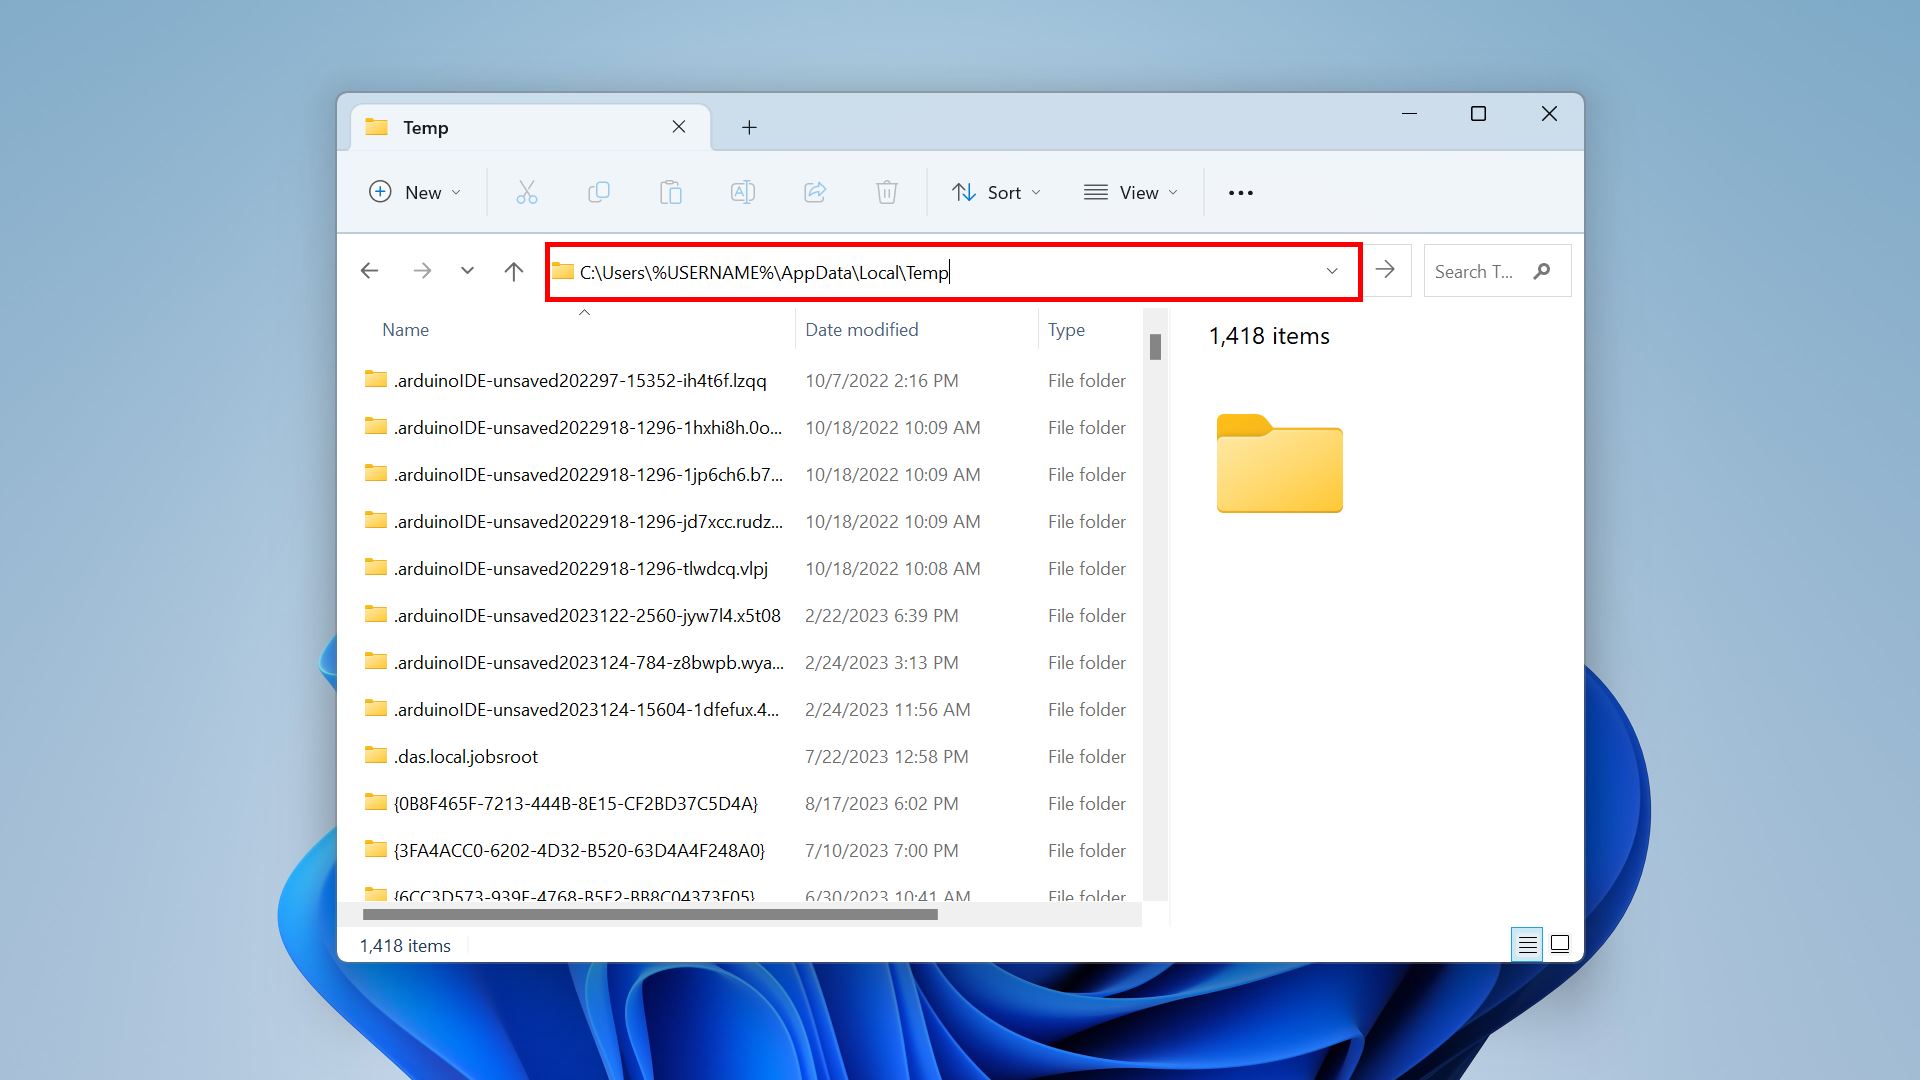
Once you get there, use the search bar in File Explorer and look for related file extensions like MPP and MPT. After you recover an unsaved file in Microsoft Project on Windows, make sure to save it properly the next time and back it up.
Method 5: Recover Data From Autosave
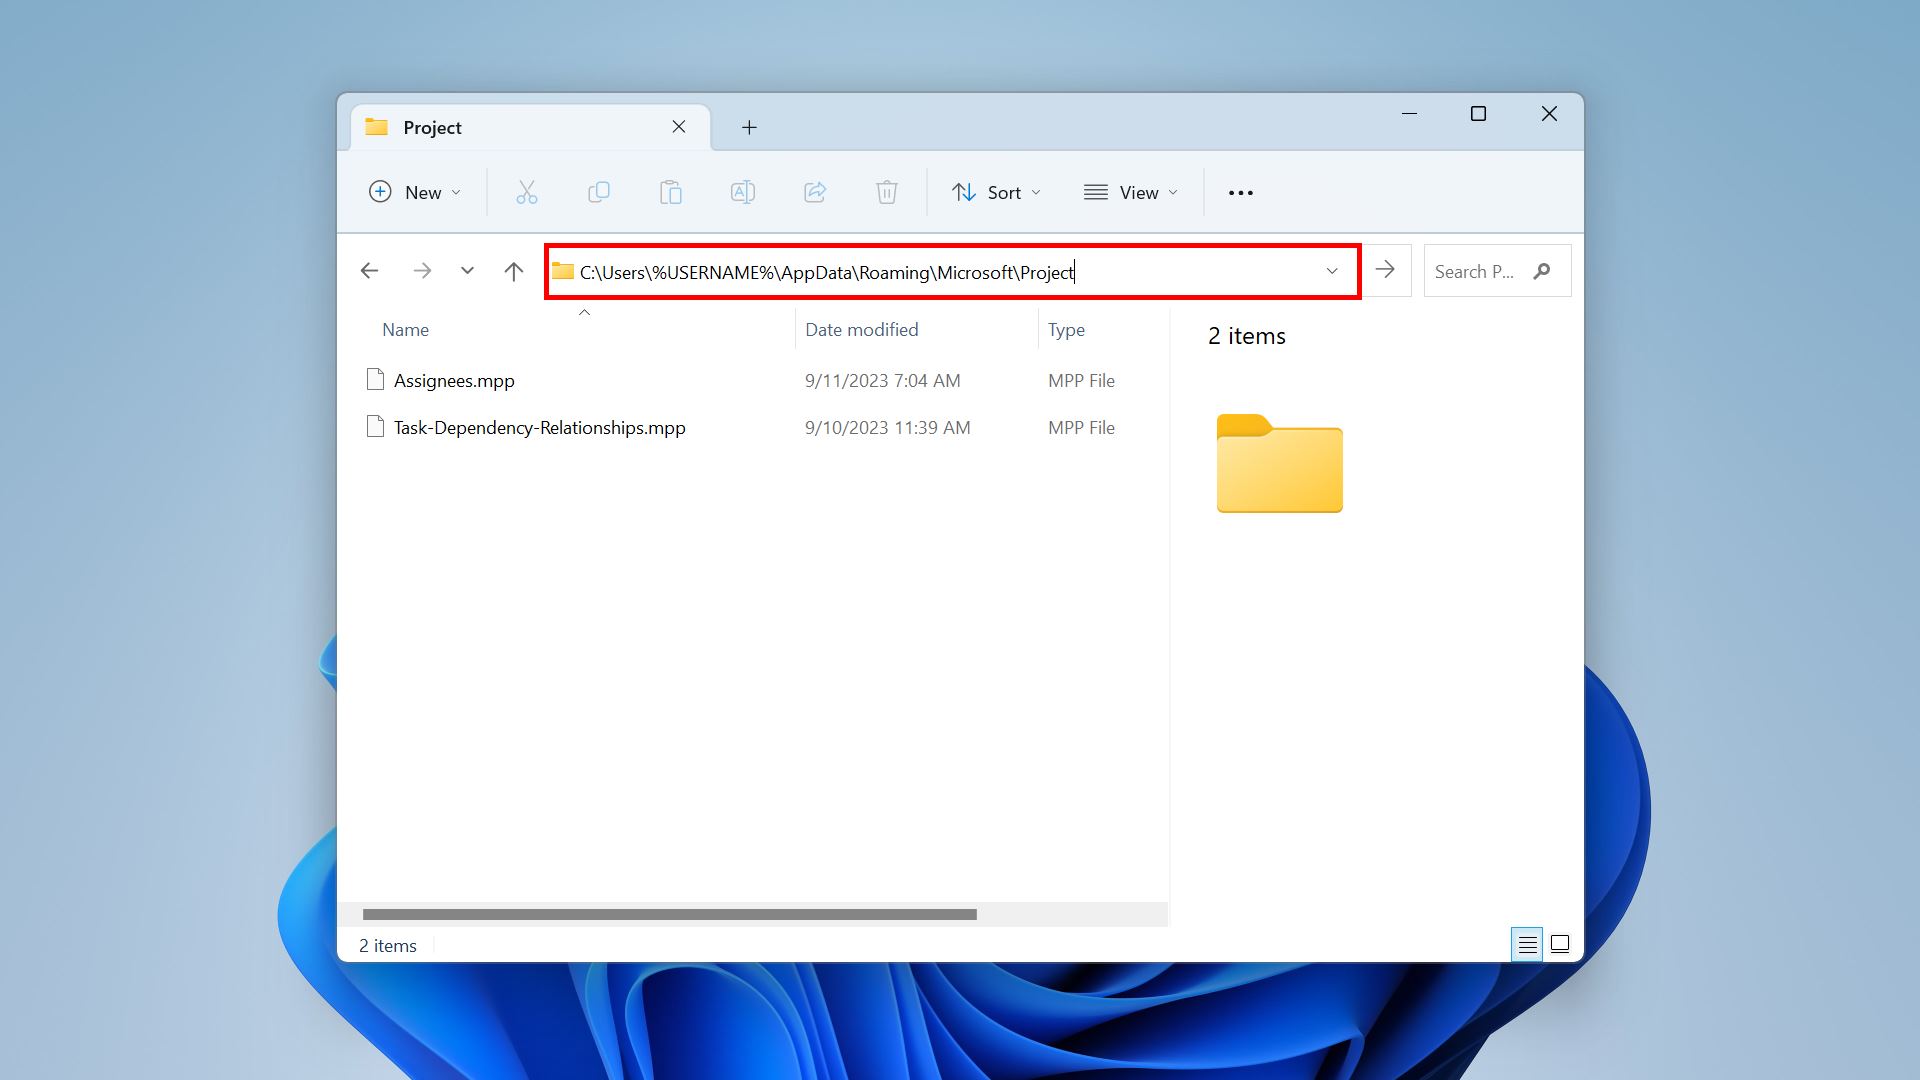
You can enable the Microsoft Project autosave feature so that it saves the current version over certain intervals (e.g., five minutes). It isn’t turned on by default. If you have configured it before, you can usually find it in the following locations:
- C:\Users\%USERNAME%\AppData\Roaming\Microsoft\Project
- C:\Users\%USERNAME%\AppData\Local\Microsoft\Office\UnsavedFiles

Note that you can also change the default folder for the autosave feature. Here are the steps that you should follow:
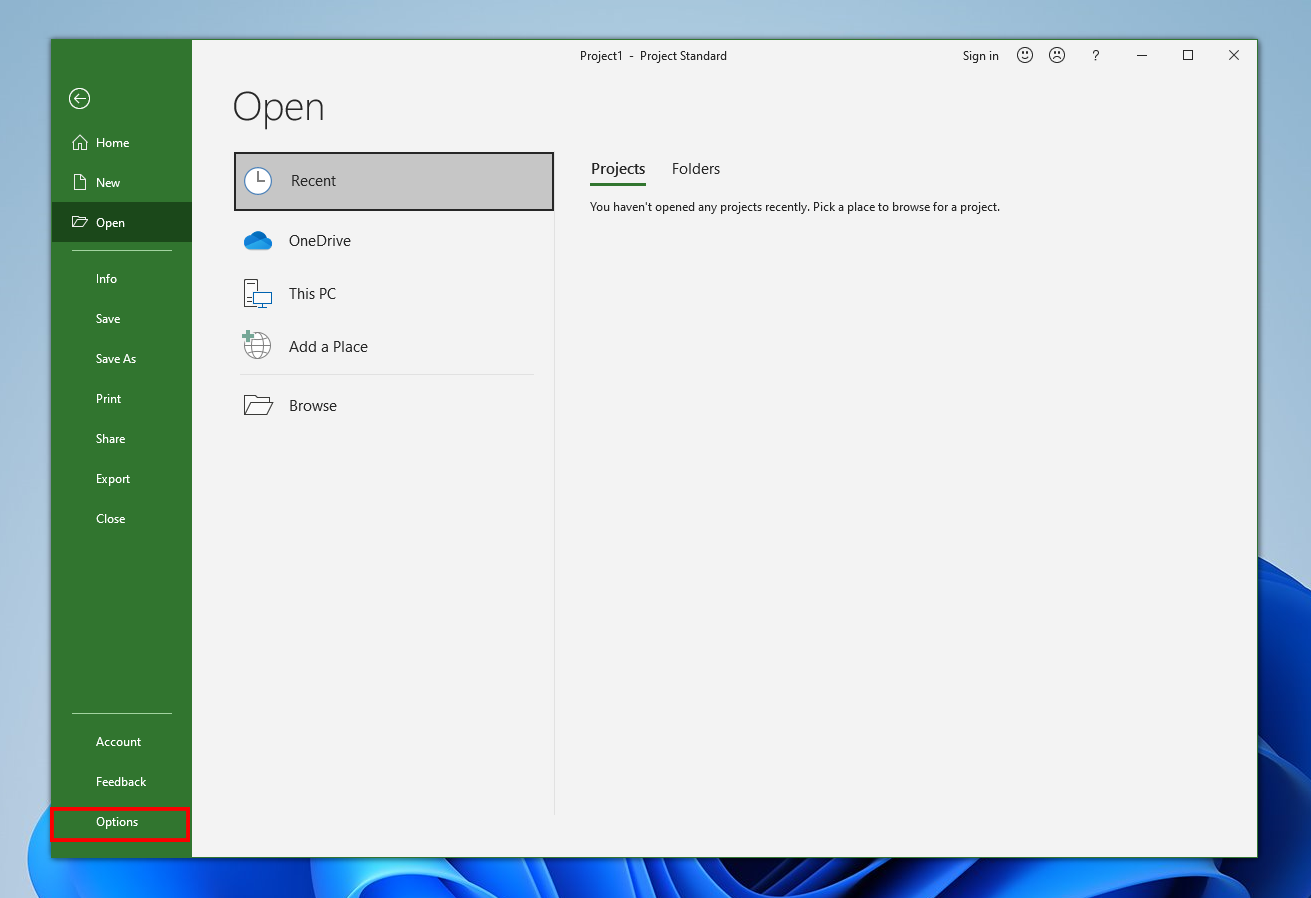
- To get started, open Microsoft Project and go to a file.
- Next, click “File” > “Options.” This would open the Project Options window on your screen, where you can adjust general settings.
- Navigate to “Save” and click the “Browse” button for the “Default File location” field. Select your preferred folder and proceed to the next steps.
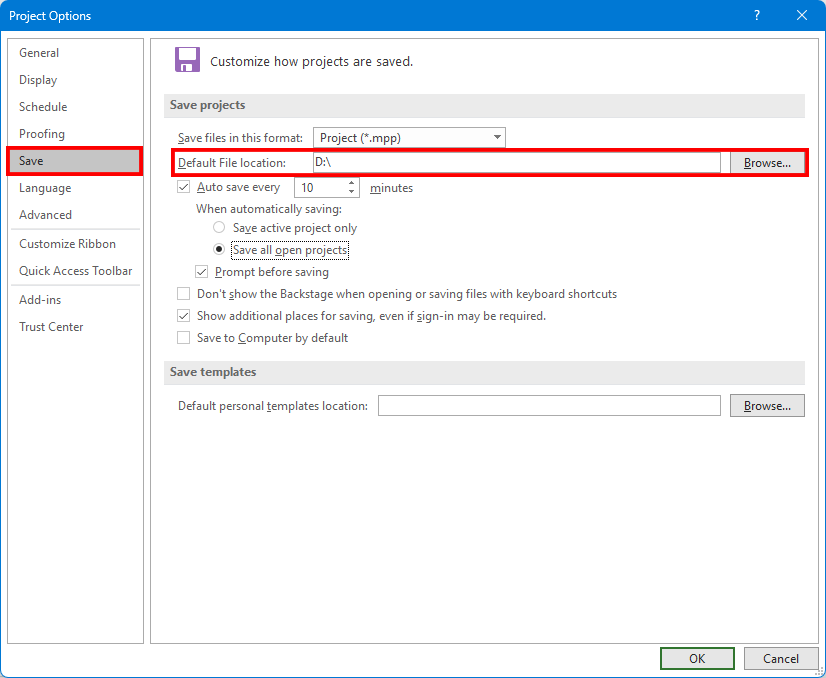
- After that, toggle on “Auto save every [interval] minutes.” The default interval is 10 minutes, which you can freely adjust.
- Under “When automatically saving,” select “Save all open projects.”
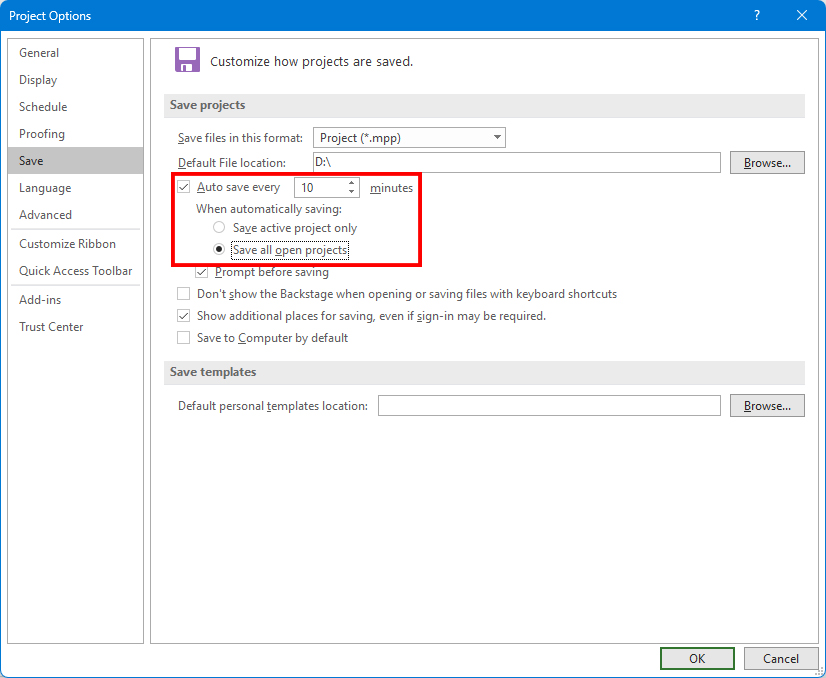
- Finally, click the “OK” button at the bottom to finish.
How to Repair Corrupted Files After Recovery
As mentioned, one reason for lost Microsoft Project files is corruption. You need to do a few more steps to get access to their contents again. Particularly, you want to save your MPP files as Extensible Markup Language (XML) files, and then, create new projects using them. Here’s what you can do:
- Open the recovered Project file in Microsoft Project.
- Next, go to the “File” menu and click “Save as.” This will open a new window where you can enter the filename and format of your project.
- Select your preferred destination folder. Then, add a name for your Project file.
- After that, open the “Save as type” drop-down menu and choose “XML Data.”
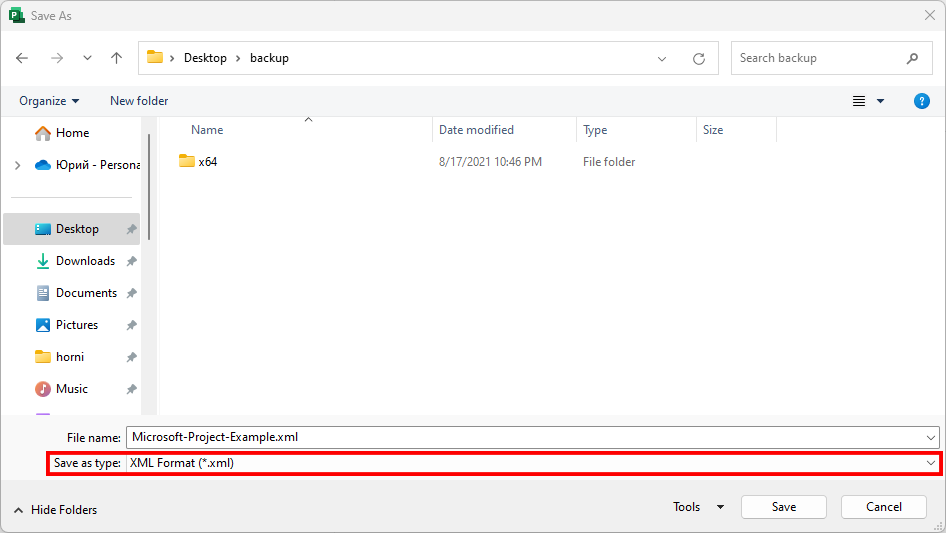
- Click “Save” to finish.
- Close the current XML file.
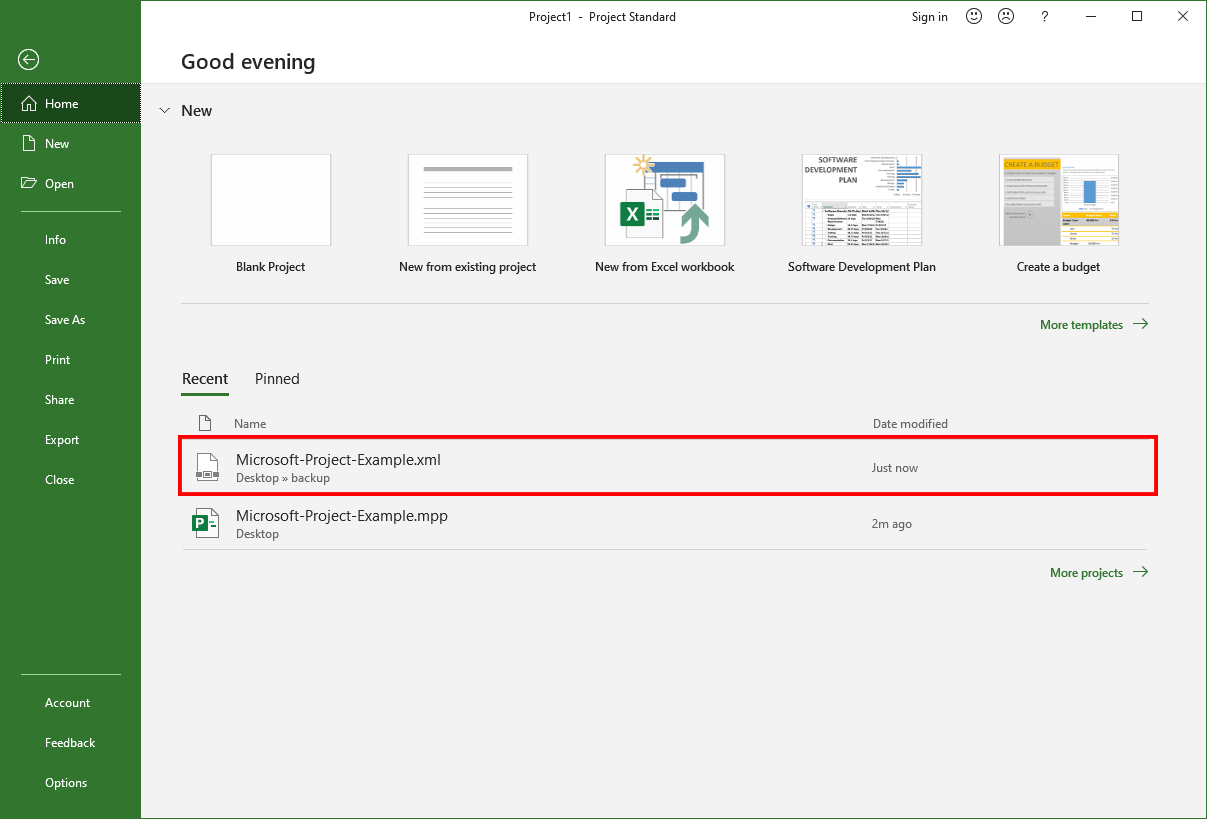
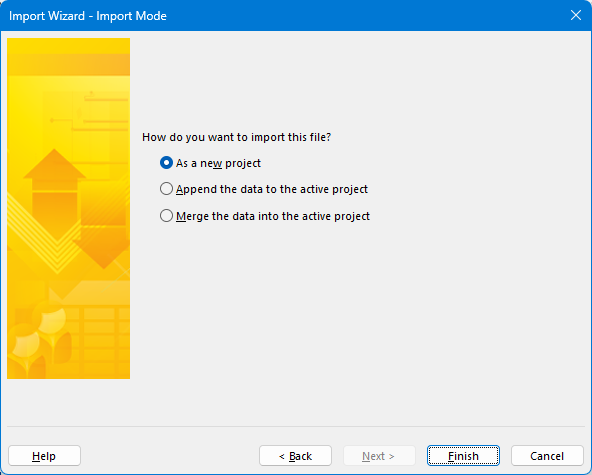
- Next, start a new project on Microsoft Project, then go to “File” > “Open” and select XML file you created
- Proceed with importing it to a new project
- Save that project as an MPP file. Make sure to use a different name to prevent further corruption.
Conclusion
Microsoft Project files can be lost due to malware attacks, file system errors, power surges, and even simple human carelessness. While you can recover them using the recycle bin or backup, it requires you to do some preliminary actions. Data recovery software can do the job even without prior setups. Whichever you prefer, ensure to do the recovery as soon as possible.
FAQ
- C:\Users\%USERNAME%\AppData\Roaming\Microsoft\Project
- C:\Users\%USERNAME%\AppData\Local\Microsoft\Office\UnsavedFiles


")
