
Many companies and individuals keep valuable information in Excel spreadsheets. Suddenly realizing you have deleted or lost an important Excel file when it’s needed for a meeting can pose a huge problem. Don’t worry. We are going to show you multiple ways to recover deleted Excel files on a Windows computer.
Table of Contents
How to Recover a Deleted Excel Document on Windows
Before embarking on a data recovery adventure, make sure you didn’t just save the Excel file to a different location and now simply can’t find it. You might consider searching your computer for the file to see if it’s just misplaced. Once you have determined the file is really gone, you can try these methods to get it back.
Method 1: Restore a deleted Excel file from the Recycle Bin
The first place to look for your deleted file is the Windows Recycle Bin. Here’s how to do it.
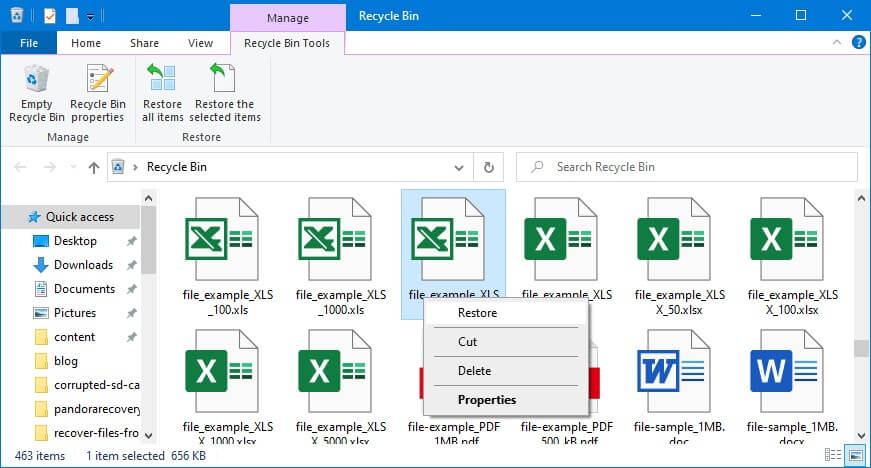
- Open the Recycle Bin by clicking on its icon.
- Select the files you want to recover from the list of available items.
- Right-click on your selection and choose Restore.
- Files will be recovered to their original locations. You can also drag files out of the Recycle Bin to another folder or the desktop.
Method 2: Use the Windows undo function
Here’s another simple method that can restore a deleted Excel file. Using the key combination of Ctrl-Z undoes the last command entered on a Windows computer. If you enter this command immediately after deleting your file, the operating system will undo the deletion and make the file available again. You can’t hurt anything by trying this method and it may save you a bunch of time if it works, so give it a shot.
Method 3: Search for autosaved or temporary files
It’s very possible that you have not deleted the file, but simply forgot to or were unable to save it. Maybe your system crashed before you had a chance to hit the save button. There are two locations on a Windows computer that you can check that may contain the file you were unable to save.
Autosaved files
If Excel’s AutoRecover function is active, your lost files may be in the folder where AutoRecovered files are stored. To display the name of this folder, use the following procedure.
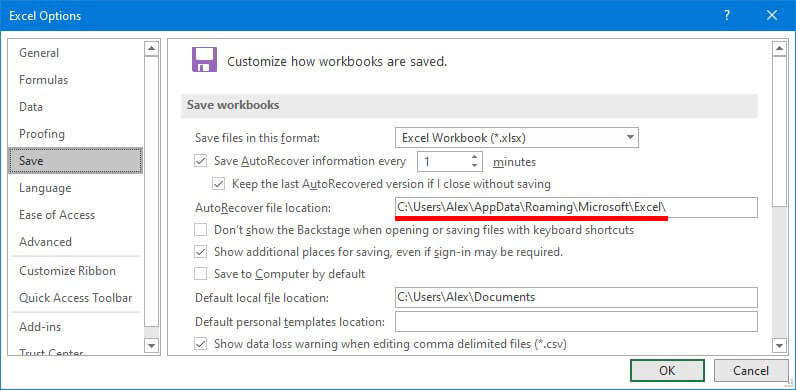
- In Excel, click on File and then Options.
- Click on Save in the left-side menu to display how your Excel workbooks are being saved.
- The AutoRecover file location is where AutoRecovered files are saved. If AutoRecover is enabled, you can go to this folder and search for your lost file. It may have been generically renamed, so be sure to check all the files for the one you want.
Temporary files
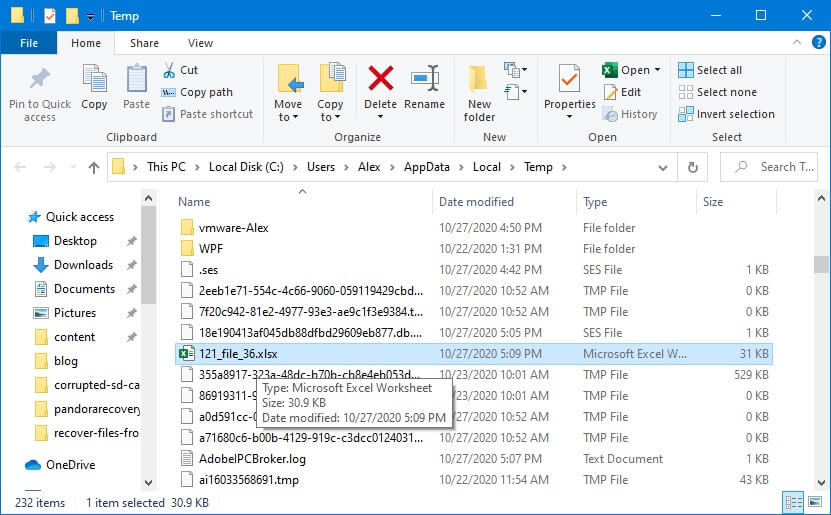
- Open the Start menu and type %temp% in the Search field.
- Press Enter to open the folder and view its contents.
- Search for .xls or .xlsx files. The files may have generic filenames and will have to be opened to see if they are what you need.
Method 4: Try reverting to a previous version of your Excel file
Windows 10 users can try restoring a previous version of a file from a system restore point. Follow these steps to give it a try.
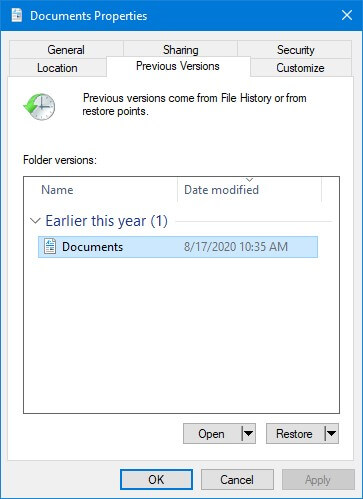
- Open File Explorer.
- Go to the file or folder which you would like to restore to a previous version.
- Right-click on the item and select Previous Versions from the context menu.
- Select the version you would like to restore in the File versions list.
- Click Open to review the file’s contents.
- Click the Restore button to recover the file to its original location. You will be prompted to allow the file write to complete.
Method 5: Restore from a backup
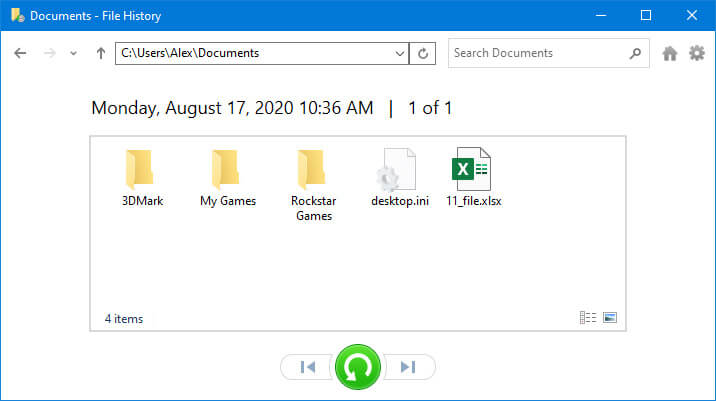
If you are in the habit of backing up your computer, you may be able to recover the lost file from your backup media. Depending on the version of Windows you are running, you will either use File History (Windows 10) or Backup and Restore (earlier versions than Windows 10). Both tools offer intuitive help to guide you through the recovery process. Of course, you need to have made a backup of the files in question to use this recovery method.
Method 6: Use Disk Drill data recovery software
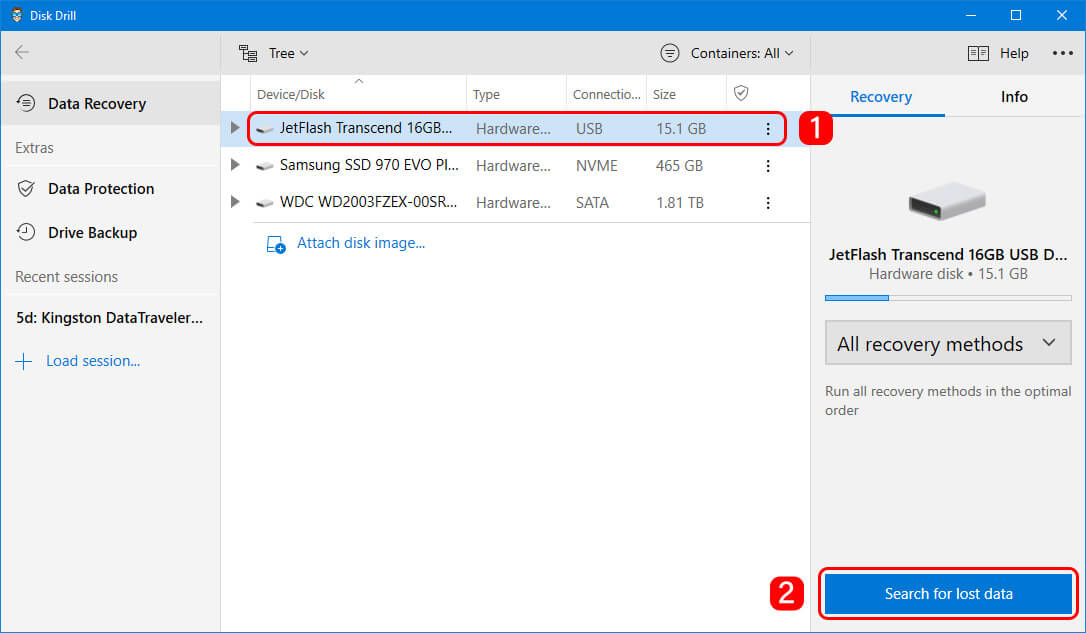
If the previous methods have failed to get back your deleted Excel file, it’s time to try a data recovery with Disk Drill. Here’s what you need to do.
- Download and install Disk Drill for Windows. As mentioned previously, don’t perform the download and install on the device with the last file so you don’t inadvertently overwrite the data you want to preserve.
- Connect an external storage device if necessary and launch Disk Drill. Select the disk or partition with the lost file.
- Click the Search for lost data button to start scanning for deleted data.
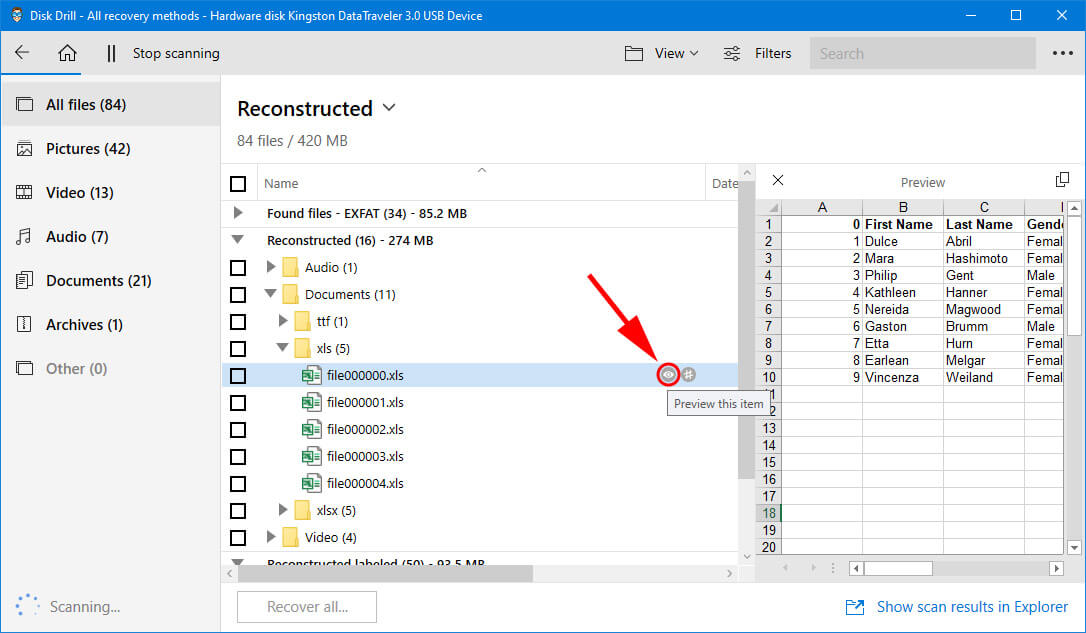
- Preview the files that Disk Drill finds and select the Excel files you want to restore.
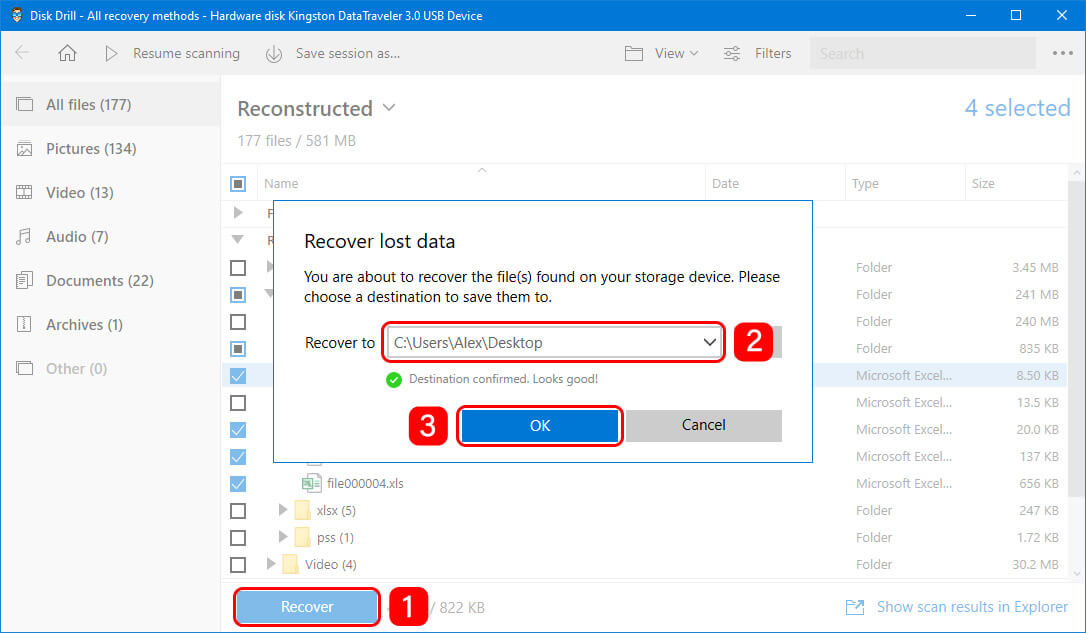
- Click the Recover button and choose a new location for the recovered files that is not on the same device that lost the data in the first place.
Conclusion
There you have it. You now have several methods with which to recover a deleted Excel file on a Windows computer. Disk Drill data recovery software will often work when other methods fail, and a free download lets you identify the files that can be recovered.
Since Excel files often contain valuable information, we suggest that you get in the habit of backing them up regularly. It’s always a good idea to take a backup of your data. You never know when you’ll need it.
FAQ:
- Use Excel’s AutoRecover feature;
- Use the Windows Recycle Bin or Mac’s Trash;
- Recover from a backup;
- Undelete the file with CTRL-Z or Command-Z;
- Restore the Excel files with Disk Drill data recovery software.
- Download and Install Disk Drill for your OS platform.
- Connect the flash drive to your machine.
- Launch Disk Drill and choose the flash drive from the disk list.
- Scan the flash drive for lost data.
- Preview and select the files you want to recover.
- Perform the file recovery.
- Use the Trash or Recycle Bin;
- Use the Windows CTRL-Z or Mac Command-Z command:
- Use Excel’s AutoRecover feature;
- Recover from a previously made backup.
- Log in to your OneDrive account.
- Select the Recycle Bin from the OneDrive navigation pane.
- Point to the Excel files you would like to recover and click the circle checkbox to select them.
- Click Restore.
- Open the Excel workbook and select the Review menu.
- Click on Protect Workbook.
- In the Protect Structure and Window dialog box that appears, enter the password you want to use and make sure that the Structure checkbox is selected.
- Reenter the password and click OK.


