 Windows has several in-built tools that help detect and fix errors on your storage drives. One of these is the Scan and fix tool. In rare instances, you can lose some of your files as Scan and fix resolves errors on your storage drive. Our guide contains step-by-step instructions on how to recover these deleted files after a Scan and fix scan.
Table of Contents
What Is Scan and Fix and Why Does It Show Up
When Windows detects any problem on an external storage drive that you just connected to your PC, it’ll usually display the Scan and fix window. Maybe you disconnected your drive without ejecting it first, or Windows has detected bad (unreadable) sectors on the drive–Windows displays the message when your drive isn’t working as it should. It’s easy to click on the Scan and fix option unwittingly. In most cases, it will indeed scan and fix your external storage drive, but occasionally, it can do more harm than good.
There are two primary reasons why Scan and fix could lead to data loss:
- The scan was interrupted. If you disconnected the drive, there was a power cut, or a forced shutdown during the scan, you could experience data loss on the drive that was being scanned.
- Bad sectors on the drive. If the Scan and fix utility encounters bad sectors on the drive, it will attempt to fix them. However, the process involved in fixing bad sectors can lead to data loss. Scan and fix moves data from bad sectors to a reserved area and notifies Windows that the bad sectors are unfit for storing data. However, there are limited spare sectors on your drive, and once they’re used up, data from the bad sectors will simply be deleted.
How to Recover Data Deleted by Scan and Fix
Usually, you can recover most, if not all, of your data if Scan and fix deleted it. There are two main ways to do this–use a data recovery program (professional, or free), or restore your files from a backup. For drives that are physically damaged or no longer detected by your PC, it’s best to contact a professional data recovery service instead of attempting DIY data recovery.
To improve your data recovery chances, keep in mind the following:
- Attempt a data recovery scan as soon as possible.
- Avoid writing new files to the drive.
- Use a good data recovery program from the get-go. The first data recovery scan is often the most successful.
Method 1: Use a Professional Data Recovery Tool
A professional data recovery tool is the easiest and most cost-effective way to get back your data. But with the innumerable options at your disposal, it can be tough to pick one that delivers on its promises.
For this tutorial, we picked Disk Drill–one of the best data recovery apps on the internet. It’s easy to use and works with all major file systems, including NTFS, FAT32, and exFAT. Using Disk Drill, you can even recover data from drives that have no file system at all, i.e., they’re RAW. On Windows, you can recover up to 500 MB of data at no cost, as part of Disk Drill’s free trial.
Let’s take a look at how to recover data that was deleted by Scan and fix:
- Download Disk Drill and install it.
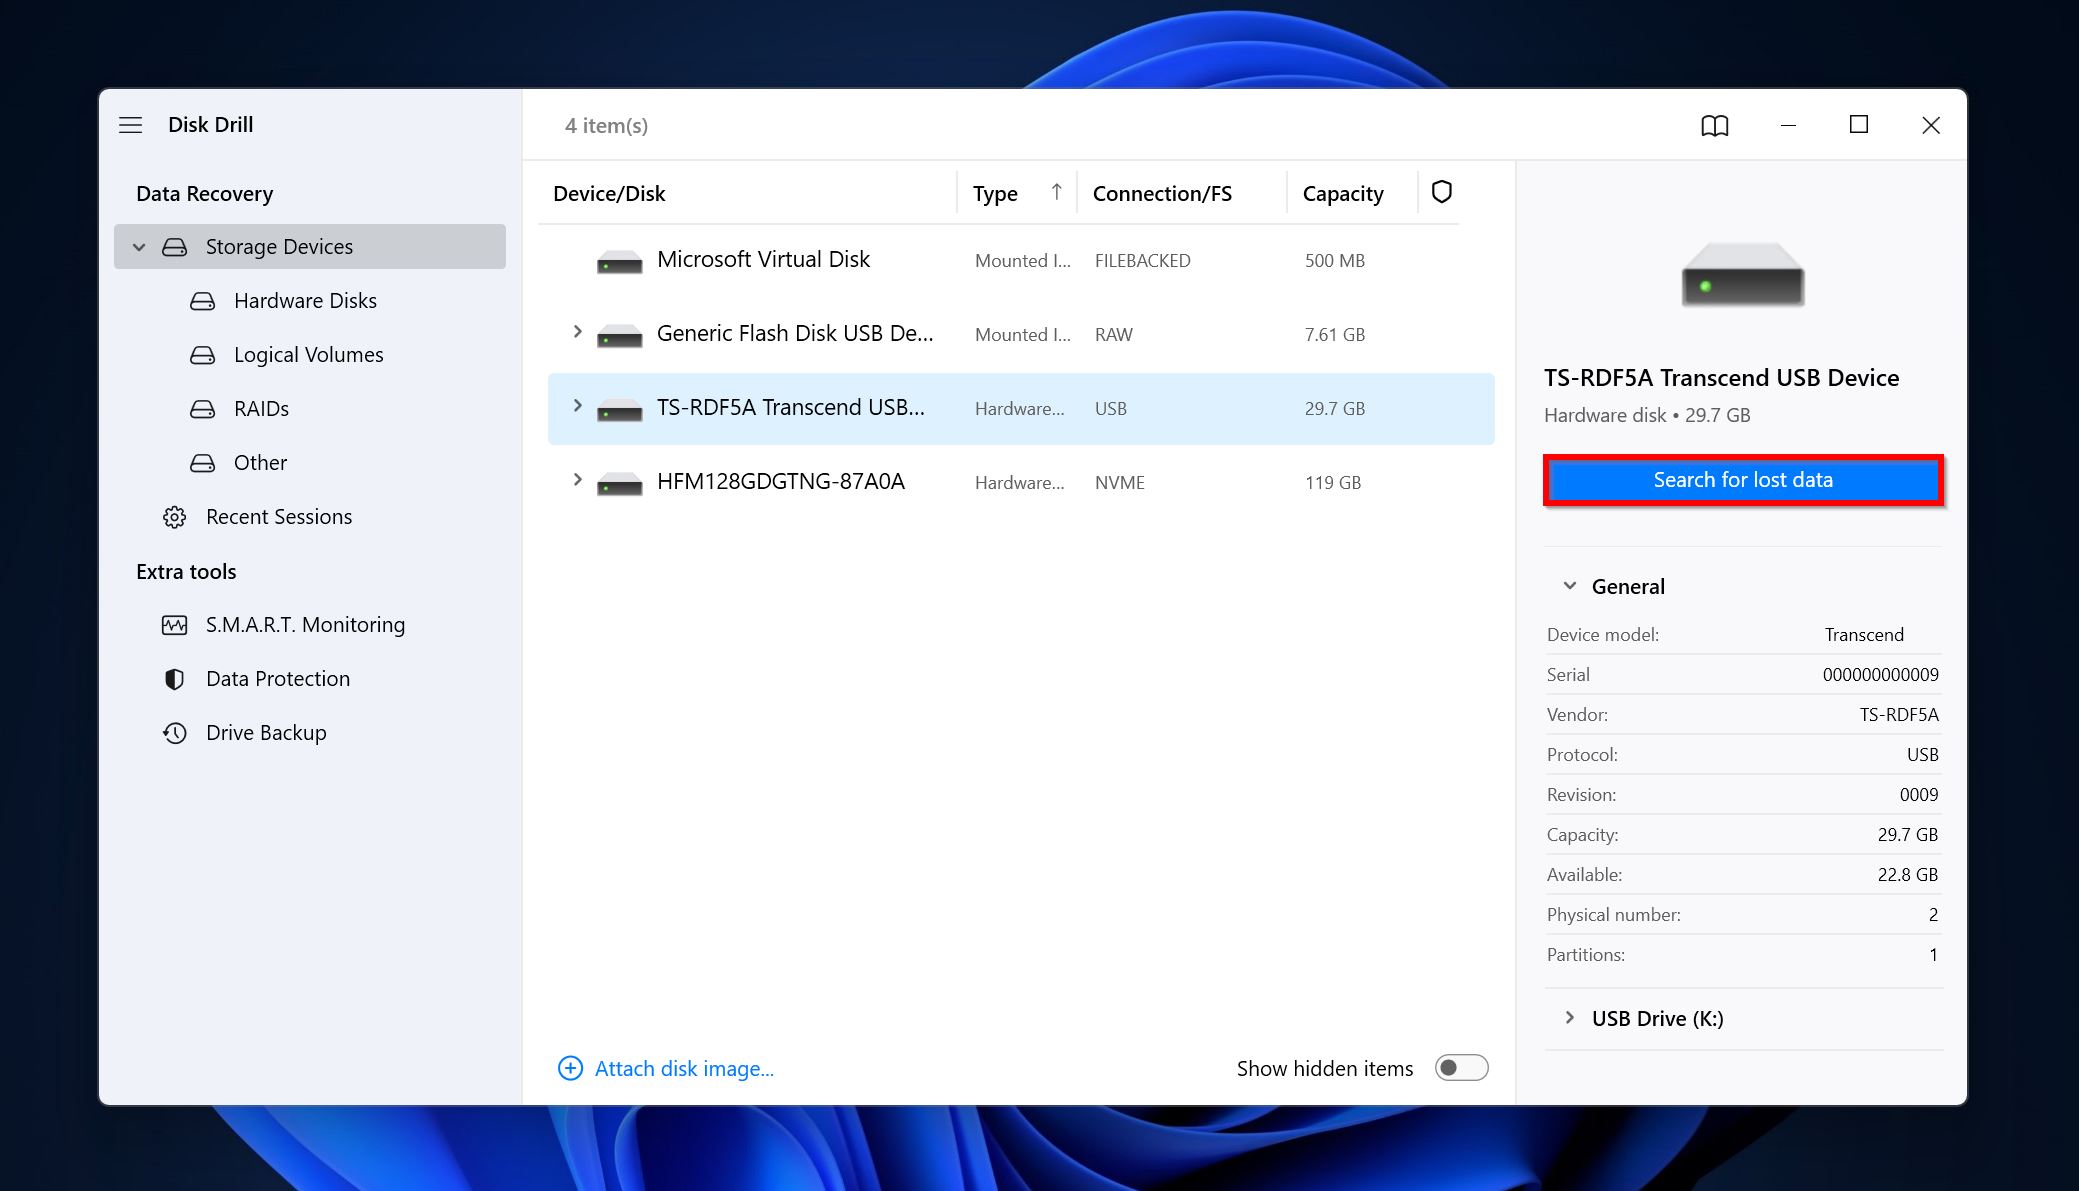
- Open Disk Drill, select the external storage drive, and click Search for lost data to scan your drive for deleted files.
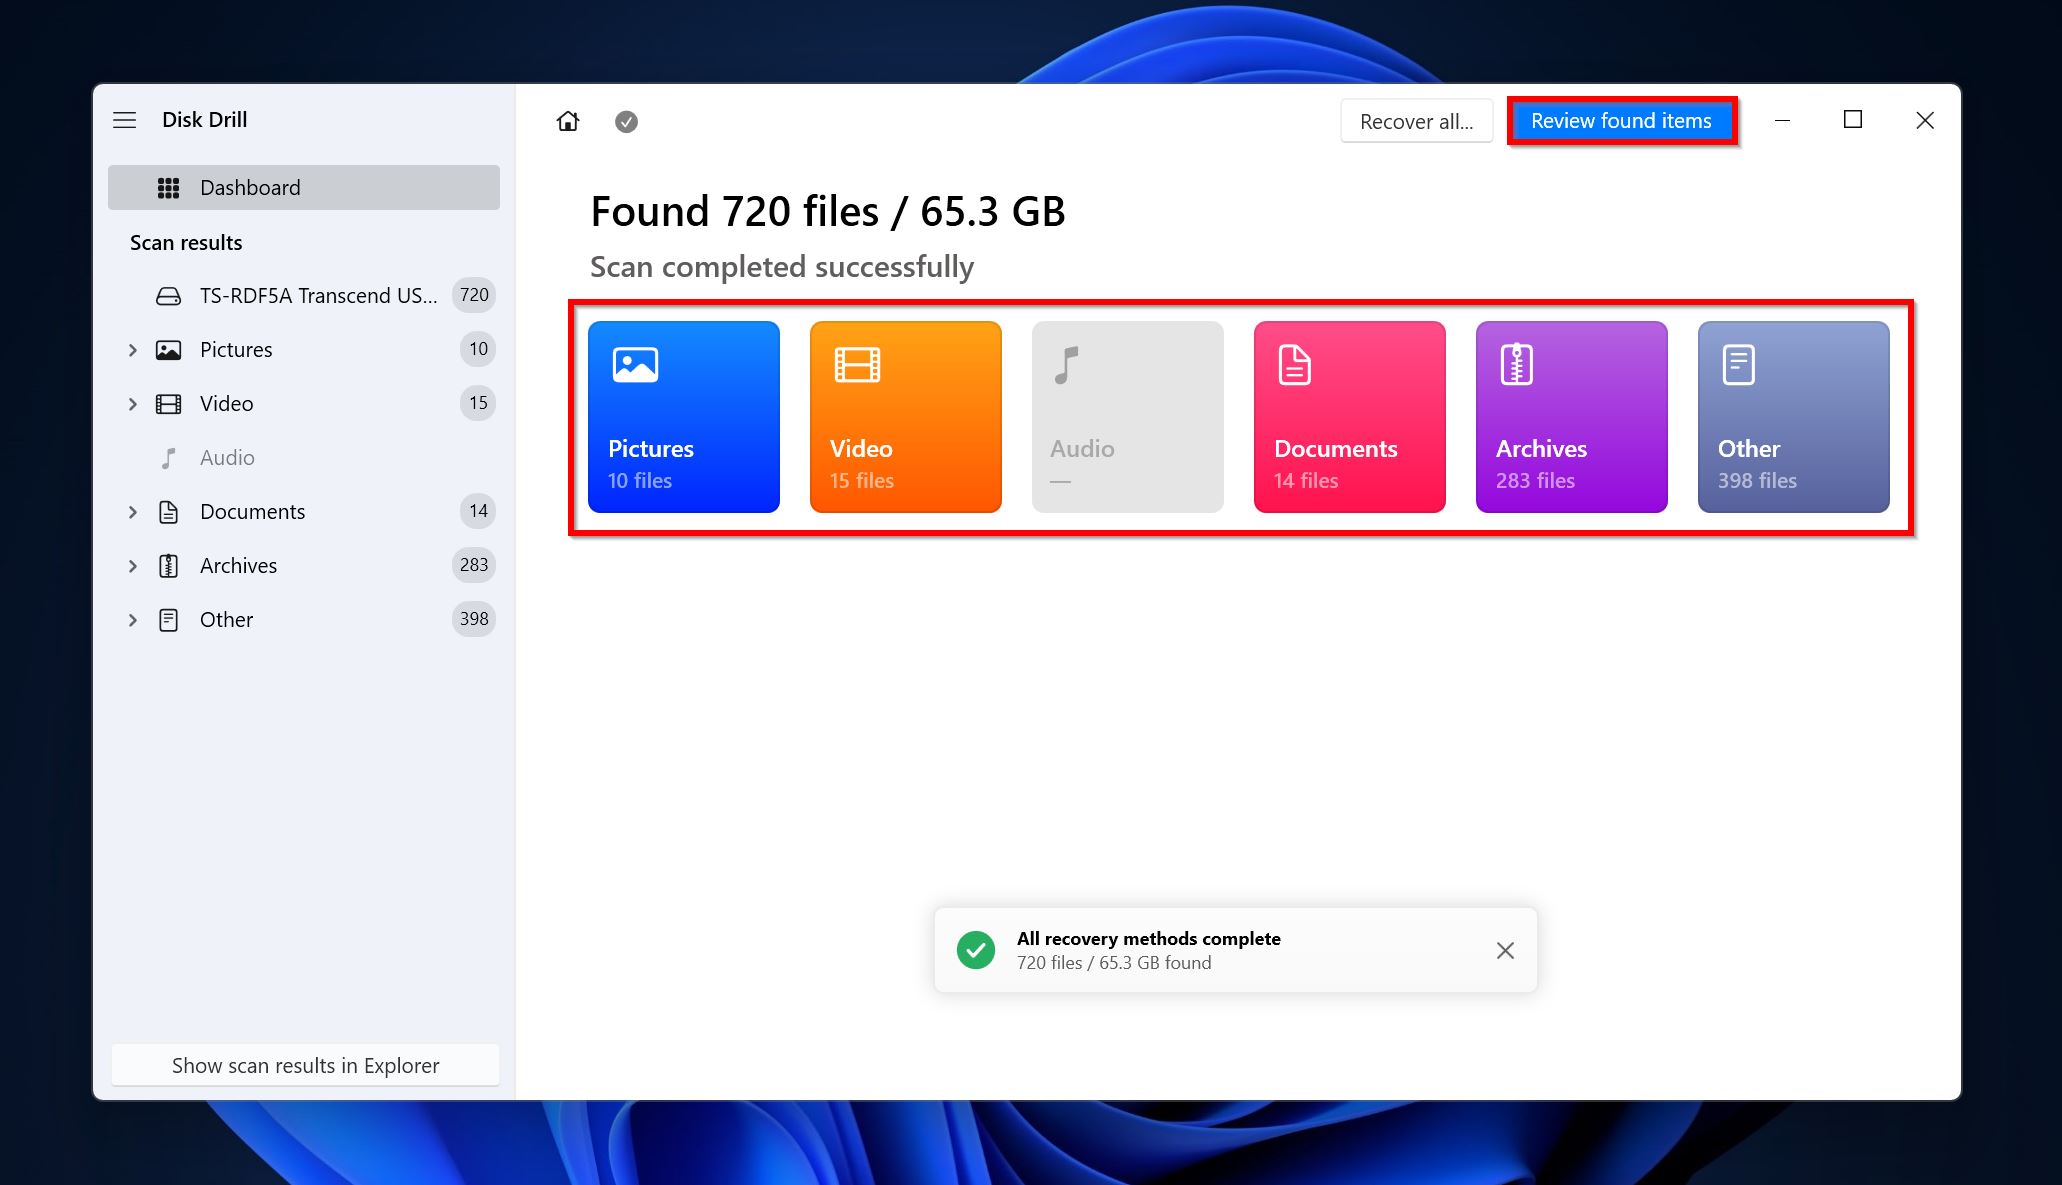
- Click on Review found items to view the recoverable data that Disk Drill discovered. Alternatively, you can filter out the results by clicking on the file type you wish to recover (Pictures, Video, Audio, Documents, Archives, and Other).
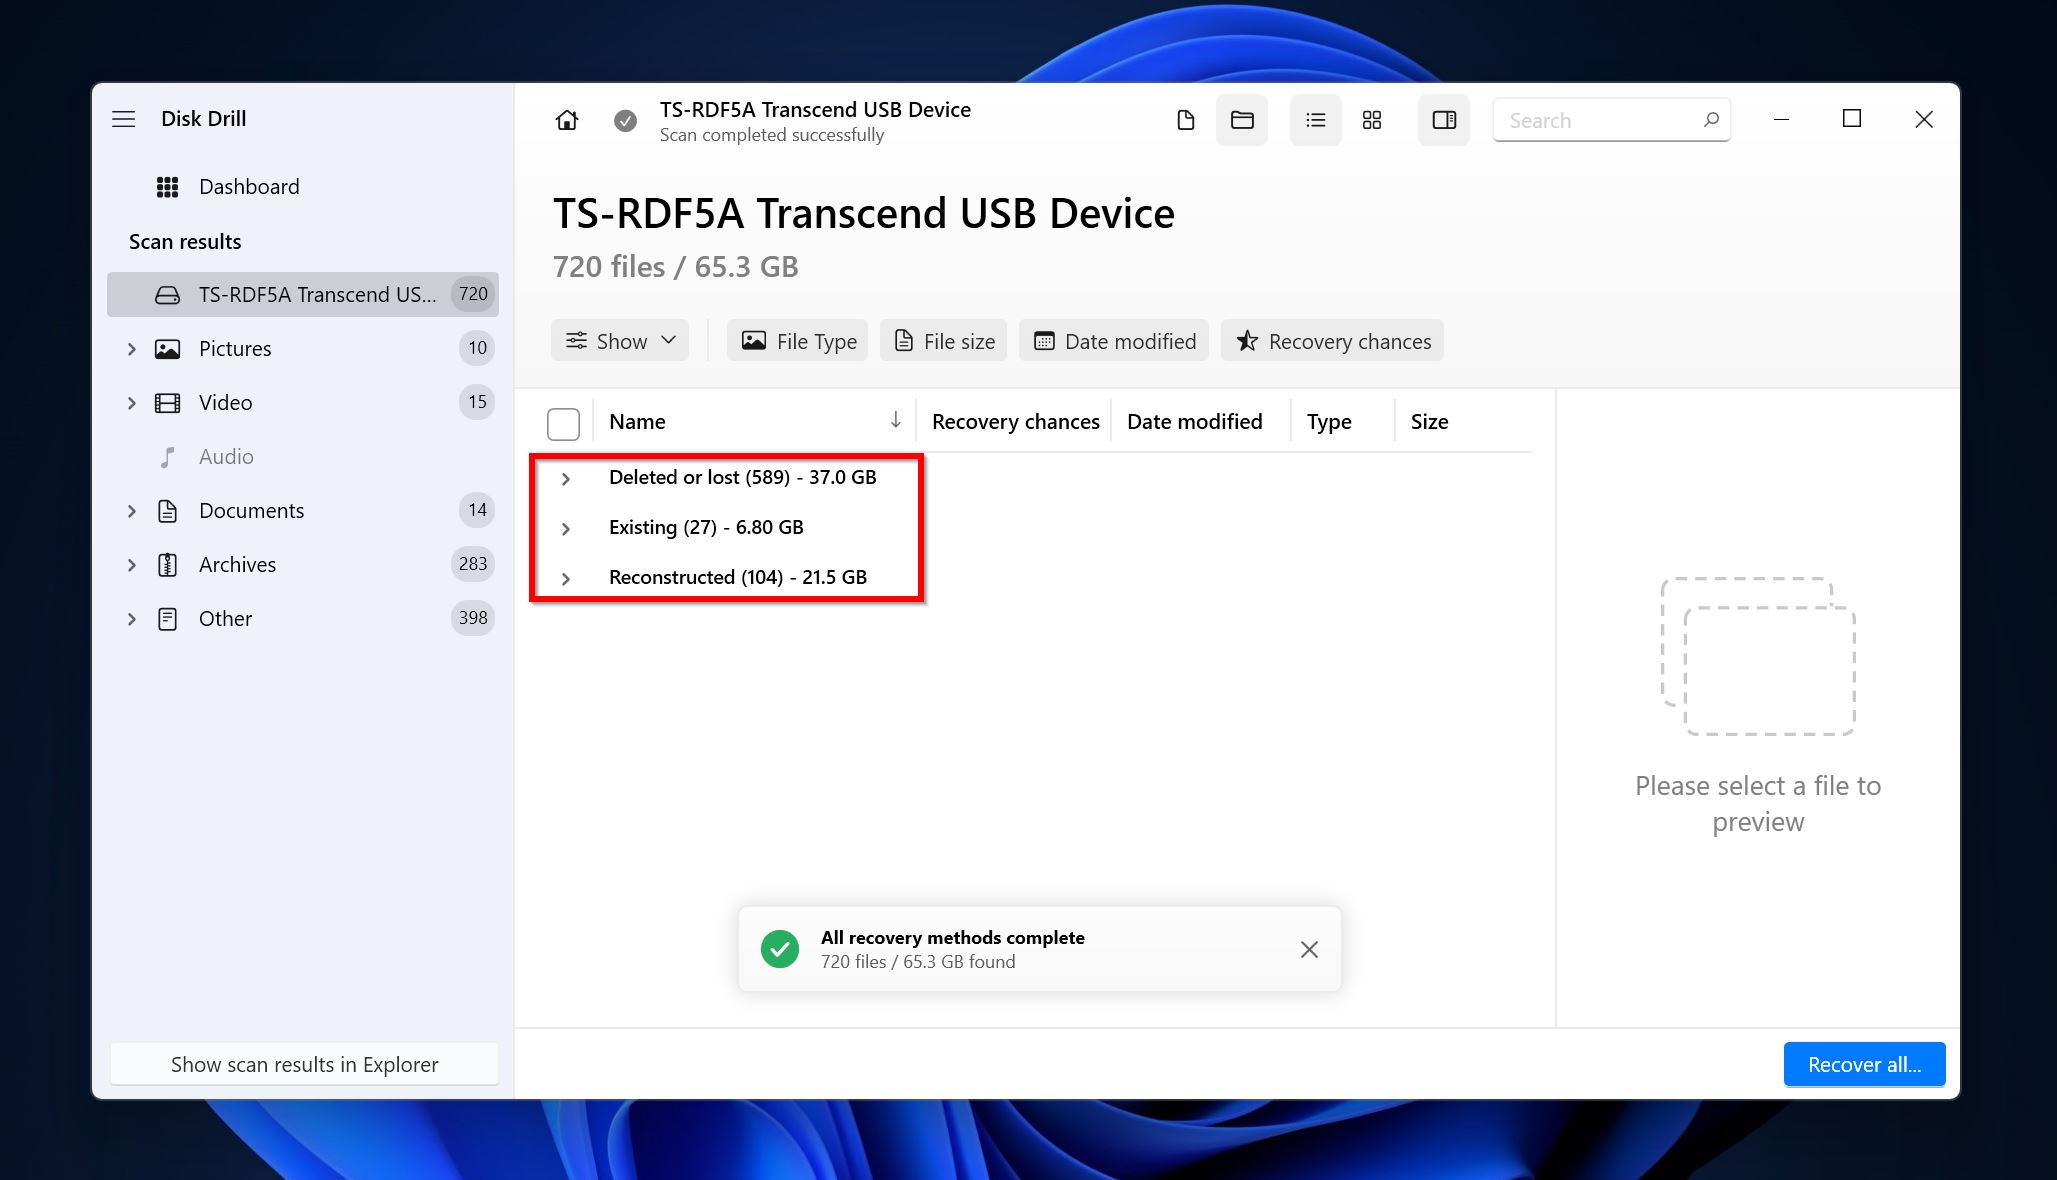
- Expand the Existing section to view files that currently exist on the drive. To view files that were deleted, expand the Deleted or lost and Reconstructed sections.
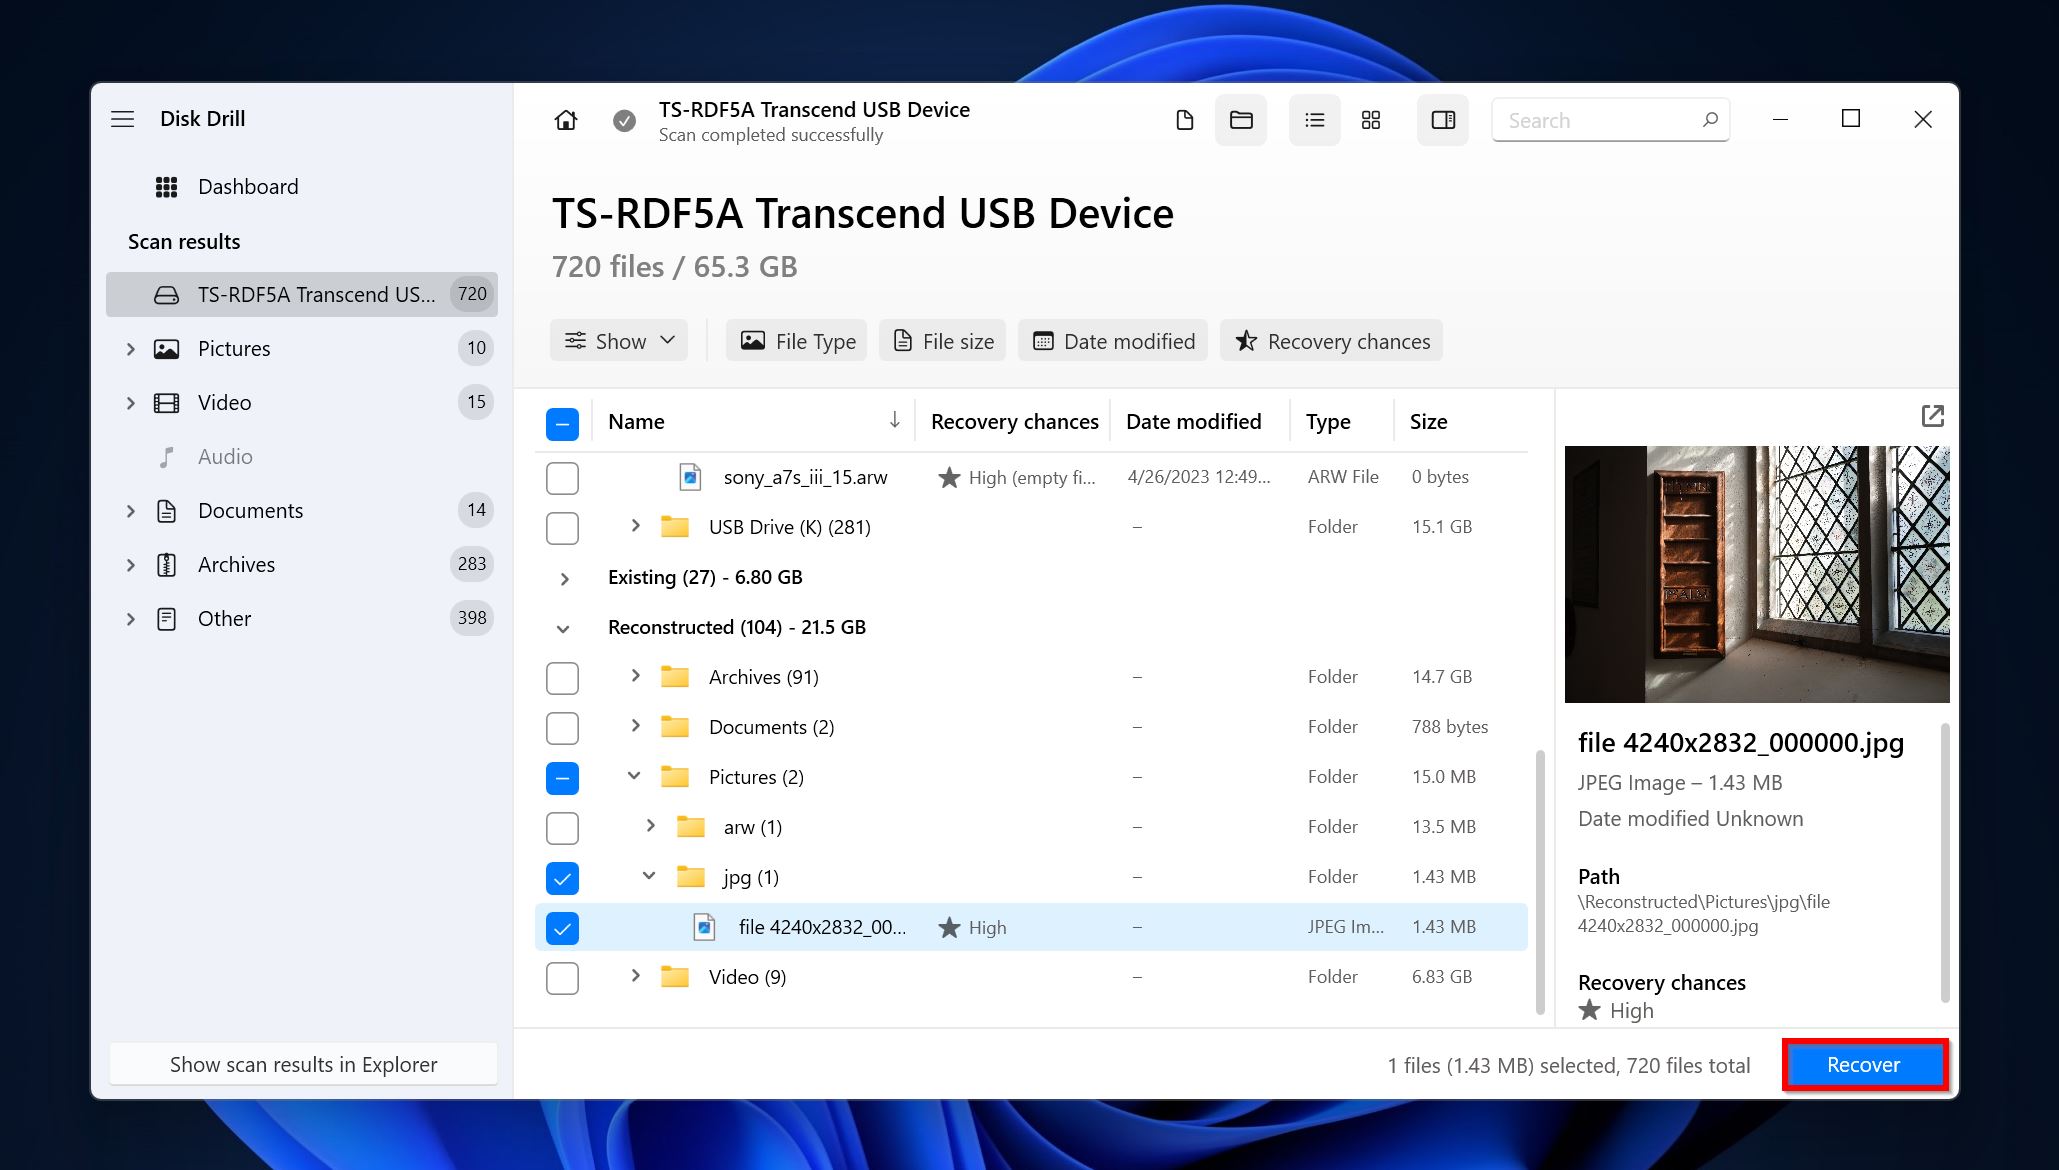
- Select the files you wish to recover. Disk Drill will display a preview of the currently selected file. To manually preview a file, click on the eye icon next to the filename. Click on Recover once you’ve confirmed your selection.
- Choose a recovery destination for the files and click Next.
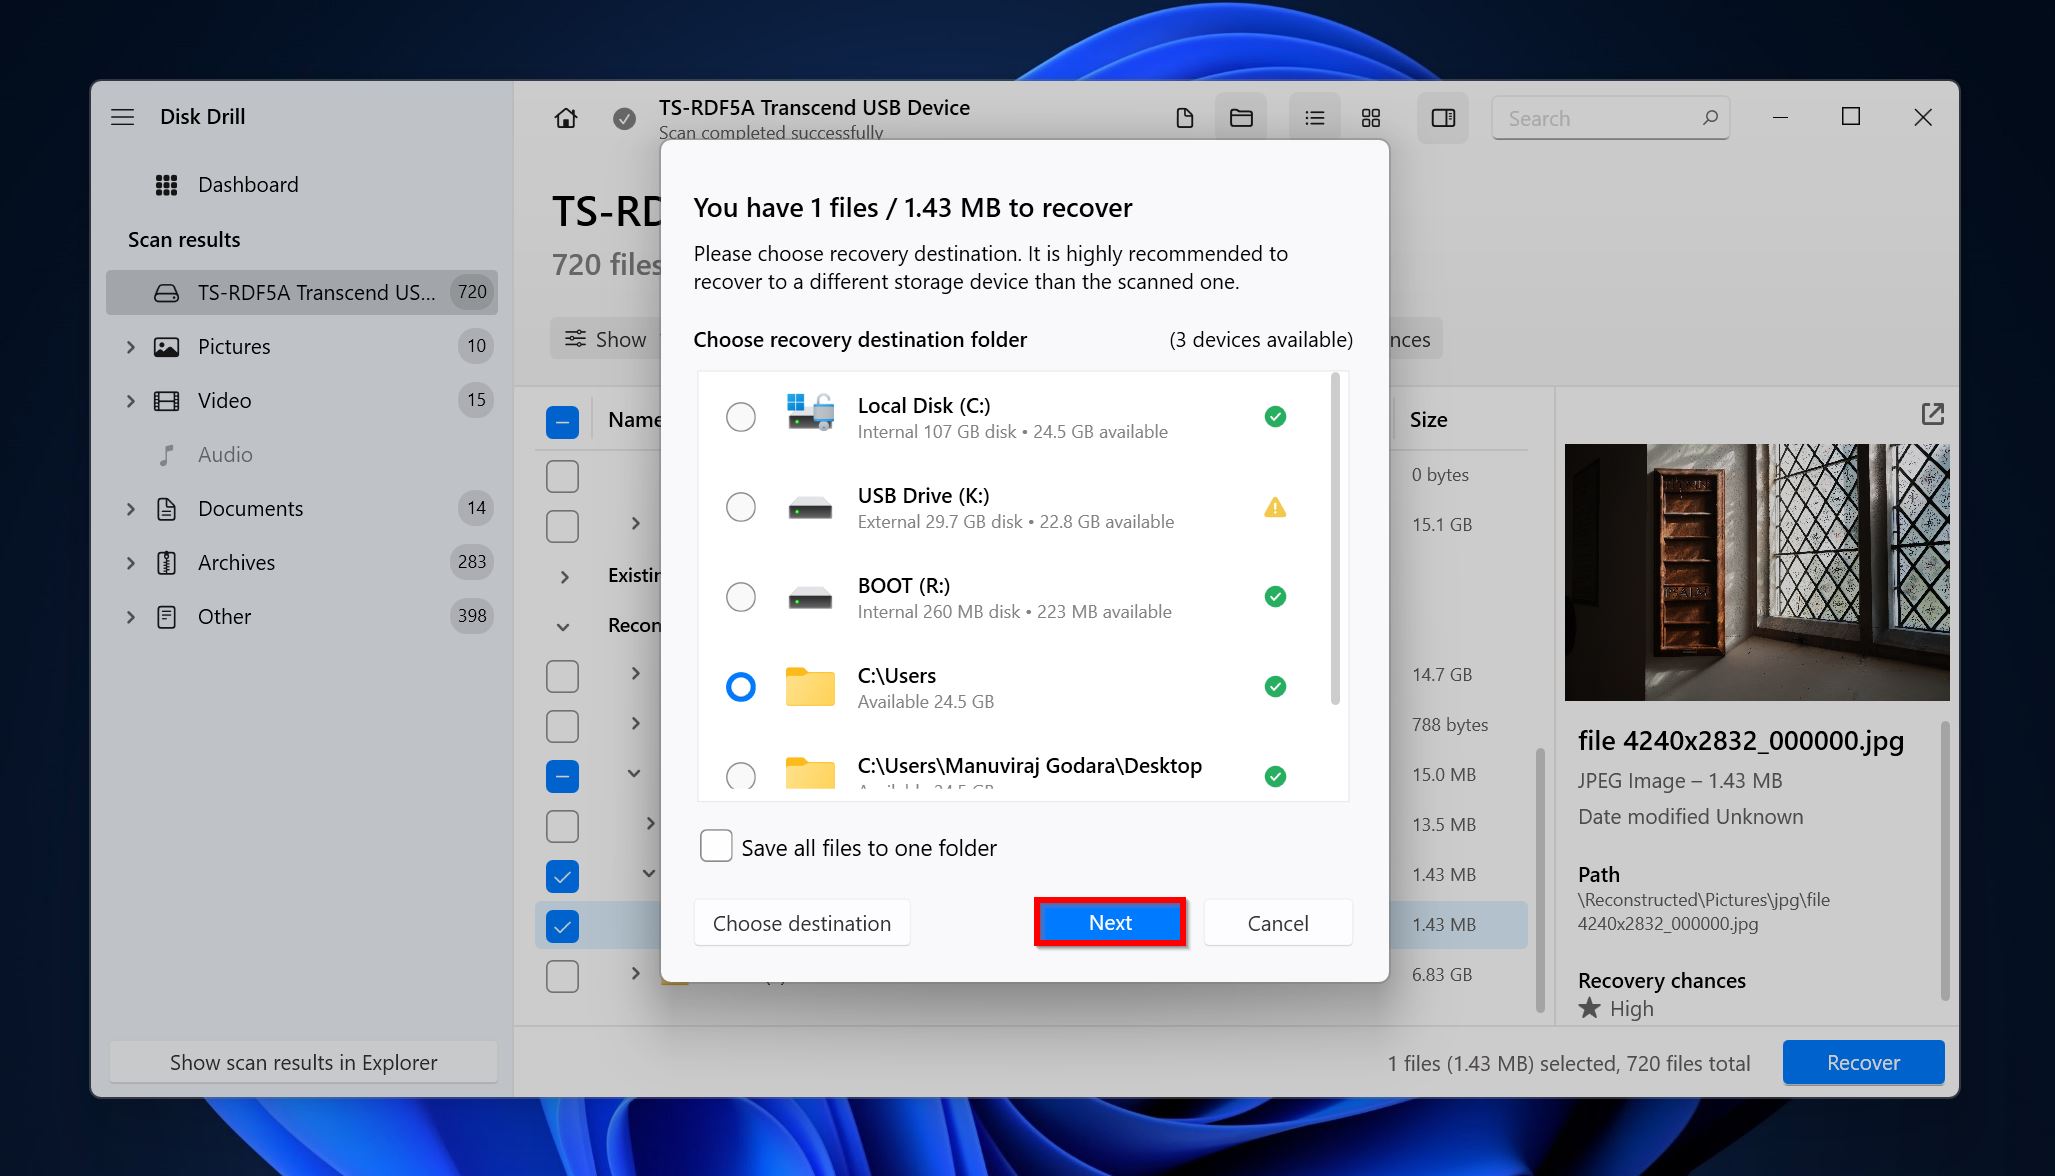
- Disk Drill will recover the selected files.
Method 2: Use a Free Data Recovery Tool
If you’re on a budget, there are some free data recovery tools available that can help you recover your data. However, they’re not as user-friendly and effective as the paid options available on the web. You should make a judgment based on the importance of the lost data.
A good, free data recovery tool you could use is Recuva. It does support a wide range of file systems and storage drive types, but the data recovery scan will not return as many results as other, paid data recovery tools. Still, if your budget doesn’t allow it, it’s better to use Recuva than to not attempt data recovery at all.
Here’s how to use Recuva to get back data from an external storage drive:
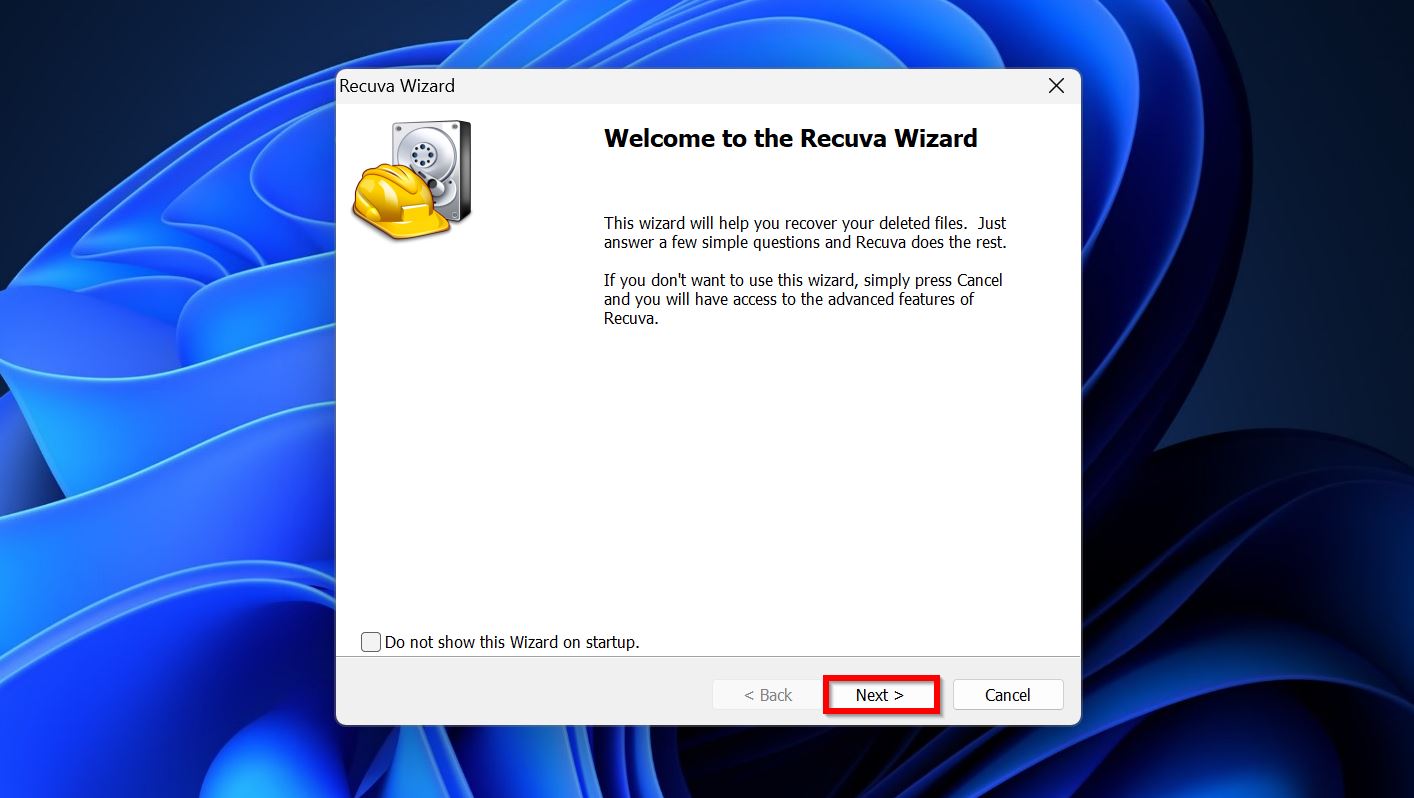
- Download Recuva and install it.
- Open Recuva, and you’ll be welcomed to a wizard-like interface. Click on Next.
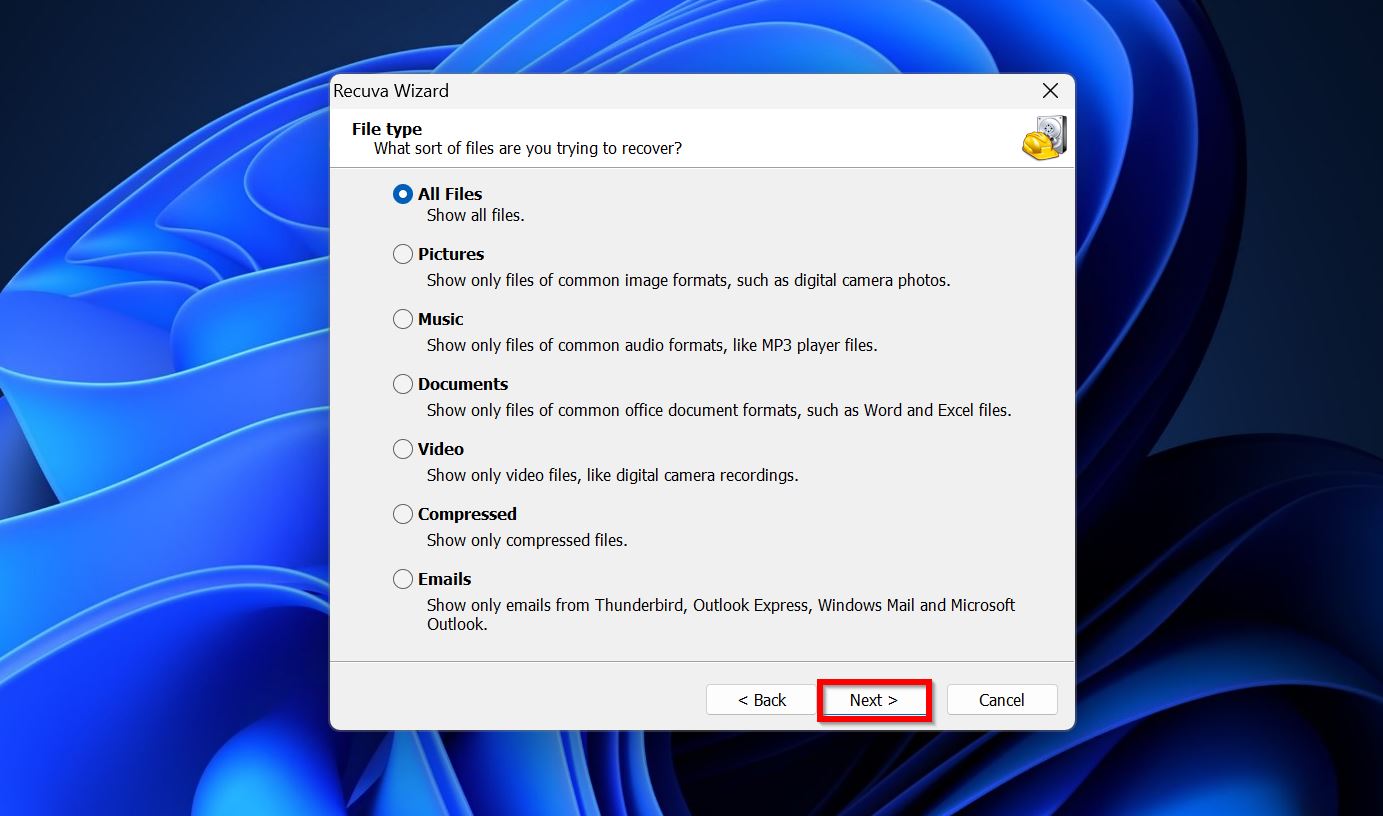
- Choose the file type you wish to recover and click Next.
- Select the external storage drive, by selecting In a specific location > Browse. Choose the external storage drive here.
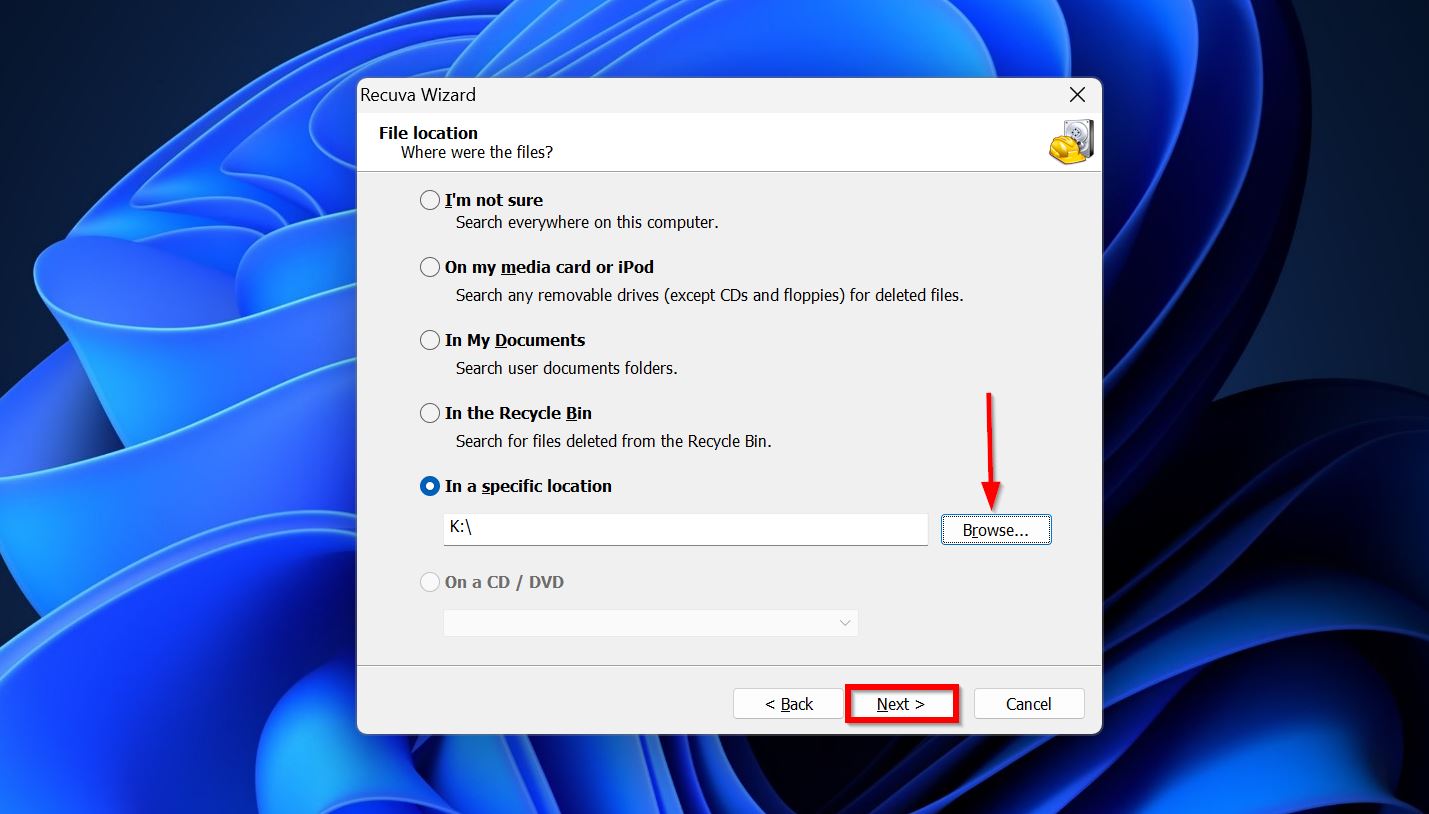
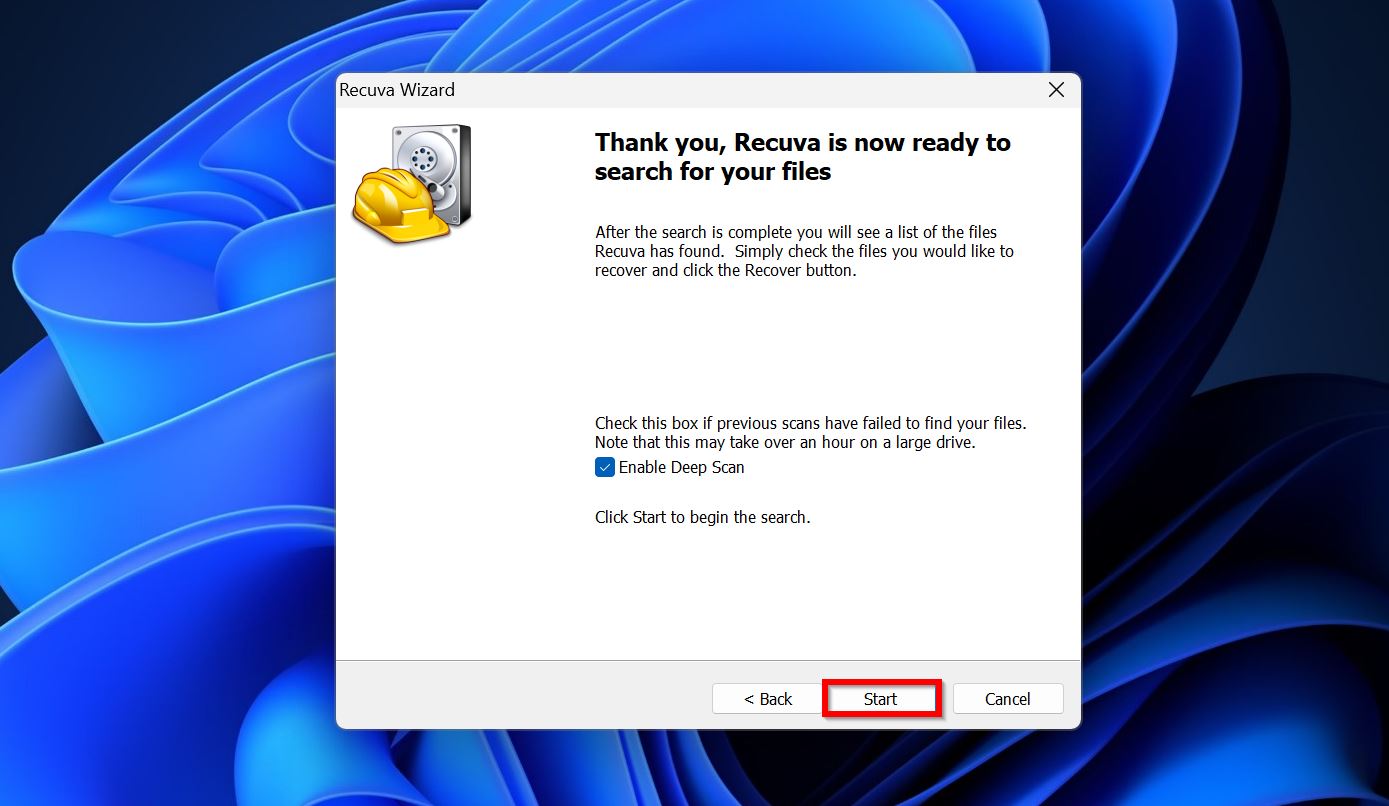
- Click Next to begin the data recovery scan. It’s best to select the Enable Deep Scan option to discover more files, at the cost of a longer scan time.
- Select the files you wish to recover, click Recover and select the recovery destination. Recuva won’t display a preview of the selected files.
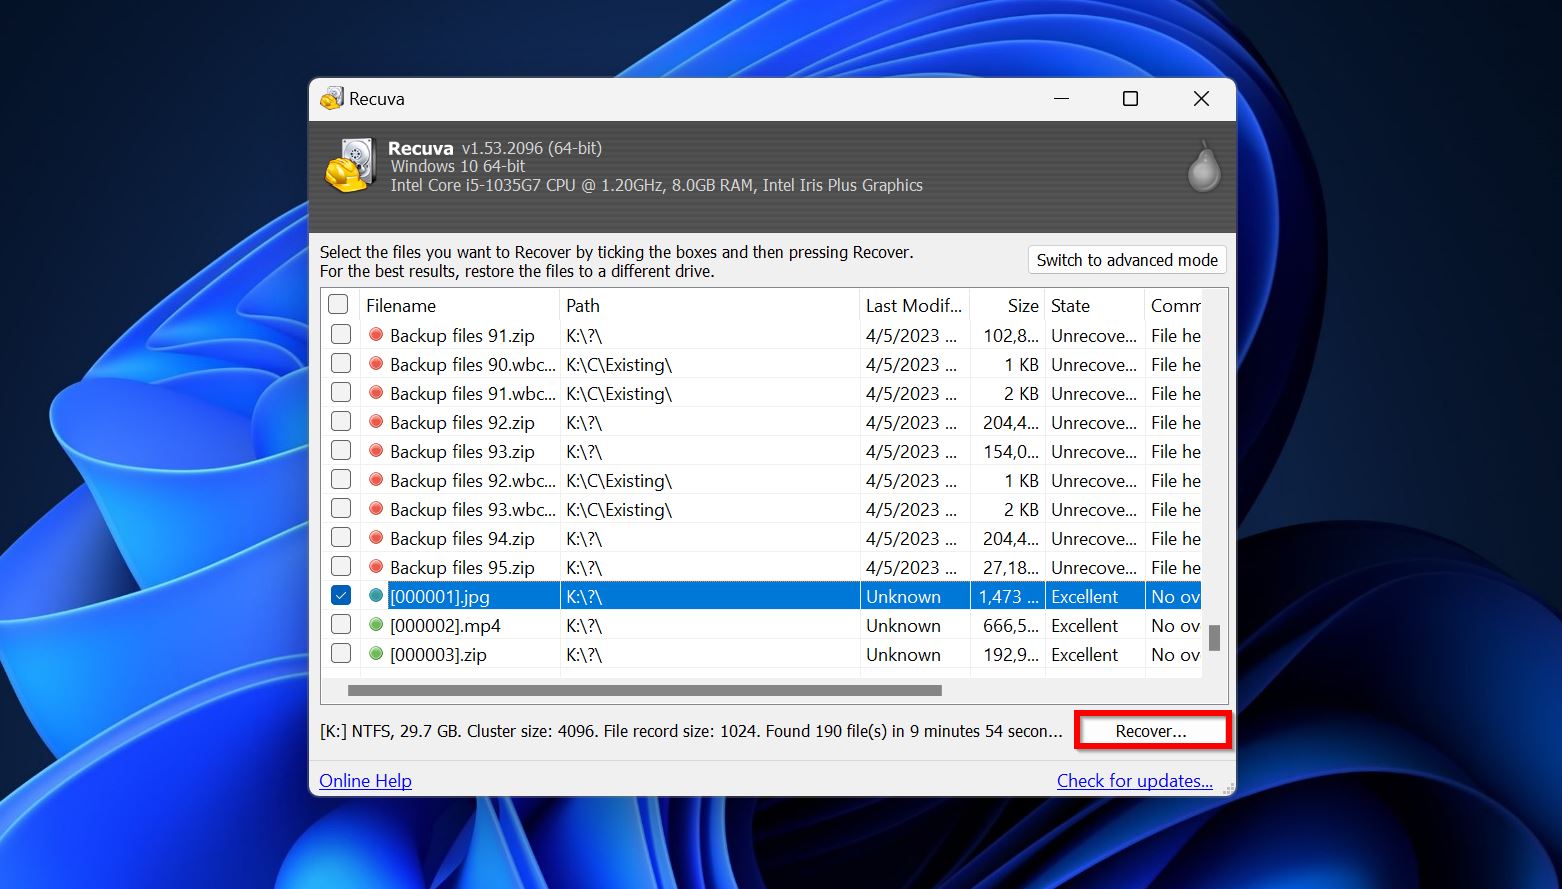
- Recuva will recover the selected files.
Method 3: Recover Deleted Data from a Backup
A regular backup schedule is the best way to protect yourself against data loss. Ideally, you should have local as well as cloud backups. A cloud backup is especially useful when dealing with data loss from external storage drives because the affected drive could have been where you backed up your data. Restoring data from a cloud storage service is simple–visit the website, log in, and download the required folders.
Here is an example of how to do it if you’re using Google Drive:
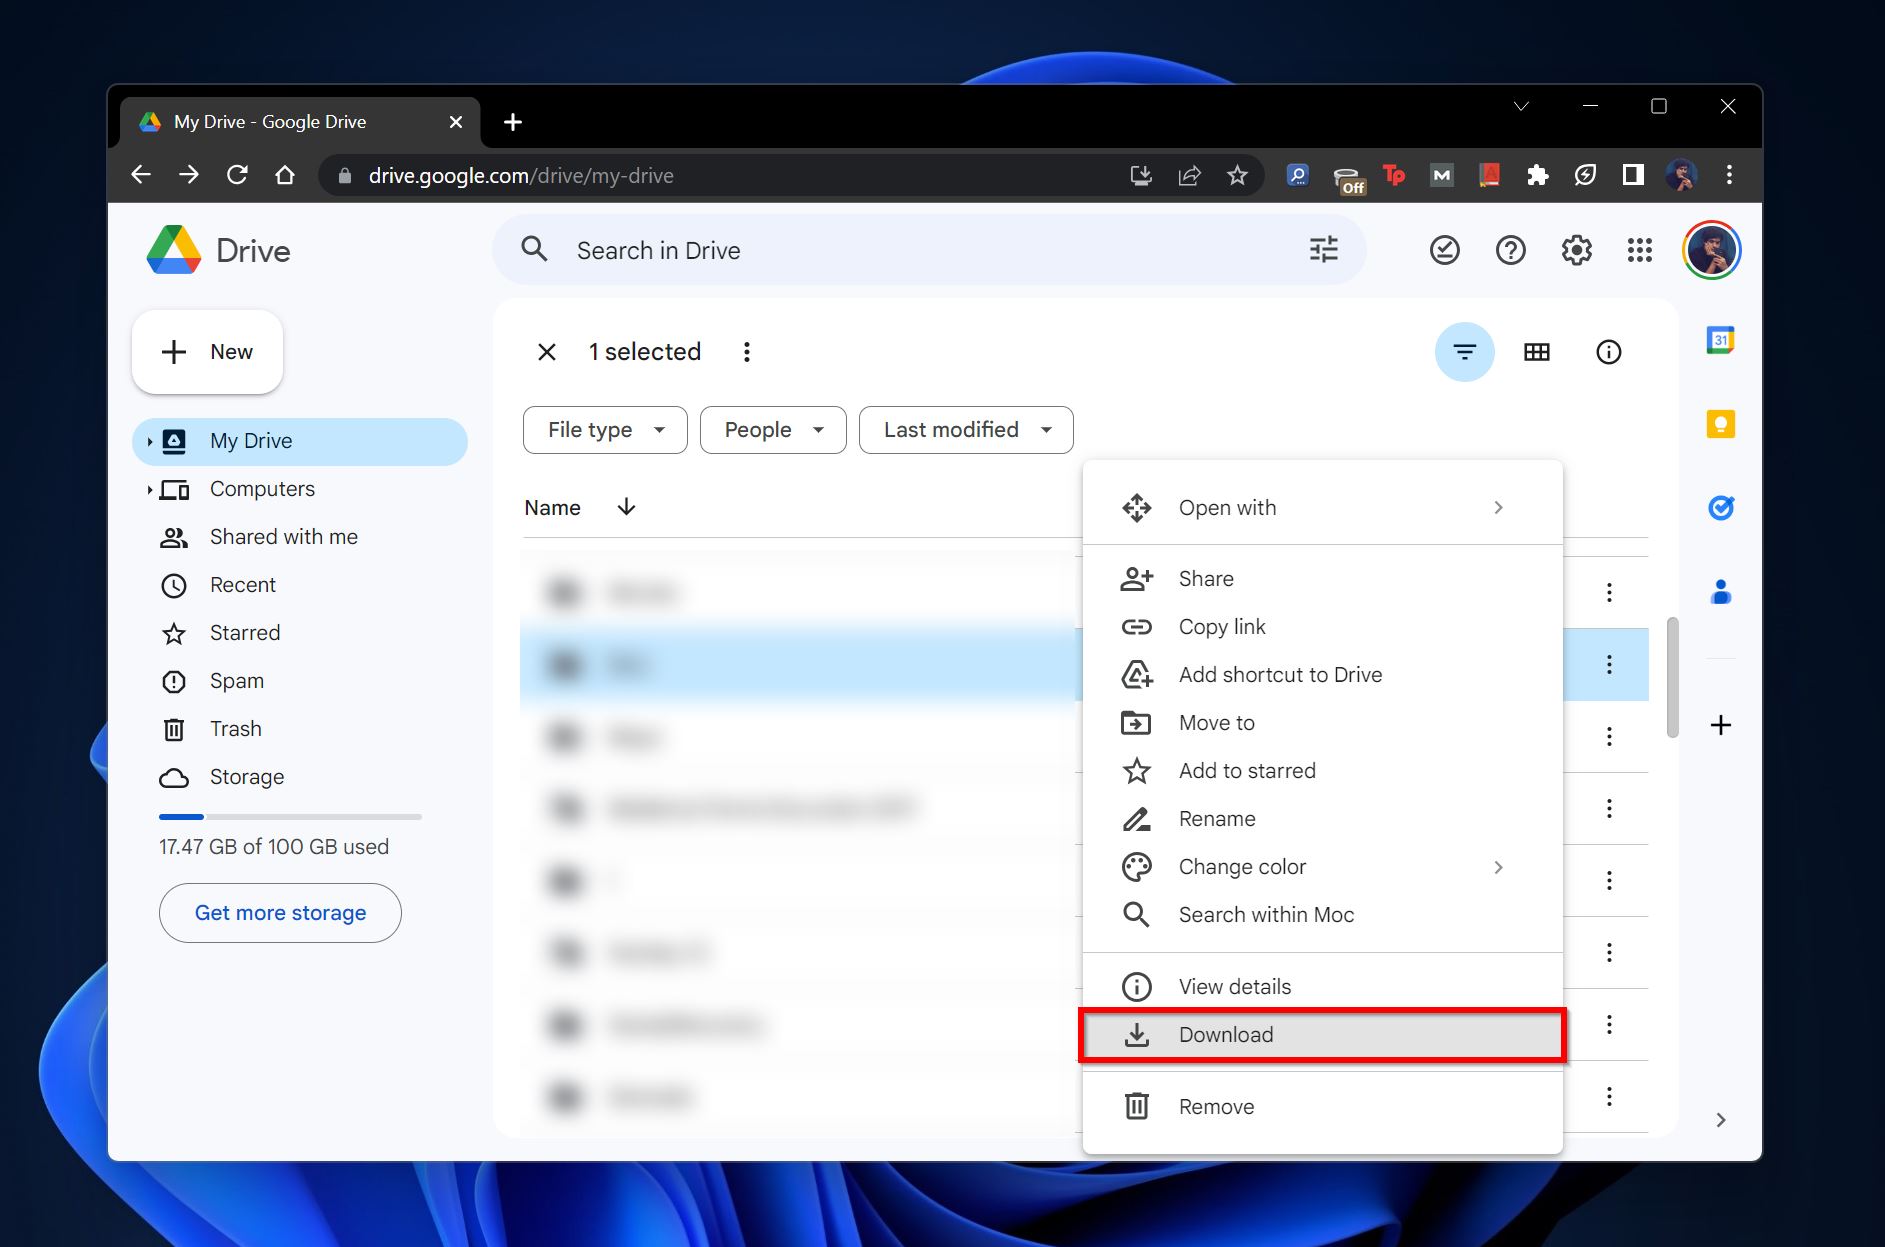
- Open a web browser, visit the Google Drive website, and log in using your Google credentials.
- Select the folders/files you wish to restore, right-click on them, and choose Download.
Conclusion
Thanks to third-party data recovery solutions, it’s quick and easy to recover files from a drive that suffered data loss due to Scan and fix. But, we still recommend you keep multiple backups of all your important data on the cloud and on multiple storage drives. Additionally, always copy your files to a secure location before running utilities like Scan and fix and CHKDSK.


")