 The “No bootable devices found” error can pop up unexpectedly on your PC. The error usually indicates a misconfigured boot sequence, a damaged boot sector, disk corruption, or physical damage to the connectors or the drive. Luckily, you can fix this error and recover your data from the drive. How? Simply follow our guide.
Table of Contents
What Does the No Bootable Devices Found Error Mean
The first sector on your drive, called the Master Boot Record (MBR), contains all the necessary information required to boot Windows. If your PC is unable to detect the drive which contains the boot sector, it displays the “No bootable devices found” message.
Usually, the error pops up because of one or more of the following reasons:
| Reason | Description |
| 📋 Incorrect boot order/sequence | Your PC’s motherboard determines which storage drive to boot from, depending on how the BIOS is configured. If the drive containing Windows is prioritized lower than an unbootable drive, you’ll encounter the, “No bootable devices found” error. This can be easily fixed in the BIOS’ boot sequence settings. |
| 𓊒 Corrupt boot sector or partition table | Your PC won’t boot if the drive’s boot sector (MBR) is corrupt or missing entirely. All your data is still there, but the instructions for booting Windows are unreadable, resulting in the bootable device not found error. Windows has a couple of in-built utilities that can help you repair the drive’s boot sector. |
| 🔨 There’s physical damage to the drive, the SATA cables, or the connection is loose | Although rare, a loose SATA connector will prevent the drive from being detected by your PC, causing boot errors. You can try reconnecting the cable, or using a separate cable altogether. Clicking, whirring, or beeping noises indicate that the drive is physically damaged. It’s best to stop using the drive in this case. |
| 💿 The Windows partition is inactive | The primary partition or the partition containing Windows (usually the C: drive) should be marked as “active.” If it isn’t an active partition, you’ll encounter the no boot device available error. This can be fixed by using the diskpart utility. |
How to Fix the No Bootable Devices Found Error
Often, when your computer says, no boot device found, it can be fixed by simply changing the boot order or reconnecting a loose SATA cable. In other cases, the issue may not be so simple, and you’ll need to create a bootable USB or CD to access Command Prompt, then attempt to repair the boot sector.
You can create a bootable USB drive using Windows installation media. You’ll need another working computer for this. Download the relevant media tool, depending on whether you’re using Windows 10 or Windows 11.
After you’re done downloading the tool, follow these steps:
- Launch the Windows Media Creation tool. Make sure you have an empty USB drive with 8 GB or more storage space, connected to the PC.
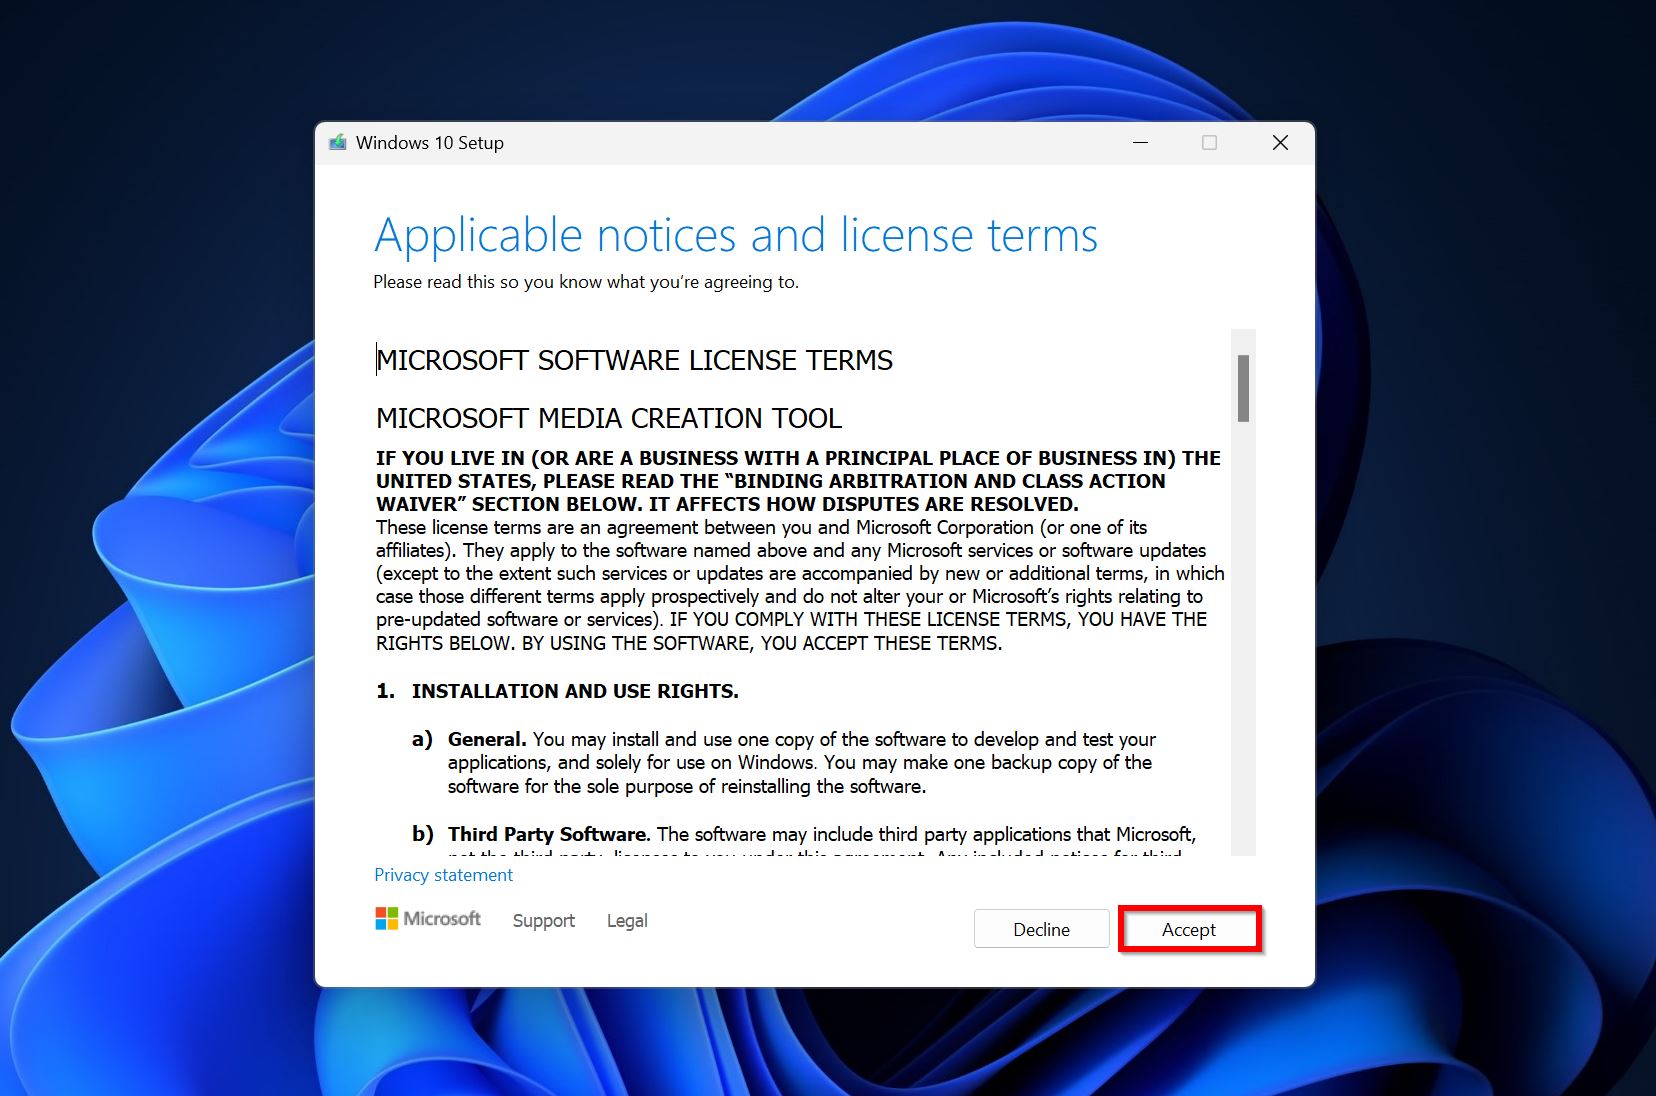
- Accept the license terms.
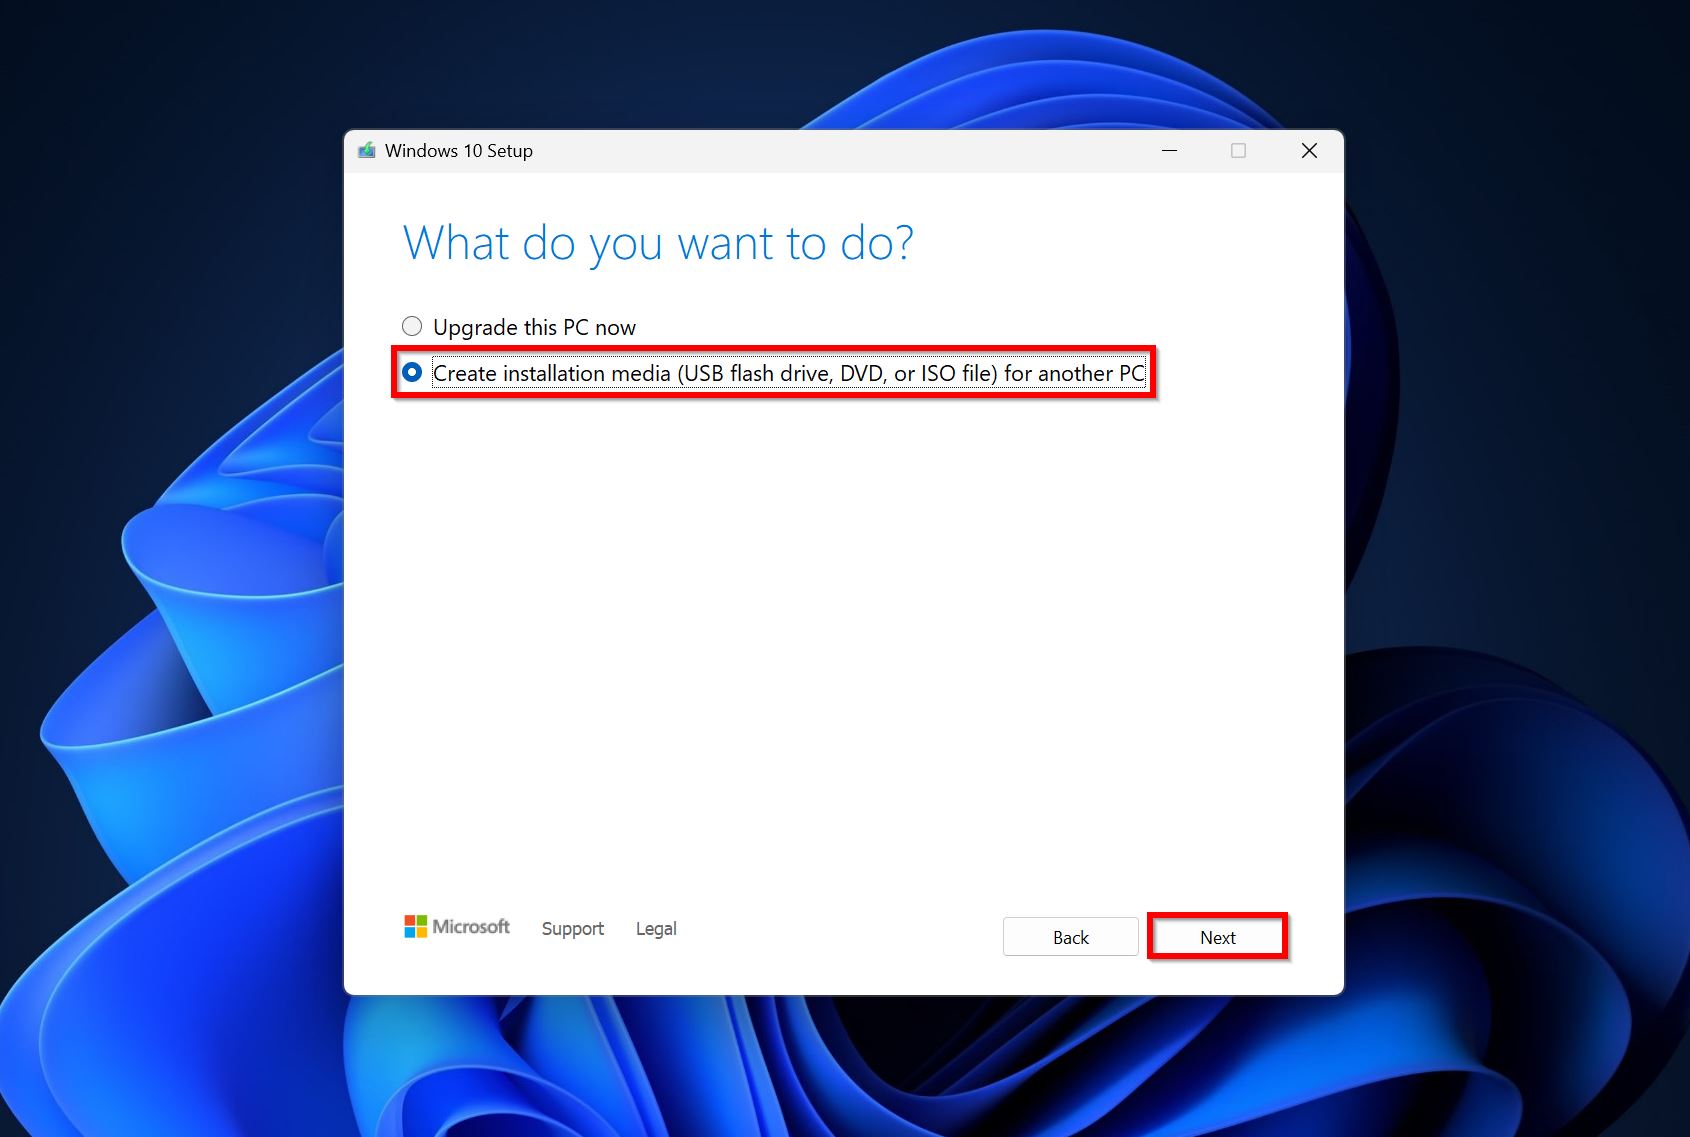
- Select the Create installation media for another PC option and click Next.
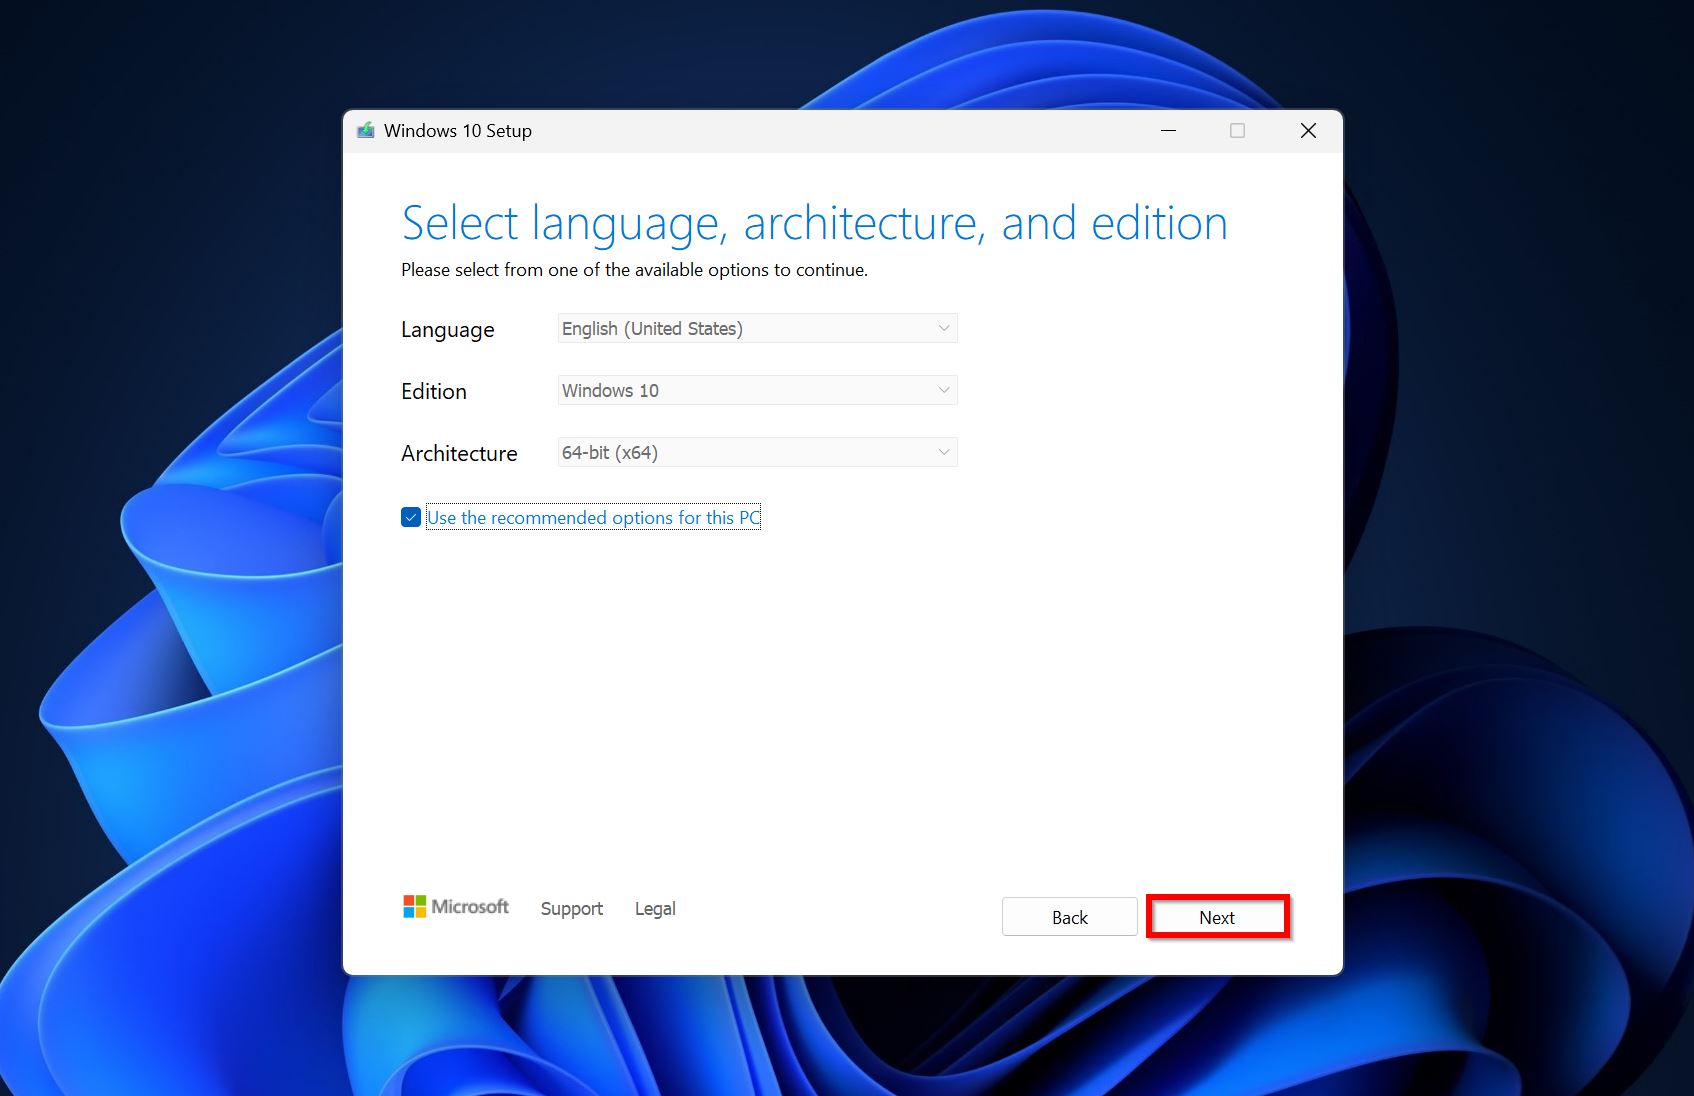
- Select the Windows version, architecture, and language. Click Next.
- Choose the USB Flash Drive option and click Next.
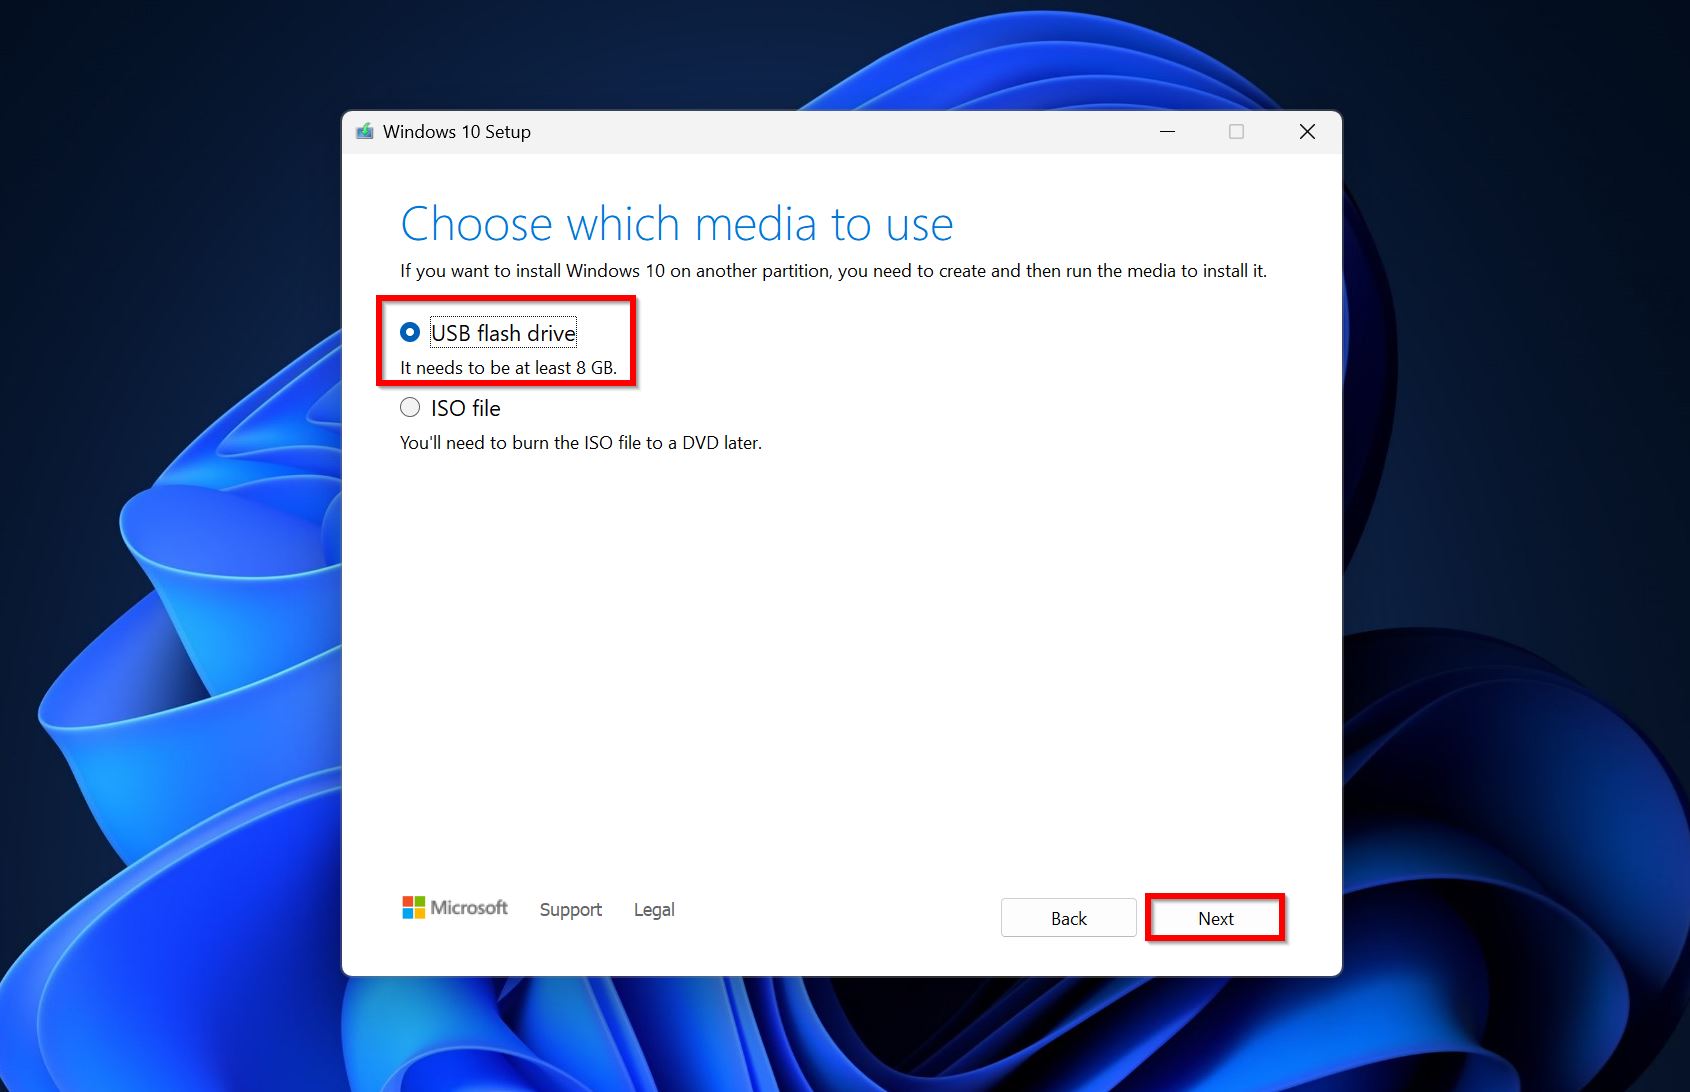
- Select the connected USB flash drive and click Next.
- The tool will download and create the installation media. Use this USB to boot into Windows for all methods that require you to access the Command Prompt.
When you connect the bootable USB drive and start your PC, you’ll boot into the Install Windows screen. Here, press Shift + F10 to access the Command Prompt.
Make sure that the HDD Is Physically Connected
The first thing to check when you encounter the no bootable device error, is the physical connection of the drive to your PC. Check for loose SATA and power cables. Re-slot the SATA cable, or the SSD if you have to.
It’s also a good idea to check for any physical damage on the cable, SATA connector, and the port. Look for cracks on the SATA connector and signs of unusual peeling on the cable itself. Ensure that it’s not unnaturally bent.
It’s also recommended that you connect the drive to another PC and see if it is detected and read by it.
Manually Select the Boot Device Order in the BIOS
For Windows to boot successfully, the boot drive must be first in the boot order/sequence. You can check this and modify it in the BIOS’s boot manager. The exact process will differ, depending on the motherboard’s manufacturer. However, it should look something like this:
- To enter the BIOS settings, press the relevant key (or key combination) to enter the BIOS settings. Typically, it’ll be one of the function keys.
- Look for the Boot Order or Boot Sequence option and open it.
- Ensure that the drive containing Windows is at the top of the list. If not, move it to the top.
Alternatively, some motherboards have a One-Time Boot menu that lets you select the boot device. The process for selecting a boot drive from the one-time boot menu will be similar to the boot order steps listed in the previous section:
- Go to the one time boot menu by pressing the respective key (usually F11 or F12) as soon as the manufacturer’s logo appears.
- Select the drive which contains your OS.
- Choose the Boot from this device option.
Run CHKDSK on the Boot Drive
The CHKDSK command is an effective command-line utility in Windows that can detect and fix bad sectors and corruption on your disk. It’s an easy-to-execute fix that can help resolve the no bootable device error in Windows.
To run CHKDSK on a PC that won’t boot, you’ll need to create Windows installation media. The steps for this can be found right at the beginning of the fixes section in this article.
After you’ve created Windows installation media, follow these steps to run CHKDSK and fix the no boot device available issue:
- Connect the installation media to your PC and boot it.
- On the install Windows screen, choose Repair your computer.
- Go to Troubleshoot > Advanced options > Command Prompt. You can also access CMD using the Shift + F10 shortcut.
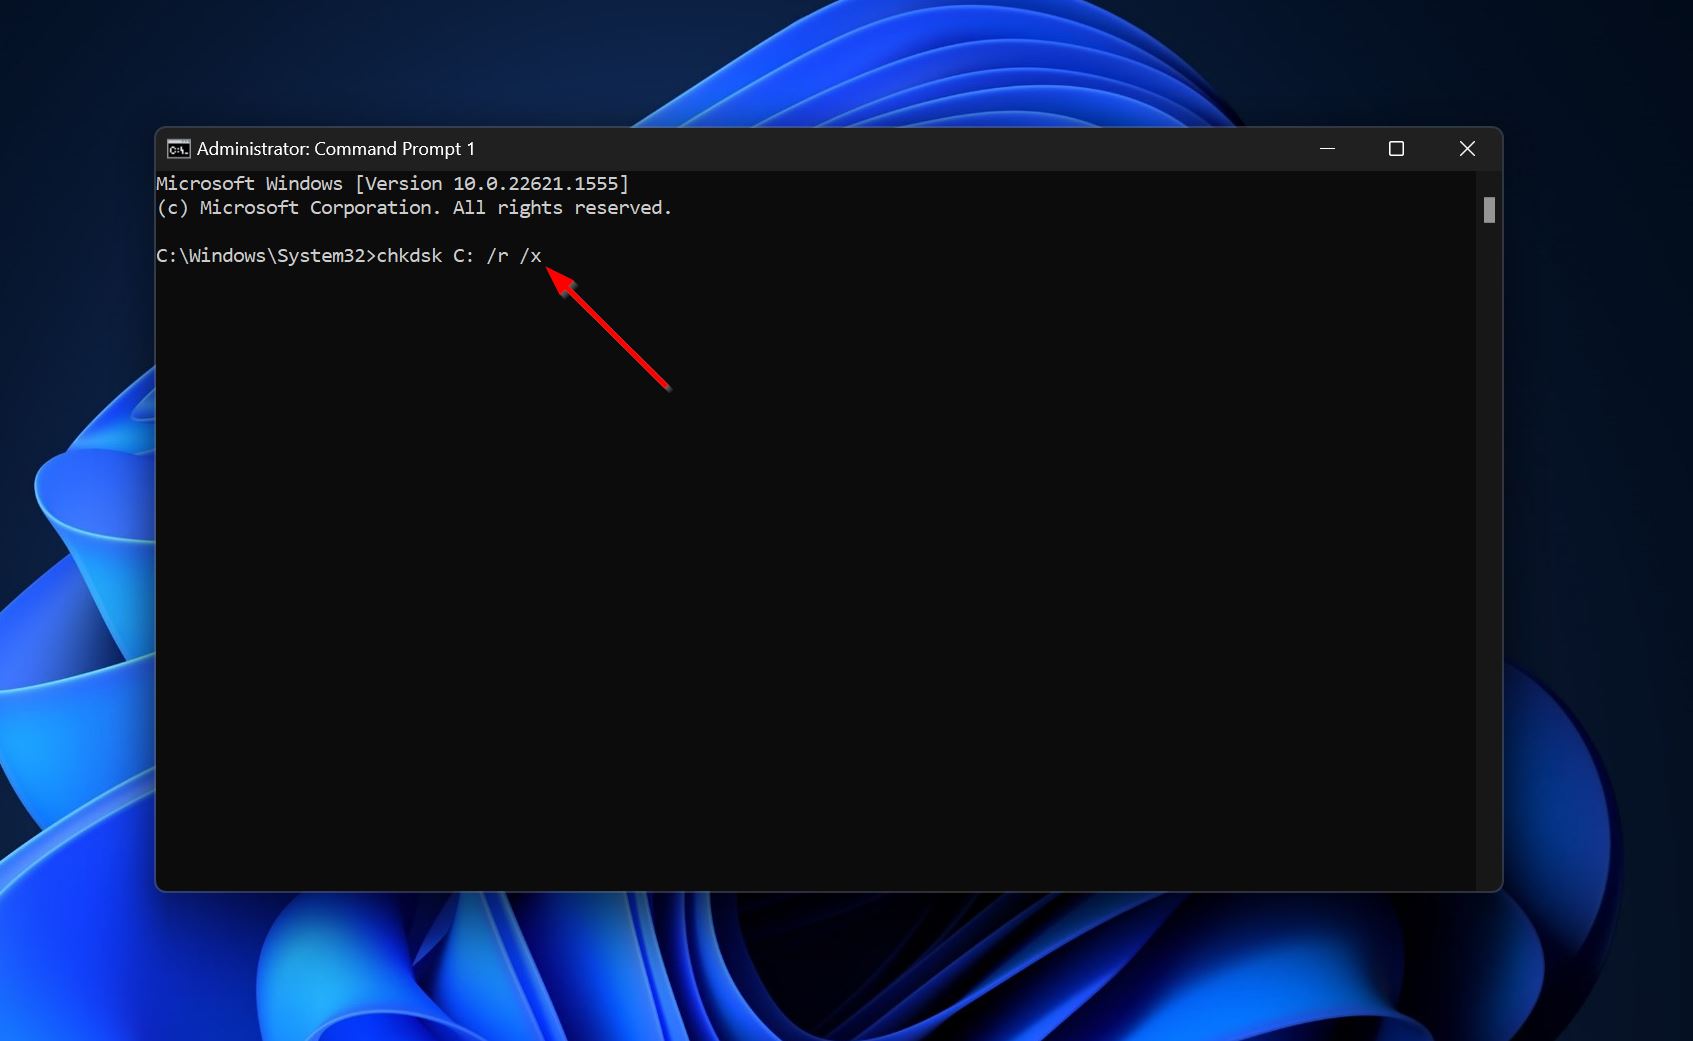
- In the CMD console, type chkdsk C: /r /x and press Enter.
- Wait for CHKDSK to scan and fix the drive. Reboot your PC after it’s done.
Be sure to disconnect the installation media when you reboot your PC.
Make Sure that Primary Partition is Marked as Active
If the primary partition’s status on your PC was changed to “inactive,” you will encounter the boot disk not found issue. This can be easily resolved by marking the primary partition as active. There are two ways to do this–use the Command Prompt within the Windows Recovery Environment (the screen you get after you select Repair your computer) or create a live bootable USB and change the partition status using Disk Management.
Use Command Prompt to Mark the Primary Partition as Active
- Connect the USB drive containing Windows installation media to your PC and boot it.
- Click on Repair your computer and go to Troubleshoot > Advanced options > Command Prompt.
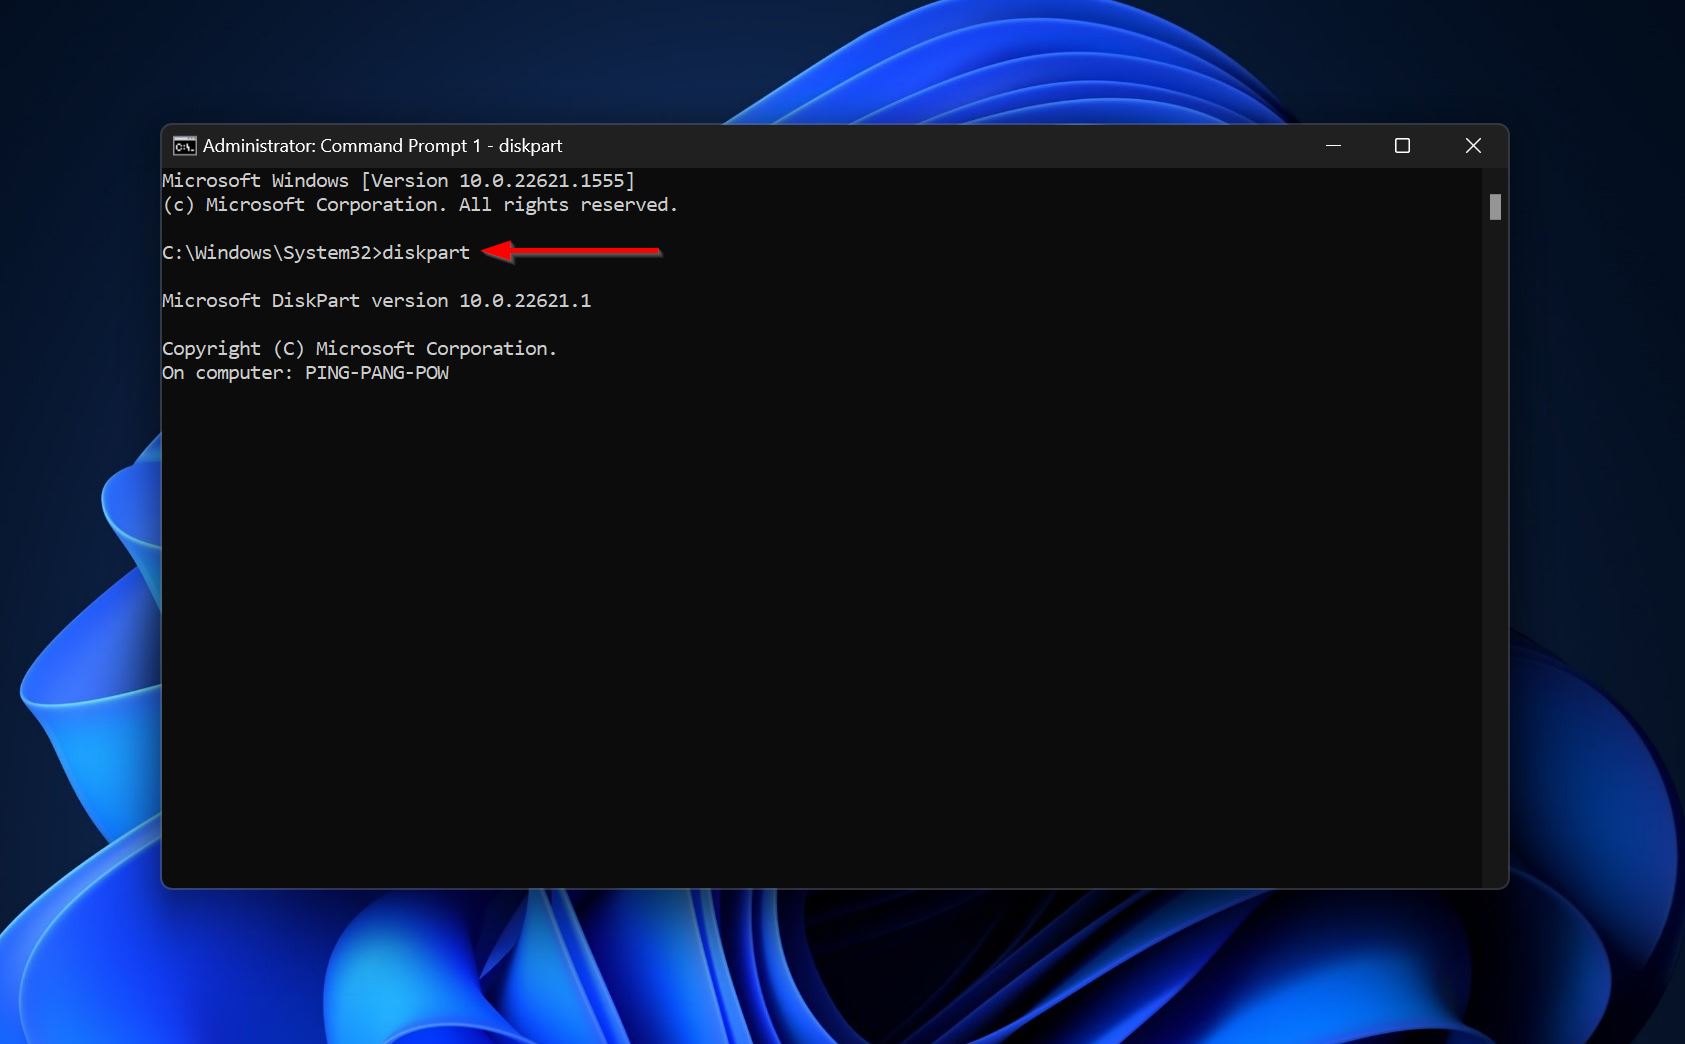
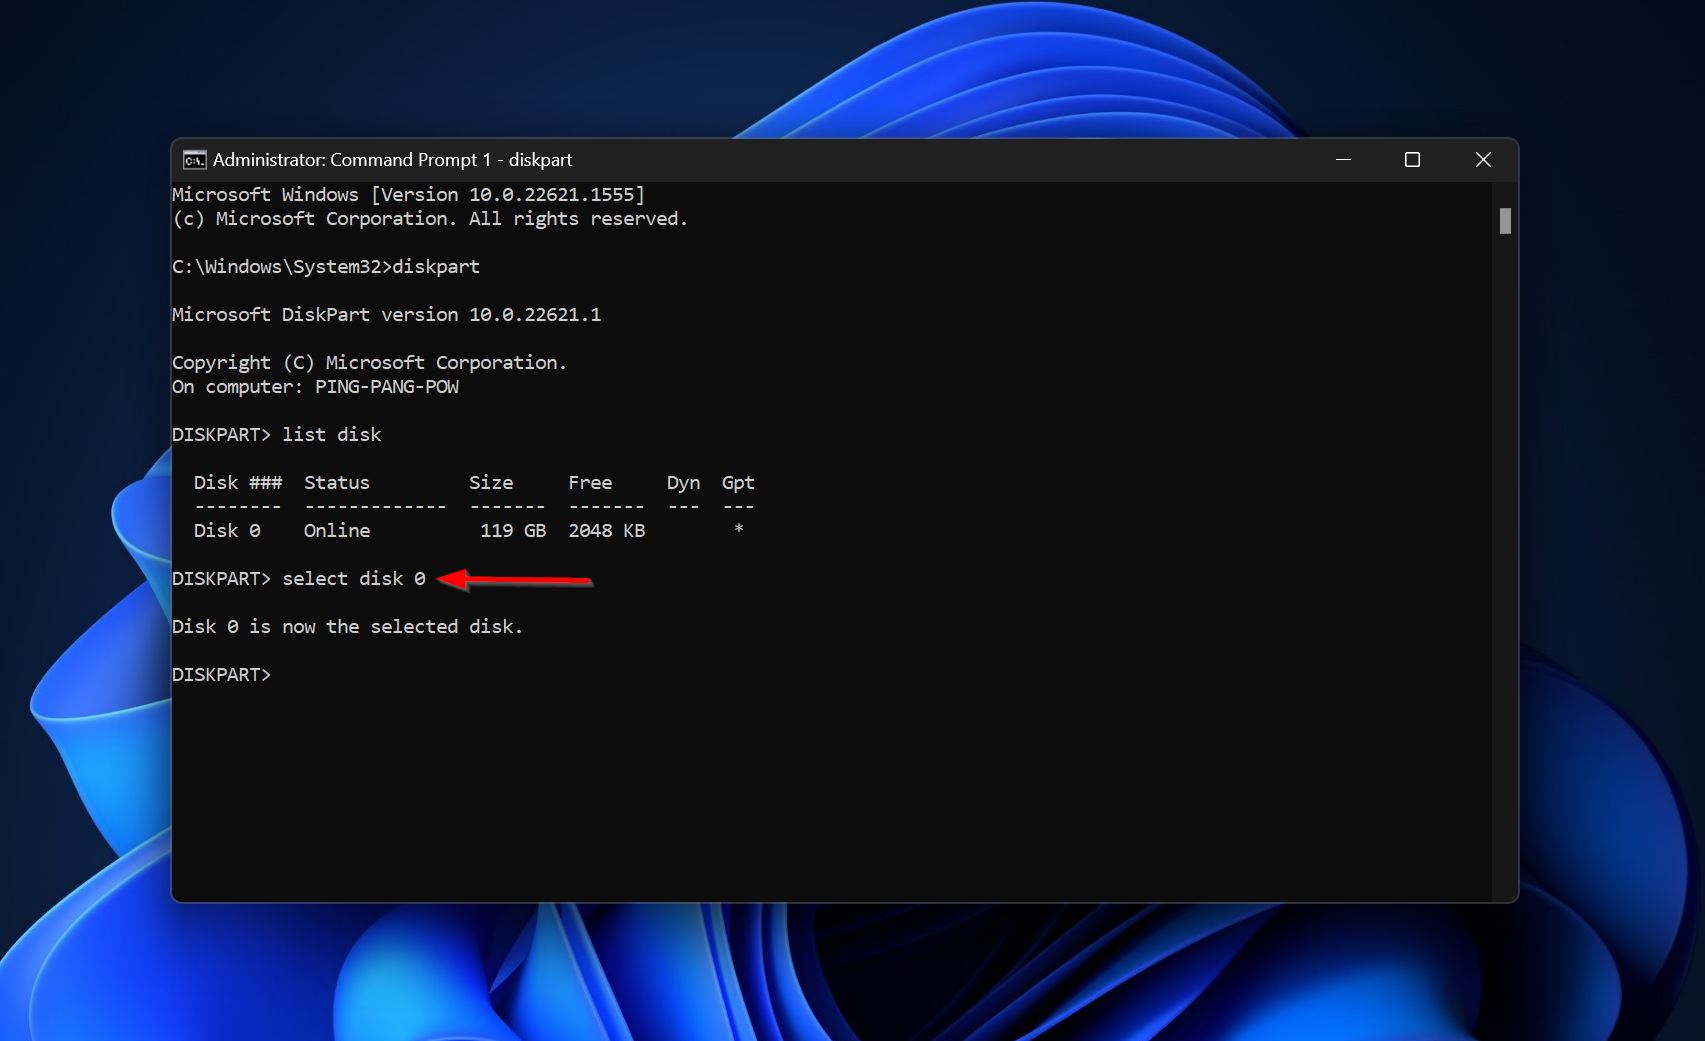
- In the CMD console, type diskpart and press Enter.
- Type list disk and press Enter.
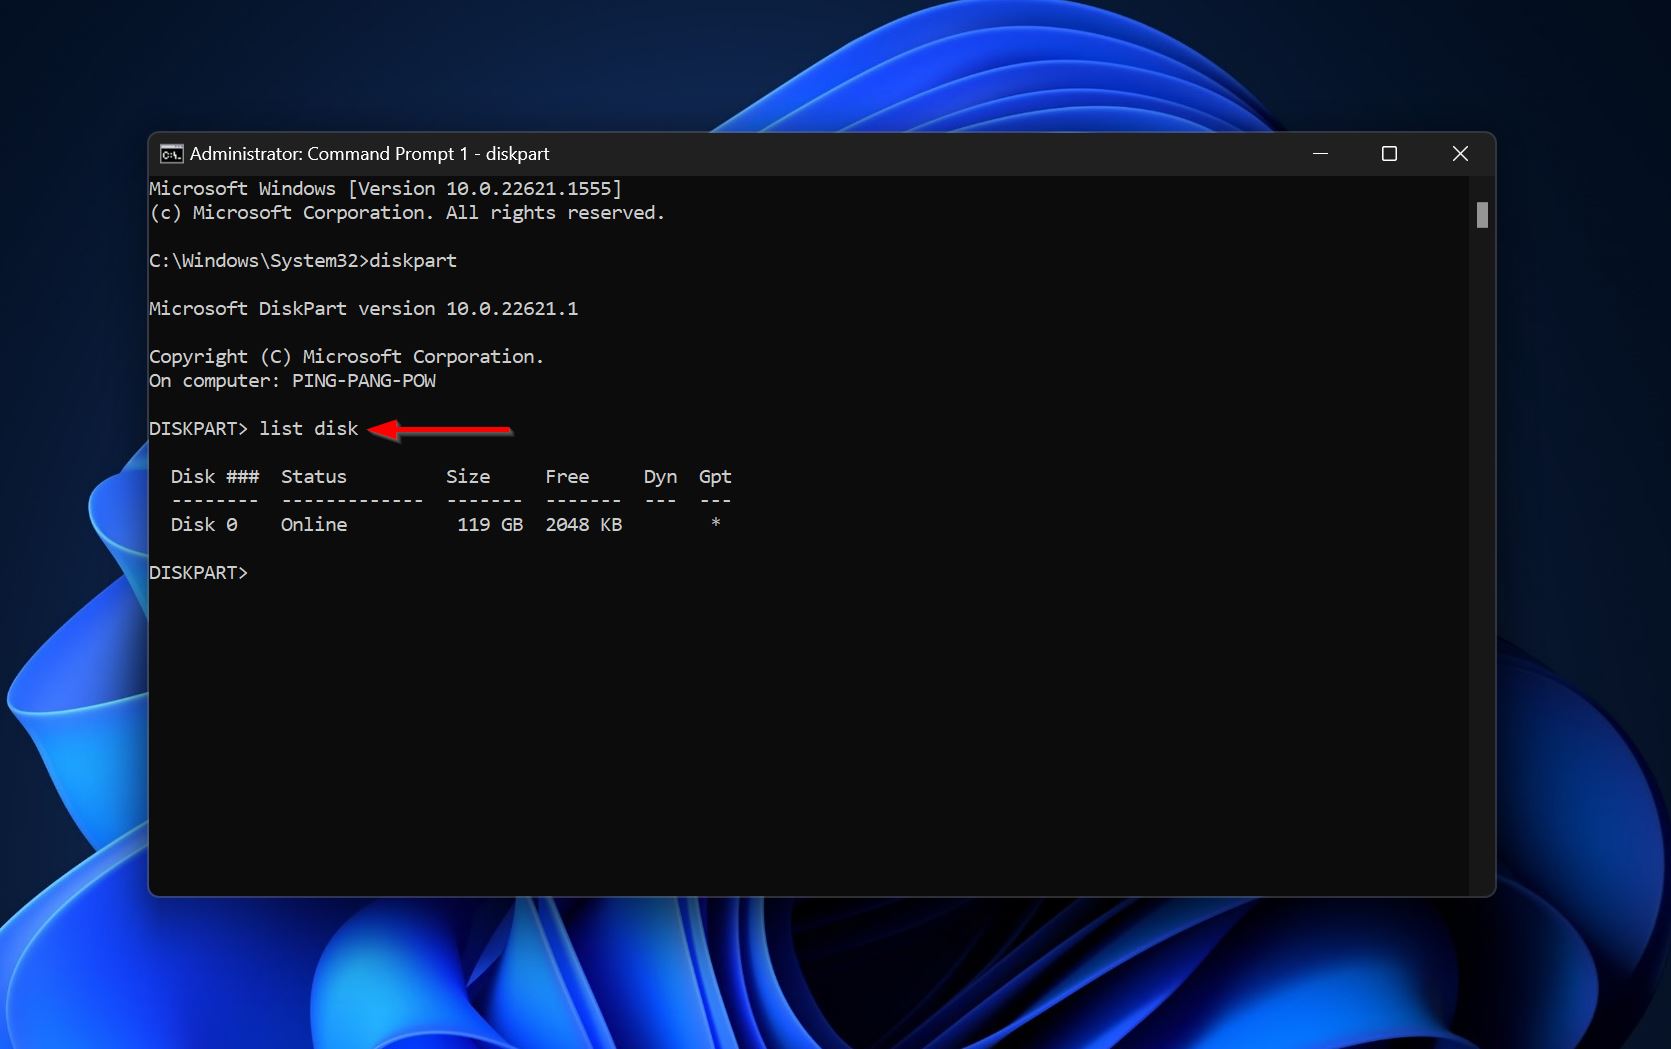
- Type select disk 0 and press Enter.
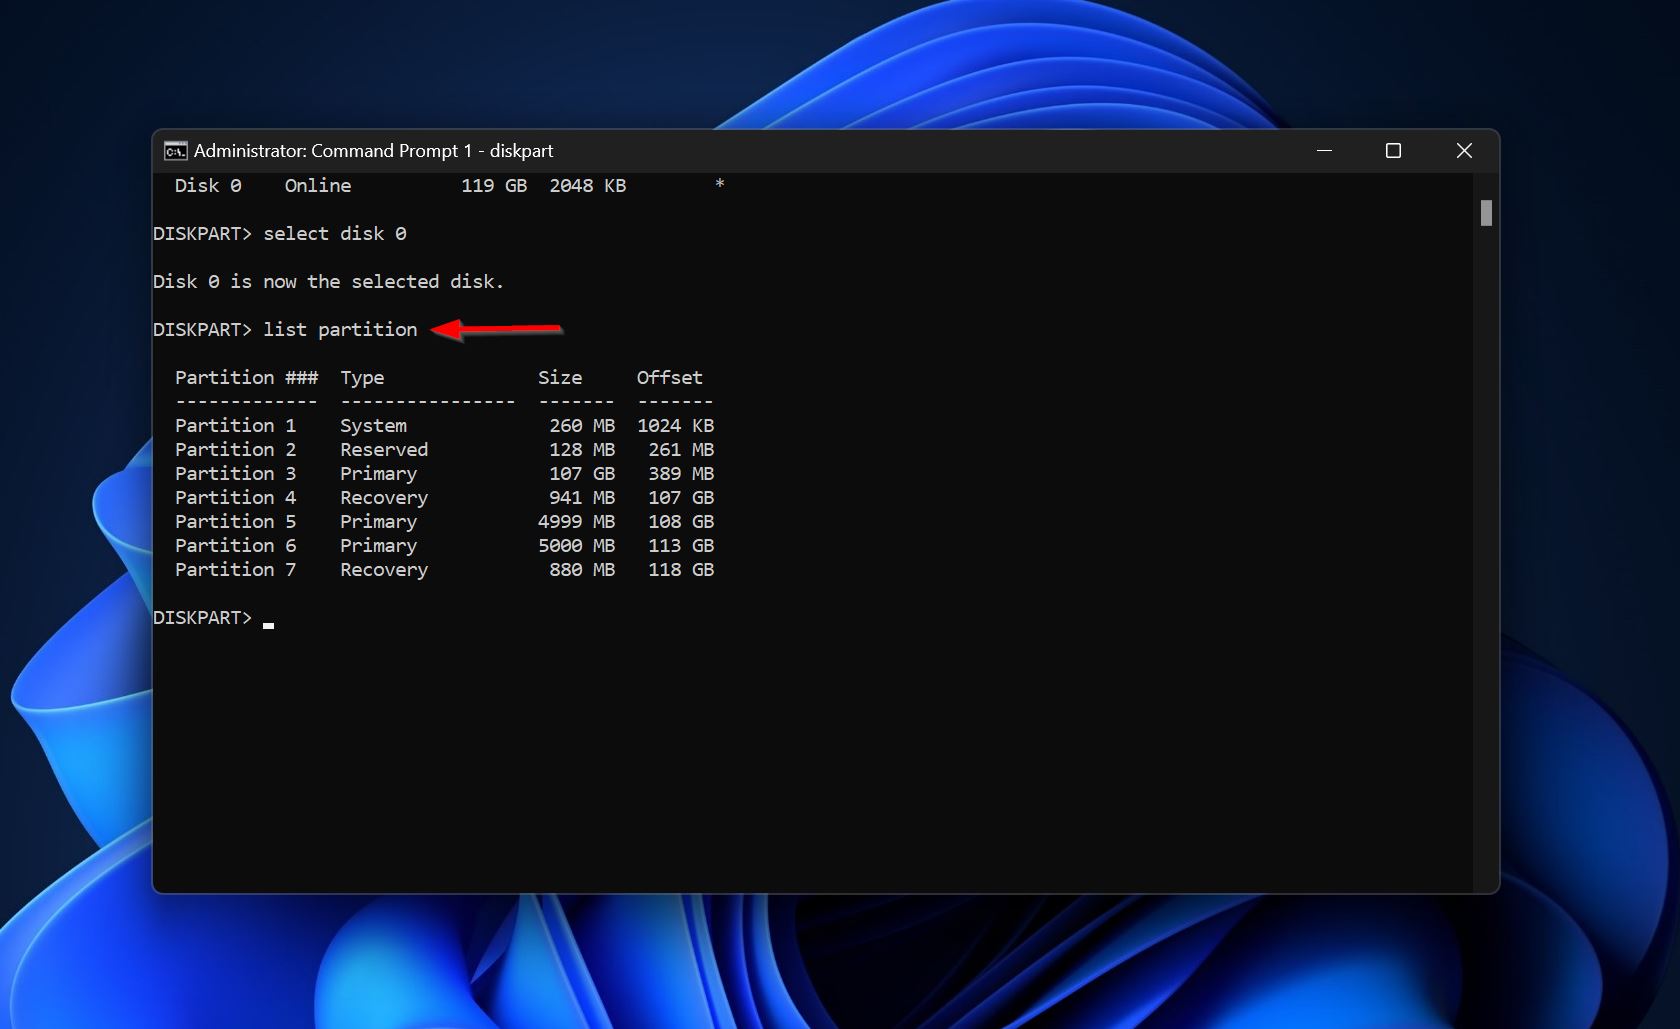
- Type list partition and press Enter.
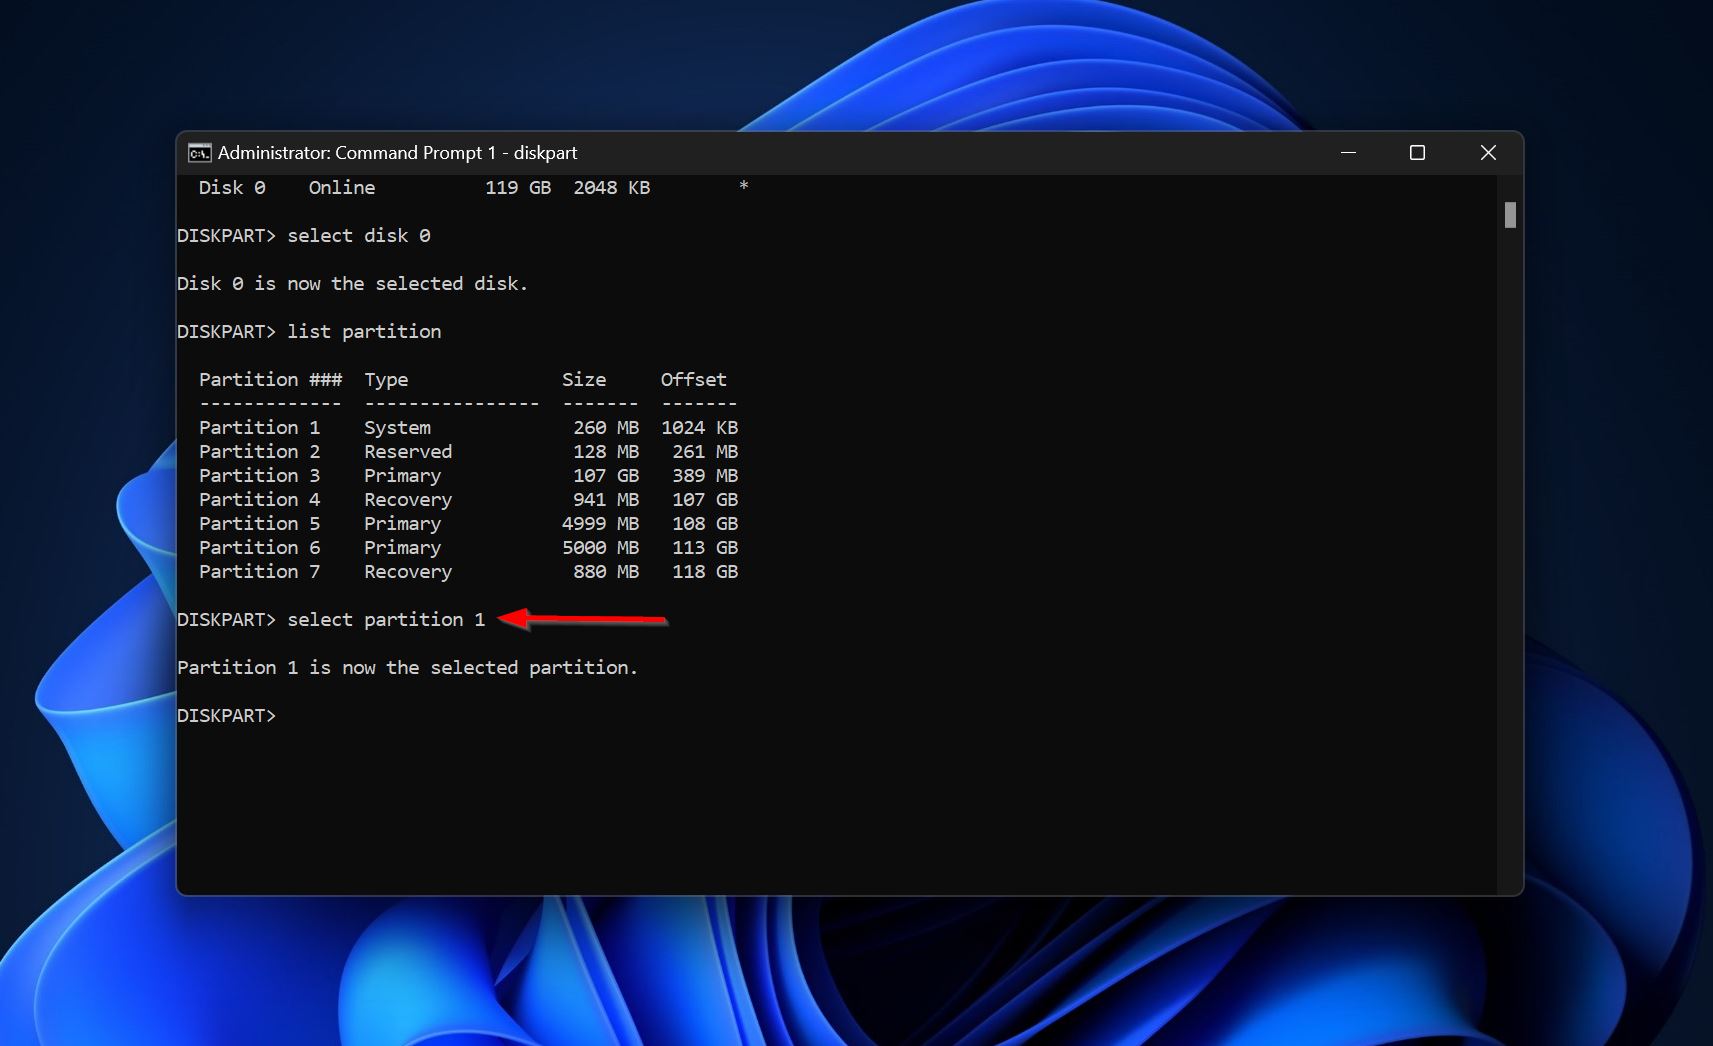
- Type select partition 1 and press Enter. Usually, the System Partition is 1. Look for the “System Reserved” label next to the partition list and select the relevant partition.
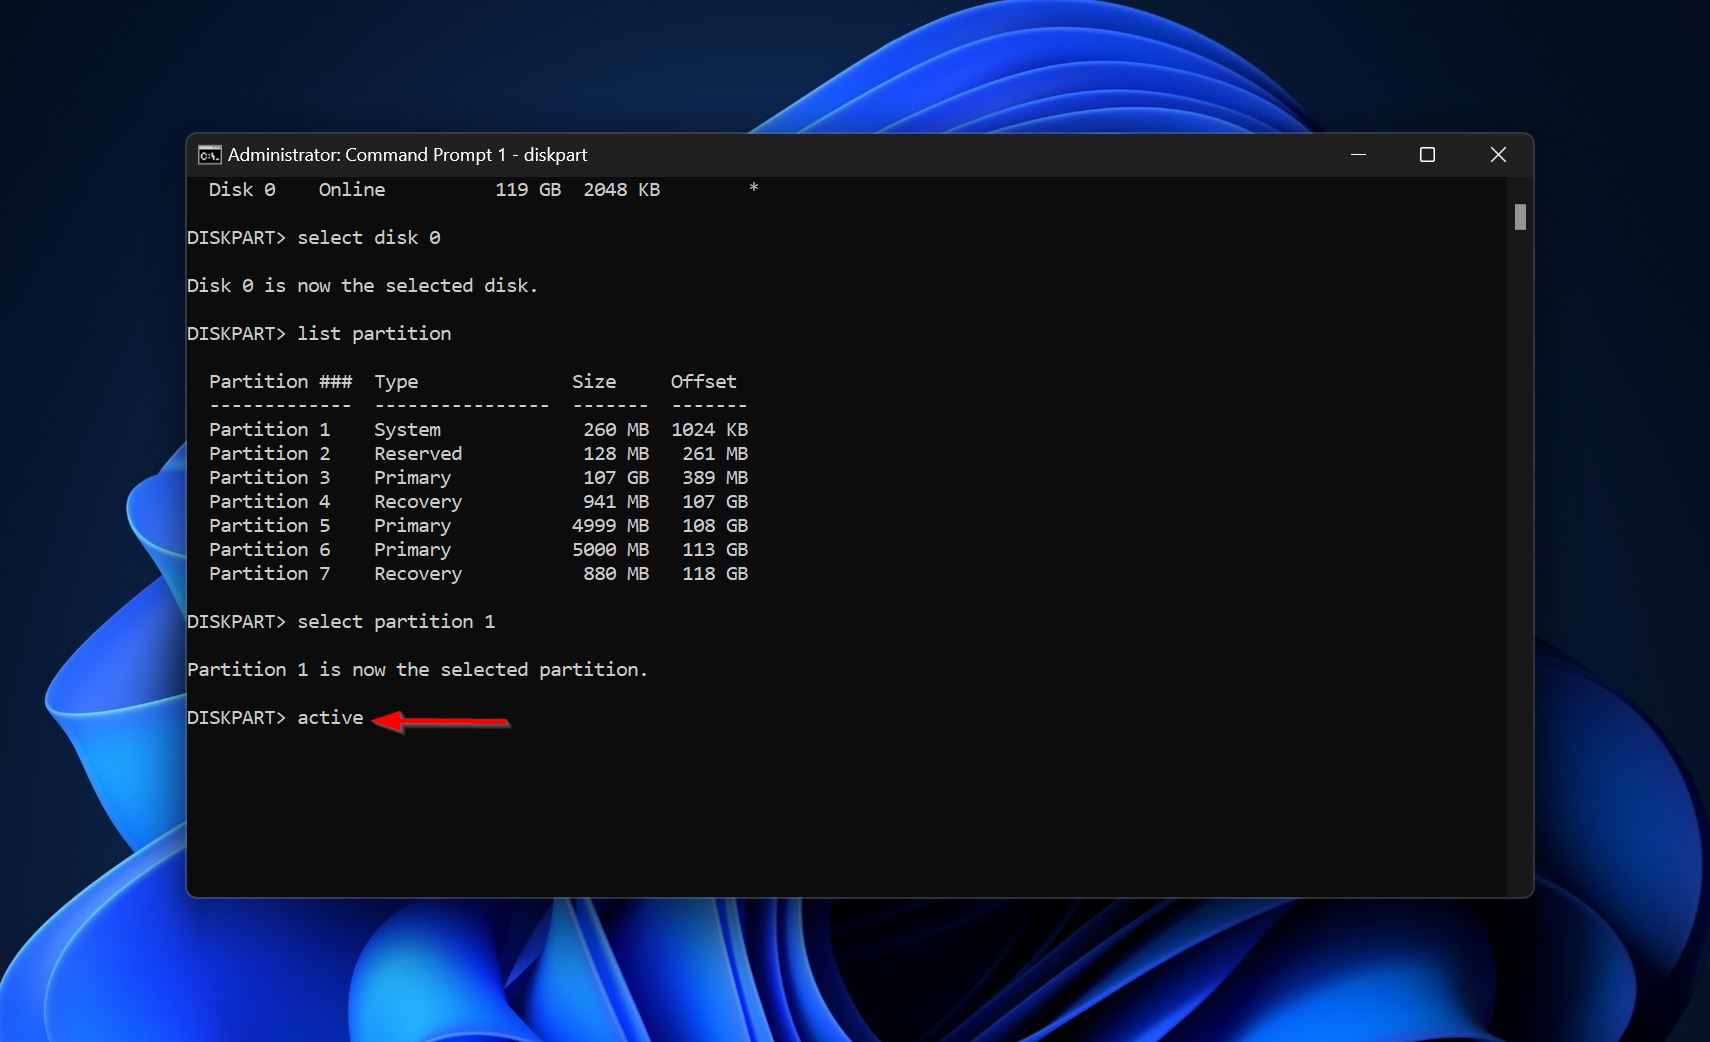
- Type active and press Enter.
- Close Command Prompt and reboot your PC.
Use a Live USB and Mark the Primary Partition as Active
To create a bootable USB, you’ll first need to download a tool called Rufus and the ISO file for Windows 10 or Windows 11, depending on your needs. You can create an ISO file using the Windows Media Creation tool as well. Simply open the Media Creation Tool, and select the Windows version, architecture, edition, and language. Click Next and pick the ISO file option.
Subsequently, follow these steps:
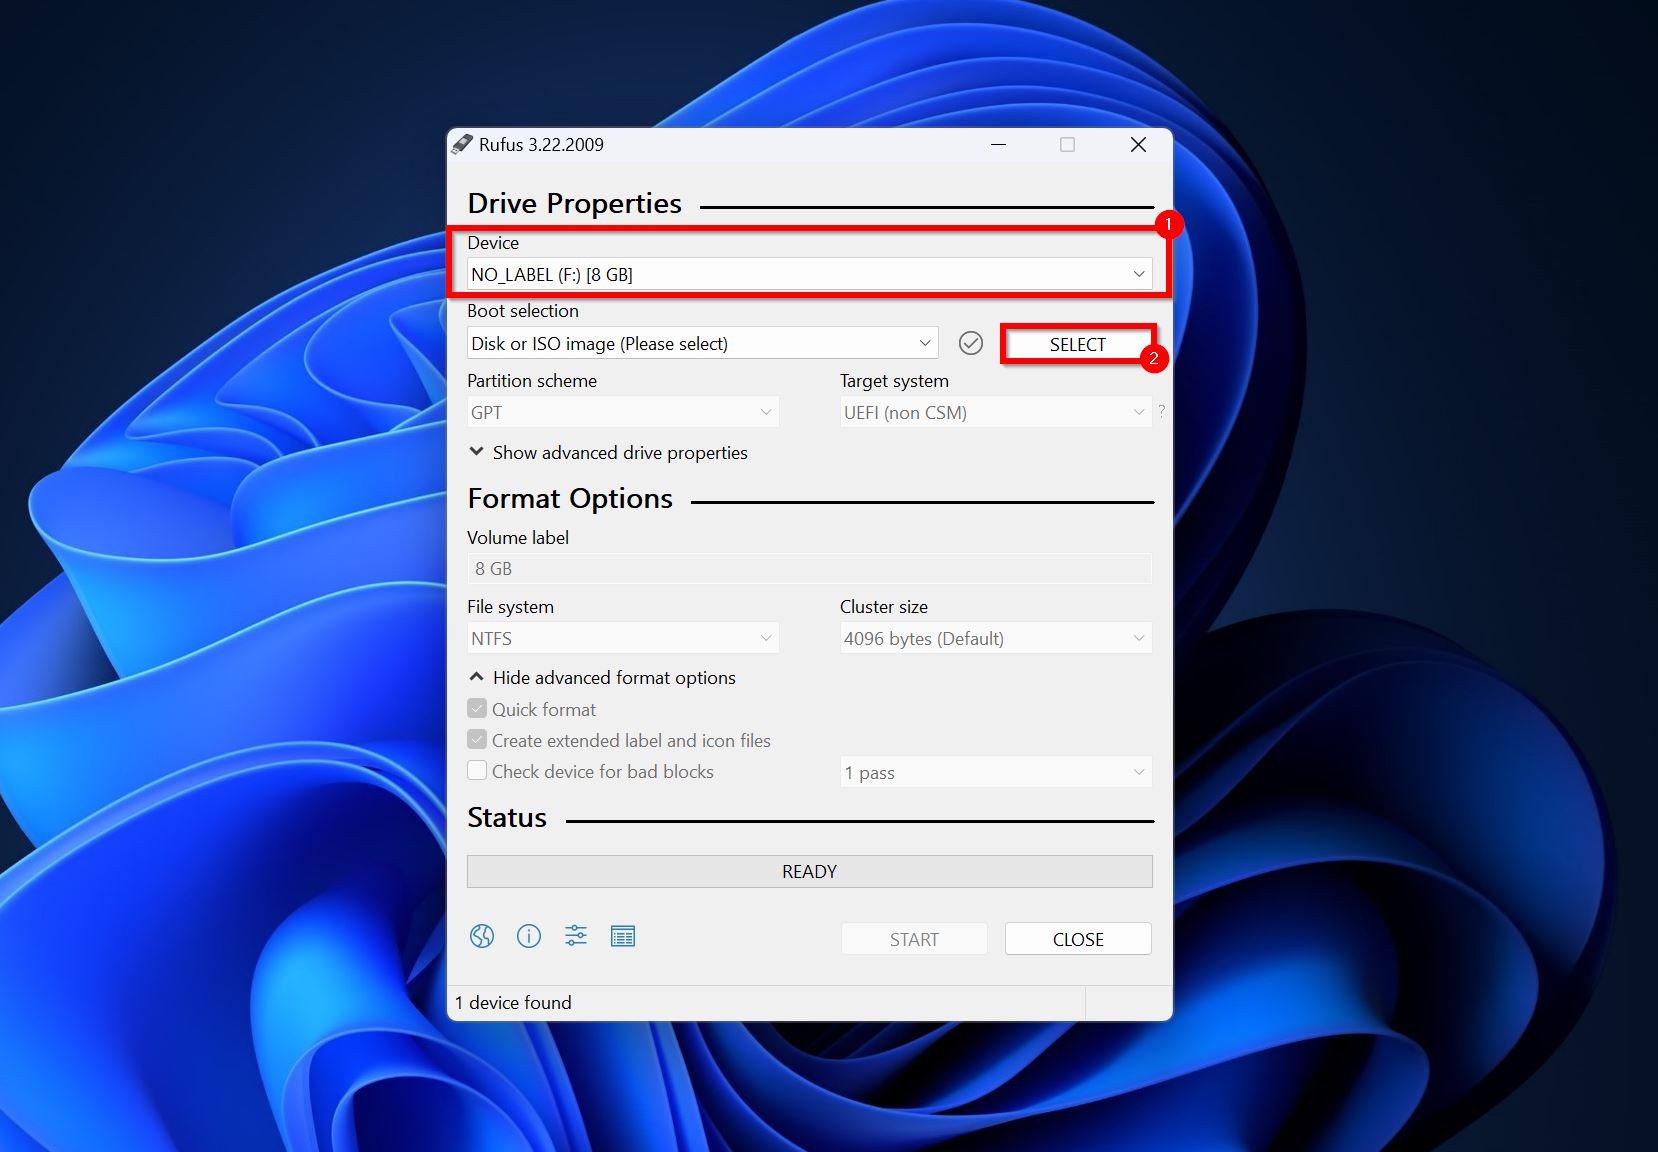
- Open Rufus and choose the USB drive (ideally 8 GB or more) from the Device drop-down menu. The USB drive will be formatted, so ensure there’s no important data on it.
- Click on the Select button next to the Boot selection drop-down menu. Find the Windows ISO file and double-click on it.
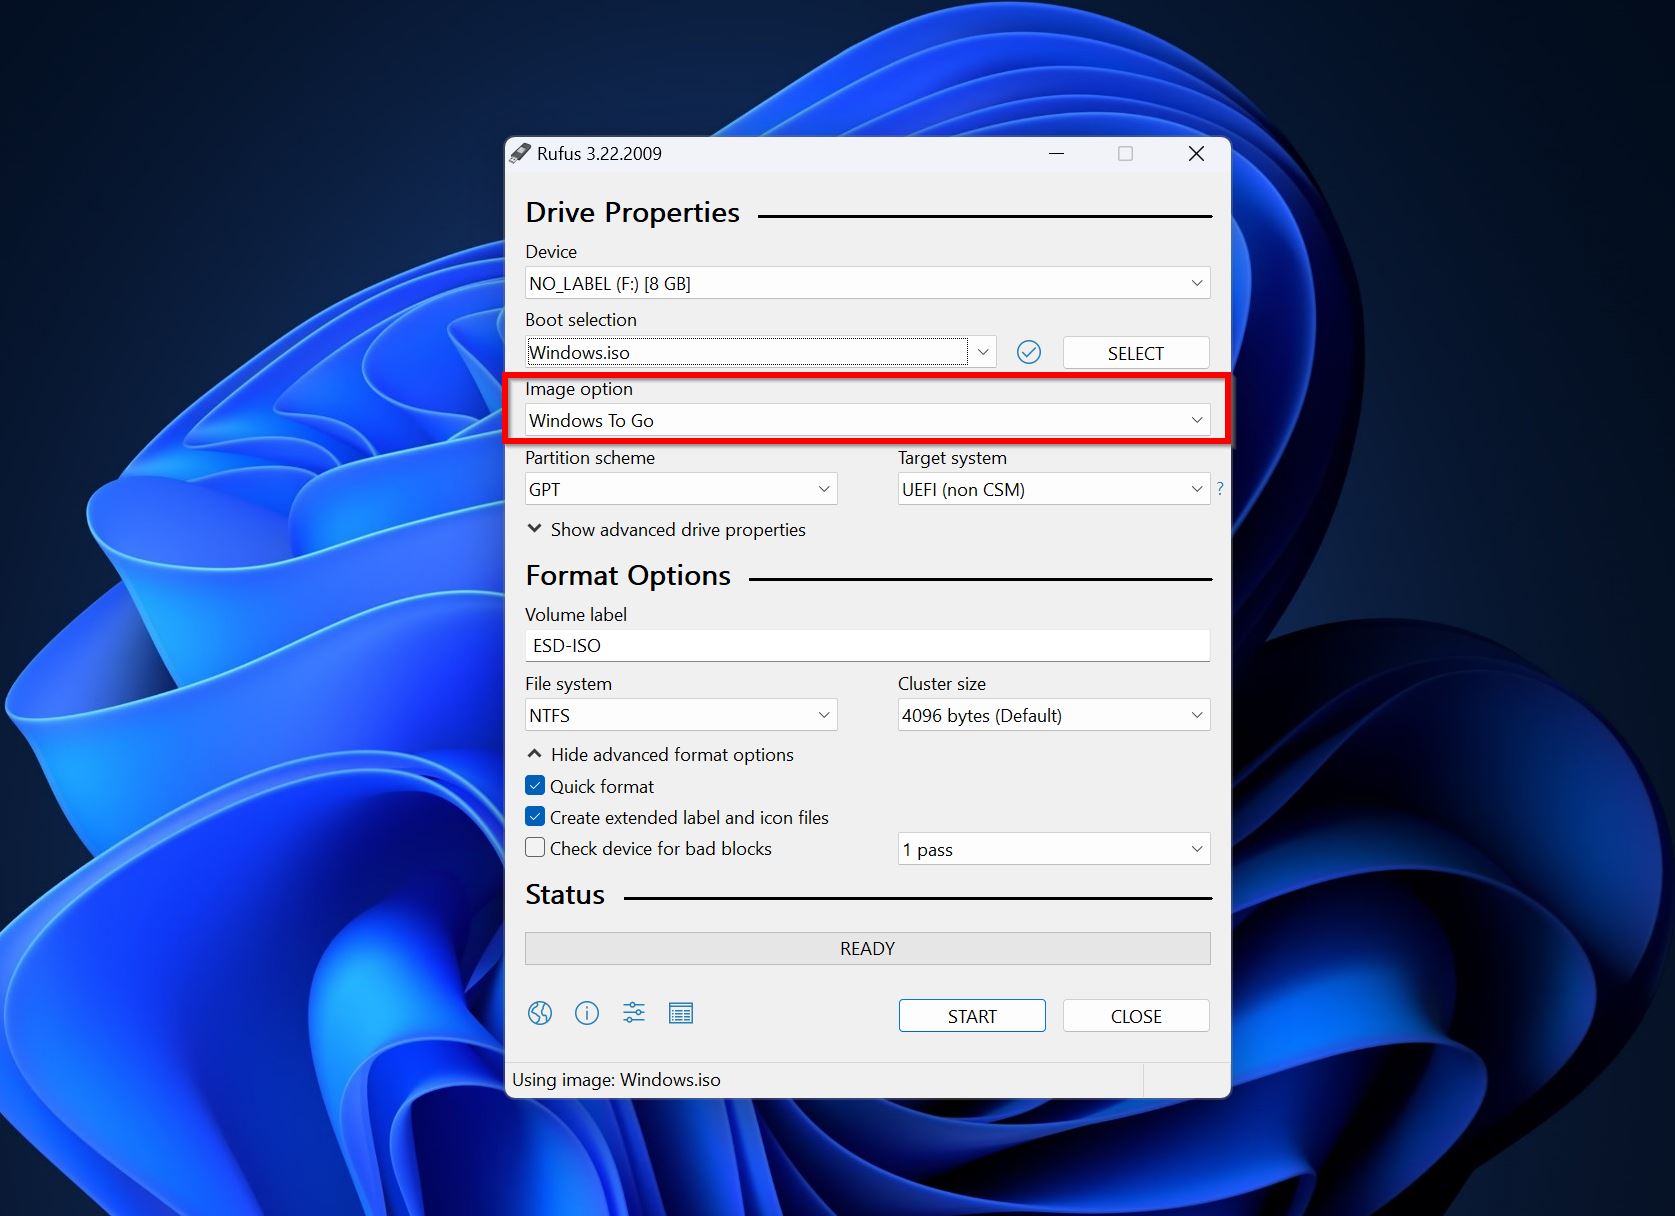
- Select Windows To Go from the Image option drop-down menu.
- Click on the START option in Rufus to create the bootable USB drive.
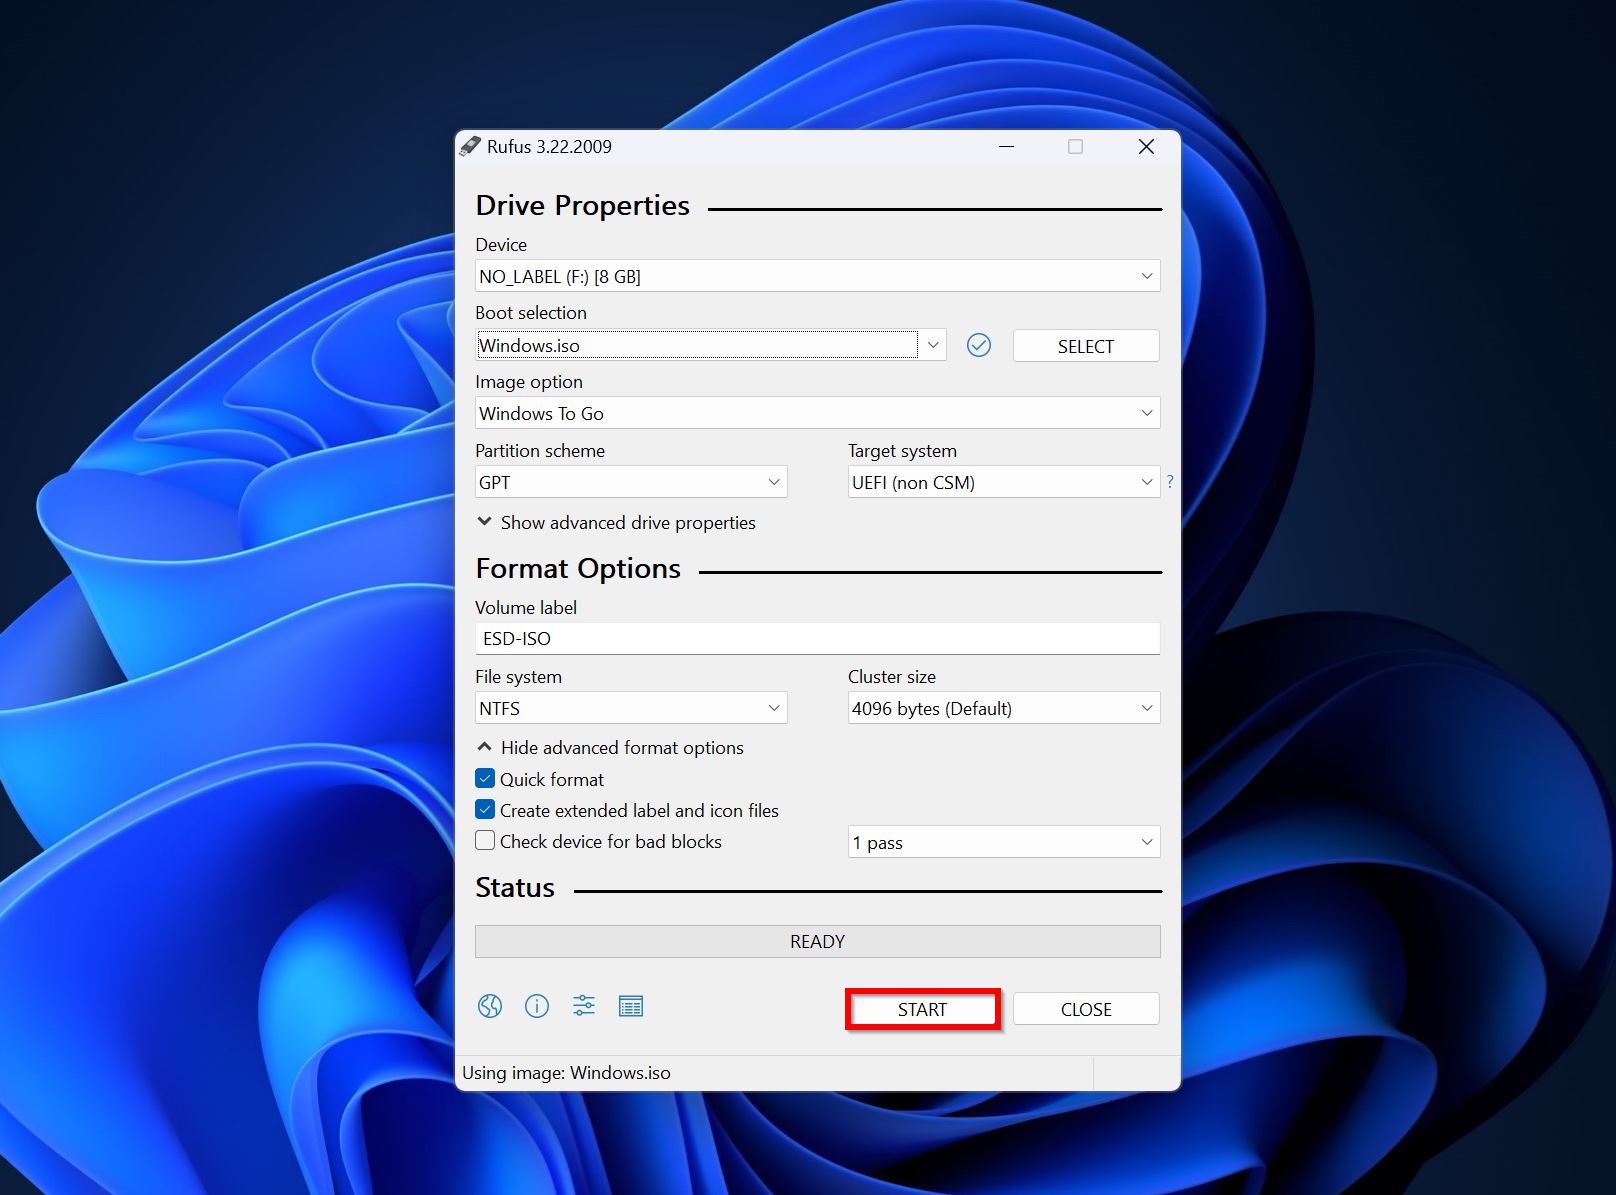
- You can connect this drive to your PC and boot the GUI version of Windows.
Once you’re in the Windows user interface, open Disk Management and mark the primary partition as active. Here’s how:
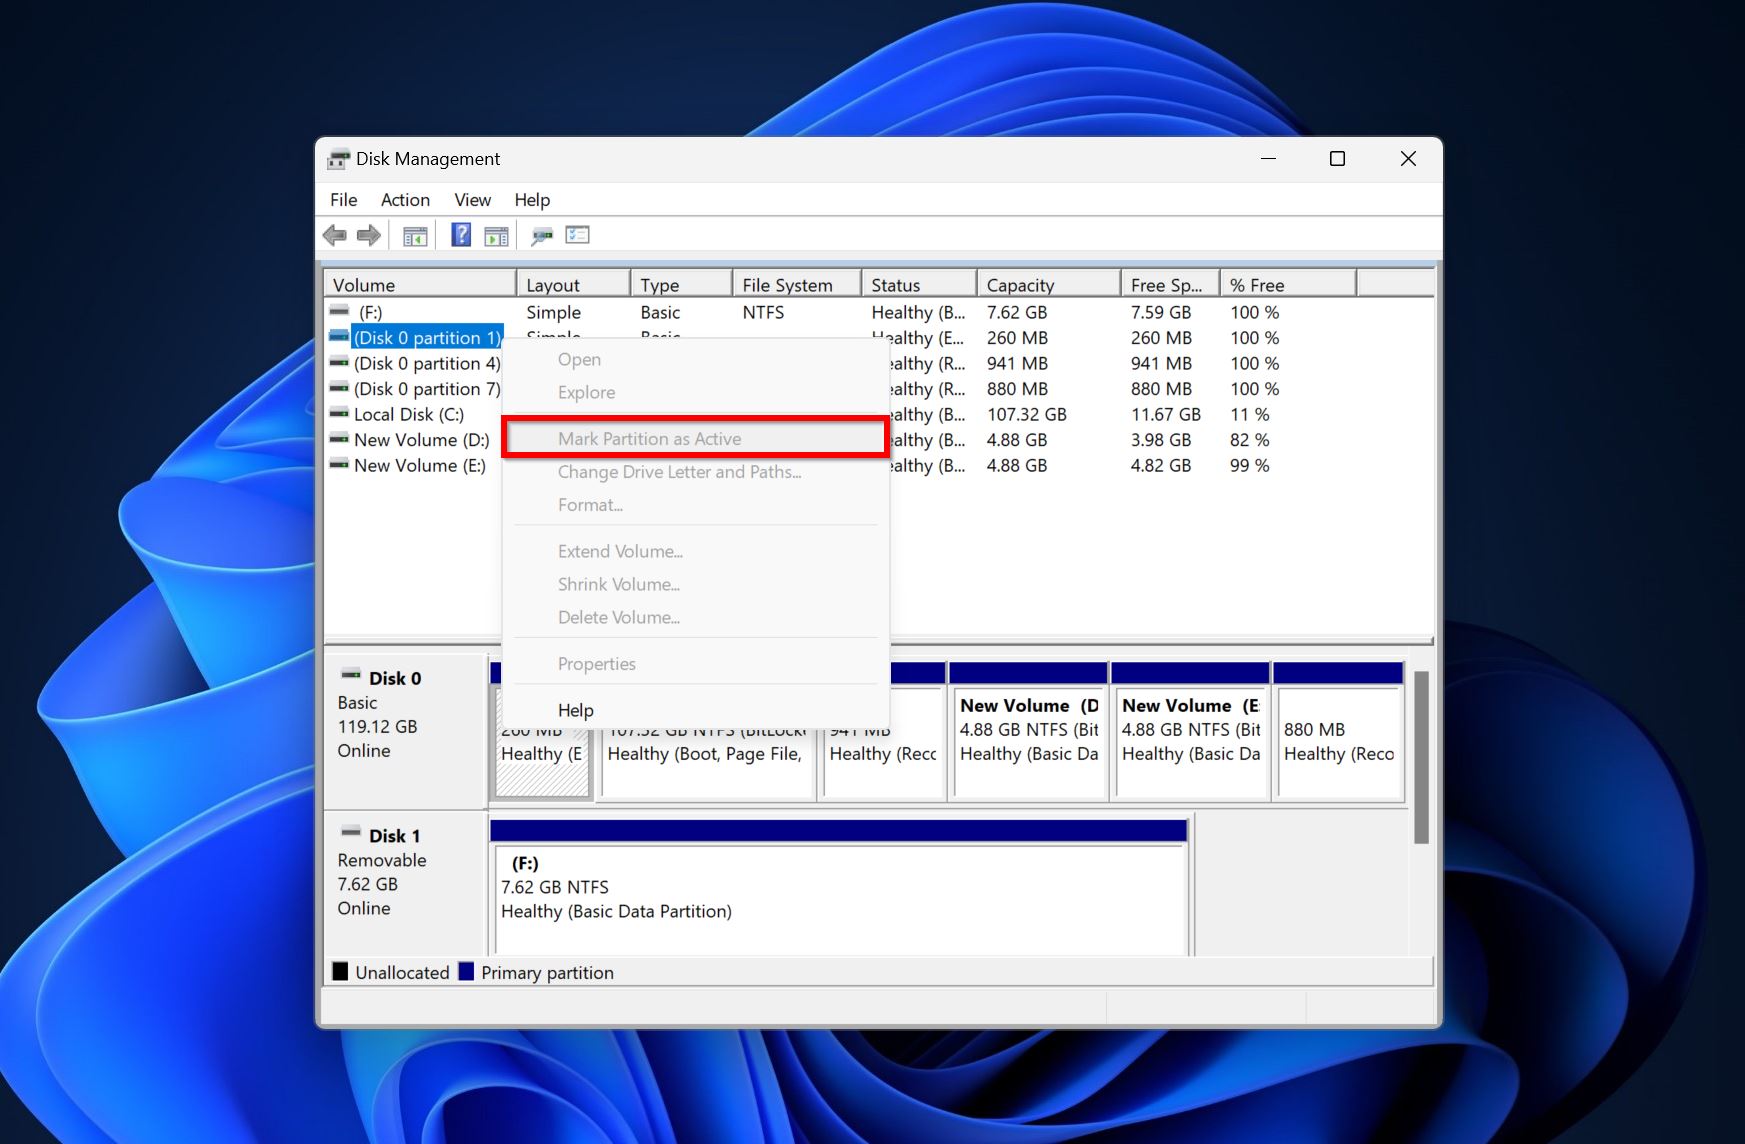
- Type “disk management” in Windows Search (Windows Key + S). Choose Create and format hard disk partitions from the search results.
- In Disk Management, right-click on the System Partition (usually Partition 1) and click Mark Partition as Active.
Remember, you can use the diskpart method in the case of a live USB as well. Simply open Command Prompt as administrator and execute the related commands from the section.
Rebuild the BCD File
The Boot Configuration Data (BCD) file is integral to successfully boot Windows. If it’s corrupt or missing, Windows won’t boot and will usually display the “No bootable devices found” error. Luckily, Windows has an in-built command-line utility, Bootrec, that lets you rebuild the BCD file.
Here’s how you can do that:
- Connect Windows installation media to your PC and boot it.
- Click on Repair your computer and navigate to Troubleshoot > Advanced options > Command Prompt.
- In the CMD console, type BOOTREC /FIXMBR and press Enter.
- Type BOOTREC /FIXBOOT and press Enter.
- Type BOOTREC /scanOS and press Enter.
- Finally, type BOOTREC /rebuildbcd and press Enter.
- Exit Command Prompt and reboot your PC.
Troubleshoot RAID Issues
If you’re using a RAID array on your computer, it may be trickier to troubleshoot the boot devices not found error. It could be a case of a drive failure or the RAID array becoming misconfigured.
You can attempt to diagnose which of the RAID drives are failing by checking the S.M.A.R.T. values of the individual drives in the RAID array. Replace the drive and rebuild the RAID array to get the PC to boot again.
It’s best to keep the RAID drivers in your PC updated. The drivers you download will depend on RAID controller you’re using. Popular brands include Dell, Hewlett-Packard (HP), Acer, and Toshiba.
It’s also a good idea to determine if any of the drives are physically failing. Check for whirring, beeping, and clicking sounds from the drives. If you hear such sounds, it’s best to disconnect the array and contact a professional data recovery service to help you out.
In some scenarios, you may have to format the array to get your PC to boot up properly.
How to Recover Data From the Not Bootable Device
It’s a good idea to recover your data from a PC that displays the “No bootable device found” error. Especially, if the issue is caused by an accumulation of bad sectors and other forms of logical corruption. The best way to get back your data is to use a reliable data recovery program.
In our case, we picked Disk Drill. It’s easy to use, supports a wide range of storage drives and over 400 file formats, and works with all popular file systems. It also comes with a free trial that lets you recover up to 500 MB of data for free (only on Windows).
Since Windows won’t boot, you can either–use a live USB and download Disk Drill after booting up from it, or use a disk enclosure to connect the internal HDD to another working computer. Then use Disk Drill to recover data from it.
In any case, the data recovery process will be as follows:
- Download Disk Drill and install it.
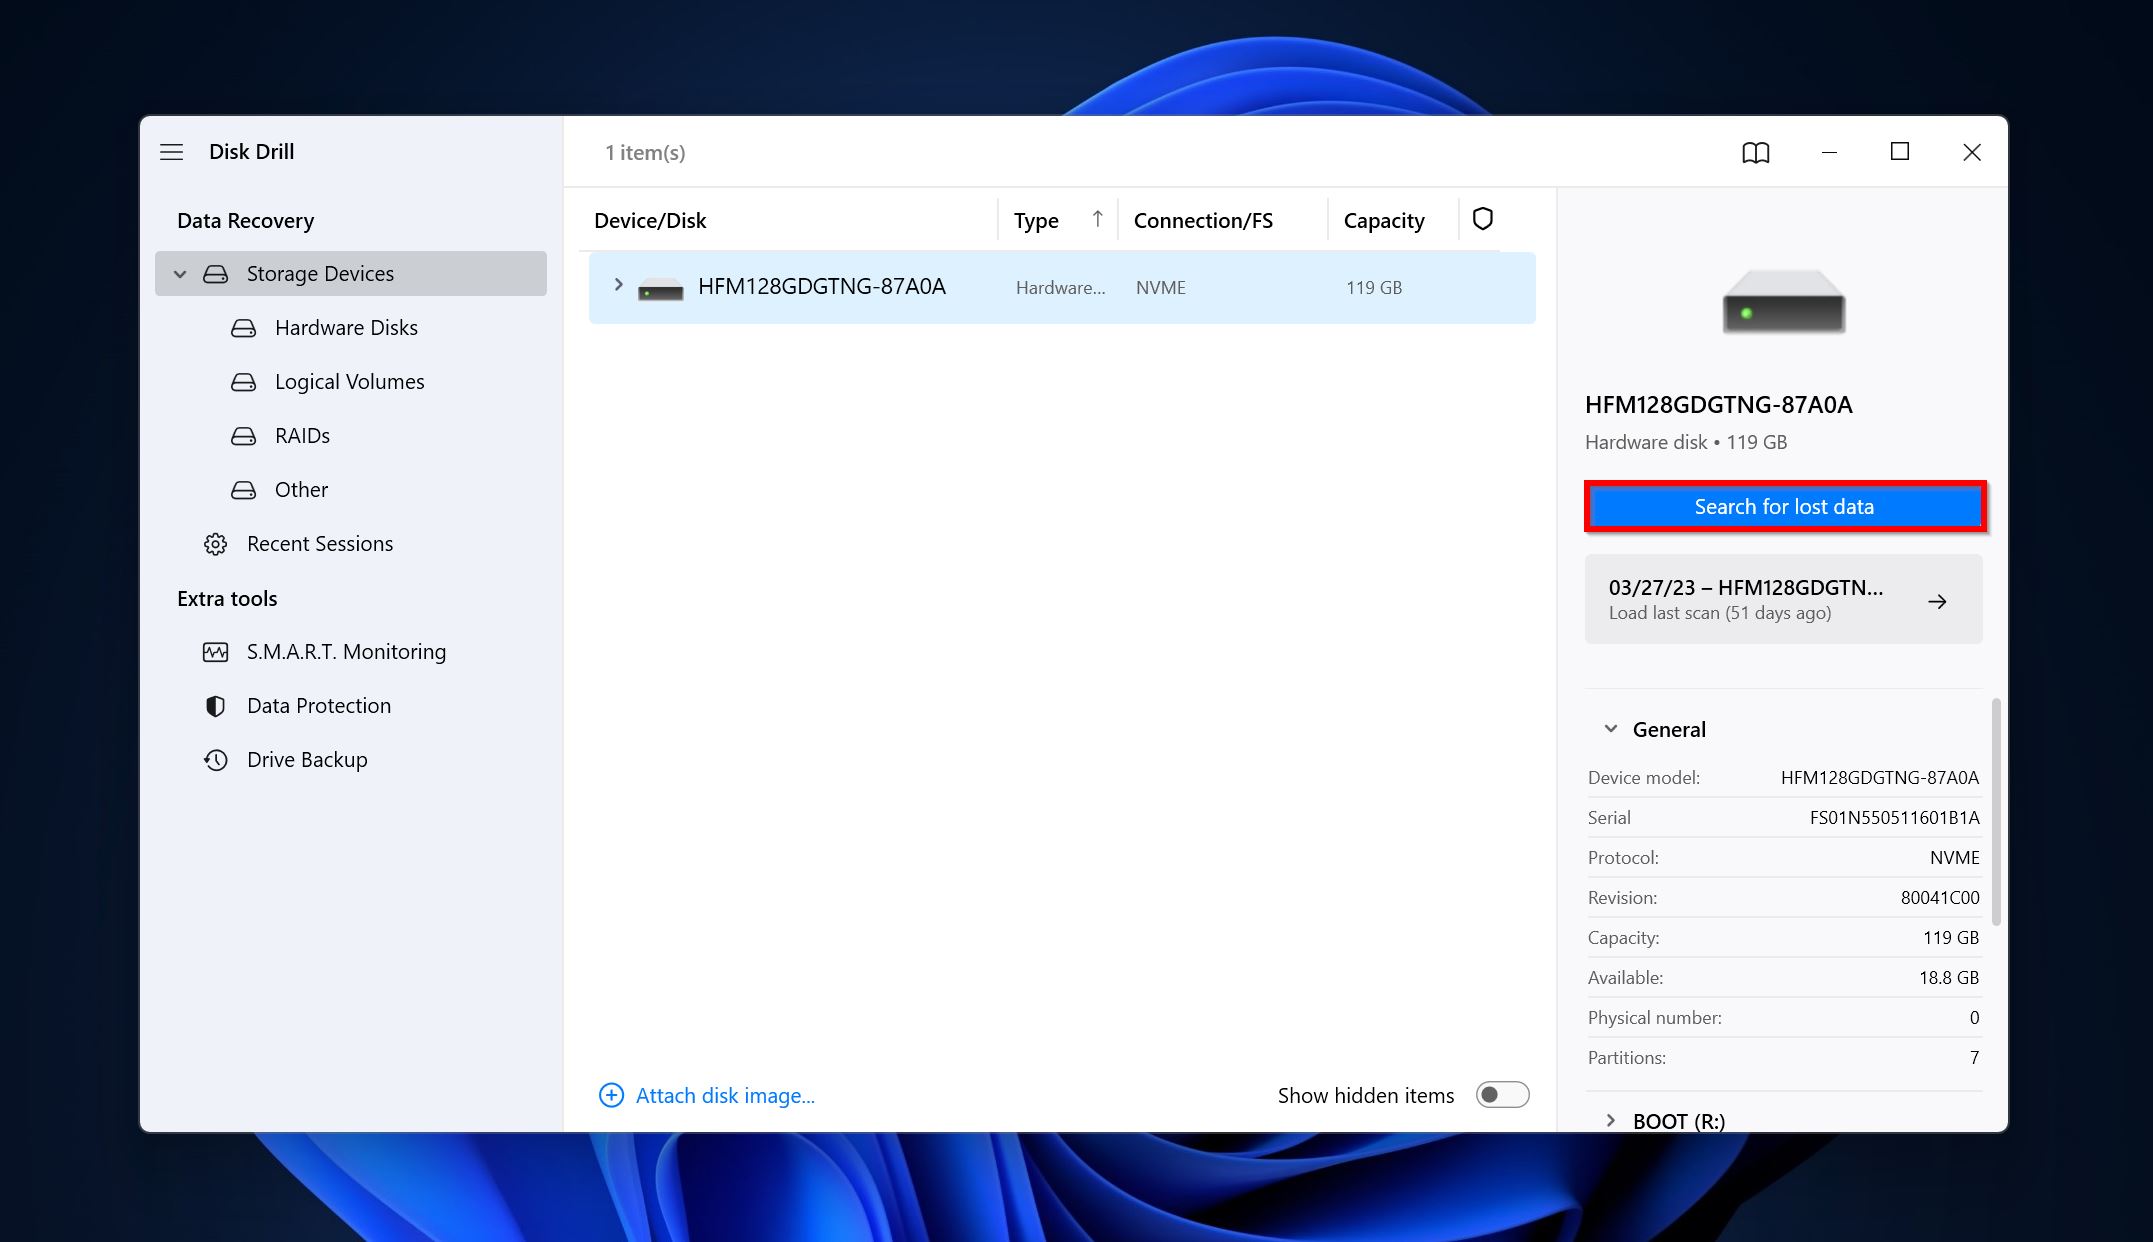
- Open Disk Drill, select the disk that was not booting, and click Search for lost data.
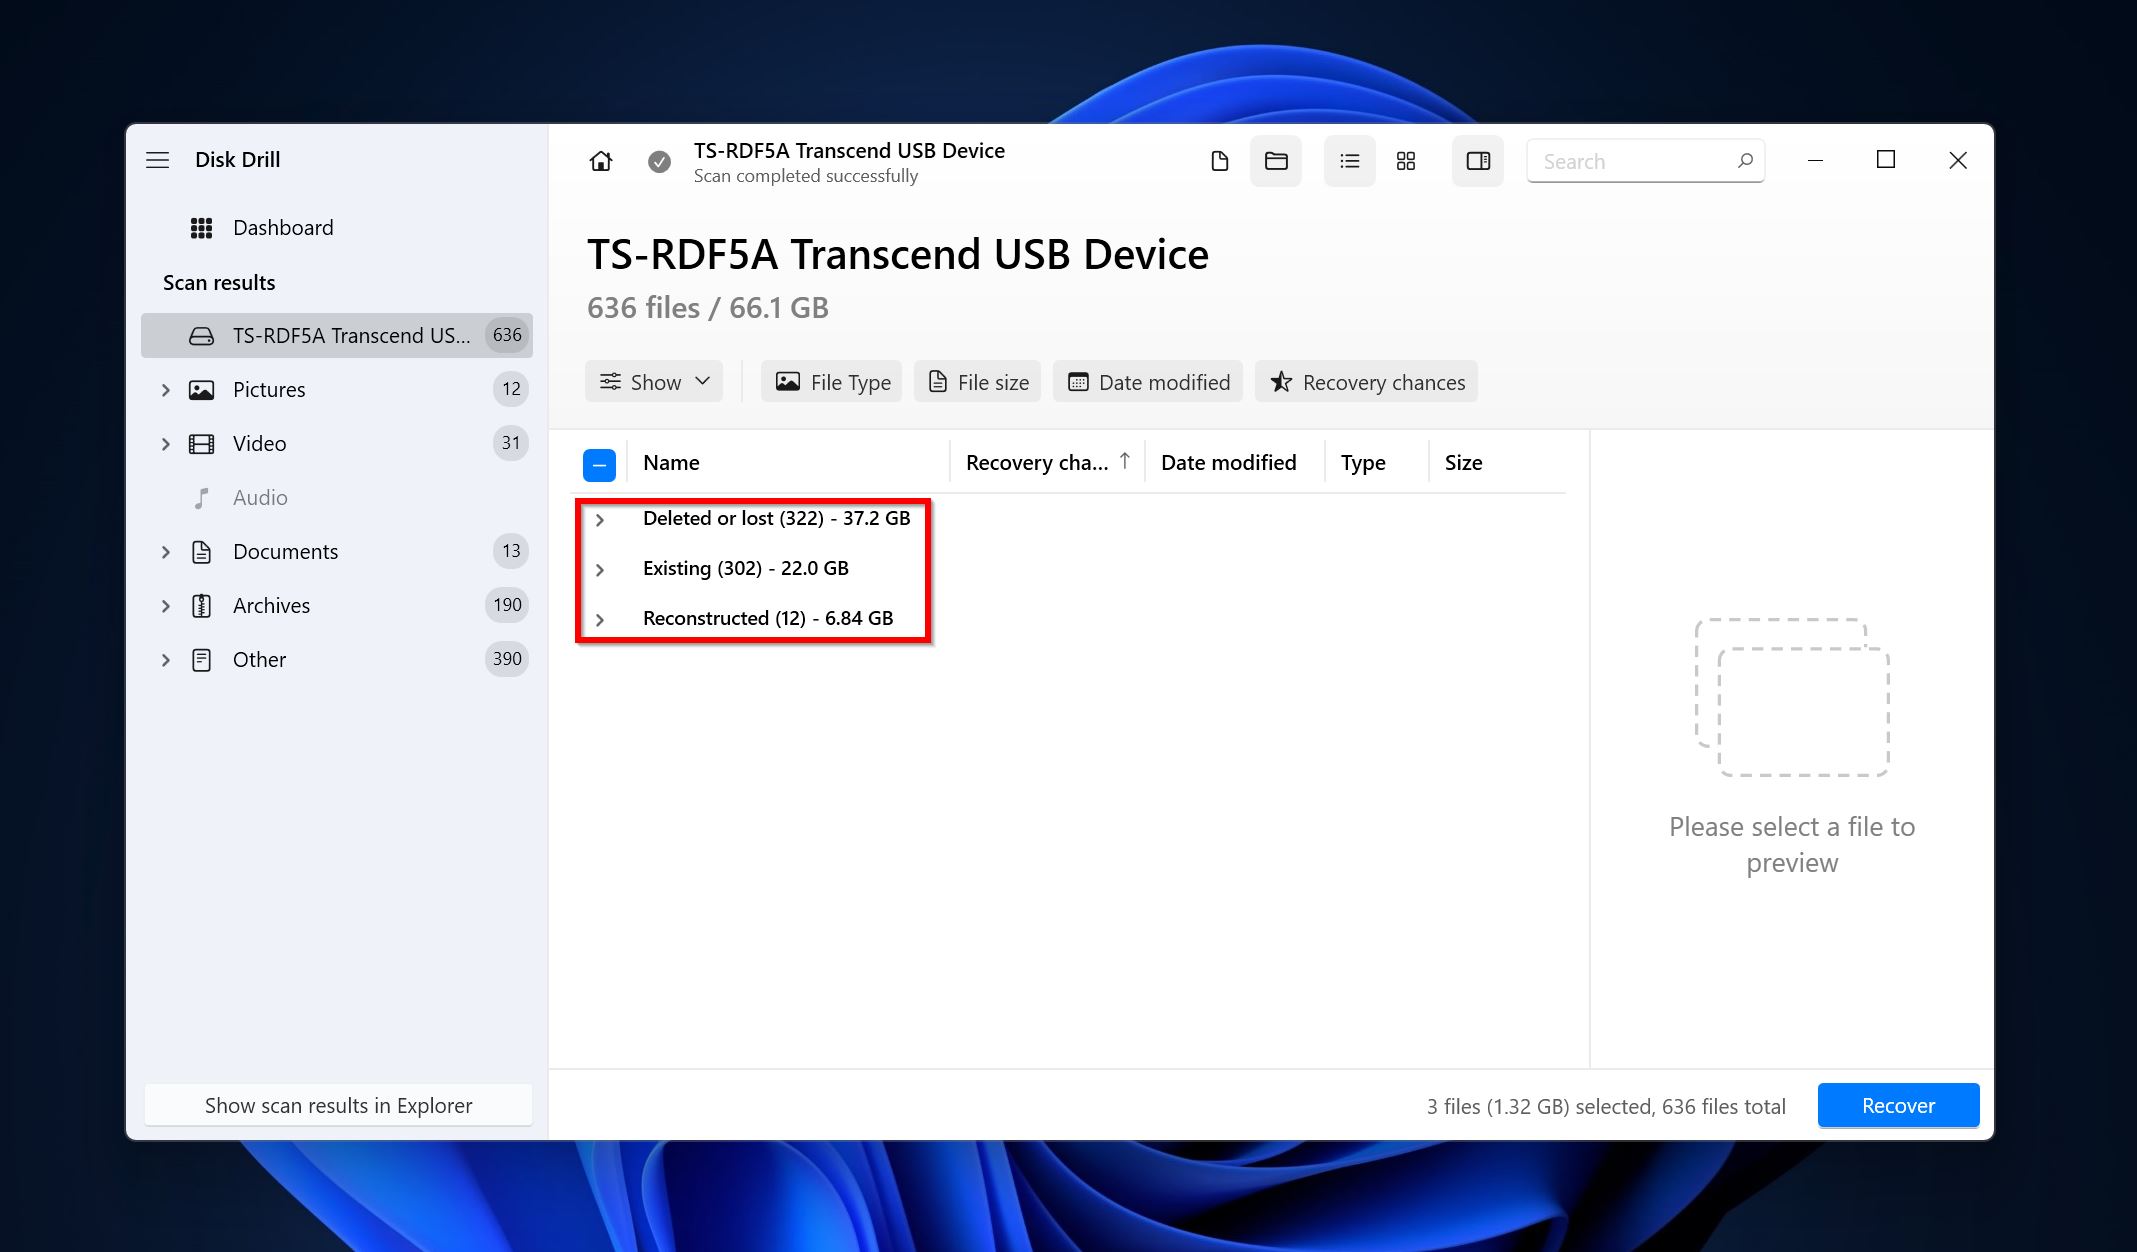
- Click on Review found items, or directly click on the file type you wish to recover (Pictures, Video, Audio, Documents, Archives, and Other).

- Expand the Existing section to view files that are already there on the drive. To view files that were deleted earlier, expand the Deleted or lost, and Reconstructed sections.
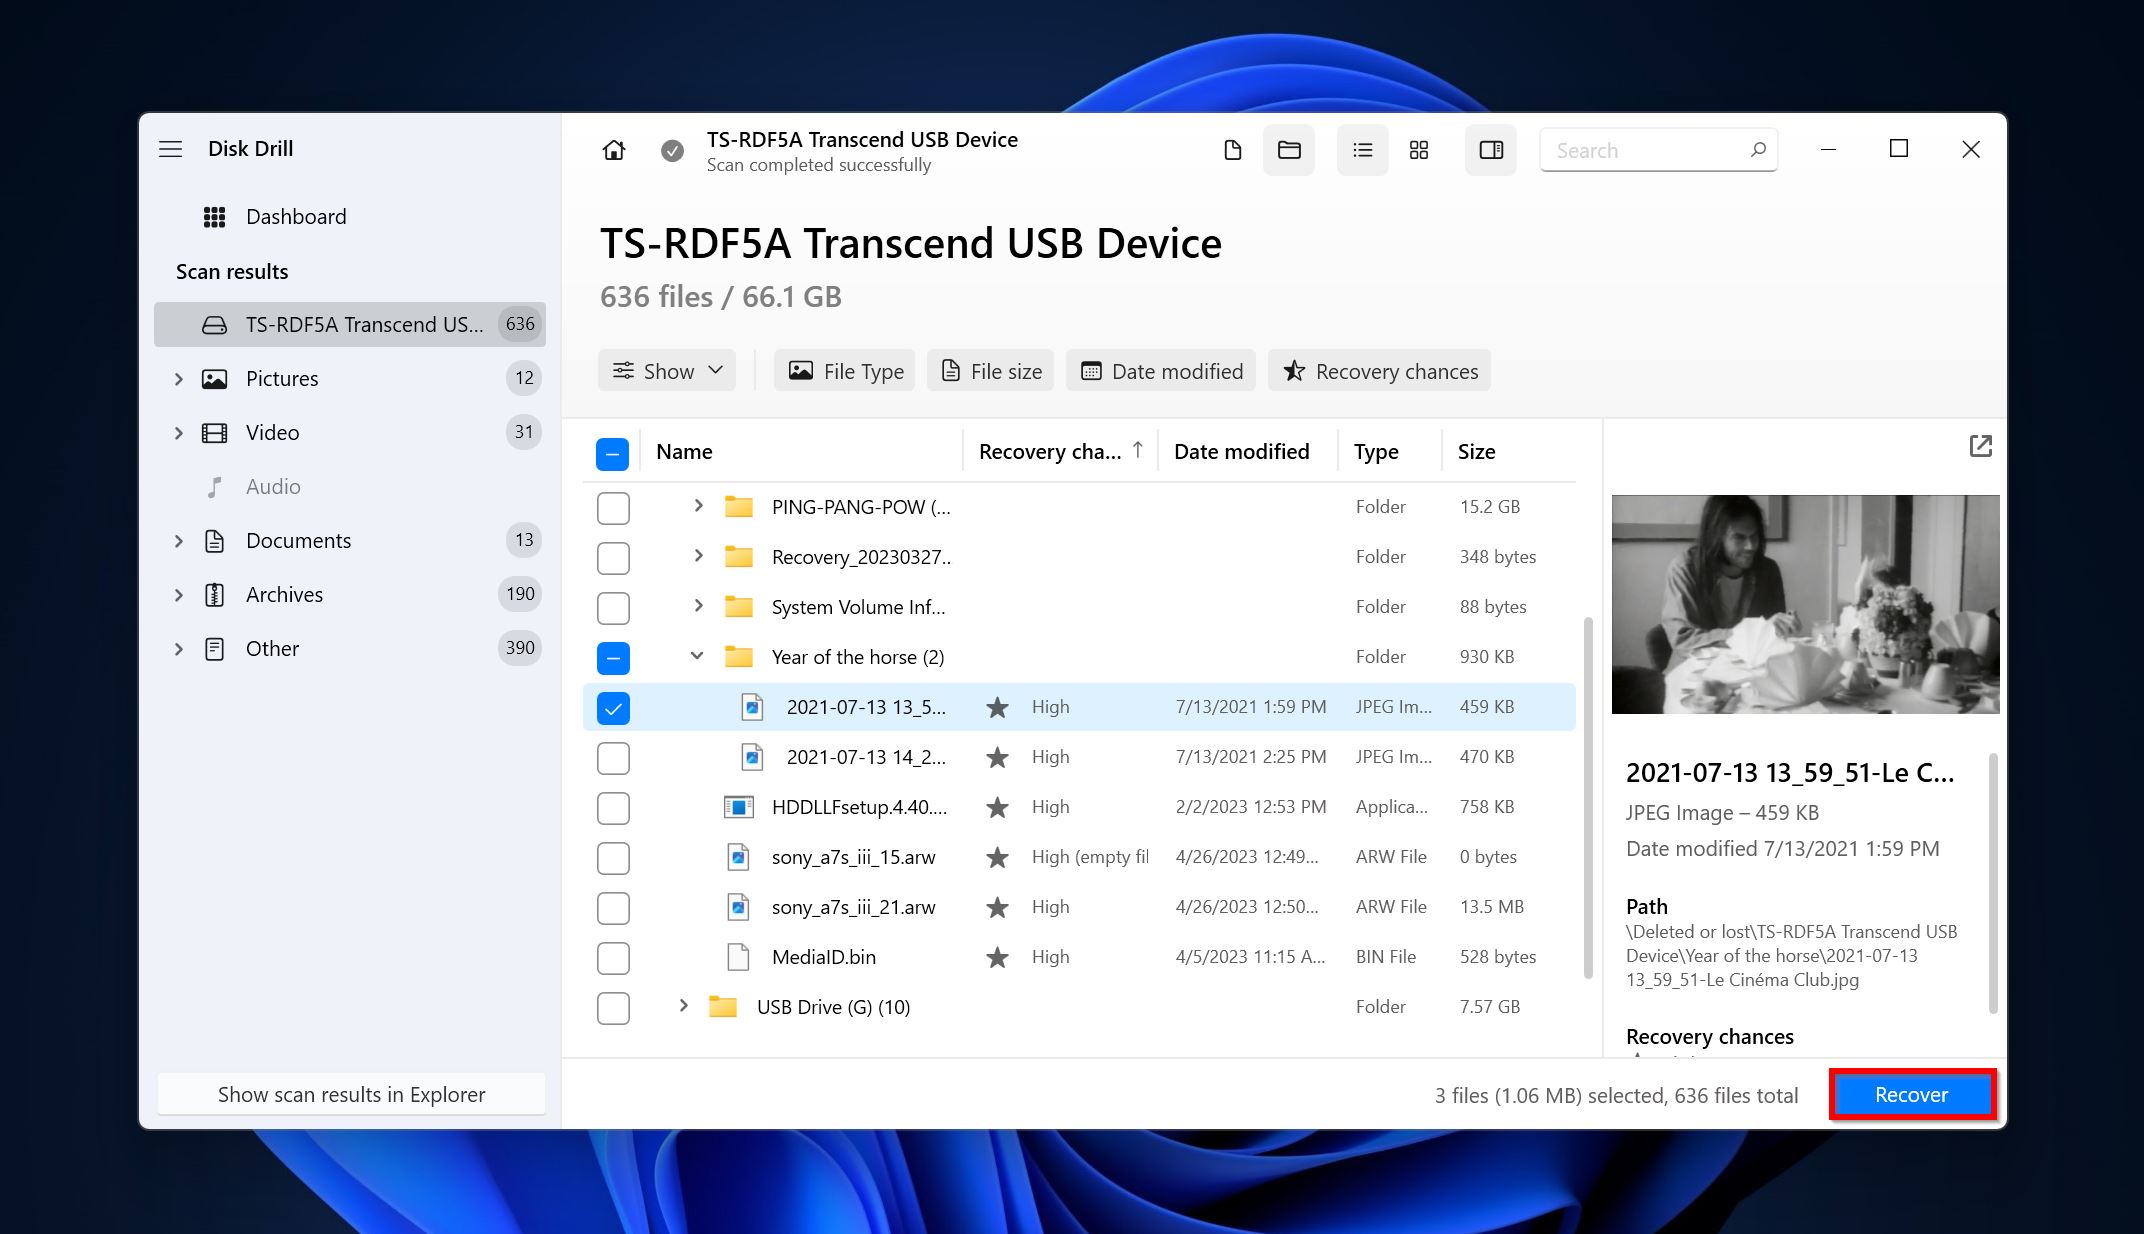
- Use the checkboxes to select the files you wish to recover. Disk Drill displays a preview of the currently selected file. To manually preview a file, click on the eye icon next to the filename. Once you’ve confirmed your selection, click on Recover.
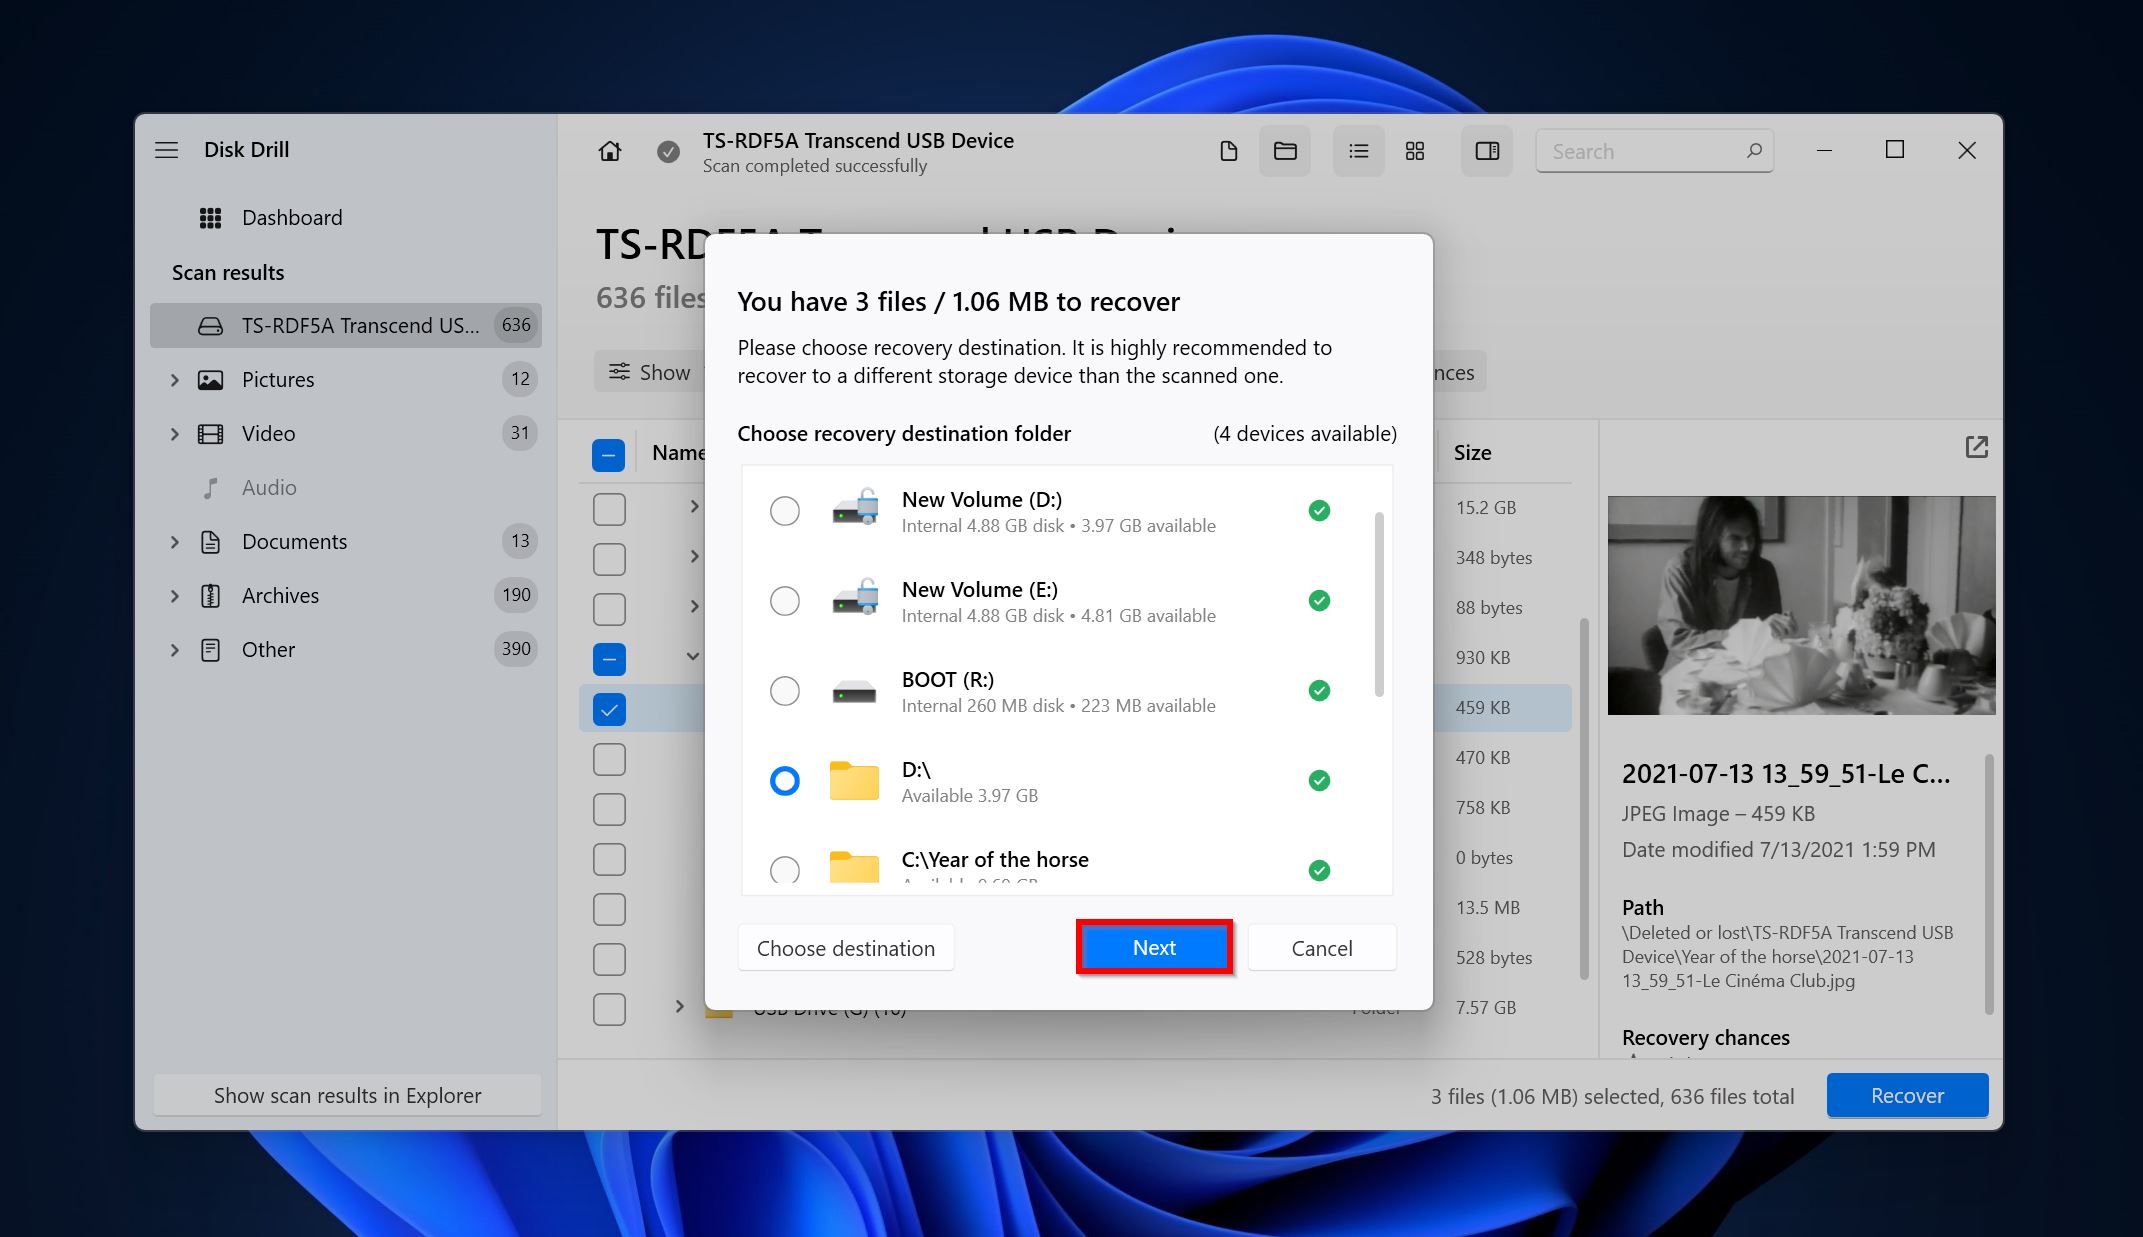
- Choose a recovery destination for the files. Remember to restore them to another drive. Click Next.
- Disk Drill will recover the files.
Conclusion
The “No bootable devices found” is a critical error message that should be addressed as soon as possible. However, your top priority should be to get back your data from the drive. Sticking to a regular backup schedule is an excellent way to protect yourself against data loss, regardless of the cause.
FAQ
- Go to the BIOS settings on your PC.
- Open the Boot settings.
- Ensure that the SSD is at the top of the boot order.
- Save the settings and reboot.
- Open Disk Management.
- Right-click on the drive and select Properties.
- Go to the Volumes tab and see if it has a GPT or MBR partition style. Also, check the Status entry for a “No Media” label. Both these things signify that the drive is bootable.
- Manually select the Boot device from the Boot manager.
- Change the Boot sequence so that the bootable device is at the top.
- Troubleshoot RAID issues in PERC BIOS.


