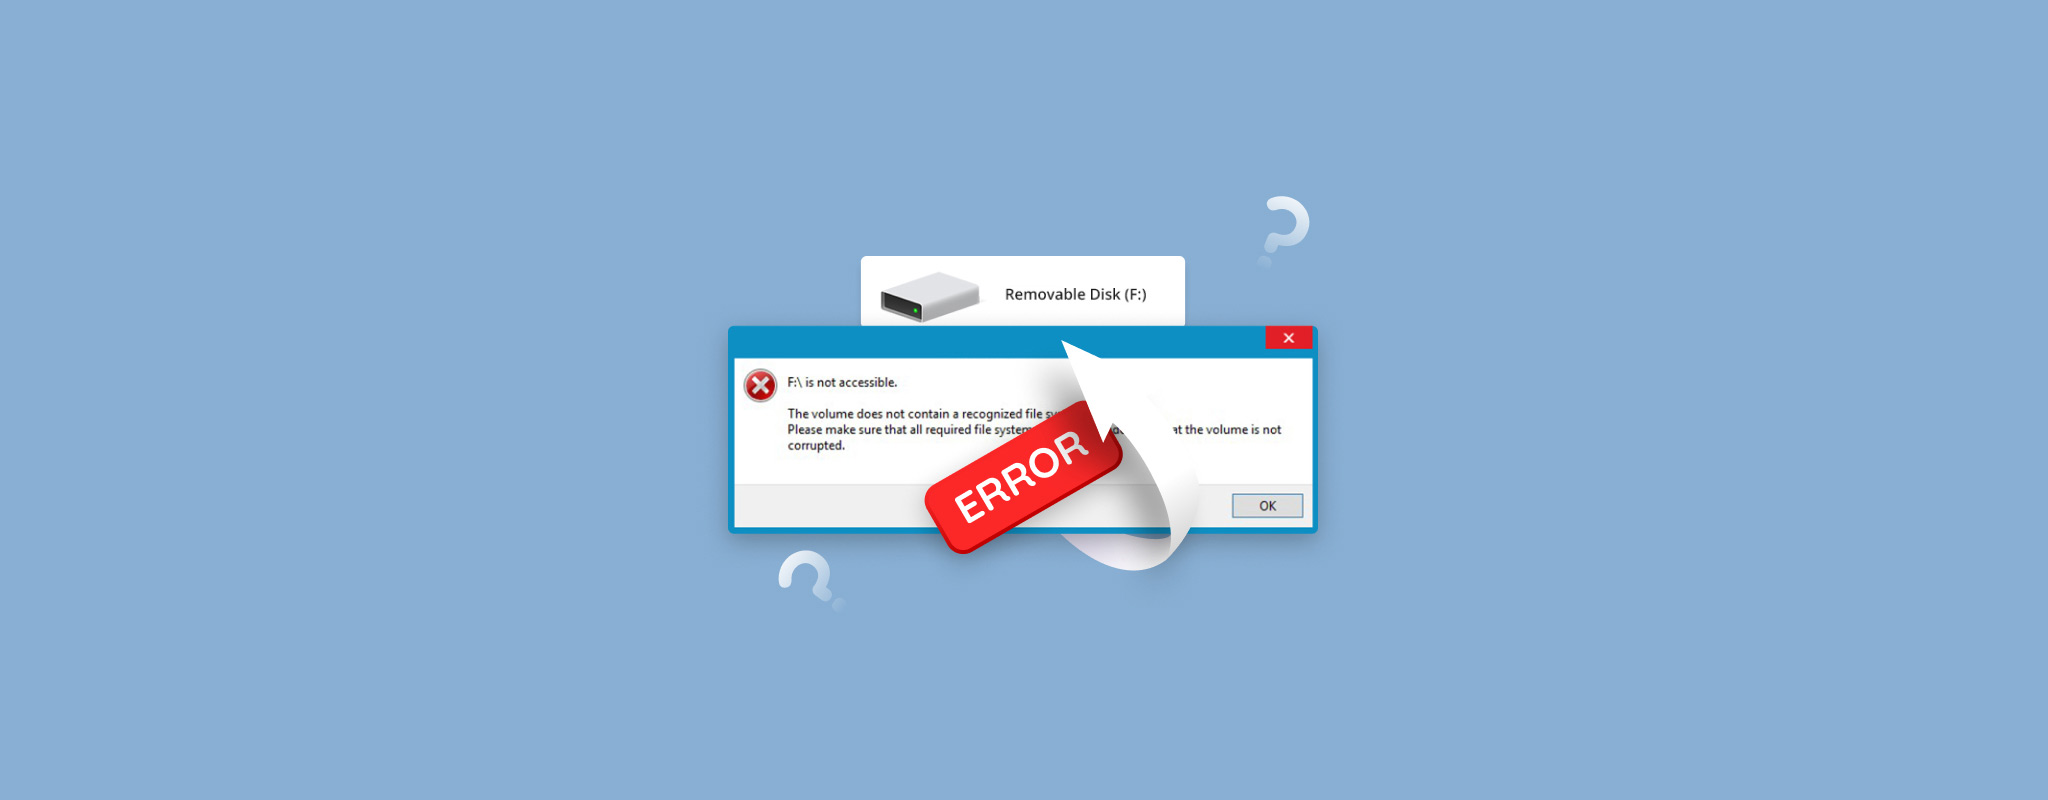
 Running into the dreaded “the volume does not contain a recognized file system” error? It’s easy to start panicking in this situation, given how you’re unable to access your storage device and may be cut off from important information.
In this guide, we’ll discuss the different factors that could lead to this error, as well as the best ways you can fix it so you can get your hard drive back in working order.
Table of Contents
What Causes a “Volume Does Not Contain A Recognized File System” Disk Error
While there are quite a few reasons why your hard drive may be facing the “file system not recognized” error, they all lead to the same result. Your operating system is unable to properly read the file system on your storage device, making the volume inaccessible. This is not to be confused with the hard drive not showing up on your OS error, which is when the storage device is not detected at all.
Here are some of the most common causes of the “the volume does not contain a recognized file system” error and the methods for potentially repairing them:
| Reason | Description |
| 🔧 Damaged or missing file system driver | A “driver” is a group of files that allow a computer’s operating system to communicate with its components. If the driver responsible for file systems is damaged or missing, it may lead to certain hard drives encountering the “file system not recognized” error. Updating the file system drivers should take care of this issue. |
| ☣️ Virus | Computers infected with viruses or malware can experience a myriad of different issues, one of which is the hard drive no longer being recognized. Installing an antivirus/antimalware program and scanning your computer should help. |
| 💿 Bad sector | Bad sectors are when certain clusters in your hard drive space are no longer functioning correctly, barring them from any reading or writing activity. This could be due to a factory defect or regular wear and tear and may be the cause of your “file system not recognized” issue. Running the CHKDSK tool and defragmenting or formatting the drive are a few ways you may be able to repair file system issues like these. |
| 🔗 Compatibility issue | You may be facing the “the volume does not contain a recognized file system” error simply because the hard drive is utilizing a file system that’s unsupported by the computer’s OS. Windows machines, for example, are incapable of accessing hard drives with certain Mac or Linux file systems, such as Ext4, XFS, or APFS. |
| 🗂️ File system damage | There are a number of things that can lead to a damaged/corrupted file system. This includes the abrupt removal of the storage device, sudden power interruption, OS crashes, and more. To fix a hard drive with a damaged/corrupted file system, you can try using the Windows Error Checking tool or formatting the device. |
| 💾 Incorrect disk format | Errors stating that your file system is not recognized may appear if you format a hard drive but the process isn’t completed properly. For cases like these, it’s best to reformat the drive and make sure it’s completed successfully. |
| 🔨 Physical damage | A hard drive that’s sustained significant physical damage can be susceptible to a wide range of issues, including becoming unrecognized by an OS. |
| ↔ Incorrect disconnection | Disconnecting a hard drive from your computer before it’s ready may cause a “file system not recognized” error. This generally leads to corruption, meaning you should use the Windows Error Checking tool or CHKSDSK to see if it can sort things out. |
| 🔌 Incorrect system shutdown | Similar to incorrect disconnection, suddenly turning off your computer before it’s prepared can cause corruption in your hard drive. If the “volume does not contain a recognized file system” error is appearing after this happens, try using the Error Checking tool or CHKDSK to see if it can repair the problem. |
How to Recover Data from a Volume with an Unrecognized File System
In case you’re trying to recover data from a hard drive with an unrecognized file system, there are certain top-notch data recovery programs capable of scanning storage devices that are inaccessible by your computer’s OS.
Keep in mind that it’s highly recommended that you create a byte-to-byte backup of the drive and recover data from there instead, provided that the volume isn’t too large. This helps prevent further data loss.
Note: If you’re experiencing the error on a removable drive, like a USB stick or an external hard drive, you can try connecting it to the device on which it last worked properly. The problem may have occurred due to the difference in file systems.
Disk Drill is a superb rescue option that boasts exceptional recovery rates, speedy drive scans, and UI designed for both newbies and tech-savvy users. It works with a wide range of devices and file systems and can recover pretty much any file format. It even has a built-in byte-to-byte backup feature, so you’ll be killing two birds with one stone.
To top it all off, you can install the app’s trial version to try out all of its features and recover up to 500 MB (for Windows users) without spending a dime.
Here’s how to recover data from a volume with an unrecognized file system using Disk Drill:
- To get started, download the Disk Drill setup file from the Cleverfiles website and install it on your computer.
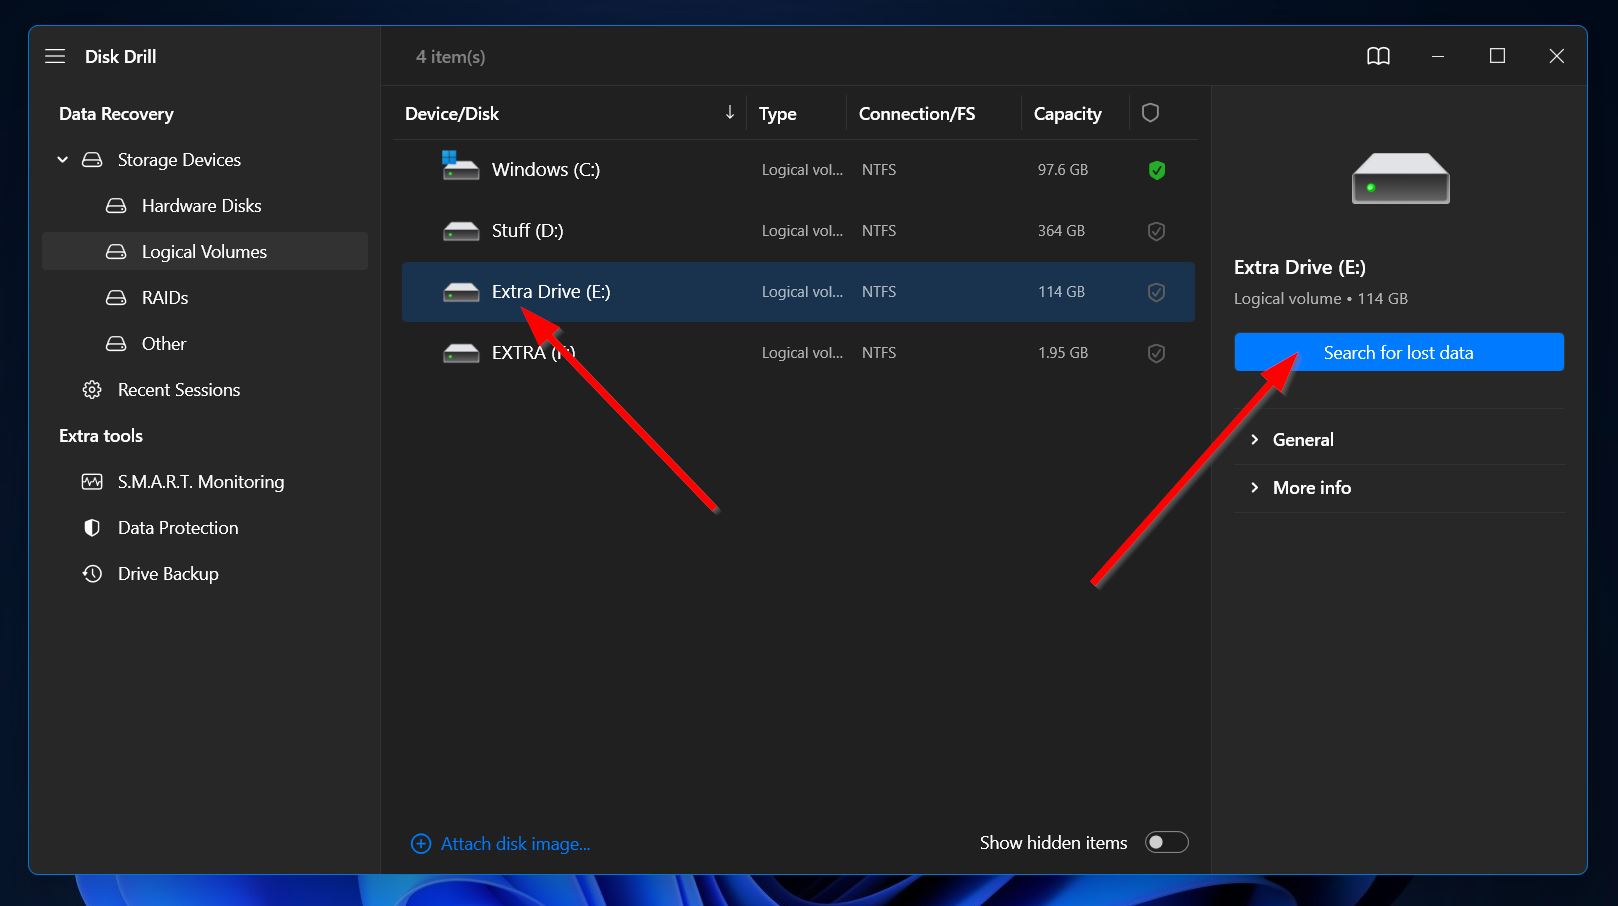
- Launch the program, then select your storage medium from the list of available devices and click the “Search for lost data” button.
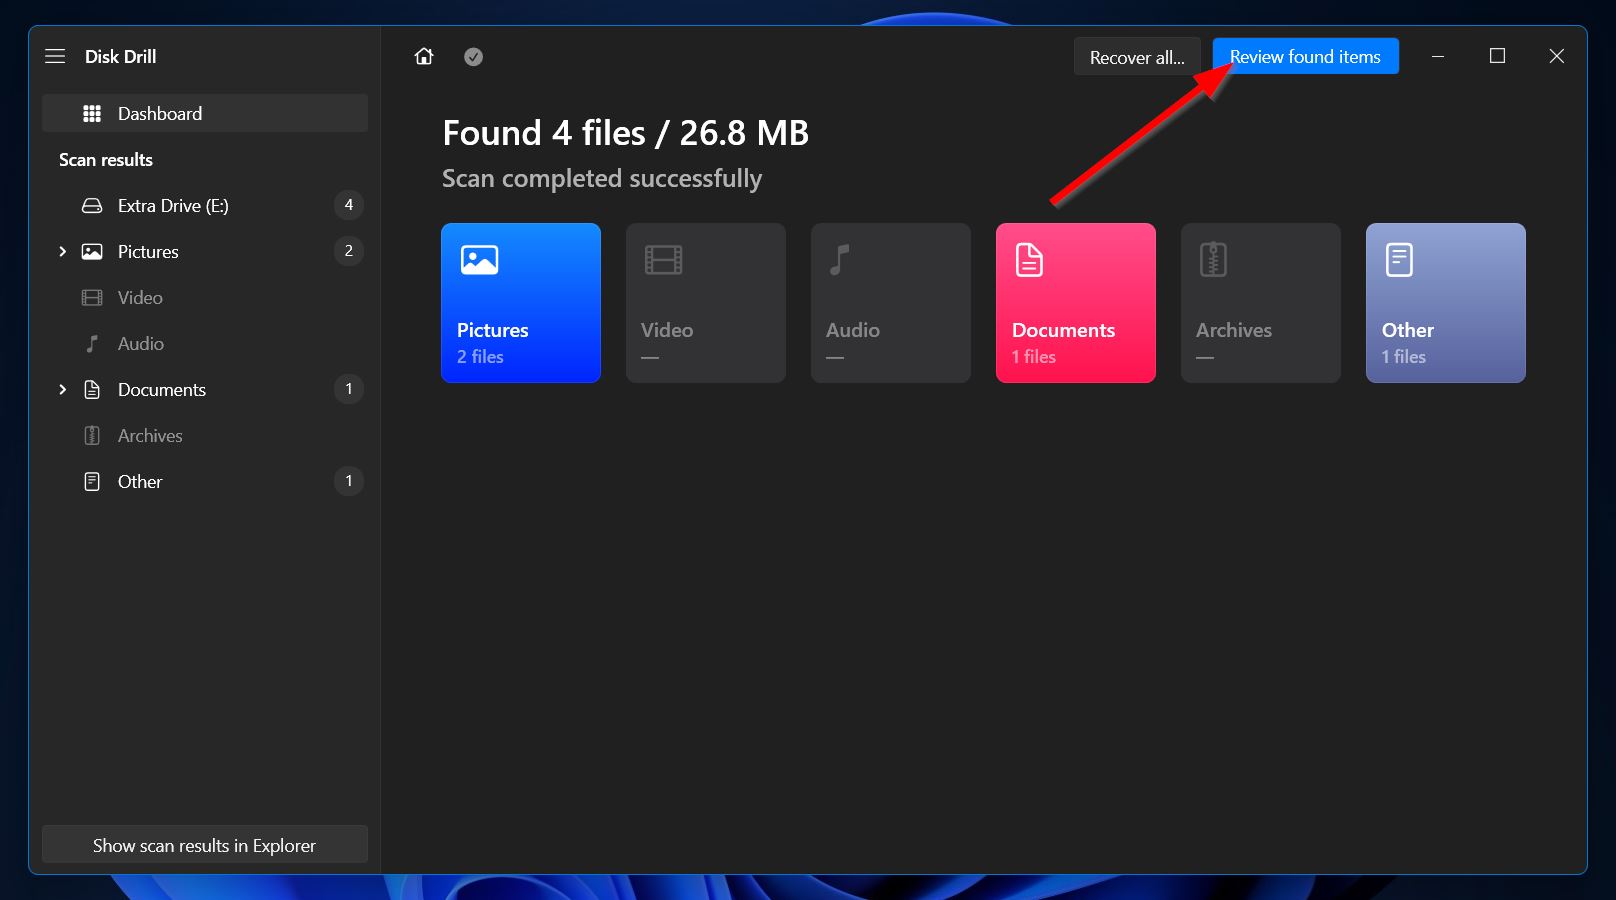
- After that, the scanning process will now begin. While waiting, you can click the “Review found files” button in the top-right corner to jump to the results section as the scan continues. Otherwise, just wait for the process to complete and click the same button to proceed.
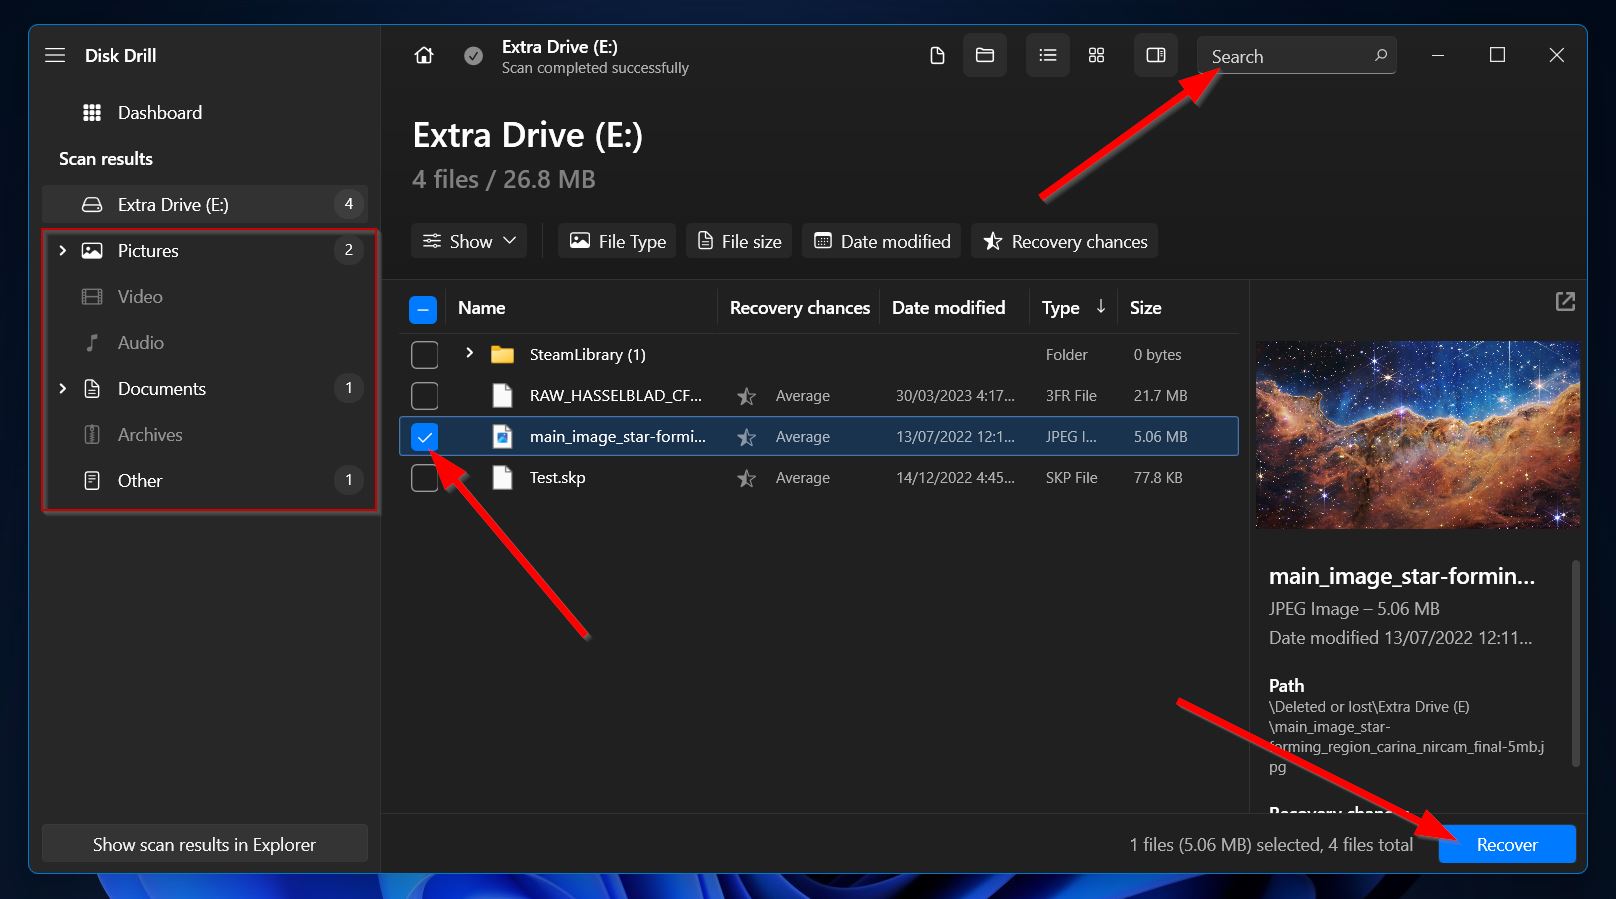
- In the results section, you should see a category labeled “Existing.” This contains a folder with all the files currently available on your storage device. Mark the folder by ticking the checkbox next to the folder name, then hit the “Recover” button in the bottom-right corner. If you’re looking to recover specific files, you can browse the folder and just select the files you need instead.
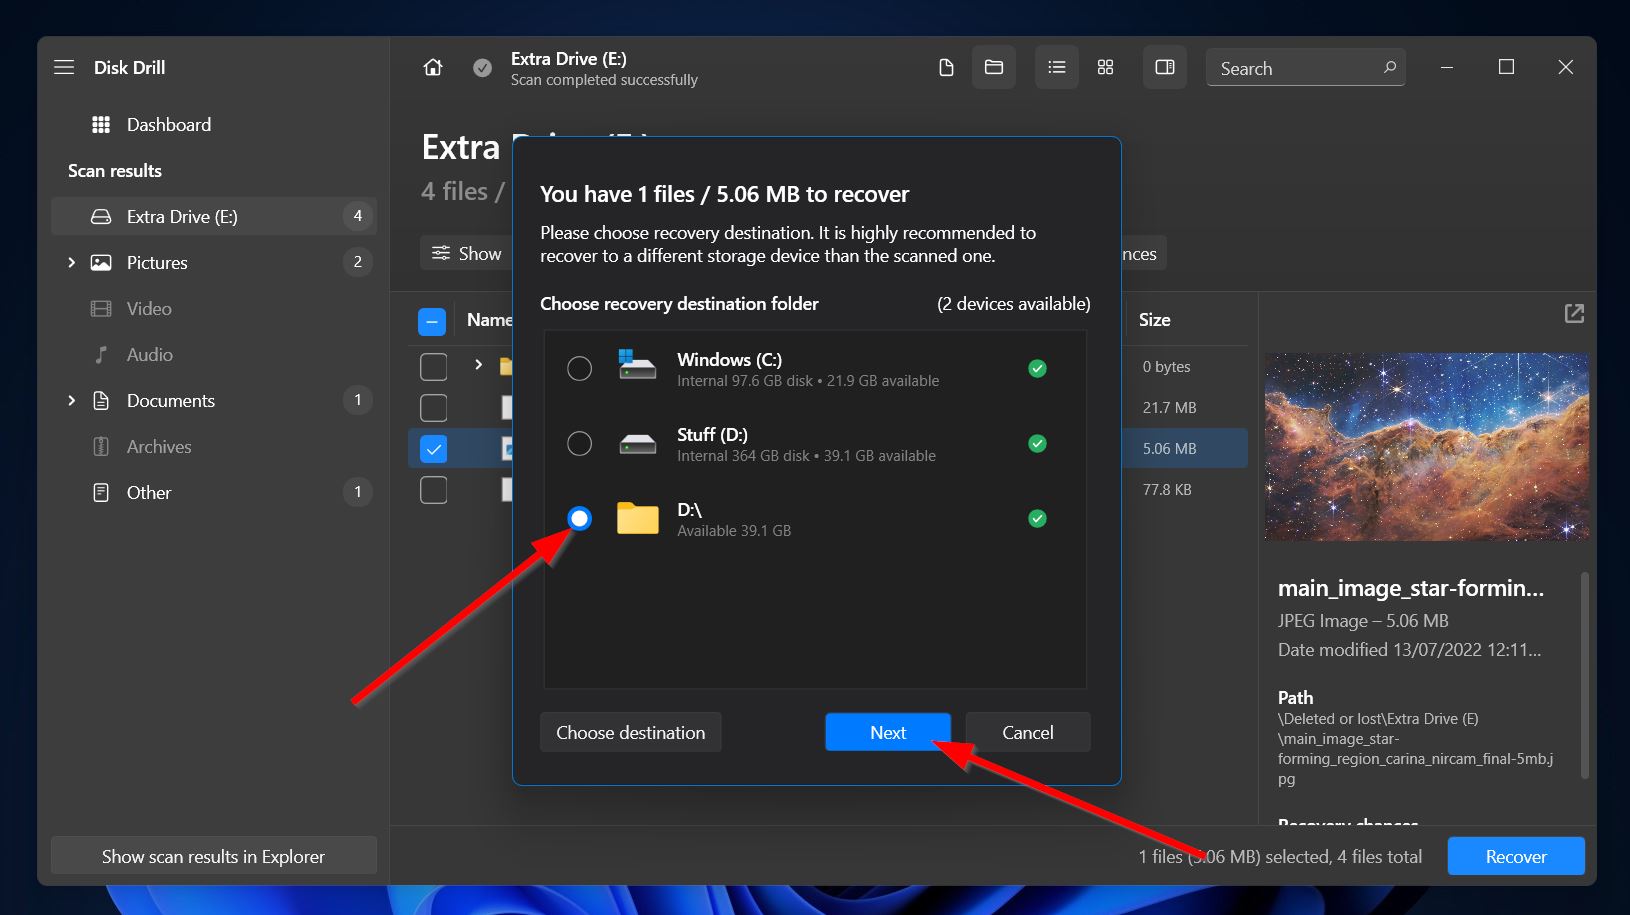
- Upon clicking, you’ll see a small pop-up appear where you’ll need to enter the location folder for your recovered files. Of course, this has to be on a different drive than the one you’re recovering from. Click “Next” when you’re ready.
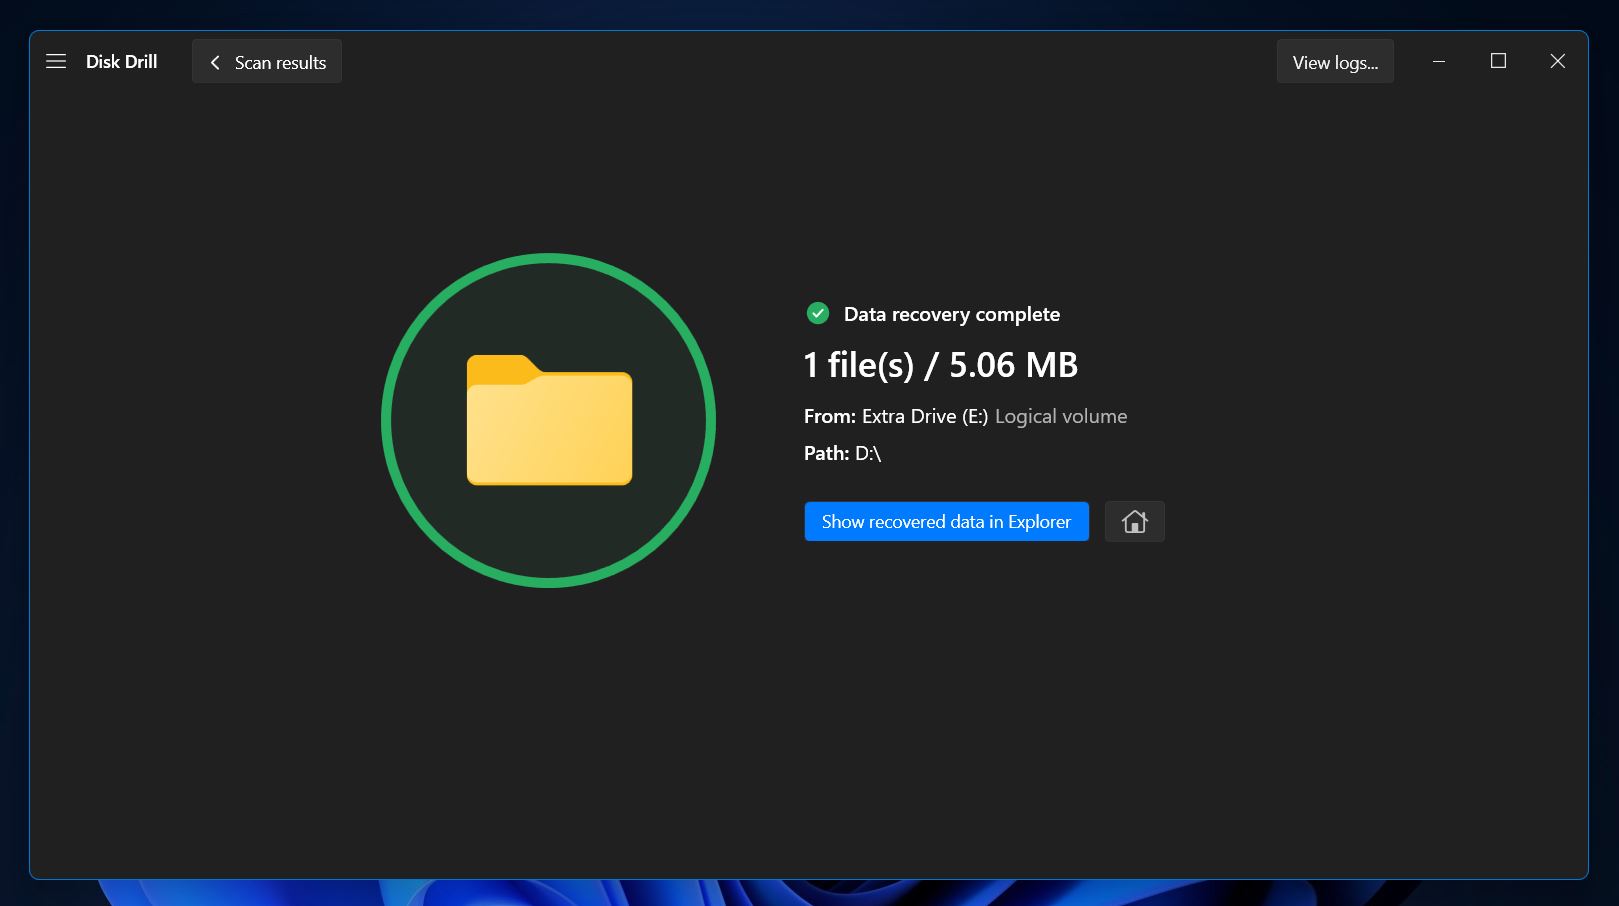
- Disk Drill will now do its best to restore your chosen files. Once successful, you’ll see a completion screen with a button labeled “Show recovered data in Explorer.” Clicking it will take you right to your rescued files.
How to Fix Volume Doesn’t Contain a Recognized File System Error
There are several fixes you can try in order to repair the “volume does not contain a recognized file system” error plaguing your hard drive. This ranges from utilizing built-in OS tools or third-party solutions to formatting your drive in extreme cases.
Method 1: Scan Your Drive for Errors
Windows has a built-in error-checking tool that scans a storage device for bad sectors and file system issues, then tries to correct them. Here’s how to use it:
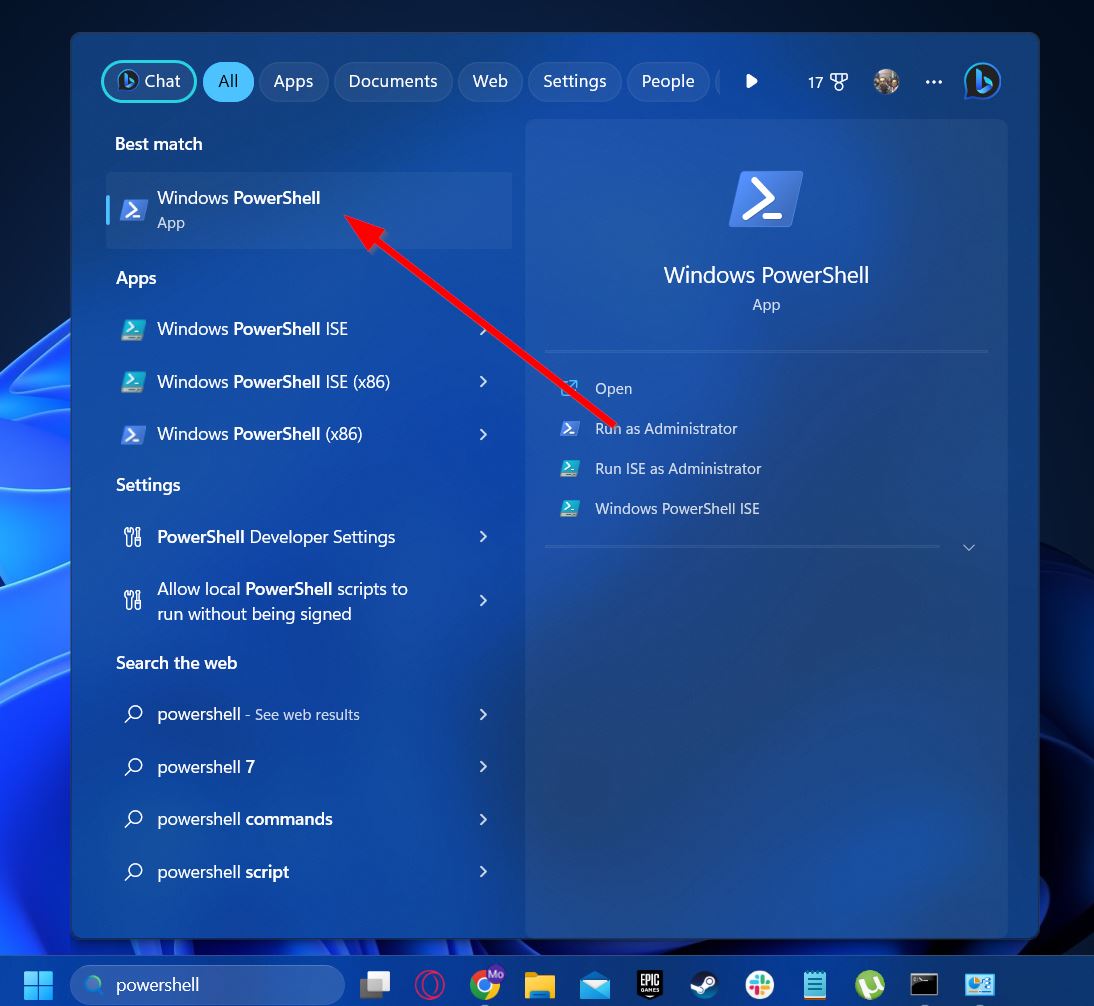
- First, type “PowerShell” into the Windows taskbar search feature, then right-click the top option and select “Run as administrator.”
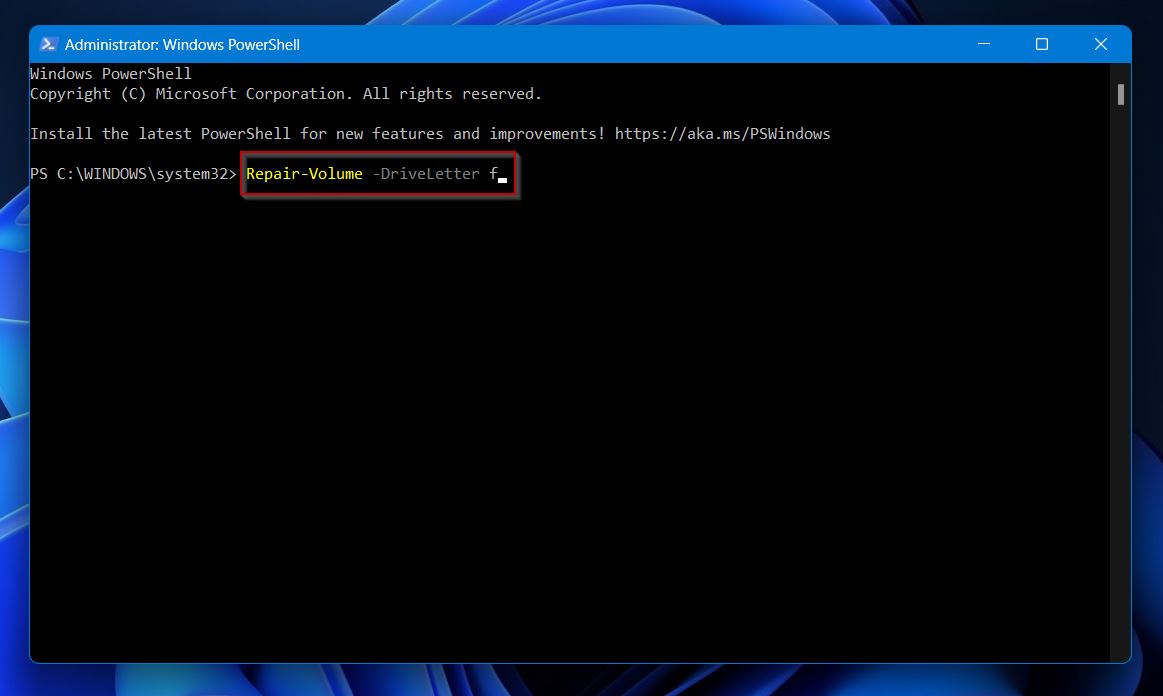
- Next, type in the command “Repair-Volume -DriveLetter (the letter of your hard drive).” In our case, we’re scanning the “f” drive, so our command would be “Repair-Volume -DriveLetter f.” Hit “Enter” to execute the command.
- The error-checking tool will now scan the drive for errors and repair them if possible.
Method 2: Run a SFC Command in CMD
SFC stands for “System File Checker” and is a Windows tool that repairs corrupted system files that may be causing the “file system not recognized” error. To run a SFC Command in CMD, simply follow the steps below:
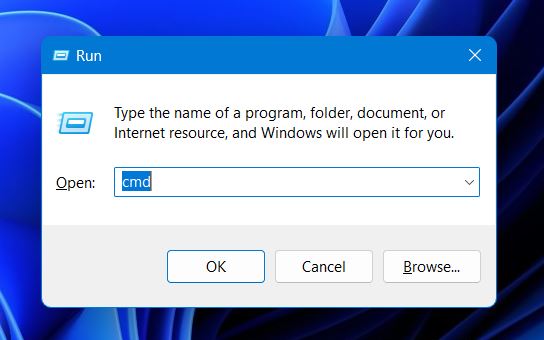
- To get started, press the “Windows” + “R” keys simultaneously to bring up the “Run” command, then type “cmd” and press “Ctrl” + “Shift” + “Enter.”
- Next, type in “sfc /scannow” and hit “Enter.”
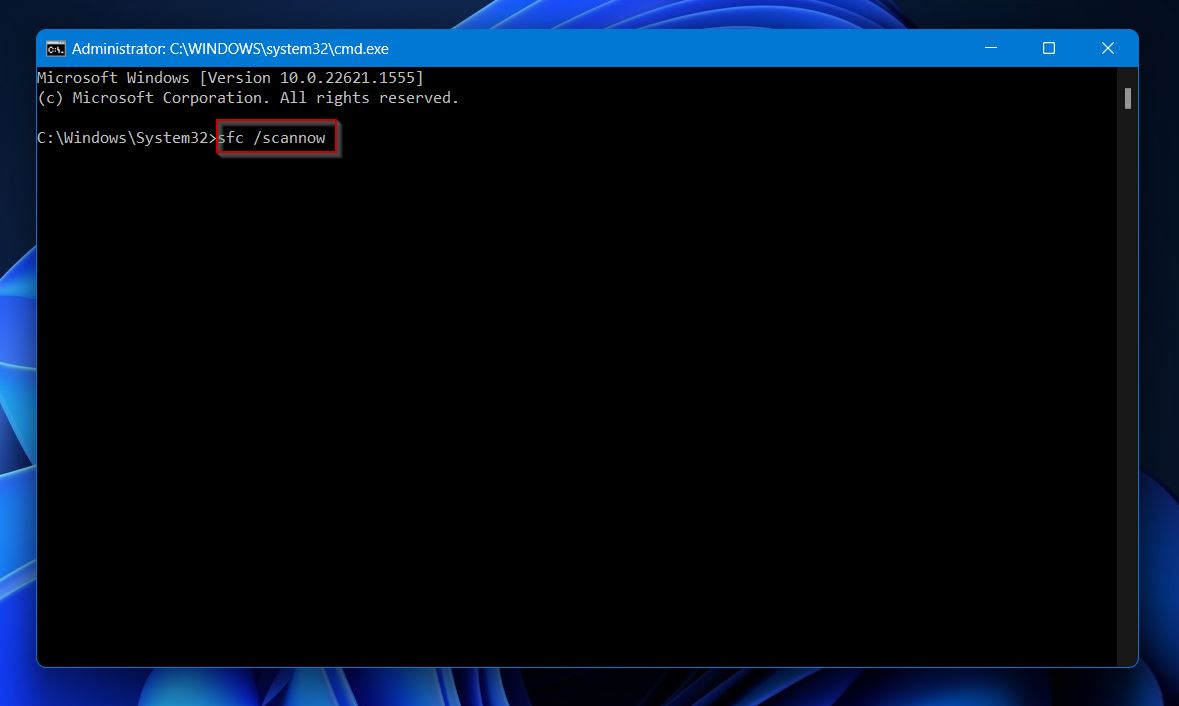
- SFC will start scanning your operating system for errors and will repair any corrupted files.
Method 3: Fix Drive Corruption with CHKDSK Command
CHKDSK (Check Disk) is another built-in Windows tool that scans the integrity of a hard drive and tries to fix any system issues that it uncovers, including disc volume errors and bad sectors. Using this tool might just repair the “volume does not contain a recognized file system” error plaguing your hard drive.
Here’s a quick and easy step-by-step guide on how to launch CHKDSK:
- First, press the “Windows” + “R” keys simultaneously to bring up the “Run” command, then type “cmd” and press “Ctrl” + “Shift” + “Enter.”
- Then, type in “chkdsk” followed by the drive letter of the affected volume.
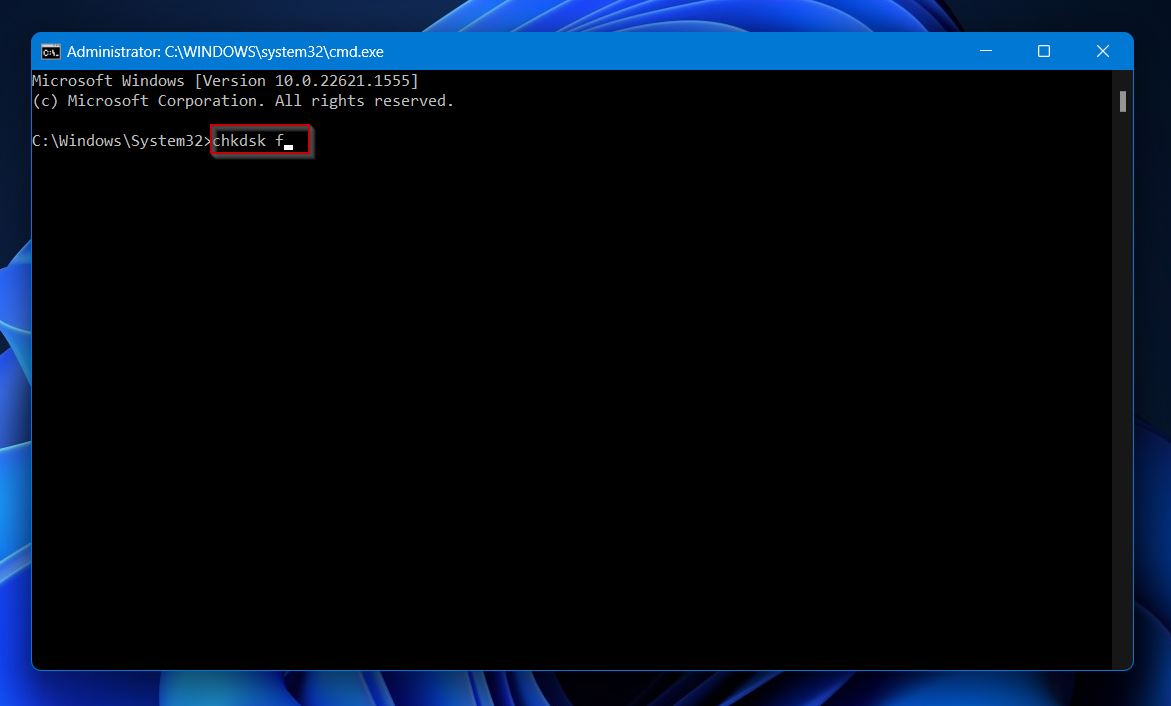
- After that, CHKDSK will now scan the device and repair any issues within its scope.
Method 4: Update a Disk Driver
Outdated or corrupted drives are another reason you may be encountering the unrecognized file system error. If so, you’ll want to update your disk driver. Here’s how to do it:
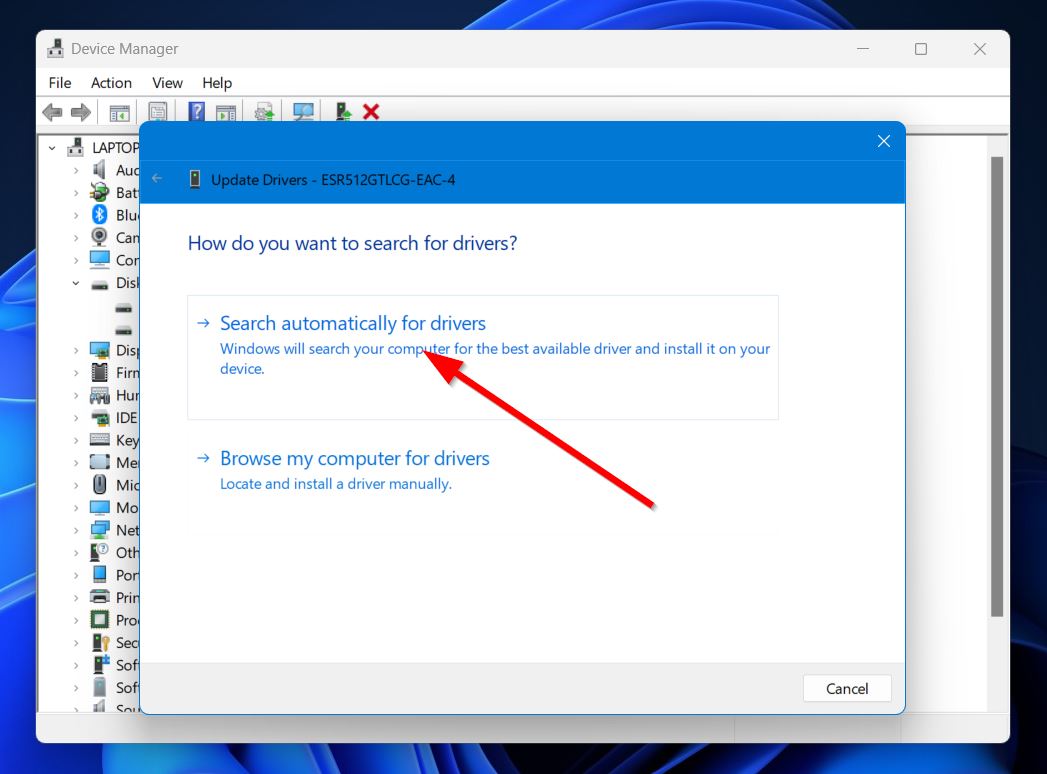
- To get started, type “device manager” into the Windows taskbar search feature and select the top option.

- Next, expand the “Disk Drives” category, then right-click the affected device and select the “Update driver” option.
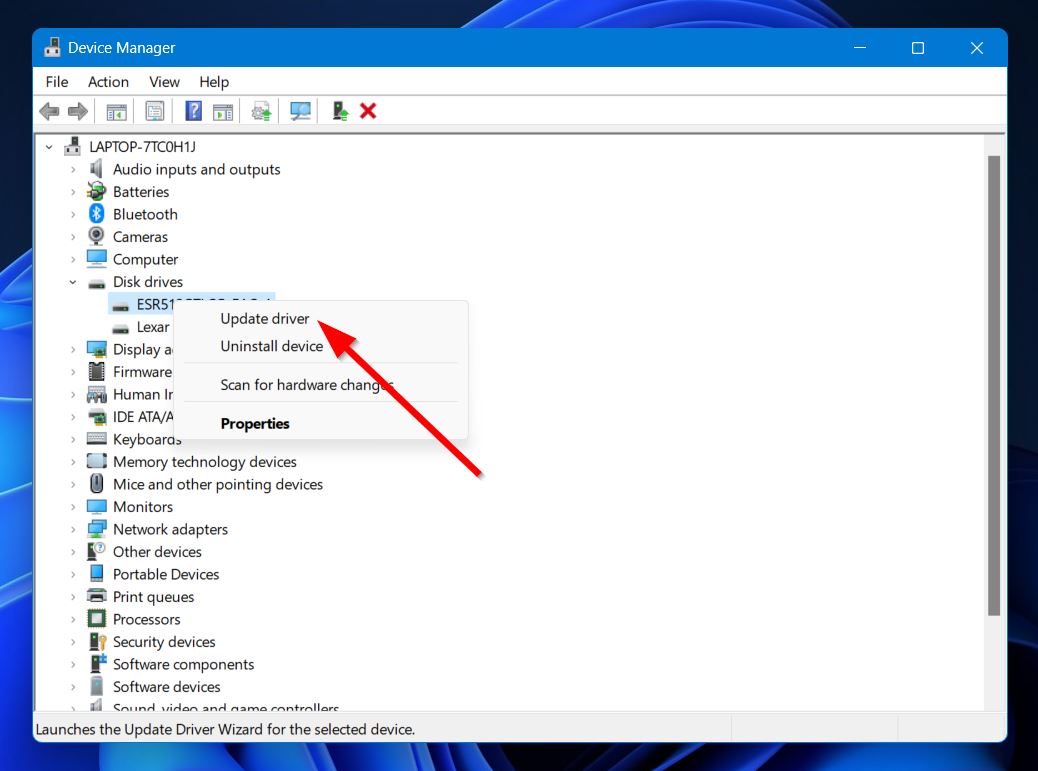
- Choose the “Search automatically for drivers” option, and Windows will take care of the rest.
Method 5: Scan the Drive with Antivirus Software
The “volume does not contain a recognized file system” is one of many different issues that could be caused by a virus or malware attack on your computer. To be safe, it’s best that you install a trusted antivirus program on your PC and perform a thorough scan to weed out any viruses wreaking havoc. Microsoft Defender is an example of a well-known antivirus program that comes packaged with the brand’s operating systems from Windows XP onward.
Method 6: Use Windows Restore Point Feature
System Restore is a Windows feature that allows users to revert their operating system files and settings to a prior backup point. This is often used to restore a computer to working order after it has encountered serious issues. In this case, your computer will be returned to a state when the error wasn’t occurring.
Keep in mind that a restore point must be available in order to run this feature. To utilize Windows System Restore, simply follow the steps outlined below:
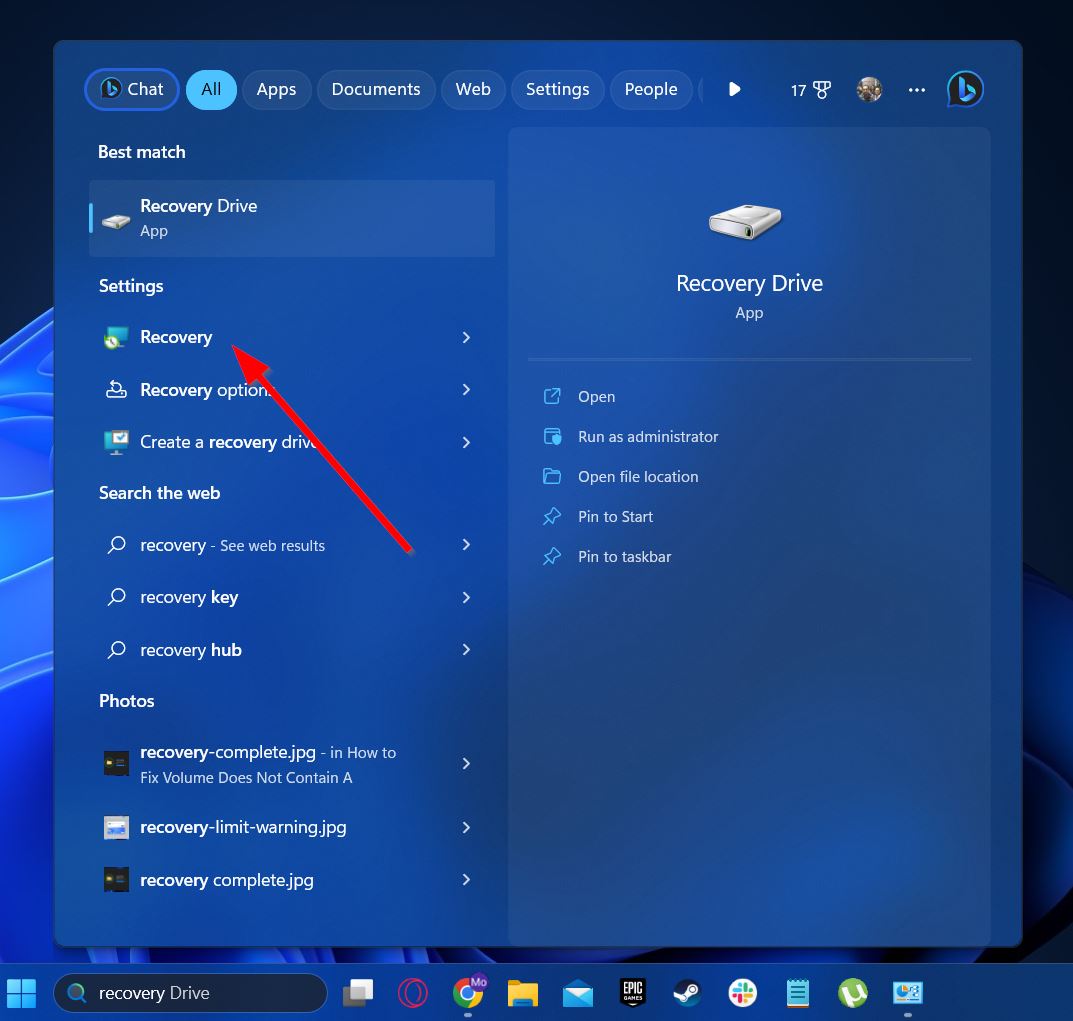
- Type “recovery” into the Windows taskbar search feature and select the option with the same name.
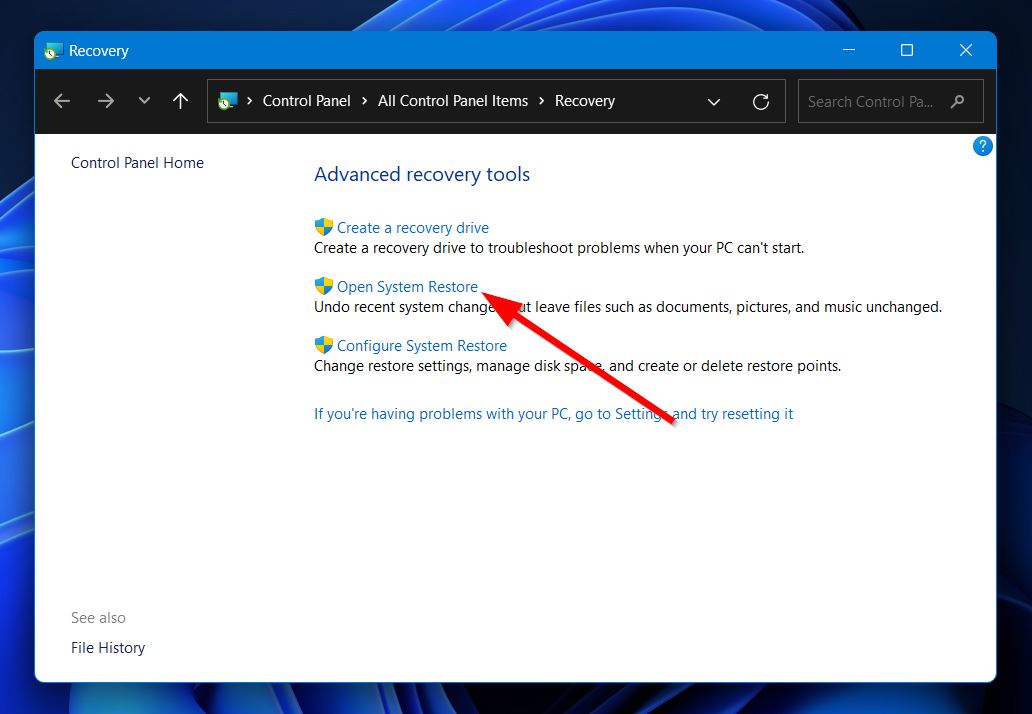
- Next, click “Open System Restore.”
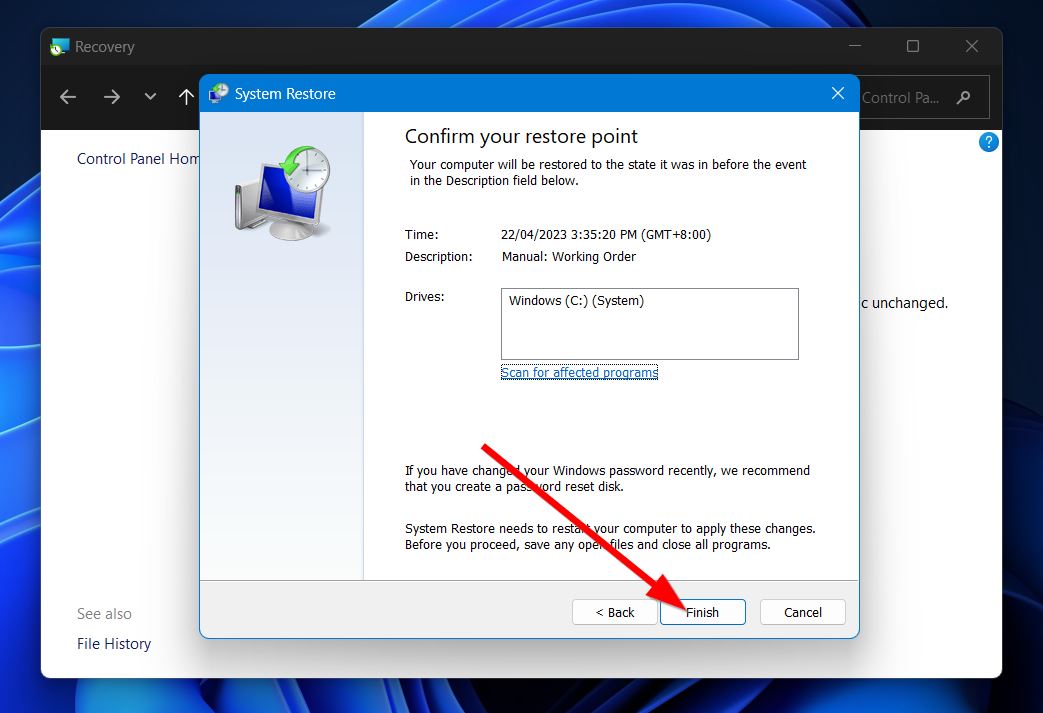
- Click “Next” on the first screen, then select an appropriate restore point from the list. From there, click “Next” to proceed.
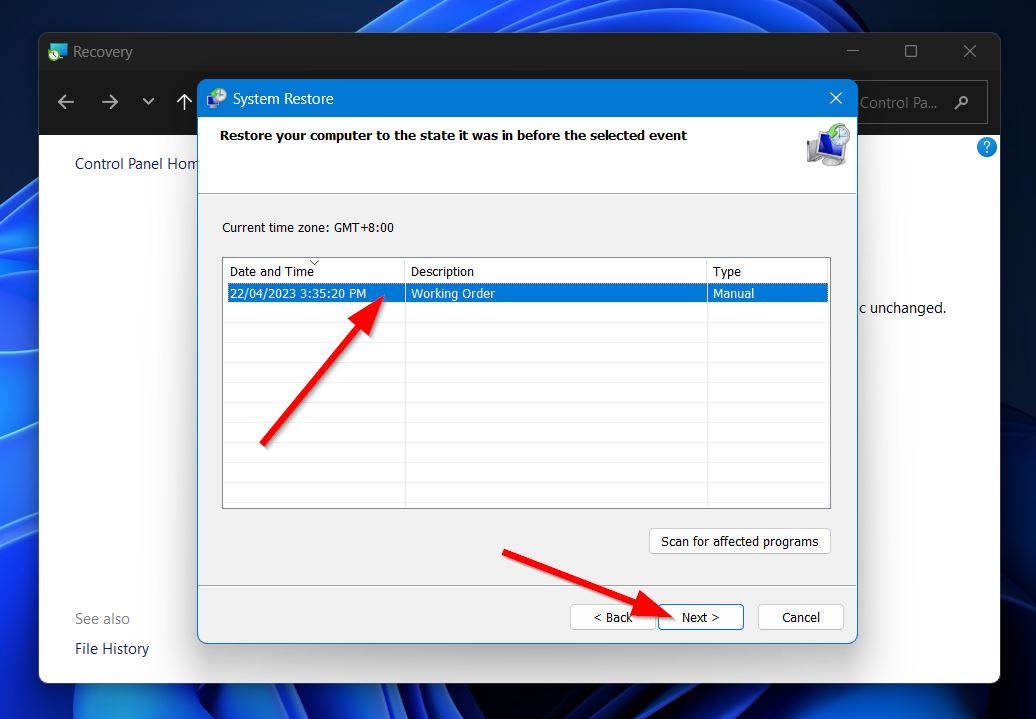
- After that, hit “Finish,” and System Restore will proceed to restore your OS using the selected restore point.
Method 7: Format a Volume of Drive with an Error
If all else fails, your best bet is to format the disk that’s encountering the “file system not recognized” error. To perform the format using the Windows Diskpart tool, here’s what you can do:
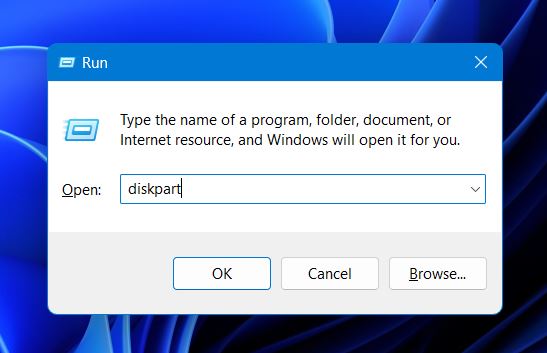
- Press the “Windows” + “R” keys simultaneously to bring up the “Run” command, then type “diskpart” and press “Ctrl” + “Shift” + “Enter.”
- Next, type “list disk” and press “Enter.”
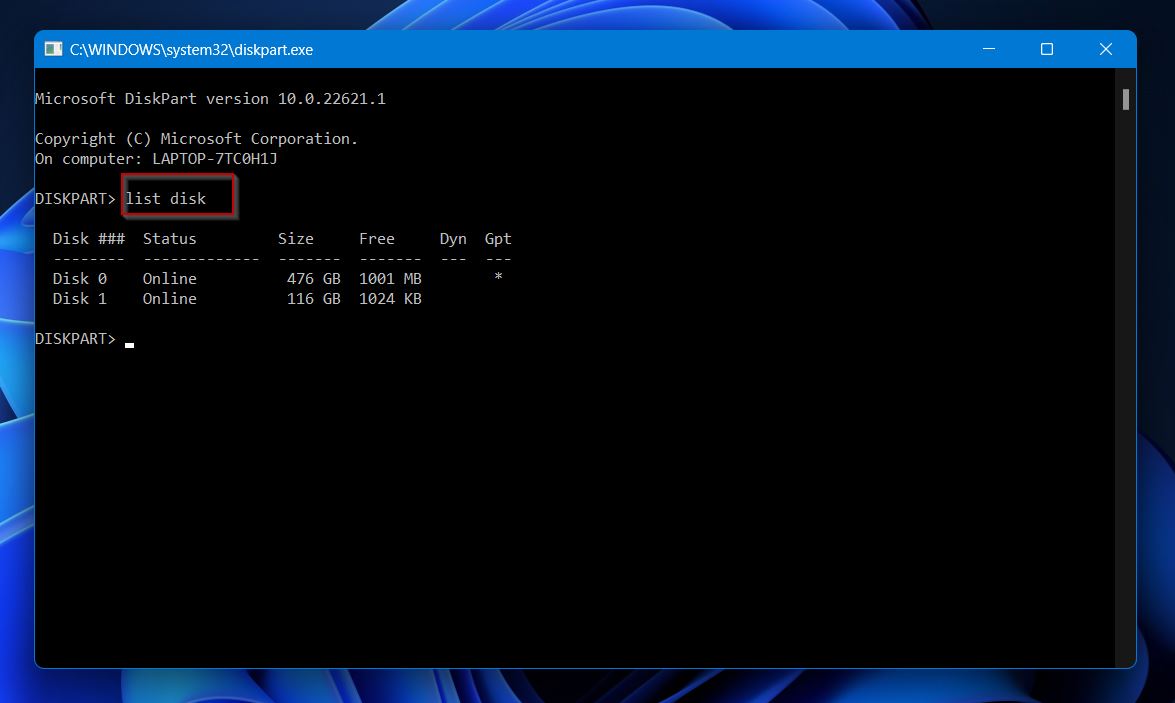
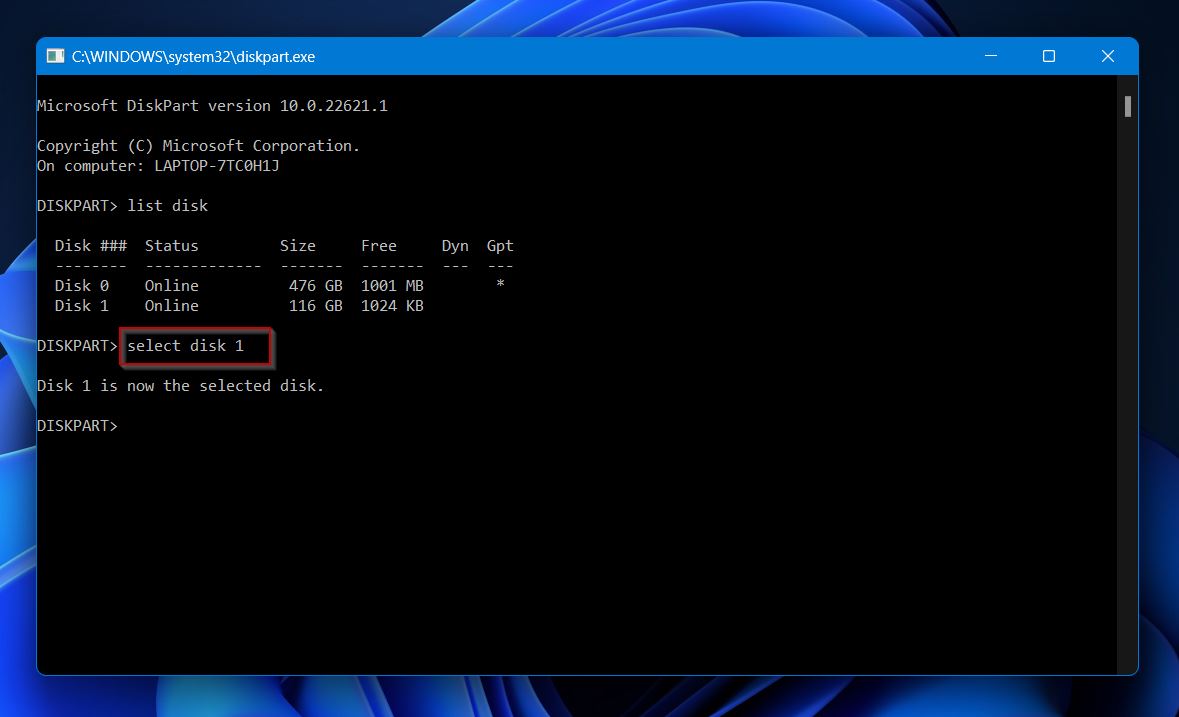
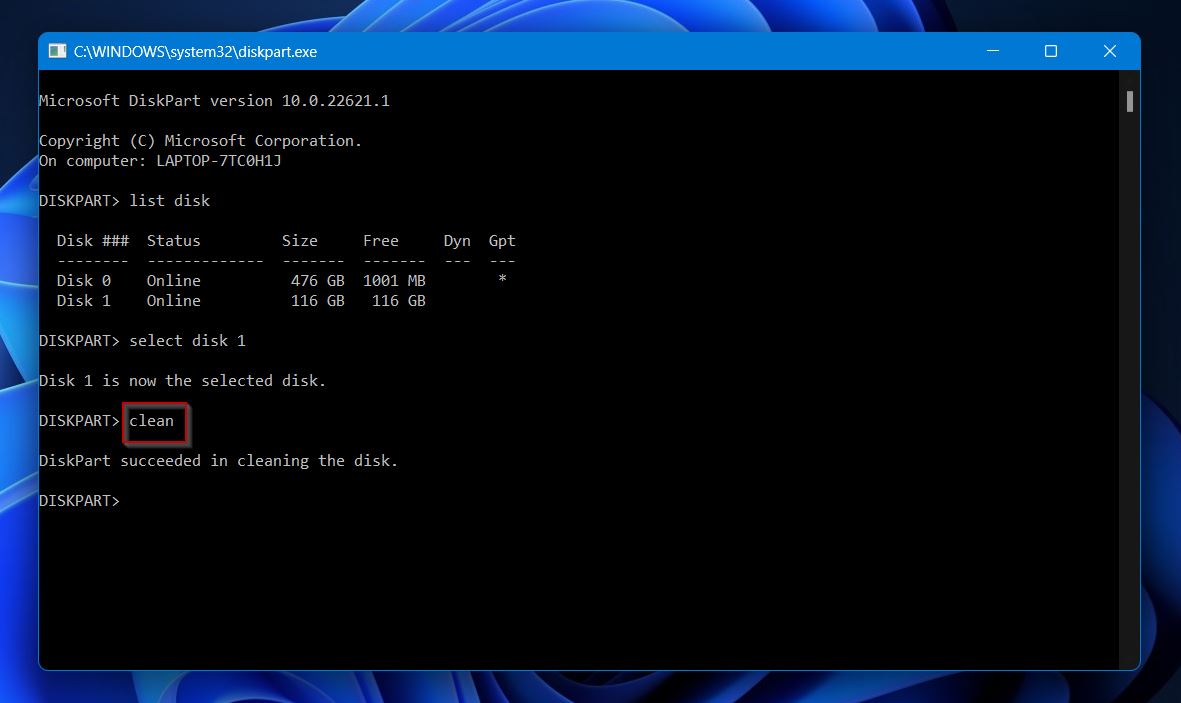
- Upon clicking, you’ll see a list of all the storage disks connected to your computer. You can differentiate between them by recognizing their storage capacities. Type “select disk” followed by the corresponding number assigned to the hard disk with the unrecognized file system error. A sample command would be “select disk 1”. Once you’re ready, press the “Enter” key.
- Type in “clean” and hit “Enter.”
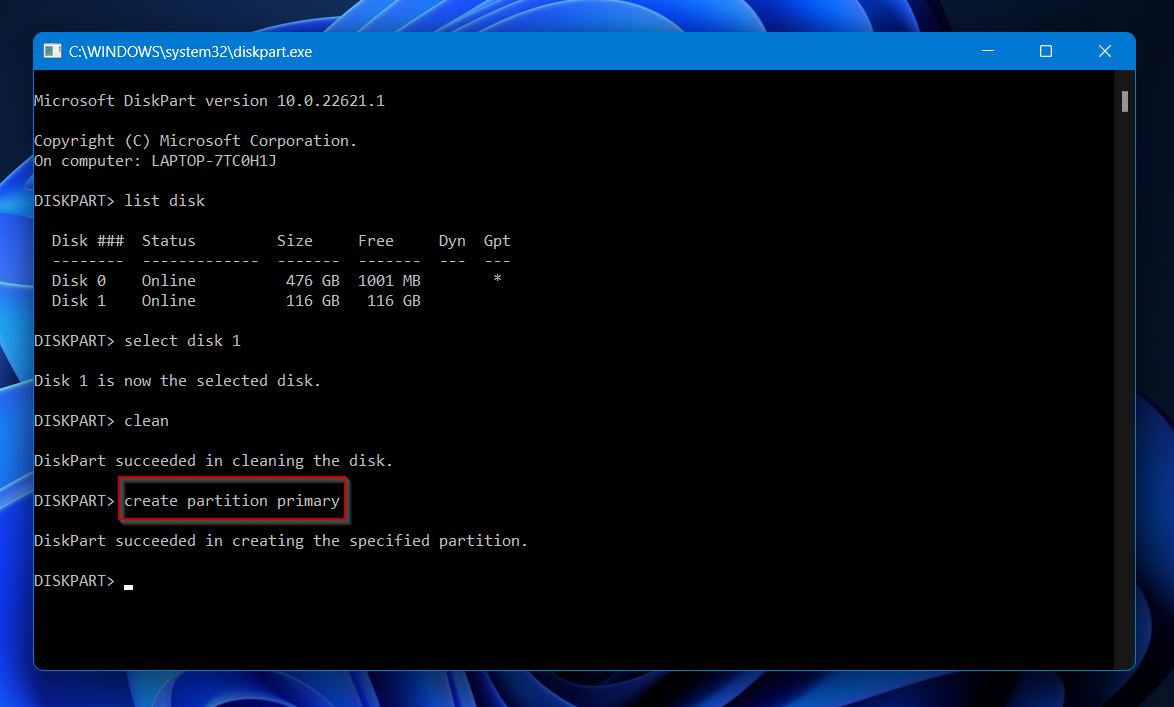
- Next, type in “create partition primary” and press the “Enter” key.
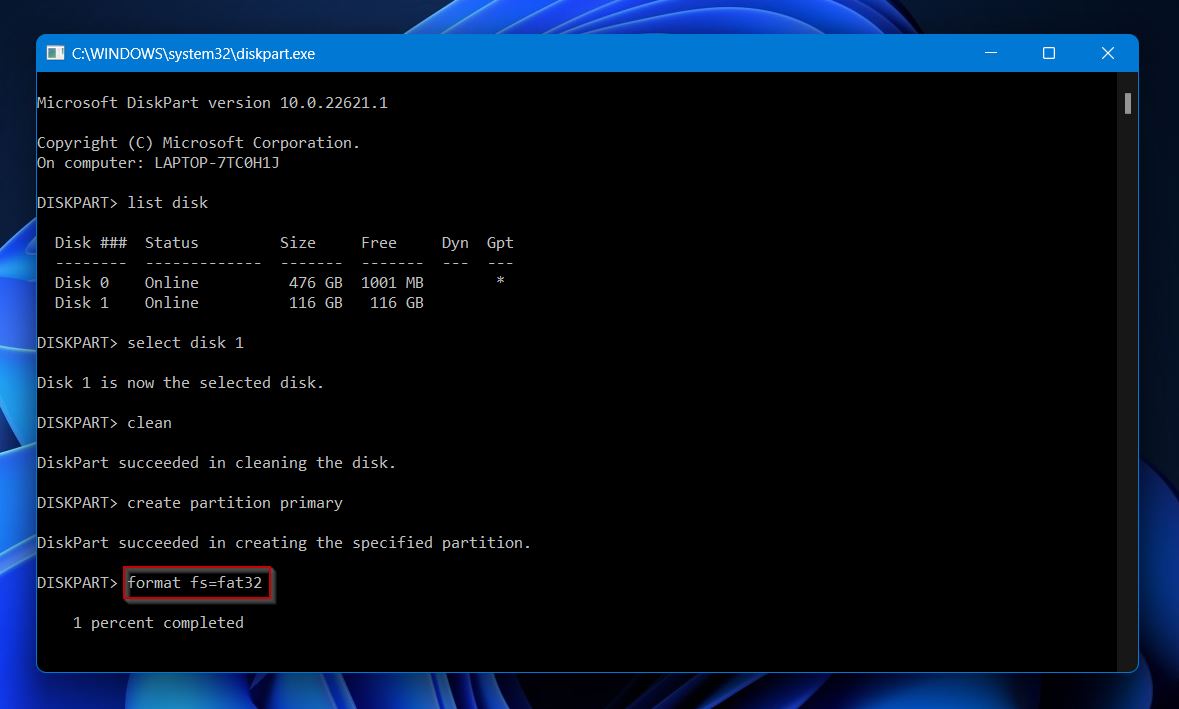
- After that, type in “Format fs=” followed by the file system you want your storage device to have. This can be NTFS, FAT32, exFAT, etc. Hit “Enter” when you’re ready. From there, just assign a drive letter to your volume by typing “assign=” followed by the drive letter of your choice. Press “Enter” to finalize the process.
FAQs
- FAT 12/16/32
- exFAT
- NTFS
- HPFS (Only supported by Windows NT versions 3.1, 3.5, and 3.51)
- Windows error-checking tool
- Windows SFC tool
- Disk driver update
- Antivirus scan
- Windows System Restore
- Storage device format


