 The CHKDSK command is frequently used to detect and resolve any issues on storage drives. However, many users notice that some of their files go missing after a CHKDSK scan. Does CHKDSK delete these files, and is there a way to get them back? We’ll answer these questions in our detailed guide below.
Table of Contents
What Is the CHKDSK Command?
CHKDSK (Check Disk) is a command-line tool used to find and potentially resolve logical issues on your storage drive, primarily bad sectors. You can run CHKDSK using the Command Prompt (chkdsk), or use the limited GUI version called Error checking. Regular CHKDSK scans are helpful in preemptively fixing disk errors that may pop up later and keeping the disk health in check.
CHKDSK works on drives formatted with the NTFS and FAT file systems. You cannot use the command on RAW drives; therefore it’s not helpful in cases where the file system is missing, or corrupted beyond recognition.
It’s common to notice some data loss after running the CHKDSK command, especially if you ran it using the /r parameter. This is essentially collateral damage, because CHKDSK detects bad sectors and marks them as unusable. Any files that were indexed in the bad sectors, or had their fragments stored in the bad sectors, will be deleted, or become inaccessible.
When CHKDSK is underway, you may notice the message “Deleting index entries.” Many users falsely assume this is what’s deleting their files. When CHKDSK displays this message, it’s actually removing the records of these files, as the files themselves are already damaged or missing. Think of your HDD as a book, and the files as chapters then index entries would be the corresponding chapter names in the contents page of the book. If a chapter is missing, its name will be deleted from the contents page.
How to Avoid Losing Data Due to CHKDSK
Ideally, you should back up your drive before running a CHKDSK scan. To achieve this, you can manually copy the files, use Windows File History or Backup & Restore, or create a disk image of the drive in question. You can also use the /f parameter instead of /r to only detect and list issues on your drive, instead of automatically fixing the errors.
If the drive is inaccessible via Windows Explorer, but still shows up in Windows Disk Management, it’s best to use a data recovery program to scan and recover files from the storage drive. There are plenty of such tools available on the web. Choose one that has a good track record, is easy-to-use, and recognizes NTFS and RAW drives.
Disk Drill is one such data recovery program that fits the bill. With its modern, minimalist UI, and advanced data recovery algorithm, it ensures a smooth and successful data recovery procedure. It’ll work with all types of storage drives, with or without a file system (RAW). Additionally, it lets you create a disk image of your drive, which ensures your data remains safe if the drive’s condition worsens. If you don’t wish to create a disk image, you can directly scan the drive using Disk Drill.
Here’s how to avoid losing data due to CHKDSK:
Step 1: Create a Disk Image of the Drive (Optional)
A disk image is a soft copy of your drive, and you can scan it for recoverable data in case the actual drive fails, or incurs more data loss. The only drawback of creating a disk image is that you’ll need a separate drive to store the disk image. The size of the disk image will be equal to the total storage capacity of the disk you wish to scan with CHKDSK.
Here’s how to create a disk image using Disk Drill:
- Download Disk Drill and install it. It’s best to install it on a separate drive and not the one you plan to recover data from.
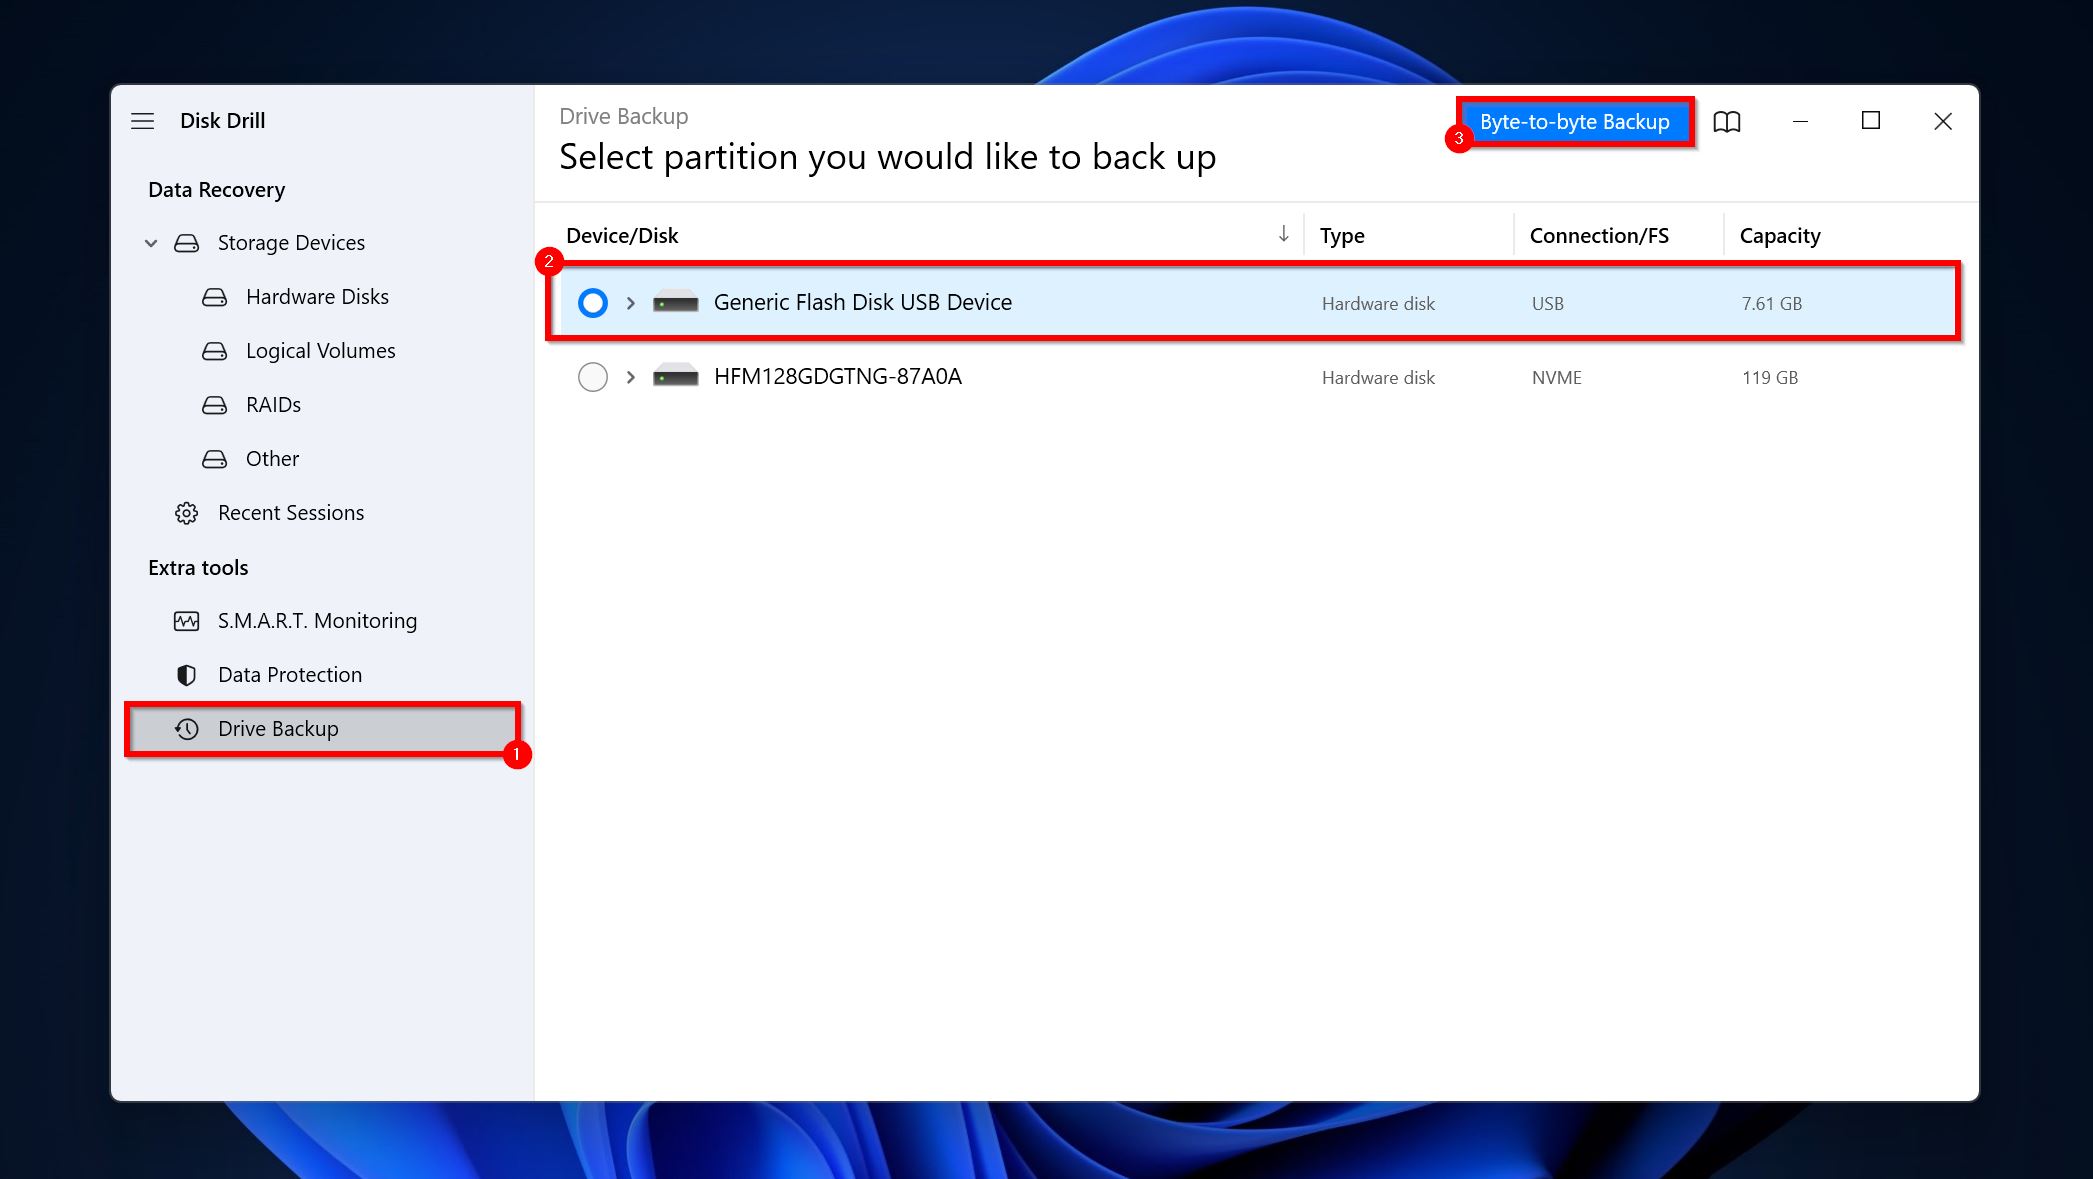
- Open Disk Drill and click on Drive Backup in the left navigation bar.
- Select the drive you intend to scan with CHKDSK and click on Byte-to-byte Backup.
- Choose where you wish to save the disk image and click OK.
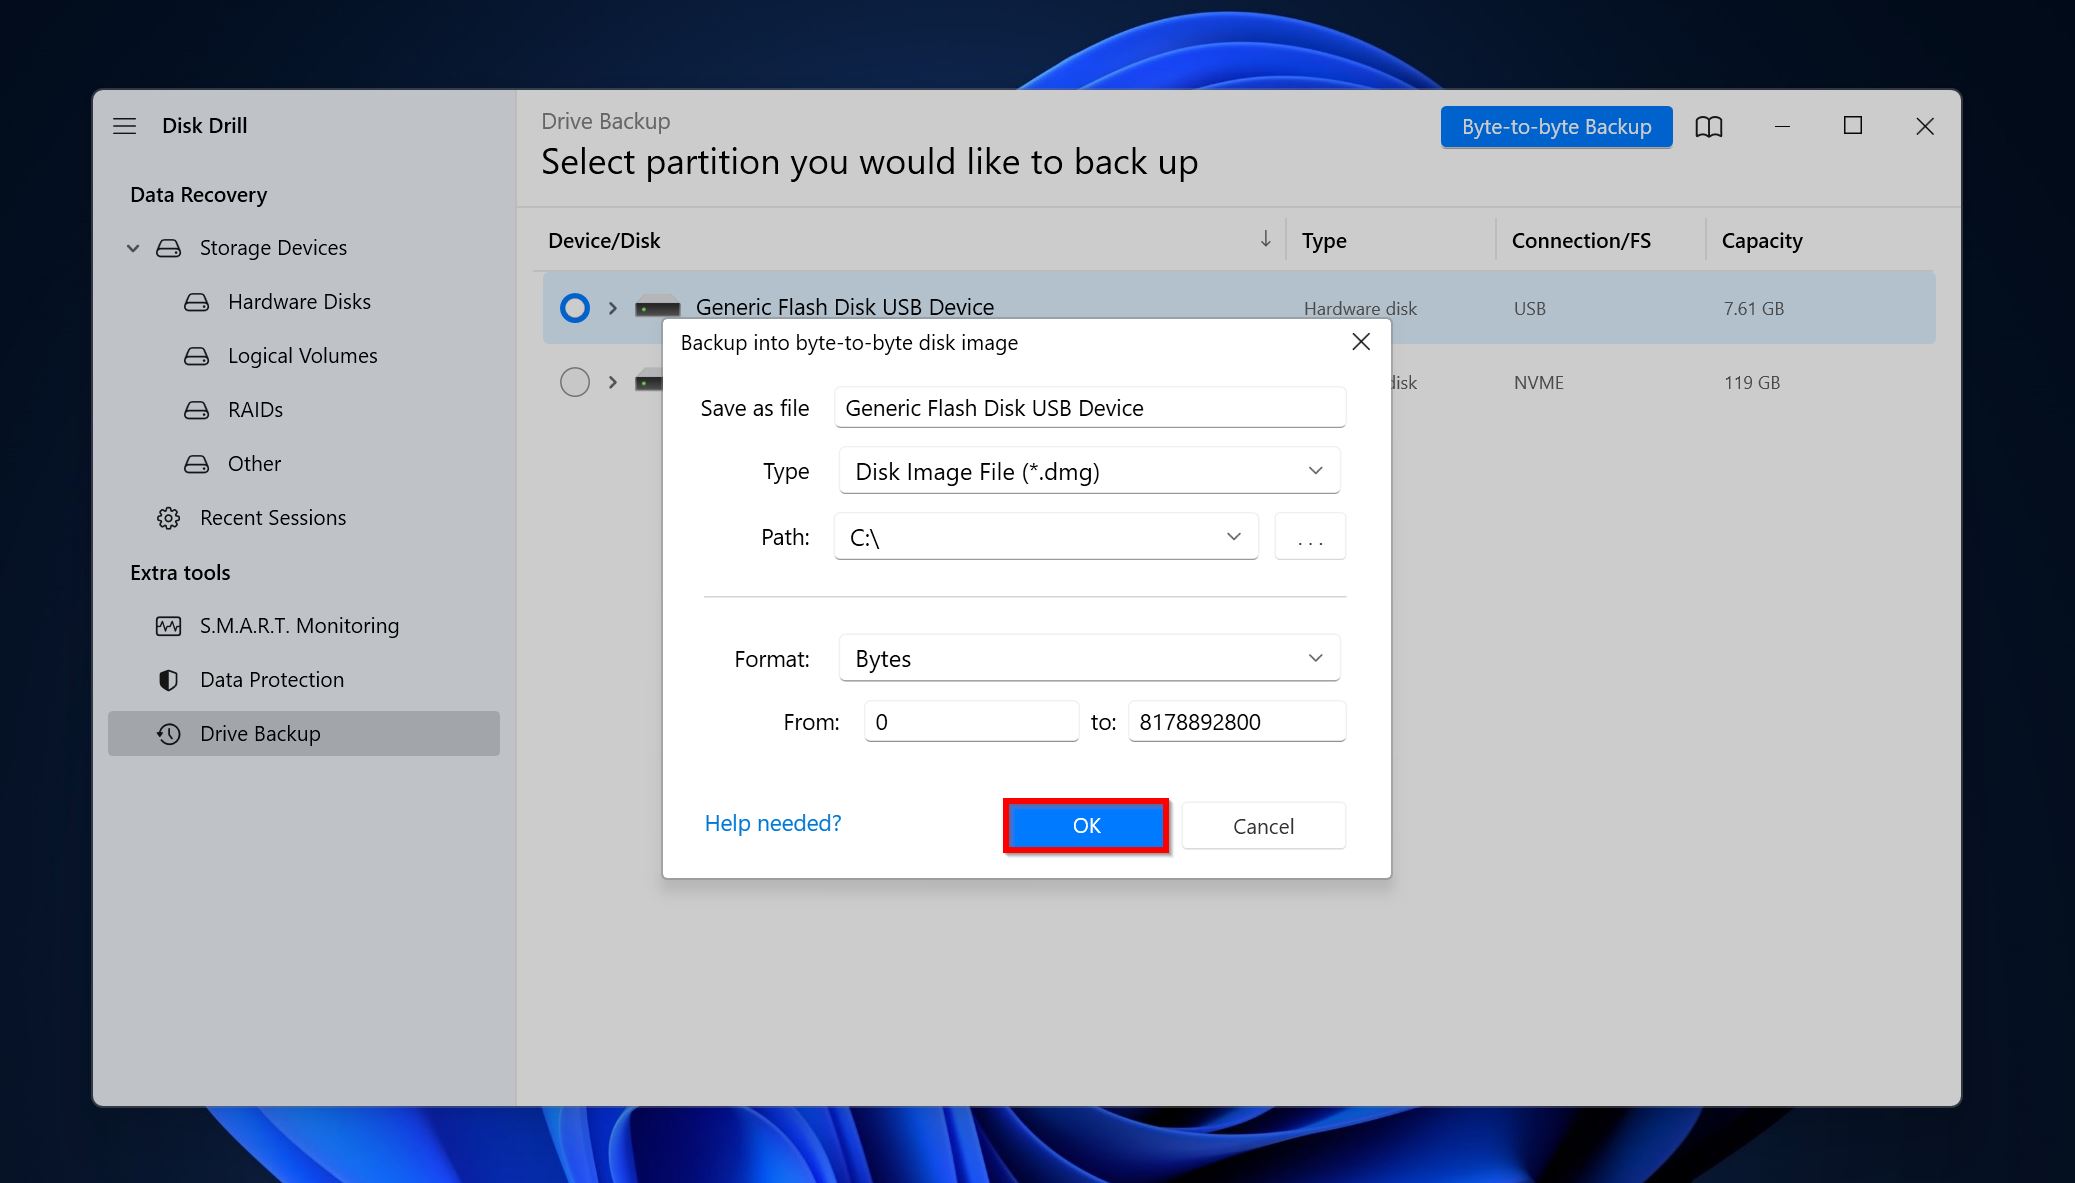
- Disk Drill will create the disk image. This may take a while, depending on the drive’s size.
Step 2: Scan the Disk/Disk Image for Recoverable Data (Required)
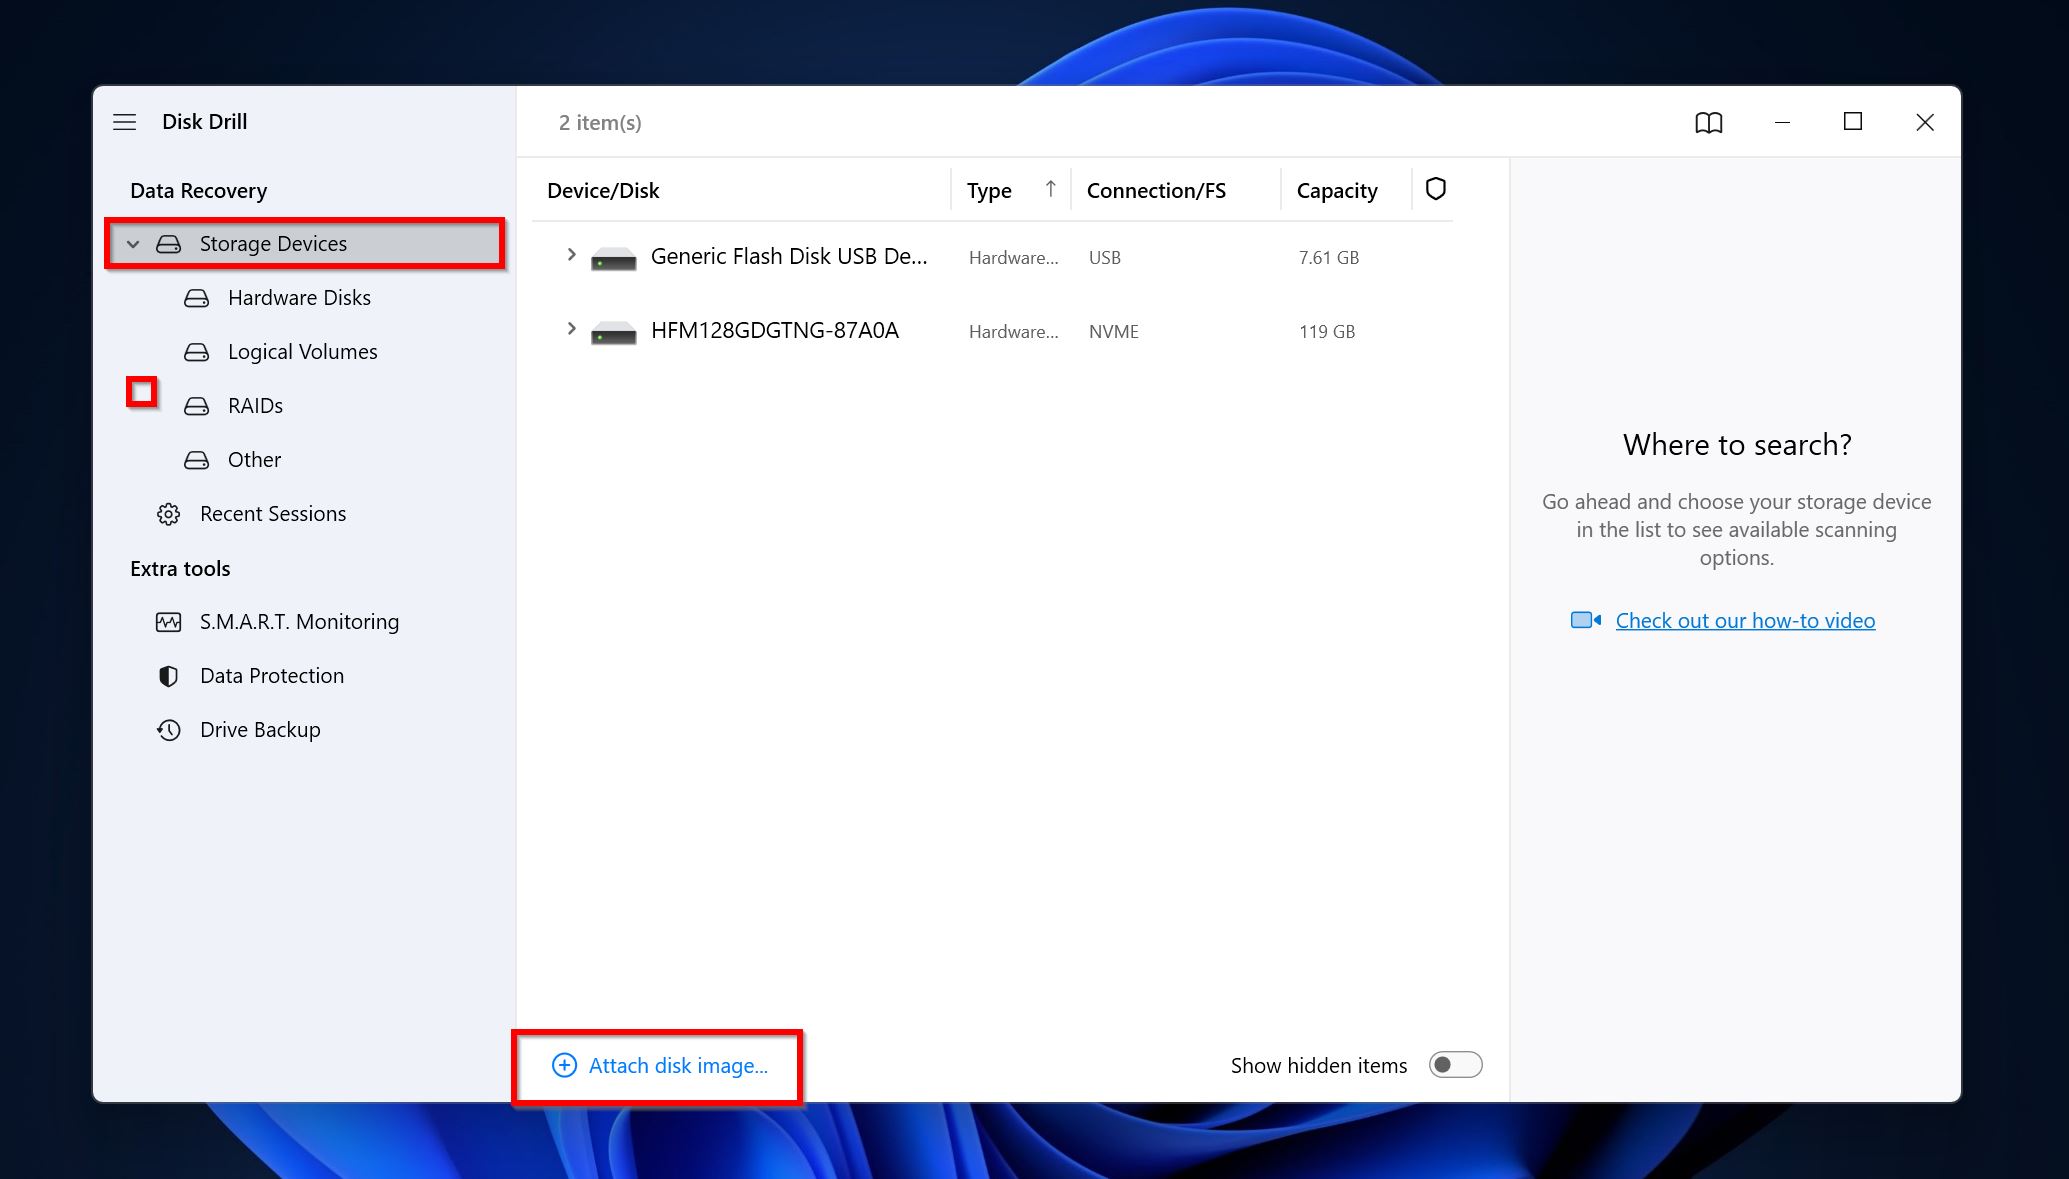
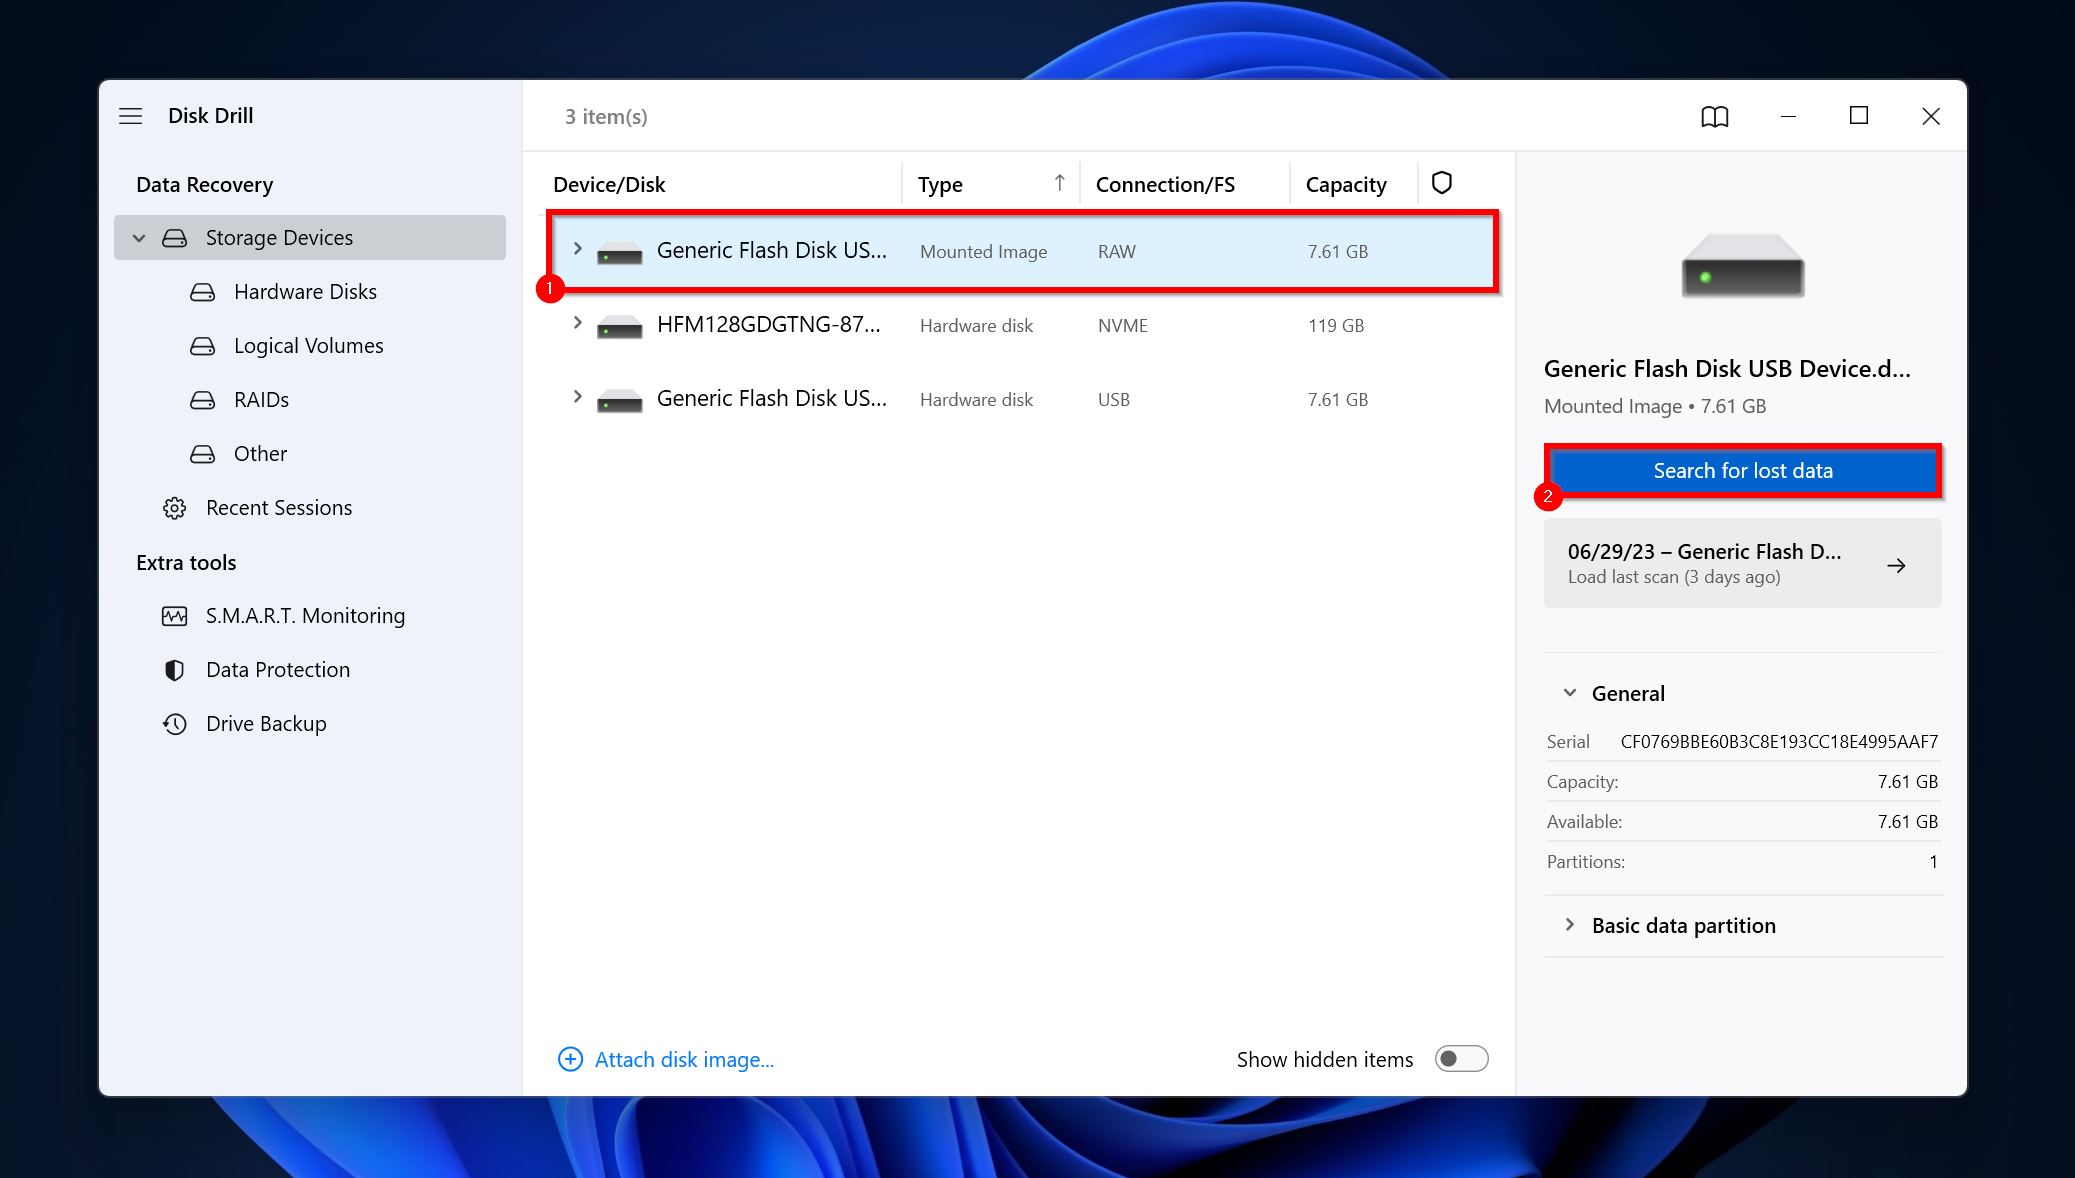
- Open Disk Drill and ensure you’re on the Storage Drives tab. If you created a disk image, click on Attach disk image, browse for the disk image and double-click on it. It’ll be added to the storage device list.
- Select the disk or disk image, and click on Search for lost data.
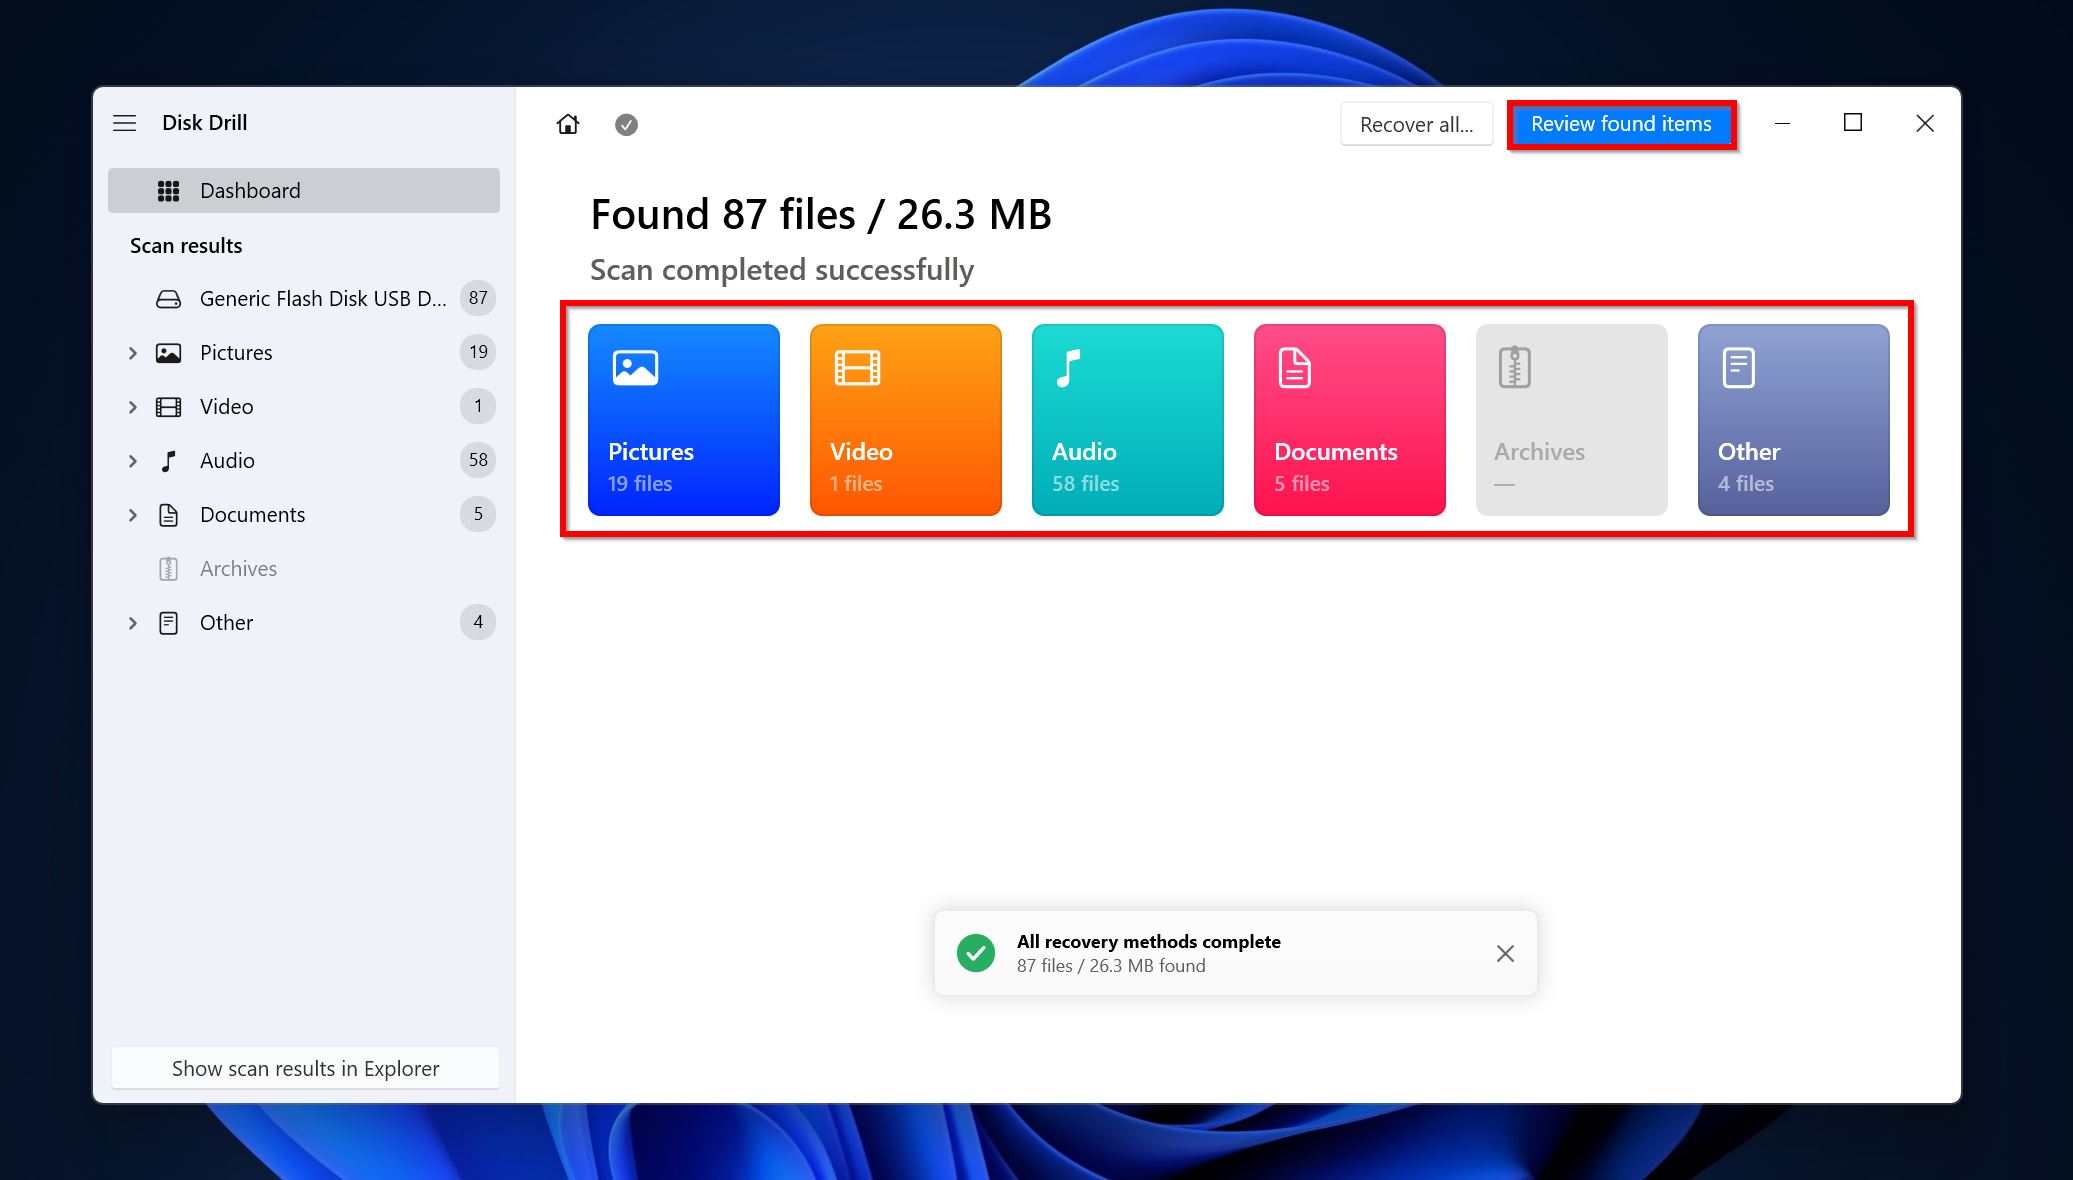
- Click on Review found items to view all recoverable files. If you wish to only view certain file types, click on the relevant file type tiles instead (Pictures, Video, Audio, Documents, Archives, and Other).
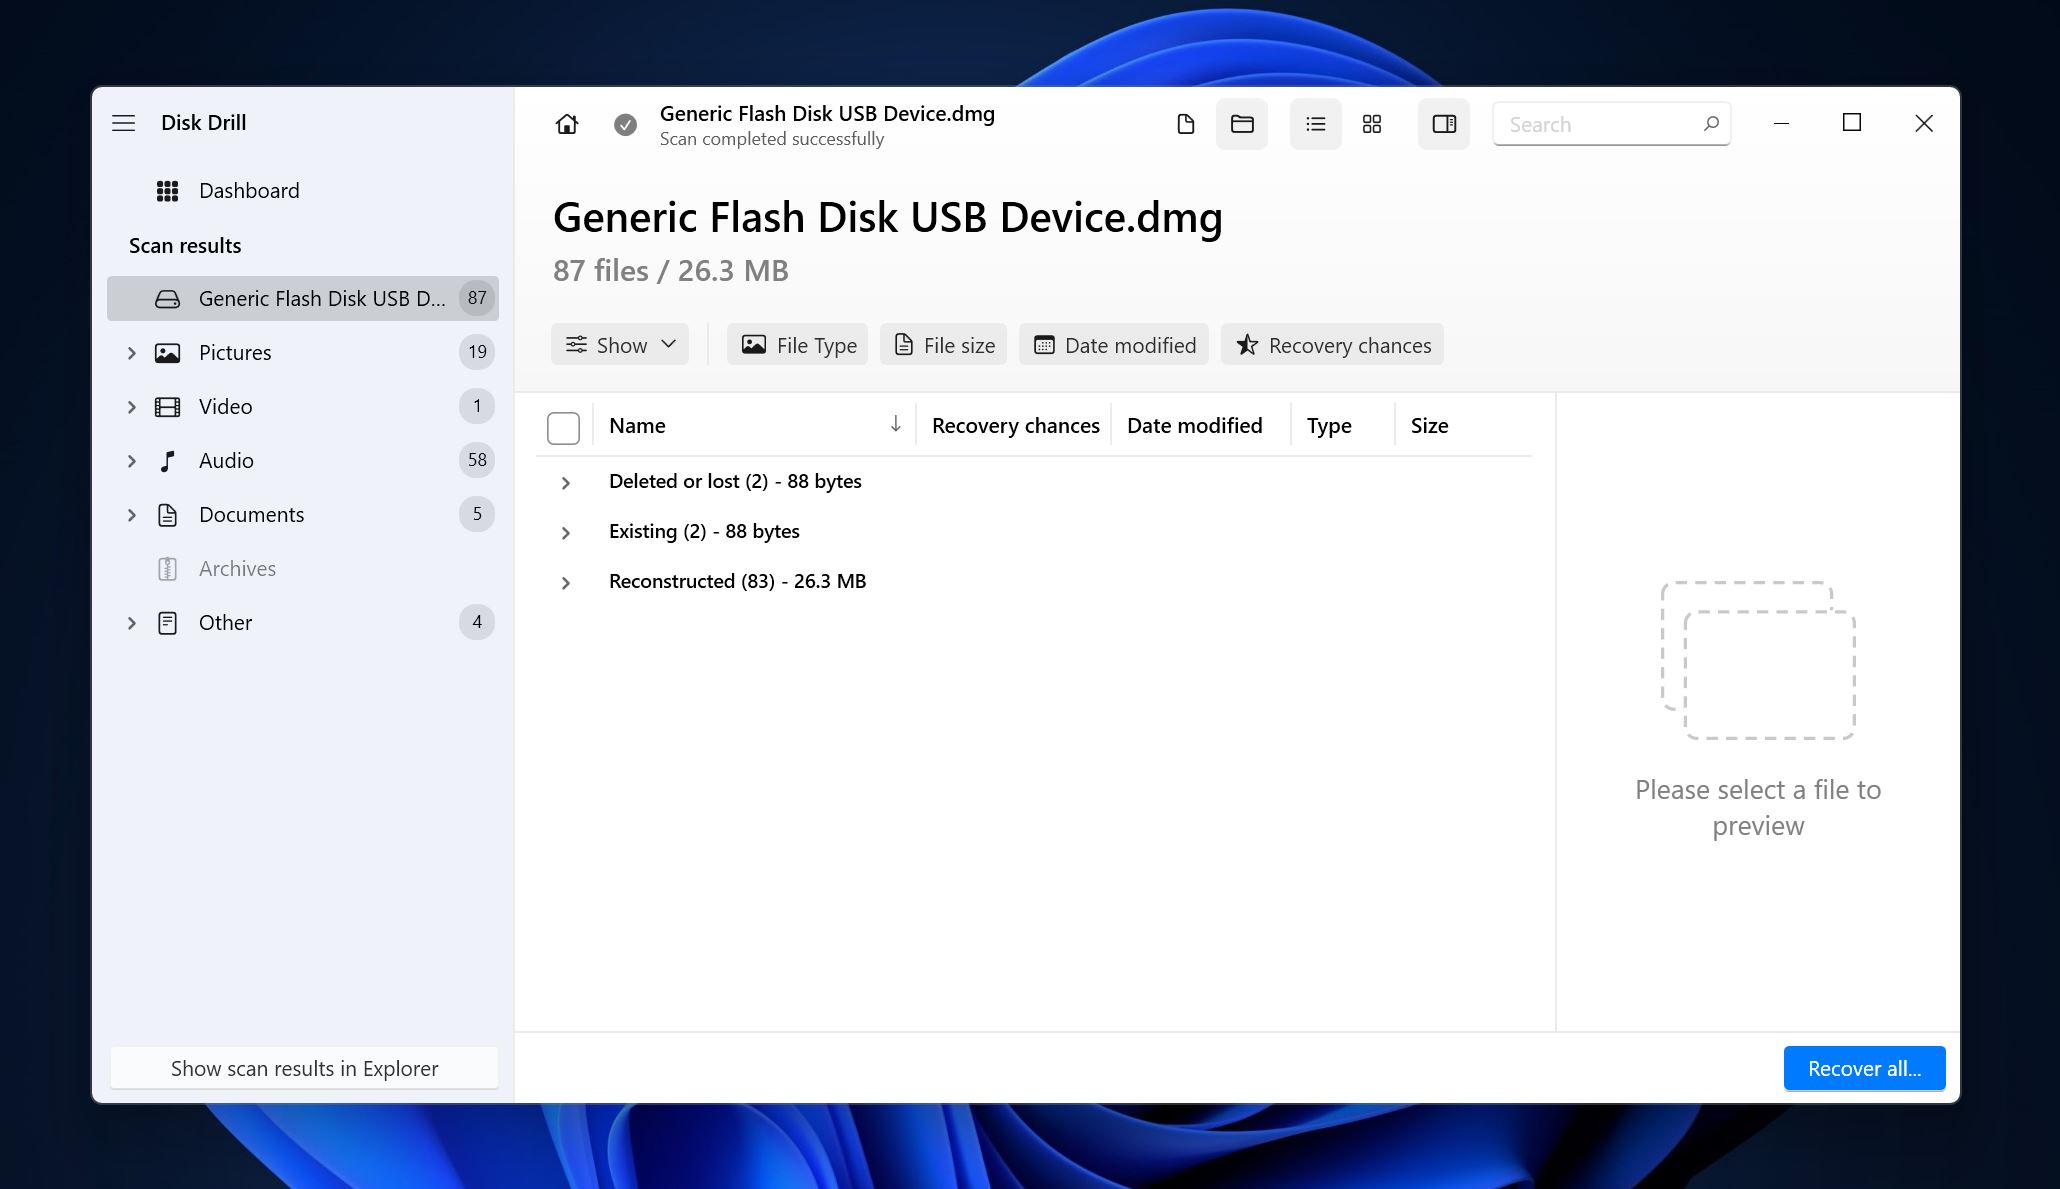
- Expand the Existing section to view the currently stored files on the disk. To view deleted files that are recoverable, expand the Deleted or lost and Reconstructed sections.
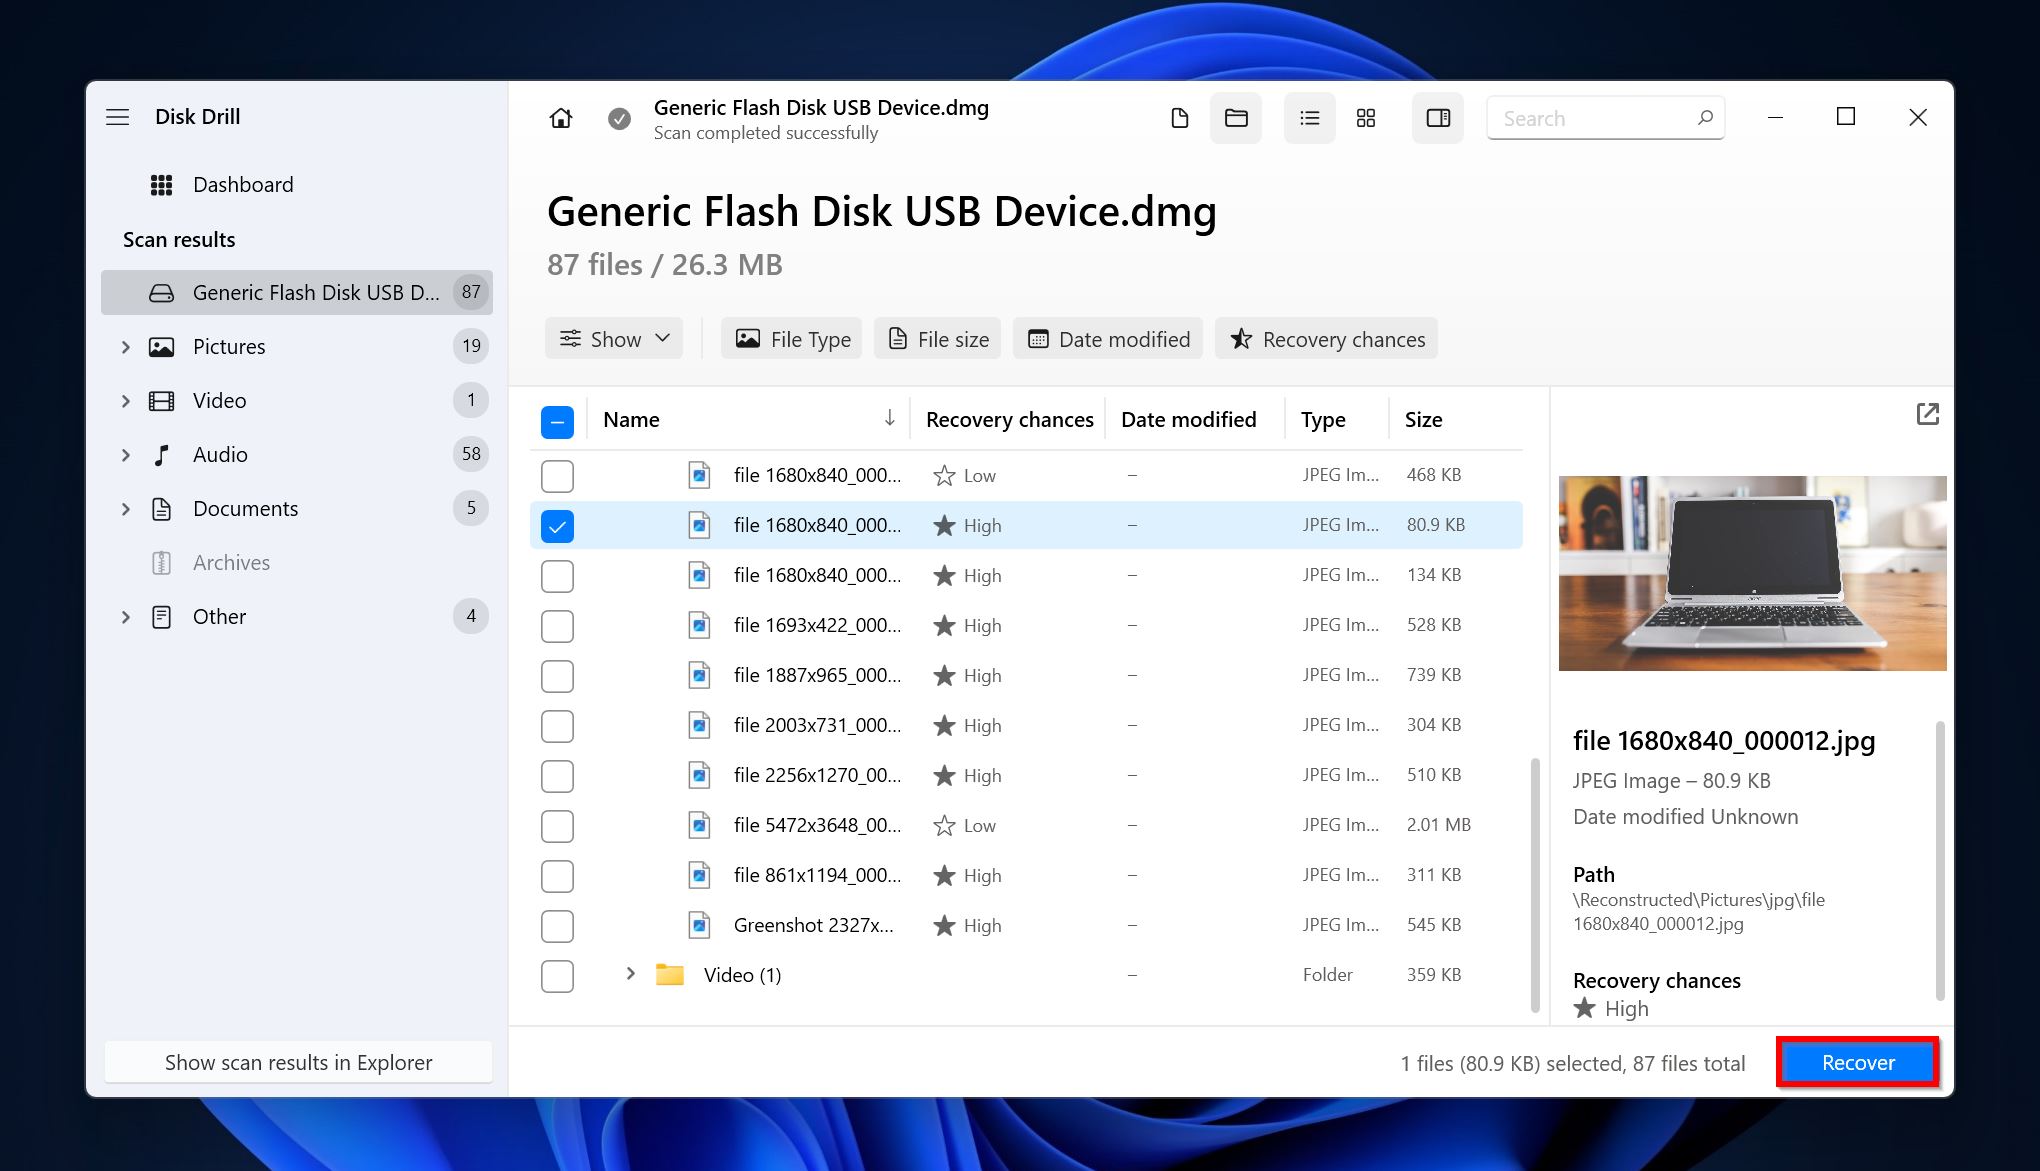
- Select the files you wish to recover. Disk Drill displays a preview of the currently selected file, but you can manually preview any file by clicking the eye icon next to its filename. Click on Recover once you’re done with the selection.
- Select a recovery destination for the files and click Next. Again, save the files to a separate drive, and NOT the one you plan to scan using CHKDSK.
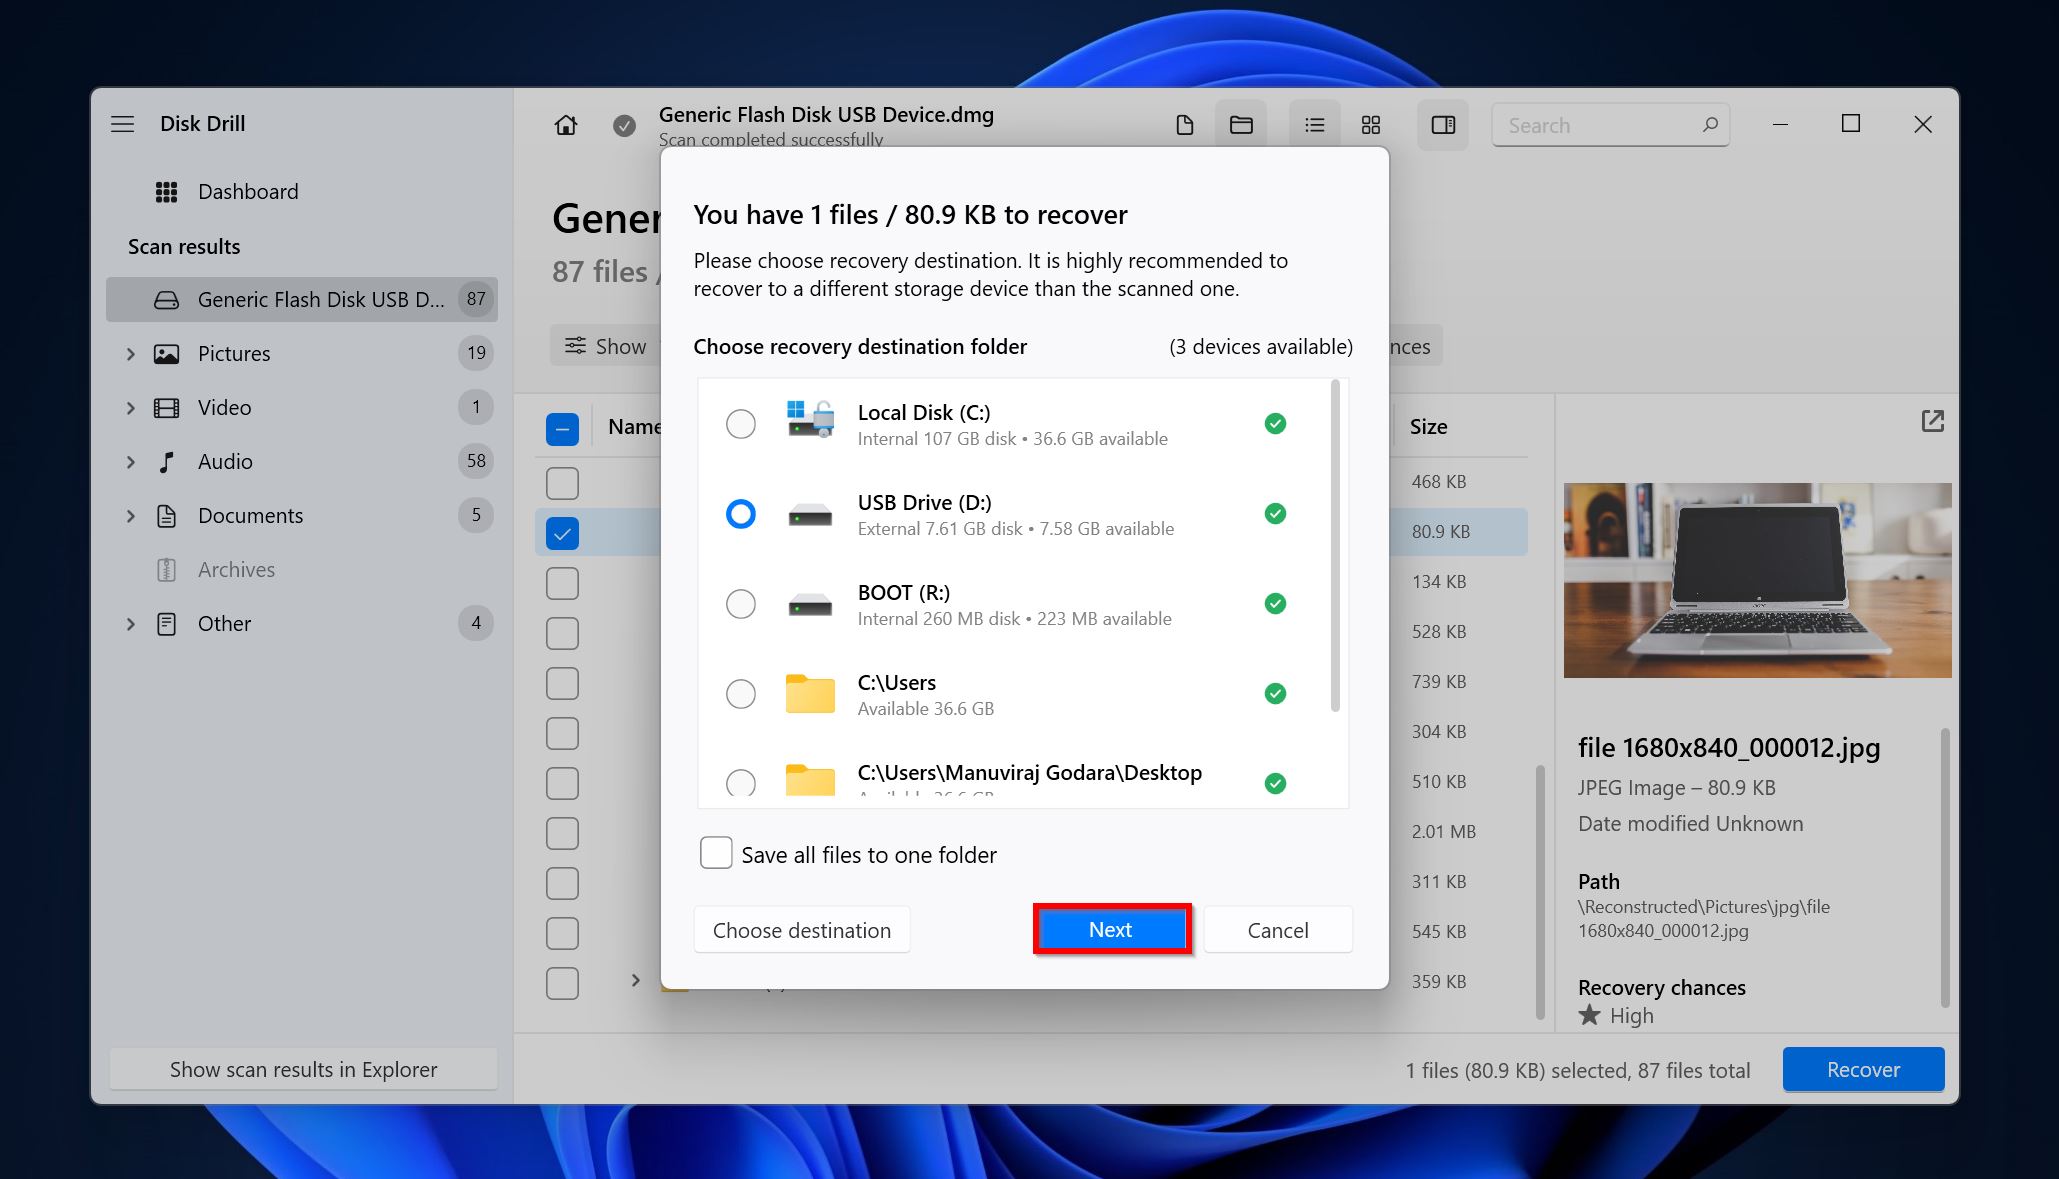
- Disk Drill will recover the selected files. As part of Disk Drill’s free trial, you can recover up to 500 MB of data for free (Windows only).
How to Recover Files that Were Deleted by CHKDSK
Scanned your drive using CHKDSK, without recovering your data first? You can still get back your files by using data recovery software, checking the FOUND.000 folder, or restoring them from a backup. Unless you created a backup, the most reliable way to get back your files is using third-party data recovery tools (described in the previous section).
Let’s take a look at the other two methods of recovering files after a CHKDSK scan:
Method 1: Recover the Files from the FOUND.000 Hidden Folder
After a CHKDSK scan, Windows creates a hidden folder in the C: drive, named FOUND.000. This folder is where CHKDSK puts recovered files and file fragments that were stored in the bad sectors. It’s a long shot, but you try to look for your files in this folder. There’s one caveat–all files in this folder will have a .chk extension.
If you know what extensions the deleted files had, you can try renaming the .chk files to the relevant extensions. This should let you view the files, and you can copy them somewhere else. If there are several hundred files in the FOUND.000 directory, it’s not worth going through the trouble; it’s better to use a data recovery tool.
Method 2: Restore the Files from a Backup
Windows has two primary backup features–Windows File History, and Backup & Restore (Windows 7). If you had set up any of them before data loss occurred, you can use the backup to get back your files.
Here are the step-by-step instructions on how to restore deleted files after a CHKDSK scan, using Windows File History:
- Ensure the drive you used to set up File History is connected to your PC.
- Type “file history” in Windows Search (Windows Key + S) and click on Restore your files using File History from the search results.
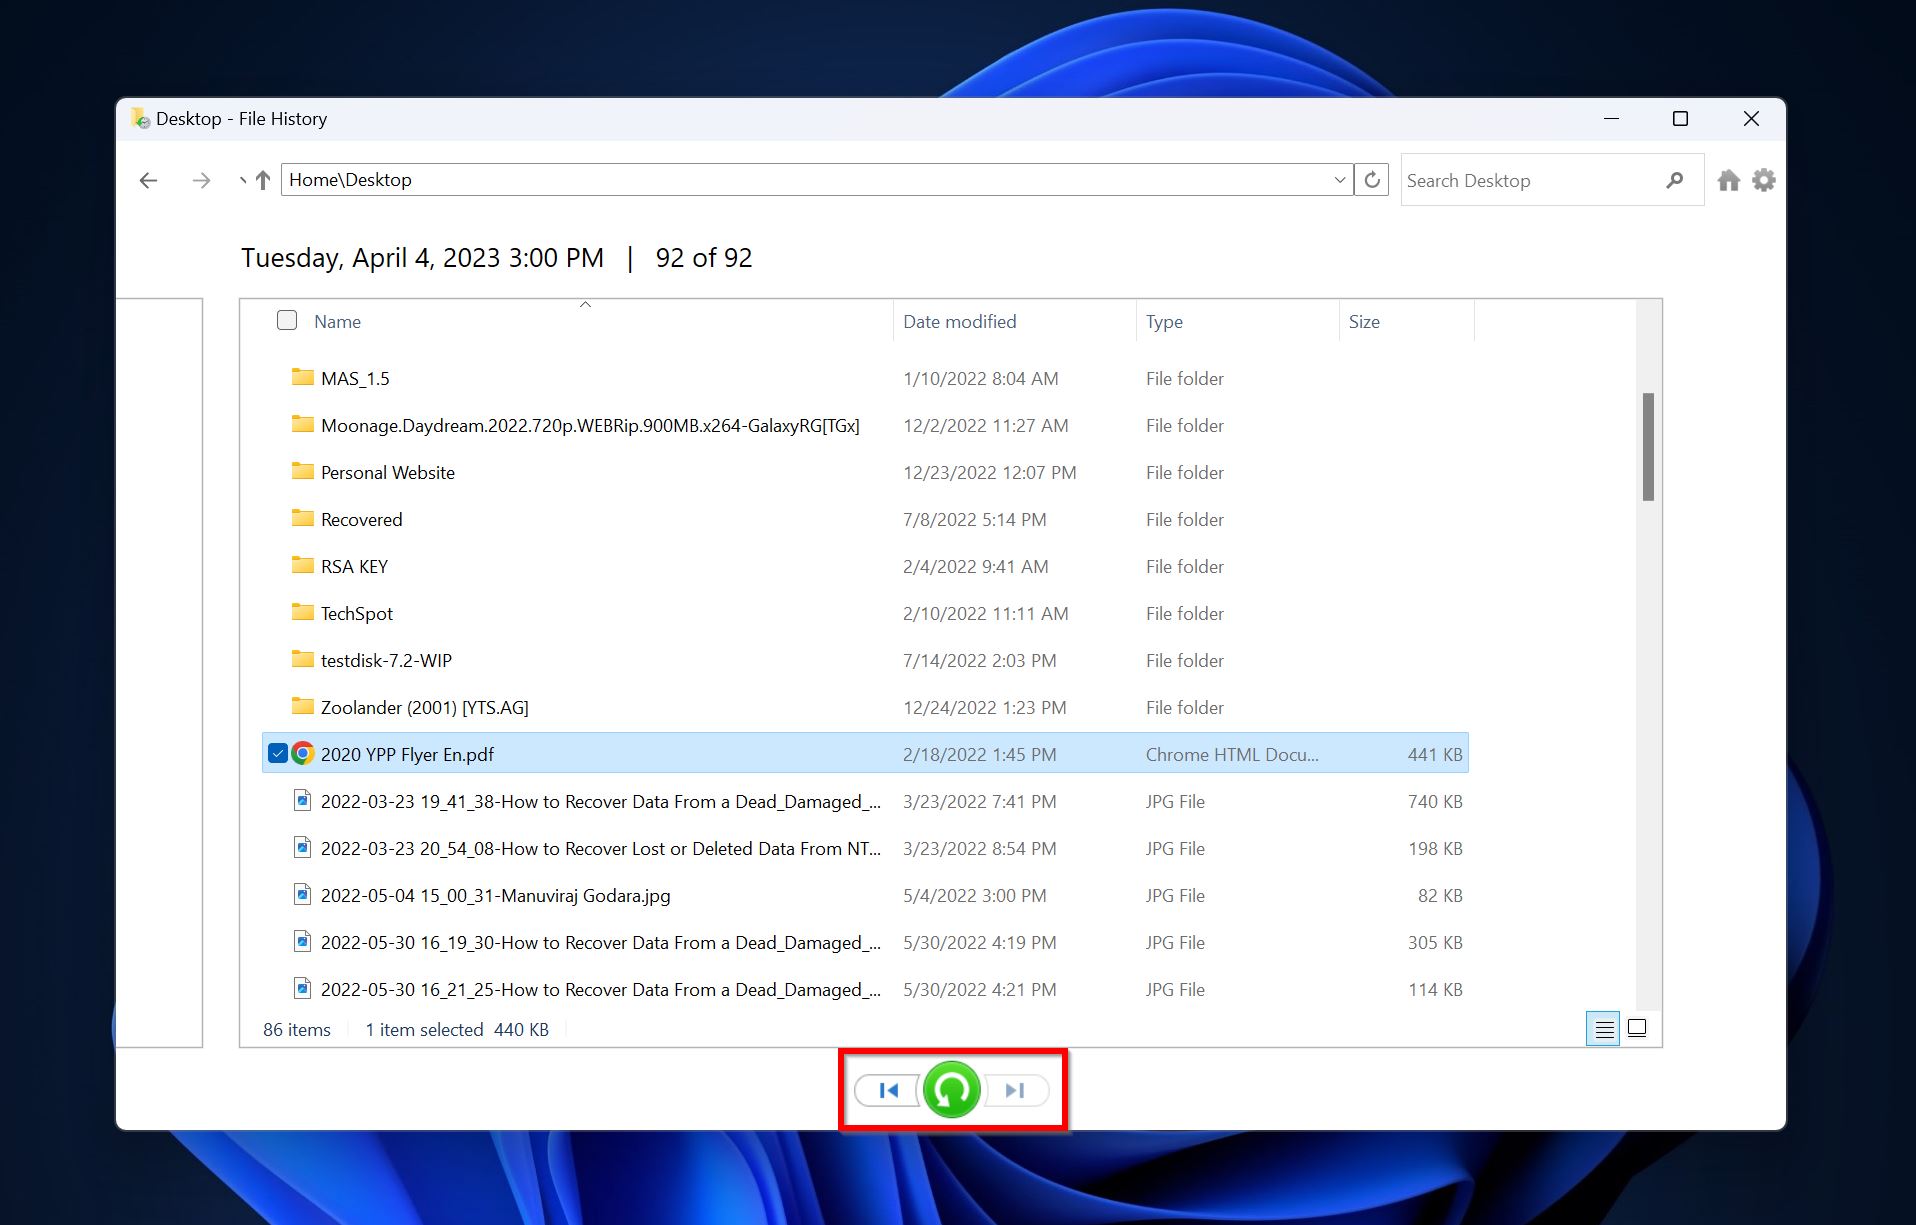
- Browse to the folder that contained the files CHKDSK deleted. Cycle through the backups until you find one that contains the files.
- Select the files you wish to restore and click the green restore button.
Conclusion
It’s normal for your storage drive to incur some data loss after a CHKDSK scan. While it’s advisable to back up your data before performing a CHKDSK scan, you can recover your files after the scan as well–using data recovery tools, checking the hidden FOUND.000 folder, or restoring a backup.
FAQ
- Launch Command Prompt as Administrator.
- Type chkdsk X: /r in the console and press Enter. Replace X with the drive letter (C:, D:, etc.) you wish to scan.
- Wait for CHKDSK to finish scanning the drive.


