USB flash drives, also known as pen drives, are one of the most useful storage devices today, making it easy to transfer files between devices, create backups of important data, and share documents, images, and more with friends and colleagues.
Perhaps because USB flash drives have so many uses, there are so many causes that can make files stored on them disappear, including viruses and malware, file system corruption, software bugs, and, of course, user errors.
In many cases, it’s possible to recover flash drive files using CMD, without any third-party software. Because flash drive recovery using CMD is something even more experienced users are typically not familiar with, we’ve decided to describe the entire process from start to finish.
Table of Contents
What Is Command Prompt (CMD)?
The Command Prompt, better known simply as CMD, is the default command-line interpreter for Microsoft Windows. The job of a command-line interpreter is to interpret text commands entered by the user.
CMD supports many different commands that make it possible to do everything from moving files around to formatting storage devices or connecting to remote machines. Most users are not familiar with these commands because they are used to relying on applications with a graphical user interface.
However, sometimes it’s more efficient or convenient to enter a relatively simple command than it is to download, install, and use a graphical application just to accomplish the same thing, and USB flash drive recovery is a good example.
Must-Try CMD Flash Drive Recovery Methods
Some methods for performing flash drive recovery using CMD are applicable in more situations than others, and the one we’re starting with is guaranteed to come in handy at least once.
Method 1: Recycle Bin
![]() Best for: Recovering recently deleted files.
Best for: Recovering recently deleted files.
This method can help with the recovery of recently deleted files that are still present in the Recycle Bin. Use it when you can’t open the Recycle Bin by double-clicking on its desktop icon, such as when the icon has disappeared, or when the icon simply refuses to open the Recycle Bin.
To recover flash drive files using CMD from the Recycle Bin:
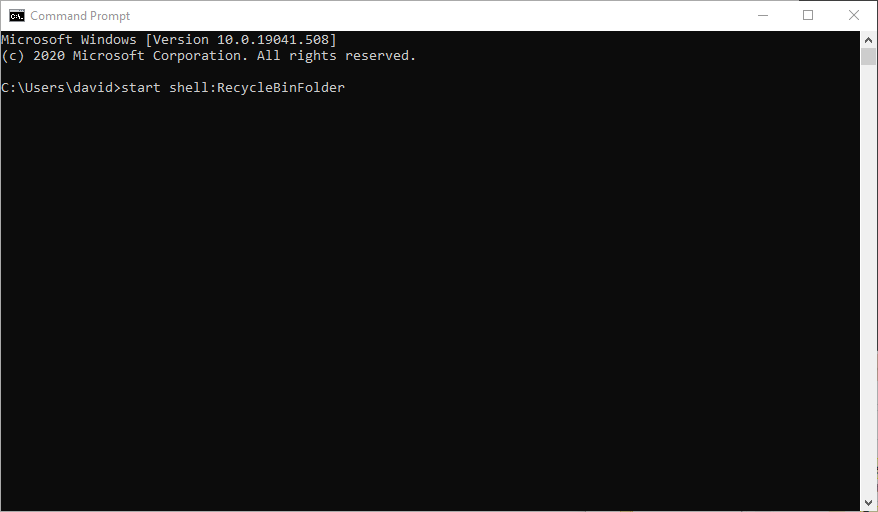
- Open the start menu and type “cmd”. Hit Enter on your keyboard.
- Paste the following command into the Command Prompt window and press Enter: start shell:RecycleBinFolder
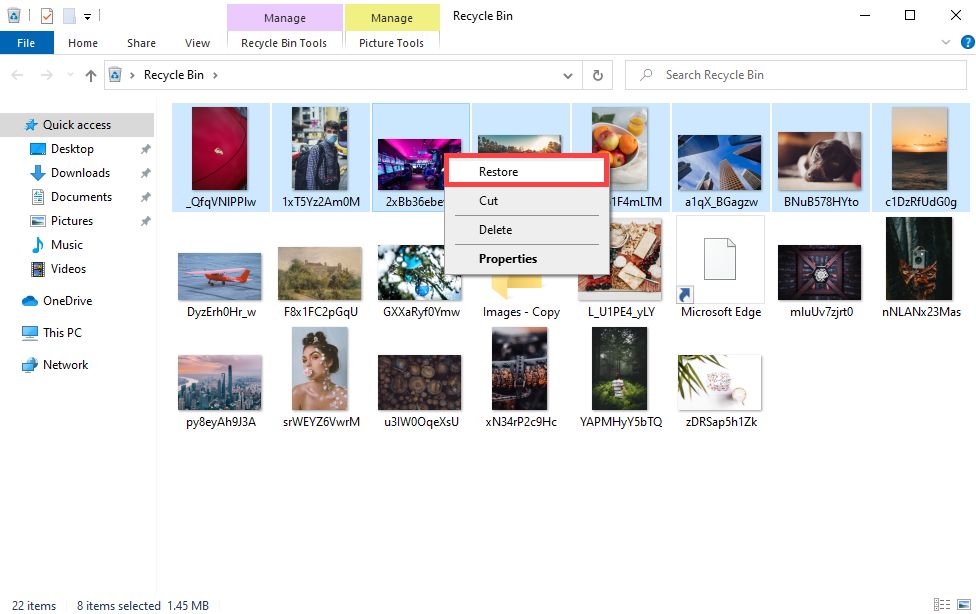
- Select the files you want to restore from the Recycle Bin, right-click on any selected file, and click Restore. Alternatively, you can simply drag them back to the USB flash drive or any other location.
Keep in mind that this method won’t help you recover files that are not present in the Recycle Bin. It simply provides an alternative way to open the Recycle Bin, one that doesn’t depend on the Recycle Bin icon.
If it doesn’t work, you can open the Recycle Bin by using its GUID (Globally Unique Identifier) instead. Here’s the command you need to copy & paste into CMD:
explorer ::{645FF040-5081-101B-9F08-00AA002F954E}
Again, a File Explorer window with the Recycle Bin opened should appear, and you can simply move all deleted files to a safe location.
Method 2: ATTRIB (Attribute) Command
 Best for: Regaining access to files after a malware infection.
In addition to names, files and even entire directories have various attributes, which are used mainly for access control purposes.
What sometimes happens is that malware infects a USB flash drive and changes the attributes of all files stored on it, making it appear as if the files were gone. In reality, the files are still present on the USB flash drive—it’s just that they’ve been hidden from view.
To fix this issue and regain access to your files, you need to perform command prompt flash drive recovery using the ATTRIB command, whose purpose is to display, set, and remove attributes assigned to files and directories.
To get back lost files from a USB flash drive using the ATTRIB command:
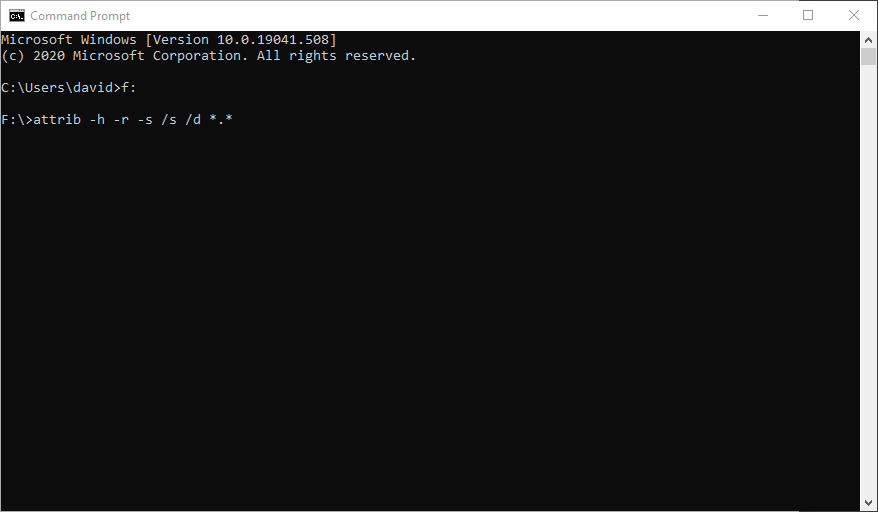
- Open the start menu and type “cmd”. Hit Enter on your keyboard.
- Enter the letter assigned to your USB flash drive followed by a colon (such as “E:” or “D:”) and hit Enter.
- Paste the following command into the Command Prompt window and press Enter: attrib -h -r -s /s /d *.* (make sure to replace DRIVE_LETTER with the letter assigned to your USB flash drive)
- Open File Explorer and open your USB flash drive. All lost files should be right there, and you shouldn’t have any trouble opening them.
Here’s a detailed explanation of the command you’ve just used:
- -h clears the Hidden file attribute.
- -r clears the Read-only file attribute.
- -s clears the System file attribute.
- /d applies attrib and any command-line options to directories.
- /s applies attrib and any command-line options to matching files in the current directory and all of its subdirectories.
- *.* specifies that you want to apply the attrib to all files in the current directory.
As you can see, the command isn’t nearly as complicated as it seems at first. It simply performs multiple file management operations at the same time, saving you time and allowing you to regain access to lost files.
Method 3: CHKDSK (Check Disk) Command
![]() Best for: Repairing files that have become inaccessible due to flash drive corruption.
Best for: Repairing files that have become inaccessible due to flash drive corruption.
Sometimes, the data stored on a USB flash drive becomes corrupted and impossible to access. That can happen when transferring files to the same flash drive from multiple different operating systems, or when using a buggy software application.
Fortunately, there’s a handy command-line utility included in Windows that you can use to check the file system and file system metadata of a volume for logical and physical errors. This utility is called CHKDSK, and it works with all local storage devices, including USB flash drives.
To repair files on a USB flash drive with CHKDSK:
- Open the start menu and type “cmd”. Hit Enter on your keyboard.
- Enter the following command (make sure to replace DRIVE_LETTER with the letter assigned to the hard drive you want to fix) and press Enter: chkdsk DRIVE_LETTER: /r

- Wait for CHKDSK to finish.
The /r parameter tells CHKDSK to fix errors on the disk (which can also be done separately using the /f parameter), locate bad sectors, and recover readable information.
If CHKDSK identifies lost file fragments, it saves them as CHK files on the USB flash drive. There are many utilities that you can try to recover CHK files created by CHKDSK, including UnCHK, FileCHK, and CHK-Mate. They all do more or less the same, so it doesn’t matter too much which one you try first.
Method 4: Windows File Recovery
 Best for: Recovering permanently deleted files.
With the three methods we’ve described so far, it’s possible to solve a variety of data loss emergencies except for the recovery of permanently deleted files. To address this common problem, Microsoft released a CMD application called Windows File Recovery, and you can download it for free from the Microsoft Store.
Windows File Recovery is a data recovery solution capable of recovering permanently deleted photos, documents, videos, and other types of files from all local storage devices with NTFS, FAT, exFAT, and ReFS file systems, and you can read more about it in this review.
To recover permanently deleted files with Windows File Recovery:
- Install Windows File Recovery from the Microsoft Store.
- Open the start menu and type “cmd”. Hit Enter on your keyboard.
- Enter the following command (make sure to replace DRIVE_LETTER with the letter assigned to the hard drive you want to fix) and press Enter: winfr DRIVE_LETTER: C: /x
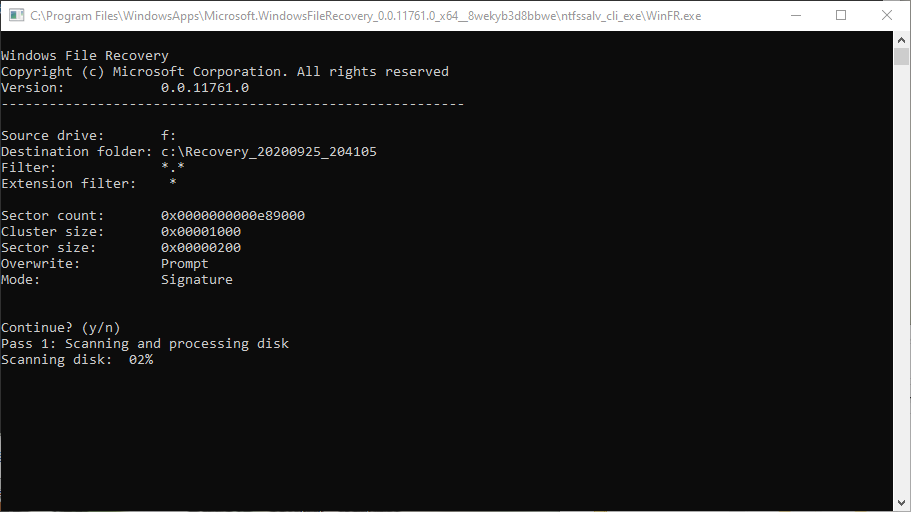
- Wait for Windows File Recovery to finish scanning your USB flash drive.
- Open File Explorer and navigate to the destination folder.
Because Windows File Recovery is still in its infancy, it can recover only a handful of common file formats, and it doesn’t exactly deliver the best data recovery results, especially when compared with mature data recovery applications like Disk Drill.
Alternative to CMD USB Flash Drive Recovery: Disk Drill

Just because it’s not that difficult to learn how to recover data from a pen drive using the Command Prompt, it doesn’t mean that CMD is always the best option for USB flash drive recovery.
In fact, you can almost always get better data recovery results by using a graphical data recovery tool like Disk Drill. With it, it’s possible to recover hundreds of file formats with a few simple clicks from any USB flash drive, regardless of which file system it uses.
The Windows version of Disk Drill can be downloaded from its website and used to recover up to 500 MB for free. The instructions below explain how it works.
Step 1. Download and Install Disk Drill
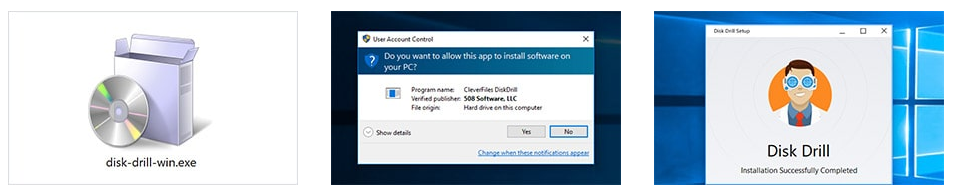
First, download Disk Drill from its website and install it on your system drive. You can then launch the application using its desktop icon or by opening the Start menu and typing “disk drill”. When you first launch Disk Drill, you will be given the option to upgrade to Disk Drill PRO, which offers unlimited recovery and up to three activations.
Step 2. Scan Your USB Flash Drive
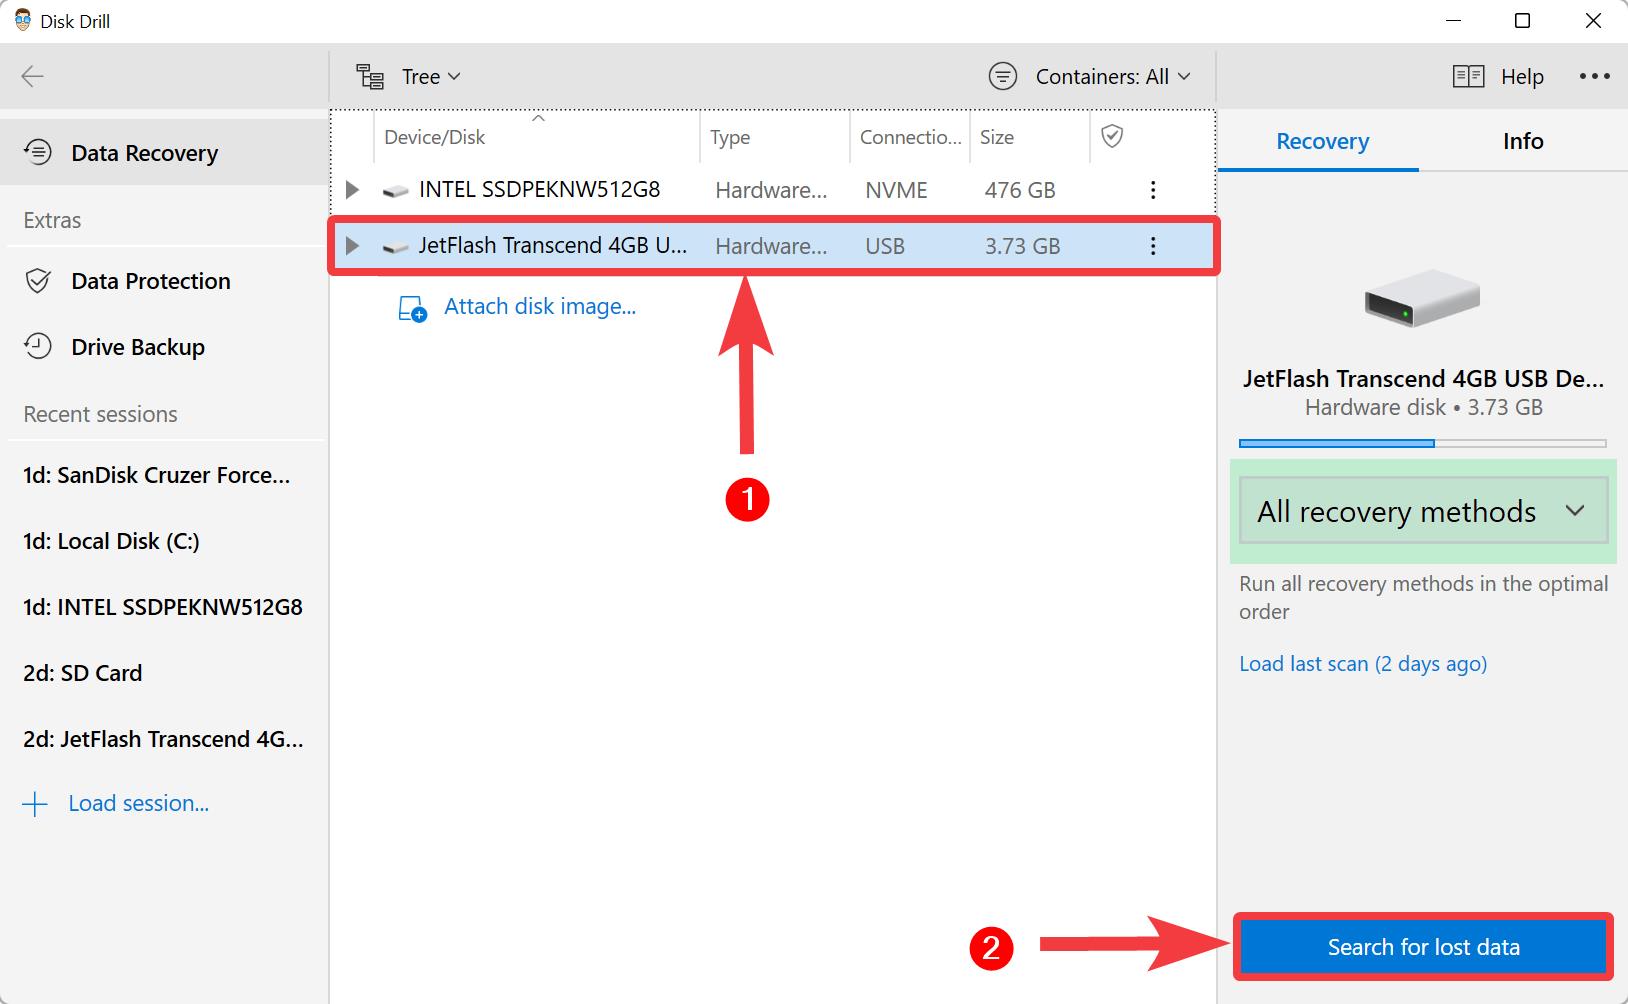
Next, select your USB flash drive and click the Search for lost data button. Disk Drill will automatically apply its data recovery algorithms in the optimal order to recover as many lost files as possible. If you don’t want to wait for the scan to finish, you can choose to Review found items right away.
Step 3. Recover Selected Files
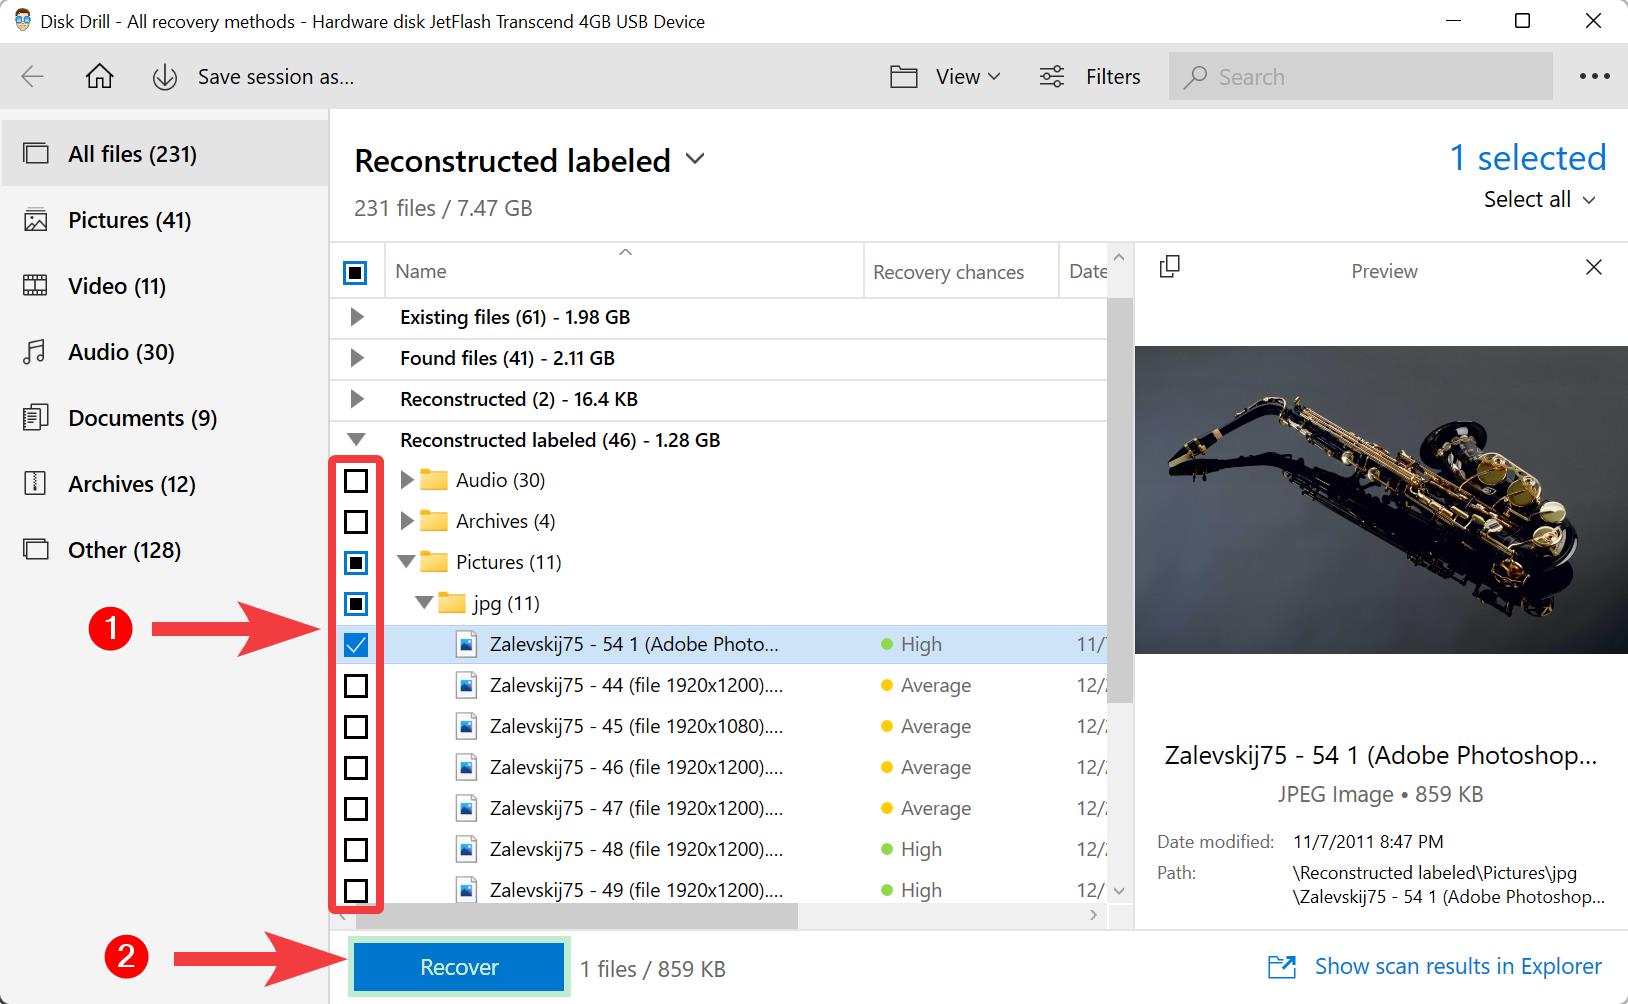
Finally, select all files you want to recover and click the Recover button. Disk Drill will ask you to specify the recovery directory. Select a directory that’s NOT located on the USB flash drive that you’re currently recovering to avoid overwriting the selected files. You can then open the recovered files in File Explorer.


