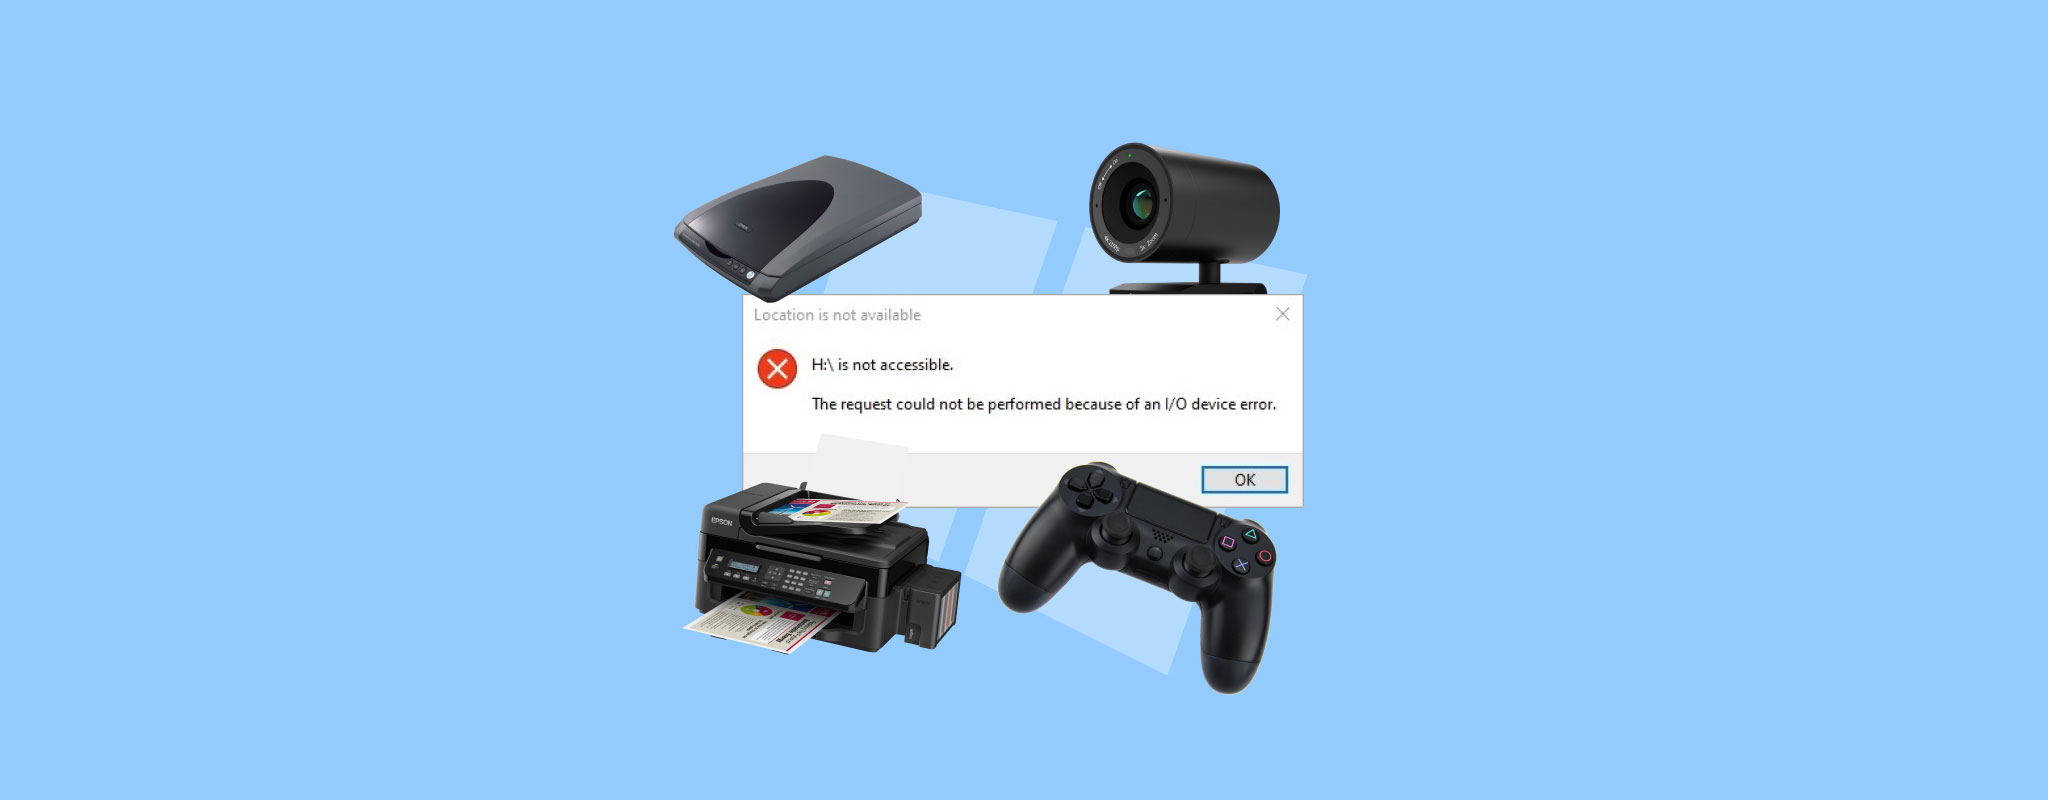
 Sometimes, when you try to read or write to a drive, initialize it, and even while booting, you may get the message, “The request could not be performed because of an I/O device error.” The issue is an indication that your PC is having trouble reading or writing to the drive. So, how do you resolve it and ensure your data is safe? Our guide will answer these questions for you.
Table of Contents
What Is the I/O Device Error and What Causes It
When Windows has trouble reading a storage drive, be it USB drives, HDDs, or SSDs, you’ll typically see the I/O device error message. It can show up in a variety of situations, such as disk initialization, booting, and trying to create a Windows 7 backup.
The error often appears while using third-party apps like photo editors, download managers, and more. However, an error code usually accompanies the error message in this case. For example, “I/O Device Error 1117.”
The root cause of the I/O device error is typically malfunctioning hardware. This includes damaged connector ports and cables, in addition to damaged storage drives.
The following table lists the common reasons that lead to the input-output error:
| Reason | Description |
| 🔌 Incorrectly connected storage drive | Windows won’t be able to read an improperly connected storage drive. Even if your PC detects the drive, it can’t work with it. There can be numerous reasons behind this, including a physically damaged hard drive. |
| ➰ Damaged ports or cables | If the connector cables or ports are damaged, Windows will be unable to read or write to the drive, even if it detects it. This usually happens in the case of external HDDs as the cables are more susceptible to being stretched or damaged. |
| 🔐 Write-protected SD card | The I/O device error can present itself when you try to low-level format an SD card that is write-protected. |
| 💻 Incompatible, missing, or corrupted drivers | When you connect a storage drive, Windows automatically finds and installs the required software drivers. In the case of niche or specialized drives, this may not be possible and you’ll have to download the drivers manually. Additionally, if the drivers are corrupt or incompatible, Windows will have trouble communicating with the drive and you’ll get the I/O device error. |
| 🔨 Physical damage | If the storage drive is physically damaged, Windows will have trouble reading it. Regular wear and tear, heat, water, and physical shock can all lead to physical damage on your drive. It’s best to stop using a physically damaged disk and seek the help of data recovery experts. |
How to Fix the I/O Device Error in Windows
Depending on what caused the error, there are different ways to resolve the I/O device issue. Typically, you’ll be able to sign in to your PC and perform these fixes. But, if you can’t boot the computer, it’s best to connect the internal drive to another PC using a disk enclosure or create a live USB to boot into Windows.
Here are various ways to fix the I/O Device Error:
Fix 1: Restart the Computer
A simple restart can often fix the most notorious errors. Before you proceed to use any other fix, simply restart your PC. After rebooting, try accessing your drive and performing the same operation that resulted in the I/O device error.
If the error persists, move on to the fixes below.
Fix 2: Check Cables and Ports
Damaged cables and ports are one of the most common reasons behind the I/O device error. Thankfully, cables are easy to replace, and you can always use a different port to connect the drive to your PC.
Here are some checks you can do to ensure that the cables and ports are working properly:
- Inspect the cables for any signs of damage–there should be no peeling, stretching, or unusually bent areas.
- Reconnect the SATA or USB cables and make sure they fit snugly into the port. Also, be sure to wipe off any dust or debris that may have accumulated.
- If you’re using an external hard drive or USB, connect it to the USB ports on the motherboard, instead of the ones on the PC cabinet.
- You can also switch cables, and connect the drives to another working computer to see if the error persists. If the drive works fine, there’s likely an issue with the original PC’s software configuration.
Fix 3: Update the Driver
Outdated drivers hamper the connectivity between your storage drive and the computer. In most cases, Windows automatically downloads and installs the later updates. But, Windows may skip some updates, so it’s best to manually update the relevant drivers.
Before proceeding to update individual drivers, check whether there’s a Windows update available. These updates usually contain driver updates as well, saving you the trouble of having to update the software drivers manually. To check for Windows updates, right-click on Start then choose Settings > Windows Update.
To update the drivers for your storage drive, follow these steps:
- Press Windows Key + R, type devmgmt.msc in the Run text box and press Enter. This will launch the Device Manager utility.
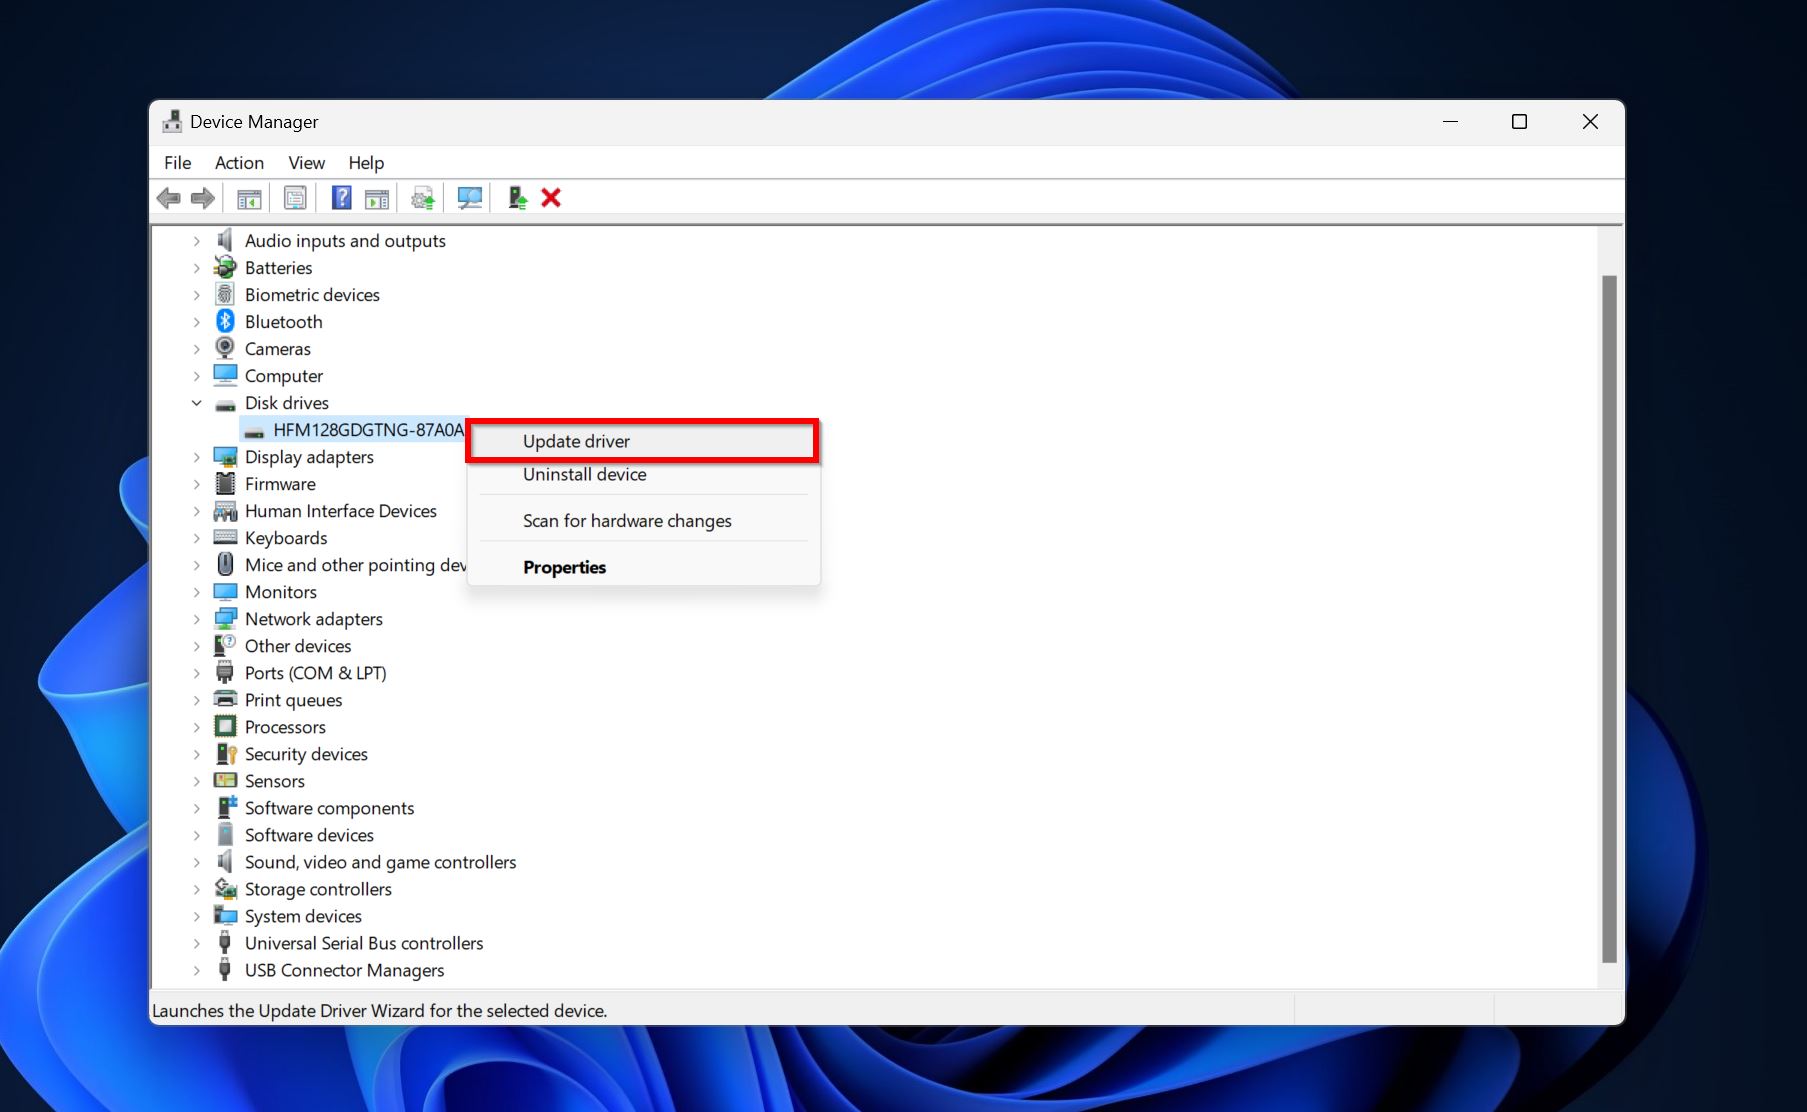
- Expand the Disk Drives menu in the Device Manager.
- Right-click on the storage device that’s showing the I/O Device Error and click on Update driver.
- Click on Search automatically for drivers.
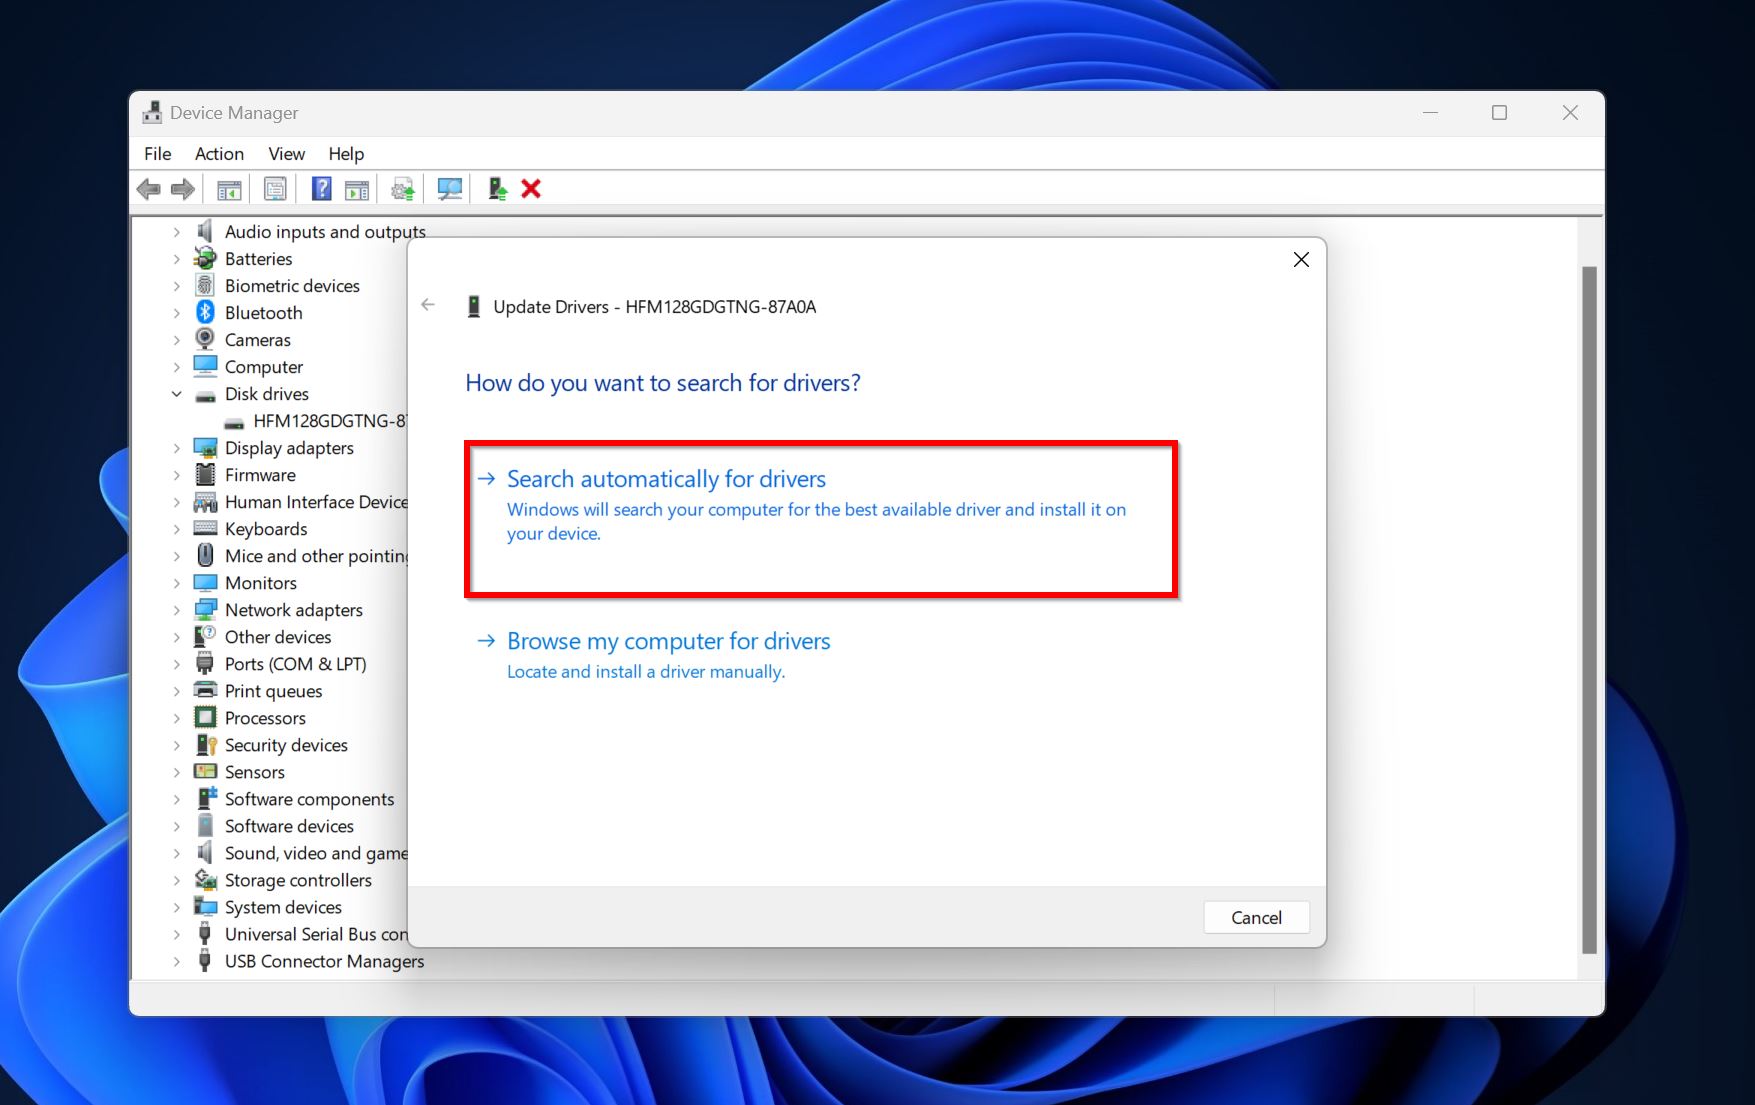
- Windows will download and install the latest drivers. Reboot your PC.
Fix 4: Change the Drive Letter
If you’re facing the I/O device error on your USB drive, or external HDD, it could be a case of missing or conflicting drive letters. The drive letter is the alphabet that appears next to the disk in Windows Explorer (like F:). Drive letters are unique to each drive connected to the PC.
To change the drive letter or assign one to a drive, you need to use Disk Management:
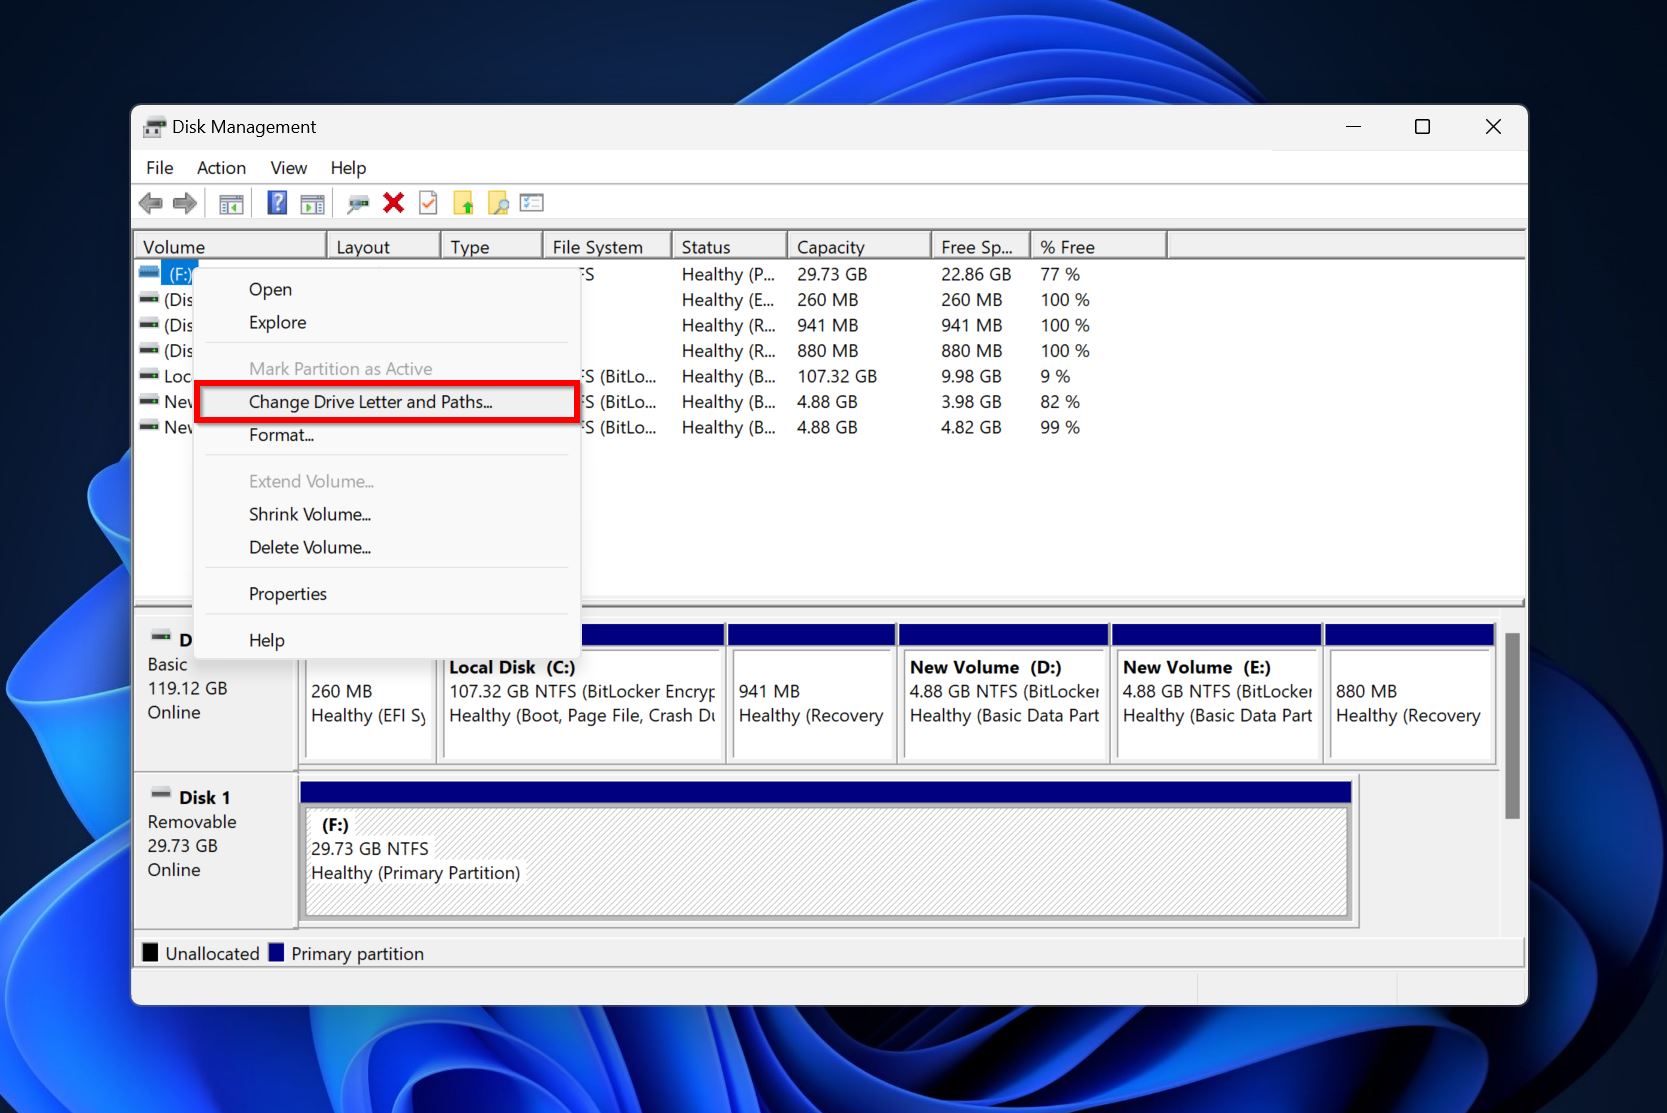
- Type “disk management” in Windows Search (Windows Key + S). Click on Create and manage hard disk partitions from the search results.
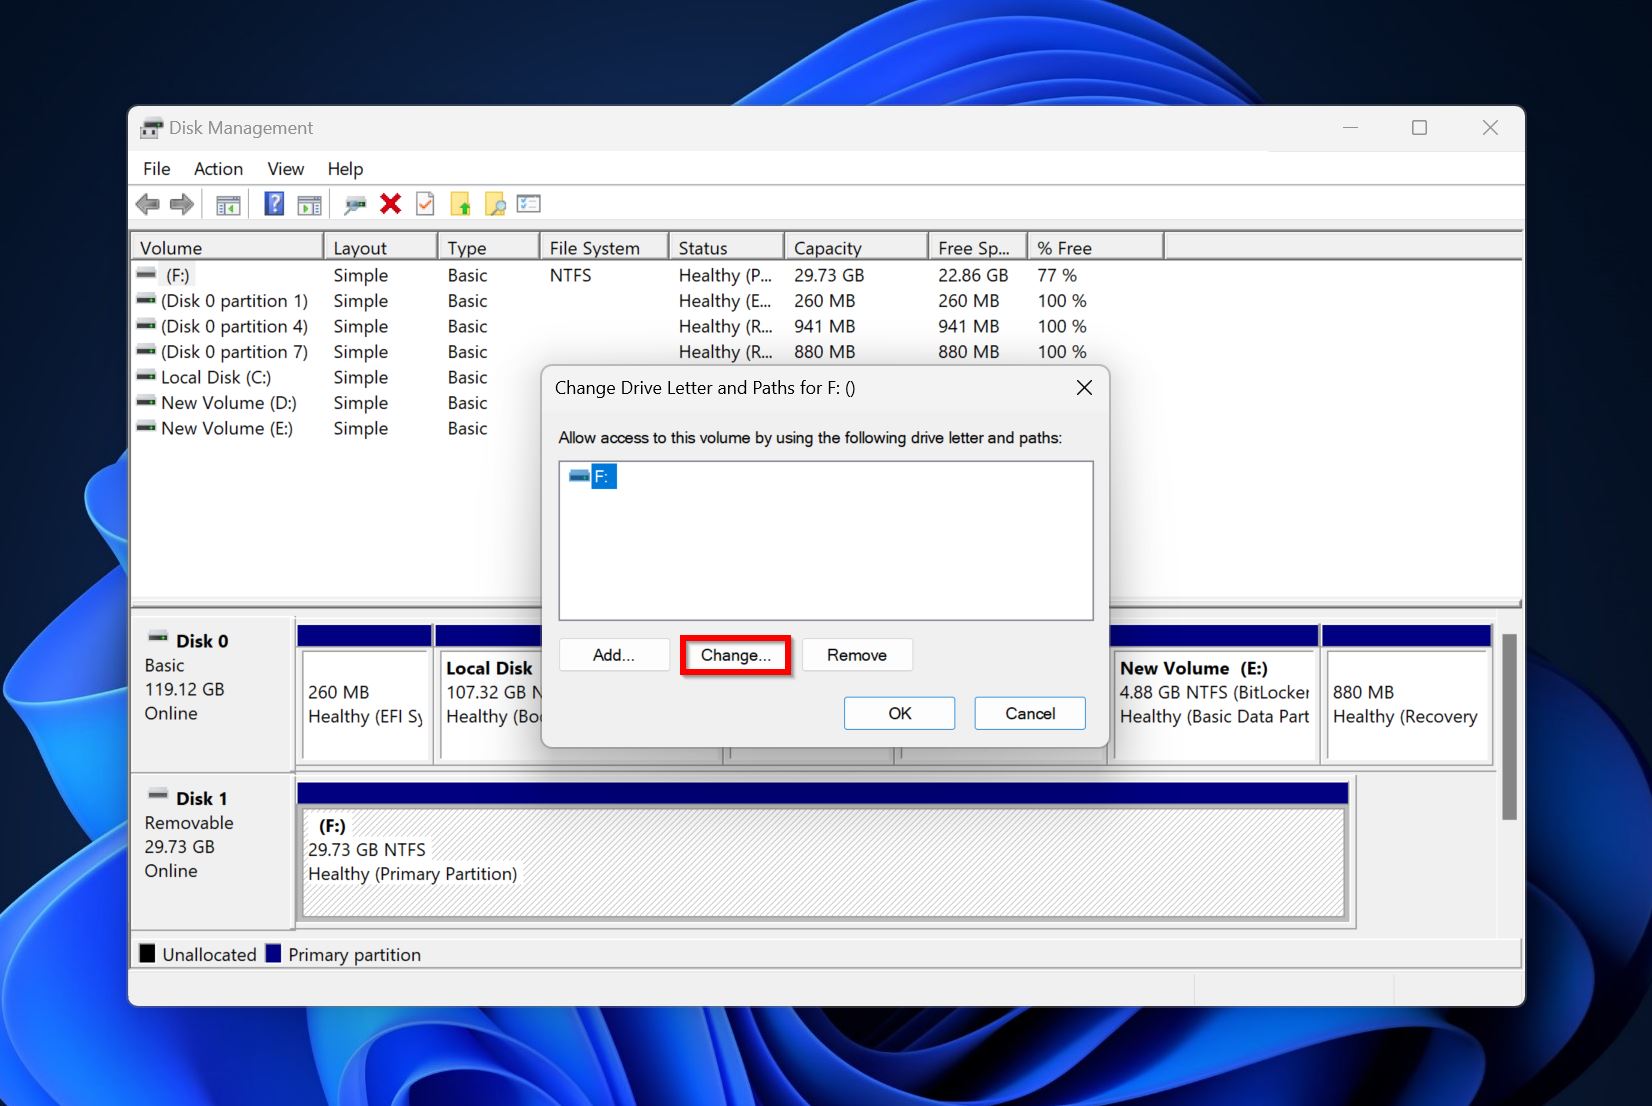
- Right-click on the drive with the disk I/O error and choose Change Drive Letter and Paths.
- Click on Change.
- Use the dropdown menu next to Assign the following drive letter to choose a drive letter. Click OK.
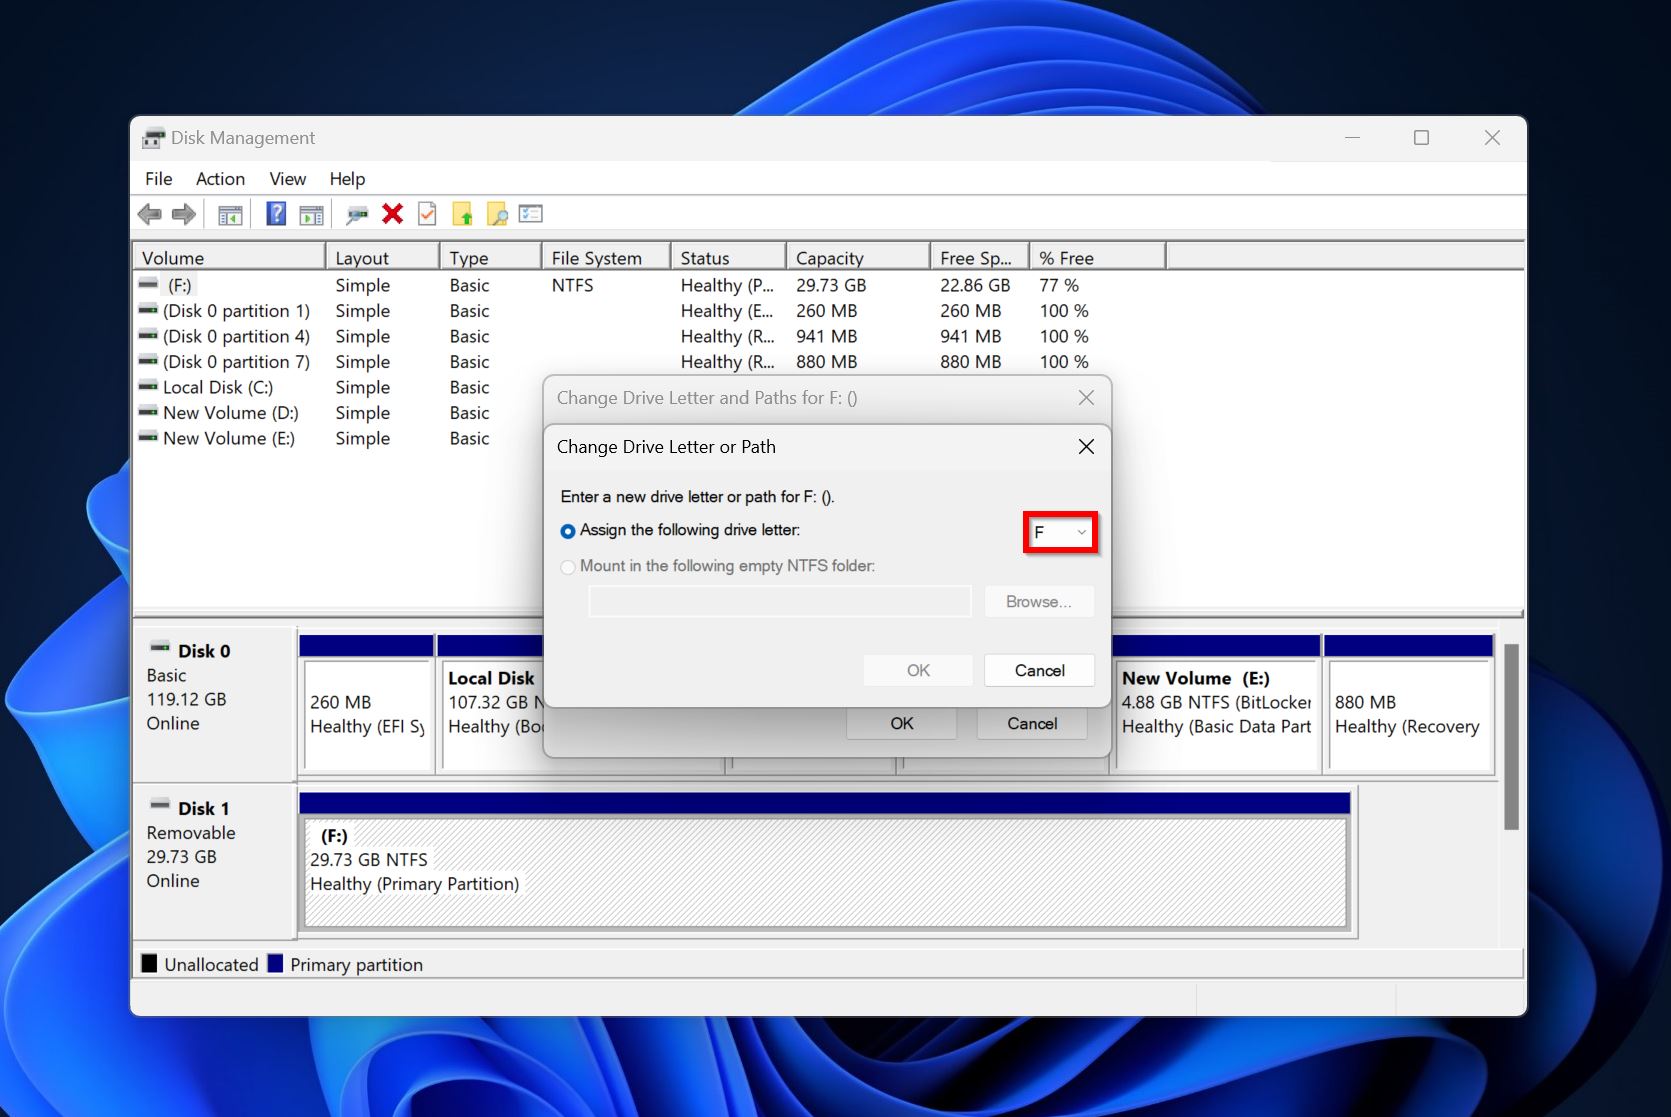
- The drive letter will be changed.
Fix 5: Run CHKDSK and SFC
CHKDSK and System File Checker (SFC) are both command-line diagnostic utilities in Windows. CHKDSK finds and repairs bad sectors as well as other common issues on your storage drive. SFC checks the integrity of your system files. Running both these utilities can fix a wide range of issues on your computer, including the I/O device error.
We recommend you first run CHKDSK, and if that doesn’t work, use the SFC utility.
Here’s how to run CHKDSK:
- Type “cmd” in Windows Search (Windows Key + S). Right-click on Command Prompt and choose Run as administrator.
- Type chkdsk X: /r /x and press Enter. Replace X with the drive letter of the disk you wish to scan.
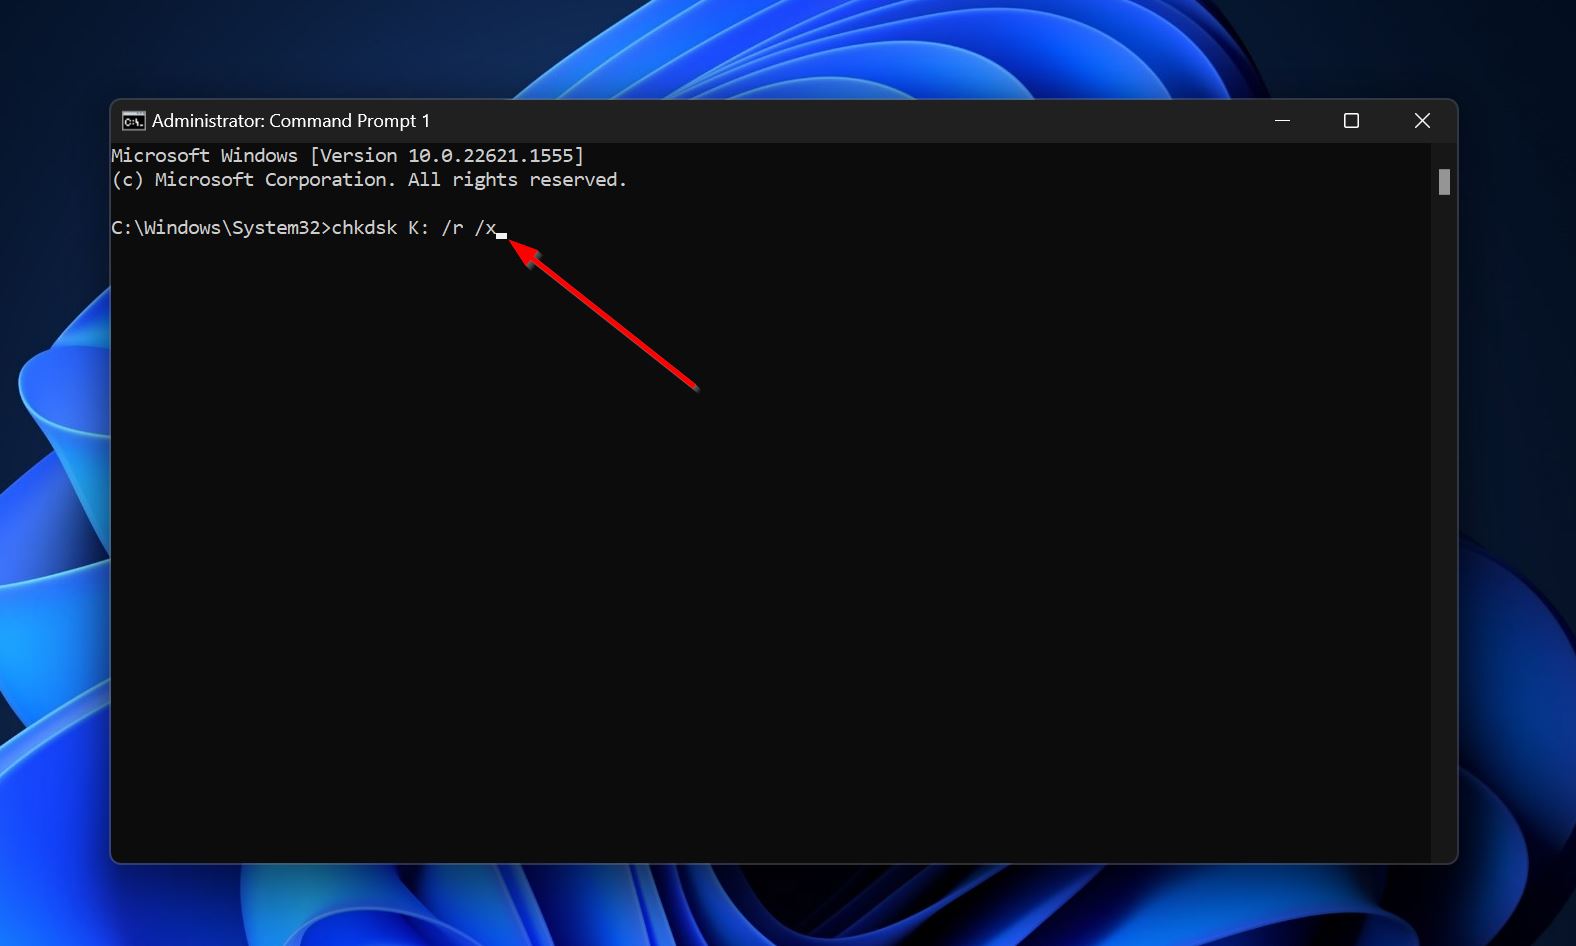
- Wait for CHKDSK to finish scanning, and reboot your PC.
If you continue to face the I/O drive error, run SFC:
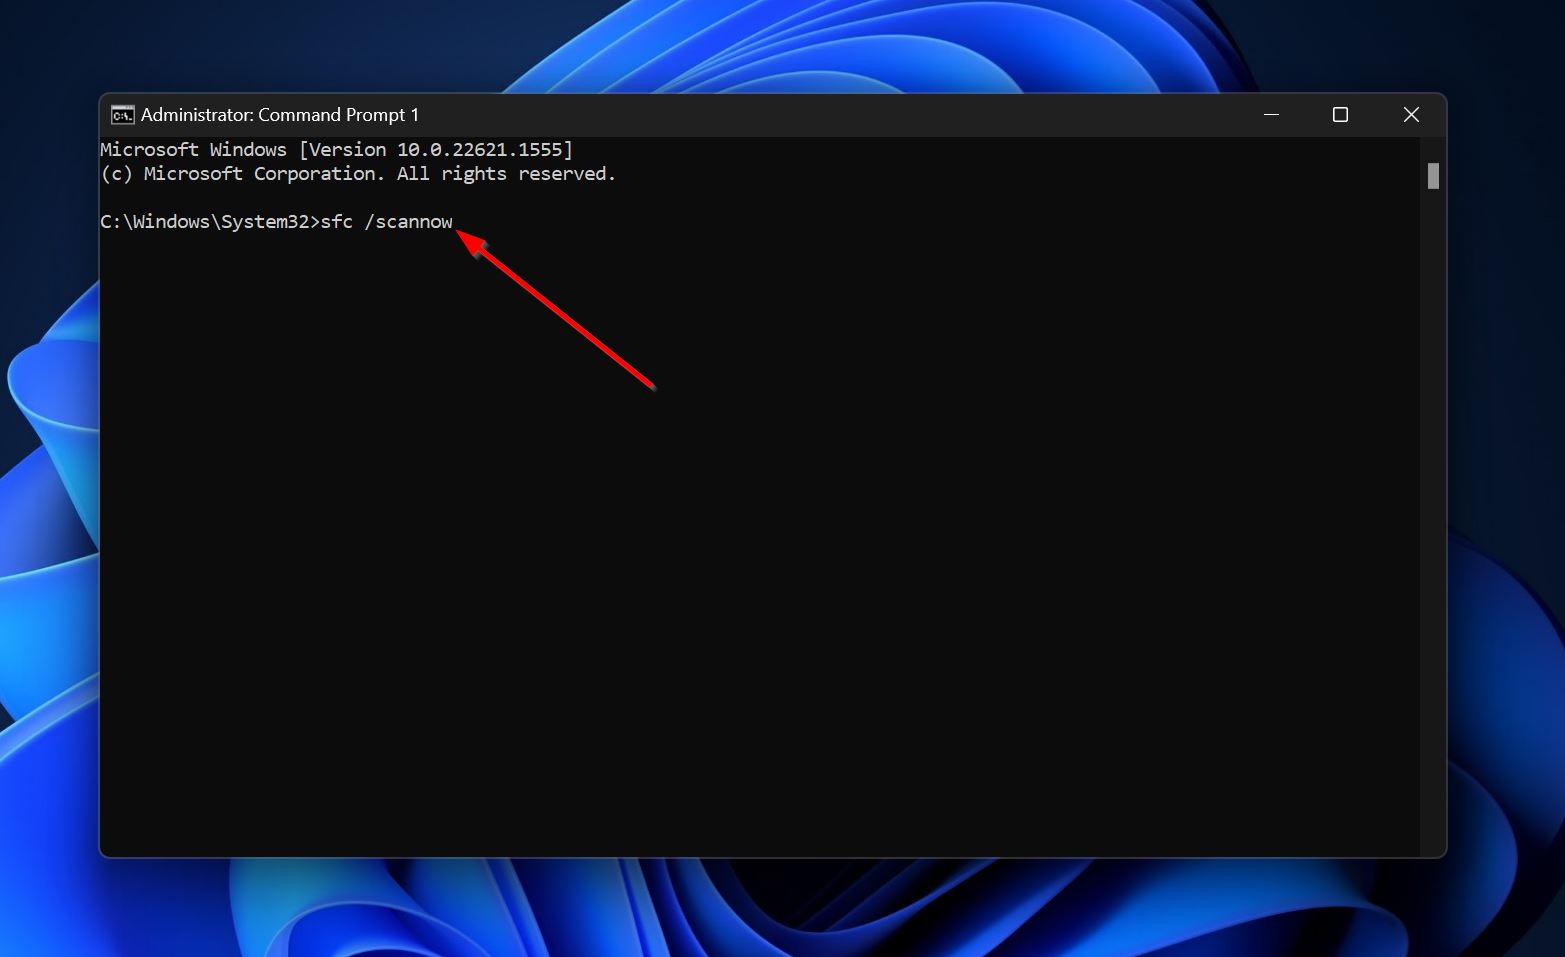
- Run the Command Prompt as administrator.
- Type this command and press Enter – DISM /online /cleanup-image /restorehealth. Skip this step if you don’t have an active internet connection.
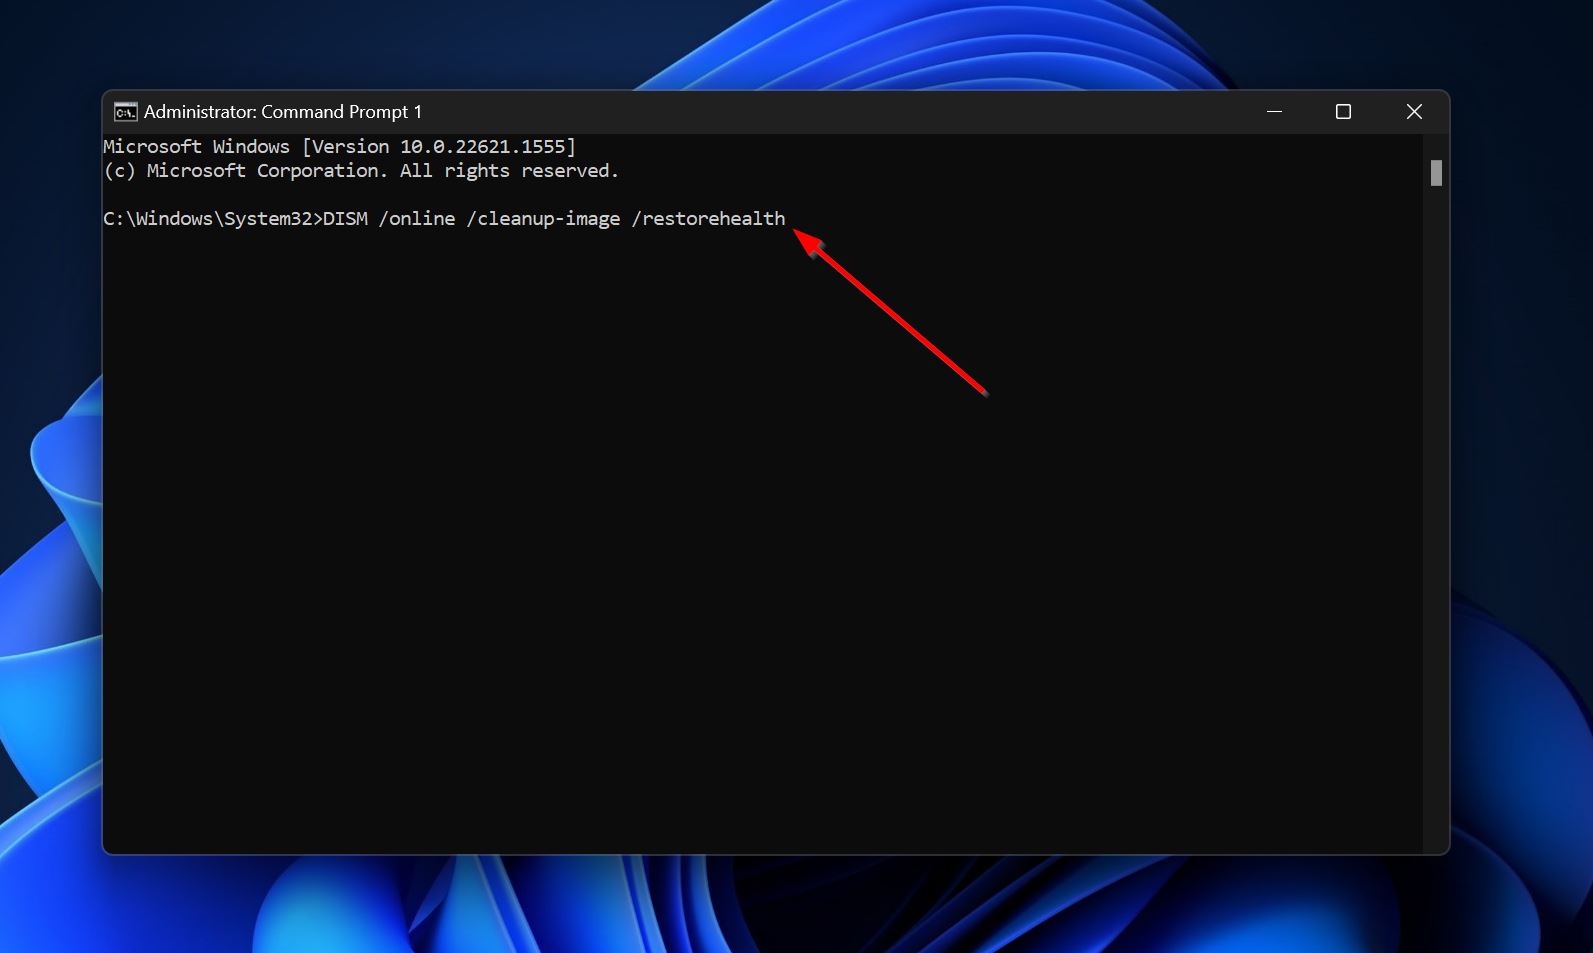
- Now, type sfc /scannow and press Enter.
Fix 6: Remove Write Protection from the SD Card
The I/O device error can pop up when you try to make changes to a write-protected SD card. Most often, it shows up when you attempt to low-level format the SD card. Usually, SD cards have a physical write-protection switch, so ensure that the switch is set to OFF.
If the error persists, use the Diskpart utility to remove write-protection from the SD card:
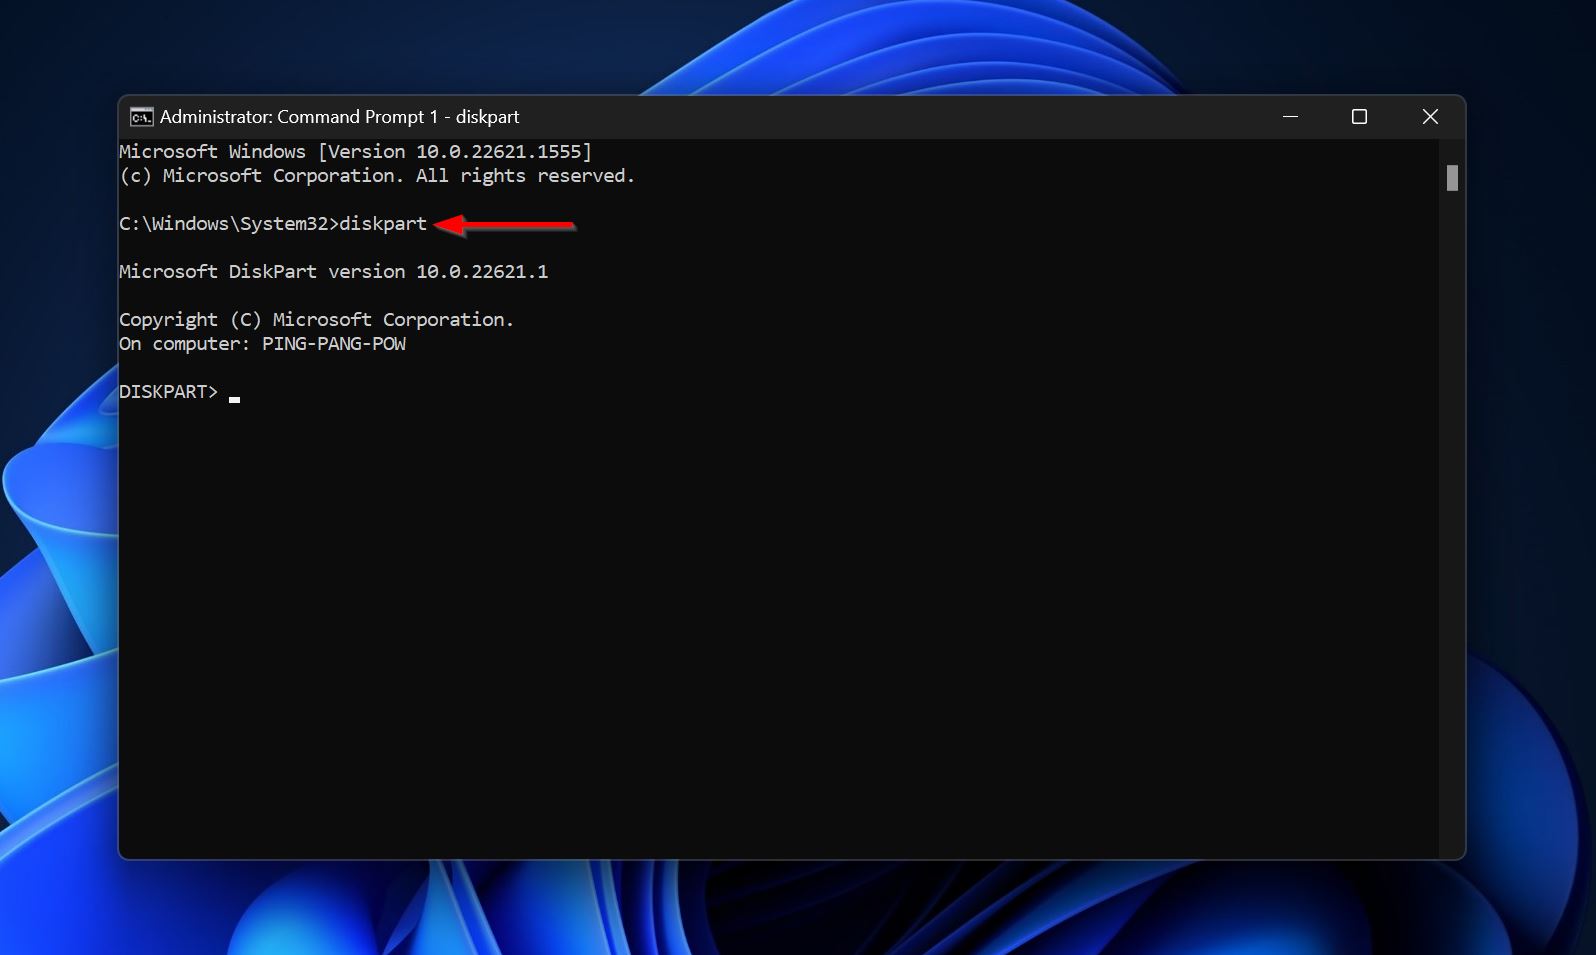
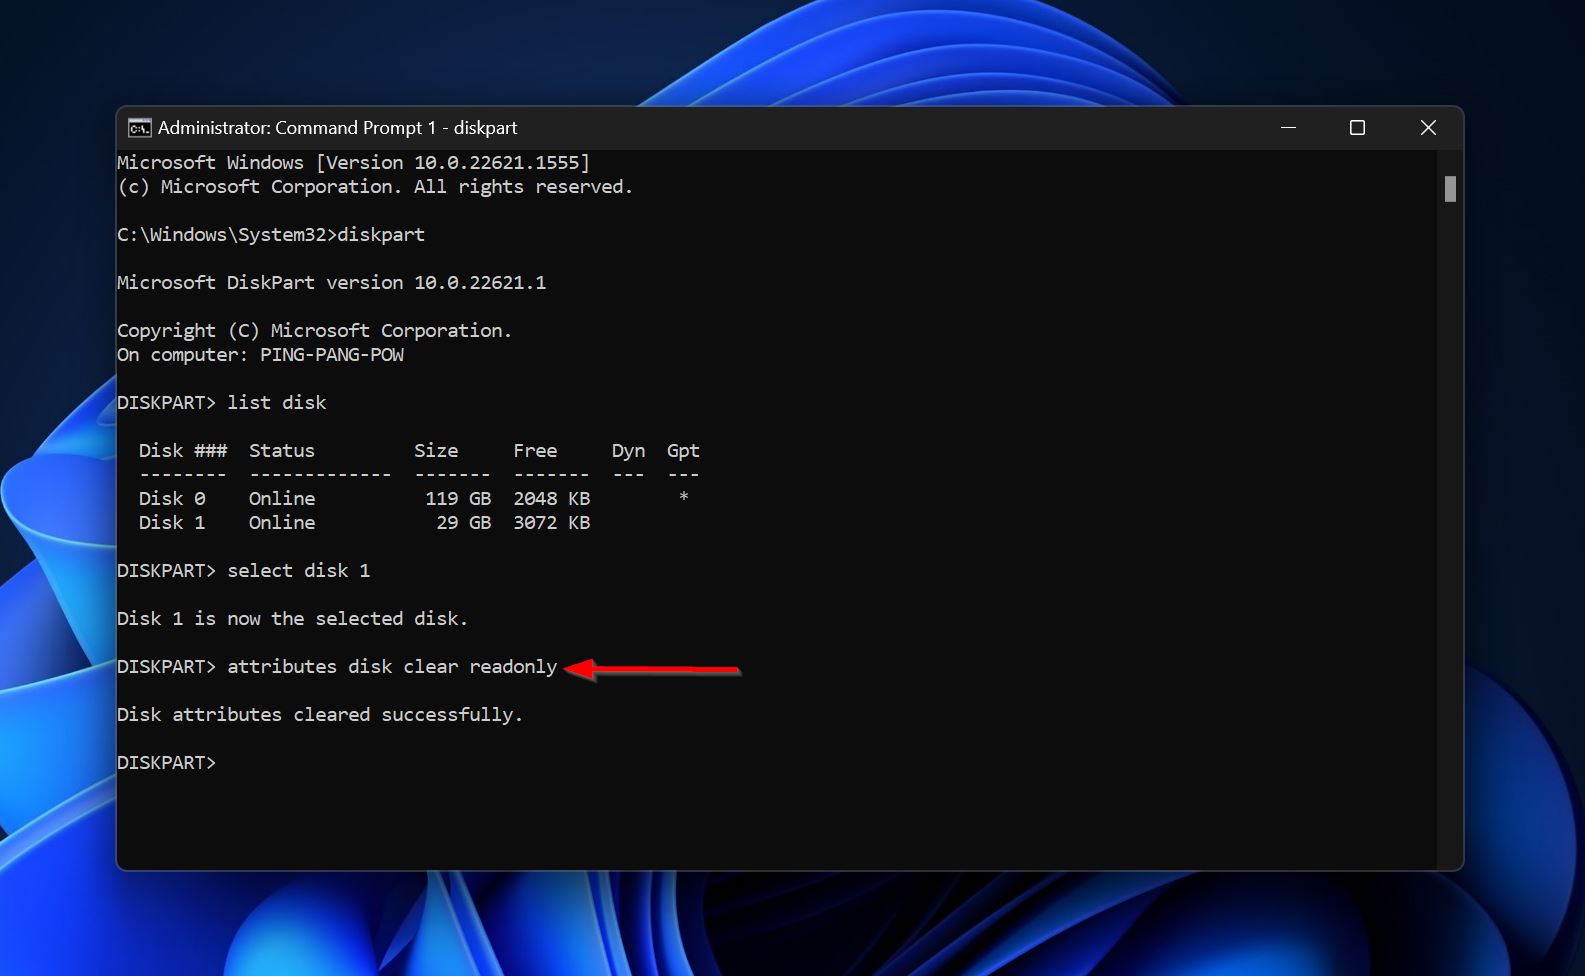
- Type “cmd” in Windows Search (Windows Key + S). Right-click on Command Prompt > Run as administrator.
- Type diskpart and press Enter.
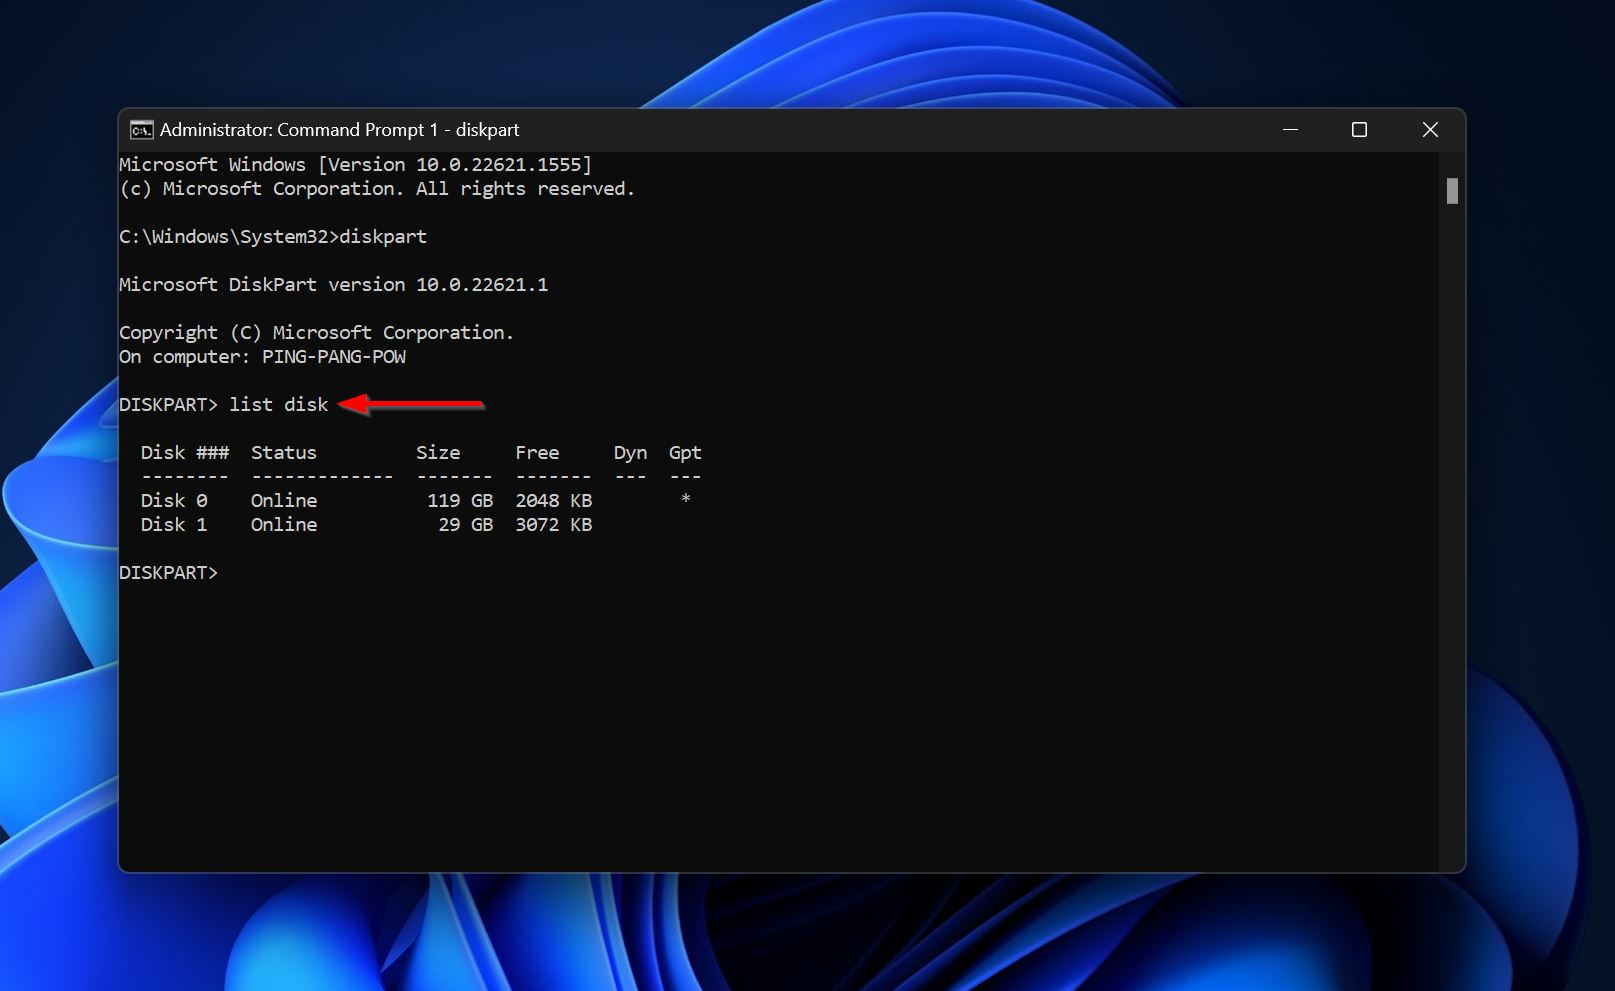
- Type list disk and press Enter. This will display all the drives connected to your PC.
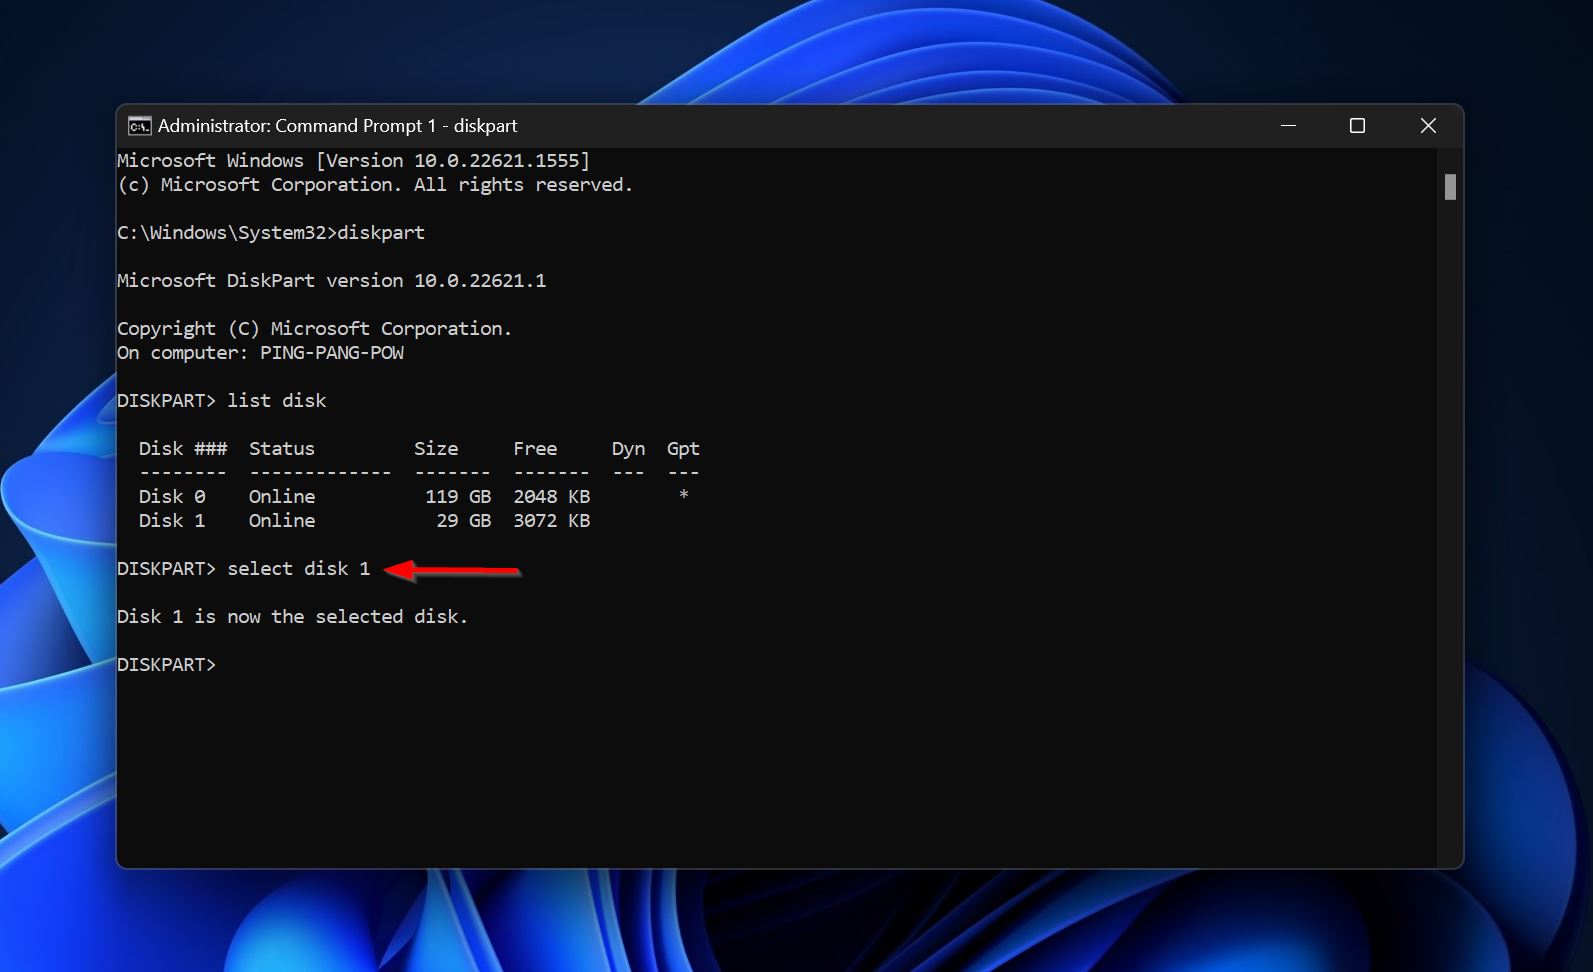
- Select the drive with the I/O device error–type select disk x and press Enter. Replace x with the disk number of the drive. For example, select disk 1.
- Type attributes disk clear readonly and press Enter. This should remove the write-protection from your SD card.
The steps above should be enough to disable write-protection on the SD card. However, if the method above doesn’t work, follow steps 1 to 4, and instead of step 5, follow these steps:
- Type clean and press Enter.
- Type format fs=ntfs quick and press Enter.
This performs a quick format on the drive. However, your data will still be recoverable using Disk Drill, the data recovery program we’ll use to recover data from a disk with the I/O device error. To skip to the data recovery guide, click here.
Fix 7: Check the Drive’s S.M.A.R.T. Status
Self-Monitoring Analysis and Reporting Technology (S.M.A.R.T.) lets you see your drive’s health across numerous parameters. Using a disk’s S.M.A.R.T. status, you can determine if it’s failing or if there’s an accumulation of bad sectors on it.
There are plenty of third-party tools that can provide you with an in-depth S.M.A.R.T. report of your drive. A good choice is Crystaldiskinfo.
In the S.M.A.R.T. report of your drive, look at the following fields:
- 05: Reallocated Sectors Count
- 0A: Spin Retry Account (Not applicable to flash storage devices like USB drives, SSDs, and memory cards)
- C4: Reallocation Event Count
- C5: Current Pending Sector Count
- C6: Uncorrectable Sector Count
If the values in these fields are in triple digits or more, it indicates a failing drive. You should stop using the drive immediately and contact a professional data recovery service. Continued data usage can result in permanent data loss.
In case the values are in double digits or below, you can perform a full format of the drive and continue using it. However, your data will be lost irrecoverably, and it’s still recommended you change the drive soon.
How to Recover Data From a Storage Device that Encountered the I/O Device Error
The security of your data should be the primary concern when dealing with the I/O device error on your disk. As long as your drive is visible in Windows Disk Management with its accurate storage size, you can recover data from it.
If you’re unable to boot into your computer, use this guide to create a live USB drive that’ll let you boot into the Windows GUI.
In this tutorial, we’ll use Disk Drill to perform data recovery. It was an easy choice, thanks to its ease of use and advanced data recovery algorithm. It works with all types of storage drives and common file systems (including RAW drives that have no file system at all).
The data recovery process consists of two parts:
Part 1: Create a Disk Image of the Drive
It’s recommended that you create a disk image of the drive and scan it for data, instead of directly scanning the physical drive. A disk image is essentially a soft copy of your entire drive, so you’ll need another storage drive that has free space equal to or more than the size of the affected drive.
Here’s how to create the disk image using Disk Drill:
- Download and install Disk Drill.
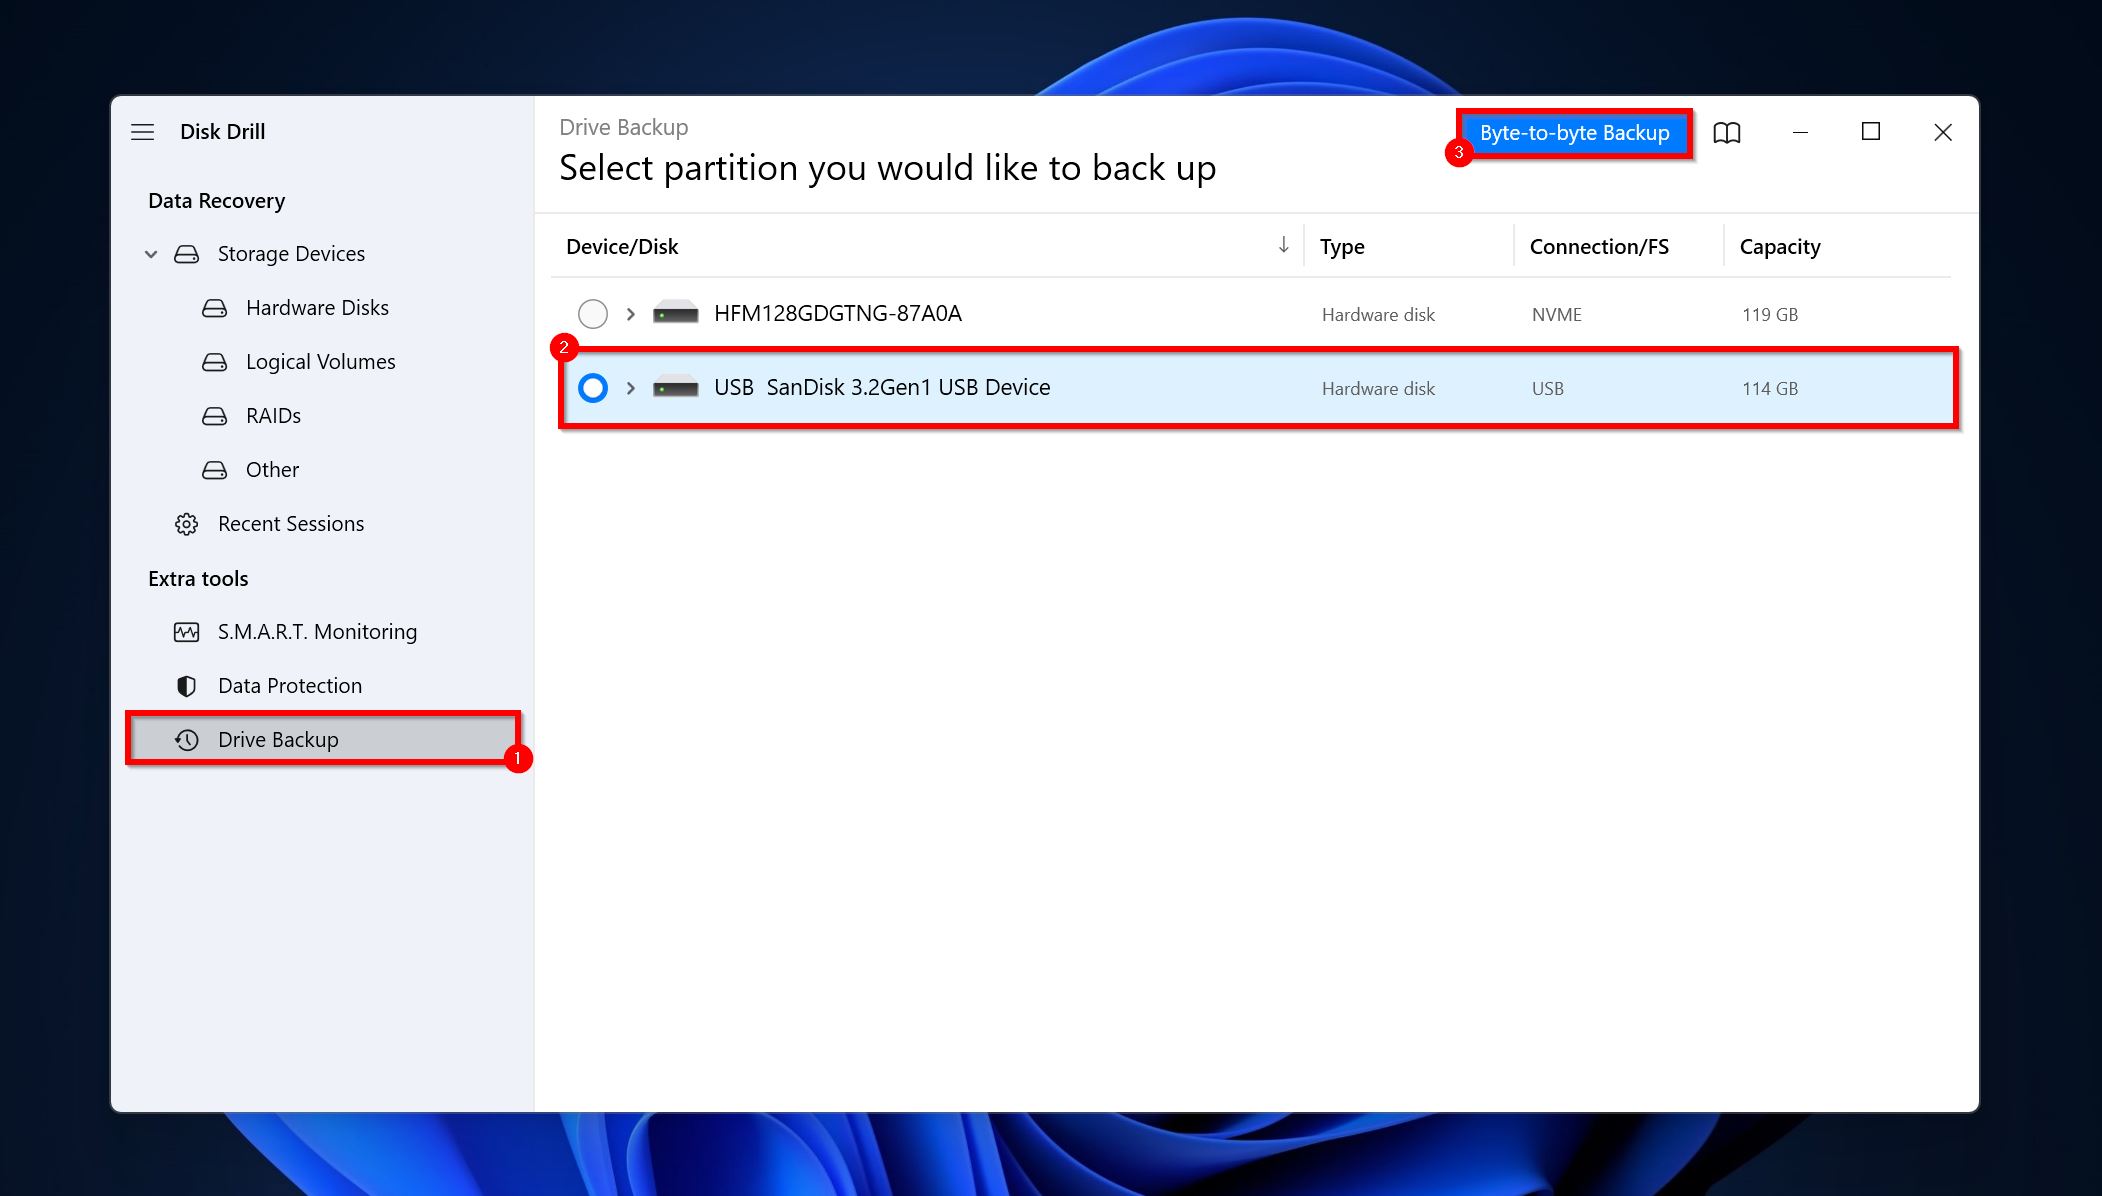
- Open Disk Drill and click on Drive backup under Extra tools.
- Select the drive and click on Byte-to-byte Backup.
- Choose a save destination and click OK.
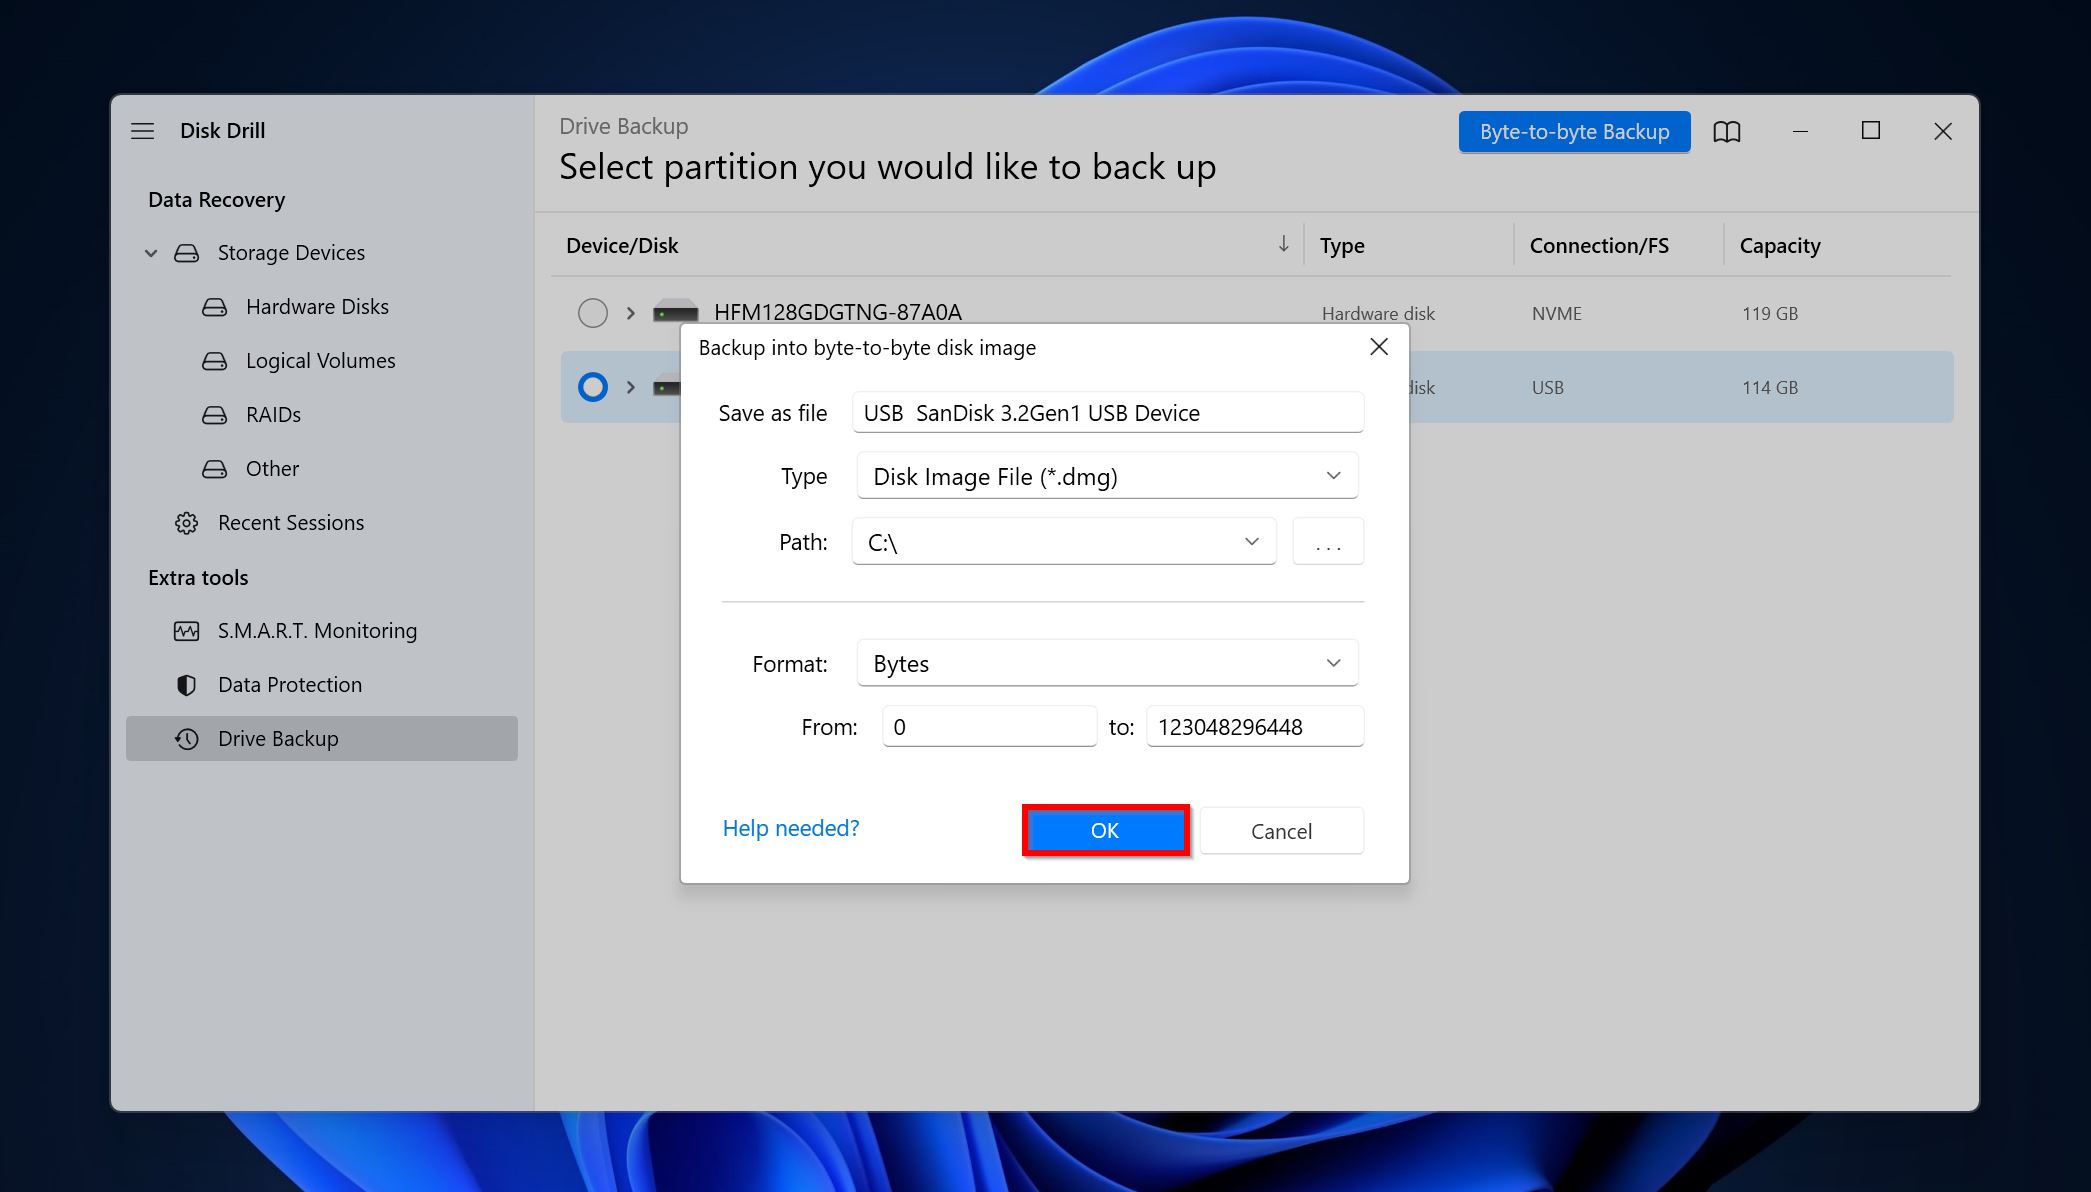
- Disk Drill will create the disk image.
Part 2: Recover Data from the Disk
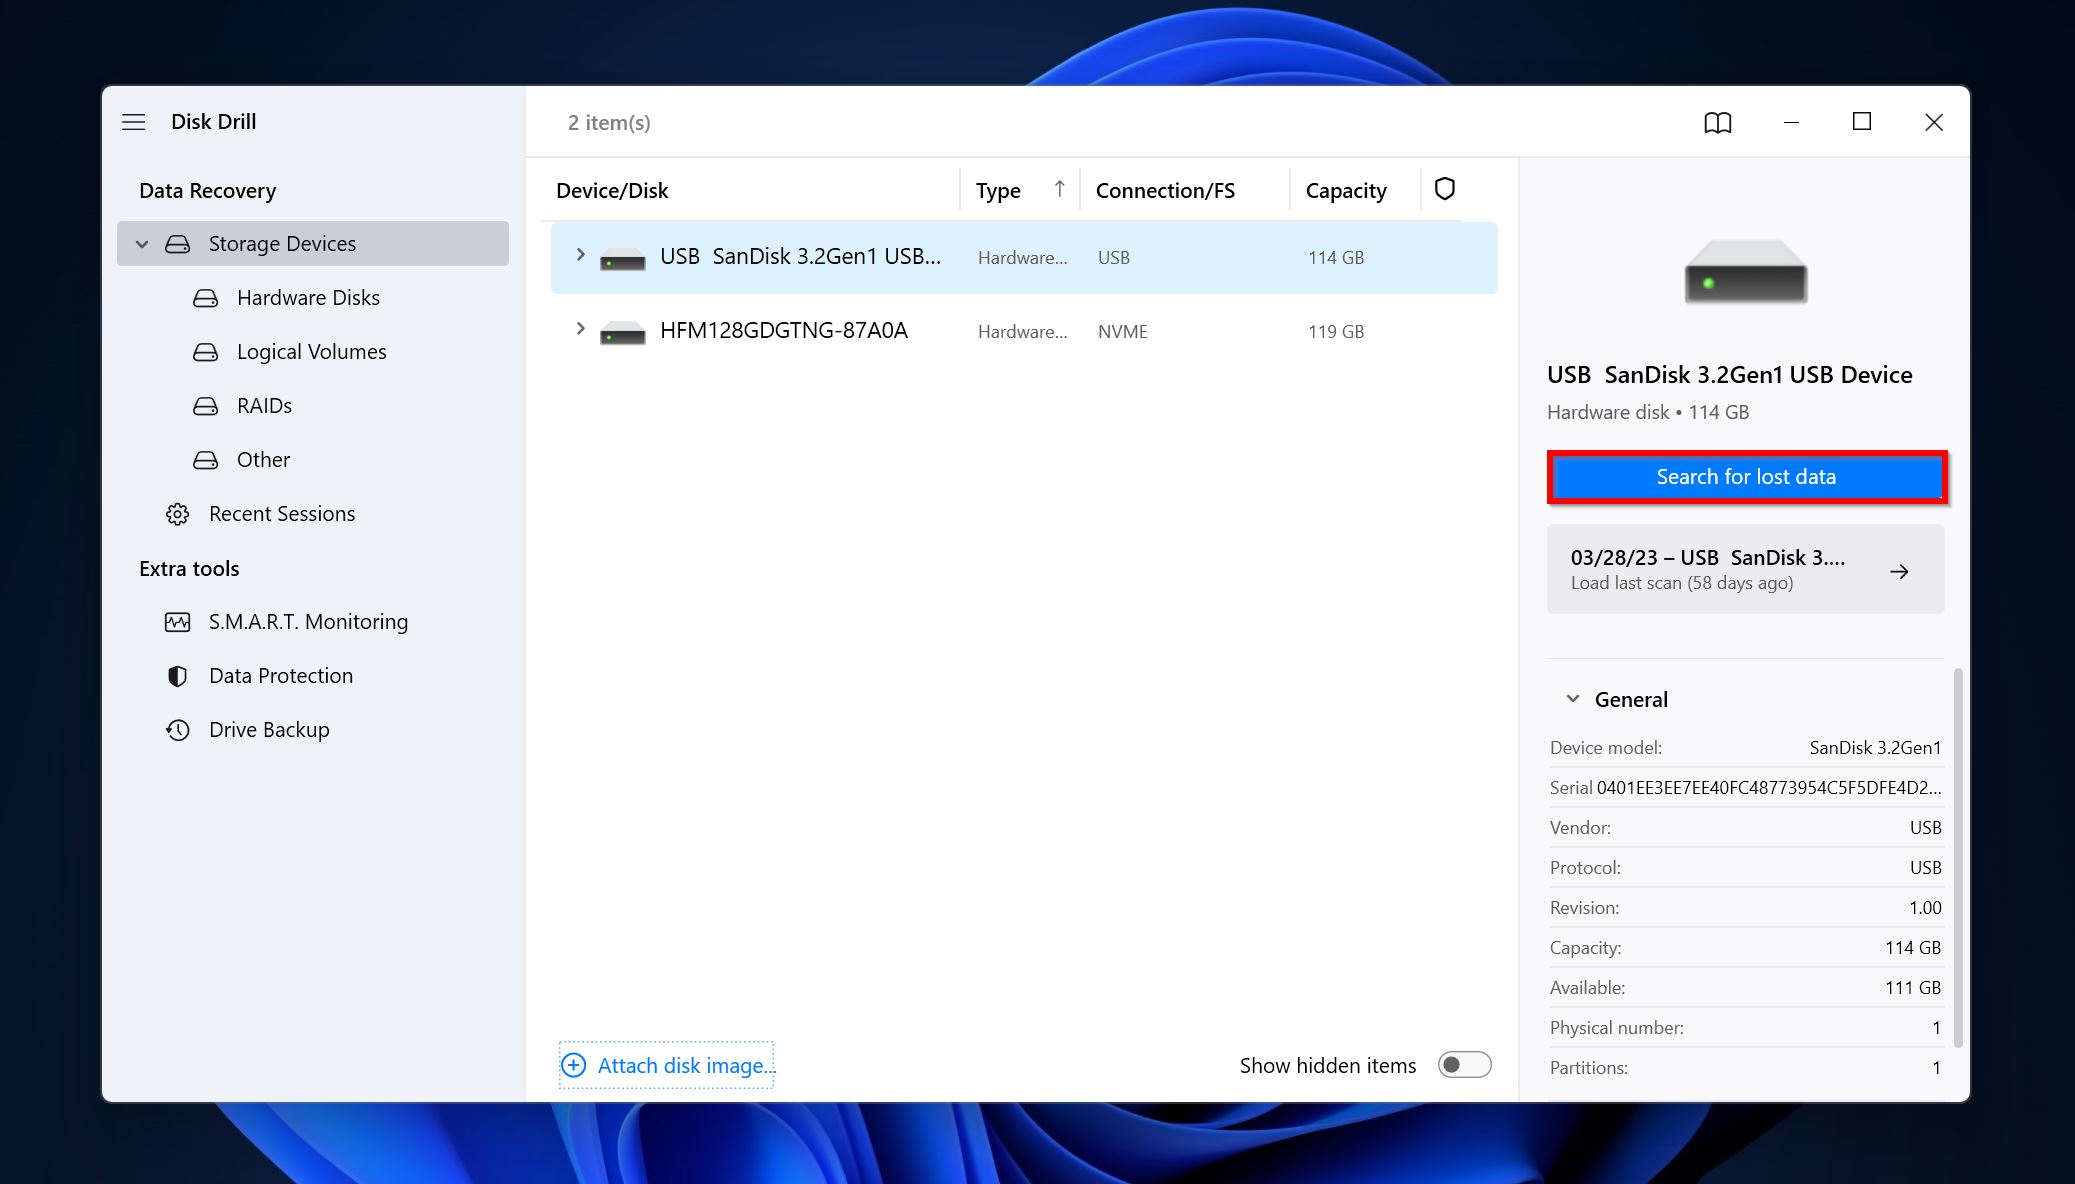
- Open Disk Drill, click on Attach disk image, and double-click on the disk image you’d created earlier. The disk image will be added as a drive.
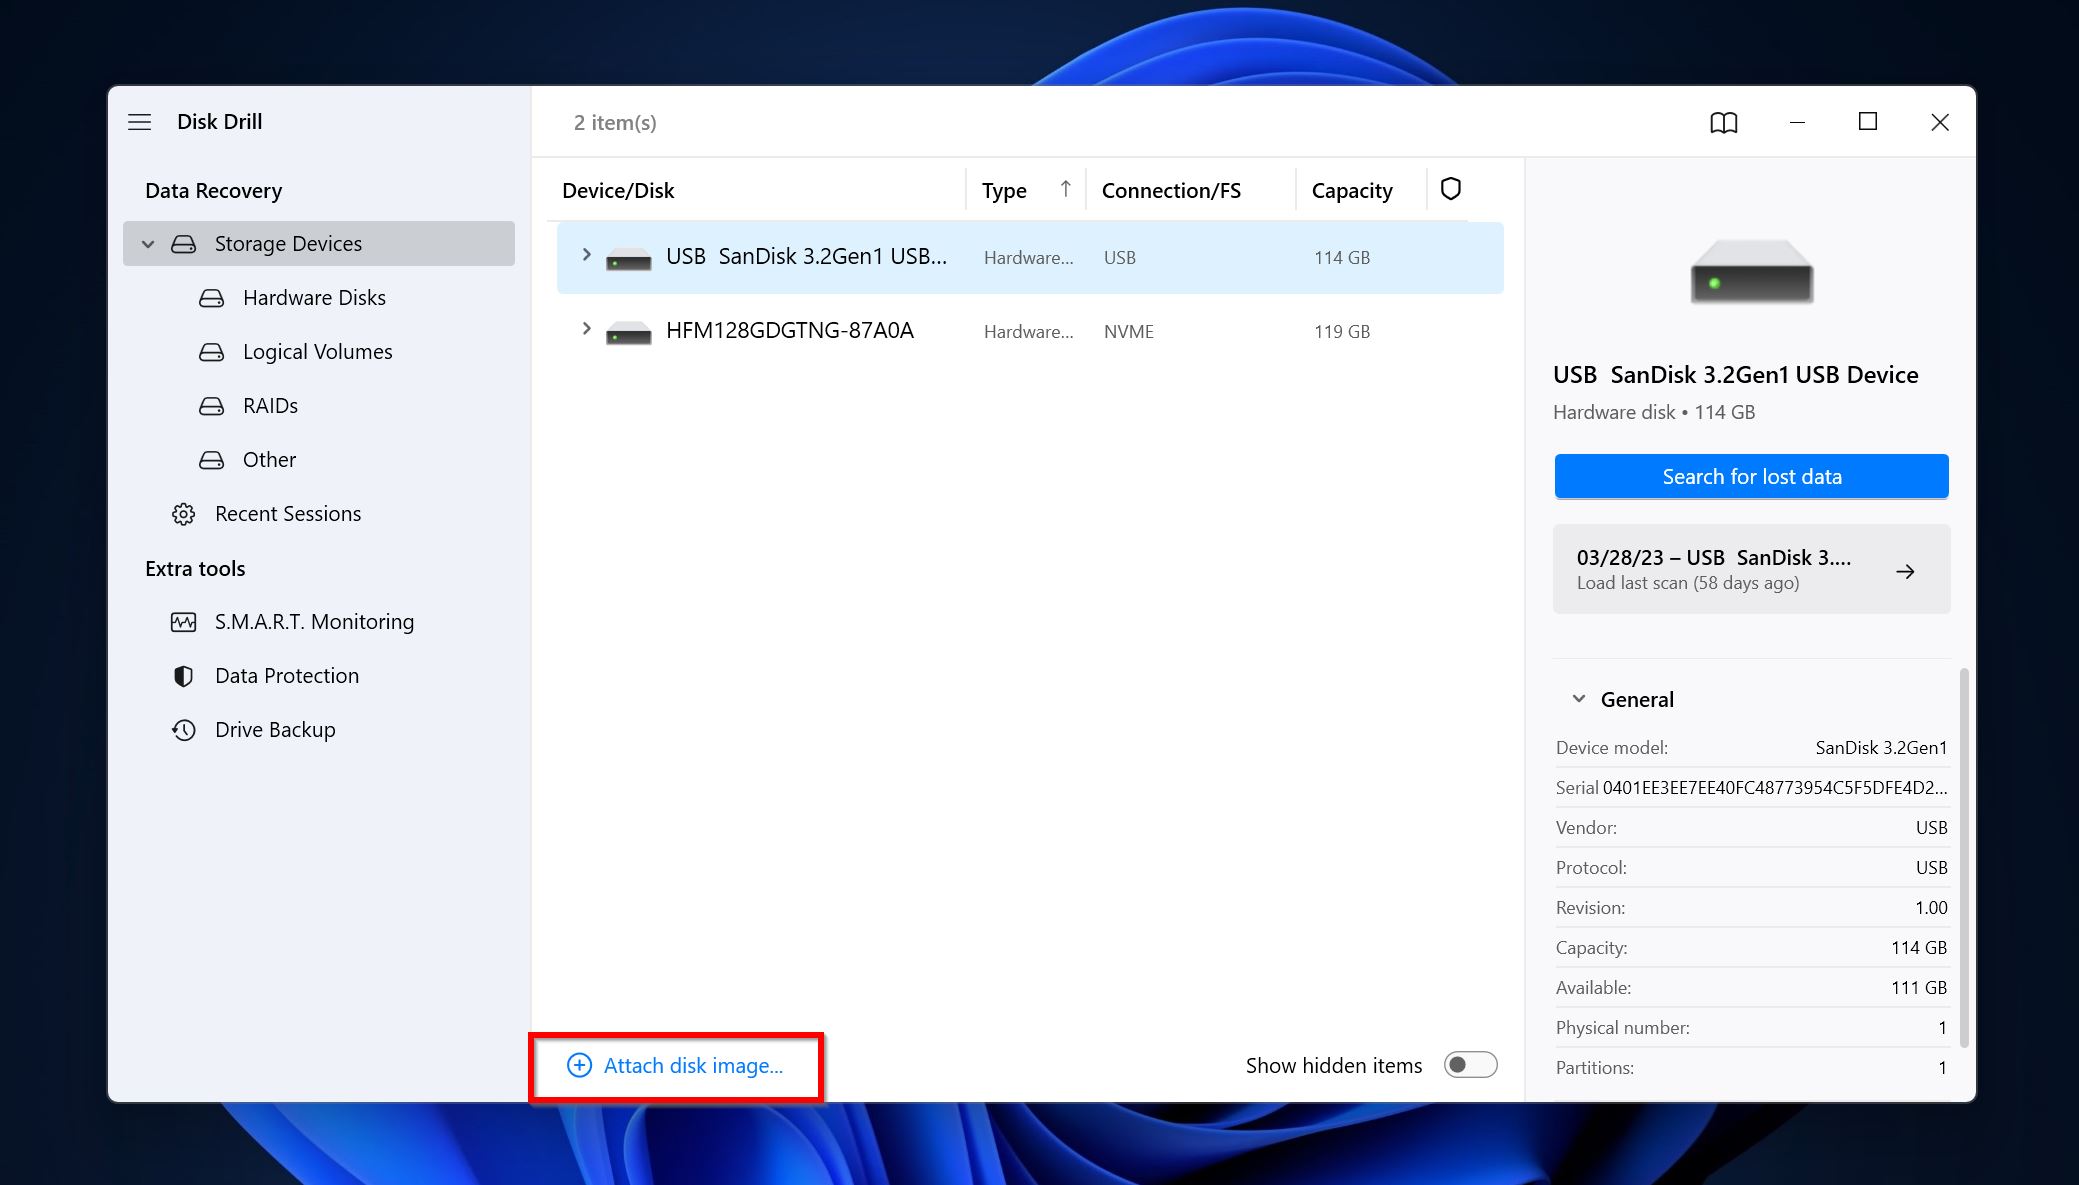
- Select the disk image and click Search for lost data.
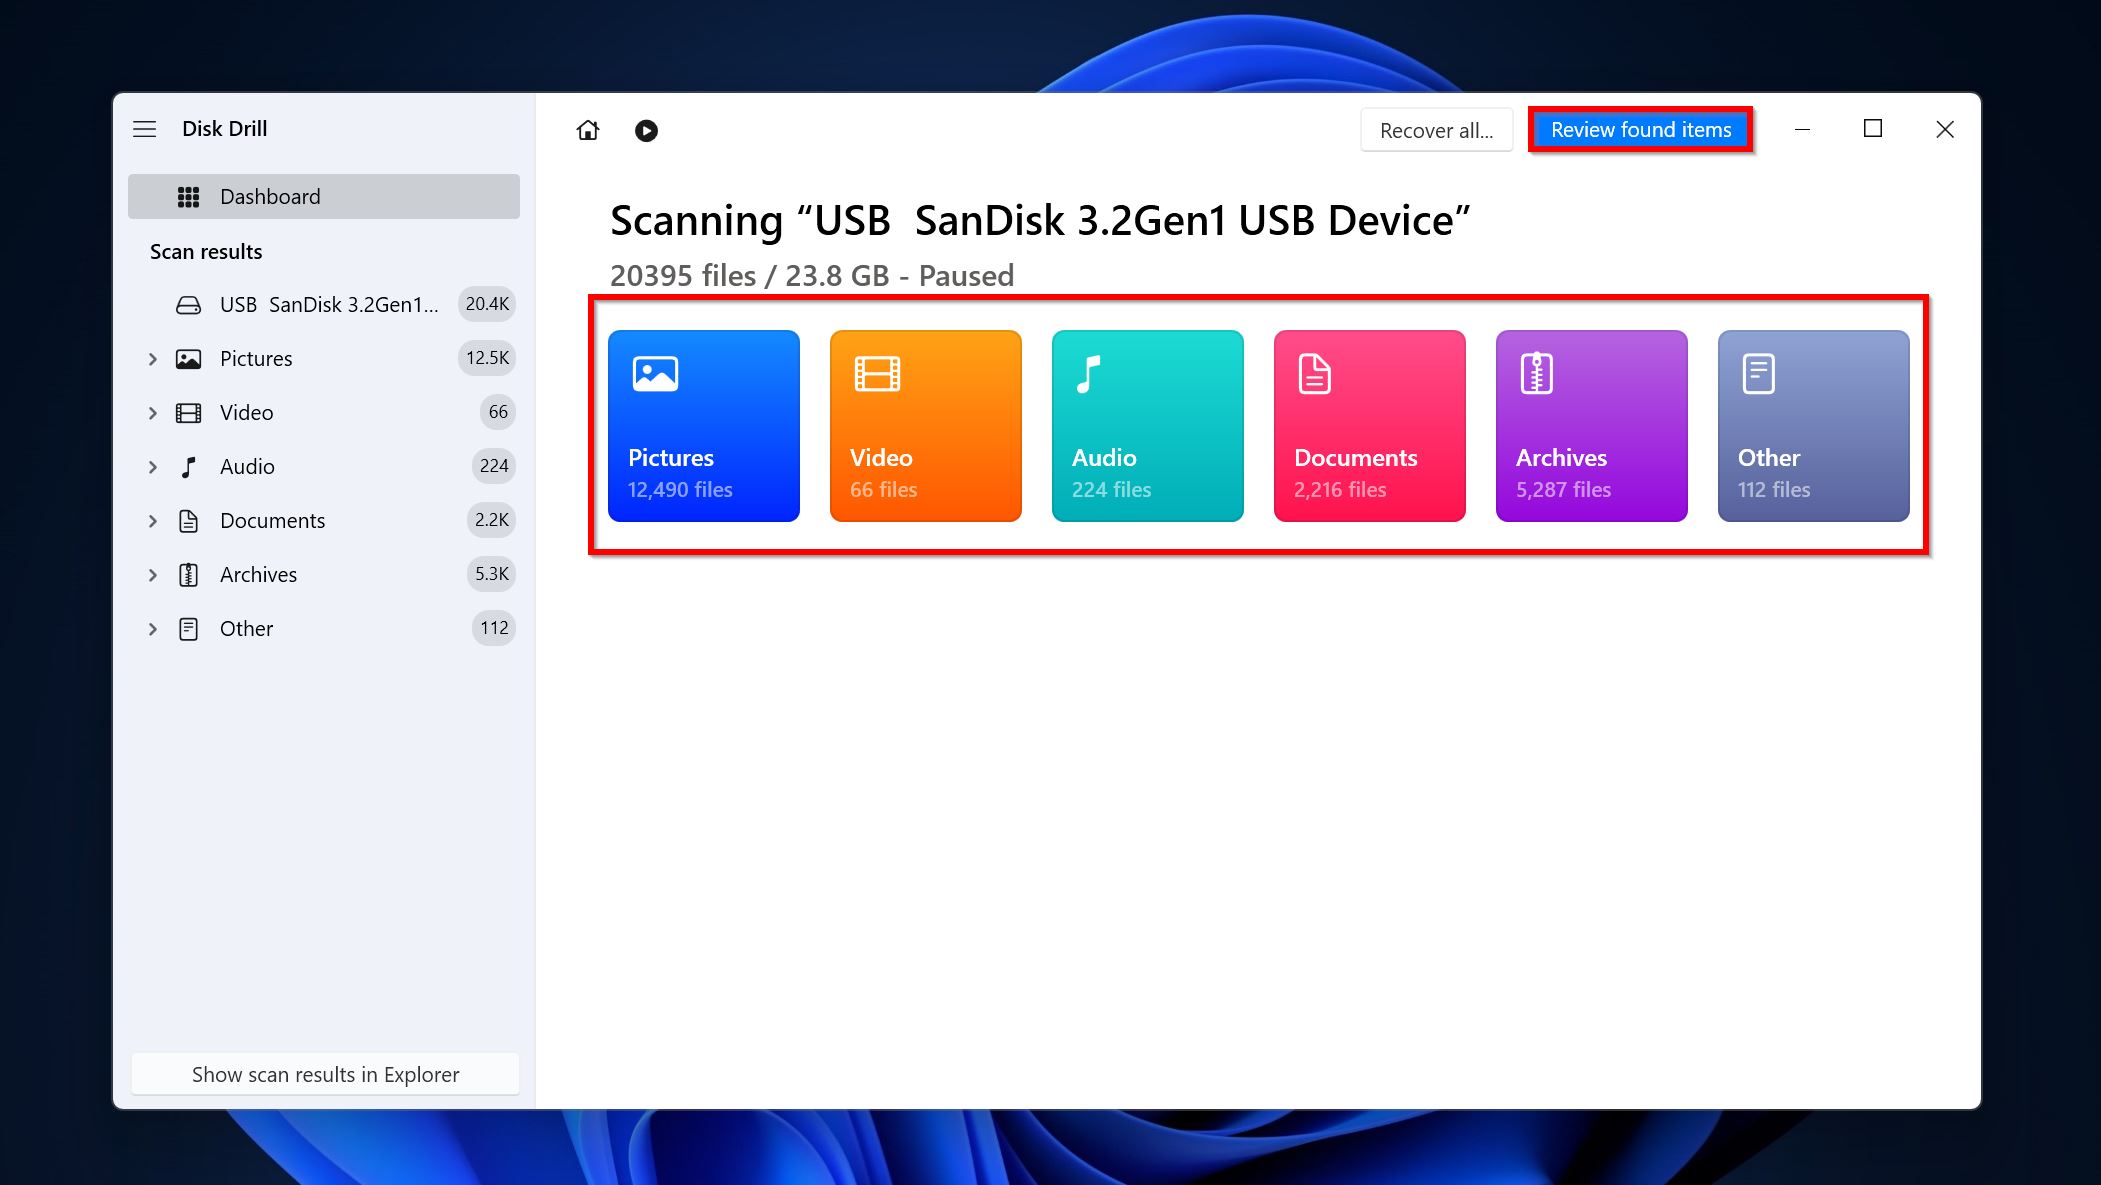
- Click on Review found items. You can also directly filter out the results by clicking on the relevant file type (Pictures, Videos, Audio, Documents, Archives, and Other).
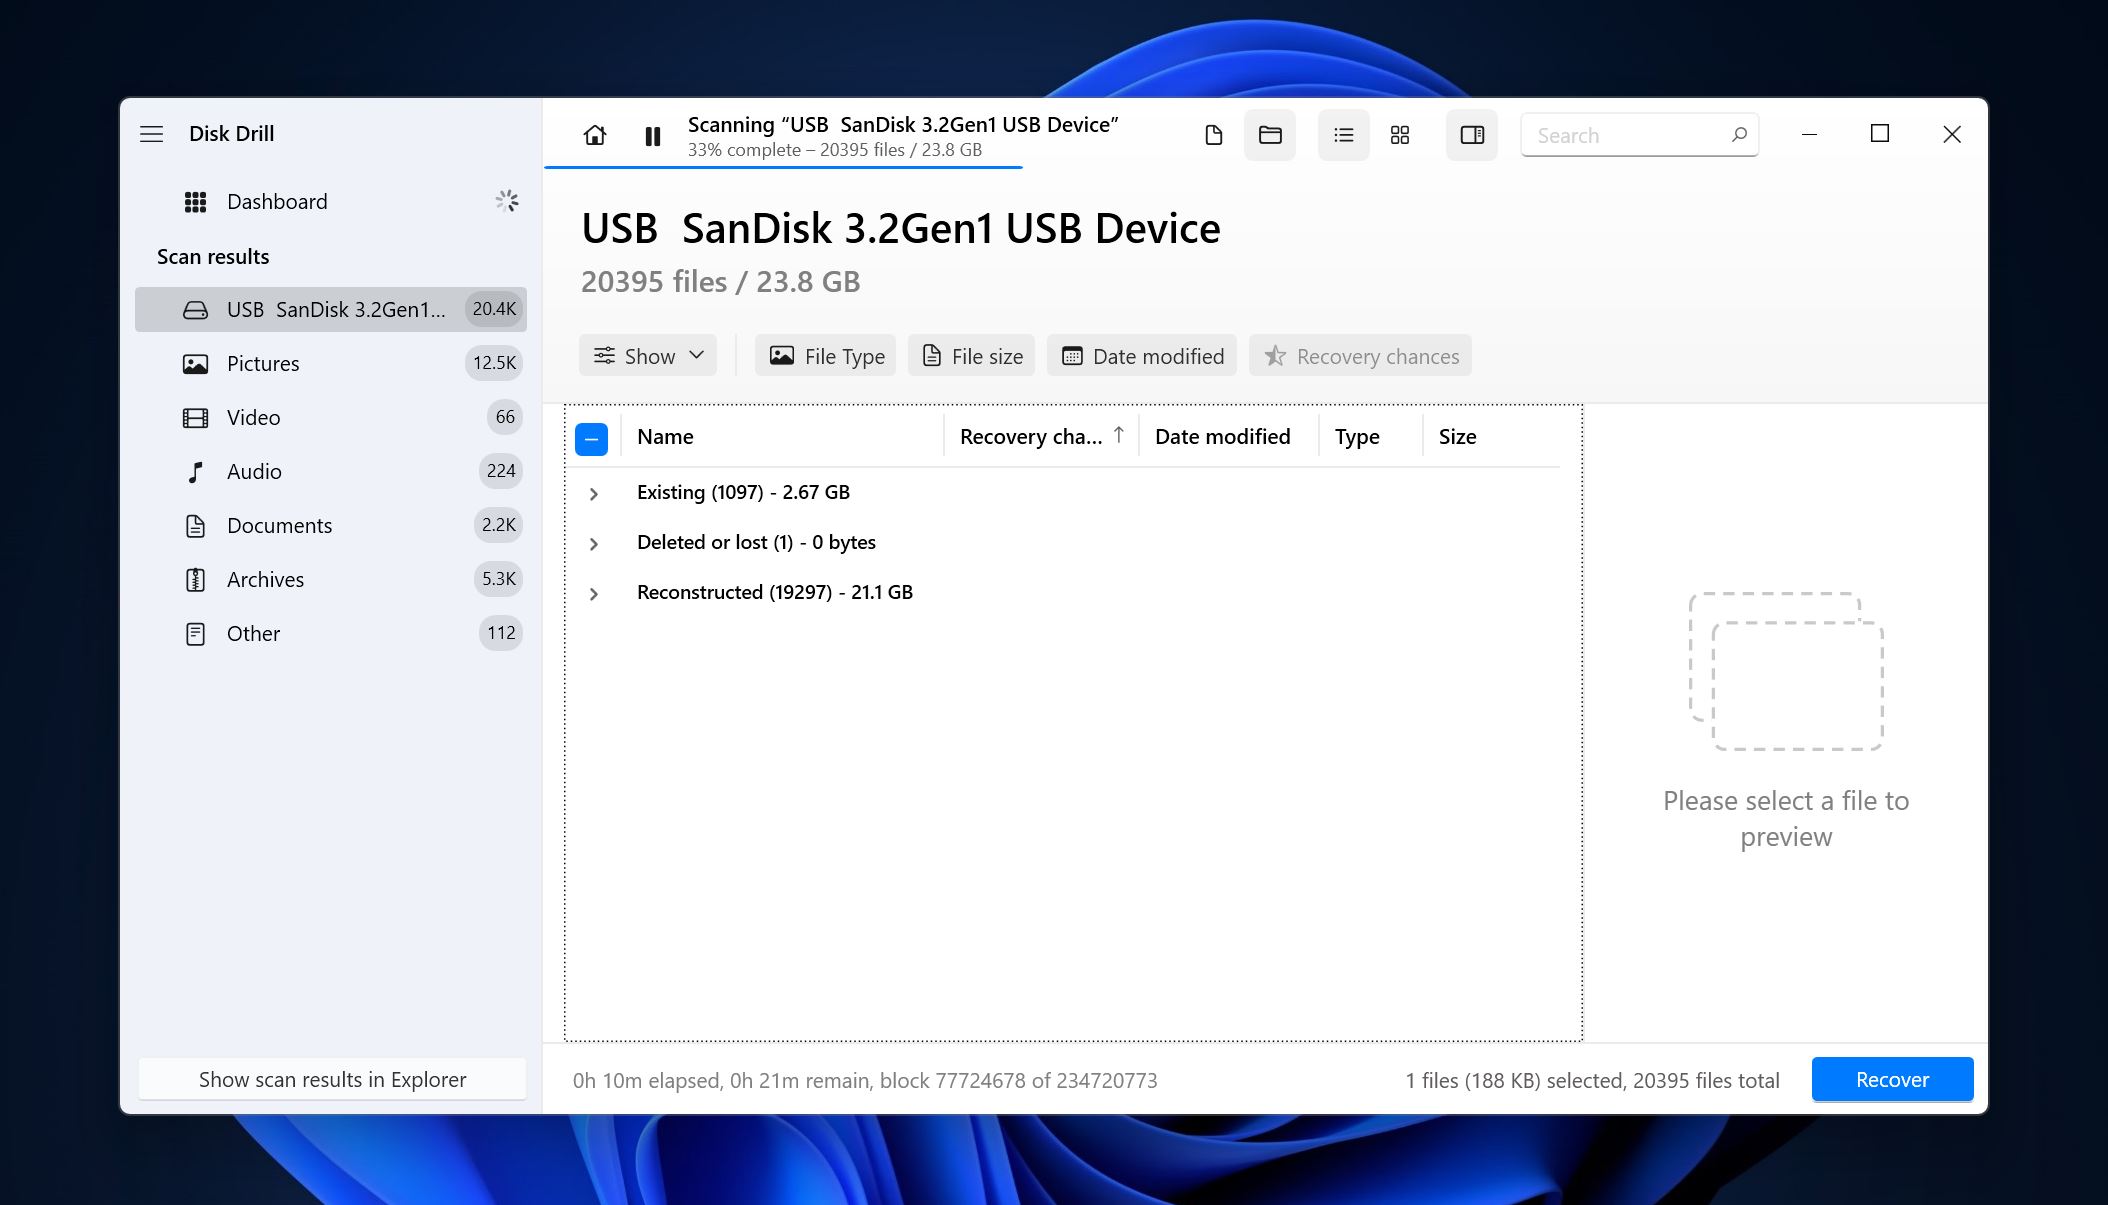
- Expand the Existing section to view the currently stored files on the drive. The Deleted or lost and Reconstructed sections list previously deleted files.
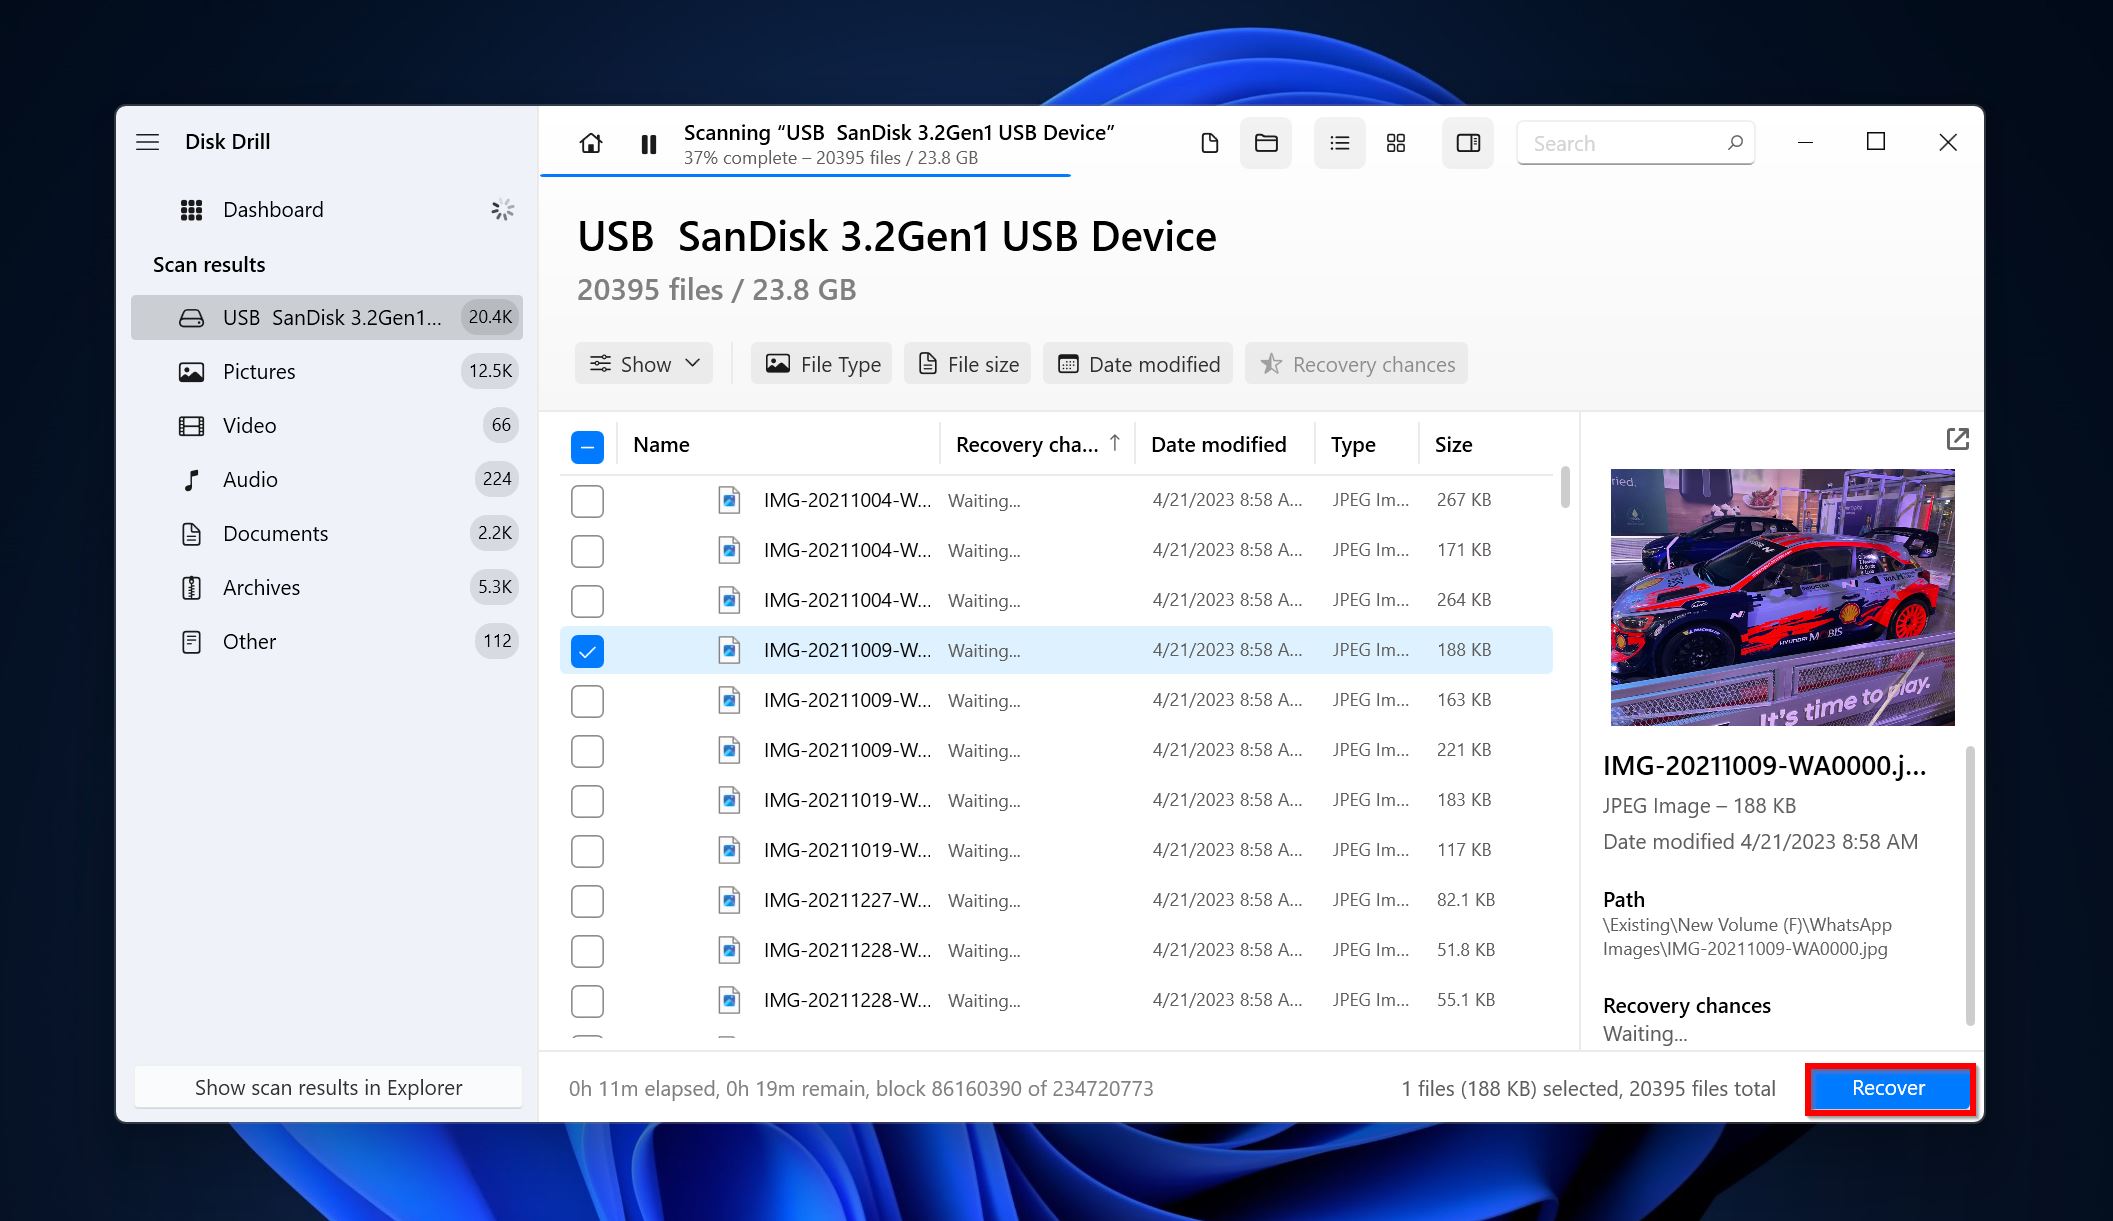
- Select the files using the checkboxes. Disk Drill displays a preview of the currently selected file. To manually preview a file, click on the eye icon next to the filename. Click on Recover after confirming the selection.
- Choose a recovery destination and click on Next.
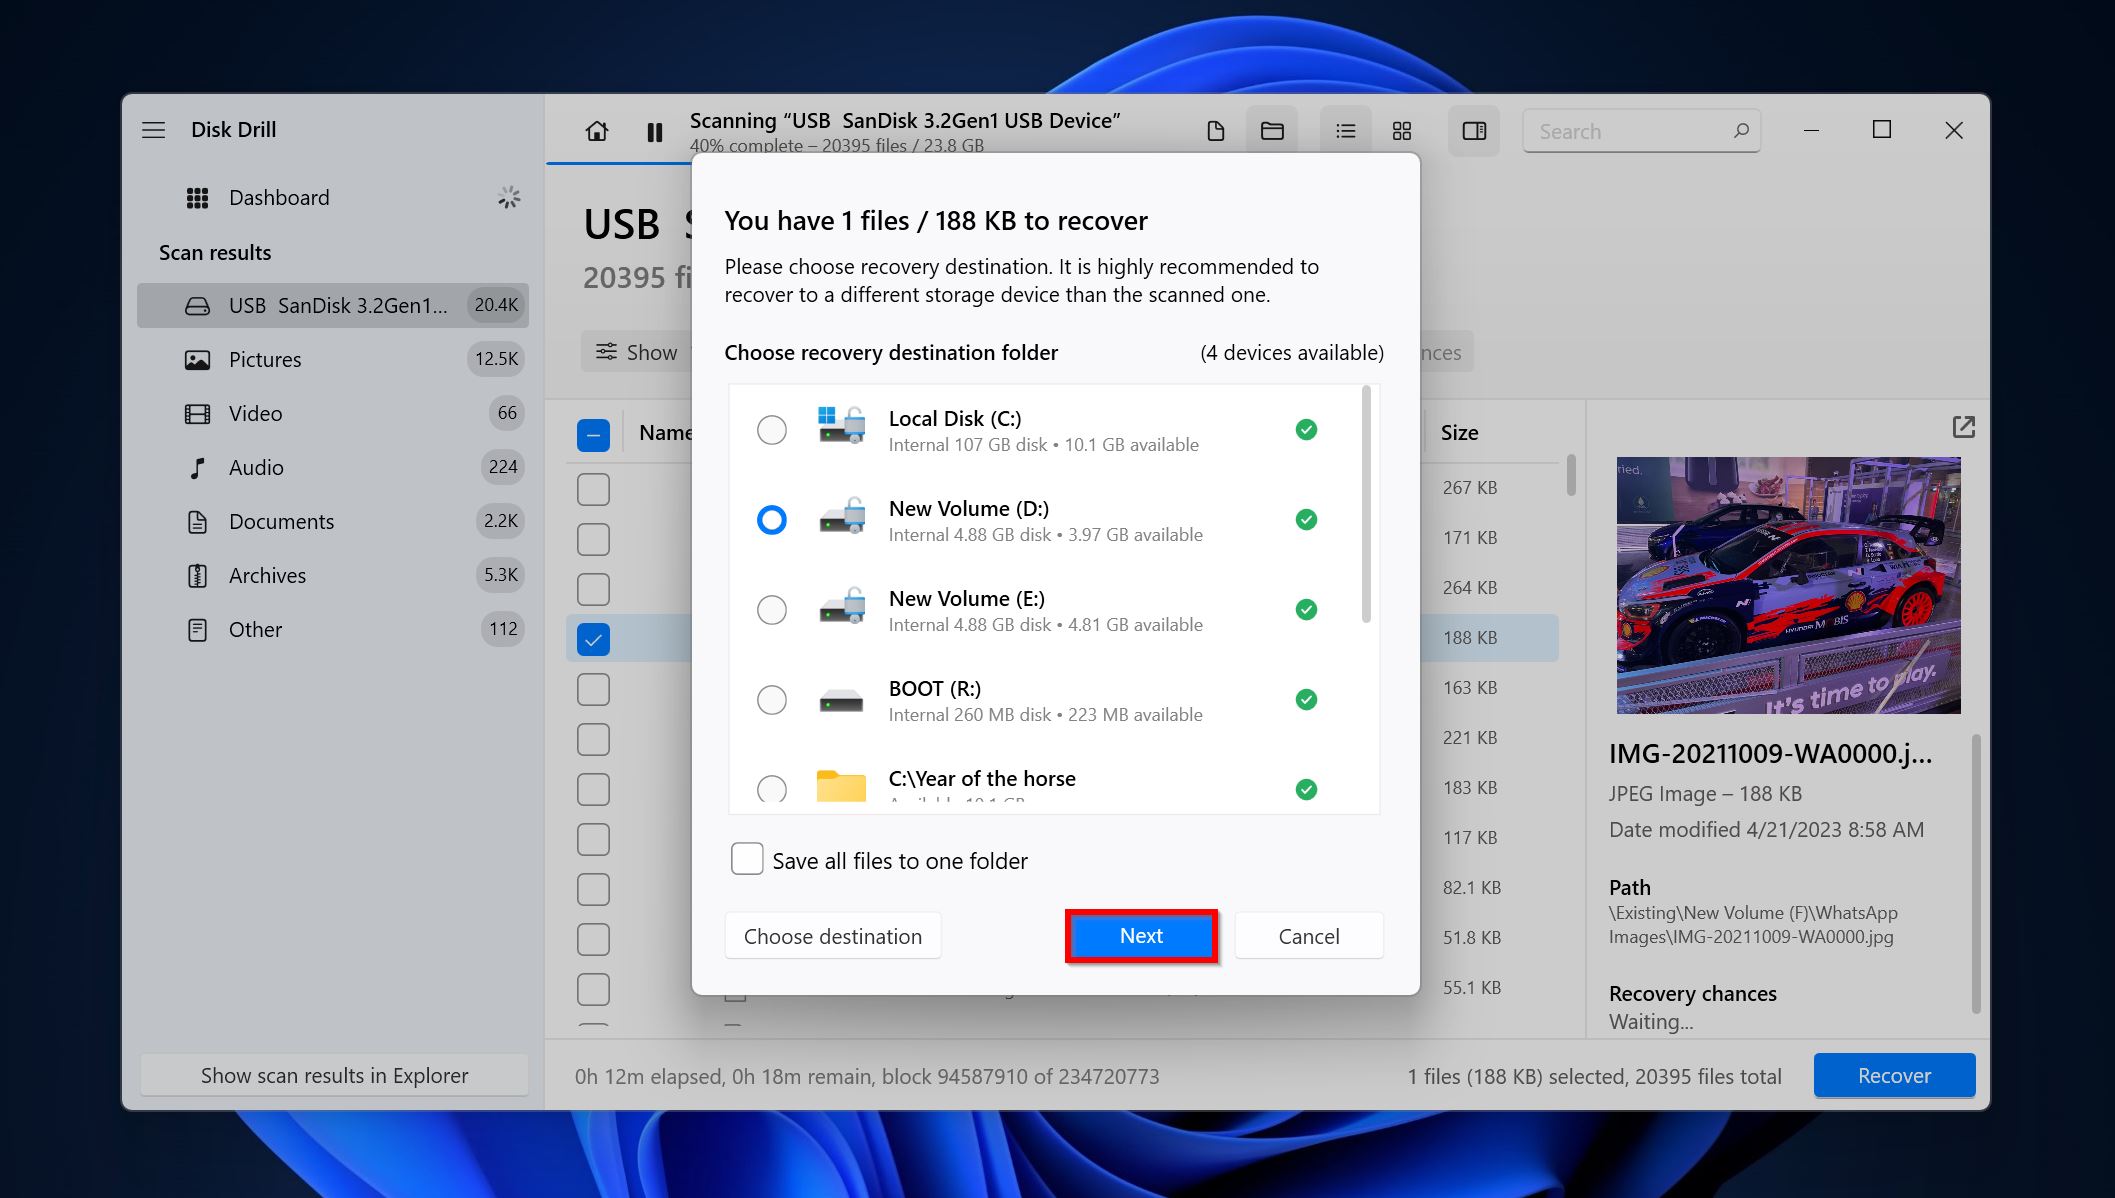
- Disk Drill will recover the files for you.
Conclusion
The I/O device error is typically benign, and you can fix it using the methods above. However, the only way to completely protect yourself from data loss due to any reason, is to create regular backups of important data. We recommend you store the backups on local drives as well as cloud storage.
FAQ
- Restart the PC.
- Check the cables and ports for damage. Reconnect the drive.
- Perform a clean boot of your PC and see if the error persists.
- Ensure the transfer mode is correct in the IDE channel properties.


