 Screenshots allow you to capture information efficiently, whether you want to save or share them. However, they can easily get lost on Windows due to a variety of reasons, including the snipping tool you use. It’s also possible that you have removed them by accident or that your storage is corrupted.
In the following sections, we will explain where you can find your screenshots by default and how to get permanently deleted screenshots back in case you can’t locate them there anymore.
Table of Contents
Where Are My Screenshots Saved?
To understand where to find screenshots on Windows, it’s important that you learn how the built-in snipping features work on a PC. There are multiple ways you can take screenshots. Here are some of them:
- Press the “PrtScn” key on your keyboard. This will take a capture of your entire screen, and the screenshot gets saved to the clipboard. You can paste this photo on any platform that works with graphics. To access your clipboard history, simply press Windows key + V on your keyboard.
- Use the “Windows key + Shift + S” shortcut. After taking your screenshot, it gets saved to the clipboard and the “%UserProfile%\Pictures\Screenshots” folder that you can locate on File Explorer.
- Open the Snipping Tool app on Windows. Take your screenshot as instructed in the app and make your edits to the photo. When saving your screenshot, you will be asked to select your preferred file location. To recover unsaved snipping tool images, you can find them in “%UserProfile%\Pictures\Screenshots” in File Explorer.
- Press “Windows key + PrtScn.” This will take a shot of your entire screen and automatically save it to the “%UserProfile%\Pictures\Screenshots” folder.
Other apps that you use to take screenshots normally have their own default folder. For example, if you’re using the Xbox Game Bar, your screenshots might be saved to the “C:\Users\user\Videos\Captures” folder by default (note that this is changeable).
How to Get Deleted or Lost Screenshots Back
If you didn’t find your screenshots at the locations we have mentioned above, they might have already been deleted or lost on your Windows PC. But you might still be able to get them back! Here are six methods to recover deleted screenshots on Windows 10 and 11.
Method 1: Use the Built-in Search Features
Lost screenshots typically happen when you don’t have a file-naming scheme applied or a dedicated folder for them. You can quickly and efficiently locate them on your Windows machine by using the built-in search features. There are at least three approaches to this. Here are they:
- Typing the file name of your screenshot in the Start menu
- Using the Search box on the Windows taskbar
- Using the search field on File Explorer
These methods should be pretty self-explanatory. But when you search for files in File Explorer, consider the following steps to recover snipping tool images:
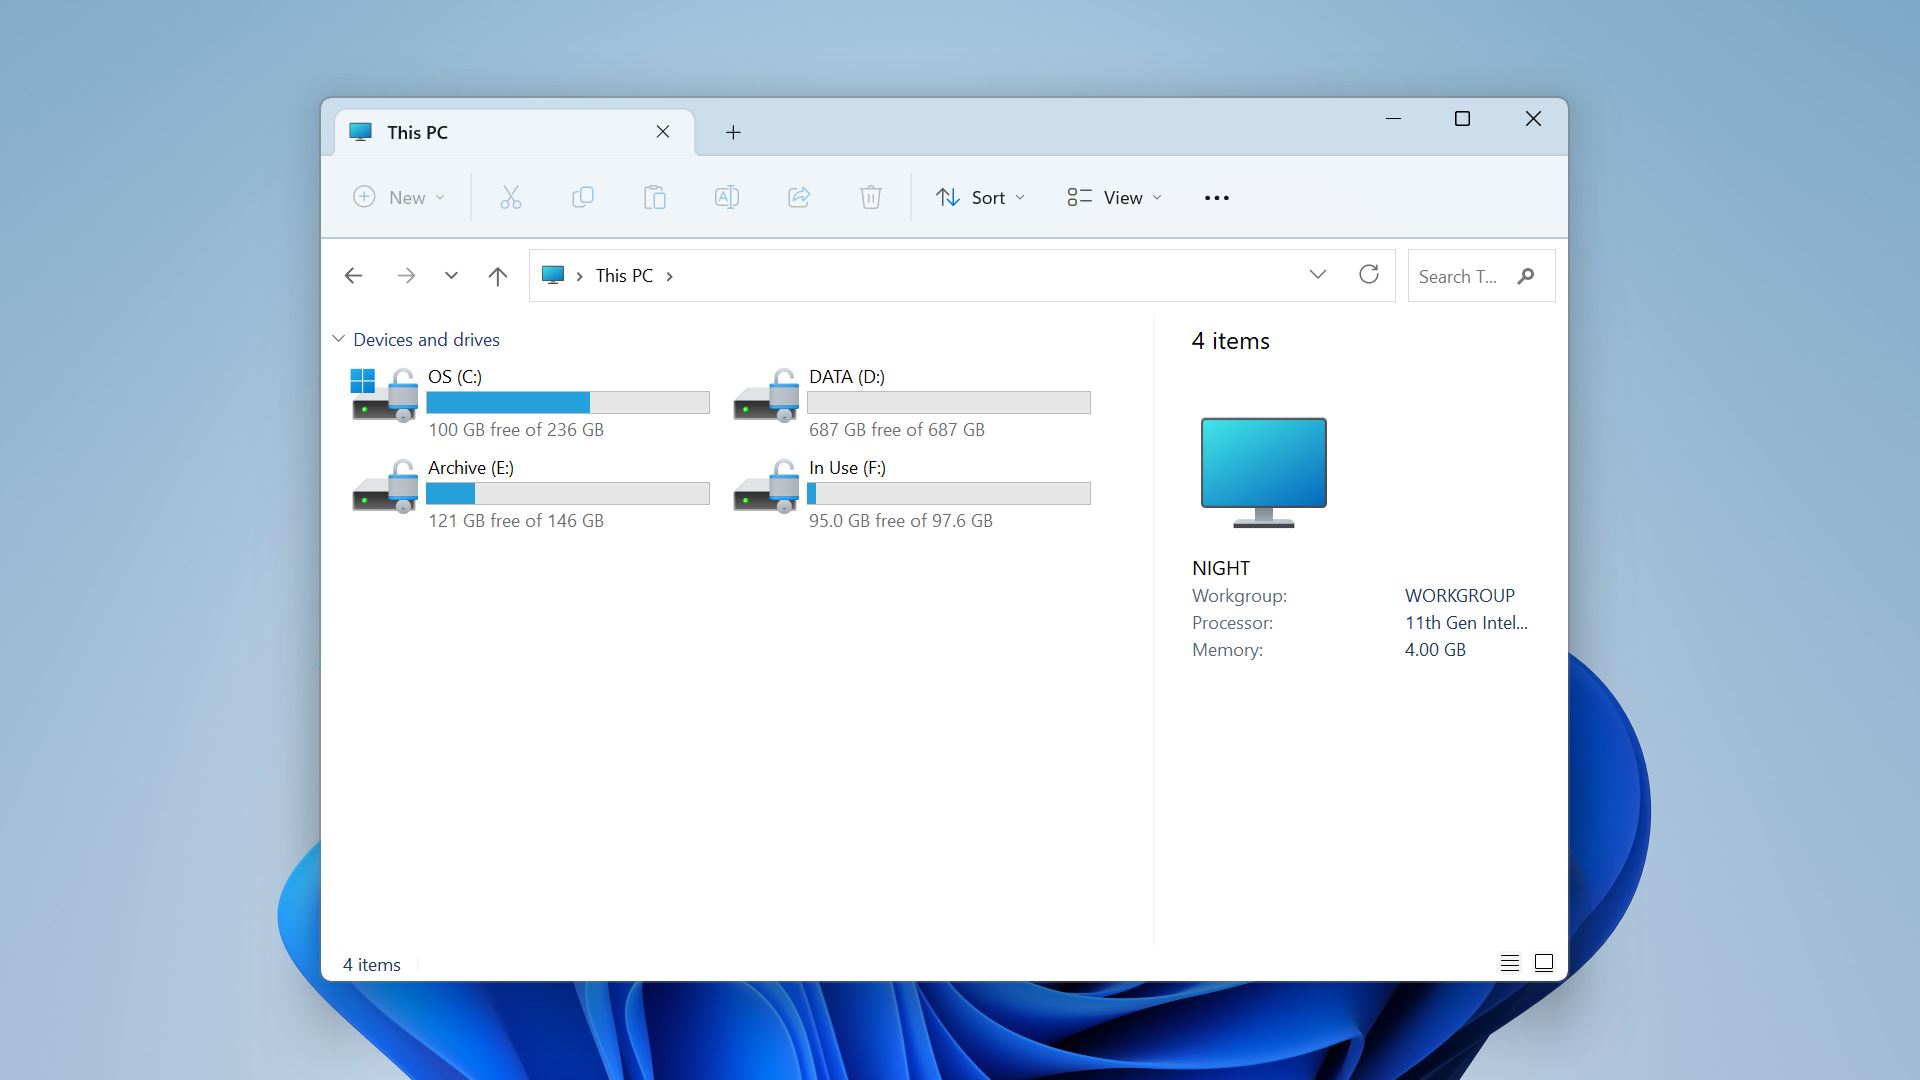
- On File Explorer, navigate to the folder where you think your screenshot is saved. If you want to search your entire machine, go to “This PC.”
- Next, type “screenshot” in the search box. This would filter out all other pictures (personal and downloaded) that aren’t snipped.
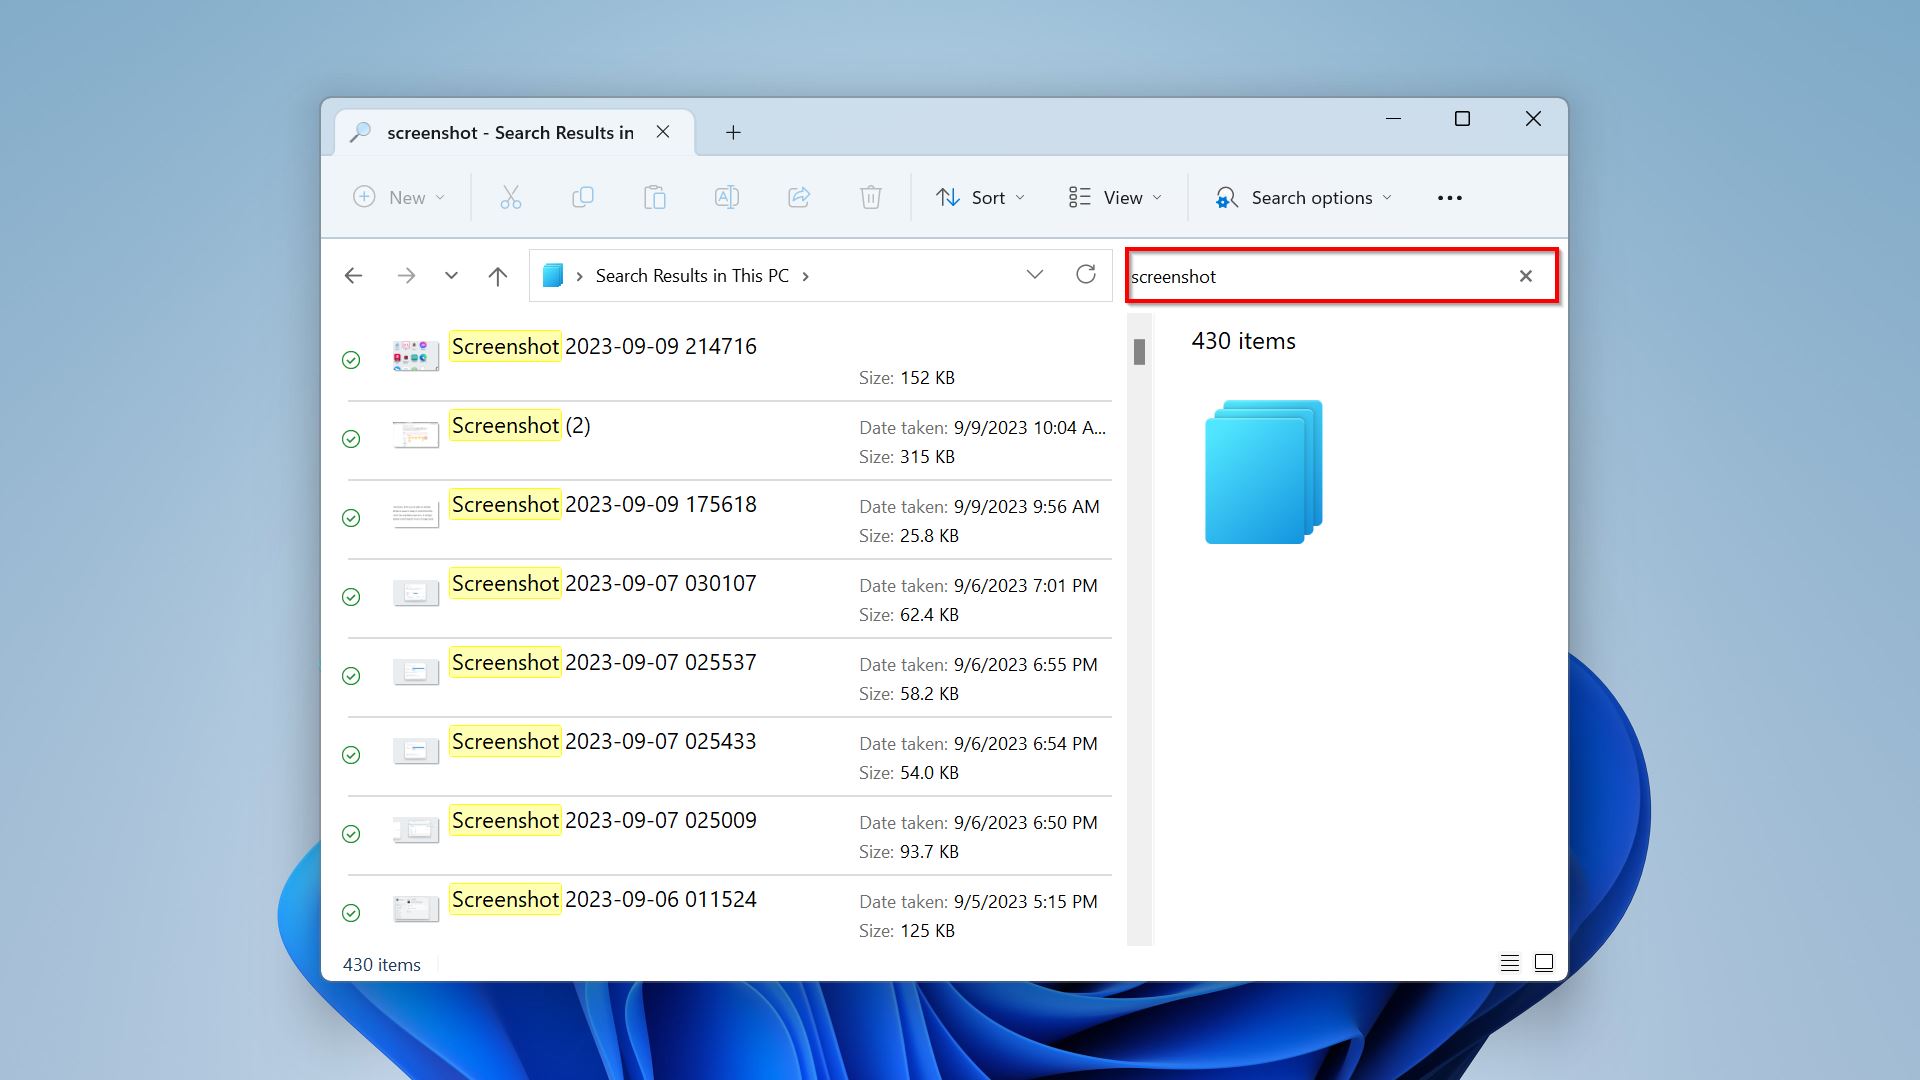
- After that, click the “Search options” drop-down and choose “Kind” > “Picture.” You can stack your filter options. For example, you can also select “Date modified” > “This week” to find your screenshots in the past seven days.

Method 2: Check the Recycle Bin
To do deleted screenshots recovery, you can use the Recycle Bin folder. You should be able to find recently removed files unless you have chosen to permanently delete them. You can usually access it in the upper-left corner of your desktop or by using Windows Search.
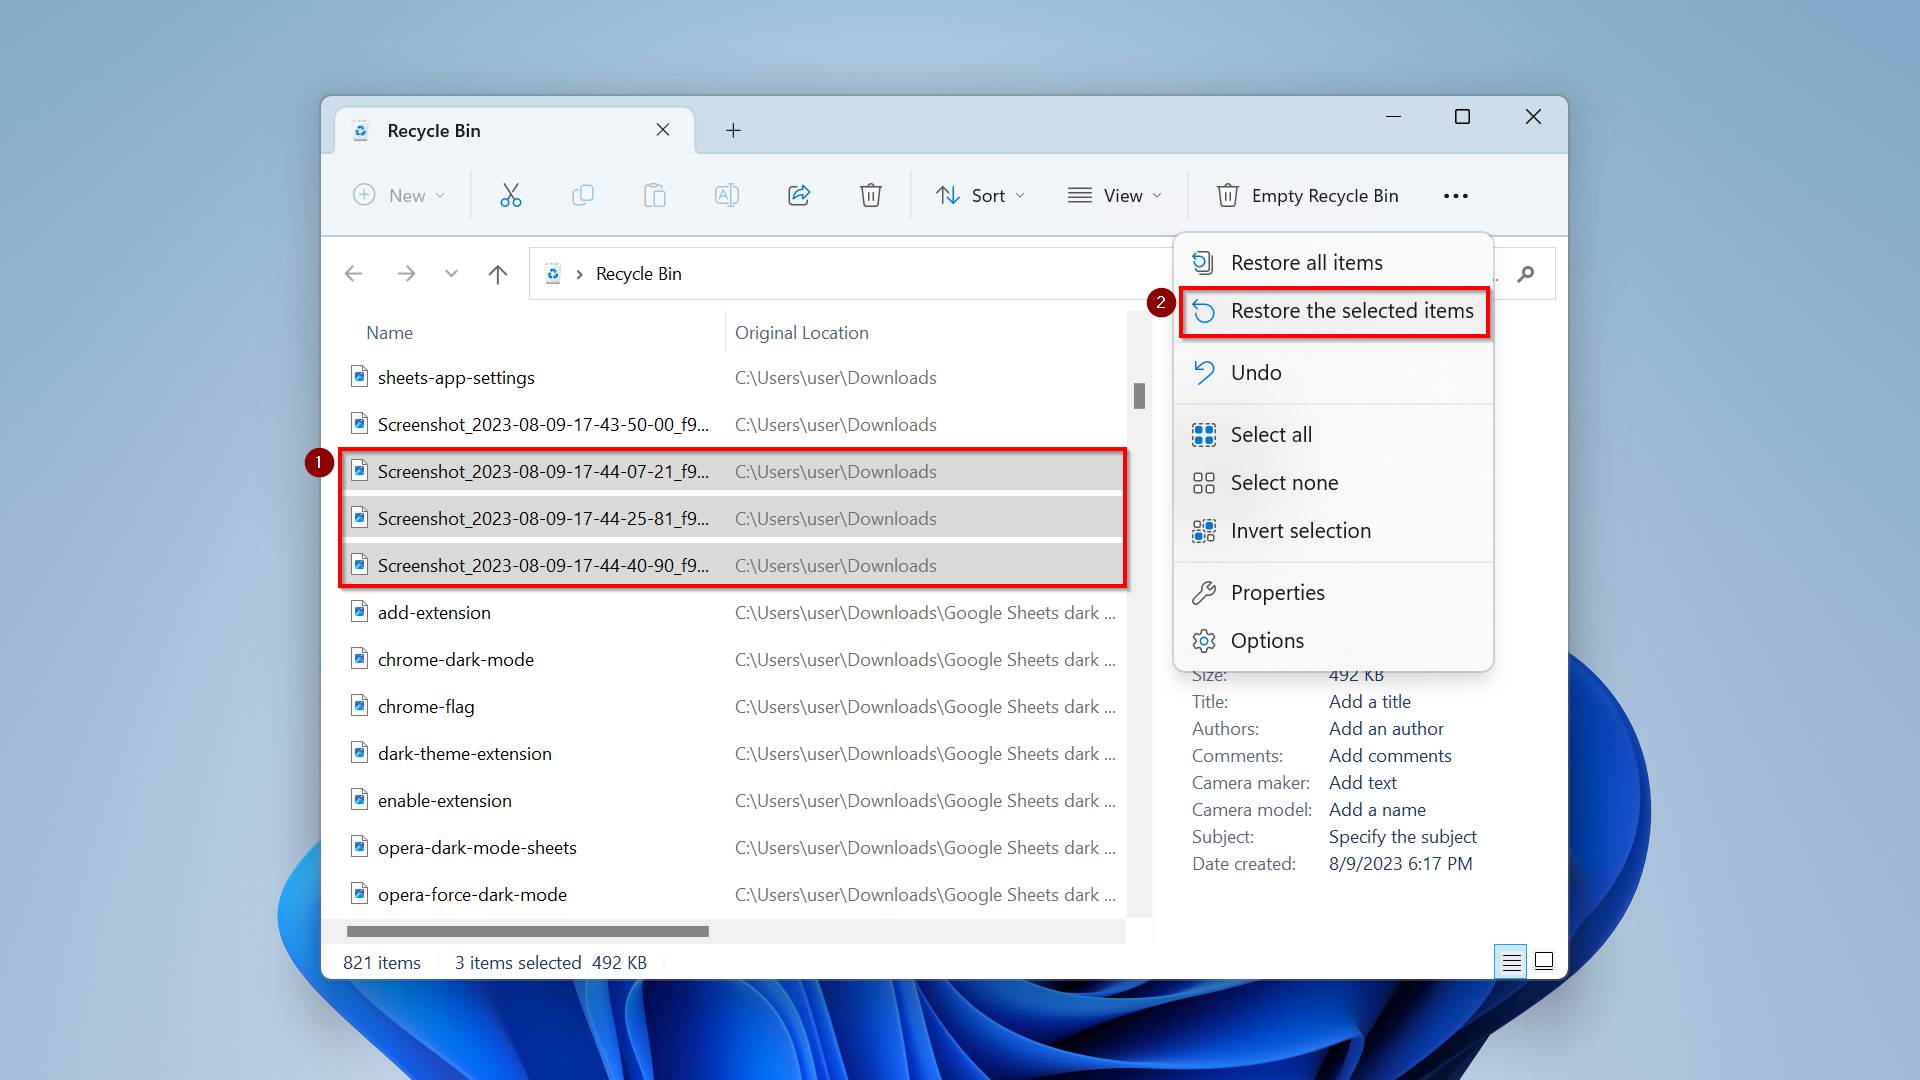
In the Recycle Bin, find and select the screenshots that you want to restore. Then, click “Restore the selected items” at the top.
Method 3: Make Sure Your Screenshots Aren’t Hidden
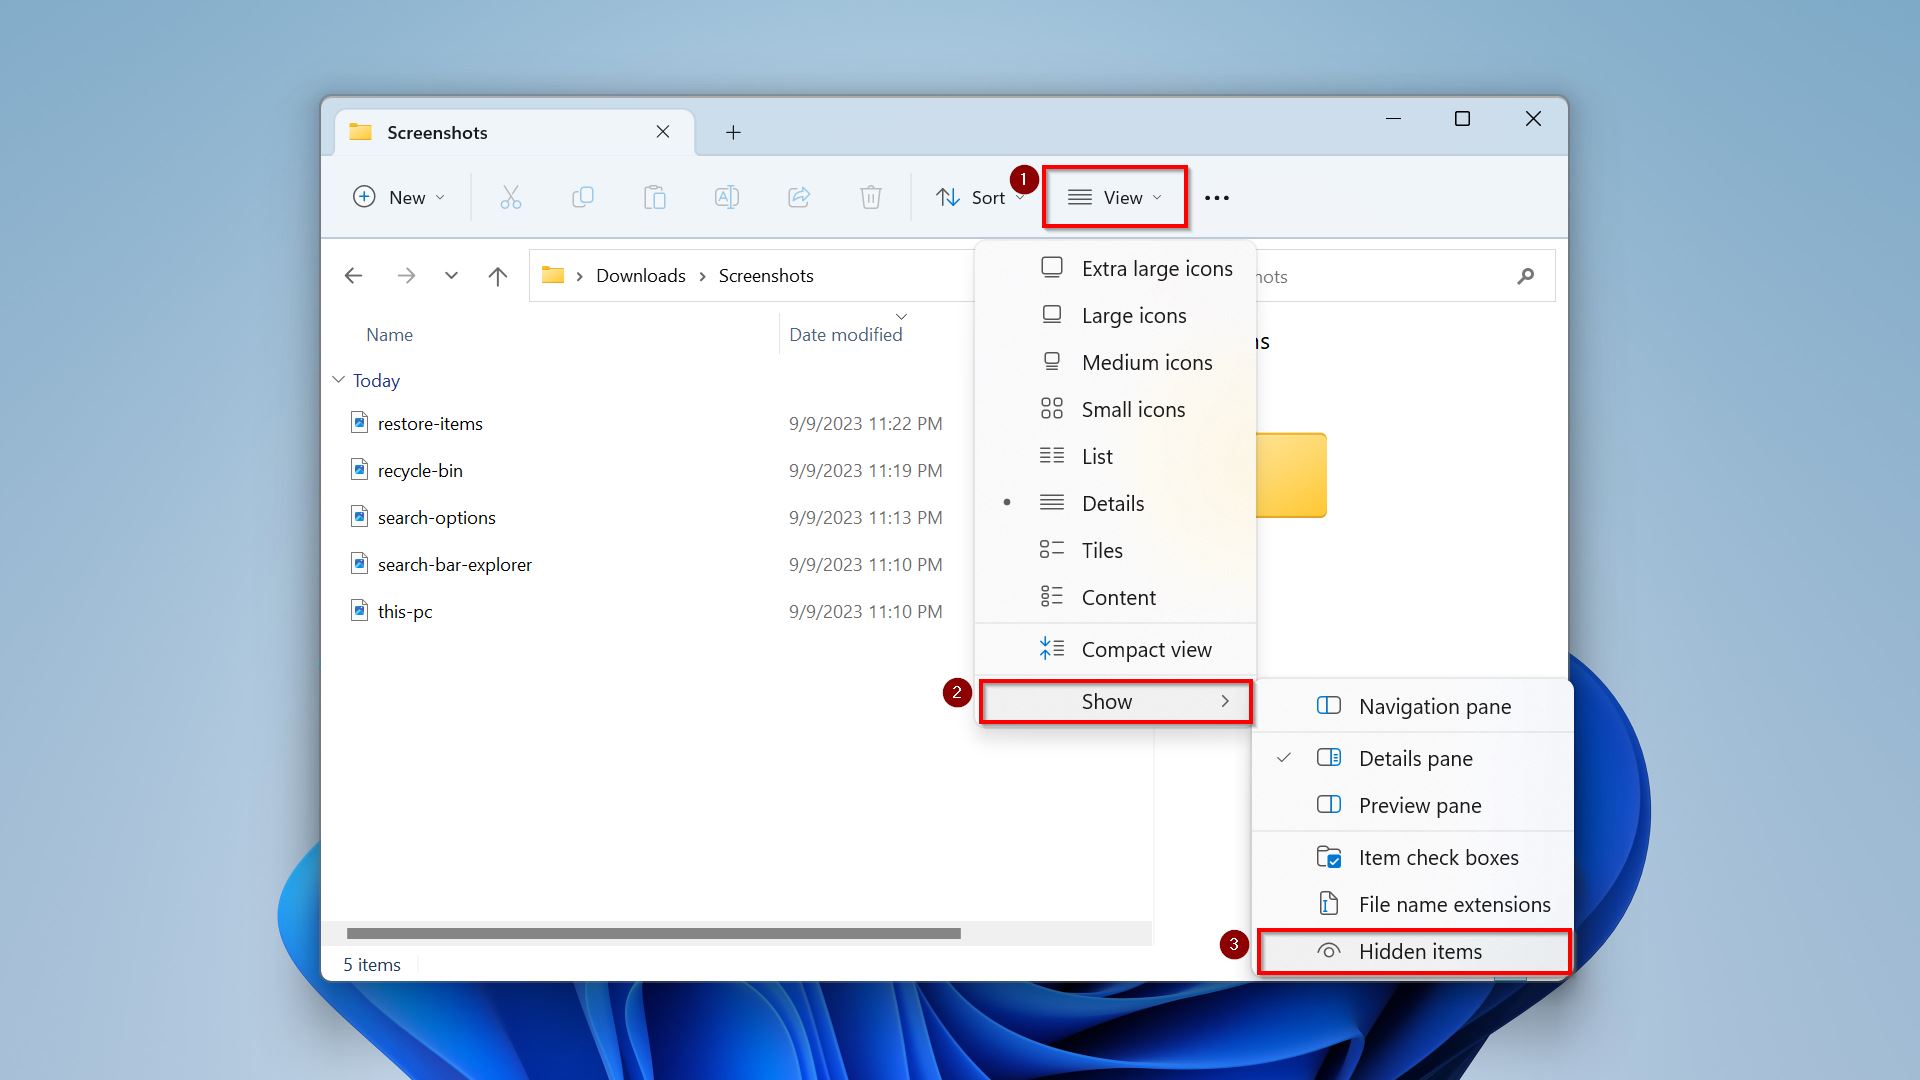
You can hide and unhide your screenshots and other files in File Explorer using the View settings. To check if you have hidden screenshots, go to the folder where you think they are. Simply click “View” and select “Show” > “Hidden items” in the dropdown menu.
Method 4: Recover from the Backup
You can back up your files to another drive using the File History feature on Windows. If you had it configured before, you may be able to restore your screenshots from the previous versions of certain files and folders. To use the File History feature, simply follow the steps below:
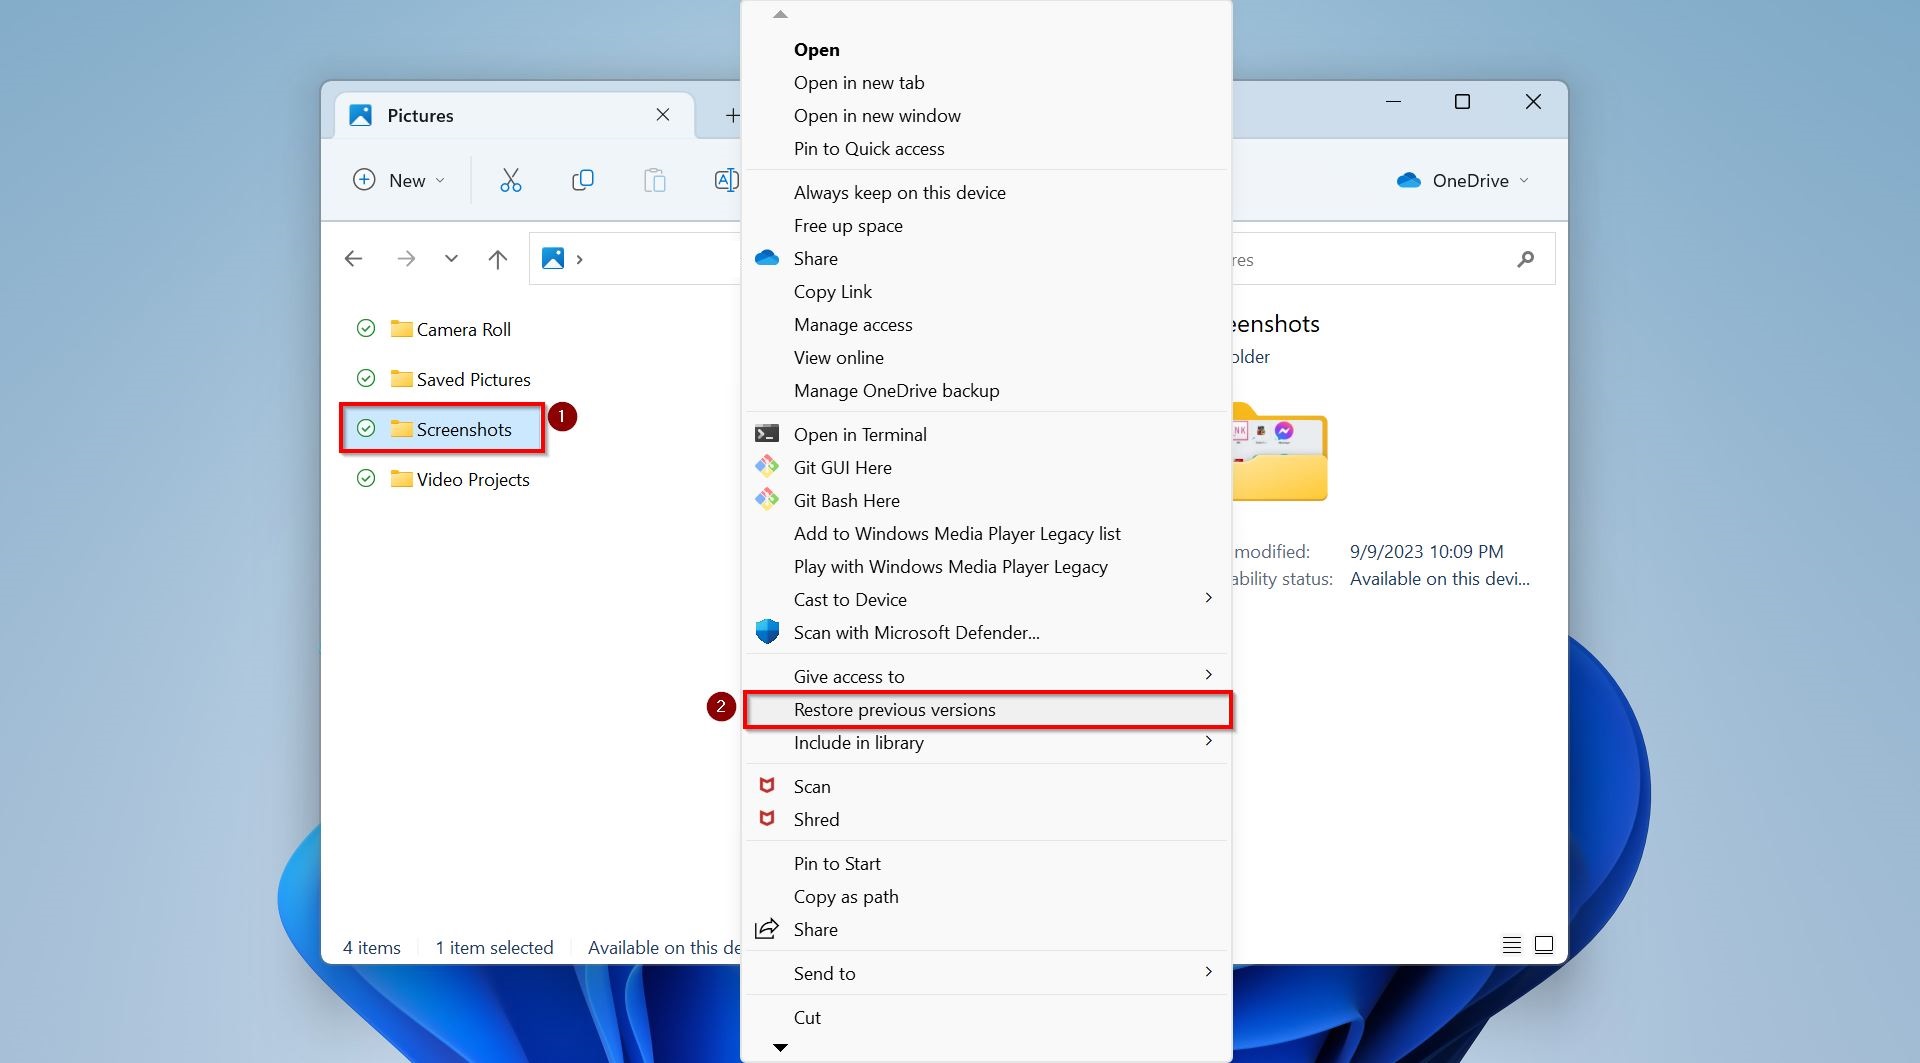
- To get started, open File Explorer and go to the file or folder that you wish to restore.
- Next, right-click the file and choose “Restore previous versions.”
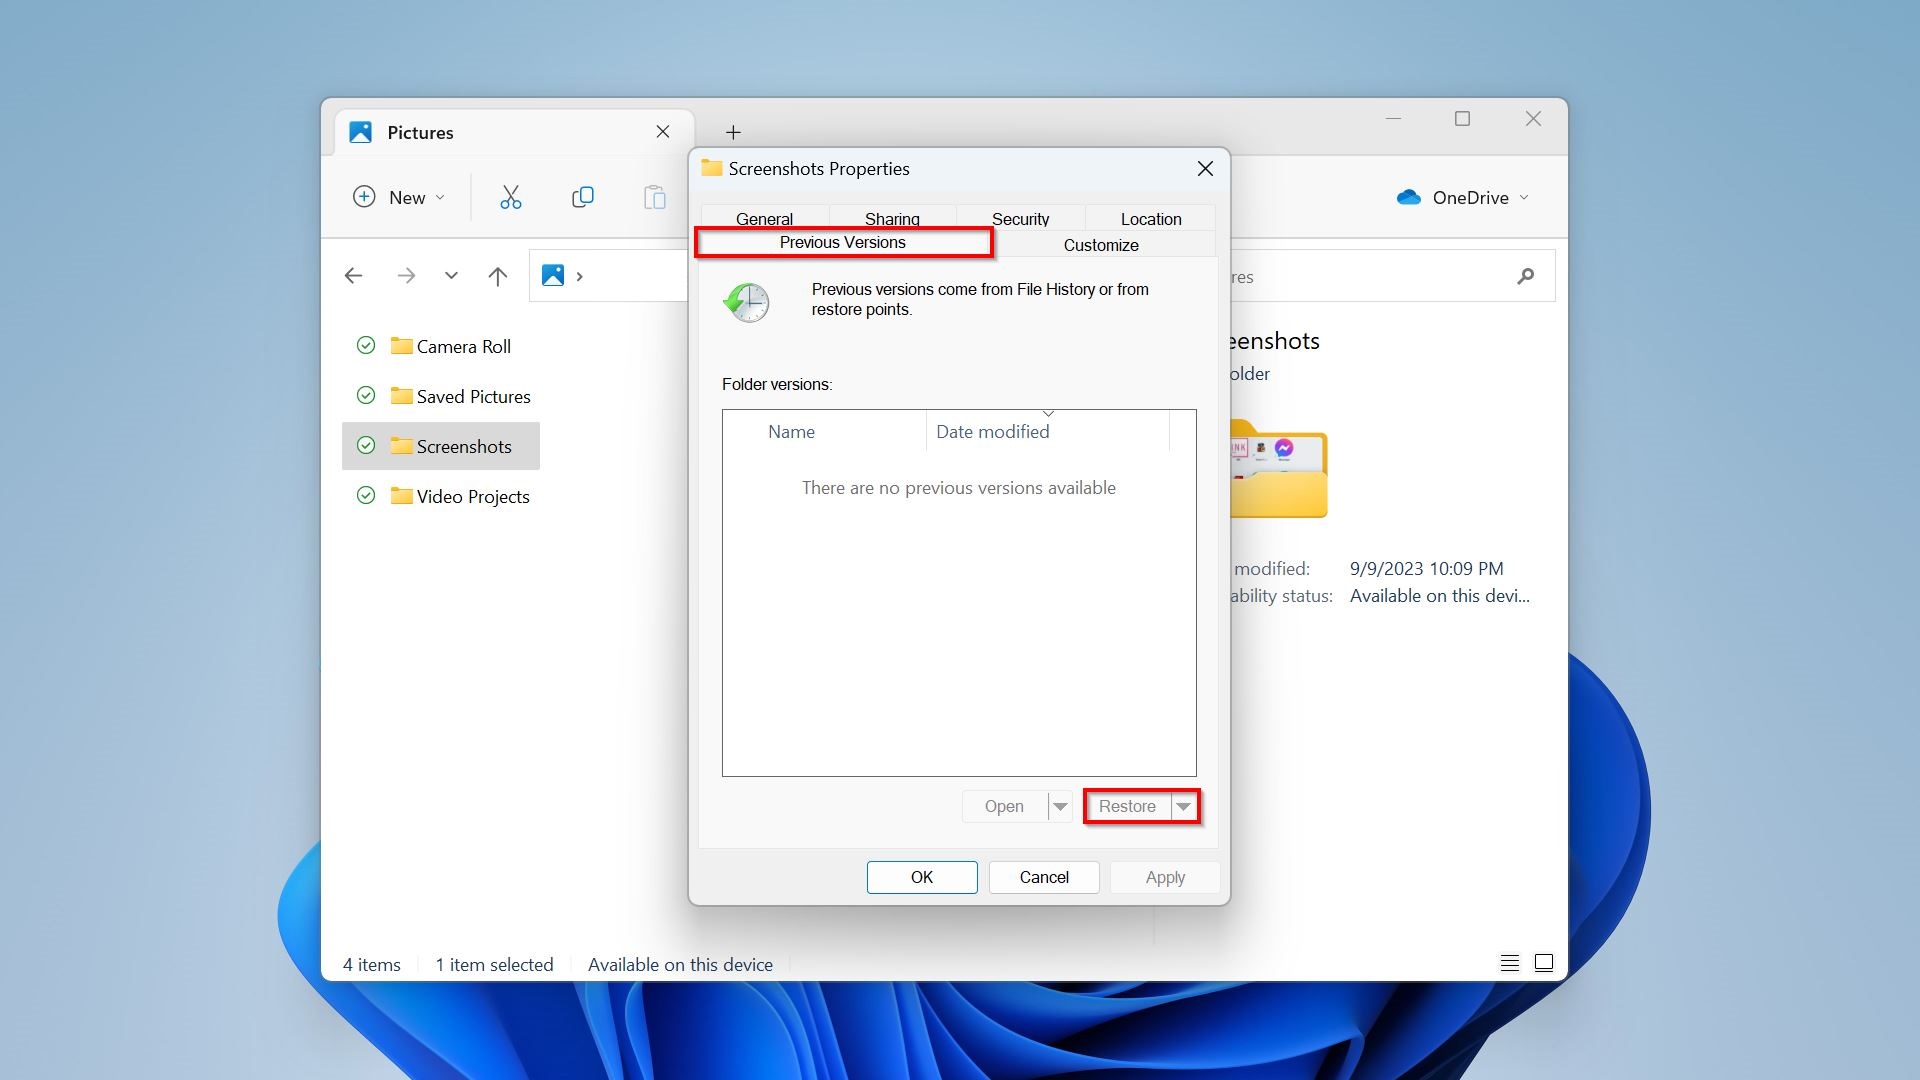
- Upon clicking, this will open the Properties window of that file, showing you the “Previous Versions” tab.
- Choose your preferred file version and click the “Restore” button. Alternatively, you can open the drop-down menu and select “Restore to” if you want to save the file to another location.
You can use either an external drive or a disk partition as your File History location. As with many other drives, it can get corrupted over time. If that happens, consider performing hard drive data recovery to restore the files inside.
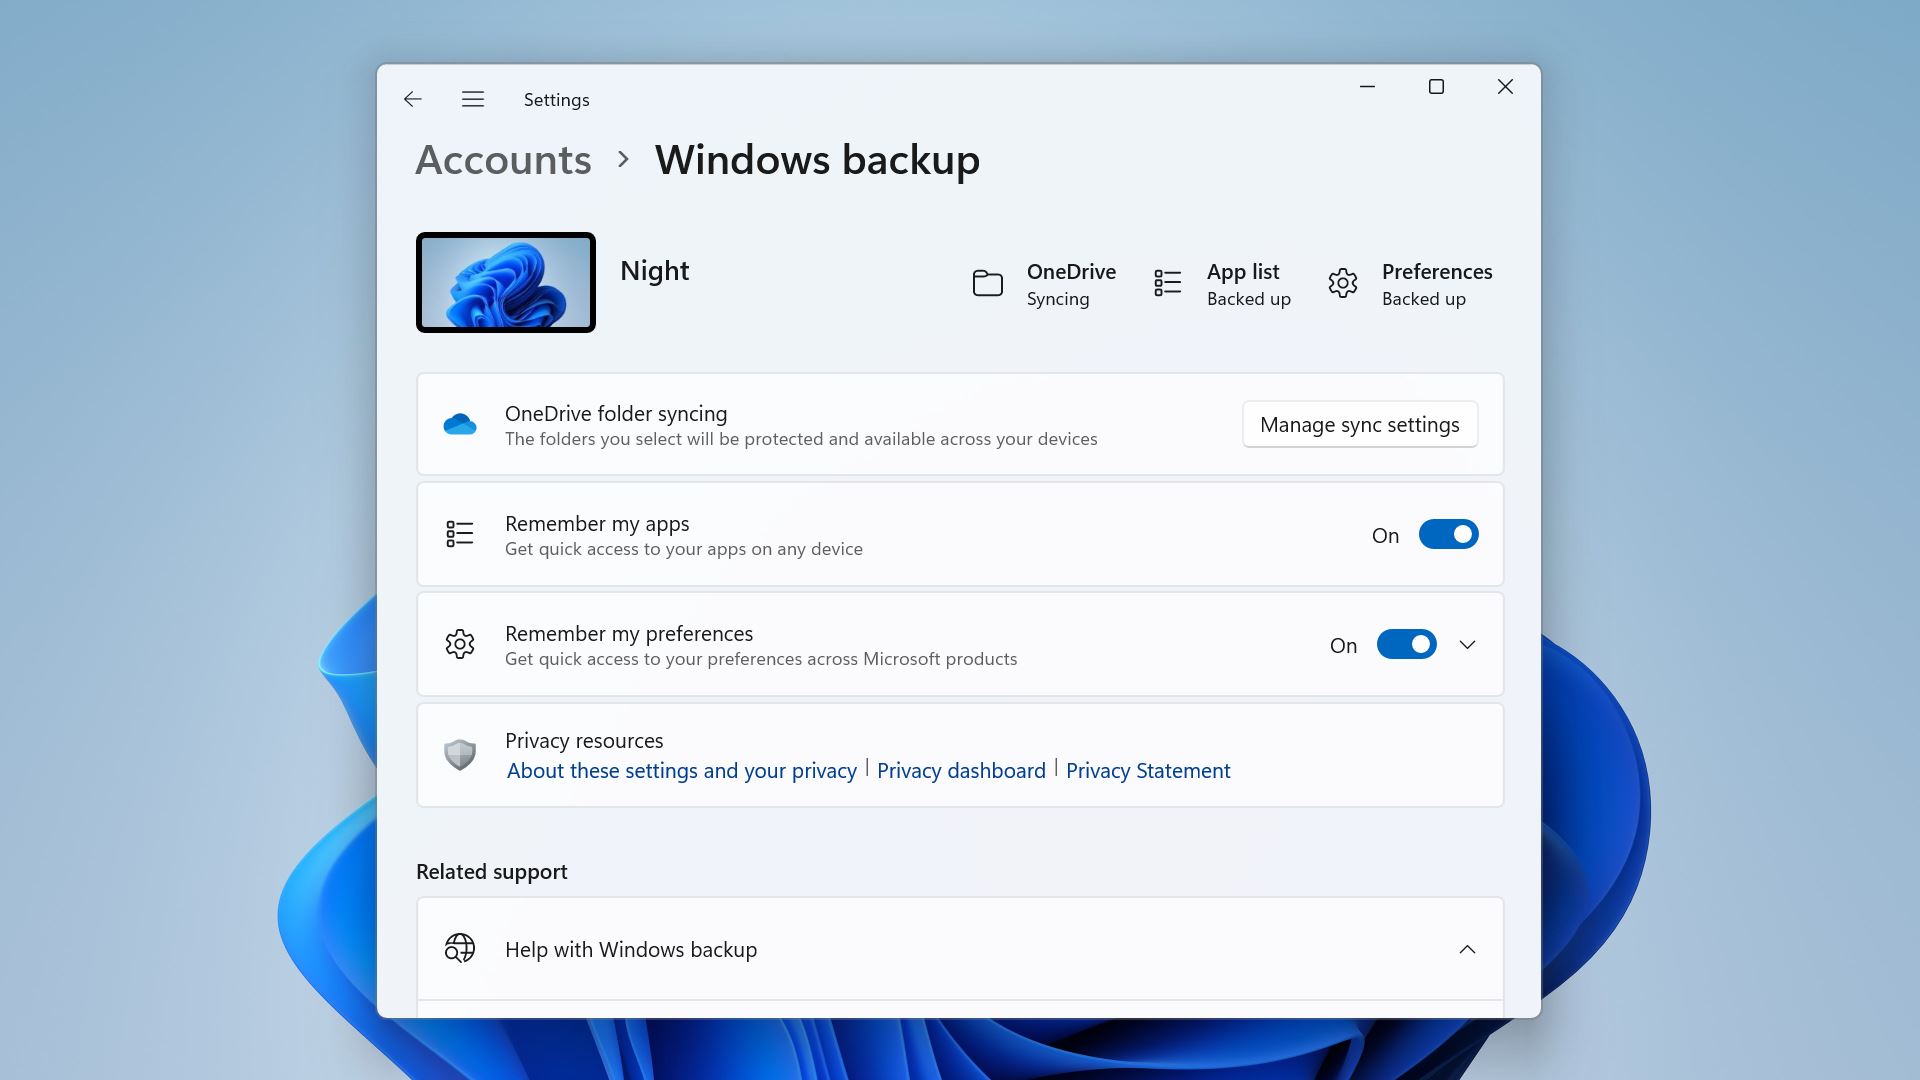
Windows also allows you to enable OneDrive syncing and backup, which saves your local files to the cloud. To verify this, you can go to Settings and select “Accounts” > “Windows backup.” If syncing is on, you can see your cloud account to check if your lost screenshots were backed up.
Method 5: Use Data Recovery Software
If none of the methods above help you recover screenshots on Windows, you should consider using a data recovery software, like Disk Drill.
Disk Drill can find and recover not only lost screenshots but also those you have permanently removed. If you’re a Windows user, you can take advantage of its free trial that lets you recover up to 500 MB worth of files.
Here’s a quick and simple step-by-step guide on how to use Disk Drill to recover your deleted screenshots on Windows:
- To get started, download Disk Drill for Windows. We recommend you install it on an external drive to avoid wear and tear on your computer’s storage media. In turn, this prevents data from accidentally being overwritten.
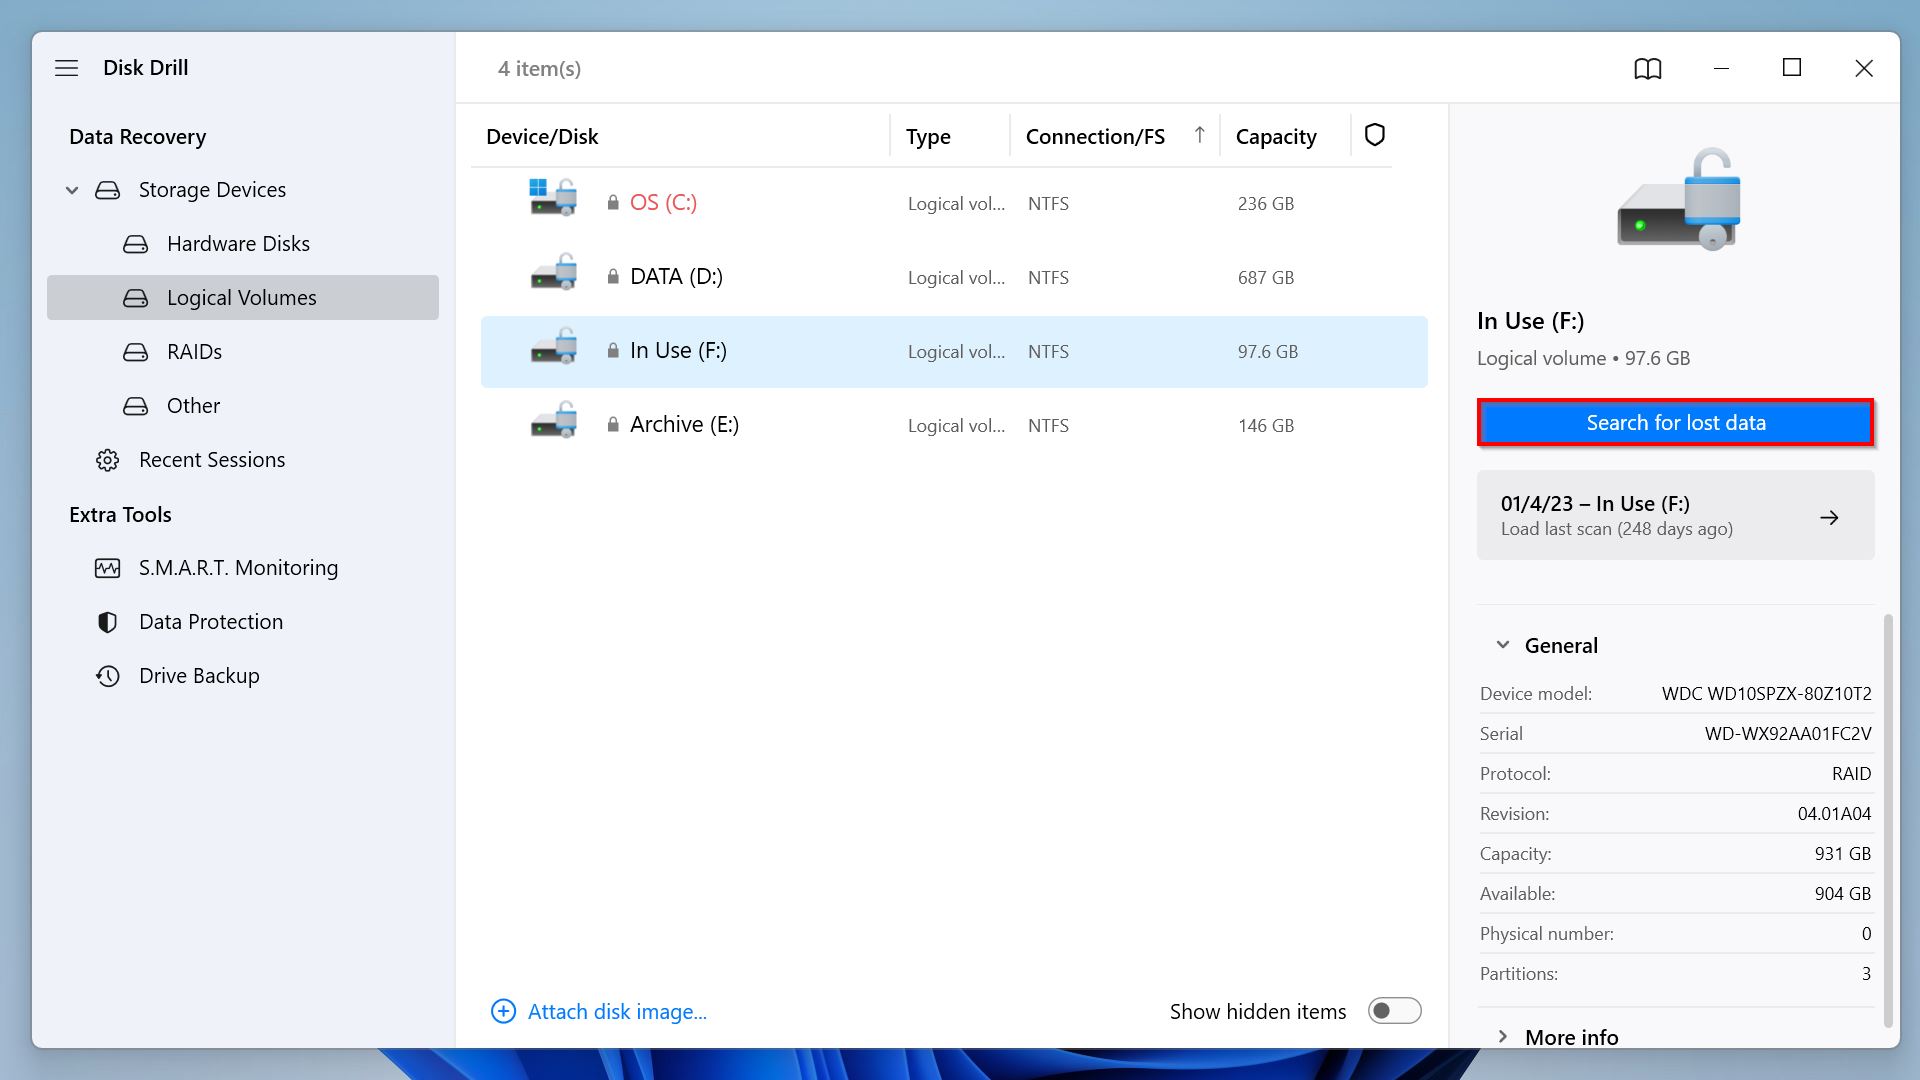
- Once the installation is complete, navigate to the disk or device that you want to recover screenshots from and click the “Search for lost data” button on the right pane.
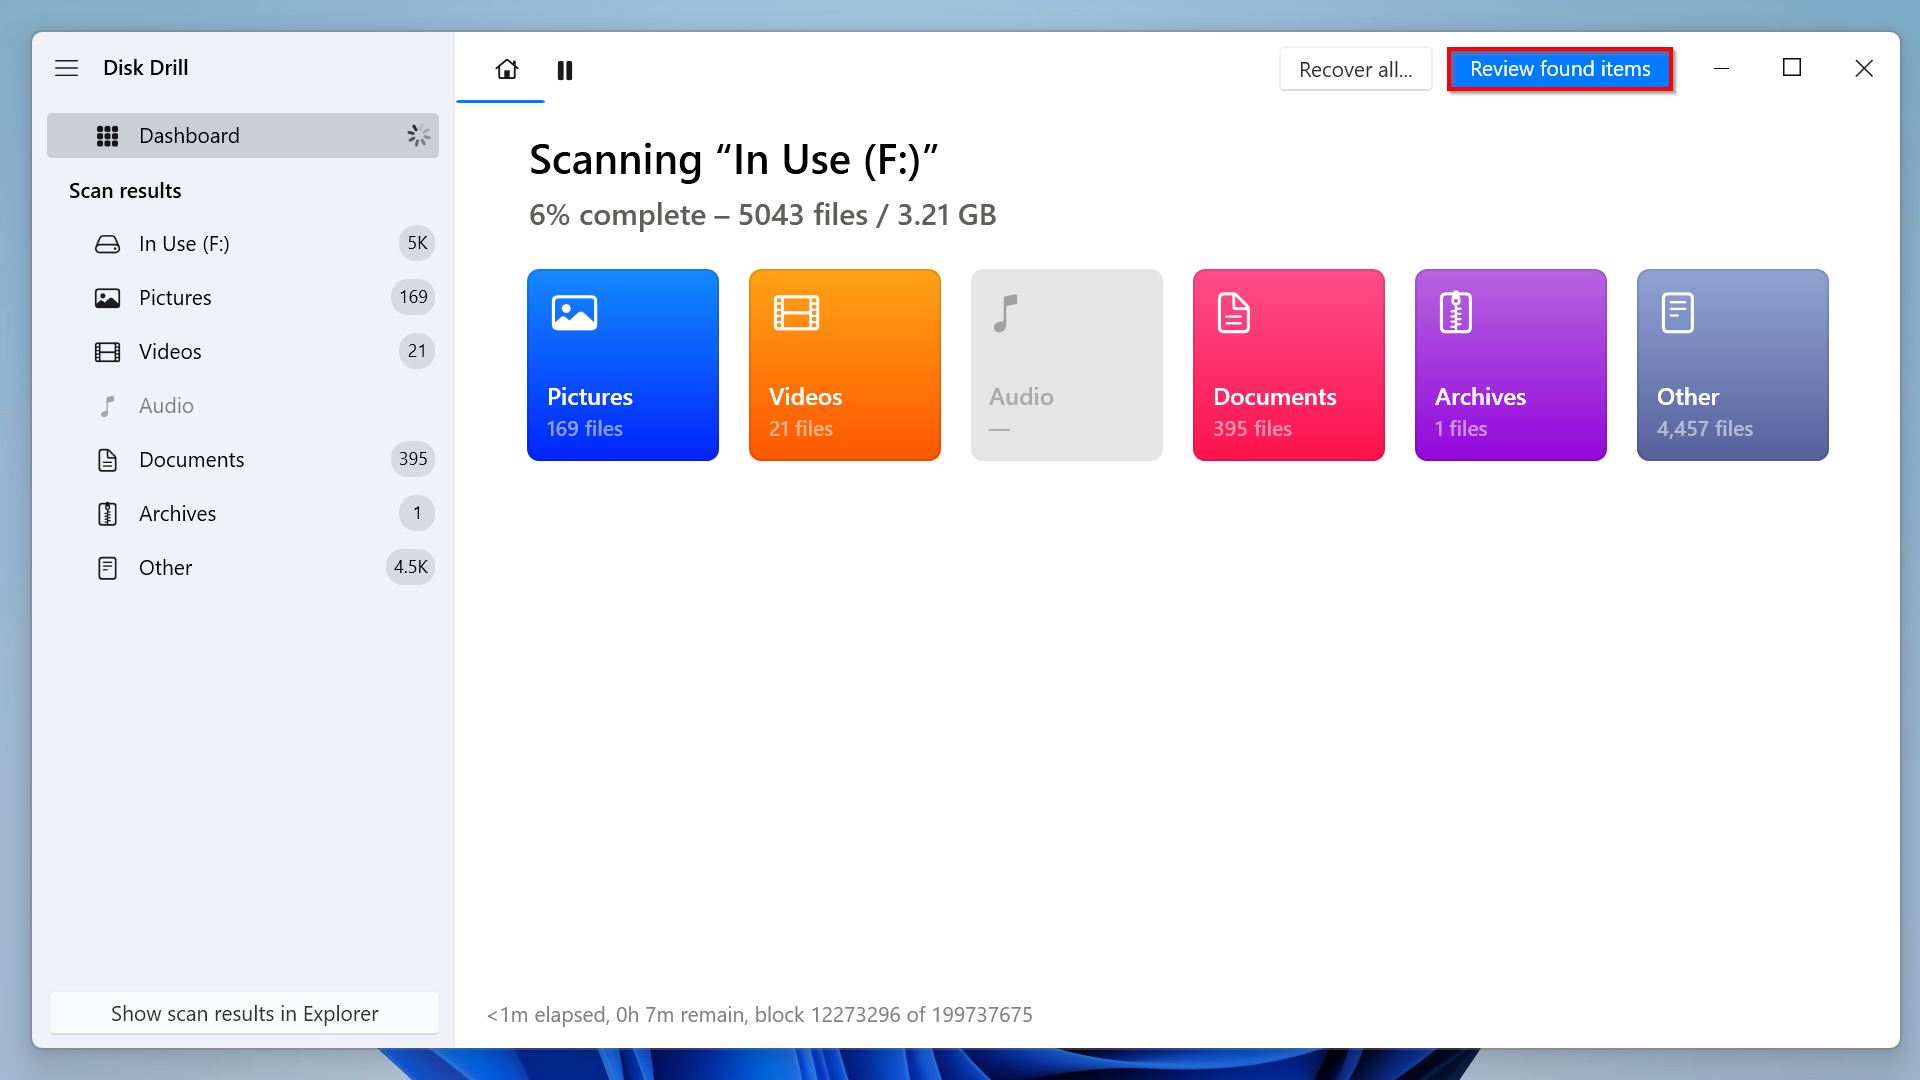
- Upon clicking, Disk Drill will start scanning your disk for all recoverable files. If you want to check the results, click “Review found items” at the top-right portion of Disk Drill.
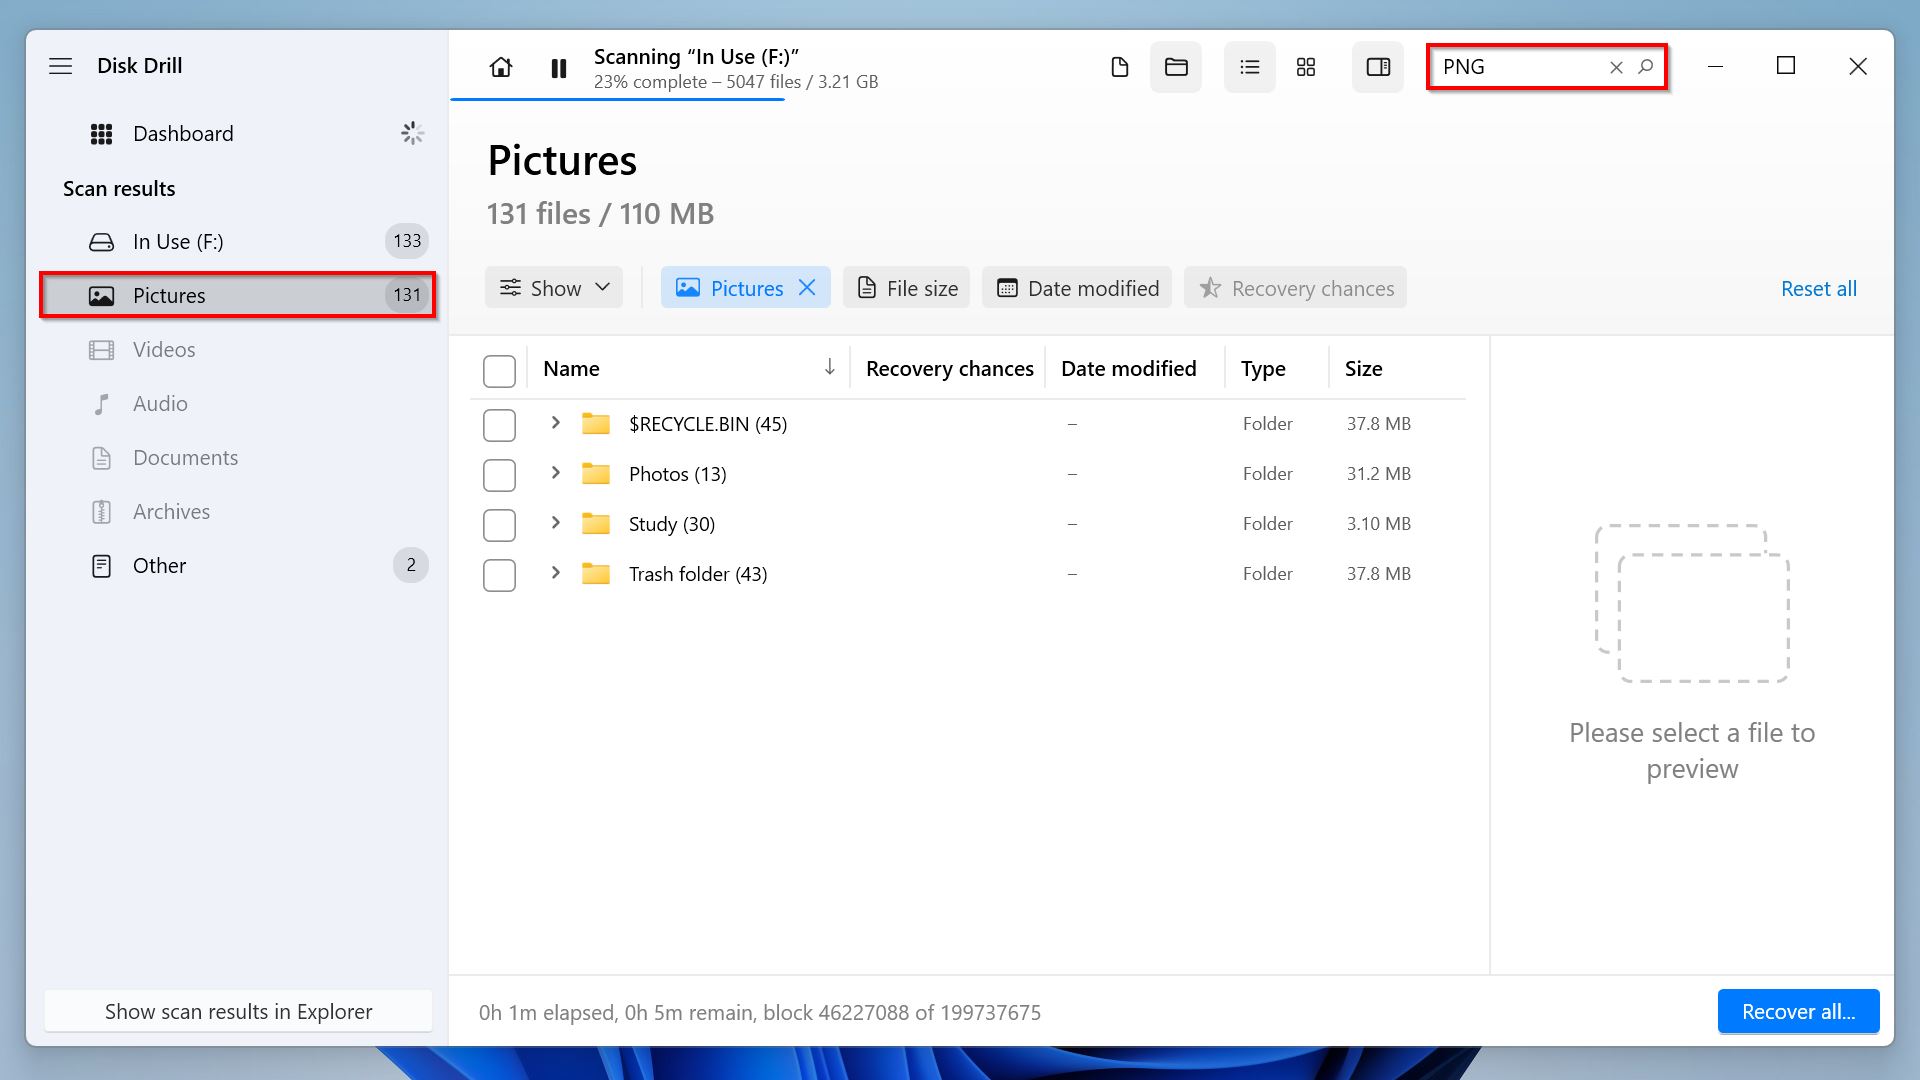
- Next, you’ll be redirected to the results section where you can look for the screenshots you wish to recover. To narrow down the list of found files, choose one of the categories on the left side of the window. In this case, select “Pictures.” Alternatively, you can click the search bar in the top-right corner and type your screenshot’s name or file type, (e.g., “screenshot” or “PNG”).
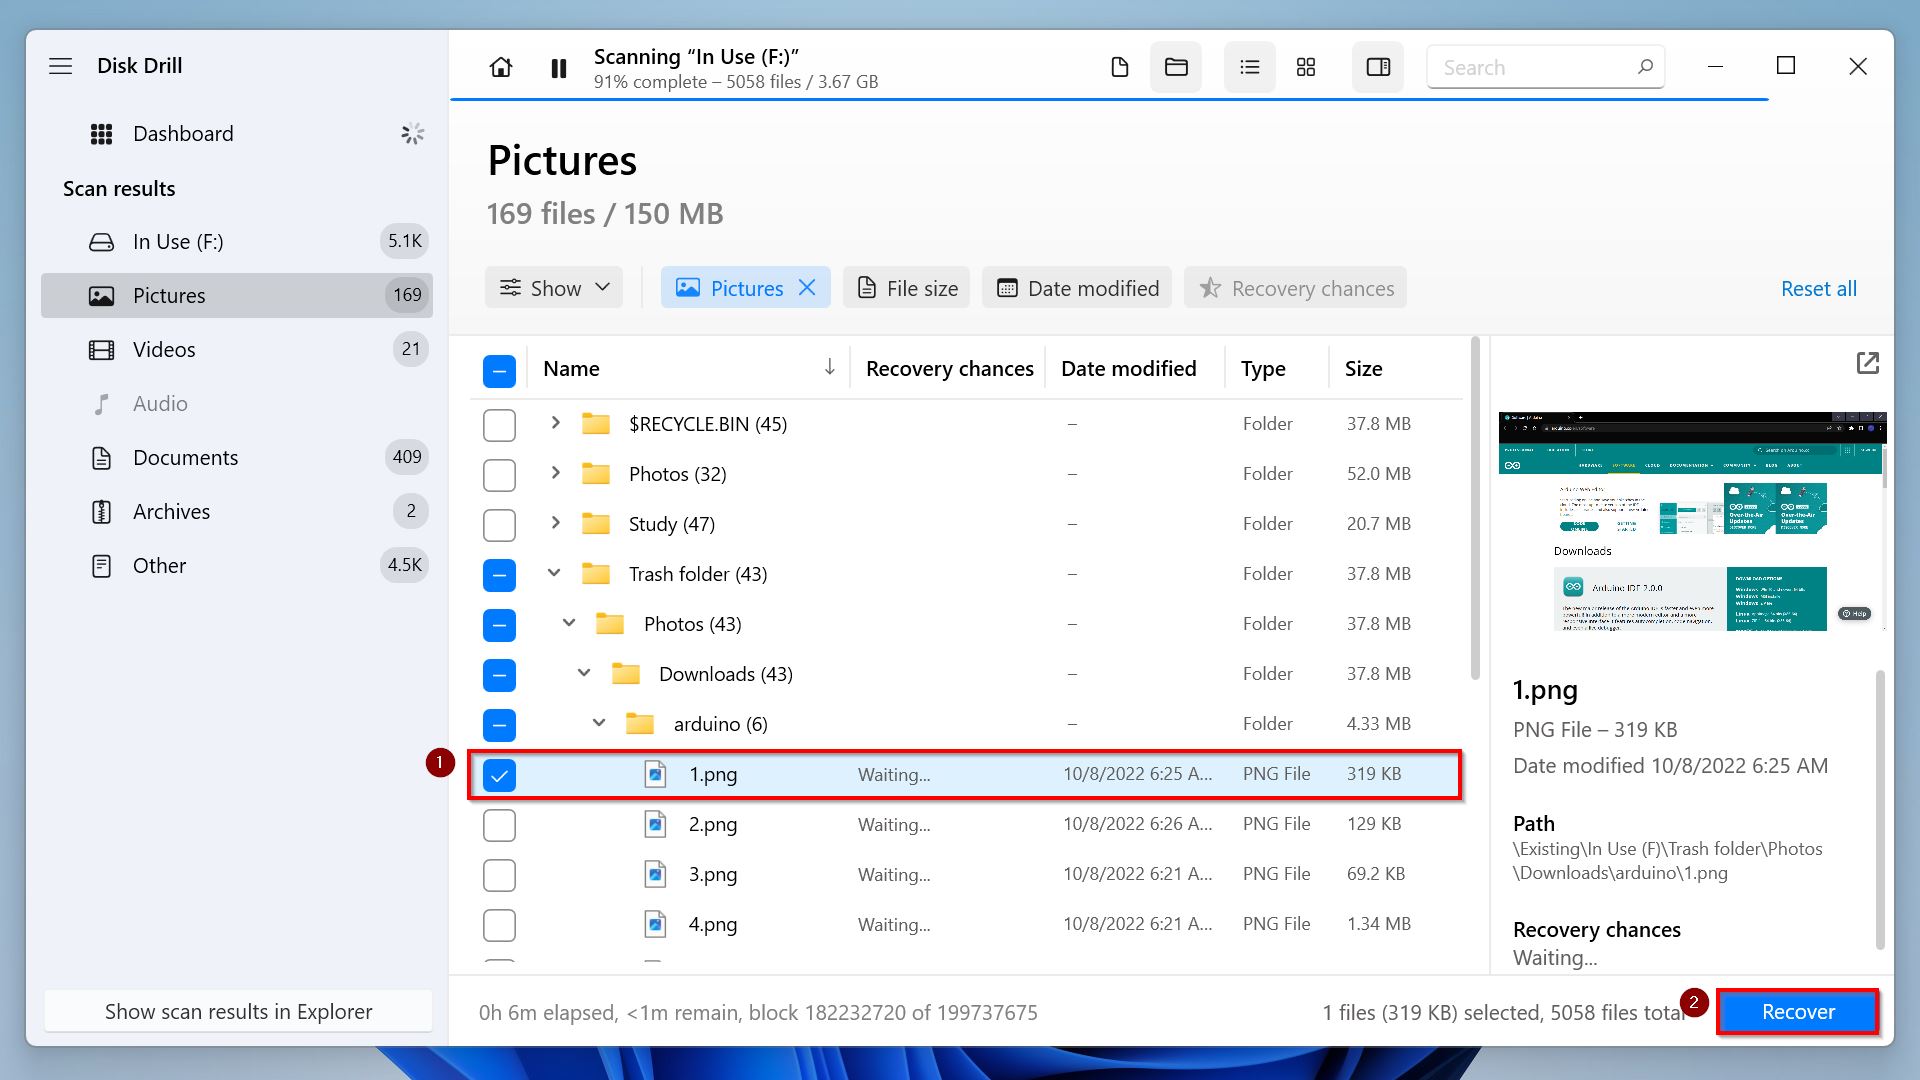
- Once you find the screenshots you want to restore, tick the checkboxes next to their file names and click “Recover.”
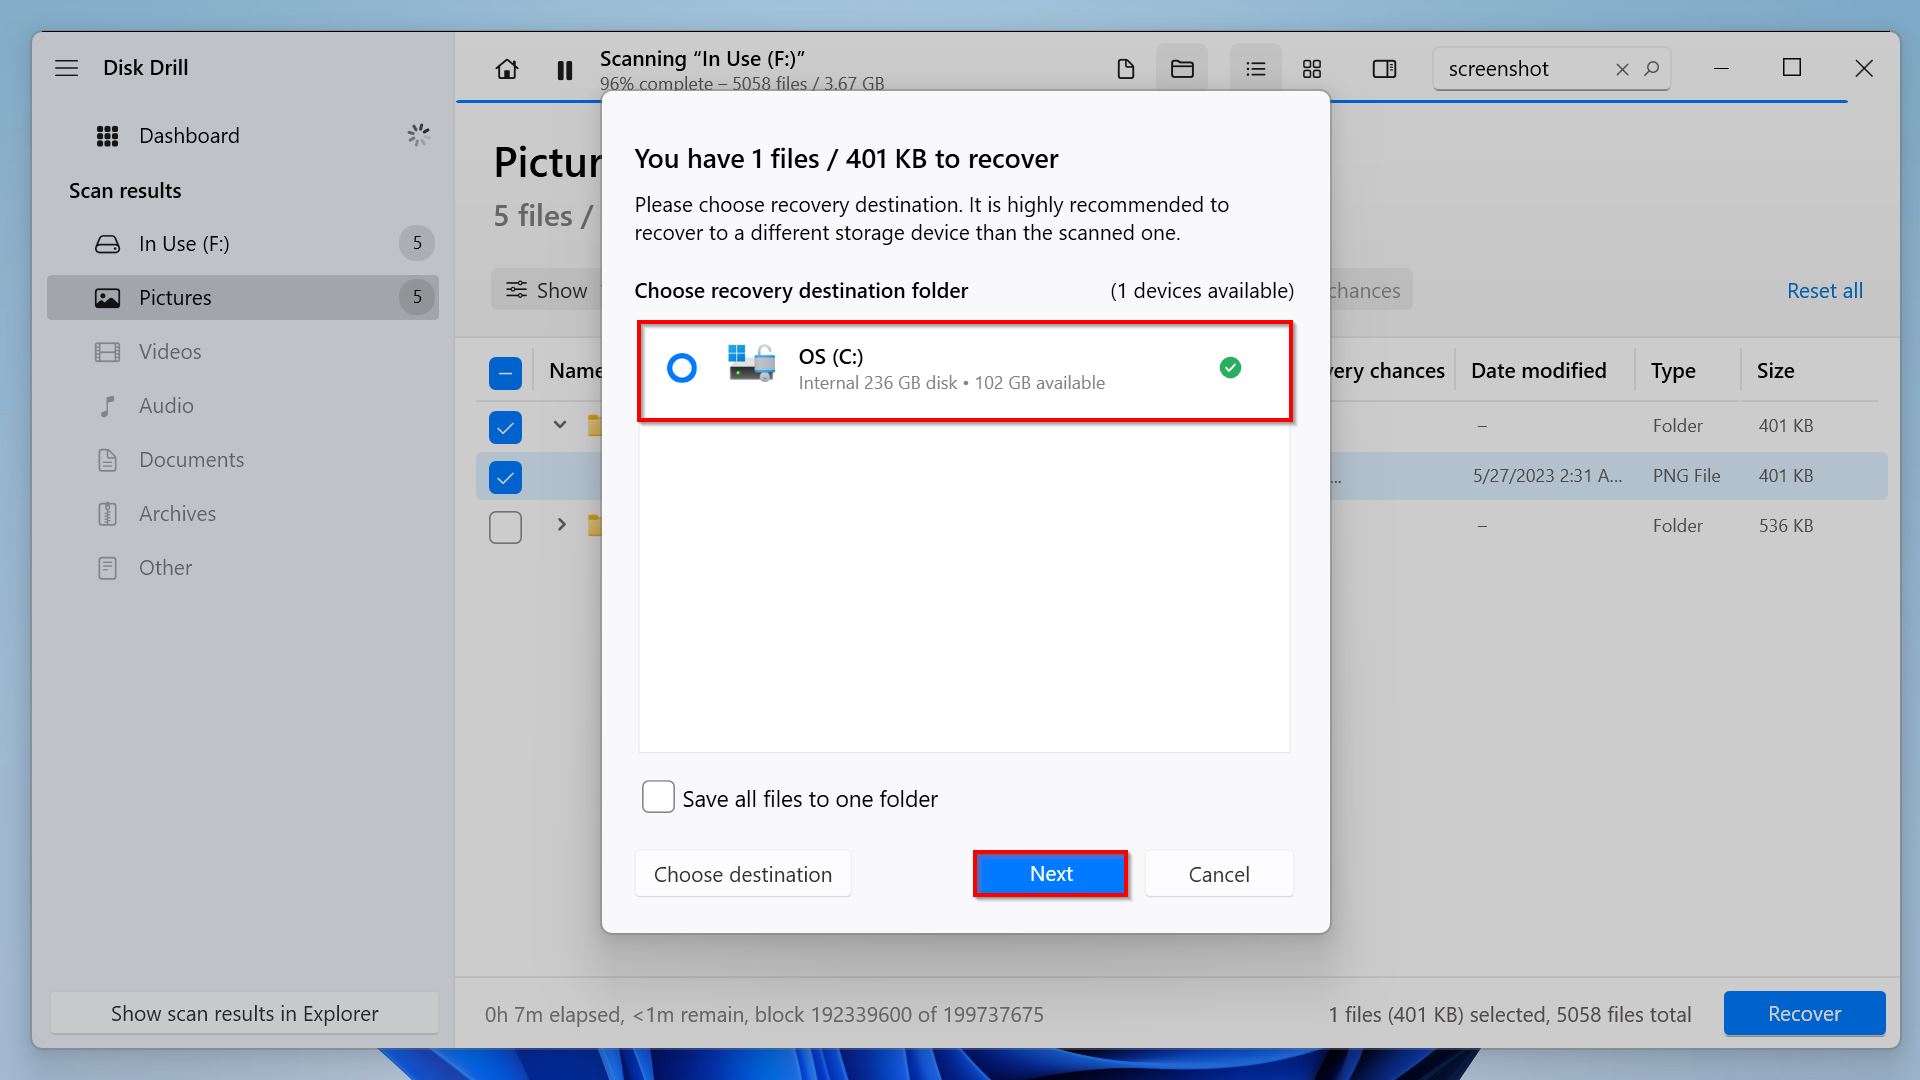
- Upon clicking, a small pop-up will appear. Pick a suitable file location for your recovered data and click “Next” to continue. We highly recommend you to prevent using the same disk or folder that was scanned to avoid overwriting recoverable data.
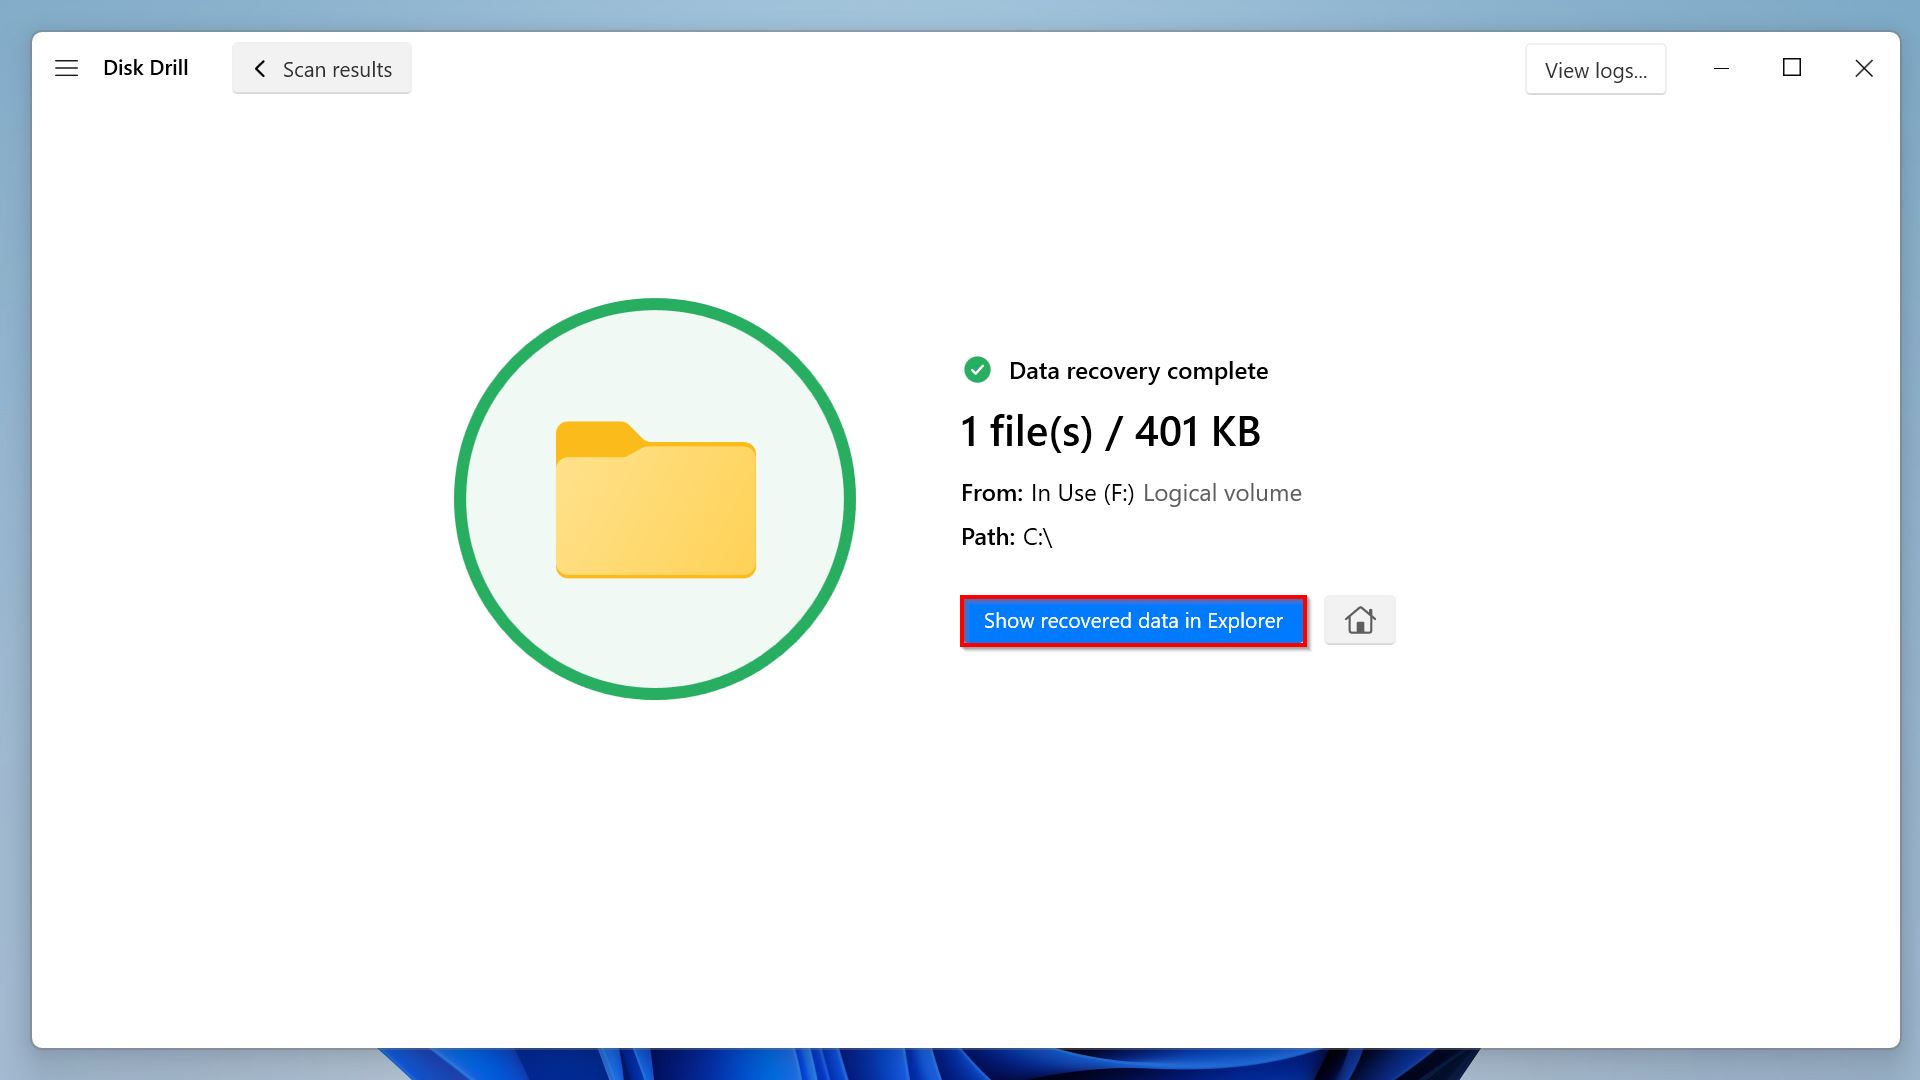
- Finally, Disk Drill will now attempt to recover your selected files. Once done, click “Show recovered data in Explorer” to view your restored screenshots.
Method 6: Check the Temporary Files Folder
If you took a screenshot using the “PrtScn” key on your keyboard, chances are you weren’t able to save it as a file. Recall that it only gets saved to your clipboard history and can only be pasted into supported programs.
Here’s what you can do:
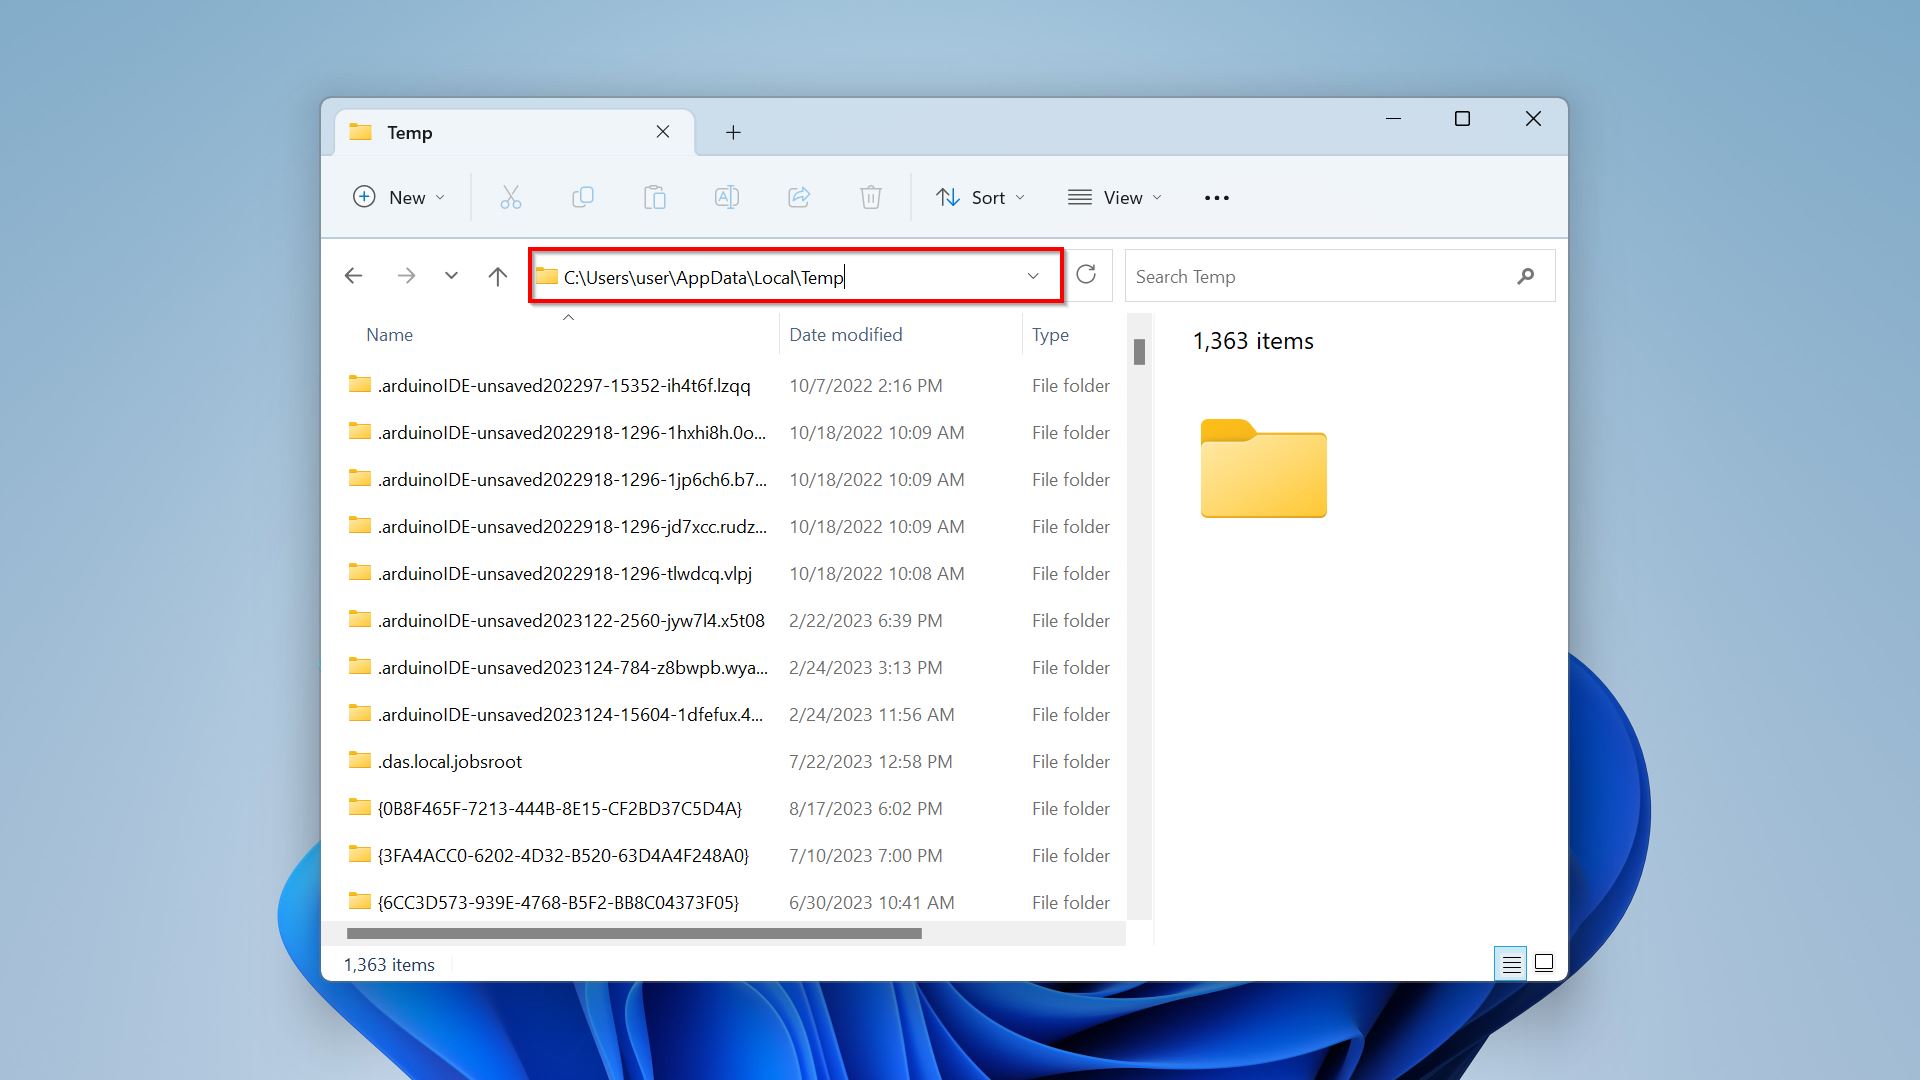
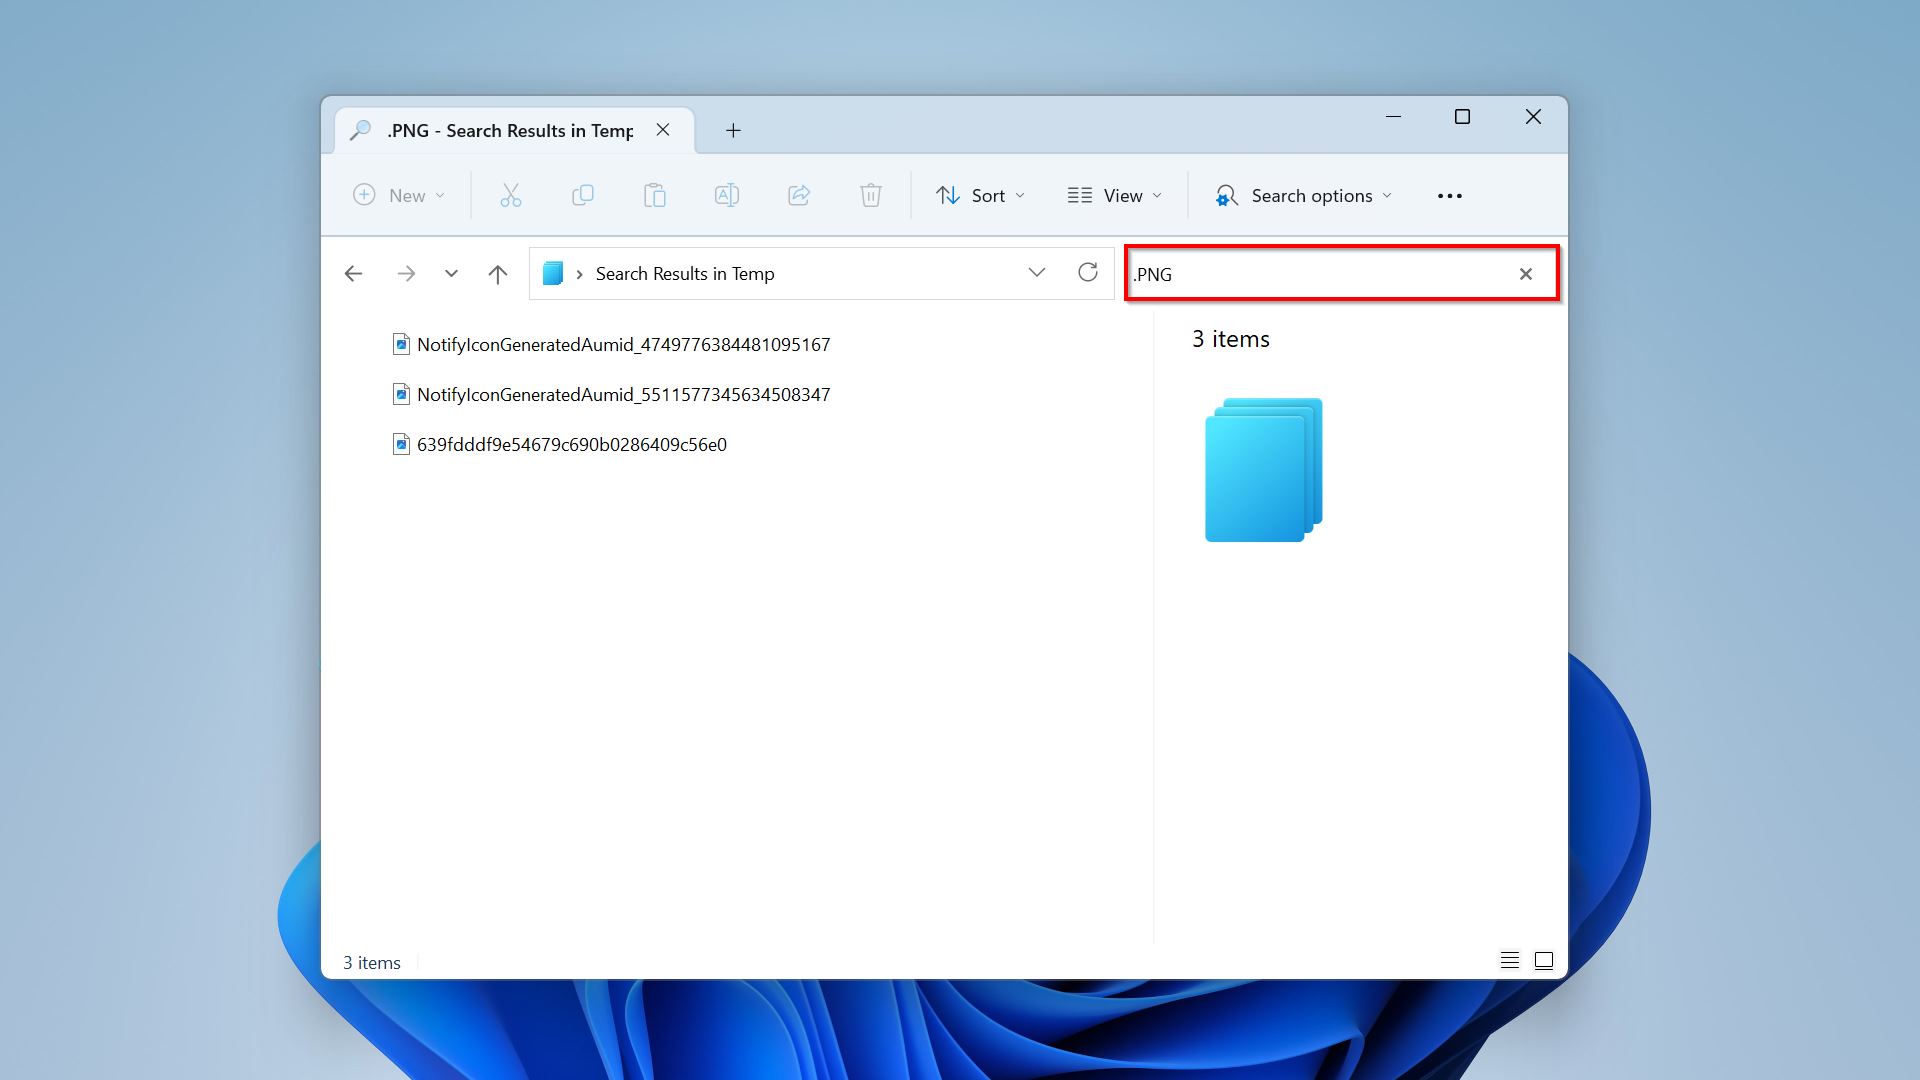
- To check the folder for your temporary files, paste this path to File Explorer: “C:\Users\%USERNAME%\AppData\Local\Temp.”
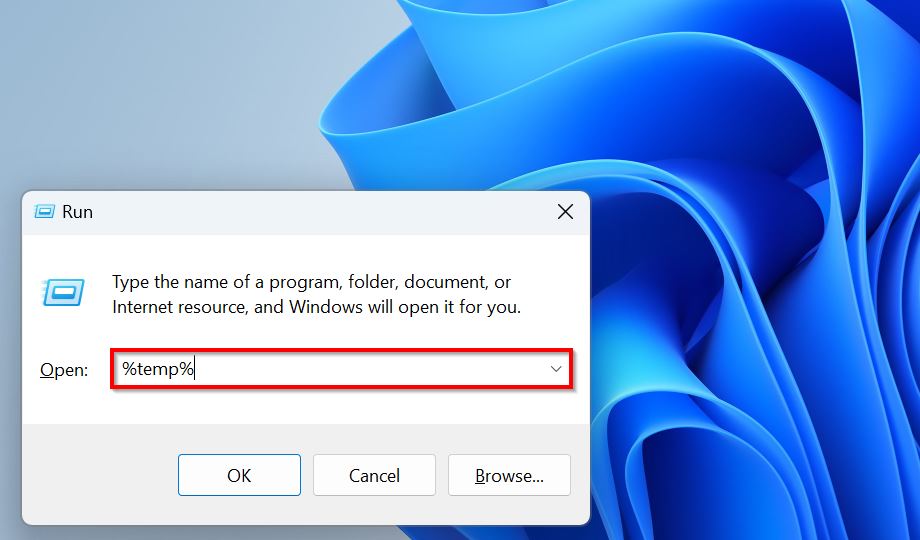
- Alternatively, press Windows key + R and run %temp%.
- After that, use the search bar to find possible file names for your screenshots, e.g., “screenshot,” “.png,” or “.jpg.”
Conclusion
Screenshots can be lost on your PC for many reasons, like accidental deletion, corrupted files, and poor file naming. But there’s still a chance for you to get permanently deleted screenshots back by using the Recycle Bin, Windows Search, File History, and Temporary Files Folder. If none of them work, use data recovery apps like Disk Drill to restore your screenshots.
FAQ
- Launch the Files app on your Chromebook.
- Select “Trash” on the left menu.
- Find and right-click your deleted screenshot.
- Choose “Restore from trash” from the context menu.
- Restore it from the Recycle Bin
- Use data recovery software
- Recover the folder from a backup storage


